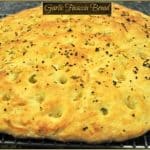
Garlic Focaccia Bread, with olive oil and herbs, is delicious with a variety of meats and salads, or as an appetizer, with seasoned dipping oil!

Garlic Focaccia Bread is a versatile side dish for a variety of meats or salads, can be served as an appetizer (served with dipping oil and herbs), or simply used to make a great sandwich!
The crispy “dimpled” crust of this delicious bread (with olive oil, garlic and fresh thyme topping), is its trademark feature!
My friends and I used to frequent a local restaurant that brought baskets of sliced warm focaccia bread and a small bowl of dipping oil (with herbs) to the table before dinner. Oh. My. Goodness.
I’m fairly certain that restaurant is where I really fell in love with focaccia bread in all its glory!
Talk about GOOD!!! I knew I wanted to make something similar at home, so I decided to try an old recipe I had stored in my trusty (and practically dilapidated) file box.
Scroll Down For A Printable Recipe Card At The Bottom Of The Page
Where I Discovered The Original Recipe
Many years ago, I found a recipe in a newspaper, cut it out, and taped it to a 3×5 index card. It’s now old and yellowed, but I had NEVER tried that particular recipe until recently. WOW- it was DELICIOUS!
The original recipe was titled “Nona’s Courtyard Cafe Focaccia”, and I THINK (not sure) it might have originated from a restaurant (now closed) in Ventura, California.
I tried to find the recipe online, but no luck… oh well. At least I had this old recipe on file to try. It’s very easy to make, and here’s how!
How To Make Garlic Focaccia Bread
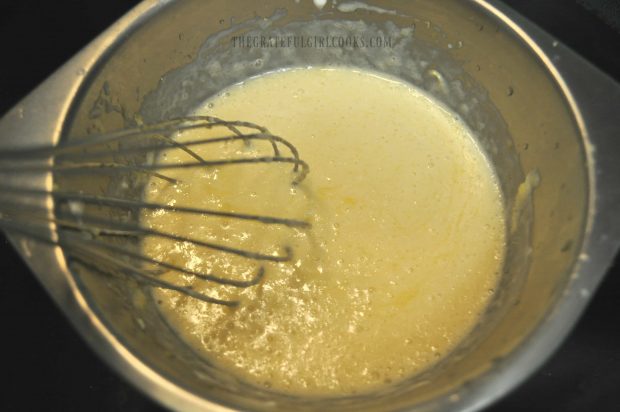
Mix yeast with warm water (100 degrees) in a large bowl. Stir, then set the bowl aside for 5 minutes to let yeast fully dissolve.
Bubbles will begin to appear on the surface, which tells you the yeast is active, alive, and working.

Add flour, 1 Tablespoon olive oil, Parmesan cheese, honey, salt and cold water to bowl. Mix the ingredients well. I started mixing it with a spoon, then switched to using my (clean) hands to mix it up, because it was easier that way, as it is a thick dough.
Form the dough into a ball, then put it on a lightly floured work surface. Roll the dough out with a rolling pin, smoothing and shaping it into a circle of dough about 10 inches wide.

In a separate small bowl or measuring cup, mix together 1/3 cup olive oil and crushed garlic. Set aside to let the flavors “mingle”, while you get the dough ready for it!

Poke Holes In The Dough
Transfer the dough circle to a large baking sheet with edges (I used a ratty old pizza pan with edges). Poke holes in the top of the dough using your finger.
Make deep holes all over the top of the dough, but don’t go all the way through dough to the bottom.

Brush Dough with Oil
Cover the top and sides of dough with the olive oil/ garlic mixture. I started off spooning it on top, then used a pastry brush to fully coat top and sides of dough, and to spread the garlic around.
There is a lot of “excess” oil that will run off the edges of dough onto pan. Just scoop it up with a spoon and fill up all the holes with it.
Sprinkle top of dough with chopped fresh thyme (or fresh rosemary, if substituting). There will STILL be excess oil around bottom of dough, as you can see in the photo below. Leave it there! It absorbs into the bread while it bakes and helps to make a nice crispy crust!
Set the pan aside and let the dough rise a bit (uncovered) for about 30 minutes in a warm place, free from drafts. Preheat oven to 400º F. while dough is rising.

Bake The Garlic Focaccia Bread
After dough has risen, bake it in a 400º F. oven for 23-25 minutes, or until the bread is evenly browned all over. Remove from oven, transfer the garlic focaccia bread to a wire rack, and let it cool for 20-25 minutes before you serve it.
Doesn’t it look GOOD? See the little pieces of garlic in the “dimples”? ALL the oil has been absorbed into crust. The 2 photos below show the top and bottom of the bread… nice and crispy on the outside, but soft on the inside!


If you want to make the garlic focaccia bread ahead of time, you can easily reheat it by covering it tightly with aluminum foil and reheat on low heat (250º F.) in oven for 10-15 minutes.
Serve The Focaccia Bread
To serve, slice the bread in half from left to right, then cut the garlic focaccia bread into 2″ wide strips from top to bottom.
You can serve it with a (2 to 1) mixture of olive oil and balsamic vinegar or olive oil and fresh herbs (like garlic, thyme and rosemary, etc.) in a little bowl for dipping, if you wish.

Here’s a close up of a slice of the garlic focaccia bread once it has been cut into pieces, so you can see what the inside looks like! YUM.
My husband, son and I enjoyed this bread served with Orange and Rosemary Glazed Salmon, steamed broccoli and rice. It was delicious.
We ended up with a few pieces of focaccia bread left over, so I will serve it on the side with spaghetti, made with Easy Spaghetti Sauce with Italian Sausage for tonight’s dinner!

Perhaps you will consider making this garlic focaccia bread! It’s a great side dish to compliment a variety of main courses or salads. I hope you’ll enjoy it.
It can also be used as an appetizer BEFORE the meal, when served with a mixture of olive oil and fresh herbs (or olive oil/balsamic vinegar). You can also use it to make a delicious sandwich! Lots of possibilities.
Thanks for stopping by, and I invite you to come back soon for more family-friendly recipes. Take care, may God bless you, and have a wonderful day.
Looking For More BREAD Recipes?
You can find ALL of my recipes in the Recipe Index, which is located at the top of the page. I have lots of delicious bread recipes to choose from, including:
Want More Recipes? Get My FREE Newsletter!
I publish a newsletter 2 times per month (1st and 15th) with lots of recipes, tips, etc.
Would you like to join our growing list of subscribers?
There is a Newsletter subscription box on the top right (or bottom) of each blog post, depending on the device you use.
You can submit your e-mail address there, to be added to my mailing list.
Find Me On Social Media:
Facebook page: The Grateful Girl Cooks!
Pinterest: The Grateful Girl Cooks!
Instagram: jbatthegratefulgirlcooks

Adapted from Recipe Source: old newspaper article (original source/newspaper/author unknown)
↓↓ PRINTABLE RECIPE BELOW ↓↓
Garlic Focaccia Bread, with olive oil and fresh herbs, is a great side dish for a variety of meats and salads, can be used to make sandwiches, or served as an appetizer with dipping oil!
Category: Appetizer, Bread, Side Dish
Cuisine: Italian
Keyword: garlic focaccia bread
Servings: 10 slices
Calories Per Serving: 229 kcal
Author: JB @ The Grateful Girl Cooks!
- 1/2 ounce dry active yeast
- 1 cup water heated to 100 degrees
- 3 cups flour (all purpose)
- 1 Tablespoon olive oil
- 1/4 cup cold water
- 1 teaspoon honey
- 3/4 teaspoon salt
- 1/4 cup Parmesan cheese ,freshly grated
- 1/3 cup olive oil
- 1 teaspoon garlic (crushed)
- 1/2 teaspoon fresh thyme (or rosemary) , finely chopped
Mix yeast with warm water (100 degrees) in a large bowl. Stir, then set bowl aside for 5 minutes to let yeast fully dissolve. Bubbles will begin appearing on the surface, which tells you the yeast is active and working.
Add flour, 1 Tablespoon olive oil, Parmesan cheese, honey, salt and cold water to bowl. Mix ingredients well. NOTE: I started mixing it with a spoon, then switched to using my (clean) hands to mix it up, because it's easier (it's a thick dough). Form dough into a ball, then place on a lightly floured surface. Roll dough out with a rolling pin, smoothing and shaping it into a circle 10" wide.
In a separate small bowl or measuring cup, mix together 1/3 cup olive oil and crushed garlic. Set aside to let flavors "mingle" while you get dough ready.
Transfer the dough circle to a large baking sheet or pizza pan (with edges) . Poke holes in top of the dough using your fingertips. Make deep holes all over the top of the dough, but don't go all the way through to the bottom.
Cover top/sides of dough with olive oil/ garlic mixture using spoon and/or pastry brush. There will be oil that runs off edges onto pan. Scoop it up with a spoon and fill the holes with it. Sprinkle top with chopped fresh thyme (or rosemary, if using). There will STILL be excess oil on pan around bottom of dough. Leave it there! It will absorb into the bread when it bakes, and help to make a nice crust! Set bread aside, and let dough rise a bit (uncovered) for 30-40 minutes in a warm place, free from drafts. Preheat oven to 400º F. while dough rises.
After dough has risen, bake in 400º F. oven for 23-25 minutes, or until bread is evenly browned. Remove from oven, transfer bread to a wire rack, and let cool 20-25 minutes before serving. To serve, slice in half from left to right, then cut into 2" thick slices from top to bottom. If desired, serve with dipping sauce of (2 to 1 mix) olive oil and balsamic vinegar OR olive oil and fresh herbs, like thyme, garlic, rosemary. ENJOY!
NOTE: Yeast used is equivalent of 2 (¼ ounce) packages OR 4½ teaspoons of bulk dry active yeast.
Nutrition Facts
Garlic Focaccia Bread
Amount Per Serving (1 slice)
Calories 229 Calories from Fat 81
% Daily Value*
Fat 9g14%
Saturated Fat 1g6%
Cholesterol 1mg0%
Sodium 216mg9%
Potassium 53mg2%
Carbohydrates 29g10%
Fiber 1g4%
Protein 5g10%
Vitamin A 20IU0%
Vitamin C 0.1mg0%
Calcium 35mg4%
Iron 1.8mg10%
* Percent Daily Values are based on a 2000 calorie diet.
Here’s one more to pin on your Pinterest boards! 


! They are a wonderful breakfast treat! / The Grateful Girl Cooks!")

! They are a wonderful breakfast treat! / The Grateful Girl Cooks!")


