Chocolate butterhorns are made from scratch yeast rolls, with a delicious chocolate filling. Recipe yields 32, using a bread machine or made by hand.
Well, after almost a week of insane “busy-ness”, I am back to taking time out of my day to add a new recipe to this blog. Today’s recipe is for Chocolate Butterhorns. I found this recipe online a couple of years ago from Jessica Fisher (at Life As Mom.com). After looking at the recipe, I thought these rolls sounded pretty good, so I gave them a try. Delicious!
The butterhorns are filled with chocolate chips (so how bad can that be?), are easy to make, and freeze well. This chocolate butterhorns recipe makes 32 rolls, so freezing some for another time is a perfect option for busy families!
Scroll Down For A Printable Recipe Card At The Bottom Of The Page
Making Chocolate Butterhorns
The recipe (as written) utilizes a bread machine. The dough is mixed and rises in the bread machine. The dough is then removed, rolled out, cut into portions, then chocolate pieces are added. Chocolate butterhorns are then rolled, rise again, and then are baked. That’s the instructions in a nutshell.
Do I Have To Have A Bread Machine To Make Chocolate Butterhorns?
The answer is NO. If you don’t have a bread machine, there are a couple other options, shown below.
Option #1: You can mix the dough in a stand mixer, with a dough hook.
Option # 2: You can also mix the dough by using your muscles and mixing the dough by hand.
Once Dough Is Mixed By Hand
If making the dough by hand (or stand mixer), once your dough has been mixed, place it in a lightly greased mixing bowl. Cover the dough, and place in a warm spot. Let the dough rise until it has doubled in size.
Once the dough has doubled in size, simply follow the remaining instructions in the recipe card for rolling them up, filling, baking, etc.

The dough is rolled into a circle, then cut into individual rolls. Once cut, the dough is topped with semi-sweet chocolate, rolled into crescent shapes, and baked.
To Serve
Once done, the warm butterhorns are lightly dusted with sifted powdered sugar and cocoa powder before serving.

Here is a picture of the rolls, fresh from the oven. They sure look good enough to eat!!!!

I hope you will give these soft, chocolate butterhorns a try…we really enjoyed them! I think they would also taste fantastic with seedless raspberry jam added to the chocolate chip filling! Wouldn’t THAT be decadent to sink your teeth into??? YUM.
Looking For More “From Scratch” Bread Recipes?
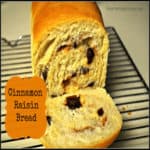
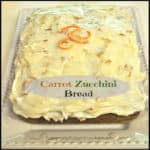
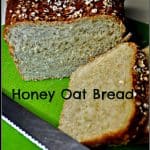
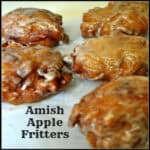
All of my homemade bread recipes are located in the Recipe Index, which can be found at the top of the page. A few favorites you might enjoy include:
Interested In More Recipes?
Thank you for visiting this website. I appreciate you using some of your valuable time to do so. If you’re interested, I publish a newsletter 2 times per month (1st and 15th) with all the latest recipes, and other fun info. I would be honored to have you join our growing list of subscribers, so you never miss a great recipe!
There is a Newsletter subscription box on the top right side (or bottom) of each blog post, depending on the device you use, where you can easily submit your e-mail address (only) to be included in my mailing list.
You Can Also Find Me On Social Media:
Facebook page: The Grateful Girl Cooks!
Pinterest: The Grateful Girl Cooks!
Instagram: jbatthegratefulgirlcooks
 Recipe Source: http://lifeasmom.com/2010/04/chocolate-butterhorns-perfect-for-freezing-perfect-for-anytime.html
↓↓ PRINTABLE RECIPE BELOW ↓↓

- 1 cup milk
- 1/2 cup butter , melted
- 2 eggs
- 1/2 cup granulated sugar
- 4 cups all-purpose flour
- 1 teaspoon salt
- 1 Tablespoon (heaping) dry active yeast
- 1 - 2 cups chocolate chips (how much you add is up to you, depending on taste preference)
- 1/4 cup powdered sugar
- 1 Tablespoon cocoa powder
- Place the dough ingredients in a bread machine cannister. Set controls for dough cycle and start machine. Once dough cycle has completed, remove dough from pan. Place on lightly floured work surface and divide into 4 equal parts.
Roll each section of dough into a 12 inch circle. Cut each circle into 8 pie shaped wedges. Place a small amount of chocolate chips over the surface of each individual wedge. Roll up each of the wedges, beginning at the wide part of the triangle and rolling up, ending at the point. Roll up each of the wedges, beginning at the wide part of the triangle and rolling up, ending at the point.
- Place rolls on greased baking sheet or parchment paper lined baking sheet. Let rise in a warm place until doubled in size.
- Bake rolls in a preheated 375 degree oven for 12-15 minutes (until golden brown). Remove from oven and cool on wire racks.
- TO PREPARE AHEAD FOR FREEZING: Once you roll up the rolls, place them (point side down) on a baking sheet. Place in freezer. Once frozen, remove rolls and store them in freezer bags in freezer until you want to prepare them. To prepare the frozen rolls: Remove from bag, place on greased or parchment paper lined baking sheet. Let thaw and rise for approximately 5 hours (until rolls are doubled in size). Bake in 375 degree oven for 12-15 minutes or until golden brown.
TO GARNISH: Once rolls are baked, lightly sift cocoa powder and powdered sugar over the top of each butterhorn. Serve warm, and enjoy!
No Bread Machine Available? Here are two options to prepare the dough: Lightly spray a large mixing bowl with spray. Option #1: Mix the dough in a stand mixer, with a dough hook. Option # 2: Mix the dough by hand (really takes muscles!). Once dough is mixed, transfer to the greased mixing bowl. Cover the bowl, place in a warm spot, and let dough rise until doubled in size. One doubled in size, continue with Step #2 in recipe.
Here’s one more to pin on your Pinterest boards!


