Ken’s Garlic Bread is an easy, crunchy, side dish for salads, soup or main courses. Broiled baguette has Parmesan, garlic, butter, paprika & parsley! 
I named this “recipe” after my husband, Ken… a total bread-lover, who ALWAYS enjoys this garlic bread with a meal. Seriously… the guy can put away the garlic bread. Therefore I named it “Ken’s Garlic Bread”. Amen.
I felt rather foolish thinking I could put this garlic bread “recipe” (if you can call it that) on my blog. Then I realized there’s people who suffer in silence, somberly eating a plain, ordinary, buttered slice of bread, while our family scarfs down delicious, crispy, flavorful garlic bread! Ha Ha!
Family Traditions… Even For Garlic Bread!
I finally decided… why NOT put our tried-and-true Ken’s garlic bread “recipe” out there? (Hey… it IS my blog, right?) I get it… most people have “their way” of making garlic bread, and that’s awesome. Well, this is our family’s way.
Maybe you will like it as much as we do. Maybe one of our grown sons has been lying awake wondering HOW does Mom make that good garlic bread we always used to have for dinner?
That is why I posted this recipe for my dear sweet husband Ken’s garlic bread. And believe it or not… there really is no “recipe”. Just some pictures that will show you what we do. Nine times out of 10 we start with sourdough bread, but French bread is a good runner up.
Use pre-sliced bread, or slice an entire loaf or a small baguette in half horizontally (lengthwise)… whatever you want! You can use virtually any kind of bread, and chances are, you’re gonna like it!
Follow these easy directions, then cook the bread on a rack under your oven broiler. That’s it!!
How To Make Ken’s Garlic Bread
Here’s how: Slice the loaf or baguette in half length-wise with a serrated knife, and do the following:
Yep, that’s right… I used the kind of parmesan cheese that comes in the green can for this version. Both “shaker can parmesan” and fresh grated Parmesan cheese are perfect for this bread.
I keep both around my home but wrote this recipe using the type of Parmesan cheese that most people commonly have in their home. Guess you’ll have to choose which kind to use.

Lightly sprinkle with garlic powder. Don’t be too heavy handed, folks! We don’t need to chase away any vampires today!

Now lightly sprinkle Ken’s garlic bread with paprika.

Lightly sprinkle with dried parsley. Now put Ken’s garlic bread on a rack under the broiler. Keep an eye on it so it doesn’t burn… You want it to look nice and golden brown…

Time To Eat Ken’s Garlic Bread!
And there you have it! Congratulations. You made my hubby Ken’s favorite garlic bread. Aren’t you proud? Now insert a piece of this yummy bread into your mouth and enjoy!

Hope you will give this a try… It’s DEFINITELY not rocket science, and it works like a charm every time. Absolutely delicious! ENJOY!
Looking For More BREAD Recipes?
You can find all of my recipes in the Recipe Index, located at the top of the page. A few of our favorite bread recipes, (perfect for accompanying a variety of dishes) include:
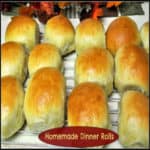
- Homemade Dinner Rolls
- Red Lobster Cheddar Biscuits
- Easy Cheesy Garlic Crescent Rolls
- Italian Biscuit Flat Bread
- Classic Challah Bread
Want More Recipes? Get My FREE Newsletter!
I publish a newsletter 2 times per month (1st and 15th) with lots of recipes, tips, etc.
Would you like to join our growing list of subscribers?
There is a Newsletter subscription box on the top right (or bottom) of each blog post, depending on the device you use.
You can submit your e-mail address there, to be added to my mailing list.
Find Me On Social Media:
Facebook page: The Grateful Girl Cooks!
Pinterest: The Grateful Girl Cooks!
Instagram: jbatthegratefulgirlcooks

Here’s one more to pin on your Pinterest boards!


 in about 30 minutes! No rising time involved for this easy recipe. / The Grateful Girl Cooks!")


 in about 30 minutes! No rising time involved for this easy recipe. / The Grateful Girl Cooks!")


