Month: June 2019

How To Can Peach Pie Filling

Learn how to can peach pie filling for long term storage in this tutorial. Enjoy the convenience of having jars of pie filling stored away in your pantry, to use year round!
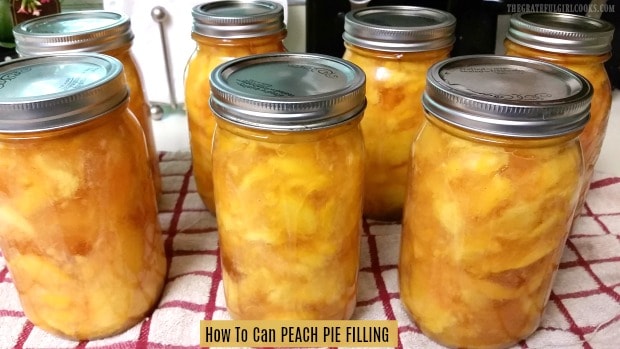
Learn how to can peach pie filling for long term storage in this tutorial. Enjoy the convenience of having jars of pie filling stored in your pantry.

Do you enjoy peach pie? We sure do, and this recipe will teach you how to can peach pie filling, to enjoy year round, long after fresh peaches are out of season!

Scroll Down For A Printable Recipe Card At The Bottom Of The Page

I LOVE To Use Freshly Picked Peaches In My Recipes!

There is a local U-Pick peach farm a few miles from our home, and I love to pick fresh peaches every summer! The peaches have been used to make peach jam, peach pie, streusel topped galettes, canned peaches, peach turnovers, and this canned pie filling!

I have also enjoyed making peach salsa, old-fashioned peach crisp, canned peach salsa, and even peach smoothies and ice cream using fresh-picked peaches! There’s just no end to what you can do with a delicious, ripe peach!

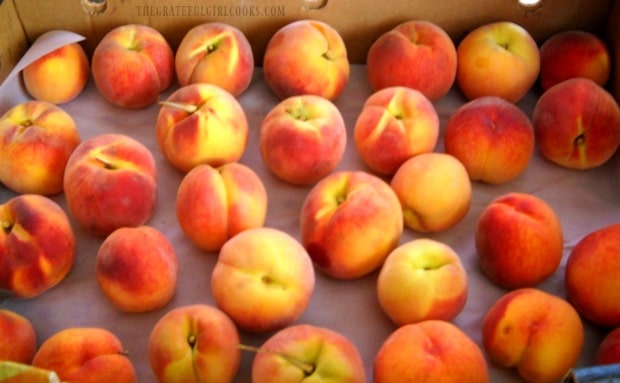
Freshly picked peaches, ready to use to make pie filling!

Before beginning, make sure you have all your canning supplies ready! Prepare jars, lids, and a water bath canner according to manufacturer instructions, and safe canning guidelines.

Canning peach pie filling requires some work to get the peaches (and the pie filling) ready! It takes a bit of time to work through each step, but the end result is absolutely worth your time! Stick with it, read the directions thoroughly before beginning, and then go for it!

Peeling All Those Peaches Is Easy Using This Method

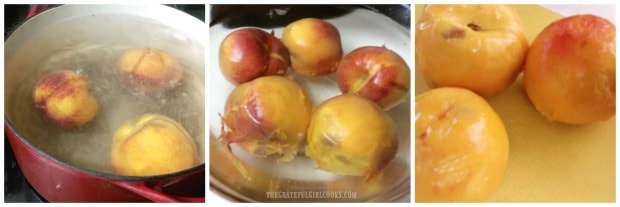
A lot of people use a knife to hand peel all the peaches needed, and that is perfectly okay, but I’d like to show you another option! There’s a slightly quicker method for peeling large amounts of peaches quickly.  Bring a large pot of water to a full boil. Place peaches (whole) 3-4 at a time into the boiling water for 45 seconds to 1 minute.

Immediately remove and place them into large bowl full of ice water, to stop the cooking. After this, the peels should come off the peaches very easily with a gentle rub! Repeat process, making sure water is boiling, and bowl of water is ice cold for each batch. Continue until all peaches are peeled.

Peaches are dipped in boiling water, then ice water to remove peels.

Slice, Treat, And Heat Peach Slices

I didn’t take a photo of this (oops), but remove the peach pits, and then slice the peeled peaches into 1/2″- 3/4″ slices. You will want to drop the slices as you cut them into a large bowl of a light syrup (see NOTE below), or use a product like Fruit Fresh, to prevent the slices from browning. Because there is such a large amount of peaches necessary for canning, you definitely don’t want to skip this step!

NOTE: If using a light syrup, heat 1/2 cup sugar into 5 cups of water only until sugar is dissolved. Pour into bowl, and then toss in the peach slices as you cut them. If using Fruit Fresh, follow package instructions.

Heat The Treated Peach Slices

Bring a large pot of water to a full boil.Drain the treated peach slices, and then place them in the boiling water (about 6-7 cups at a time). Bring the water back to a boil, and then let the peaches cook for only 1 minute.

Remove, and then drain peaches (and keep them warm), and continue process until all peaches have been cooked for 1 minute. You will end up needing a total of about 6 quarts worth of cooked peaches.

Prepare Thickener For The Pie Filling

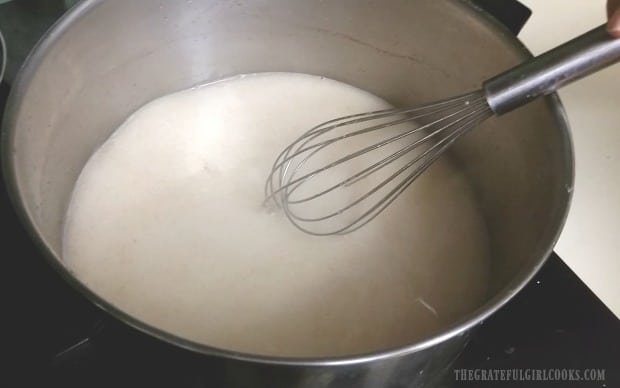
In another separate large pan, mix the granulated sugar, Clear Jel and water. Heat on medium-high heat, stirring often, until it begins to thicken, and gets bubbly. **In case you are curious, Clear Jel is a powdered, safe thickening agent that can be purchased online. It is preferred in canning pie fillings using high heat, over the use of flour or cornstarch**.

Add the cinnamon and the bottled lemon juice to the pan, and let it boil for 1 more minute. Yes… use all that bottled lemon juice (it’s for long term preservation). It will not affect the taste of your pie filling. Now add all of the warm peach slices, and give it all a good stir to fully combine ingredients. Continue to cook for 3 minutes, stirring the peach pie filling constantly (sorry, no photo).

Water, sugar and Clear Gel cooking in a pan.

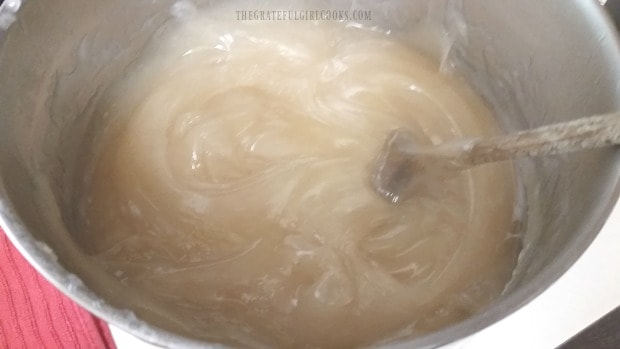
The sugary mixture for peach pie filling has thickened up in the pan.

Time To Add The Peach Pie Filling To The Canning Jars

Whew… we are almost ready to finally can some peach pie filling! Okay… here’s what you need to do!

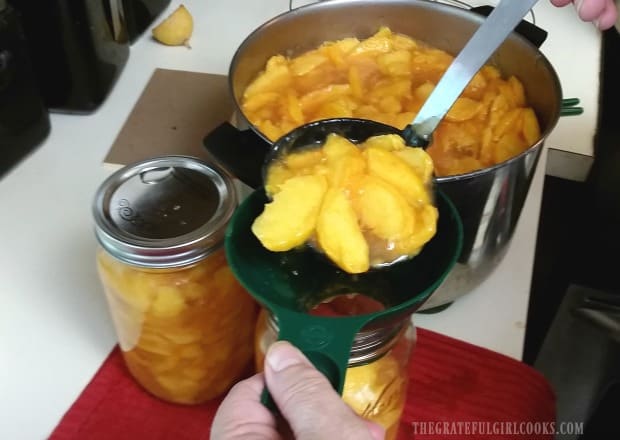
Fill each of the hot, prepared canning jars (I use quart size), being sure to leave a 1″ headspace. Remove the air bubbles, and then using a wet cloth or paper towel, clean the rims of the jars, so they are free of sticky residue (for a good seal). Add the flat lids and twist the screw bands on, until they are fingertip tight.

The peach pie filling is ladled into the hot canning jars.

Can The Peach Pie Filling

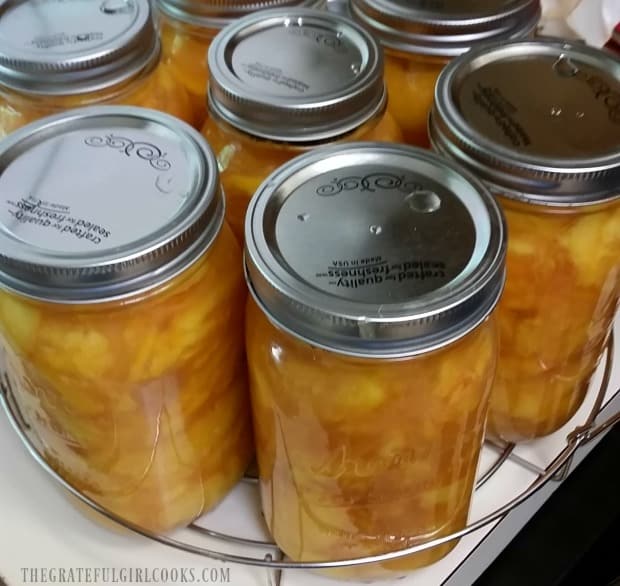
Place the jars of canned peach pie filling onto an elevated canning rack and place the rack with jars carefully into simmering water in the canner. The hot water needs to be about an inch ABOVE the tops of the jars once jars are in the canner before processing. Bring the water in the canner to a gentle boil, and then process jars (both pints or quarts) for 30 minutes after the water comes to a boil.

Jars of pie filling are loaded onto rack and then are placed in a water bath canner.

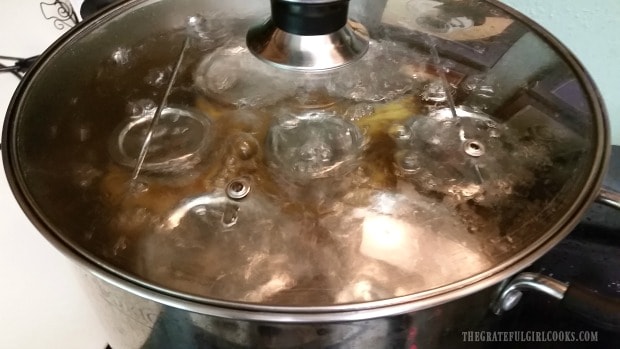
Jars of peach pie filling being processed in a water bath canner.

Once Processing Is Finished

Once fully processed, carefully remove the HOT jars of peach pie filling from the canner using canning tongs, and place them onto a dish towel. Do NOT place the hot jars directly onto your kitchen counter, because they could crack due to temperature variances (hot jars/cold counter).

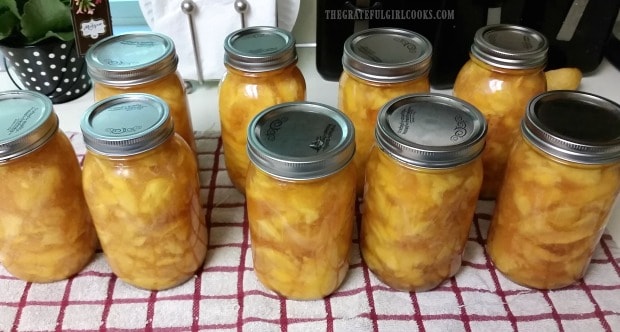
Finished jars of canned peach pie filling, cooling on counter.

Let the jars cool, undisturbed for 12-24 hours. You should hear them “ping” as the jars seal. Once cooled, check the seal on each jar to ensure they have sealed properly and are ready (and safe) for long term storage. Wipe down the cooled jars, label them, and add them to your pantry! Now you can make peach pie any time you want!

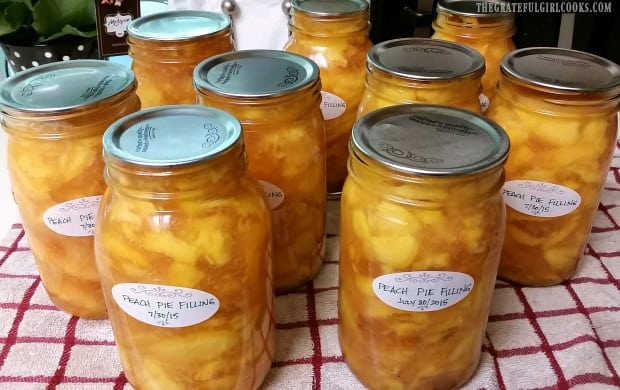
Labeled jars of peach pie filling have cooled and are ready to store in pantry.

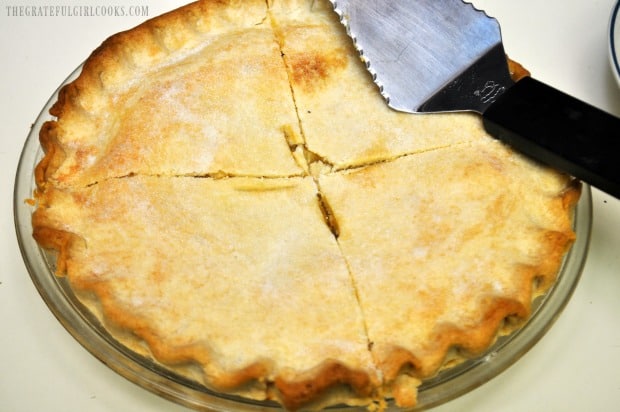
Made a peach pie!

Yes, it IS a bit of work to can peach pie filling, but it sure is nice to have several jars put away for a quick pie months later (long after summer peaches have disappeared from stores). I hope you will give this recipe a try! Thanks for visiting, and have a great day!

Looking For More CANNING Recipes?

You can find all of my canning recipes in the Recipe Index, located at the top of the page. I have many canning recipes, with instructions, for foods and jams. A few of the canned items you might want to try include:

Interested In More Recipes?

Thank you for visiting this website. I appreciate you using some of your valuable time to do soIf you’re interested, I publish a newsletter 2 times per month (1st and 15th) with all the latest recipes, and other fun info. I would be honored to have you join our growing list of subscribers, so you never miss a great recipe!
There is a Newsletter subscription box on the top right side (or bottom) of each blog post, depending on the device you use, where you can easily submit your e-mail address (only) to be included in my mailing list.

You Can Also Find Me On Social Media:
Facebook page: The Grateful Girl Cooks!
Pinterest: The Grateful Girl Cooks!
Instagram: jbatthegratefulgirlcooks

Author's signature

Original Recipe Source: https://www.simplycanning.com/peach-pie-recipes.html

↓↓ PRINTABLE RECIPE BELOW ↓↓

0 from 0 votes
How To Can Peach Pie Filling
Prep Time
1 hr
Cook Time
30 mins
Total Time
1 hr 30 mins
 

Learn how to can peach pie filling for long term storage in this tutorial. Enjoy the convenience of having jars of pie filling stored in your pantry.

Category: Canning and Preserving, Dessert
Cuisine: American
Keyword: can peach pie filling
Servings: 7 quarts
Calories Per Serving: 1105 kcal
Author: JB @ The Grateful Girl Cooks!
Ingredients
  • 6 quarts fresh peaches , enough to make 6 quarts sliced)
  • 7 cups granulated sugar
  • 2 cups + 3 Tbsp. Clear Jel
  • cups cold water
  • teaspoons cinnamon
  • cups bottled lemon juice
Instructions
  1. Before beginning, make sure to have all your canning supplies ready! Prepare jars, lids, and a water bath canner according to manufacturer instructions, and safe canning guidelines.

  2. Peel peaches with a knife OR bring a large pot of water to a boil. Place peaches (whole) 3-4 at a time into boiling water for 45 seconds to 1 minute. Immediately remove and place them into large bowl full of ice water, to stop cooking. After this, the peel should come off easily with a gentle rub! Repeat process, making sure water is boiling, and bowl of water is ice cold for each batch. Continue until all peaches are peeled. Remove peach pits, and slice peaches into 1/2"- 3/4" slices. Drop the slices as you cut them into a large bowl of a light syrup (see NOTE below), or use a product like Fruit Fresh, to prevent slices from browning. NOTE: If using a light syrup, heat 1/2 cup sugar into 5 cups of water only until sugar is dissolved. Pour into bowl, and then toss in the peach slices as you cut them. If using Fruit Fresh, follow package instructions.
    Bring a large pot of water to a full boil. Drain treated peach slices, and place them in the boiling water (6-7 cups at a time). Bring water back to a boil, and then let peaches cook for 1 minute. Remove, and drain peaches (and keep them warm). Continue until all peaches have been cooked. You need a total of 6 quarts of cooked peach slices.

  3. In a separate large pan, mix granulated sugar, Clear Jel and water. Heat on medium-high heat, stirring often, until it begins to thicken, and gets bubbly. Add cinnamon and bottled lemon juice to the pan; let it boil for 1 more minute. Yes... use all that bottled lemon juice (it's for long term preservation). It will not affect the taste of your pie filling. Now fold in warm peach slices, to fully combine ingredients. Continue to cook for 3 minutes, stirring the peach pie filling constantly.

  4. Fill each of the hot, prepared canning jars, being sure to leave a 1" headspace. Remove air bubbles by inserting a plastic knife several times into jars, adjust headspace if necessary, and use a wet cloth or paper towel to clean the rims of the jars, so they are free of sticky residue (for a good seal). Add the flat lids and twist screwbands on, until fingertip tight. Place jars onto an elevated canning rack and place rack carefully into simmering water in the canner. The hot water needs to be about an inch ABOVE the tops of the jars once jars are in the canner before processing. Bring the water in the canner to a gentle boil, and then process jars (both pints or quarts) for 30 minutes after water comes to a gentle boil.

  5. Once fully processed, carefully remove HOT jars of peach pie filling from the water bath using canning tongs, and place them on a dish towel on counter. Do NOT place hot jars directly onto kitchen counter, because they could crack due to temperature variances (hot jars/cold counter). Let jars cool, undisturbed for 12-24 hours. Once cooled, check the seal on each jar to ensure they have sealed properly and are ready and safe for long term storage. Wipe jars clean, label, and store in pantry. Enjoy!
Nutrition Facts
How To Can Peach Pie Filling
Amount Per Serving (1 quart jar)
Calories 1105 Calories from Fat 18
% Daily Value*
Fat 2g3%
Saturated Fat 1g6%
Sodium 12mg1%
Potassium 1604mg46%
Carbohydrates 282g94%
Fiber 13g54%
Sugar 269g299%
Protein 8g16%
Vitamin A 2645IU53%
Vitamin C 77.1mg93%
Calcium 64mg6%
Iron 2.2mg12%
* Percent Daily Values are based on a 2000 calorie diet.

Here’s one more to pin on your Pinterest boards!Learn how to can peach pie filling for long term storage in this tutorial. Enjoy the convenience of having jars of pie filling stored in your pantry.

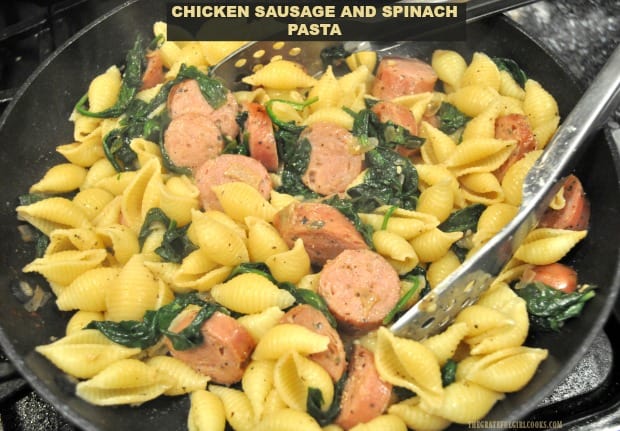
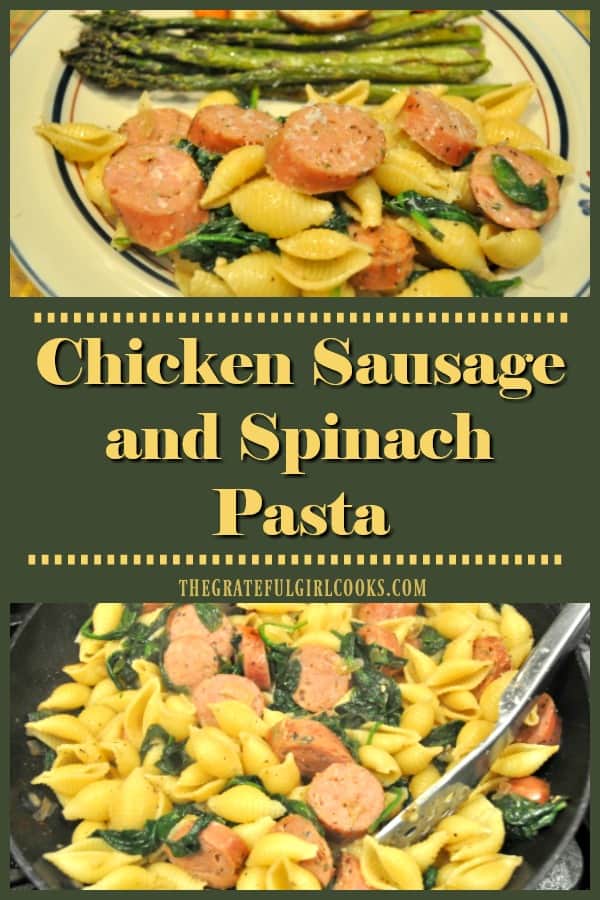
Chicken Sausage and Spinach Pasta

Chicken sausage and spinach pasta is an easily made dish, flavored with seasoned chicken sausages, fresh spinach, onions, garlic, and Parmesan cheese!

Do you enjoy cooking with chicken sausages? I’ve come to enjoy the variety of flavors available, and the reduced calories over the past year. Recently I came up with this simple recipe for chicken sausage and spinach pasta, and want to share it here on the ol’ blog!

The recipe in itself is very easy to make. Basically, chicken sausage links are cooked, pasta shells are cooked, and baby spinach, onions, and garlic are cooked. Combine them, along with Parmesan cheese, butter, and light seasoning, and you’ve got yourself a great tasting meal! Here’s how to make this dish:

Scroll Down For A Printable Recipe Card At the Bottom Of The Page

Cook The Chicken Sausages

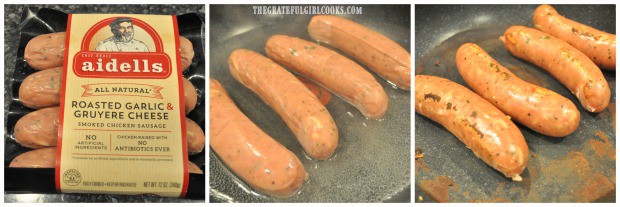
Seen below are the chicken sausages I used. You can use any variety you enjoy, but this time we had this meal with Roasted Garlic & Gruyere Cheese links. YUM!

Cook the sausages per package directions. For this brand, I cook the sausages in a cup of water for 8-10 minutes on medium heat, until the water has cooked away. Cook the sausages for 2-3 minutes until lightly browned on all sides.

After cooking, let the chicken sausages rest for 5 minutes, then slice them in 1/2″ rounds, and set aside. Do not clean out the skillet (you will use it to cook spinach later).

The chicken sausages are cooked according to package instructions.

Cook The Pasta Shells

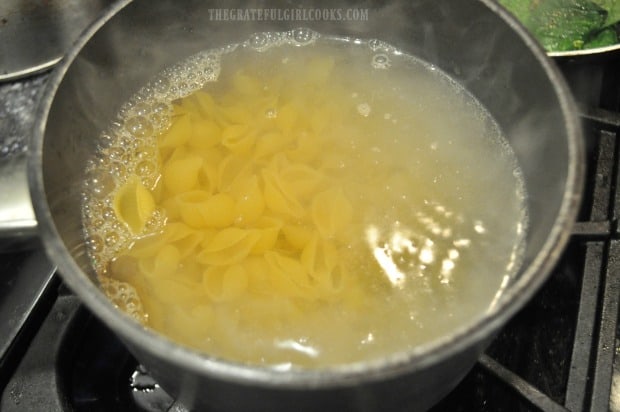
Cook the small pasta shells in boiling water until done. Follow package instructions for length of time (about 9-11 minutes usually). Once pasta is finished cooking, drain, reserve the cooking water, and keep the shells warm. IMPORTANT: Do not pour out the starchy water from the pasta. You will need some later!

Pasta shells are cooked to add to this dish.

Cook The Spinach, Onions and Garlic

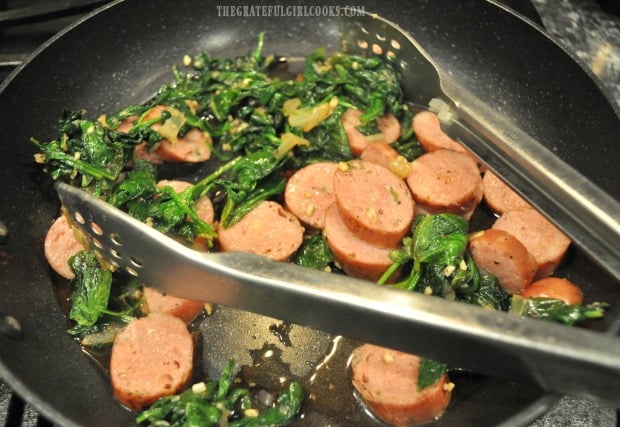
Cook the chopped onion in the same skillet (with any leftover sausage “grease”) used to cook the sausages. If there was no “grease” leftover, simply add just a tiny bit of oil (1/2 teaspoon or so). Continue to cook the onions on medium heat, for 1-2 minutes, stirring often.

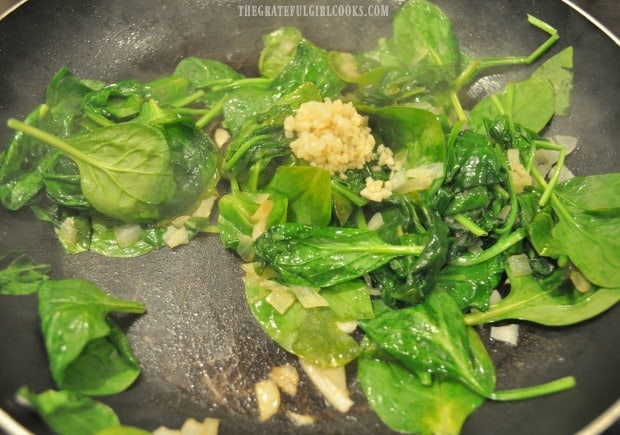
Add the baby spinach one handful at a time to the skillet. Continue to cook as the spinach wilts down. Once the spinach has cooked down, add more spinach, and continue until all spinach is in skillet. Season the spinach with salt and pepper, to taste.

Add the minced garlic, and cook for an additional minute or two, stirring often to prevent the garlic from burning. It is done when all of the spinach has cooked down considerably.

Spinach, onions and garlic cooking for the pasta dish.

Finish The Chicken Sausage and Spinach Pasta

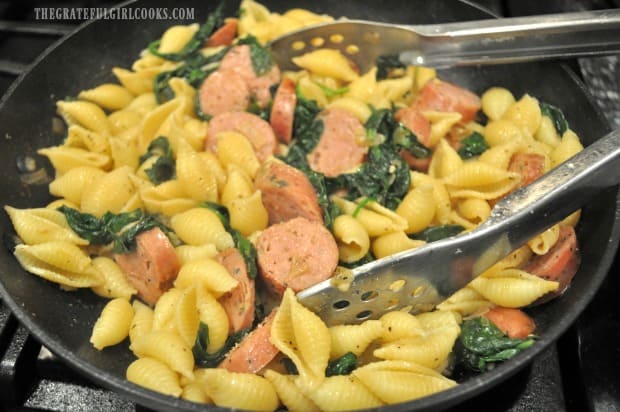
Place the chicken sausages back into the skillet, and gently toss to mix the ingredients. Add the Parmesan cheese, and toss gently to combine.

Cook on medium heat, and then add the drained pasta to the skillet. Pour in 1/4 cup of the reserved starchy water (from the pasta), and the butter. Toss the chicken sausage and spinach pasta together. Stirring often, continue to cook the chicken sausage and spinach pasta until the water has been absorbed into the pasta, butter has melted, and the dish is heated through.

Cooked chicken sausage slices are added to the skillet with the spinach.

The chicken sausage and spinach pasta is almost ready!

The Chicken Sausage And Spinach Pasta Is Ready To Eat!

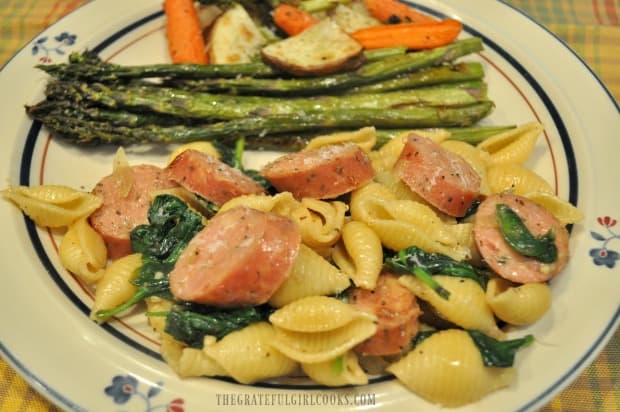
Once all the starchy water has been absorbed and the dish is heated through, the chicken sausage and spinach pasta is ready to serve! Taste test the pasta, and add additional salt and pepper, to suit your taste buds.

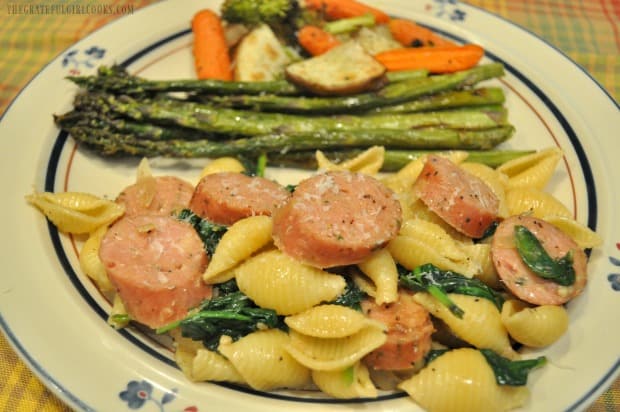
Dish up the portions onto serving plates, and if you want, sprinkle the top with additional finely grated Parmesan cheese!

Chicken sausage and spinach pasta, on a plate with roasted veggies.

Each portion of chicken sausage and spinach pasta is sprinkled with Parmesan cheese.

I really hope you enjoy this dish! We really did, and trust you will, too. If you enjoy chicken sausages, be sure to check out my recipe for Sausage, Spinach & Veggie Skillet!

Thanks for stopping by, and I invite you to come back soon for more family-friendly recipes. Take care, God bless you, and have a wonderful day.

Looking For More PASTA Recipes?

You can find all of my recipes in the Recipe Index, located at the top of the page.  A few of our favorite pasta recipes include:

Interested In More Recipes?

Thank you for visiting this website. I appreciate you using some of your valuable time to do soIf you’re interested, I publish a newsletter 2 times per month (1st and 15th) with all the latest recipes, and other fun info. I would be honored to have you join our growing list of subscribers, so you never miss a great recipe!
There is a Newsletter subscription box on the top right side (or bottom) of each blog post, depending on the device you use, where you can easily submit your e-mail address (only) to be included in my mailing list.

You Can Also Find Me On Social Media:
Facebook page: The Grateful Girl Cooks!
Pinterest: The Grateful Girl Cooks!
Instagram: jbatthegratefulgirlcooks

Author's signature

0 from 0 votes
Chicken Sausage and Spinach Pasta
Prep Time
10 mins
Cook Time
25 mins
Total Time
35 mins
 

Chicken sausage and spinach pasta is an easily made dish, flavored with seasoned chicken sausages, fresh spinach, onions, garlic, and Parmesan cheese!

Category: Entree
Cuisine: American
Keyword: chicken sausage and spinach pasta
Servings: 4
Calories Per Serving: 326 kcal
Author: JB @ The Grateful Girl Cooks!
Ingredients
  • 4 links chicken sausage
  • 1 cup pasta shells (small) , uncooked
  • 3 cups baby spinach
  • 1 teaspoon minced garlic
  • 1/4 cup chopped onion
  • Salt and Pepper , to taste
  • 1/4 cup grated Parmesan cheese
  • 1 Tablespoon butter
  • 1/4 cup starch water (from cooking pasta)
  • Additional Parmesan cheese for garnish , optional
Instructions
  1. Cook chicken sausages per package directions. After cooking, let sausages rest for 5 minutes, then slice into 1/2" rounds, and set aside. Do not clean out skillet (you will use it to cook spinach later).

  2. Cook pasta shells in boiling water, following package instructions for length of time (about 9-11 minutes usually). Once pasta's done, drain, reserve cooking water, and keep shells warm. IMPORTANT!: Do not pour out the starchy water from the pasta. You will need some later!

  3. Cook chopped onion in the same skillet (with any leftover sausage "grease") used to cook sausages. If there is no "grease" leftover, simply add just a tiny bit of oil. Continue to cook the onions on medium heat, for 1-2 minutes, stirring often. Add baby spinach (one handful at a time) to skillet. Continue to cook as spinach wilts down. Once spinach has cooked down, add more spinach, and continue until all spinach is in skillet. Season spinach with salt and pepper, to taste. Add minced garlic, and cook for 1-2 minutes, stirring often to prevent garlic from burning. It is done when all spinach has cooked down considerably.

  4. Place chicken sausage slices back into skillet, and gently toss to mix with spinach. Add Parmesan cheese, and toss to combine. Add drained pasta to skillet. Pour in 1/4 cup of the reserved starchy water (from the pasta), and butter. Stirring often, continue to cook until the water has been absorbed into the pasta, butter has melted, and the dish is heated through.

  5. Taste test pasta, and add additional salt and pepper, if necessary. Dish up portions onto serving plates, and sprinkle with additional grated Parmesan cheese, if desired! Enjoy!

Nutrition Facts
Chicken Sausage and Spinach Pasta
Amount Per Serving (1 g)
Calories 326 Calories from Fat 153
% Daily Value*
Fat 17g26%
Saturated Fat 5g31%
Cholesterol 73mg24%
Sodium 1010mg44%
Potassium 196mg6%
Carbohydrates 25g8%
Fiber 1g4%
Sugar 2g2%
Protein 20g40%
Vitamin A 2550IU51%
Vitamin C 8.7mg11%
Calcium 97mg10%
Iron 1.7mg9%
* Percent Daily Values are based on a 2000 calorie diet.

Here’s one more to pin on your Pinterest boards!Chicken sausage and spinach pasta is an easily made dish, flavored with seasoned chicken sausages, fresh spinach, onions, garlic, and Parmesan cheese!

Skillet Glazed Pork Chops

Delicious Skillet Glazed Pork Chops (boneless or bone-in) are covered in a simple, four ingredient glaze, and take only 25 minutes to prepare!

If you enjoy pork chops, then I’m thrilled to share with you this incredibly simple and delicious recipe for skillet glazed pork chops today! I found the recipe in one of my cookbooks, and decided to try it out! Sure am glad that I did! The recipe can be used with bone in OR boneless thick pork chops, so it is very versatile!

Lightly seasoned pork chops are pan-seared in a skillet in a teensy tiny bit of oil, and then removed from the pan once done. A very easy 4 ingredient glaze is then prepared in the same skillet, then the pork chops are added back in and coated with the glaze. That’s it!

The end result is a absolutely delicious quick dinner in under half an hour! Here’s how to make skillet glazed pork chops.

Scroll Down For A Printable Recipe Card At The Bottom Of The Page

Mix the Ingredients For The Pork Chop Glaze

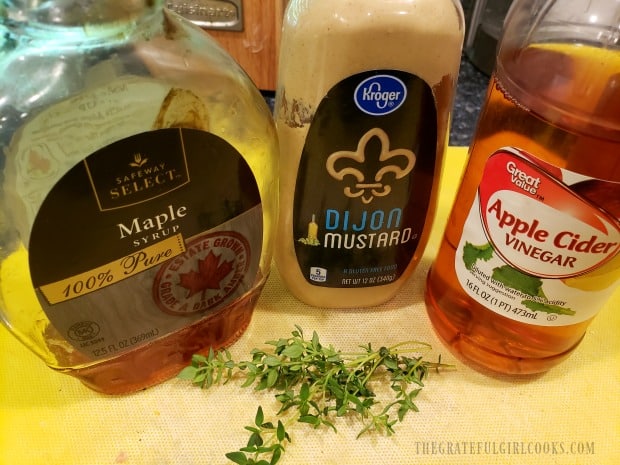
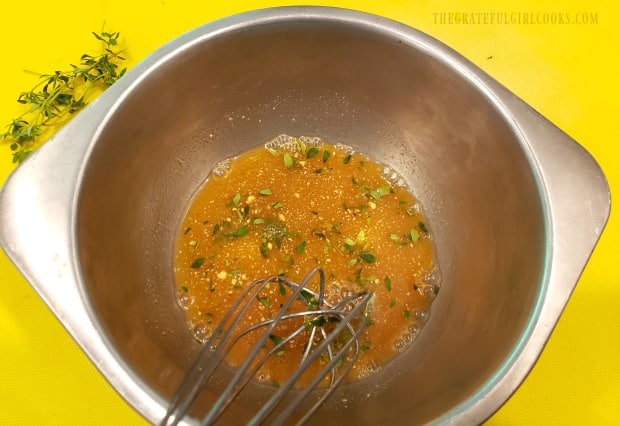
The sauce/glaze is super easy to make! Measure out pure maple syrup, Dijon mustard, apple cider vinegar and chopped fresh thyme leaves in a small bowl. TIP: If you don’t have access to fresh thyme, you can substitute dried thyme. Mix the glaze ingredients well (with a whisk or fork), until fully blended. Set the sauce aside.

Only 4 ingredients needed to make the glaze: maple syrup, dijon, cider vinegar and thyme.

The glaze for the pork chops is whisked together in a small bowl.

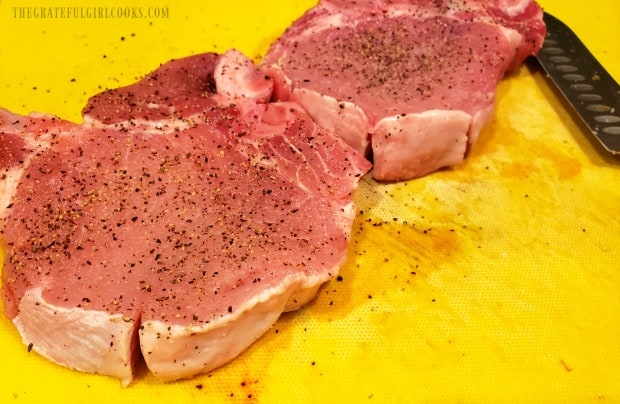
Use a sharp knife to cut through the fat layer and silverskin on the outside of the chops, at  2″ intervals. This will help the chops to not curl up and buckle too much when pan-searing them. Lightly season the pork chops with salt and black pepper.

Pork chops are seasoned with salt and pepper, and fat is sliced through on outside of each one.

Cooking The Skillet Glazed Pork Chops

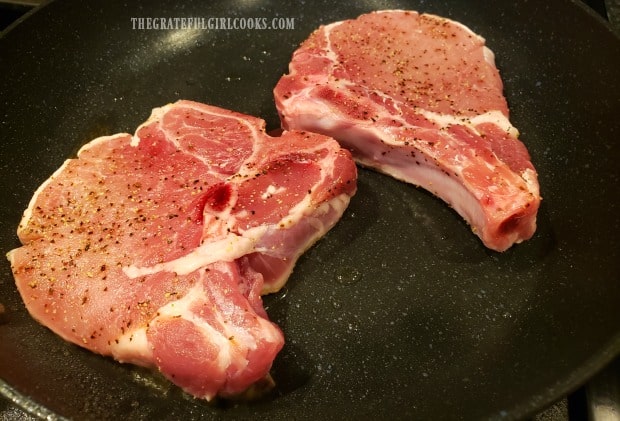
Heat one teaspoon of vegetable oil in a 9-10″ skillet. Heat the oil on medium-high heat until really hot, but just barely smoking. Carefully place both pork chops in the skillet. You should hear them sizzle a bit when they hit the skillet.

Pan-sear the pork chops on medium high heat for 3-4 minutes, then carefully flip the chops to the other side. Turn the heat down to medium, and continue to cook the skillet glazed pork chops until they register 145° F. on a meat thermometer. This will usually take between 5-10 minutes.

Remove Pork Chops From Skillet When Done

Once done, remove the pork chops from the skillet. Place them on a plate, and cover them with aluminum foil, to keep them warm while you cook the glaze. NOTE: Do not clean the skillet after removing pork chops. Leave any remaining grease in the pan.

Pork chops are pan-seared in a skillet before adding the glaze.

Cook The Glaze For the Pork Chops

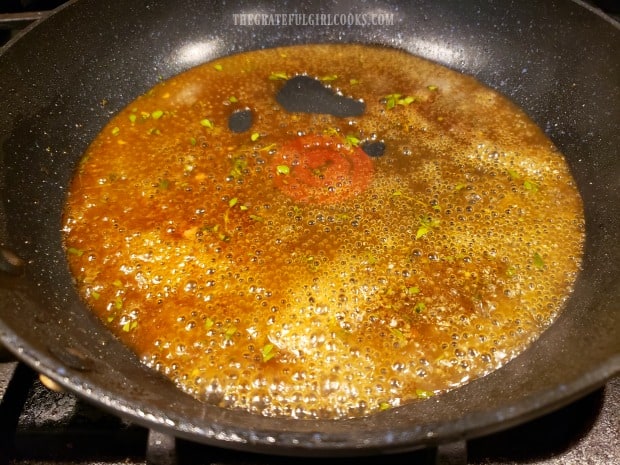
Give the reserved sauce a quick whisk, then pour it into the skillet. Turn the heat back up to medium, and bring the sauce to a simmer, scraping up any leftover pork brown bits left on the bottom of skillet. These will add flavor to the sauce!

Once the sauce has begun simmering, continue to cook until the sauce becomes more a syrupy glaze consistency. This should take only 2-3 minutes, and the glaze will thicken and reduce in volume a bit.

The glaze for the pork chops is cooked in the skillet until syrupy.

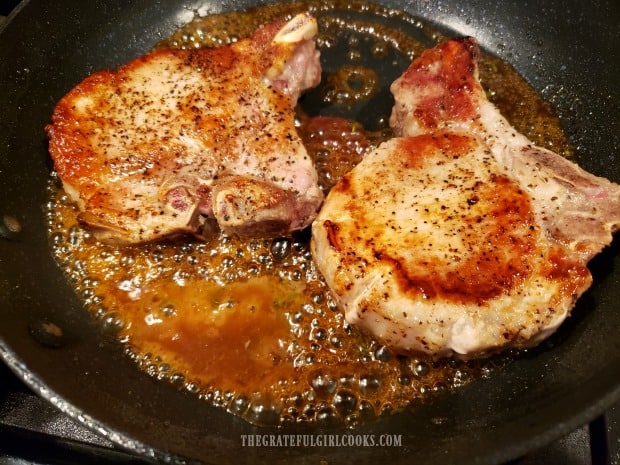
Place the pork chops back into the skillet with the glaze. Pour any juices that accumulated on the plate with the pork chops back into the skillet, as well. Continue to cook the skillet glazed pork chops, turning them over in the glaze. Spoon excess glaze over the top of the chops, to completely coat them with the sticky sauce.

Skillet Glazed Pork Chops finish cooking in the thickened glaze.

Serve The Skillet Glazed Pork Chops

After the skillet glazed pork chops have continued to cook for a couple minutes, they are done, and are ready to serve! If checking the internal temperature, pork should reach 145-160 degrees to be cooked adequately.

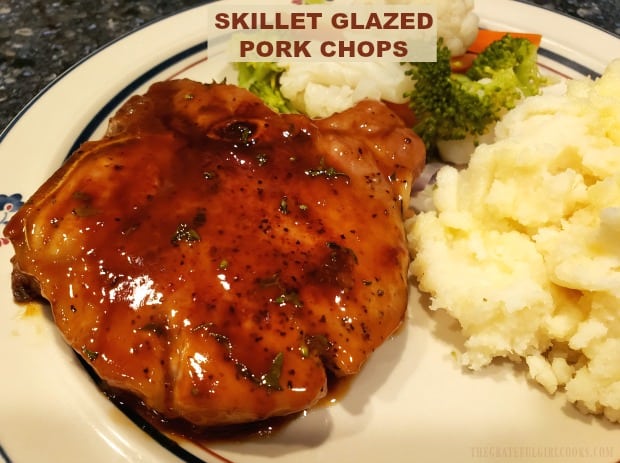
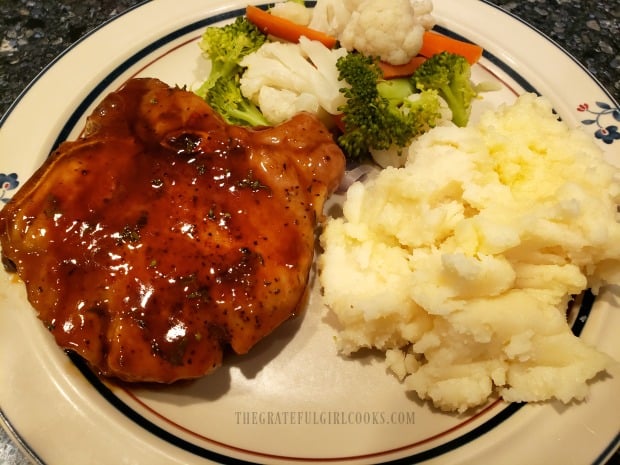
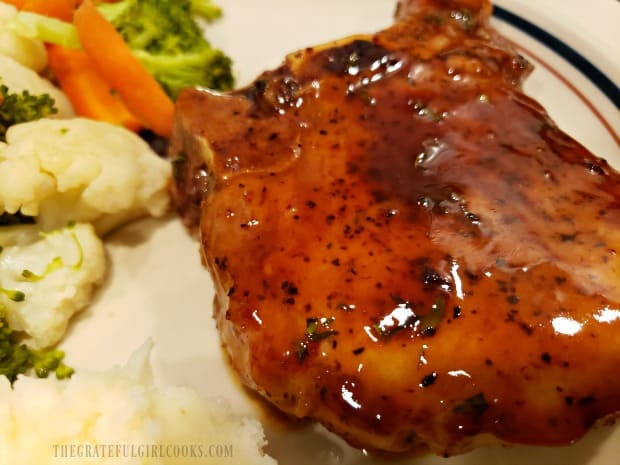
Transfer the pork chops to serving plates, and spoon any leftover glaze over the tops of each piece of meat. Serve with side dishes you enjoy. We enjoyed these pork chops with steamed veggies and mashed potatoes! Enjoy!
The finished pork chops are served with glaze spooned over the top of each piece.One of the skillet glazed pork chops, served with mashed potatoes and assorted veggies.

I really hope you enjoy this easy recipe for skillet glazed pork chops! My hope is you will be pleasantly surprised at the wonderful sauce that perfectly compliments the pork!  Have a wonderful day, and may God bless you today in all you undertake.

Looking For More PORK CHOP Recipes?

You can find all of my pork chop recipes in the Recipe Index, located at the top of the page. A few family favorites include:

Interested In More Recipes?

Thank you for visiting this website. I appreciate you using some of your valuable time to do soIf you’re interested, I publish a newsletter 2 times per month (1st and 15th) with all the latest recipes, and other fun info. I would be honored to have you join our growing list of subscribers, so you never miss a great recipe!
There is a Newsletter subscription box on the top right side (or bottom) of each blog post, depending on the device you use, where you can easily submit your e-mail address (only) to be included in my mailing list.

You Can Also Find Me On Social Media:
Facebook page: The Grateful Girl Cooks!
Pinterest: The Grateful Girl Cooks!
Instagram: jbatthegratefulgirlcooks

Author's signature

Original Recipe Source: One of my cookbooks, titled: “The Complete Cooking For Two Cookbook”, from the editors at America’s Test Kitchen, published 2014, page 147

0 from 0 votes
Skillet Glazed Pork Chops
Prep Time
5 mins
Cook Time
20 mins
Total Time
25 mins
 

Delicious Skillet Glazed Pork Chops (boneless or bone-in) are covered in a simple, four ingredient glaze, and take only 25 minutes to prepare!

Category: Entree
Cuisine: American
Keyword: skillet glazed pork chops
Servings: 2
Calories Per Serving: 324 kcal
Author: JB @ The Grateful Girl Cooks!
Ingredients
  • 2 5-6 ounce pork chops (about 3/4" thick) , bone in OR boneless
  • salt & pepper , to season pork (to taste)
  • 1 teaspoon vegetable oil
For Glaze:
  • 3 Tablespoons pure maple syrup
  • 2 Tablespoons apple cider vinegar
  • teaspoons dijon mustard
  • ½ teaspoon minced fresh thyme leaves , can substitute 1/8 tsp. dried thyme
Instructions
  1. Measure out pure maple syrup, dijon mustard, apple cider vinegar and chopped thyme leaves in a small bowl. Mix the glaze ingredients well (with a whisk or fork), until fully blended. Set aside.

  2. Use a sharp knife to cut through fat layer and silverskin on the outside of the chops, at 2" intervals. This will help chops to not curl up and buckle too much when pan-searing them. Lightly season pork chops with salt and pepper.

  3. Heat vegetable oil in a 9-10" skillet on medium-high heat until really hot, but just barely smoking. Carefully place pork chops in skillet. You should hear them sizzle when they hit the skillet. Pan-sear pork chops on medium high heat for 3-4 minutes, then carefully flip the chops to the other side. Turn heat down to medium, and continue to cook until they register 145° F. on a meat thermometer. This usually takes between 5-10 minutes. Once done, remove the pork chops from skillet. Place them on a plate, and cover them with aluminum foil, to keep them warm while you cook the glaze. NOTE: Do not clean the skillet after removing pork chops... leave any remaining grease or browned bits in the pan, to cook with the sauce.

  4. Give sauce a quick whisk, then pour it into skillet. Turn heat back to medium; bring sauce to a simmer, scraping up any pork brown bits left on the bottom of skillet. These will add flavor to the sauce! Once sauce has begun simmering, continue to cook until it becomes more of a syrupy consistency. This should take 2-3 minutes; glaze will thicken/reduce in volume a bit. Place pork chops back into skillet with glaze, along with any accumulated juices. Continue to cook pork chops for 1-2 minutes, turning them over in the glaze. Spoon excess glaze on top of the chops, to completely coat. Transfer pork chops to serving plates, and spoon any leftover glaze over the tops of each piece. Serve and enjoy!
Nutrition Facts
Skillet Glazed Pork Chops
Amount Per Serving (1 g)
Calories 324 Calories from Fat 108
% Daily Value*
Fat 12g18%
Saturated Fat 5g31%
Cholesterol 95mg32%
Sodium 114mg5%
Potassium 596mg17%
Carbohydrates 21g7%
Sugar 18g20%
Protein 31g62%
Vitamin C 0.8mg1%
Calcium 43mg4%
Iron 0.7mg4%
* Percent Daily Values are based on a 2000 calorie diet.

Here’s one more to pin on your Pinterest boards!Delicious Skillet Glazed Pork Chops (boneless or bone-in) are covered in a simple, four ingredient glaze, and take only 25 minutes to prepare!

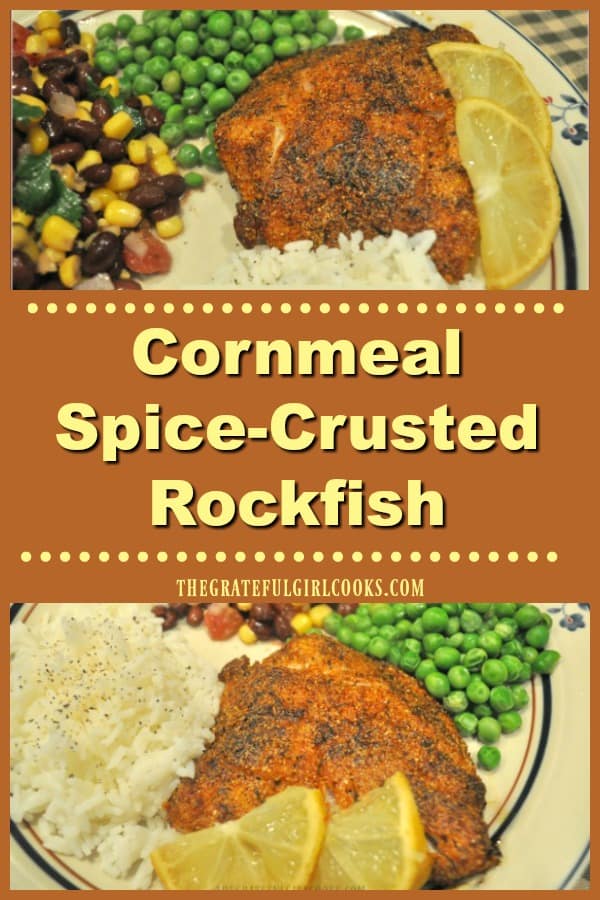
Cornmeal Spice-Crusted Rockfish

Cornmeal Spice-Crusted Rockfish is an EASY pan-seared Weight Watchers entree (2 SP). Delicious, simple, gluten free, and ready to eat in under 20 minutes!
Cornmeal Spice-Crusted Rockfish is an EASY pan-seared Weight Watchers entree. Delicious, simple, gluten free, and ready to eat in under 20 minutes!

Over the past couple of years, my husband and I have been trying to eat more seafood. One of the types of fish we have really enjoyed is rockfish, also known as Pacific Snapper.

Rockfish is typically found in the waters off the West Coast (CA, OR, WA and British Columbia), and it has a mild flavor and flaky texture. I’ve enjoyed using it in a couple of my recipes previously (see links below).

Scroll Down For A Printable Recipe Card At the Bottom Of The Page

How I Found This Recipe

As you may or may not know, I have been collecting cookbooks for over 40 years now. I LOVE to randomly look through cookbooks, seeking out interesting recipes to try! THIS is one of those recipes! Guess what? It’s from a Weight Watchers cookbook! Even if you are not watching your calories, you will love the flavors in this completely easy, low calorie seafood dish!

I found the recipe for cornmeal spice-crusted rockfish in a Weight Watchers Freestyle Cookbook I got last year. It is only 2 smart points per serving, if following a WW Freestyle plan! The original recipe uses tilapia, but I wanted to try it with the rockfish fillets I had in the freezer, so I did! We loved it!

How To Make Cornmeal Spice-Crusted Rockfish

The first step is to mix together the spice mixture for the rockfish. Place cornmeal and the seasonings onto a large sheet of wax paper, and mix together.

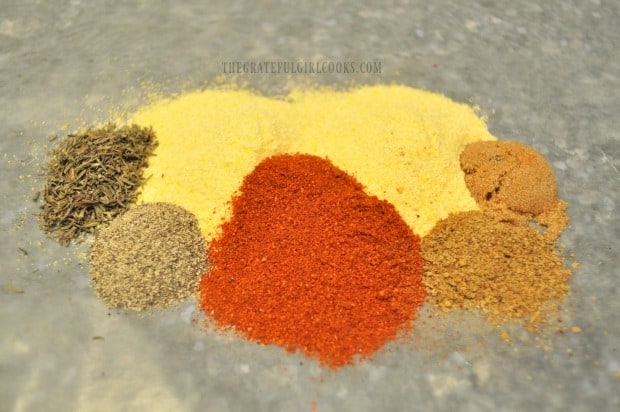
The spices which are added to the cornmeal are smoked sweet paprika, black pepper, Old Bay seasoning, brown sugar, and dried thyme. Once the ingredients are combined, spread the spice mixture out on the wax paper or work surface.

Spices are added to cornmeal to season the crust on the rockfish.

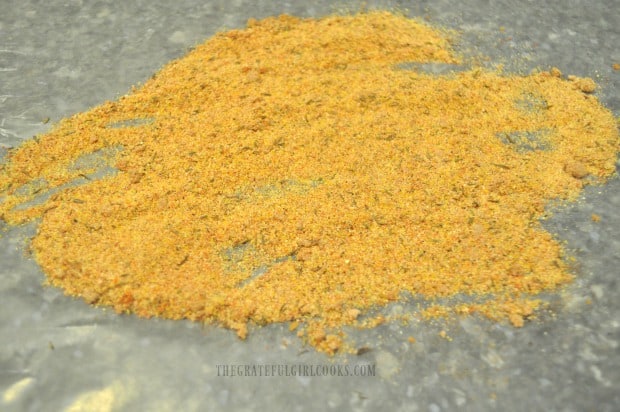
The spice mixture is spread out to dip the rockfish in.

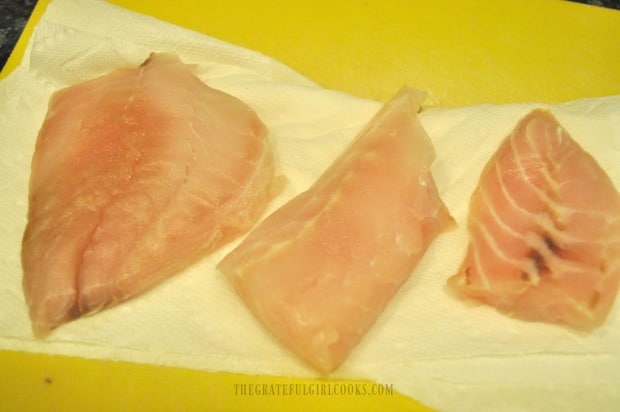
Gently pat dry the fish using paper towels. FYI: There will be varying sizes of rockfish fillets, and because it was only my husband and I eating, I used three very small pieces of fish.

The recipe as written serves 4, and there will be enough spice mix to coat 4 decent sized pieces of fish.

Rockfish fillets are patted dry before rolling them in cornmeal spice mixture.

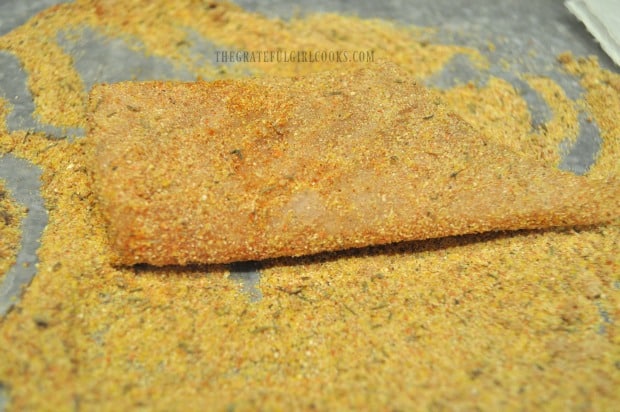
Dredge each piece of fish in the spice mixture, to coat all sides well. Use your fingers to press the seasonings onto the fish until it adheres to the surface. Set the coated piece of fish aside onto a plate, and continue with next piece, until all fish has been covered with spice/cornmeal mix.

The cornmeal spice-crusted rockfish fillets are now ready to cook.

Cook The Cornmeal Spice-Crusted Rockfish

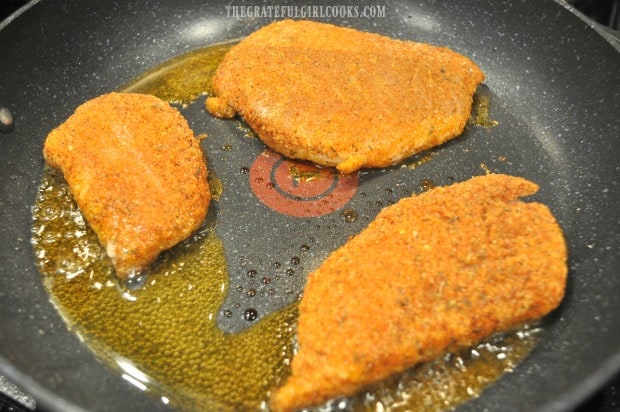
Heat the canola oil in a large skillet, on medium-high heat. Once oil is very hot, add the cornmeal spice-crusted rockfish. Lightly spray the top surface of the fish with non-stick spray.

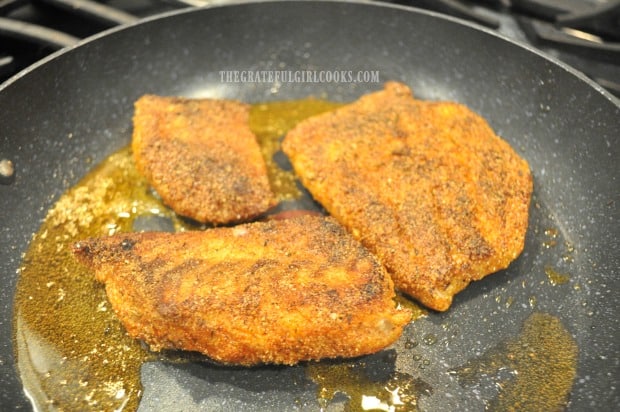
Cook the fish about 4 minutes, until the underside is deeply browned. Carefully turn each piece of cornmeal spice-crusted rockfish over to the other side, and continue cooking for approximately 4 more minutes. The cornmeal spice coating will crisp up as the fish cooks, and make a wonderfully seasoned outside “crust” on the fillets. This is a GOOD thing!

The cornmeal spice-crusted rockfish fillets are cooked in canola oil in a skillet.

After fish cooks on one side, each fillet is flipped to cook the other side.

Once the fish is cooked, transfer each piece to a dinner plate, and serve with your choice of side dishes! That’s it… now you’re ready to eat this delicious cornmeal spice-crusted rockfish! YAY! See how EASY it was to make this dish?

Serve The Cornmeal Spice-Crusted Rockfish

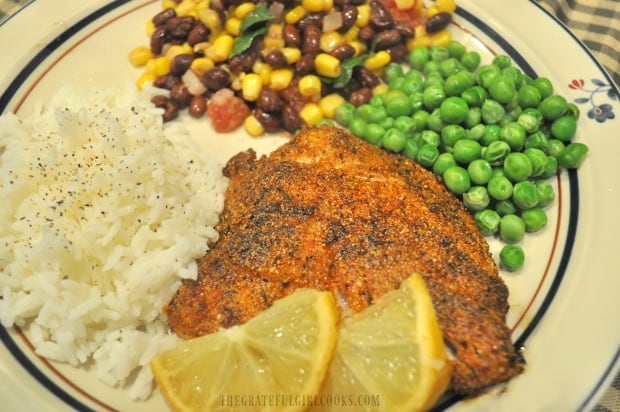
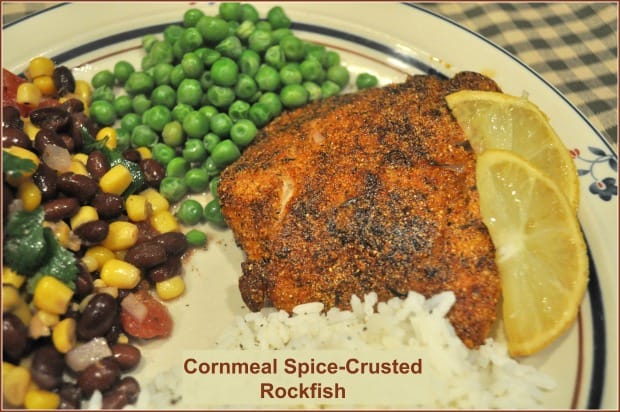
I served our cornmeal spice-crusted rockfish with a side of steamed rice (for my hubby), petite green peas, and my easy to make Southwestern Black Bean Salad (minus the avocadoes).

The fish is garnished with lemon wedges, which we squeezed over the fish before eating. That little extra zing of flavor made this dish even more delicious!

Lemon wedges garnish the finished cornmeal spice-crusted rockfish, served with rice and veggies.

We REALLY enjoyed this seafood dish, and I truly hope it has interested you enough to give it a try! This seafood dish is easy to make, is incredibly low calorie, cooks in no time at all, and tastes wonderful! Hope you’ll try it! Have a great day.

Looking For More Recipes Using ROCKFISH?

You can find all of my seafood recipes in the Recipe Index, located at the top of the page. A couple delicious recipes that use rockfish include:

Interested In More Recipes?

Thank you for visiting this website. I appreciate you using some of your valuable time to do soIf you’re interested, I publish a newsletter 2 times per month (1st and 15th) with all the latest recipes, and other fun info. I would be honored to have you join our growing list of subscribers, so you never miss a great recipe!
There is a Newsletter subscription box on the top right side (or bottom) of each blog post, depending on the device you use, where you can easily submit your e-mail address (only) to be included in my mailing list.

You Can Also Find Me On Social Media:
Facebook page: The Grateful Girl Cooks!
Pinterest: The Grateful Girl Cooks!
Instagram: jbatthegratefulgirlcooks

Author's signature

Original Recipe source: “The Essential WW Freestyle Cookbook”, published by Weight Watchers International, Inc., copyright 2018, page 84

0 from 0 votes
Cornmeal Spice-Crusted Rockfish
Prep Time
10 mins
Cook Time
8 mins
Total Time
18 mins
 

Cornmeal Spice-Crusted Rockfish is an EASY pan-seared Weight Watchers entree. Delicious, simple, gluten free, and ready to eat in under 20 minutes!

Category: Entree-Seafood
Cuisine: American
Keyword: cornmeal spice-crusted rockfish
Servings: 4
Calories Per Serving: 167 kcal
Author: JB @ The Grateful Girl Cooks!
Ingredients
  • 2 Tablespoons cornmeal
  • 2 teaspoons smoked sweet paprika
  • 1 teaspoon black pepper
  • 1 teaspoon Old Bay seasoning
  • 1 teaspoon dried thyme
  • 1 teaspoon packed brown sugar
  • 4 rockfish fillets (approx. 4-5 ounces each)
  • 4 teaspoons canola oil
  • Lemon wedges (for garnish)
Instructions
  1. Place cornmeal and the seasonings onto a large sheet of wax paper, and mix together. Once combined, spread the spice mixture out on the wax paper or work surface.

  2. Gently pat dry the fish using paper towels. Dredge each piece of fish in the spice mixture, to coat all sides well. Use your fingers to press the seasonings onto the fish until it adheres to the surface. Set the coated piece of fish aside onto a plate, and continue with next piece, until all fish has been covered with spice/cornmeal mix.

  3. Heat canola oil in a large skillet, using medium-high heat. Once oil is very hot, add the cornmeal spice-crusted rockfish. Lightly spray the top surface of the fish with non-stick spray. Cook the fish about 4 minutes, until the underside is deeply browned. Carefully turn each piece of fish over to the other side, and continue cooking for approximately 4 more minutes. Once the fish is done transfer each piece to a dinner plate, garnish each piece with lemon wedges, and serve with your choice of side dishes! Enjoy!
Recipe Notes

WW Freestyle = 2 Smart Points per serving!

Nutrition Facts
Cornmeal Spice-Crusted Rockfish
Amount Per Serving (1 fillet)
Calories 167 Calories from Fat 54
% Daily Value*
Fat 6g9%
Saturated Fat 1g6%
Cholesterol 57mg19%
Sodium 85mg4%
Potassium 477mg14%
Carbohydrates 6g2%
Fiber 1g4%
Sugar 1g1%
Protein 22g44%
Vitamin A 525IU11%
Calcium 26mg3%
Iron 1.2mg7%
* Percent Daily Values are based on a 2000 calorie diet.

Here’s one more to pin on your Pinterest boards!

Cornmeal Spice-Crusted Rockfish is an EASY pan-seared Weight Watchers entree (2 SP). Delicious, simple, gluten free, and ready to eat in under 20 minutes!


Greek Garbanzo Salad

Delicious Greek garbanzo salad, with kalamata olives, feta cheese, cucumbers, peppers & light dressing, is vegetarian, gluten-free, and super easy to make!
Delicious Greek garbanzo salad, with kalamata olives, feta cheese, cucumbers, peppers & light dressing, is vegetarian, gluten-free, and super easy!

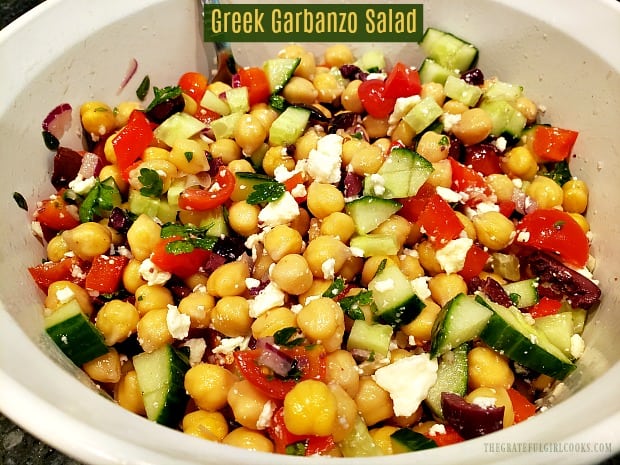
Do you enjoy garbanzo beans? If you do, then you will love this absolutely yummy Greek garbanzo salad! This little legume (also called a chickpea) is a protein packed, and fiber filled super food in my book! This delicious salad can be served as a side salad OR as a meatless option for a main course.

Scroll Down For A Printable Recipe Card At The Bottom Of The Page

Other Salads Using Garbanzo Beans

Two other dishes I really enjoy using garbanzo beans in are Nanci’s 4-Bean Salad, and Lemony Chickpea Salad. They are so light, and flavorful, and I hope you will consider checking out these recipes, as well. Both of these salads take only minutes to pull together, so they are perfect, convenient dishes to prepare on busy days!

How To Make This Greek Garbanzo Salad

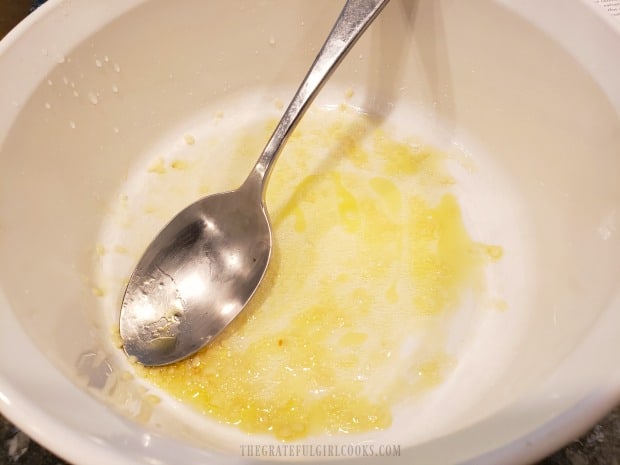
The first thing you need to do is prepare the (totally EASY) dressing for the Greek garbanzo salad. Place minced garlic, olive oil, lemon juice and a small amount of salt in a medium sized salad bowl, and mix until combined. See how easy that was?

Lemon juice, olive oil, salt and minced garlic are blended to make dressing for salad.

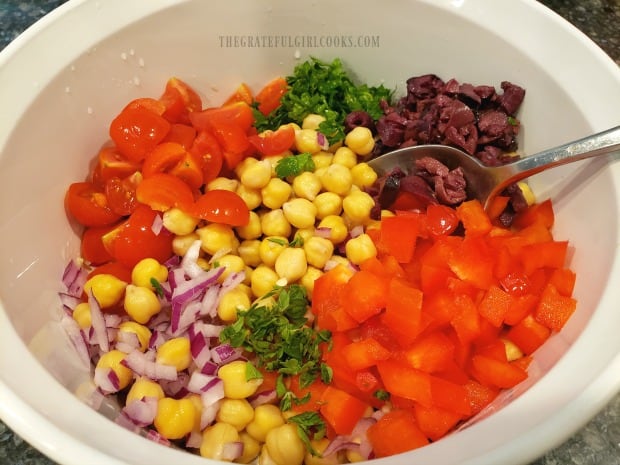
Add the drained garbanzo beans, bell peppers (orange or red), cherry tomatoes, red onion, kalamata olives, and fresh parsley and oregano (can substitute dried oregano).

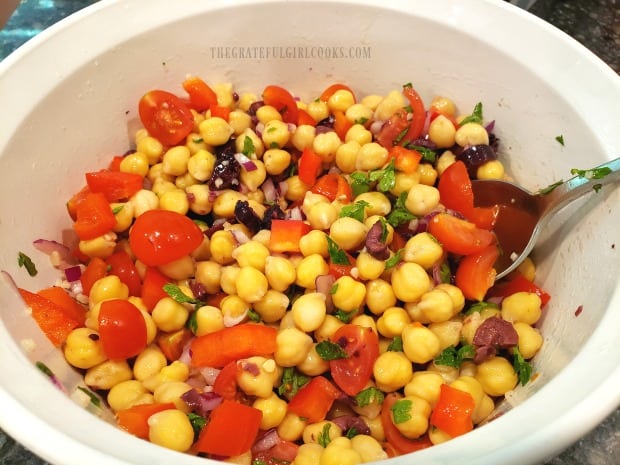
Give the ingredients a good stir, so they are fully combined with the dressing on the bottom of bowl. **Do not add the cucumber and feta cheese at this time, unless you are serving the salad right away.**

For Best Flavor, Let Salad Marinate In Refrigerator

For the very best flavor, I recommend placing the salad (covered) in the refrigerator for a couple hours minimum. This will give the salad a good chill, AND let the flavors mingle and get to know each other! You can even let the salad marinate overnight, if desired!

Tomatoes, bell peppers, garbanzo beans, red onion, kalamata olives & fresh herbs in bowl.The salad ingredients are mixed to coat with the lemon/olive oil dressing.

Before Serving The Greek Garbanzo Salad, Add Final Ingredients

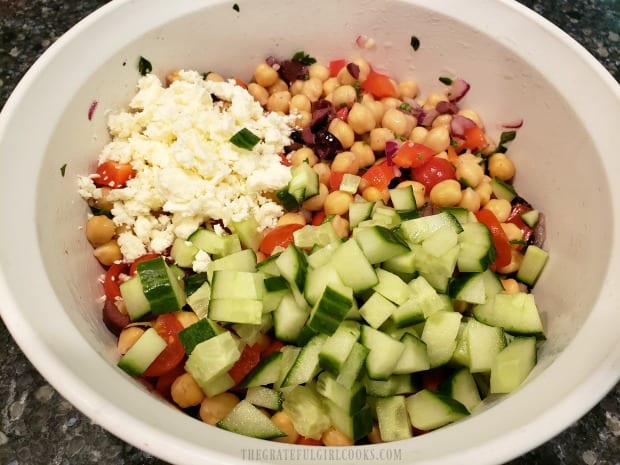
Right before you serve the salad, add the chopped cucumber (they should be nice and crunchy), and the crumbled feta cheese. Toss, to combine.

NOTE: I mixed both the feta and cucumbers into the Greek garbanzo salad, but you can also mix in the crunchy cucumbers, toss to combine, and then top the salad with the feta, if desired.

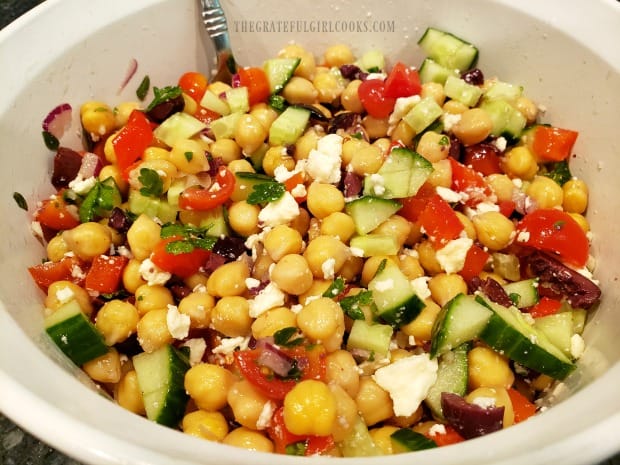
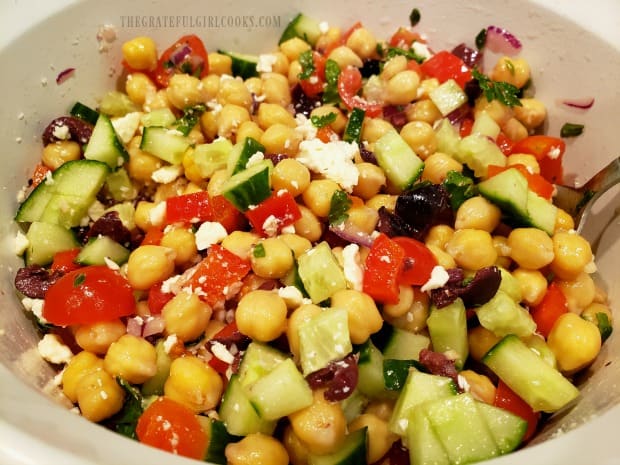
Feta cheese and diced cucumbers are added to the Greek garbanzo salad before serving.A bowl full of the Greek garbanzo salad, ready to eat!

Now you’re ready to serve this cool, crispy, colorful, and flavor-filled Greek garbanzo salad! The salad has a wonderful taste thanks in part to the feta cheese, simple lemon dressing and tangy kalamata olives. YUM!

Greek garbanzo salad is chilled, then served!

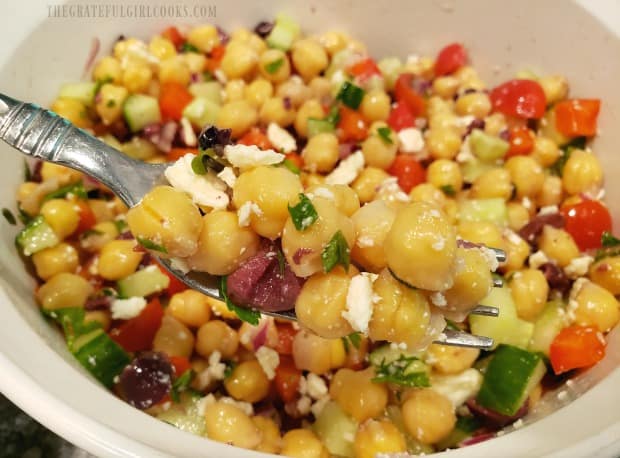
Here is a close up view (below) of a forkful of the Greek garbanzo salad… ready to eat! My husband and I loved this simple salad. Our grown son (a vegetarian) popped in for a visit, and tried this salad. He loved it, too!

A bite of the Greek garbanzo salad on a fork, ready to eat.

Hope you will consider trying this delicious Greek garbanzo salad. It truly is very good, and would be a perfect side dish to serve on a hot, summer evening! The salad will keep well for several days, covered in the refrigerator! Have a great day, friends.

Looking For More SALAD Recipes?

You can find ALL of my recipes in the Recipe Index, located at the top of the page. I have a nice variety of delicious salad recipes for you to enjoy, including:

Interested In More Recipes?

Thank you for visiting this website. I appreciate you using some of your valuable time to do soIf you’re interested, I publish a newsletter 2 times per month (1st and 15th) with all the latest recipes, and other fun info. I would be honored to have you join our growing list of subscribers, so you never miss a great recipe!
There is a Newsletter subscription box on the top right side (or bottom) of each blog post, depending on the device you use, where you can easily submit your e-mail address (only) to be included in my mailing list.

You Can Also Find Me On Social Media:
Facebook page: The Grateful Girl Cooks!
Pinterest: The Grateful Girl Cooks!
Instagram: jbatthegratefulgirlcooks

Author's signature

Original recipe source: “The Skinnytaste Cookbook”, by Gina Homolka, published 2014 by Clarkson-Potter Publishers, page 146.

0 from 0 votes
Greek Garbanzo Salad
Prep Time
15 mins
Cook Time
0 mins
Total Time
15 mins
 

Delicious Greek garbanzo salad, with kalamata olives, feta cheese, cucumbers, peppers & light dressing, is vegetarian, gluten-free, and super easy!

Category: Salad/Side Dish
Cuisine: Greek
Keyword: Greek Garbanzo Salad
Servings: 5 (1 cup servings)
Calories Per Serving: 141 kcal
Author: JB @ The Grateful Girl Cooks!
Ingredients
For Salad Dressing
  • 2 garlic cloves , minced
  • 3 Tablespoons lemon juice , fresh squeezed
  • 1 Tablespoon olive oil
  • ½ teaspoon salt
For Salad
  • 2 cups canned garbanzo beans (chickpeas) , rinsed and drained (gluten free)
  • 1 cup cherry tomatoes , quartered
  • ½ cup red (or orange) bell pepper , chopped
  • ¼ cup red onion , chopped
  • ¼ cup kalamata olives , pitted and chopped
  • 2 Tablespoons fresh parsley , chopped
  • ½ teaspoon fresh oregano leaves , chopped (OR 1/4 tsp. dried)
  • cups English cucumber , chopped ( or regular cucumber, seeded)
  • cup feta cheese , crumbled
Instructions
  1. Place minced garlic, olive oil, lemon juice and salt in a medium sized salad bowl, and mix together until combined.

  2. Add the drained garbanzo beans, bell peppers (orange or red), cherry tomatoes, red onion, kalamata olives, fresh parsley and oregano (can substitute dried oregano). Give the ingredients a good stir, so they are fully combined with the dressing on bottom of bowl. For the very best flavor, I recommend placing the salad (covered) in the refrigerator for a couple hours minimum. This will give the salad a good chill, AND let the flavors mingle and get to know each other! You can even let the salad marinate overnight, if desired!

  3. Right before you serve the salad, add in the chopped cucumber (it should be nice and crunchy!), and crumbled feta cheese, and toss to combine. NOTE: I mixed both the feta and cucumbers into the salad- you can also mix in the crunchy cucumbers, toss to combine, and then top the salad with the feta, if desired. Serve, and enjoy! Refrigerate any leftovers.
Nutrition Facts
Greek Garbanzo Salad
Amount Per Serving (1 cup)
Calories 141 Calories from Fat 63
% Daily Value*
Fat 7g11%
Saturated Fat 2g13%
Cholesterol 9mg3%
Sodium 638mg28%
Potassium 267mg8%
Carbohydrates 15g5%
Fiber 4g17%
Sugar 3g3%
Protein 6g12%
Vitamin A 850IU17%
Vitamin C 33.2mg40%
Calcium 92mg9%
Iron 1.4mg8%
* Percent Daily Values are based on a 2000 calorie diet.

Here’s one more to pin on your Pinterest boards!Delicious Greek garbanzo salad, with kalamata olives, feta cheese, cucumbers, peppers & light dressing, is vegetarian, gluten-free, and super easy!
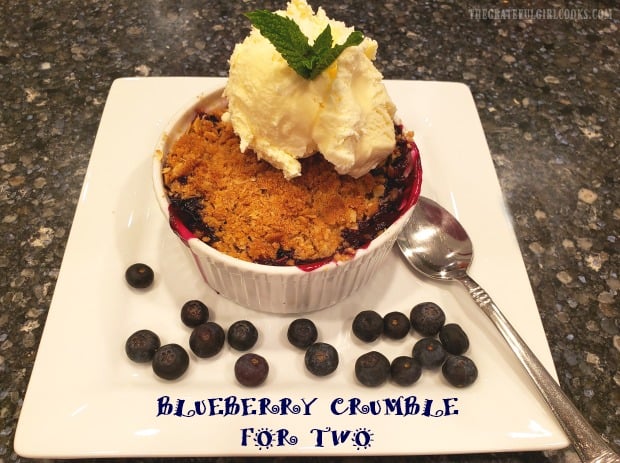
Blueberry Crumble For Two

Blueberry Crumble For Two is a simple and delicious dessert, featuring ramekins packed with fresh blueberries, capped with a buttery streusel topping!
Blueberry Crumble For Two is a simple and delicious dessert, featuring ramekins packed with fresh blueberries, topped with a buttery streusel topping!

Do you like blueberries? We sure do… in cereal, muffins, pies, crisps, scones, cakes, salads and eaten right off the blueberry bushes in our backyard! If you enjoy them like we do, then you will really enjoy this blueberry crumble!

Our two sons are grown men now, so these days my husband and I can easily enjoy meals made for two. My grocery bill is extremely thankful, too! Maybe you’re in the same boat, wanting to make a delicious dessert, but don’t need a HUGE dessert hanging around the house for days and days. Perhaps you only need to cook for one or two… then this yummy recipe is for YOU!

That’s where this easy blueberry crumble for two comes in handy! Two individual sized desserts in 12 ounce ramekins! You can also make this dessert for two in a small baking dish (8.5 x 5.5 inches), if you don’t have access to individual sized ramekins!

Prepare Your Baking Dishes For Filling

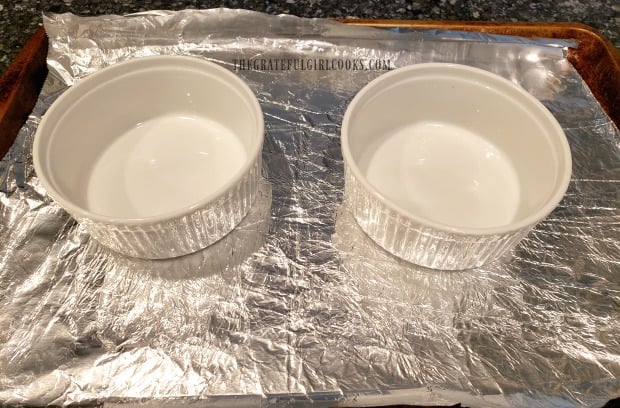
Cover a baking sheet (with rimmed edges) with aluminum foil. The foil is there to catch any blueberry filling that bakes OUT of the ramekins. Doing this one step really helps with cleanup (and you’ll be thankful you did this later!).

Spray each of the ramekins (or the baking dish) lightly with non-stick baking spray on the bottom and sides, and place on top of the aluminum foil. Preheat your oven to 375° F. and adjust an oven rack to a lower-middle position.

Ramekins are sprayed with non-stick baking spray, and placed on foil-covered baking sheet.

Prepare The Blueberries

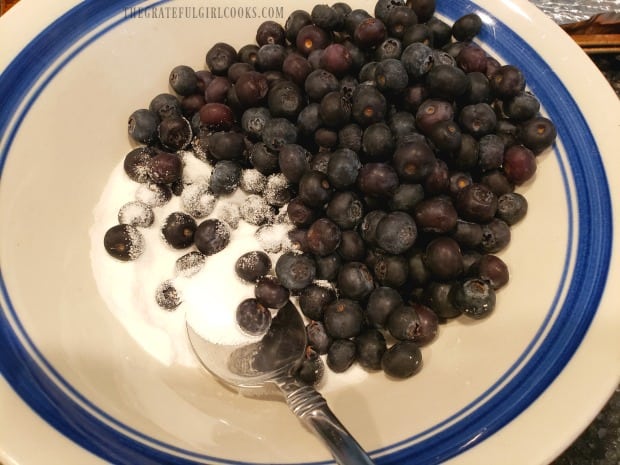
Place the blueberries in a medium sized bowl. Add granulated sugar, cornstarch and a pinch of salt to the bowl, and gently stir to combine. If you think the blueberries you’re using are too tart, you can easily add a couple more teaspoons of sugar, if desired.

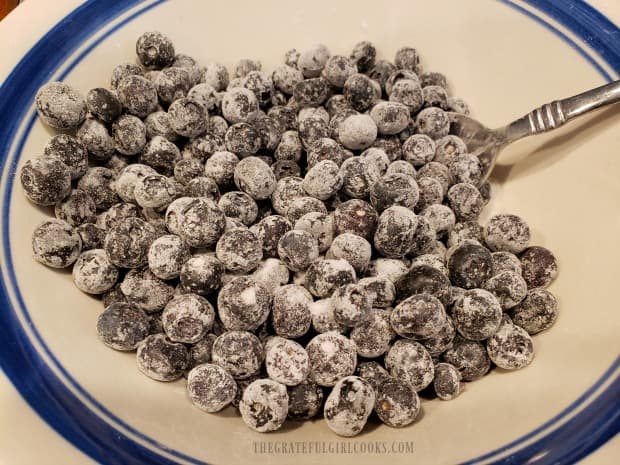
The blueberries will end up being coated with the sugar/cornstarch mixture, which is exactly what you want!

Fresh blueberries in a bowl with sugar, cornstarch and a pinch of salt.The blueberries are covered with granulated sugar, cornstarch and a pinch of salt.

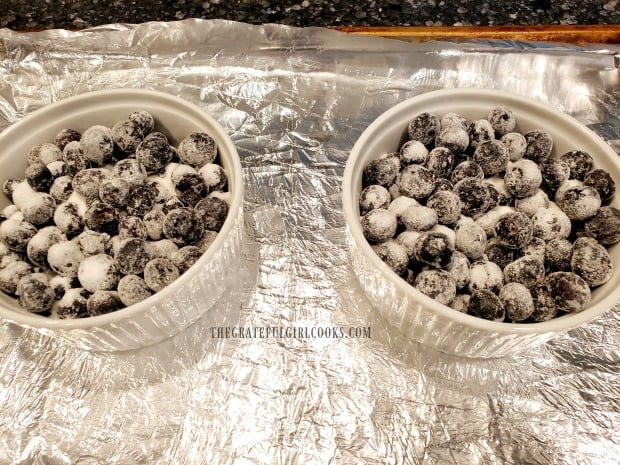
Evenly divide the sugared blueberries between the two prepared ramekins (or baking dish, if using).

Two ramekins are filled with the sugar coated fresh blueberries.

Make The Streusel Topping For The Blueberry Crumble

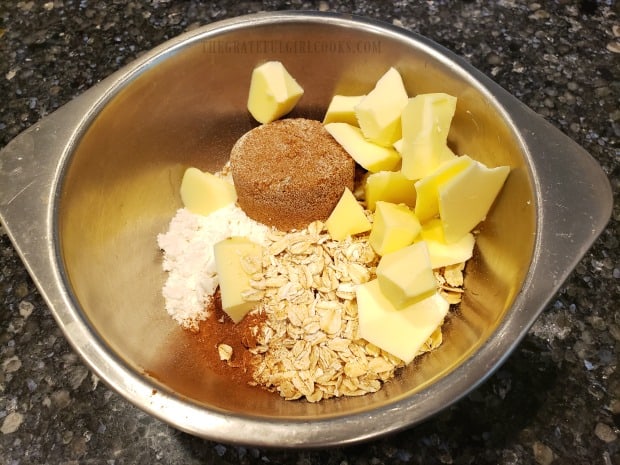
It’s very easy to make the streusel topping for the blueberry crumble. Place oats, flour, brown sugar, cinnamon and very cold small chunks of butter in a medium bowl.

Using a pastry blender, two forks, or your fingers, combine these ingredients until the butter becomes about the size of a dime. You can also “pinch” the butter into the ingredients, so you are able to make the powdery ingredients adhere to the butter, forming clumps.

Ingredients for the streusel topping for the blueberry crumble are combined in a bowl.

Top The Blueberries With Streusel Topping

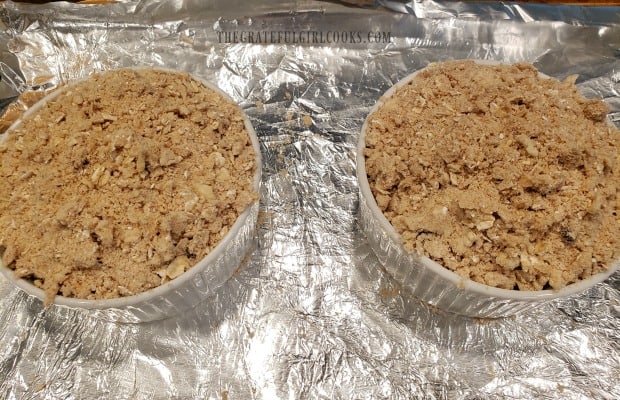
Top each ramekin with the streusel topping, dividing it evenly between the two dishes. If it spills onto the foil, just scoop up what you can and dump it back on top!

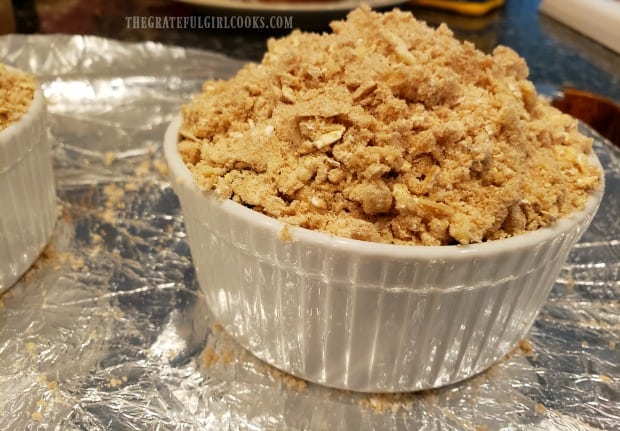
Make sure to use all the topping! The streusel will be piled pretty high on top of the blueberries, but will decrease in size once baked.

A streusel topping is placed on top of the sugar-coated blueberries in ramekins before baking.The side view of a blueberry crumble before baking.

Baking The Blueberry Crumble

Place the desserts in a preheated 375° F. oven, and bake for approximately 30 minutes. Rotate the baking sheet in the oven halfway thorough the baking time.

When done, the blueberry crumble should be golden brown on top, and be bubbling all around the edges. Remember that aluminum foil under the dishes? Told you that you would be thankful you added that little step! (When done, just throw away the foil… easy cleanup!)

Transfer the finished blueberry crumble to a wire rack, and let the dessert cool for about 15 minutes before serving. They are very hot!

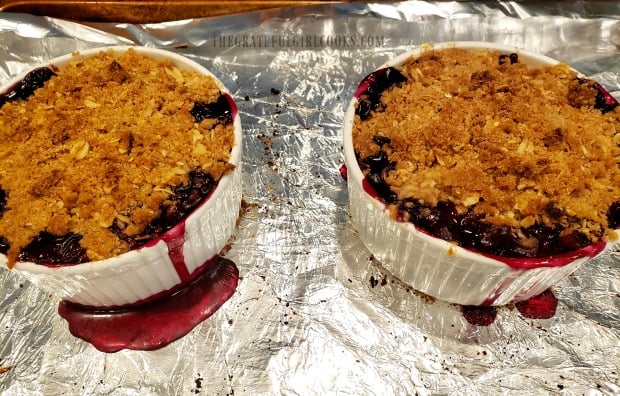
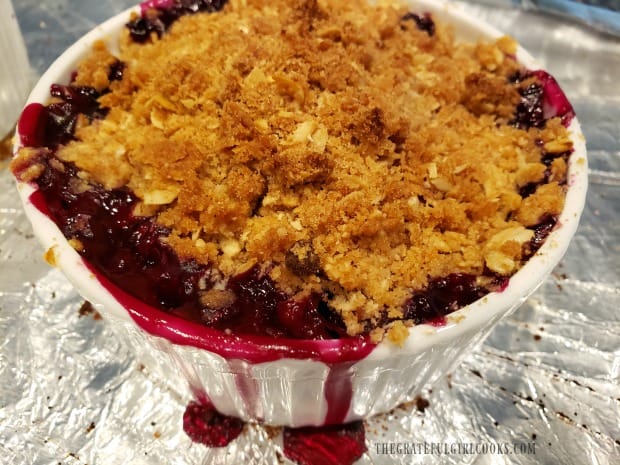
This is a photo of two finished blueberry crumbles, cooling off after baking.A close up photo of a baked streusel topped blueberry dessert.

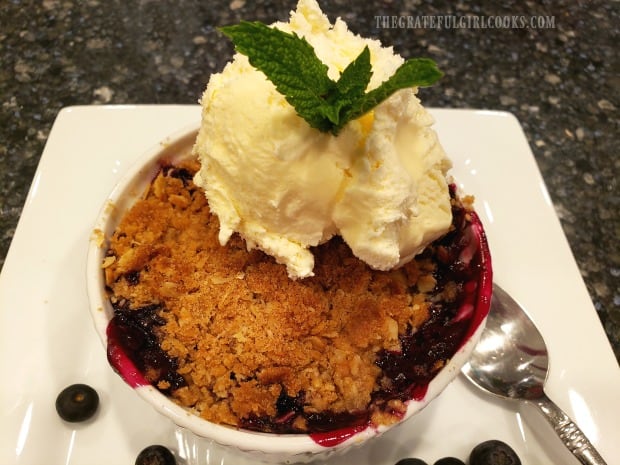
Once the blueberry crumble has cooled a bit, it is ready to serve. Yes… I TOTALLY recommend serving this yummy dessert with a scoop of vanilla ice cream! It adds extra calories, but sometimes ya just gotta go with it! YUMMO!

Blueberry Crumble is served with vanilla ice cream and a mint leaf on top!

Thanks for stopping by today. I truly hope you will consider trying this decadent, yet simple blueberry crumble recipe. Pretty sure you will love it!

All of my recipes can be found in the Recipe Index, located at the top of the page. Be sure to check out my recipes for individual sized strawberry cobbler, old-fashioned peach crisp, or mini apple crisps! Have a wonderful day!

Interested In More Recipes?

Thank you for visiting this website. I appreciate you using some of your valuable time to do soIf you’re interested, I publish a newsletter 2 times per month (1st and 15th) with all the latest recipes, and other fun info. I would be honored to have you join our growing list of subscribers, so you never miss a great recipe!
There is a Newsletter subscription box on the top right side (or bottom) of each blog post, depending on the device you use, where you can easily submit your e-mail address (only) to be included in my mailing list.

You Can Also Find Me On Social Media:
Facebook page: The Grateful Girl Cooks!
Pinterest: The Grateful Girl Cooks!
Instagram: jbatthegratefulgirlcooks

Author's signature

Original Recipe Source: One of my cookbooks called “The Complete Cooking For Two Cookbook”, published 2014 by The Editors at America’s Test Kitchen, pages 367-368

0 from 0 votes
Blueberry Crumble For Two
Prep Time
10 mins
Cook Time
30 mins
Total Time
40 mins
 

Blueberry Crumble For Two is a simple and delicious dessert, featuring ramekins packed with fresh blueberries, capped with a buttery streusel topping!

Category: Desssert
Cuisine: American
Keyword: blueberry crumble
Servings: 2
Calories Per Serving: 658 kcal
Author: JB @ The Grateful Girl Cooks!
Ingredients
  • ¼ cup granulated sugar
  • teaspoons cornstarch (acts to thicken fruit without cooking)
  • 1 pinch salt
  • 2 cups blueberries
  • ½ cup all purpose flour
  • ¼ cup packed brown sugar
  • cup old-fashioned rolled oats (do not use instant or quick cooking)
  • ¼ teaspoon ground cinnamon
  • 4 Tablespoons unsalted butter , cut into chunks and very cold
Instructions
  1. Cover a baking sheet (with rimmed edges) with aluminum foil. Spray two (12 oz.) ramekins (or an 8.5 x 5.5" baking dish) lightly with non-stick baking spray on bottom and sides; place on top of the aluminum foil. Preheat oven to 375° F. and adjust an oven rack to a lower-middle position.

  2. Place blueberries in a medium sized bowl. Add granulated sugar, cornstarch and a pinch of salt to the bowl; gently stir to combine. If you think the blueberries you're using are too tart, you can easily add a couple more teaspoons of sugar, if desired. Blueberries should be coated when done. Evenly divide the sugared blueberries between the two prepared ramekins or baking dish.

  3. Make streusel topping: Place oats, flour, brown sugar, cinnamon and very cold, small chunks of butter in a medium bowl. Using a pastry blender, two forks, or fingers, combine these ingredients until butter becomes about the size of a dime. You can also "pinch" butter into the ingredients, so you are able to make the powdery ingredients adhere to butter, forming small clumps. Top each ramekin with the streusel topping, dividing it evenly between the two dishes. If it spills onto the foil, just scoop up and dump it back on top! Use all the topping!

  4. Bake at 375° F. for approx. 30 minutes. Rotate the baking sheet in the oven halfway thorough the baking time. When done, the blueberry crumble should be golden brown on top, and be bubbling all around the edges. Transfer the ramekins to a wire rack, and let cool for 15 minutes before serving. Serve with a scoop of vanilla ice cream... and enjoy!

Nutrition Facts
Blueberry Crumble For Two
Amount Per Serving (1 g)
Calories 658 Calories from Fat 216
% Daily Value*
Fat 24g37%
Saturated Fat 15g94%
Cholesterol 60mg20%
Sodium 33mg1%
Potassium 233mg7%
Carbohydrates 108g36%
Fiber 6g25%
Sugar 67g74%
Protein 6g12%
Vitamin A 780IU16%
Vitamin C 14.4mg17%
Calcium 45mg5%
Iron 2.6mg14%
* Percent Daily Values are based on a 2000 calorie diet.

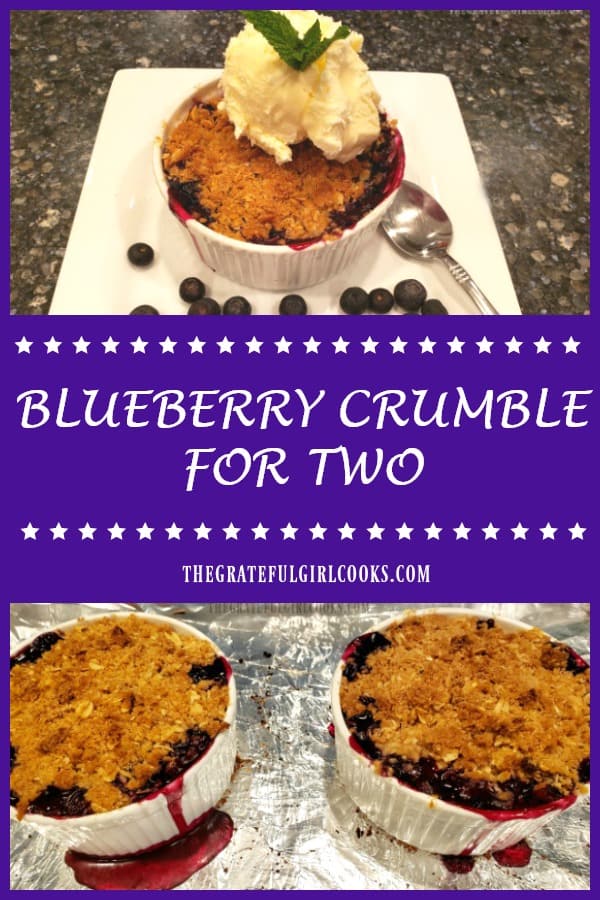
Here’s one more to pin on your Pinterest boards!Blueberry Crumble For Two is a simple and delicious dessert, featuring ramekins packed with fresh blueberries, capped with a buttery streusel topping!

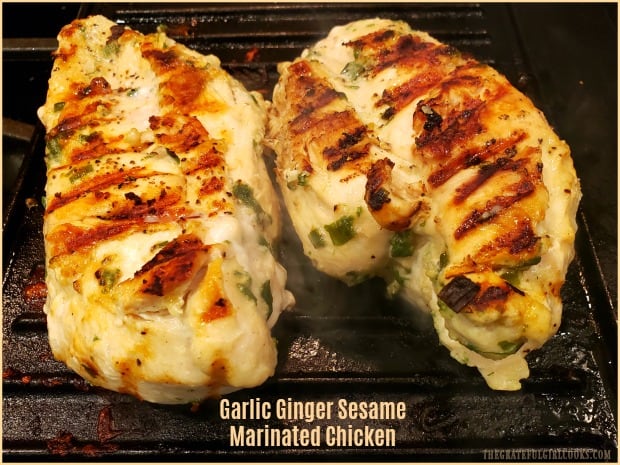
Garlic Ginger Sesame Marinated Chicken

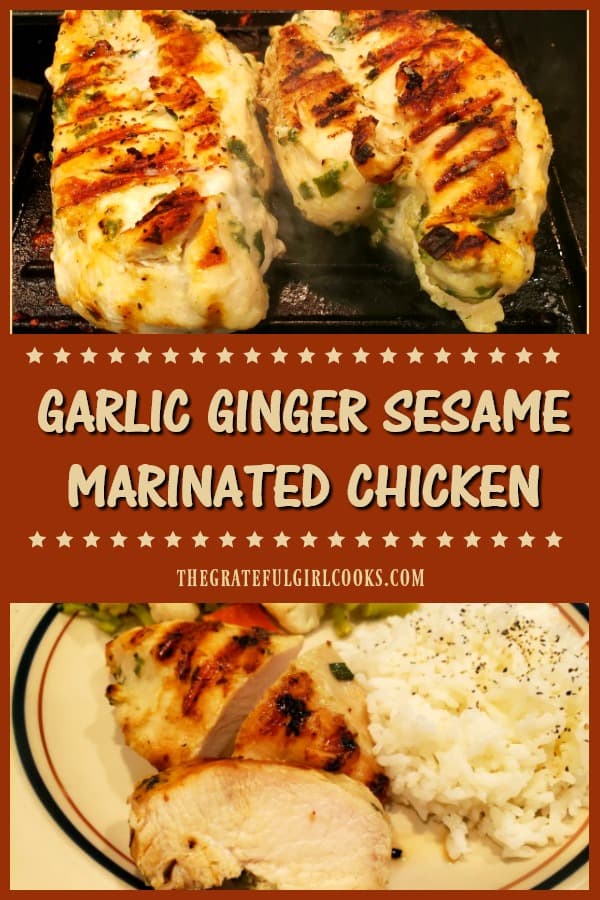
Garlic Ginger Sesame Marinated Chicken is delicious and easy to make! Chicken breasts are marinated in sauce, and cooked on a BBQ or indoor grill pan!

We eat a lot of chicken in our home. It is such a versatile type of food, because it can be fixed in so many different ways, with so many different flavor combos!  Recently I made this delicious, but incredibly SIMPLE recipe for Garlic Ginger Sesame Marinated Chicken, and wanted to share it here.

This marinade I found in a cookbook was created for flank steak, but I thought it would taste great on chicken, as well, so I tried it! YUM! The recipe is super easy to make, and the end result is deliciously flavored chicken breasts! Boneless, skinless chicken breasts are marinated for at least an hour in an easy to make marinade.

After the chicken has marinated, all you do is cook the chicken on a bbq grill or on a griddle pan in the kitchen. EASY PEASY, right? For the photos below, I cooked the marinated chicken on a cast iron grill that was placed directly over a flame on my stove.

Scroll Down For A Printable Recipe Card At The Bottom Of The Page

Make The Marinade For The Chicken

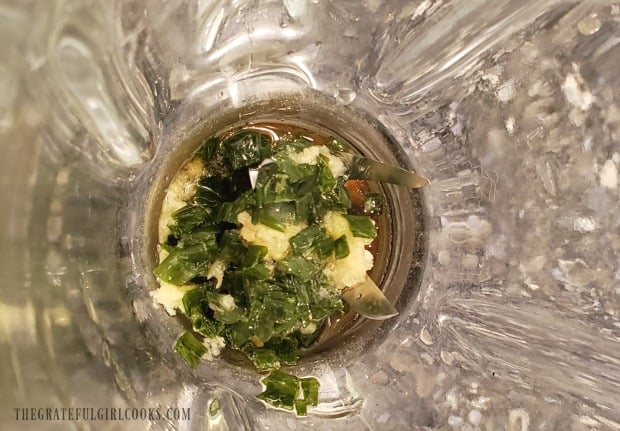
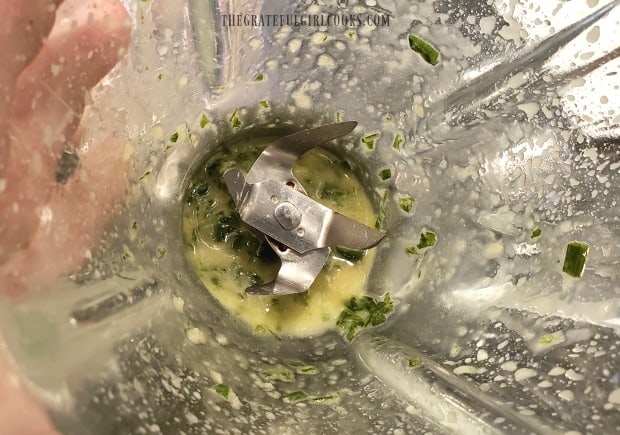
Making the marinade is very simple to do. Place grated fresh ginger, toasted sesame oil, vegetable oil, minced green onion (scallions), and minced garlic cloves into a blender. Blend these ingredients for about 30 seconds, or until the mixture is fully blended and fairly smooth.

The ingredients for the marinade are placed in a blender.Marinade ingredients for chicken are blended until well combined.

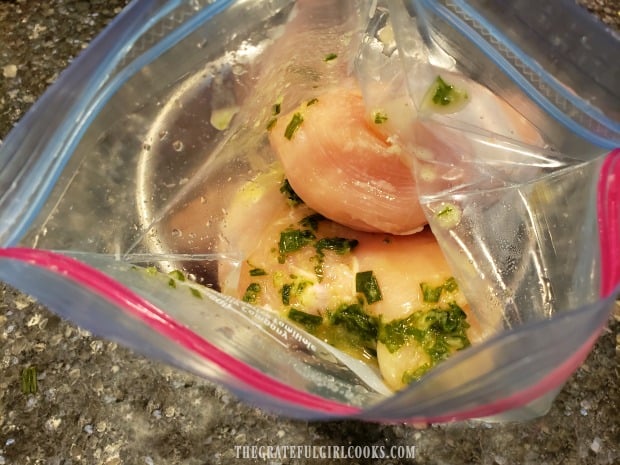
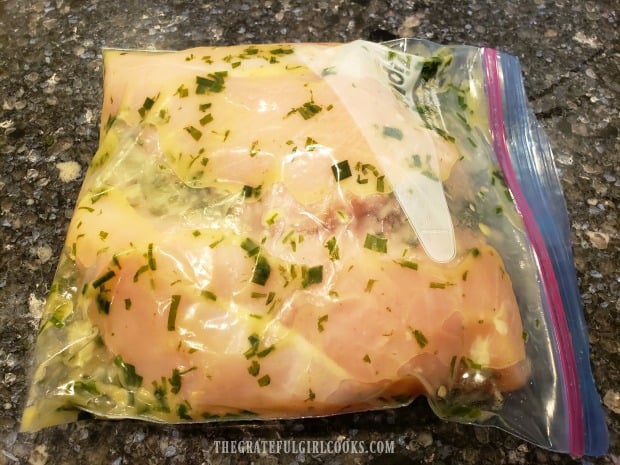
Pour (scraping the blender clean) the marinade into a large re-sealable bag or a shallow container.  Add the boneless, skinless chicken breasts to the marinade, and turn to coat them completely with marinade. Seal or cover chicken, and place in refrigerator to marinate for AT LEAST 1 hour. I made mine up in the morning, so it marinated all day!

NOTE: The recipe, as written below in the printable recipe card, makes enough for 4 chicken breasts. As you can see from my photos, I only cooked 2 pieces of chicken, so I cut the marinade amount in half.

Chicken pieces are place in zip loc bag, along with the marinade.The chicken pieces are coated with the marinade, then refrigerated.

Cooking The Marinated Chicken

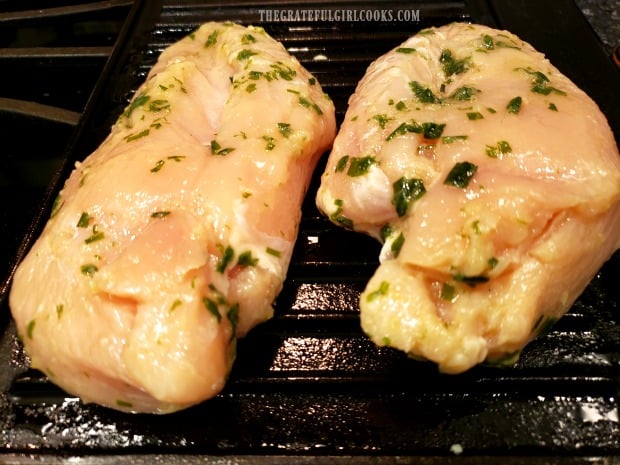
After marinated chicken has been in the refrigerator for at least an hour (or when you’re ready to cook it), spray a grill (off heat) with non-stick baking spray or brush with vegetable oil generously. Heat grill on medium-high temperature until it’s really hot, but not smoking.

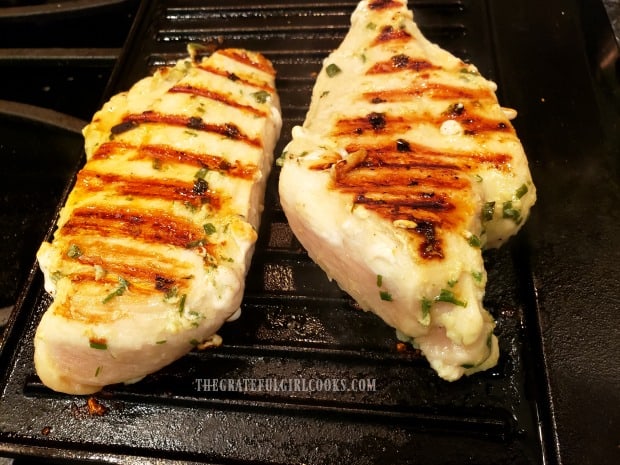
Once the grill is really hot, carefully transfer the marinated chicken to the grill. You should hear it sizzle when it hits the grill. Once you place the chicken on the grill, do not disturb or move it. After about 8-10 minutes, carefully flip the chicken over to the other side.

How Long Do I Cook The Garlic Ginger Sesame Marinated Chicken?

For THICK chicken breasts: After 8-10 minutes, the bottom of the chicken breast should be nice and golden brown. After you flip the chicken over, set a timer for 8 minutes and check for internal temperature. I used thick breasts and they took 18 minutes total to fully cook.

For THIN chicken breasts: Thin cutlet type chicken breasts will obviously cook a LOT faster than thicker ones (they may only take 3-4 minutes per side).

Marinated chicken is grilled on a hot, well-oiled grill pan.The garlic ginger sesame marinated chicken is turned over halfway through grilling time.

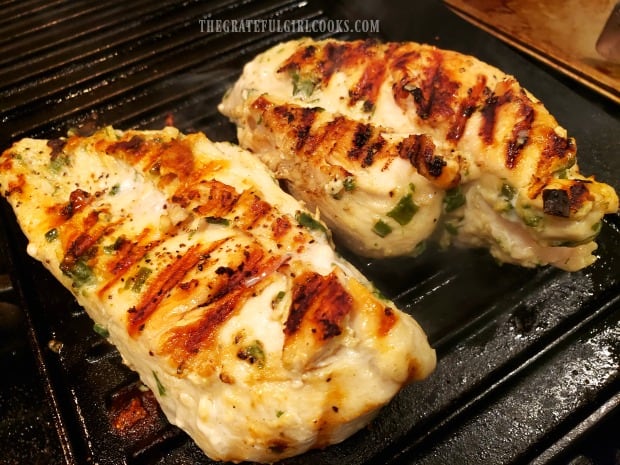
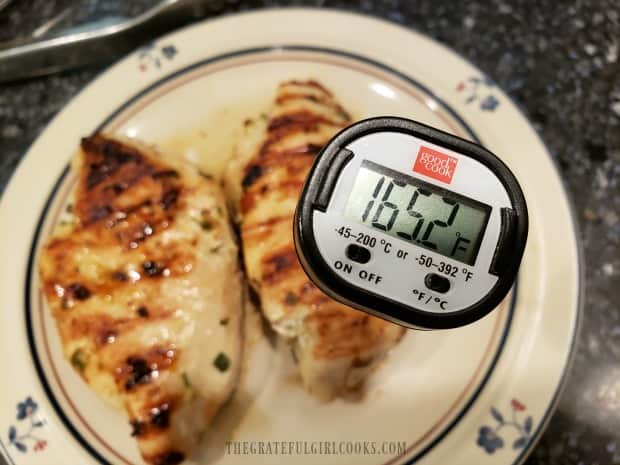
TIP:**Cooking times will vary due to different thicknesses of chicken breasts. Check the internal temperature by inserting a meat thermometer into the thickest part of the breast. Chicken is done when the internal temp. is at 165° F.

Two pieces of garlic ginger sesame marinated chicken cooking on indoor grill pan.The meat thermometer says the chicken is fully cooked at 165 degrees F.

Time To Enjoy This Delicious Chicken

Once the marinated chicken has fully cooked, Iet it “rest” for a couple minutes, to let the juices redistribute within the meat. this helps to keep the chicken “juicy”.

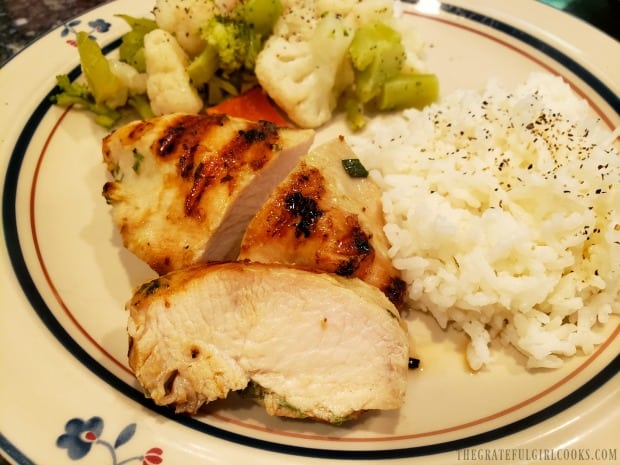
We enjoyed this chicken with steamed broccoli, red peppers, and cauliflower, and some rice on the side. The meal was simple, satisfying, and we loved the subtle marinade flavor on the chicken! It tasted delicious!

Flavorful garlic ginger sesame marinated chicken on plate with rice and steamed veggies.

I really hope you will consider trying this recipe for garlic ginger sesame marinated chicken. It’s an easy chicken dish to make, especially if you marinade the chicken early in the day! Hope you enjoy a truly wonderful day.

Looking For More CHICKEN Recipes?

If you’re looking for more chicken recipes, be sure to check them all out in the Recipe Index, located at the top of the page (there’s a LOT of them!). A few family favorites include:

Interested In More Recipes?

Thank you for visiting this website. I appreciate you using some of your valuable time to do soIf you’re interested, I publish a newsletter 2 times per month (1st and 15th) with all the latest recipes, and other fun info. I would be honored to have you join our growing list of subscribers, so you never miss a great recipe!
There is a Newsletter subscription box on the top right side (or bottom) of each blog post, depending on the device you use, where you can easily submit your e-mail address (only) to be included in my mailing list.

You Can Also Find Me On Social Media:
Facebook page: The Grateful Girl Cooks!
Pinterest: The Grateful Girl Cooks!
Instagram: jbatthegratefulgirlcooks

Author's signature

Original source for marinade recipe: Page 501 in “The Complete America’s Test Kitchen TV Show Cookbook 2001-2019”, copyright 2018, published by America’s Test Kitchen.

0 from 0 votes
Garlic Ginger Sesame Marinated Chicken
Prep Time
5 mins
Cook Time
16 mins
Marinating Time (minimum)
1 hr
Total Time
1 hr 21 mins
 

Garlic Ginger Sesame Marinated Chicken is delicious and easy to make! Chicken breasts are marinated in sauce, and cooked on a BBQ or indoor grill pan!

Category: Entree
Cuisine: Asian
Keyword: marinated chicken
Servings: 4
Calories Per Serving: 230 kcal
Author: JB @ The Grateful Girl Cooks!
Ingredients
  • 4 medium boneless, skinless chicken breasts
  • 1/4 cup toasted sesame oil
  • 2 Tablespoons vegetable oil
  • 3 Tablespoons fresh ginger , finely grated
  • 2 stems green onion , minced
  • 3 Tablespoons garlic cloves , minced
Instructions
  1. Place grated fresh ginger, toasted sesame oil, vegetable oil, minced green onion (scallions), and minced garlic cloves into a blender. Blend these ingredients for about 30 seconds, or until mixture is fully blended and fairly smooth.

  2. Pour (scraping blender clean) the marinade into a large re-sealable bag or shallow container.  Add the chicken breasts to the marinade, and turn to coat them completely with marinade. Seal bag or cover container, and place in refrigerator to marinate for AT LEAST 1 hour.

  3. After chicken has marinated for at least an hour, spray a grill (off heat) with non-stick baking spray or generously brush with oil. Heat grill on medium-high temperature until really hot, but not smoking. Transfer chicken to the grill. It should sizzle when it hits grill. Once chicken is on grill, do not disturb or move it. After about 8-10 minutes, flip chicken over to the other side. TIP:**Cooking times will vary due to different thicknesses of chicken breasts. Check the internal temperature by inserting a meat thermometer into thickest part of the breast. Chicken is done when internal temp. is 165° F. Remove chicken from grill and let it "rest" for a couple minutes, to let juices redistribute within the meat before serving.

    For THICK chicken breasts: After 8-10 minutes, the bottom of the chicken breast should be nice and golden brown. After you flip the chicken over, set a timer for 8 minutes and check for internal temperature. I used thick breasts and they took 18 minutes total to fully cook.

    For THIN chicken breasts: Thin cutlet type chicken breasts will obviously cook a LOT faster than thicker ones (they may only take 3-4 minutes per side).

  4. Serve... and enjoy!

Nutrition Facts
Garlic Ginger Sesame Marinated Chicken
Amount Per Serving (1 piece)
Calories 230 Calories from Fat 117
% Daily Value*
Fat 13g20%
Saturated Fat 4g25%
Cholesterol 72mg24%
Sodium 133mg6%
Potassium 464mg13%
Carbohydrates 3g1%
Fiber 1g4%
Sugar 1g1%
Protein 24g48%
Vitamin A 35IU1%
Vitamin C 3.5mg4%
Calcium 16mg2%
Iron 0.5mg3%
* Percent Daily Values are based on a 2000 calorie diet.

Here’s one more to pin on your Pinterest boards!Garlic Ginger Sesame Marinated Chicken is delicious and easy to make! Chicken breasts are marinated in sauce, and cooked on a BBQ or indoor grill pan!


Double Chipper Cookies

Double Chipper Cookies are delicious homemade treats filled with semi-sweet chocolate chips, peanut butter chips, and chopped pecans or walnuts!

Do you enjoy cookies? We sure do! They are perfect little mini-treats, and I’ve loved them since I was a little girl! It was always fun when my Mom made cookies! Well, these double chipper cookies are a delicious, decadent treat as well! The combination of chocolate AND peanut butter has always been a favorite of mine, so of course, I love these cookies!

These cookies are basically a chocolate chip cookie dough batter (with a couple tweaks, including peanut butter). They’re loaded with chocolate chips, peanut butter chips (yum), and chopped pecans (or walnuts). This was one of my fun cookie experiments that turned out wonderful!

They have TWO kinds of chips in them (semi-sweet and PB), which is why they are called “double chipper cookies”!  They’re a cinch to make, and it’s easy to whip up a batch of 36 small cookies in a flash! Here’s how:

Scroll Down For A Printable Recipe Card At The Bottom Of The Page

Make The Batter For The Double Chipper Cookies

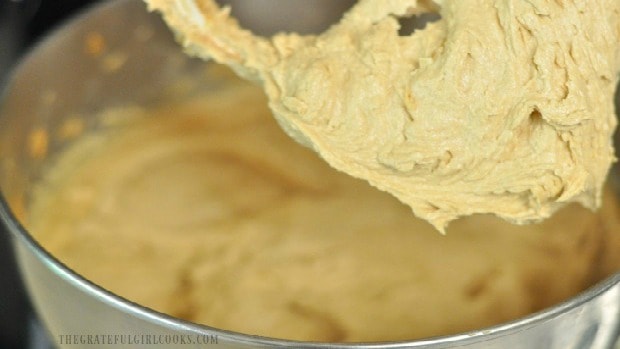
Preheat your oven to 350° F. Using a stand mixer or hand mixer, cream together butter, brown sugar, creamy peanut butter, granulated sugar and vanilla. Beat these ingredients until they are fully incorporated into the batter.

Add eggs and vanilla extract to the cookie batter, and beat for about 3-4 more minutes. The batter should be light and fluffy at this point.

Ingredients for cookies are beaten into a thick batter.

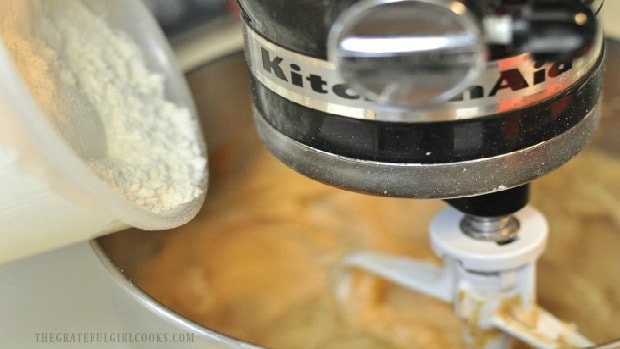
In a separate bowl, whisk together flour, salt and baking soda.  Add the flour mixture to the cookie batter, a little bit at a time, beating on low after each addition, until fully blended.

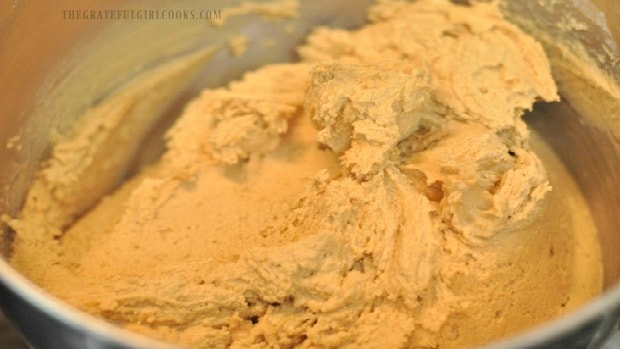
Dry ingredients are added to the cookie batter, a little at a time.The cookie dough is thick and ready for the final ingredients.

Add The Rest Of The Ingredients To The Cookie Dough

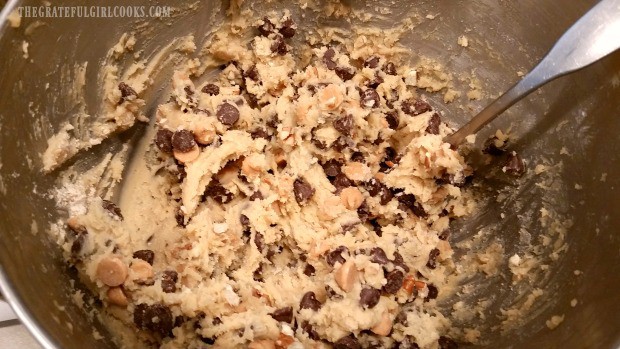
STIR the chocolate chips, peanut butter chips and chopped pecans (or walnuts) into the dough, until fully blended.

Chocolate chips, peanut butter chips and pecans are added to double chipper cookies dough

Form The Double Chipper Cookies

Place a piece of parchment paper onto a 9×13″ baking sheet. Drop the cookie batter by small spoonfuls onto the paper, about 2″ apart. If you make the cookies small, you should get about 3 dozen cookies from the dough.

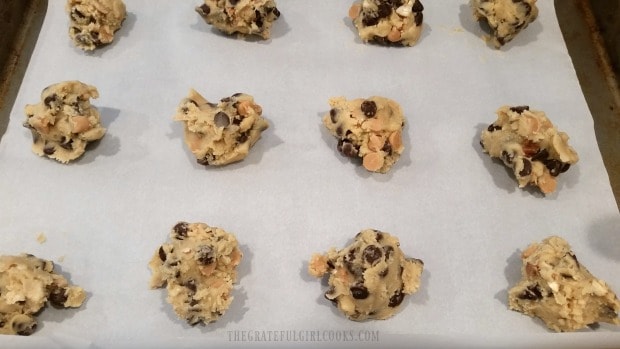
Cookie dough is dropped by spoonfuls on parchment paper lined cookie sheet.

Bake The Double Chipper Cookies

Bake the cookies at 350° F. for 8-10 minutes. Be sure to check them at the 8 minute mark, because oven temps vary greatly! When done, the cookies should have a golden brown edge on the bottom and be cooked through, but soft and light golden brown on top.

Let the cookies cool ON THE BAKING SHEET for 2-3 minutes, and then transfer them (with a spatula) to a wire rack to finish cooling.

Some of the double chipper cookies cooling on wire rack after baking.

Whether you eat these delicious double chipper cookies slightly warm or completely at room temperature, I’m sure you will enjoy the chocolate and peanut butter combo in this treat! Go ahead… grab one! I made an extra one just for YOU!

Close up of the double chipper cookies, ready to eat!

Hope you enjoy this simple cookie recipe!  Cookies always have a way of making people happy, and I trust you and those you love will be happy eating them. Have a GREAT day!

Looking For More COOKIE Recipes?

You can find all of my cookie recipes in the Recipe Index, located at the top of the page. A few family favorites are:

Interested In More Recipes?

Thank you for visiting this website. I appreciate you using some of your valuable time to do soIf you’re interested, I publish a newsletter 2 times per month (1st and 15th) with all the latest recipes, and other fun info. I would be honored to have you join our growing list of subscribers, so you never miss a great recipe!
There is a Newsletter subscription box on the top right side (or bottom) of each blog post, depending on the device you use, where you can easily submit your e-mail address (only) to be included in my mailing list.

You Can Also Find Me On Social Media:
Facebook page: The Grateful Girl Cooks!
Pinterest: The Grateful Girl Cooks!
Instagram: jbatthegratefulgirlcooks

Author's signature

↓↓ PRINTABLE RECIPE BELOW ↓↓

0 from 0 votes
Double Chipper Cookies
Prep Time
15 mins
Cook Time
9 mins
Total Time
24 mins
 

Double Chipper Cookies are delicious homemade treats filled with semi-sweet chocolate chips, peanut butter chips, and chopped pecans or walnuts!

Category: Cookies, Dessert
Cuisine: American
Keyword: double chipper cookies
Servings: 36 small cookies (approx.)
Calories Per Serving: 248 kcal
Author: JB @ The Grateful Girl Cooks!
Ingredients
  • 16 ounces COLD butter (2 sticks)
  • 1 cup dark brown sugar
  • 2 Tablespoons creamy peanut butter
  • ¾ cup granulated sugar
  • 1 teaspoon vanilla extract
  • 2 large eggs
  • 3 cups all purpose flour
  • 3/4 teaspoon salt
  • ¾ teaspoon baking soda
  • 1 cup semi sweet chocolate chips (8 ounces)
  • 1 cup peanut butter chips (8 ounces)
  • ¾ cup chopped pecans (or walnuts)
Instructions
  1. Preheat oven to 350° F. Using a stand mixer or hand mixer, cream together butter, brown sugar, creamy peanut butter, granulated sugar and vanilla. Beat until fully incorporated into a soft batter. Add eggs and vanilla to cookie batter, and beat for 3-4 more minutes. Batter should be light and fluffy.

  2. In a separate bowl, whisk together flour, salt and baking soda.  Add the flour mixture to cookie batter, a little at a time, beating on low after each addition, until fully blended. STIR the chocolate chips, peanut butter chips and chopped pecans (or walnuts) into the dough, until fully blended.

  3. Place a piece of parchment paper onto a 9x13" baking sheet. Drop the cookie batter by small spoonfuls onto paper, about 2" apart. If you make the cookies small, you should get about 3 dozen cookies from the dough. Bake cookies at 350° F. for 8-10 minutes. Check them at the 8 minute mark, because oven temps vary greatly! When done, cookies should have a golden brown edge on the bottom and be cooked through, but soft and light golden brown on top. Let the cookies cool ON THE BAKING SHEET for 2-3 minutes, and then transfer them (with a spatula) to a wire rack to finish cooling. Serve, and enjoy!

Nutrition Facts
Double Chipper Cookies
Amount Per Serving (1 cookie)
Calories 248 Calories from Fat 144
% Daily Value*
Fat 16g25%
Saturated Fat 9g56%
Cholesterol 40mg13%
Sodium 182mg8%
Potassium 72mg2%
Carbohydrates 24g8%
Fiber 1g4%
Sugar 14g16%
Protein 3g6%
Vitamin A 335IU7%
Vitamin C 0.1mg0%
Calcium 17mg2%
Iron 1.1mg6%
* Percent Daily Values are based on a 2000 calorie diet.

Here’s one more to pin on your Pinterest boards!Double Chipper Cookies are delicious homemade treats filled with semi-sweet chocolate chips, peanut butter chips, and chopped pecans or walnuts!