Month: September 2016

Mom’s Swedish Meatballs and Rice

Mom’s Swedish Meatballs and Rice is a family and budget friendly dinner that feeds 6 with one pound of hamburger meat… and it’s delicious!Mom's Swedish Meatballs and Rice is a family and budget friendly dinner that feeds 6 with one pound of hamburger meat... and it's delicious!
When I was growing up, my mother sure knew how to stretch a dollar! Mom’s Swedish Meatballs and Rice was one of the meals she fed our family of 5. She did this using only 1 pound of hamburger meat, a few other ingredients and served these delicious meatballs and gravy with rice! We LOVED this meal!

Scroll Down For A Printable Recipe Card At The Bottom Of The Page

Fast forward over 40 years later, and I still make this scrumptious meal! Now… my Mom is about as far from being Swedish as one could imagine (she’s a Texas gal), yet this was the name given it when I copied down the recipe from her over 40 years ago! Trust me, Swedish meatballs, with gravy and rice is a fantastic tasting dinner (the leftovers are awesome, as well).

Swedish meatballs are super simple to make, the gravy is even easier, and it’s fairly impossible to mess up a pan of rice, right?  Trust me when I say this is simple meal to prepare; it’s a great way to feed several people a filling meal without breaking the bank! if you like meatballs, be sure and check out some of my other meatball recipes, including Easy Meatballs for Spaghetti, Meatballs Stroganoff, Hawaiian Meatballs, and Hoisin Asian Meatballs.

How To Make Swedish Meatballs

Here’s what you do:  Place the meatball ingredients in large bowl and mix well, to combine (ground beef, bread crumbs, milk, egg, onion, salt, pepper & nutmeg).

Hamburger meat, onions and spices ready to make Swedish meatballs.

Mixing ingredients for Swedish meatballs in large mixing bowl.

Scoop out a small portion of meat, and roll it between your clean hands to form 1 inch sized meatballs. A full pound of ground beef “should” yield about 24-25 small meatballs. I was using slightly less than a full pound and ended up with 22 Swedish meatballs. Set meatballs on waxed paper or foil until all have been formed.

Meatballs are formed out of hamburger meat and spices, etc.
Brown The Swedish Meatballs

Heat shortening in large skillet (may substitute oil, if necessary). When skillet is hot, add meatballs in single layer. Let brown on one side, then carefully turn to brown all sides (I use tongs). If necessary, add additional shortening or oil to prevent sticking.  When meatballs are browned on all sides, remove them to a large plate to rest.  Keep meatballs warm.

Swedish meatballs are browned in skillet.

The Swedish meatballs are browned on all sides.

Make The Gravy

Now it’s time to make the gravy!  Using the same pan (without cleaning it out), add hot water to meat drippings in skillet. Stir to mix and heat on low, scraping up the browned bits from the bottom of the skillet. This will help “de-glaze” the pan, and will incorporate all those yummy browned bits off the bottom of the skillet into your gravy.

Hot water is added to Swedish meatball drippings in skillet to begin making gravy.

The browned bits in skillet from cooking Swedish meatballs go into the gravy.

Now add the water/flour mixture to the hot water mixture in skillet. Whisk well as you pour, to fully combine ingredients. Bring the gravy to a boil. The gravy will begin to thicken as you heat and stir it. Once thickened, taste test, and season gravy with salt/pepper, if desired.

Water, flour, and seasonings poured into Swedish meatballs gravy.

Whisking ingredients for Swedish meatballs gravy in skillet.

Add Swedish Meatballs Back Into The Skillet

Once gravy has thickened, add the browned meatballs back into the skillet. Turn to coat each meatball with gravy. Put a lid on the skillet, and cook on low for 30 minutes. Check occasionally.

If necessary, add a bit more water to skillet and mix it in, to ensure you have enough gravy. You just gotta have enough gravy for Swedish meatballs, right?

Mom's Swedish meatballs are added back into gravy in skillet.

While meatballs are cooking, cook rice using your “normal” method (I use a rice cooker).  When meatballs and rice are done, the meal is ready. Make sure to coat the Swedish meatballs in gravy before placing on serving platter.

Mom's Swedish Meatballs finish cooking in the gravy.

Serve The Swedish Meatballs And Rice

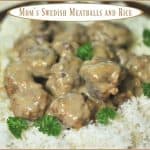
To serve, arrange the cooked hot rice in a ring shape on a serving platter.  Place sprigs of fresh parsley around the rice. Carefully place the Swedish meatballs into the center of the ring. Pour remaining gravy over the meatballs.  Serve HOT, and enjoy this delicious meal!

Mom's Swedish Meatballs with gravy are served on top of a bed of rice.

I love recipes that don’t cost an arm and a leg to prepare for my family. This simple Swedish meatballs meal fits the bill perfectly, and tastes fantastic, too!  Hope you will consider making this “comfort food” dish for those you love. It really does taste wonderful! 

Blessings to you on this day. Thanks for stopping by, and please come back again soon. Also be sure to check out ALL my recipes in the Recipe Index, located at the top of the page.

Interested In More Recipes?

Thank you for visiting this website. I appreciate you using some of your valuable time to do soIf you’re interested, I publish a newsletter 2 times per month (1st and 15th) with all the latest recipes, and other fun info. I would be honored to have you join our growing list of subscribers, so you never miss a great recipe!
There is a Newsletter subscription box on the top right side (or bottom) of each blog post, depending on the device you use, where you can easily submit your e-mail address (only) to be included in my mailing list.

You Can Also Find Me On Social Media:
Facebook page: The Grateful Girl Cooks!
Pinterest: The Grateful Girl Cooks!
Instagram: jbatthegratefulgirlcooks

Author's signature

Recipe Source: My MOM (over 40 years ago)

0 from 0 votes
Mom's Swedish Meatballs and Rice
Prep Time
15 mins
Cook Time
30 mins
Total Time
45 mins
 

Mom's Swedish Meatballs and Rice is a family and budget friendly dinner that feeds 6 with one pound of hamburger meat... and it's delicious!

Category: Entree
Cuisine: Swedish
Keyword: Swedish meatballs
Servings: 6 servings
Calories Per Serving: 454 kcal
Author: JB @ The Grateful Girl Cooks!
Ingredients
For meatballs:
  • 1 pound ground beef
  • 1 cup bread crumbs
  • 1/2 cup milk
  • 1 egg , well beaten
  • 1 small brown onion (or 1/2 large), finely chopped
  • 2 teaspoons salt
  • 1/8 teaspoon black pepper
  • 1/4 teaspoon ground nutmeg
  • Shortening , approx. 2 Tablespoons (to cook meatballs in-may substitute oil)
For gravy:
  • 2 cups very hot water
  • 2 Tablespoons flour
  • 6 Tablespoons cold water
  • Salt and pepper (to season)
For accompaniment:
  • 4 cups hot cooked rice (I used 2 cups dry rice to start, for quantity shown)
  • Butter (for rice, if desired)
  • Fresh parsley sprigs , for garnish (optional)
Instructions
  1. Place ground beef, bread crumbs, milk, egg, onion, salt, pepper and nutmeg in large bowl. Mix well, to combine. Form mixture into 1 inch meatballs; set formed meatballs onto wax paper or foil.
  2. Heat shortening (or oil) in large skillet on medium heat. Add meatballs to hot oil in single layer. Brown on all sides (a minute or two per side). If necessary, add additional shortening (or oil) if necessary, to prevent sticking. When meatballs are fully browned, remove them to a plate, and keep warm.
  3. Add hot water back into skillet (DO NOT CLEAN OUT SKILLET). Stir while cooking on low, to deglaze the skillet and scrape up the flavorful browned bits off bottom of skillet. In a separate small bowl, combine cold water and flour. Mix really well, to remove lumps. Add this mixture to hot liquid in skillet, whisking well while adding. Continue to whisk gravy to remove any lumps. Bring mixture to a boil, stirring often until mixture thickens. Taste gravy... add salt and pepper to season, if desired.
  4. Add meatballs back into skillet. Turn to coat with gravy. Put a lid on the skillet; cook meatballs and gravy for 30 minutes, adding additional water to gravy, if necessary, to ensure there will be enough gravy (as gravy will cook down a bit).
  5. While meatballs are cooking, prepare rice (using the method you normally use to cook rice).
  6. When meatballs and rice are done, place cooked rice in a ring shape around outside of serving platter. Garnish rice with sprigs of fresh parsley. Carefully spoon the meatballs into center of ring, and pour gravy over the top of meatballs. Serve hot, and enjoy!
Nutrition Facts
Mom's Swedish Meatballs and Rice
Amount Per Serving (4 meatballs + rice)
Calories 454 Calories from Fat 171
% Daily Value*
Fat 19g29%
Saturated Fat 7g44%
Cholesterol 81mg27%
Sodium 978mg43%
Potassium 342mg10%
Carbohydrates 47g16%
Fiber 1g4%
Sugar 3g3%
Protein 20g40%
Vitamin A 80IU2%
Vitamin C 1.3mg2%
Calcium 90mg9%
Iron 2.8mg16%
* Percent Daily Values are based on a 2000 calorie diet.

Here’s one more to pin on your Pinterest boards!Mom's Swedish Meatballs and Rice is a family and budget friendly dinner that feeds 6 with one pound of hamburger meat... and it's delicious!


Save

Save

Save

Save

Save

Save

Save

Save

Save

Save

Save

Save

Save

How To Roast Pumpkin Seeds

It’s easy to roast pumpkin seeds, once you’re done carving your Halloween pumpkins! With a few common ingredients, you can enjoy this simple crunchy snack!It's easy to roast pumpkin seeds, once you're done carving your Halloween pumpkins! With a few common ingredients, you can enjoy this simple crunchy snack!
I love this snack! How cool is it that not only can we carve and decorate pumpkins for the Fall season, but we can roast and eat the seeds, too! Today I’m happy to show you how easy it is to roast pumpkin seeds!

Do you roast pumpkin seeds?  When I was little, my mom would occasionally make this snack before Halloween. I love the slightly salty crunch of a pumpkin seed roasted just right! Pumpkins are beginning to make their annual appearance at grocery stores and Farmers Markets all over town!

This seems like the right time to post a quick “how to”, in case you’ve never made your own, and want to learn how! You can certainly add additional spices to the basic roasted pumpkin seeds to make them taste just how you like them. This is simply the basic “how to”.

Scroll Down For a Printable Recipe Card At The Bottom Of The Page

Choosing pumpkins to carve and to roast pumpkin seeds is always fun!

First you will need to carefully cut your pumpkin open. You can use any kind of traditional pumpkin you want. You will definitely want to put newspaper or some other paper (wax or parchment) under the pumpkin, cause it can get a bit messy! My favorite tip for getting seeds to roast AND pumpkin puree from the pumpkins is below.

You Can Also Make Pumpkin Puree From Your Pumpkin

Not only can you roast seeds, you can make pumpkin puree from fresh pumpkins! My recommendation is to use “pie” or “sugar” pumpkins (smaller variety of pumpkins) if you want to roast pumpkin seeds AND use the “meat” of the pumpkin to make puree to store in the freezer.

“Pie” or “Sugar” pumpkins have less water content in their flesh, so they make a far less watery pumpkin puree, which is desirable. By freezing the puree you can have it ready to use in various recipes throughout the year.

If you’re interested in how to make puree from your pumpkin, check out my post on How To Make Pumpkin Puree. Pumpkin puree is wonderful to use for pumpkin muffins, sconesbread, coffeecake, etc.

How To Roast Pumpkin Seeds

Now… back to the SEEDS:  After you cut your pumpkin open, and before you can roast pumpkin seeds, you need to remove the seeds and the “guts”.

Separating pumpkin stringy flesh from seeds in order to roast pumpkin seeds.

Two Methods For Removing Pumpkin Seeds

There are two ways to separate the seeds from the stringy “guts”. One way is to put that “BLOB”  into a strainer and slowly pull the seeds away from the guts by hand, then give the seeds a good rinse. This is the method I typically use.

The other method is to put the seeds/guts into a large deep bowl, fill it with water, and remove seeds with your hands from the “guts”. The seeds should float to the top once they are separated from the “guts”, then you can just scoop or skim them up.

Give the seeds a good rinse, then place them in a single layer on 3-4 layers of paper towels or a couple dish towels to drain a bit.

Seeds must be rinsed and drained in order to roast pumpkin seeds.
Spread the pumpkin seeds out in a single layer on several layers of paper towels or a couple dish towels. Once spread out, let the pumpkin seeds dry for an hour. Make sure they get nice and dry.

In order to roast pumpkin seeds, they must first dry completely, after rinsing.

Toss the dried seeds with oil. Sprinkle with salt (side note: try these sometime substituting seasoning salt for regular salt), and stir, to combine. Spread the seasoned seeds out into a single layer on a large (13×9 or larger) baking sheet.

Roast Pumpkin Seeds In Oven

Cook the pumpkin seeds for about 20-25 minutes at 325 degrees F.  When you hit the 15 minute mark, give the seeds a good stir, then spread back out again. At the 20 minute mark, give them another stir.

Keep a close eye on them so they don’t overcook and burn. The average coking time is 25 minutes… the roast pumpkin seeds are done when light golden brown and crunchy.

Roast pumpkin seeds are cooked on baking pan in oven for about 25 minutes.

When done, remove pan from oven.  Let the cooked pumpkin seeds cool completely, then eat! Be sure to store the finished pumpkin seeds in an airtight  covered container or resealable plastic bag. That’s all you need to do… see how easy it is to roast pumpkin seeds?

Roast pumpkin seeds are stored in an airtight container to keep them crunchy!

We enjoy snacking on the seeds, and occasionally I will throw a few into a salad for added crunch.  I figure if you’re gonna go to the trouble and mess of carving a pumpkin (cause it’s FUN!!), why not get an added bonus of roasted pumpkin seeds to snack on, too?!!

No hard work is required for this simple snack. A printable recipe is further below, but here is the basic “process” to roast pumpkin seeds:

A quick "how to" roast pumpkin seeds.

Hope you’ll give this recipe for how to roast pumpkin seeds a try when carving your Fall pumpkins this year! Enjoy! Have a great day, and don’t forget to check out ALL my recipes in the Recipe Index,located at the top of the page.

Interested In More Recipes?

Thank you for visiting this website. I appreciate you using some of your valuable time to do soIf you’re interested, I publish a newsletter 2 times per month (1st and 15th) with all the latest recipes, and other fun info. I would be honored to have you join our growing list of subscribers, so you never miss a great recipe!
There is a Newsletter subscription box on the top right side (or bottom) of each blog post, depending on the device you use, where you can easily submit your e-mail address (only) to be included in my mailing list.

You Can Also Find Me On Social Media:

Facebook page: The Grateful Girl Cooks!
Pinterest:
The Grateful Girl Cooks!
Instagram:
jbatthegratefulgirlcooks

How To Roast Pumpkin Seeds / The Grateful Girl Cooks!

0 from 0 votes
How To Roast Pumpkin Seeds
Prep Time
15 mins
Cook Time
20 mins
Drying Time
1 hr
Total Time
35 mins
 
It's easy to roast pumpkin seeds, once you're done carving your Halloween pumpkins! With a few common ingredients, you can enjoy this simple crunchy snack!
Category: Snacks
Cuisine: American
Keyword: roast pumpkin seeds
Servings: 8 (total 2 cups)
Calories Per Serving: 119 kcal
Author: JB @ The Grateful Girl Cooks!
Ingredients
  • 2 cups pumpkin seeds
  • 2 Tablespoons vegetable oil (or canola oil)
  • 1/4 teaspoon salt (or more), to taste
Instructions
  1. Remove seeds from pumpkin. Rinse seeds thoroughly; remove stringy pumpkin flesh from seeds. 

  2. Place pumpkin seeds in single layer on several layers of paper towels or dish towels to absorb water. Let pumpkin seeds completely dry (approx. 1 hour).

  3. Once completely dry, mix pumpkin seeds with oil and salt in large bowl. Stir well, to cover seeds with oil and salt (or any additional spices you may wish to add).

  4. Spread pumpkin seeds out in a single layer on a 13x9 baking sheet. Bake in preheated 325°F oven for approximately 20-25 minutes. Halfway through the baking time, give the seeds a good stir, then spread out into single layer again, and place back in oven. When done, the seeds should be light golden brown and crispy. Remove from oven. Remove seeds from baking sheet once cooled.

  5. Store roasted pumpkin seeds in an airtight covered container or resealable plastic bag to ensure seeds stay crunchy. Enjoy!

Nutrition Facts
How To Roast Pumpkin Seeds
Amount Per Serving (1 (1/4 cup per serving))
Calories 119 Calories from Fat 99
% Daily Value*
Fat 11g17%
Saturated Fat 4g25%
Sodium 73mg3%
Potassium 129mg4%
Carbohydrates 1g0%
Protein 4g8%
Vitamin C 0.3mg0%
Calcium 7mg1%
Iron 1.4mg8%
* Percent Daily Values are based on a 2000 calorie diet.

Here’s one more to pin on your Pinterest boards!It's easy to roast pumpkin seeds, once you're done carving your Halloween pumpkins! With a few common ingredients, you can enjoy this simple crunchy snack!


Save

Save

Save

Save

Save

Save

Save

Save

Save

Save

Save

Save

Save

Save

Olive Garden Chicken Gnocchi Soup

This delicious, copycat version of Olive Garden’s beloved thick and creamy chicken gnocchi soup is easy to make in 30 minutes, for lunch or dinner!This delicious, copycat version of Olive Garden's beloved thick and creamy chicken gnocchi soup is easy to make in 30 minutes... for lunch or dinner!
Last year a friend from out of state was staying in our home for several days. My friend Patti and I went to a local restaurant, where I tasted an amazing soup… Olive Garden Chicken Gnocchi Soup!  It was so good I’ve been on a quest ever since, to find a great recipe to duplicate it.

I think I found a great recipe on Pinterest. The soup tastes amazingly similar to the restaurant version, and it is crazy delicious! Did I mention it only takes 25-30 minutes from start to finish to make, as well? Yep.  EASY and delicious – now that’s my kind of meal! Here’s how you make this main course soup:

Scroll Down For A Printable Recipe Card At The Bottom Of The Page

How To Make Olive Garden Chicken Gnocchi Soup

Add butter and olive oil to a large soup pot. Turn heat to medium-high heat, and melt butter. Add diced onion and celery and sauté for 3-4 minutes, stirring occasionally, until onions are translucent and tender. During the last minute, add the minced garlic and continue cooking, stirring to prevent garlic from burning.

Cooking onion, celery and garlic for gnocchi soup

Once onions and celery are tender, add the flour to the pan.  Stir to combine all the ingredients.  This makes a “roux” which helps to thicken the soup. Cook the roux for an additional minute, stirring well.

Flour added to onion and celery to thicken chicken gnocchi soup

Add the half and half and the chicken broth to the soup pot, and stir well, to fully combine ingredients.

Half n' half added to chicken gnocchi soup

Chicken broth added to soup

The chicken gnocchi soup will look like the photo below. Continue to cook, stirring frequently until the soup begins to thicken.

Finish Making The Chicken Gnocchi Soup

Once the soup has begun to thicken, add the shredded carrots, chopped spinach, fresh thyme leaves, diced chicken breast, and potato gnocchi. Stir well, to fully blend all these ingredients into the chicken gnocchi soup.

Soup base for chicken gnocchi soup, cooking in large saucepan.

Continue to cook the soup on medium heat until soup is heated through, and the potato gnocchi is fully cooked (between 5 and 10 minutes). The soup will thicken up a bit more, too. See that good looking gnocchi? YUM.

Gnocchi from soup, with spinach and carrots, on wooden spoon

Serve The Olive Garden Chicken Gnocchi Soup

Once the chicken gnocchi soup is finished cooking, give it a taste test. Season with salt and ground black pepper, to taste.  See the bites of gnocchi, chicken, spinach and shredded carrots in the photo below? This is a meal in a bowl, friends!

Ladle full of homemade Olive Garden Chicken Gnocchi Soup

Ladle the creamy soup into serving bowls, and serve this chicken gnocchi soup while HOT! I think you’re gonna love this soup… we sure did! The potato gnocchi in the soup taste like little dumplings!

Soup, with chicken and gnocchi, is served in white bowl

We ate our Olive Garden chicken gnocchi soup with thick slices of crusty French bread. French bread tasted GREAT dipped in the soup to “sop up” some of that delicious creamy broth!

Thick, creamy gnocchi soup in white bowl

Sure hope you will consider making this absolutely delicious and filling chicken gnocchi soup. It’s quick and easy to prepare on a busy day, but is so filling and super delicious! The leftovers were just as good, as well! Have a great day, and thanks for taking the time to check out this recipe. Hope you enjoy it.

Looking For More GNOCCHI Recipes?

You can find all my recipes in the Recipe Index, located at the top of the page. I have some delicious gnocchi recipes you might be interested in, including:

Interested In More Recipes?

Thank you for visiting this website. I appreciate you using some of your valuable time to do soIf you’re interested, I publish a newsletter 2 times per month (1st and 15th) with all the latest recipes, and other fun info. I would be honored to have you join our growing list of subscribers, so you never miss a great recipe!
There is a Newsletter subscription box on the top right side (or bottom) of each blog post, depending on the device you use, where you can easily submit your e-mail address (only) to be included in my mailing list.

You Can Also Find Me On Social Media:
Facebook page: The Grateful Girl Cooks!
Pinterest: The Grateful Girl Cooks!
Instagram: jbatthegratefulgirlcooks

Author's signature

Recipe Source: http://therecipecritic.com/2016/09/creamy-chicken-gnocchi-soup-olive-garden-copycat/

0 from 0 votes
Olive Garden Chicken Gnocchi Soup
Prep Time
10 mins
Cook Time
20 mins
Total Time
30 mins
 
This delicious, copycat version of Olive Garden's beloved thick and creamy chicken gnocchi soup is easy to make in 30 minutes... for lunch or dinner!
Category: Soup
Cuisine: Italian
Keyword: chicken gnocchi soup
Servings: 6 servings
Calories Per Serving: 383 kcal
Author: JB @ The Grateful Girl Cooks!
Ingredients
  • 3 Tablespoons butter
  • 1 Tablespoon olive oil
  • 1 cup brown onion , diced
  • 1/2 cup celery , diced
  • 2 garlic cloves , minced
  • 1/4 cup all-purpose flour
  • 2 cups half and half
  • 1 can (14 ounces) chicken broth (**See NOTES section below for tip)
  • 1 cup shredded carrots
  • 1 cup fresh spinach leaves , chopped (may substitute frozen, chopped spinach-drained well)
  • 1 Tablespoon fresh thyme leaves
  • 1 cup cooked chicken breast , diced
  • 1 package (16 ounces) potato gnocchi (found in pasta aisle)
  • Salt and ground black pepper , to taste
Instructions
  1. Place the butter and olive oil in a large soup pot. Melt butter on medium-high heat. Add diced onion and celery. Sauté until onions are translucent and tender (about 3-4 minutes), stirring occasionally. During the last minute, add the minced garlic.
  2. Add flour to the pan, stir well, to combine (this makes a "roux"). Continue to cook this for an additional minute.
  3. Add the half and half, then the chicken broth to the soup pot. Mix well, to combine, and continue to cook, stirring frequently until the soup begins to thicken.
  4. Once soup has begun to thicken, add shredded carrots, chopped spinach, fresh thyme leaves, diced chicken and gnocchi. Simmer on low for 5-10 minutes, until soup is heated and thickened, and gnocchi have fully cooked. Taste and season with salt and pepper, if desired.
  5. Serve hot... and enjoy!
Recipe Notes

If you prefer a thinner soup, simply add an additional can of chicken broth to soup. (I like it thick and creamy, so only used one can!)

Nutrition Facts
Olive Garden Chicken Gnocchi Soup
Amount Per Serving (1 serving)
Calories 383 Calories from Fat 171
% Daily Value*
Fat 19g29%
Saturated Fat 10g63%
Cholesterol 64mg21%
Sodium 625mg27%
Potassium 381mg11%
Carbohydrates 40g13%
Fiber 3g13%
Sugar 2g2%
Protein 14g28%
Vitamin A 4585IU92%
Vitamin C 12.5mg15%
Calcium 137mg14%
Iron 3.9mg22%
* Percent Daily Values are based on a 2000 calorie diet.

Here’s one more to pin on your Pinterest boards!This delicious, copycat version of Olive Garden's beloved thick and creamy chicken gnocchi soup is easy to make in 30 minutes... for lunch or dinner!

Save

Save

Save

Save

Save

Save

Save

Save

Save

Save

Save

Tomato, Basil and Three Cheese Tart

Tomato Basil Three Cheese Tart has a flaky crust, tomatoes, Ricotta, Parmesan, Mozzarella cheese, Italian spices, and is perfect for breakfast, lunch OR dinner!
I found this recipe for a “quiche-like tart” on Pinterest from one of my favorite bloggers, tweaked the recipe very slightly, and enjoyed the results very much!  The recipe features a delectable (pat in the pan) crust.

It is flavored with quiche-style filling, fresh mozzarella cheese, Parmesan cheese, and Ricotta cheese, plus fresh basil leaves and Italian spices. This beautiful tart is beautifully “crowned” with beautiful tomato slices for a pop of flavor and color!

Believe it or not, the tomato basil three cheese tart was not too hard to make, either! This dish is perfect for breakfast, lunch OR dinner. I think it would be fabulous to serve at a brunch! Here’s how to make it.

Scroll Down For A Printable Recipe Card At The Bottom Of The Page

How To Make This Tomato Basil Three Cheese Tart

Preheat your oven to 410 degrees F.  Place butter, oil, water, sugar and salt in an oven-proof bowl. Place bowl in preheated oven; cook for 15 minutes. Remove hot bowl from oven.

Add flour into the hot butter mixture. Stir this until the dough comes together and can be formed into a ball. Place the dough ball into a 10 or 11 inch tart pan (with a removable bottom).

Tomato, Basil and Three Cheese Tart / The Grateful Girl Cooks!

Tomato, Basil and Three Cheese Tart / The Grateful Girl Cooks!

Tomato, Basil and Three Cheese Tart / The Grateful Girl Cooks!
Once dough has cooled enough to handle, press the dough into the tart pan and up the sides to form a crust. (Hint from original recipe author: save a tiny bit of dough which can be used to repair any cracks in crust after baking).  Pierce the crust all over with the tines of a fork.

Bake The Crust

Press the sides of the crust in the pan to help reinforce the crust. I used a fork to do this. Bake crust at 410 degrees for 15 minutes (until golden in color).  Remove crust from oven. If any cracks occurred, use the tiny bit of dough to do a quick repair job. Let crust cool.  Reduce oven temperature to 375 F. Place a long baking sheet into the heated oven (for later).

NOTE*** — I only had a 9 inch tart pan, so as you can see from my photos, I used the extra crust for two little tarts as well, then just divided the filling between the tarts. (The smaller crusts took a bit less time to cook).

Tomato, Basil and Three Cheese Tart / The Grateful Girl Cooks!

Tomato, Basil and Three Cheese Tart / The Grateful Girl Cooks!

Tomato, Basil and Three Cheese Tart / The Grateful Girl Cooks!

Prepare Filling For The Tomato Basil Three Cheese Tart

While you are baking crust or waiting for crust to cool down, combine the eggs, ricotta, Parmesan, half and half, Italian seasoning and salt in a medium bowl. Stir well to mix; once combined, add the small basil leaves and stir together. Set aside.

Tomato, Basil and Three Cheese Tart / The Grateful Girl Cooks!

Slice tomatoes (1/4 inch slices). Place slices on top of several paper towel to let them drain a bit.  While the tart is in the oven baking, lightly brush the tops of each tomato slice with a bit of olive oil

Tomato, Basil and Three Cheese Tart / The Grateful Girl Cooks!

Once the tart crust has cooled completely, add the grated fresh mozzarella cheese and spread to cover bottom of crust. Pour the egg mixture over the top of the mozzarella cheese.

Tomato, Basil and Three Cheese Tart / The Grateful Girl Cooks!

Tomato, Basil and Three Cheese Tart / The Grateful Girl Cooks!

Bake The Tart

Place the tart onto the heated baking sheet (in the oven) and bake on the pan for 10 minutes at 375 F. Remove tomato basil three cheese tart from oven after 10 minutes; arrange the tomato slices on top of the tart. Sprinkle tomato slices with salt and black pepper.

Place the tart back in the oven and continue to bake for an additional 15-20 minutes (mine took 20), until just set. When you slightly wiggle the tart pan, the filling should no longer “jiggle” back and forth. Remove the tart pan to a wire rack and let cool for at least 10 minutes before serving.

Tomato, Basil and Three Cheese Tart / The Grateful Girl Cooks!

Aren’t They Pretty?

This is how they looked when they first came out of the oven. I already had taken the tart pan off the small ones, as they had cooked and cooled enough before the large tart was done. Aren’t they gorgeous???

Tomato, Basil and Three Cheese Tart / The Grateful Girl Cooks!

I kinda like the little bitty ones… they would be perfect to serve at a brunch!

https://www.thegratefulgirlcooks.com/tomato-basil-three-cheese-tart/

Time To EAT!

This tomato basil three cheese tart can be served hot (after it rest for 10 minutes), or at room temperature. Either way is wonderful. Wrap the leftovers well, and they will keep for several days, if refrigerated.

Tomato, Basil and Three Cheese Tart / The Grateful Girl Cooks!

I hope you will consider making this delicious tomato basil three cheese tart.  An added benefit was being able to use fresh tomatoes and basil from our garden to make this tart! It was wonderful to have the leftovers hanging around in our refrigerator for a few days. Then it was so easy to grab a quick slice for breakfast or lunch!

In Other News!

Have a blessed day… in other news – we got a new Pembroke welsh corgi puppy yesterday, so I am up to my eyeballs in “PUPPY” stuff. So tired, yet so very thankful for our new furry bundle of JOY (even if he doesn’t seem too sure about his new living arrangements)!

Cooper is our new corgi puppy!

Sure hope you enjoy this tomato basil three cheese tart! We sure did! Thanks for stopping by, and have a wonderful day.

Looking For More Quiche-Like Recipes Like This?

You can find all my recipes in the Recipe Index, located at the top of the page. I have several quiche recipes similar to this one that you might enjoy, including:

Interested In More Recipes?

Thank you for visiting this website. I appreciate you using some of your valuable time to do soIf you’re interested, I publish a newsletter 2 times per month (1st and 15th) with all the latest recipes, and other fun info. I would be honored to have you join our growing list of subscribers, so you never miss a great recipe!
There is a Newsletter subscription box on the top right side (or bottom) of each blog post, depending on the device you use, where you can easily submit your e-mail address (only) to be included in my mailing list.

You Can Also Find Me On Social Media:
Facebook page: The Grateful Girl Cooks!
Pinterest: The Grateful Girl Cooks!
Instagram: jbatthegratefulgirlcooks

Author's signature

Recipe Adapted From: http://thecafesucrefarine.com/2016/06/tomato-basil-fresh-mozzarella-tart/

↓↓ PRINTABLE RECIPE BELOW ↓↓

0 from 0 votes
Tomato, Basil and Three Cheese Tart
Prep Time
35 mins
Cook Time
30 mins
Total Time
1 hr 5 mins
 
Tomato Basil Three Cheese Tart has a flaky crust, tomatoes, Ricotta, Parmesan, Mozzarella cheese, Italian spices, and is perfect for breakfast, lunch OR dinner!
Category: Brunch, Entree
Cuisine: American
Keyword: tomato basil three cheese tart
Servings: 8 servings
Calories Per Serving: 552 kcal
Author: JB @ The Grateful Girl Cooks!
Ingredients
For crust:
  • 6 ounces butter
  • 2 Tablespoons oil (non-flavored oil)
  • 6 Tablespoons water
  • 1 teaspoon sugar
  • 1/2 teaspoon salt
  • 2 cups all purpose flour , plus 2 Tablespoons
For tart filling:
  • 4 large eggs (room temp)
  • 1 cup ricotta cheese (room temp)
  • 1/3 cup Parmesan cheese (grated)
  • 1 cup half and half
  • 1 teaspoon Italian seasoning (dried)
  • 1/2 teaspoon salt
  • 1/4 cup small , fresh basil leaves
  • 10-15 small colorful tomatoes (I used a combo of Romas and various color cherry tomatoes)
  • 8 ounces fresh mozzarella cheese , grated
  • Olive oil (to lightly brush on tomato slices prior to baking)
  • Salt and pepper , to sprinkle on tart before final bake
Instructions
To make the crust:
  1. Preheat your oven to 410 degrees F. Place the butter, oil, water, sugar and salt in an oven-proof bowl. Place bowl in preheated oven; cook for 15 minutes. Remove hot bowl from oven.
  2. Add flour into the hot butter mixture. Stir this until the dough comes together and can be formed into a ball. Place the dough ball into a 10 or 11 inch tart pan (with a removable bottom). Once dough has cooled enough to handle, press the dough into the tart pan and up the sides to form a crust. (Hint from original recipe author: save a tiny bit of dough which can be used to repair cracked crust after baking).
  3. Pierce the crust all over with the tines of a fork. Press the sides of the crust in the pan to help reinforce the crust. I used the fork to do this. Bake at 410 degrees for 15 minutes (golden in color).
  4. Remove crust from oven. If any cracks occurred, use the tiny bit of dough to do a quick repair job. Let crust cool. Reduce oven temperature to 375 F. Put a long sheet pan into the oven to heat up.
  5. While you are waiting for crust to cool down, combine the eggs, ricotta, Parmesan, half and half, Italian seasoning and salt in a medium bowl. Stir well to mix; once combined, add the small basil leaves and stir together. Set aside.
  6. Slice tomatoes (1/4 inch slices). Place slices on top of several paper towel to let them drain a bit.
  7. Once the tart crust has cooled completely, add the grated fresh mozzarella cheese and spread to cover bottom of crust. Pour the egg mixture over the top of the mozzarella cheese. Place the tart onto the heated baking sheet (in the oven) and bake on the pan for 10 minutes at 375 F.
  8. While the tart is in the oven baking, lightly brush the tops of each tomato slice with a bit of olive oil.
  9. Remove tart from oven after 10 minutes; arrange the tomato slices on top of the tart. Sprinkle tomato slices with salt and black pepper. Place the tart back in the oven and continue to bake for an additional 15-20 minutes (mine took 20), until just set. (When you slightly wiggle the tart pan, the filling no longer "jiggles" back and forth). Remove the tart pan to a wire rack and let cool for at least 10 minutes before serving. The tart is also delicious when served at room temperature!
Recipe Notes

Note: FYI- Original recipe called for 1/2 cup small fresh basil leaves. I made the tart the first time with that measurement, but I found I actually prefer LESS basil flavor in the tart, so have adjusted the quantity down to 1/4 cup small basil leaves for my version.

Nutrition Facts
Tomato, Basil and Three Cheese Tart
Amount Per Serving (1 slice)
Calories 552 Calories from Fat 342
% Daily Value*
Fat 38g58%
Saturated Fat 23g144%
Cholesterol 179mg60%
Sodium 765mg33%
Potassium 526mg15%
Carbohydrates 33g11%
Fiber 2g8%
Sugar 5g6%
Protein 19g38%
Vitamin A 2440IU49%
Vitamin C 21.5mg26%
Calcium 331mg33%
Iron 2.6mg14%
* Percent Daily Values are based on a 2000 calorie diet.

Here’s one more to pin on your Pinterest boards!Tomato Basil Three Cheese Tart has a flaky crust, tomatoes, Ricotta, Parmesan, Mozzarella cheese, Italian spices, and is perfect for breakfast, lunch OR dinner!

Save

Save

Save

Save

Save

Save

Save

Save

How To Can Green Beans

Overrun with fresh garden green beans this summer? Learn how to can green beans for long term storage, to enjoy all year long!Overrun with fresh garden green beans this summer? Learn how to can green beans for long term storage, to enjoy all year long!
One summer several years ago I was “overrun” with green beans growing in my backyard raised bed garden. I KNEW I wanted to learn how to can green beans to preserve them, so I used a birthday gift card I received and bought a pressure canner. The rest is history!

That was several summers ago, and I’ve now learned and progressed in my pressure canning  (and water bath canning), to where I am now canning lots of veggies, beans, soups, jams, and stews… AND I LOVE IT! Do you know how to can green beans? It’s actually quite easy, once ya get the basics down.

There’s something wonderful about pulling a jar of homegrown green beans (or other foods) right out of our pantry that makes me smile!  And the fact that I’ve never had a “bad” unsealed or cracked jar tells me I must be doing it right! So if you’re interested in learning how to can green beans here’s the “how to”.

Scroll Down For A Printable Recipe Card At The Bottom Of The Page

How To Can Green Beans

First thing is very important: always refer to your pressure canner’s manufacturer’s instructions for your specific canner before beginning.  Note: Green beans must be canned using a PRESSURE canner. Vegetables and meats, soups, etc. must be pressure-canned, due to low acidity present in those foods. Unfortunately they CANNOT be processed in a water bath canner (not enough heat to kill off any potentially harmful bacteria!). This is the first thing I had to understand when it was time to learn how to can green beans!

Start with fresh beans (for this batch I combined green and yellow fillet beans from our garden). Rinse beans, and then drain them.

Trim the ends off the beans, then snap or cut them into 2 inch pieces. (I enjoy “snapping” beans while I watch TV).  Typically I pack beans tightly into jars before canning to get an estimate of how many jars I will need. Once that’s done, I remove beans,  re-wash jars, then proceed with the canning process. Set the beans aside until you’re ready to pack them into hot jars.

Fresh picked green (and yellow) beans ready to can, for long term storage!

Prepare The Canning Jars And Flat Lids

Wash the canning jars, then place them upside down on a dish towel-lined baking sheet.  Place them in a preheated 200 degree oven for about 20-25 minutes.

Some people put them in simmering water to heat, but I like the convenience of having my stove top free while I am heating the water up in my pressure canner and heating boiling water to add to the filled jars.

Canning jars being prepared for canning green beans.

While the jars are in the oven heating, prepare pressure canner, jars and lids according to manufacturer instructions. Bring a kettle of water to a low boil. About 5 minutes before the jars are finished heating and the beans are ready to be added, pour some of the very hot water over the flat jar lids (and let them sit in the water in a bowl for 5 minutes – this softens the rubber seal).

Pack The Green Beans Into Hot Jars

I usually “raw pack” the beans (one of TWO canning methods), which means to tightly pack the raw green beans in the heated jars. Fill the jars to within one inch of the top of jar.

Place 1/2 teaspoon canning salt into each jar. Pour boiling water (I use a canning funnel) into each jar, leaving 1 inch headspace. (See NOTES section of the printable recipe below for alternate method).

Green beans and canning salt are placed into prepared hot canning jars

Remove air bubbles from jar; adjust the headspace by adding or removing liquid to ensure you have the correct 1 inch headspace. Use a paper towel and wipe the rim of each jar dry/clean, to help ensure a good seal. Place the heated flat lid on jar, then add screw band and tighten to fingertip tightness.

Processing The Jars Of Green Beans

Carefully place the jars into simmering water in the pressure canner, lock the canner lid in place, then turn the stove top to medium high heat. As the water inside comes to a boil, steam will escape through the vent. Let the steam vent for 10 minutes, then place vent cover on to close vent.

Filled jars are placed onto rack in simmering water in pressure canner

Continue heating until the pressure canner reaches 10 pounds pressure. Maintain this pressure throughout the cooking time indicated. (Pint jars = process for 20 minutes, Quart jars = process for 25 minutes).

Pressure canner is sealed and temperature raised to 10 pounds pressure.

Once Canning Processing Time Is Completed

When processing time is completed, turn off the heat. Let the pressure of the canner drop down to zero naturally. Once the pressure returns to zero, wait a couple more minutes, then carefully remove the vent cover only. Wait another minute, then carefully remove canner lid. Let the jars sit in the canner for 10 more minutes, then remove them, using canning tongs.

Place the HOT jars onto a dish towel on the counter (DO NOT place directly on counter… temperature variations could make the jars crack!). Here’s a picture from another batch of jars using only GREEN beans. At this point you’ve conquered learning how to can green beans. Yay for YOU!

Cans of green beans are placed on dish towel to cool down after being removed from canner.Let The Jars Cool

Let the jars cool completely (for 12-24 hours) without disturbing, then check to make sure they sealed properly, label and store. Smile… and enjoy the reward from your small amount of work… a pantry full of green beans!

I LOVE that I can preserve beans from our garden each year and pull a jar of home-grown green beans off a pantry shelf any time I want… (haven’t bought beans in years!).

Sealed jars of green beans are labeled before storing in pantry.

For me personally, it is very rewarding to see jars of homegrown vegetables (and soups, stews, jam, etc) line our pantry shelves… it feels awesome! I am so glad I learned to pressure can and have enjoyed the results produced ever since!  And just think… it all started with learning how to can green beans!

Looking For More CANNING Recipes?

You can find all of my recipes in the Recipe Index, located at the top of the page. I have quite a few canning recipes you might enjoy, including:

Interested In More Recipes?

Thank you for visiting this website. I appreciate you using some of your valuable time to do soIf you’re interested, I publish a newsletter 2 times per month (1st and 15th) with all the latest recipes, and other fun info. I would be honored to have you join our growing list of subscribers, so you never miss a great recipe!
There is a Newsletter subscription box on the top right side (or bottom) of each blog post, depending on the device you use, where you can easily submit your e-mail address (only) to be included in my mailing list.

You Can Also Find Me On Social Media:
Facebook page: The Grateful Girl Cooks!
Pinterest: The Grateful Girl Cooks!
Instagram: jbatthegratefulgirlcooks

Author's signature

Recipe Source:  Ball Complete Book of Home Preserving, Published 2012, Robert Rose, Inc., Jarden Corporation, page 386 (and part of page 385)

0 from 0 votes
How To Can Green Beans
Prep Time
25 mins
Cook Time
20 mins
Total Time
45 mins
 
Overrun with fresh garden green beans this summer? Learn how to can green beans for long term storage, to enjoy all year long!
Category: Canning
Cuisine: American
Keyword: green beans
Servings: 4 pint jars
Calories Per Serving: 140 kcal
Author: JB @ The Grateful Girl Cooks!
Ingredients
  • 4 pounds Green beans (approx. 1½ - 2½ pounds of beans per QUART jar)
  • 2 teaspoons Canning salt
  • 4 Pint Canning jars and lids/screwbands
  • Boiling water
Instructions
  1. Wash beans, then drain. Trim ends off beans, then snap or cut beans into 2 inch pieces.
  2. Wash canning jars, then place upside down on a dish towel-lined baking sheet. Place in a preheated 200 degree oven for 20-25 minutes. While jars are heating, prepare pressure canner, jars and lids according to manufacturer instructions. Bring a kettle of water to a low boil. About 5 minutes before the jars are finished heating and the beans are ready to be added, pour some of the very hot water over the flat jar lids (and let them sit in the water in a bowl for 5 minutes).
  3. Tightly pack the raw green beans in the heated jars. Fill the jars to within one inch of the top of jar. Place 1/2 teaspoon canning salt into each jar. Pour boiling water (use a canning funnel) into each jar, leaving 1 inch headspace. Remove air bubbles from jar; adjust headspace by adding or removing liquid to ensure you have a 1 inch headspace. Use a paper towel and wipe the rim of each jar dry/clean. Place the heated flat lid on jar, then add screwband and tighten to fingertip tight. Carefully place jars into simmering water in pressure canner, lock lid in place, then turn burner to medium high heat. As water inside comes to a boil, steam will escape through vent. Let the steam vent for 10 minutes, then place vent cover on to close vent.
  4. Continue heating until pressure canner reaches 10 pounds pressure. Maintain this pressure throughout the cooking time indicated. (Pint jars = process for 20 minutes, Quart jars = process for 25 minutes). Begin processing time once canner reaches 10 pounds pressure.
  5. When processing time is completed, turn off heat. Let the pressure drop to zero naturally. Once the pressure returns to zero, wait a couple more minutes, then carefully remove vent cover. Wait another minute, then carefully unlock and remove canner lid. Let the jars sit in canner for 10 minutes, then remove, using canning tongs. Place HOT jars onto a dish towel on counter (DO NOT place directly on counter... temperature variations could make jars crack!). Let jars cool completely (for 12-24 hours) without disturbing, check for proper seal, label and store.
Recipe Notes

Quantity will vary, based on how many beans you process.
Processing: 10# pressure. Pints=20 minutes, Quarts=25 minutes.

Alternate method: Hot Pack method: Cut beans combined with boiling water to cover. Bring liquid to boil (medium-high heat). Boil beans for 5 minutes. Drain (but reserve liquid for adding to jars, if desired). Put hot beans into jars; cover with boiling water or reserved liquid. Continue with rest of directions, as written.

Nutrition Facts
How To Can Green Beans
Amount Per Serving (1 pint jar of beans)
Calories 140
% Daily Value*
Sodium 1189mg52%
Potassium 957mg27%
Carbohydrates 31g10%
Fiber 12g50%
Sugar 14g16%
Protein 8g16%
Vitamin A 3130IU63%
Vitamin C 55.4mg67%
Calcium 168mg17%
Iron 4.7mg26%
* Percent Daily Values are based on a 2000 calorie diet.

Here’s one more to pin on your Pinterest boards!Overrun with fresh garden green beans this summer? Learn how to can green beans for long term storage, to enjoy all year long!


Save

Save

Save

Save

Save

Save

Save

Save

Save

Save

Save

Save

Italian Sausage & Potato Casserole

This simple, hearty, baked Italian Sausage Potato Casserole, with sausage, potatoes, red and green peppers, onions, and Italian spices is delicious!This simple, hearty, baked Italian Sausage Potato Casserole, with sausage, potatoes, red and green peppers, onions, and Italian spices is delicious!
If you’re looking for an easy to prepare, yet hearty and flavorful main dish to make for those you love, this Italian Sausage Potato Casserole might be just for YOU!

The Italian sausage potato casserole is very simple to prepare (3 easy steps!), and features the flavors of Italian sausage, green and red bell peppers, onions, and Italian seasonings. I stumbled upon it online recently, thought it sounded promising, and made it for my husband and I.

The recipe as written (below in printable recipe card) serves 4. Note: My photos only reflect half of the total amount (I cut recipe in half since we were the only two to eat it!).

Scroll Down For A Printable Recipe Card At The Bottom Of The Page

How To Make This Italian Sausage Potato Casserole

Preheat your oven to 400 degrees. While it is pre-heating, cook the Italian sausage pieces in 2 teaspoons olive oil, on medium heat, until cooked through (and no longer pink).

Italian sausage pieces brown in olive oil in a skillet.

Browned Italian sausage slices, cooking in skillet.

Once fully cooked, drain the sausage on paper towel to absorb the grease, and then place them in a baking dish.

The browned sausage is placed into a baking dish, to begin the casserole.

Cook The Potatoes In The Same Skillet

Drain grease from skillet, then wipe pan with paper towel (do not wash).  Heat 2 Tablespoons olive oil in skillet, add potato slices, and cook until they are a light golden brown, and almost tender.

You will need to turn the potatoes as they cook to ensure they brown lightly on both sides.  Once potatoes are finished cooking, place them on top of the Italian sausage in the baking dish.

Sliced red potatoes are cooked in olive oil in skillet.

Cooked red potato slices are placed on top of Italian sausage in baking dish.

Cook the Vegetables In The Same Skillet

Using the same skillet, cook the red pepper, green pepper, and onion slices until they have softened (a few minutes).

Onion slices and red and green peppers are cooked in skillet.

Chopped bell peppers and sliced onions are cooked until golden brown.

Assemble The Italian Sausage Potato Casserole

Add the cooked veggies on top of the potatoes in the baking dish. Pour chicken stock over the veggies, potatoes and sausage.

Peppers, onions, and chicken stock are poured over the Italian sausage potato casserole.

Sprinkle with Italian seasoning, salt and pepper. Stir the casserole ingredients gently to combine.

Bake The Italian Sausage Potato Casserole

Cover the Italian sausage potato casserole dish with aluminum foil. Bake the casserole at 400 degrees, for 25 minutes.

Italian Sausage Potato Casserole, after it is baked for 25 minutes.

When done baking, remove foil, and dish the casserole up while it’s hot! That’s it! This “meat and potatoes” casserole tastes great with a side salad and/or a piece of garlic bread.

The casserole is very hot, and is now ready to serve.

Chunks of potato and Italian sausage feature prominently in this casserole.

I hope you have the opportunity to make this delicious, simple Italian sausage potato casserole for those you love. Spending time together enjoying a meal is a gift!  Have a blessed day!

Looking For More CASSEROLE Recipes?

You can find all of my casserole recipes in the Recipe Index, located at the top of the page. A few of our family favorites include:

Interested In More Recipes?

Thank you for visiting this website. I appreciate you using some of your valuable time to do soIf you’re interested, I publish a newsletter 2 times per month (1st and 15th) with all the latest recipes, and other fun info. I would be honored to have you join our growing list of subscribers, so you never miss a great recipe!
There is a Newsletter subscription box on the top right side (or bottom) of each blog post, depending on the device you use, where you can easily submit your e-mail address (only) to be included in my mailing list.

You Can Also Find Me On Social Media:
Facebook page: The Grateful Girl Cooks!
Pinterest: The Grateful Girl Cooks!
Instagram: jbatthegratefulgirlcooks

Author's signature

Recipe Source: www.barbbrinker.blogspot.com/2011/01/sausage-potato-casserole.html

0 from 0 votes
Italian Sausage & Potato Casserole
Prep Time
20 mins
Cook Time
25 mins
Total Time
45 mins
 
This simple, hearty, baked Italian Sausage Casserole, with sausage, potatoes, red and green peppers, and Italian spices is delicious!
Category: Entree
Cuisine: American
Keyword: Italian sausage potato casserole
Servings: 4 servings
Calories Per Serving: 659 kcal
Author: JB @ The Grateful Girl Cooks!
Ingredients
  • 2 teaspoons olive oil
  • 1 pound Italian sausage (sweet OR hot), cut into 2 inch pieces
  • 2 Tablespoons olive oil
  • 4 medium red potatoes , unpeeled (cut in half lengthwise, then into 1/2 inch slices (half moons)
  • 1 green bell pepper , seeded, then roughly chopped
  • 1 red bell pepper , seeded, then roughly chopped
  • 1 large brown onion , sliced thin
  • 1/2 cup chicken stock
  • 1 teaspoon Italian seasoning
  • 1 teaspoon salt
  • 1/2 teaspoon black pepper
Instructions
  1. Preheat oven to 400 degrees F. Spray a 9x13 baking dish with non-stick spray.
  2. Heat 2 Teaspoons olive oil on medium heat in a LARGE skillet. Add Italian sausage chunks; cook, stirring occasionally until sausages are cooked through and no longer pink (about 6-8 minutes). Remove sausage to a paper towel to absorb grease, then place in 9x13 baking dish. Drain grease from skillet (but do not wash-just wipe it down with a paper towel before cooking potatoes).
  3. Add 2 Tablespoons olive oil back into skillet. Turn heat to medium. Add potato slices. Cook potatoes until light golden brown (they will be "almost tender"). You will need to turn the potatoes occasionally as they cook to make sure both sides cook well. When done, remove the potatoes from skillet and place them on top of the sausage in the baking dish.
  4. In same skillet, cook the red and green peppers, and sliced onion until they soften up and lightly brown (about 3-5 minutes). When done, remove vegetables and place them on top of potatoes in baking dish.
  5. Pour the chicken stock over the sausage/potato/vegetables in baking dish, then sprinkle with Italian seasoning, salt and black pepper. Stir to combine ingredients. Cover baking dish with aluminum foil.
  6. Bake at 400 degrees for 25 minutes. Remove from oven, uncover, and dish it up while hot!
Recipe Notes

Because I was only cooking for two, I cut the recipe in half. I DID, however, leave the amount of chicken stock exactly the amount as written (1/2 cup). For all other ingredients I cut the quantity in half, and casserole was cooked in a smaller baking dish.

Nutrition Facts
Italian Sausage & Potato Casserole
Amount Per Serving (1 g)
Calories 659 Calories from Fat 405
% Daily Value*
Fat 45g69%
Saturated Fat 14g88%
Cholesterol 87mg29%
Sodium 1495mg65%
Potassium 1442mg41%
Carbohydrates 41g14%
Fiber 5g21%
Sugar 6g7%
Protein 21g42%
Vitamin A 1055IU21%
Vitamin C 84.6mg103%
Calcium 59mg6%
Iron 3.4mg19%
* Percent Daily Values are based on a 2000 calorie diet.

Here’s one more to pin on your Pinterest boards!This simple, hearty, baked Italian Sausage Potato Casserole, with sausage, potatoes, red and green peppers, onions, and Italian spices is delicious!


Save

Save

Sun-Dried Tomato And Kalamata Olive Bruschetta

This delicious sun dried tomato kalamata olive bruschetta appetizer features toasted garlic crostini with feta, cream cheese, and fresh basil!This delicious sun dried tomato kalamata olive bruschetta appetizer features toasted garlic crostini with feta, cream cheese, and fresh basil!
I’ve been on a bit of a bruschetta kick lately… busy testing appetizer recipes to decide what to make over the holidays for our family and friends. Recently I made this flavor-filled Sun-Dried Tomato Kalamata Olive Bruschetta, and it was a big hit!

The recipe is really quite easy to prepare. It’s wonderful taste comes from a garlic-rubbed toasted baguette slice, topped with feta cheese, cream cheese, and a sun-dried tomato/garlic/basil/kalamata olive tapenade.

I love that you can prepare everything ahead of time, then easily put it all together at the last minute!  That’s MY kind of appetizer!  Here’s how you make this Mediterranean inspired sun dried tomato kalamata olive bruschetta:

Scroll Down For A Printable Recipe Card At the Bottom Of The Page

How To Make Sun Dried Tomato Kalamata Olive Bruschetta

First slice a small baguette into 1/2 inch slices. Brush each slice lightly with olive oil, then rub a garlic clove over each piece.

Baguette slices are brushed with olive oil.

Fresh garlic is rubbed onto each baguette slice before baking.Bake The Baguette Slices

Bake the baguette slices for 7-9 minutes, or until the bread is light golden brown in color, and crispy. The bread needs to be crispy, because the last thing you want is a soggy bruschetta bite! TIP: You can also put the toasted baguette slices into an airtight container and save for 1-2 days before using, if you need to make this up ahead of time.

The baguette slices (crostini) are baked until crispy.

Make The Tomato Kalamata Olive Tapenade And The Feta Cheese Toppings

In a small bowl, place the feta and cream cheese, and mix well. Using another bowl, combine the ingredients for the tomato/garlic/olive tapenade.

Tomato kalamata tapenade in one bowl, and cheese mixture in another for bruschetta.

Assembling The Tomato Kalamata Olive Bruschetta Bites

Let the baked baguette slices cool completely. Once they have cooled, spread some of the feta/cream cheese mixture onto each piece. Divide and use all of the cheese topping.

Feta and cream cheese mixture is spread onto the baked crostini slices.

Serve The Tomato Kalamata Olive Bruschetta

Top the cheese mixture with some of the tomato/olive/garlic and basil mixture (LOVE those Mediterranean flavors!) Arrange the tomato kalamata olive bruschetta appetizers onto a serving platter, and serve!

Sun dried tomato kalamata olive bruschetta is almost ready to serve.

That’s it! These sun dried tomato kalamata olive bruschetta bites are totally easy to prepare. This appetizer not only LOOKS good, it tastes even better! Your guests will enjoy this flavor-filled appetizer!

The best part is that you can easily double or triple the recipe, as needed, depending on the number of guests!  Here’s one bite I saved for YOU! Hope you enjoy it!

Picking up one of the tomato kalamata olive bruschetta appetizers for a bite!

Have a wonderful day!  May you find moments of rest, gratitude, and fulfillment as you move throughout the busy-ness of this day!

Looking For More Appetizers?

You can find all of my recipes in the Recipe Index, located at the top of the page. A few favorites include:

Interested In More Recipes?

Thank you for visiting this website. I appreciate you using some of your valuable time to do soIf you’re interested, I publish a newsletter 2 times per month (1st and 15th) with all the latest recipes, and other fun info. I would be honored to have you join our growing list of subscribers, so you never miss a great recipe!
There is a Newsletter subscription box on the top right side (or bottom) of each blog post, depending on the device you use, where you can easily submit your e-mail address (only) to be included in my mailing list.

You Can Also Find Me On Social Media:
Facebook page: The Grateful Girl Cooks!
Pinterest: The Grateful Girl Cooks!
Instagram: jbatthegratefulgirlcooks

Author's signature

Recipe Source: http://www.garnishwithlemon.com/sun-dried-tomato-and-kalamata-olive-bruschetta/

↓↓ PRINTABLE RECIPE BELOW ↓↓

0 from 0 votes
Sun-Dried Tomato And Kalamata Olive Bruschetta
Prep Time
15 mins
Cook Time
0 mins
Total Time
15 mins
 

This delicious sun dried tomato kalamata olive bruschetta appetizer features toasted garlic crostini with feta, cream cheese, and fresh basil!

Category: Appetizer
Cuisine: Greek
Keyword: tomato kalamata olive bruschetta
Servings: 12 servings
Calories Per Serving: 121 kcal
Author: JB @ The Grateful Girl Cooks!
Ingredients
  • 1 small French baguette (12 thin slices or pre-sliced bag ready for appetizers), thinly sliced
  • 2 Tablespoons Olive oil (approximate-to brush on baguette slices before toasting)
  • 4 ounces Feta cheese crumbles
  • 4 ounces cream cheese , at room temp
  • 3 garlic cloves , divided
  • 4 ounces Kalamata olives , coarsely chopped
  • 1 (7 ounce) jar sun-dried tomatoes ,drained and chopped
  • 10 medium basil leaves , thinly sliced into "ribbons"
Instructions
  1. Preheat oven to 400 degrees.
  2. Slice the small baguette into slices approximately 1/2 inch wide. Lightly brush each slice with olive oil, then rub one of the garlic cloves over each piece. Place the slices in oven and "toast" only until the slices are slightly browned (takes approx. 7-9 minutes). When done, remove from oven and let cool completely.

  3. In a small bowl, mix the Feta and cream cheese together until smooth. Set aside.
  4. Coarsely chop remaining garlic cloves, kalamata olives, and sun-dried tomatoes. Slice the basil leaves into thin "ribbons" and stir into the tomato/garlic/olive mixture. (TIP: Easiest way to slice basil leaves is to stack leaves on top of each other. Roll tightly up lengthwise. Slice into thin strips).
  5. When you are ready to serve, spread each baguette slice with the feta/cream cheese mixture. Spoon a little of the tomato/olive/garlic/basil tapenade on top of the cheese... and serve!
Nutrition Facts
Sun-Dried Tomato And Kalamata Olive Bruschetta
Amount Per Serving (1 bruschetta)
Calories 121 Calories from Fat 81
% Daily Value*
Fat 9g14%
Saturated Fat 3g19%
Cholesterol 18mg6%
Sodium 346mg15%
Potassium 37mg1%
Carbohydrates 6g2%
Protein 2g4%
Vitamin A 220IU4%
Vitamin C 0.2mg0%
Calcium 70mg7%
Iron 0.5mg3%
* Percent Daily Values are based on a 2000 calorie diet.

Here’s one more to pin on your Pinterest boards!This delicious sun dried tomato kalamata olive bruschetta appetizer features toasted garlic crostini with feta, cream cheese, and fresh basil!

Save

Save

Save

Raspberry Cream Cheese Danish

Raspberry cream cheese danish are crescent roll pastries with sweet cream cheese filling, baked and topped with jam, and drizzled with a simple glaze.Raspberry cream cheese danish are crescent roll pastries with sweet cream cheese filling, baked and topped with jam, and drizzled with a simple glaze.
I found a recipe for a quick, easy danish pastry the other day and decided to give it a try. I changed up the recipe just a smidge and the end result? An absolutely delicious Raspberry Cream Cheese Danish pastry, that was enjoyed with a steaming cup of strong coffee!

Our youngest son (“young” meaning 29 years old) popped in for a visit just as I started making these, so he ended up getting to enjoy them with us, and also went home with a big plate full of pastries. There are ALWAYS side benefits of visiting Mom and Dad, right? This recipe is actually fairly easy, and you’ll end up with 16 small danish pastries. Here’s how you make them:

Scroll Down For A Printable Recipe Card At The Bottom Of The Page

How To Make Raspberry Cream Cheese Danish Pastries

Start with 2 cans of refrigerated crescent rolls. The dough will come out with 4 rectangular pieces of dough (two triangles of dough attached with perforations in between). Press the perforations closed to form a solid rectangle.

Once you have done this to both cans of dough you should have 8 rectangles of dough. Sprinkle each rectangle very lightly with sugar (use 1 Tablespoon total evenly divided between rectangles).

Canned crescent roll dough is rolled out into rectangles.

Gently roll out each rectangle to 8 inches long. Cut each rectangle in half length-wise. You will then have 16 rectangles, about 1 inch by 8 inches.

Shape The Dough

Pick up each piece of dough by each end and lightly twist the dough ends in opposite directions (i.e. left hand twist toward you, right hand away from you). Form a small circle with the twisted dough, and pinch to seal the ends.

The crescent roll dough is shaped into round rings.

Place the dough circles onto parchment paper lined baking sheet(s), about 2 inches apart. Set aside.  Preheat oven to 350 degrees.

Dough circles are placed onto parchment paper line baking sheet.

Make The Cream Cheese Filling

In a medium bowl, mix together room temperature cream cheese, 1 Tablespoon granulated sugar, lemon juice, vanilla extract and sour cream, until well combined.

A simple cream cheese filling is mixed together.

Add approximately 1 Tablespoon cream cheese filling to the center of each pastry. Lightly brush the pastry dough with melted butter. NOTE: I was concerned the cream cheese would run out the bottom of the pastry by leaving the pastry circle “open”, but having the parchment paper underneath prevented that from happening!

Bake The Raspberry Cream Cheese Danish Pastries

Bake the raspberry cream cheese danish pastries in a preheated 350 oven for 13-15 minutes, or until they are light golden brown.  When done, remove from oven to a wire rack (LEAVE THE PARCHMENT PAPER UNDERNEATH)

Brushing the danish pastries with melted butter before baking.

Prepare The Glaze While Pastries Cool

While pastries are cooling, prepare the glaze to drizzle over the top of the cooled pastries. Stir powdered sugar, milk, and vanilla extract together until smooth. You want to get it to a drizzling consistency. Too thick? Add drops of milk. Too thin? Add additional powdered sugar.

Place the glaze into a squeeze bottle or into a zip-top bag (you can snip off a tiny spout on the bottom corner of zip-top bag and use it as a pastry bag). You can also just use a spoon to drizzle the glaze onto cooled pastries.

Icing is mixed to drizzle over the finished raspberry cream cheese danish.

This is what the raspberry cream cheese danish pastries looked like fresh from the oven. Once they are completely cooled off, dollop with jam. Decoratively drizzle the glaze over each pastry. Let the glaze firm up a bit, then serve!

A dollop of raspberry jam is added to each baked danish pastry.

They are quite delicious, and weren’t hard to make, either!  THAT is a win-win.  Now where’s my huge mug of coffee??

A drizzle of icing is added to each of the raspberry cream cheese danish pastries before serving.

Hope you consider making these for the ones you love. See the notes section of the printable recipe for other flavors that would taste great as toppings for these pastries.  Have a wonderful day.

Looking For More Recipes For BREAKFAST PASTRIES?

You can find all of my recipes in the Recipe Index, located at the top of the page. A few recipes for breakfast pastries you might enjoy include:

Interested In More Recipes?

Thank you for visiting this website. I appreciate you using some of your valuable time to do soIf you’re interested, I publish a newsletter 2 times per month (1st and 15th) with all the latest recipes, and other fun info. I would be honored to have you join our growing list of subscribers, so you never miss a great recipe!
There is a Newsletter subscription box on the top right side (or bottom) of each blog post, depending on the device you use, where you can easily submit your e-mail address (only) to be included in my mailing list.

You Can Also Find Me On Social Media:
Facebook page: The Grateful Girl Cooks!
Pinterest: The Grateful Girl Cooks!
Instagram: jbatthegratefulgirlcooks

Author's signatureRecipe Slightly Adapted From: http://cakescottage.com/2016/03/07/easy-cream-cheese-danish/

0 from 0 votes
Raspberry Cream Cheese Danish
Prep Time
15 mins
Cook Time
15 mins
Total Time
30 mins
 

Raspberry cream cheese danish are crescent roll pastries with sweet cream cheese filling, baked and topped with jam, and drizzled with a simple glaze.

Category: Breakfast
Cuisine: American
Keyword: raspberry cream cheese danish
Servings: 16 servings
Calories Per Serving: 216 kcal
Author: JB @ The Grateful Girl Cooks!
Ingredients
  • 2 cans crescent rolls
  • 1 package (8 ounce) cream cheese, at room temperature
  • 2 Tablespoons granulated sugar , divided
  • 1 teaspoon fresh lemon juice
  • 3/4 teaspoon vanilla extract
  • 1 teaspoon sour cream
  • Melted butter , approx. 2 Tablespoons (for brushing onto pastries before baking)
  • Raspberry jam (1 small dollop per danish)
For icing:
  • 1 cup confectioner's sugar (powdered sugar)
  • 1 Tablespoon milk (may substitute water)
  • 1/4 teaspoon vanilla extract
Instructions
  1. Before beginning, preheat oven to 350 degrees. Line baking sheets with parchment paper.
  2. Remove crescent roll dough from cans. Keep crescent roll in rectangle shape (two triangles together). Press the perforations closed between dough triangles to make solid rectangle. You should end up with 8 rectangles. Using one Tablespoon (total amount) granulated sugar, sprinkle each rectangle lightly with sugar. Lightly roll out each rectangle to 8 inches long. Cut each rectangle in half lengthwise. (You should now have 16 pieces of dough 1 inch x 8 inches long).
  3. Pick up each piece of dough and holding on to both ends, twist the ends in opposite directions to make a loose "twisted rope" shape. Shape into a small circle and pinch ends of each circle together to seal. Place dough circles two inches apart on parchment paper lined baking sheet(s).
  4. In a separate bowl, prepare filling. Combine (room temp.) cream cheese, remaining Tablespoon granulated sugar, lemon juice, sour cream and vanilla extract. Mix until well combined.
  5. Place approximately 1 Tablespoon filling into the middle of each pastry circle (don't worry-the parchment paper underneath will keep the filling "in" the pastry!). Brush pastry dough with melted butter. Bake in 350 degree oven for 13-15 minutes (mine took 15), or until they are light golden brown. Remove pans from oven and let pastries cool on the parchment paper.
  6. Prepare icing by mixing together powdered sugar, milk and vanilla extract. You want it thin enough to drizzle over cooled pastries. Too thick? Add drops of milk. Too thin? Add more powdered sugar.
  7. Once pastries have completely cooled, place a small dollop of raspberry jam in the middle of the cream cheese filling; decoratively drizzle icing over the top of each pastry. Let icing firm up, then they are ready to serve! (icing can be put into squeeze bottle, drizzled with a spoon, or can be placed into a zip-top bag and the bottom corner can be snipped off to use as a piping bag.
  8. Enjoy!
Recipe Notes

There are lots of flavor variations for these pastries. Instead of raspberry, why not try other jam or pie filling, like cherry, blackberry, blueberry, strawberry, or lemon? All would be fantastic!

Nutrition Facts
Raspberry Cream Cheese Danish
Amount Per Serving (1 danish)
Calories 216 Calories from Fat 108
% Daily Value*
Fat 12g18%
Saturated Fat 6g38%
Cholesterol 19mg6%
Sodium 283mg12%
Potassium 24mg1%
Carbohydrates 25g8%
Sugar 15g17%
Protein 1g2%
Vitamin A 235IU5%
Vitamin C 0.7mg1%
Calcium 16mg2%
Iron 0.5mg3%
* Percent Daily Values are based on a 2000 calorie diet.

Here’s one more to pin on your Pinterest boards!Raspberry cream cheese danish are crescent roll pastries with sweet cream cheese filling, baked and topped with jam, and drizzled with a simple glaze.


Save

Save

Green Chile Chicken Crockpot Enchilada Soup

Creamy Green Chile Chicken Crockpot Enchilada Soup is an amazingly delicious Southwest inspired meal, conveniently made in a slow cooker!Creamy Green Chile Chicken Crockpot Enchilada Soup is an amazingly delicious Southwest inspired meal, conveniently made in a slow cooker!
I recently tried a new soup recipe… Green Chile Chicken Crockpot Enchilada Soup… and it was FANTASTIC!  The best part was that the soup cooks in a crockpot, for super easy preparation! Throw ingredients into crockpot in the morning… enjoy this yummy soup at night!

The flavors in this chicken crockpot enchilada soup are amazing. If you enjoy Southwestern flavors, and want to make a big batch of delicious soup, then you might need to check this one out. I found the recipe on Pinterest recently and decided to try it out.

This soup DID NOT disappoint! It was as easy as adding ingredients to crockpot, shredding chicken and adding it back in to crockpot… and then serving it up with some flavorful garnishes to finish it off! Super duper EASY!

How To Make Green Chile Chicken Crockpot Enchilada Soup

Place the chicken, green enchilada sauce, white and black beans, green chiles, canned tomatoes, chicken broth, cilantro and spices into a crockpot.

Cook the chicken crockpot enchilada soup on LOW for 5-7 hours, OR on HIGH for 3-5 hours.

The chicken crockpot enchilada soup is cooked for several hours to tenderize the chicken.
After the time you cooked it for is up, remove the chicken from the crockpot (and in my case, with a few straggler beans!). Place the chicken in a large bowl.

Shred the chicken with two forks. This part will be very easy, because the meat is so tender!

The chicken is removed from the crockpot after cooking, and is then shredded.

Shredding the cooked chicken to add back into the chicken crockpot enchilada soup.
Cut an 8 ounce block of cream cheese into chunks and add to the soup. Turn the heat to HIGH and cook the soup for another 30 minutes.

The cream cheese should be melted or easily stirred into the chicken crockpot enchilada soup at the end of the 30 minutes.

Eight ounces of cream cheese is cut into chunks to add to the enchilada soup.

Cream cheese chunks are added to the hot chicken crockpot enchilada soup, to melt.

The shredded chicken is then added back into the soup, and is heated another 10 minutes or so.  Once the soup is completely heated through, it’s ready to be ladled into serving bowls, garnished and served.

To Serve Chicken Crockpot Enchilada Soup

For BEST flavor, garnish each bowl with some chopped cilantro, a dollop of sour cream and a couple of lime wedges. The lime wedges will add even more flavor when squeezed over the chicken crockpot enchilada soup, before eating!

Green Chile Chicken Crockpot Enchilada Soup is garnished with sour cream, lime wedges and cilantro to serve.

There you have it! This soup recipe is perfect to make on a busy day! Make the soup (i.e. dump ingredients into crockpot) in the morning, and let it cook all day. Before serving, all you do is shred the chicken, add cream cheese & heat! It really is a super easy recipe… and it tastes FANTASTIC! Even the leftovers were perfect the next day!

Sure hope you will consider making this delicious, tasty green chile chicken crockpot enchilada soup! We absolutely LOVED it!  Have a great day.

Looking For More SOUP Recipes?

You can find all of my soup recipes in the Recipe Index, located at the top of the page. A few of these recipes include:

Interested In More Recipes?

Thank you for visiting this website. I appreciate you using some of your valuable time to do soIf you’re interested, I publish a newsletter 2 times per month (1st and 15th) with all the latest recipes, and other fun info. I would be honored to have you join our growing list of subscribers, so you never miss a great recipe!
There is a Newsletter subscription box on the top right side (or bottom) of each blog post, depending on the device you use, where you can easily submit your e-mail address (only) to be included in my mailing list.

You Can Also Find Me On Social Media:
Facebook page: The Grateful Girl Cooks!
Pinterest: The Grateful Girl Cooks!
Instagram: jbatthegratefulgirlcooks

Author's signature

Recipe Source: http://www.chelseasmessyapron.com/crockpot-green-chicken-chile-enchilada-soup-video/

0 from 0 votes
Green Chile Chicken Crockpot Enchilada Soup
Prep Time
10 mins
Cook Time
5 hrs
Total Time
5 hrs 10 mins
 
Creamy Green Chile Chicken Crockpot Enchilada Soup is an amazingly delicious Southwest inspired meal, conveniently made in a slow cooker!
Category: Soup
Cuisine: Southwestern
Keyword: chicken crockpot enchilada soup, chicken enchilada soup
Servings: 8 servings
Calories Per Serving: 358 kcal
Author: JB @ The Grateful Girl Cooks!
Ingredients
  • 10 ounces green enchilada sauce green enchilada sauce
  • 15.8 ounces canned cannelini beans (1 can), drained and rinsed
  • 30 ounces canned black beans , (2 cans),drained and rinsed
  • 1 pound boneless chicken breasts or thighs (I used a combo 2 breasts/3 small thighs)
  • 8 ounces diced fire-roasted green chiles + liquid (2 cans) (including liquid)
  • 10.5 ounces diced tomatoes + liquid (1 can) (including liquid)
  • 4 teaspoons ground chili powder
  • 1 Tablespoon ground cumin
  • 3/4 teaspoon paprika
  • Salt and Pepper (to taste)
  • 3 Tablespoons fresh chopped cilantro
  • 2 cups chicken broth (or stock)
  • 8 ounces cream cheese, softened
For garnish:
  • Sour cream, lime wedges, cilantro , optional
Instructions
  1. Into a large crock pot add green enchilada sauce, white and black beans, raw chicken, green chiles, diced tomatoes, chili powder, cumin, paprika, salt, pepper, 3 Tablespoons chopped cilantro, and chicken broth. Stir to combine.
  2. Put lid on crockpot. Cook on LOW for 5-7 hours OR cook on HIGH for 3-5 hours.
  3. When cooking time is finished, remove chicken pieces to a large bowl. Shred chicken using two forks. Set aside.
  4. Cut cream cheese into small chunks and add chunks into crockpot. Stir well. Put cover on crockpot. Cook on HIGH for 30 minutes. When time is up, stir or whisk the cream cheese. It should melt or easily blend into the soup at this point.
  5. Stir in the shredded chicken, and heat soup for another 10-15 minutes.
  6. Ladle hot soup into serving bowls. Garnish each bowl with additional chopped cilantro, a dollop of sour cream, and a couple lime wedges. Lime wedges should be squeezed over soup before eating!
Recipe Notes

NOTE: Caloric calculation is based on using chicken breasts, and does not include optional garnishes (sour cream, cilantro, etc.

Nutrition Facts
Green Chile Chicken Crockpot Enchilada Soup
Amount Per Serving (1 serving)
Calories 358 Calories from Fat 108
% Daily Value*
Fat 12g18%
Saturated Fat 6g38%
Cholesterol 67mg22%
Sodium 1274mg55%
Potassium 1012mg29%
Carbohydrates 38g13%
Fiber 12g50%
Sugar 4g4%
Protein 26g52%
Vitamin A 1122IU22%
Vitamin C 22mg27%
Calcium 144mg14%
Iron 6mg33%
* Percent Daily Values are based on a 2000 calorie diet.

Here’s one more to pin on your Pinterest boards!Creamy Green Chile Chicken Crockpot Enchilada Soup is an amazingly delicious Southwest inspired meal, conveniently made in a slow cooker!

Save

Save

Save

Save