Category: Breakfast

Cranberry Orange Muffins

Cranberry Orange Muffins are easy to make, loaded with orange zest and juice, and drizzled with a sweet citrus glaze! They’re a delicious breakfast treat, especially during the holidays!Cranberry Orange Muffins are easy to make, loaded with orange zest and juice, and drizzled with a sweet citrus glaze! They're a delicious breakfast treat!
Do you enjoy the flavor combination of cranberries and oranges? I sure do! I’ve been making cranberry orange muffins for almost 40 years now with the same recipe.

Recently I found a new recipe, tried it… and loved these delicious muffins even more than my trusty old recipe!

The cranberry orange muffins are really easy to make, and I think you will love them, too!

They are loaded with cranberries and the flavor of orange in the cupcakes AND the glaze make them “practically perfect in every way” (to quote good old Mary Poppins)! Here’s how to make them.

Scroll Down For A Printable Recipe Card At The Bottom Of The Page

How To Make Cranberry Orange Muffins

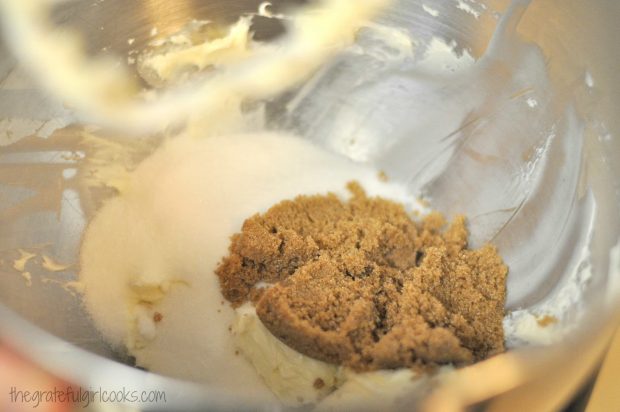
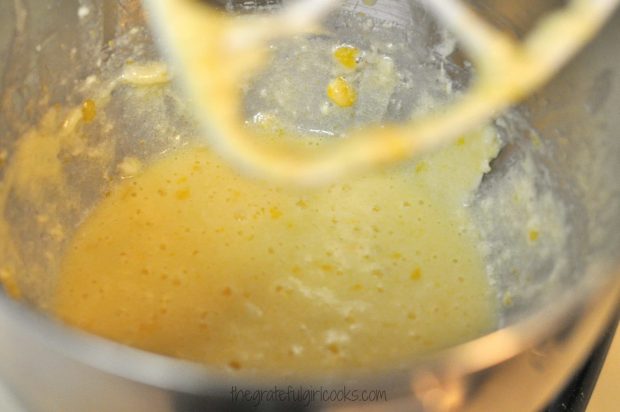
The first thing you will need to do is beat the butter until creamy. Add the granulated and brown sugars, and beat them using an electric mixer until they are well combined.

Beginning to mix batter for cranberry orange muffins.

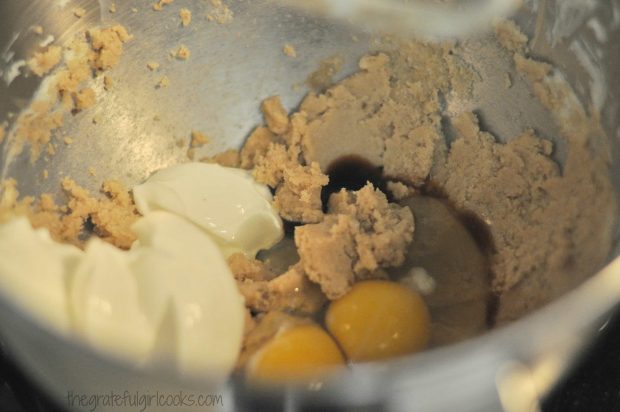
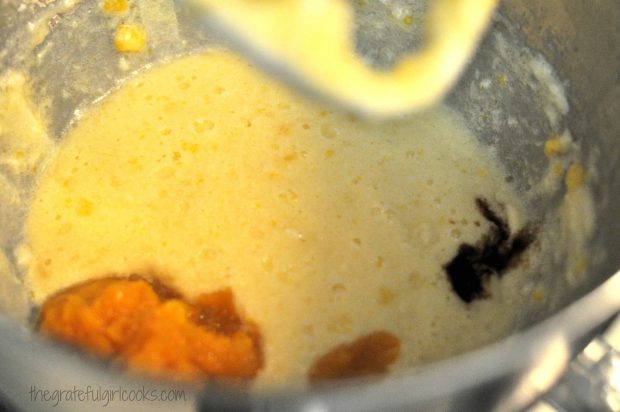
Add eggs, plain yogurt, and vanilla to the mixture. Beat these until the batter is creamy and well combined.

Eggs, yogurt and vanilla added to cranberry orange muffins batter

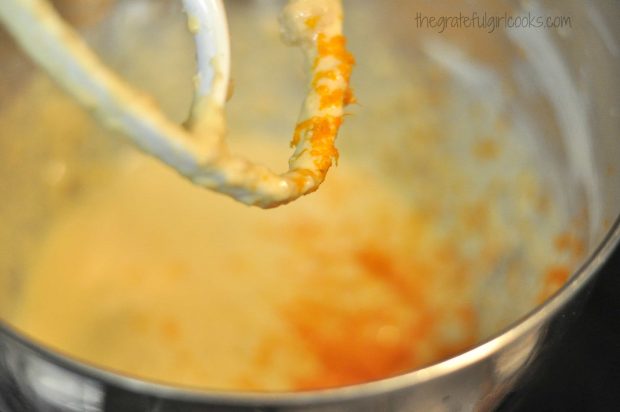
Add in the finely grated zest from 2 oranges. Wow, the orange zest sure smells good!.

Zest from an orange is added to cranberry muffin batter.

Mix The Dry Ingredients

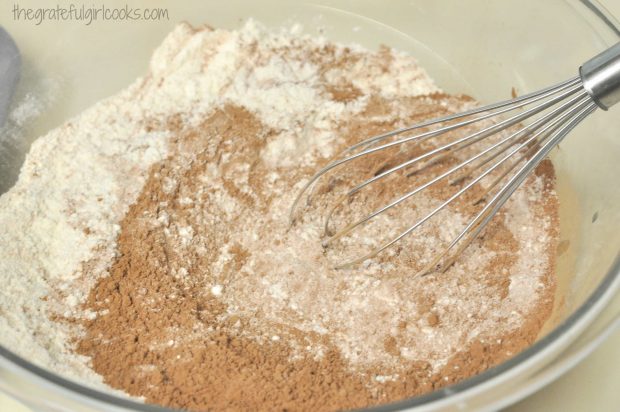
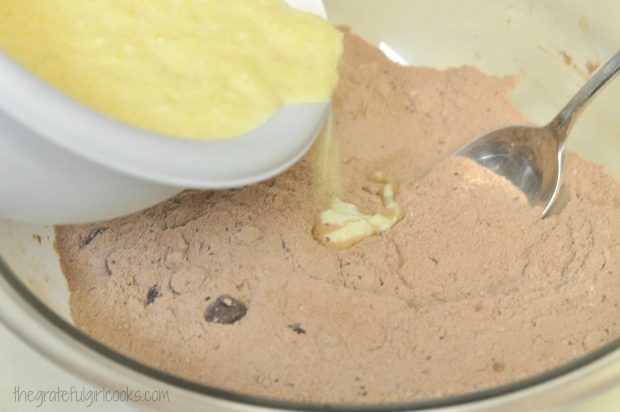
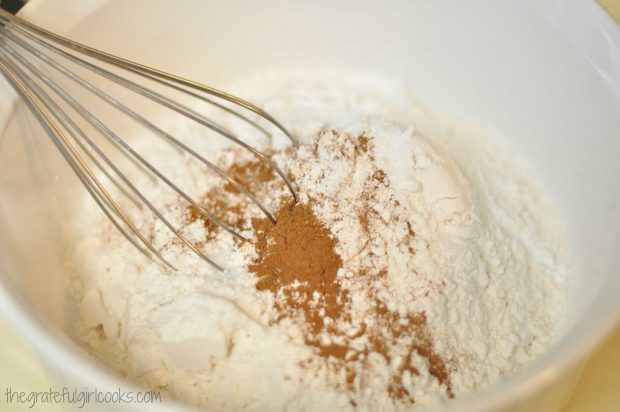
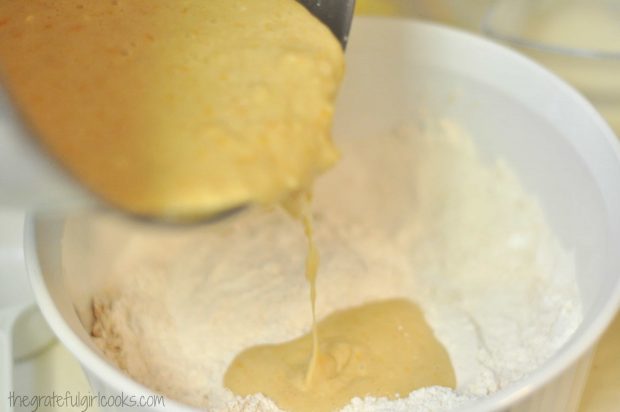
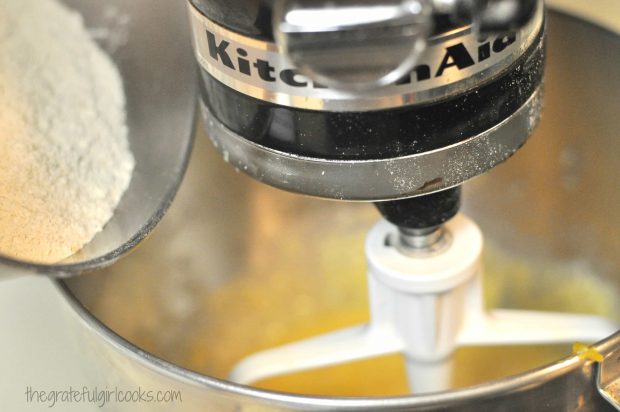
In a large separate bowl, whisk together the dry ingredients, and then pour the wet ingredients into the dry ingredients.

Dry ingredients are whisked together for cranberry orange muffins.

Wet muffin batter is added to dry ingredients for cranberry orange muffins.

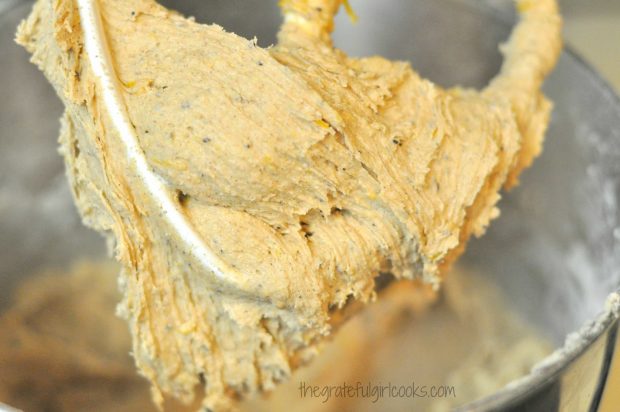
Stir the milk and orange juice into the batter. Mix them well. The batter will be fairly thick after they have been added.

Milk and orange juice is added to muffin batter.

Add fresh or frozen cranberries to the batter. Be sure to set enough aside (24) to put on TOP of the muffin batter for garnish later.

Fold the cranberries in gently, to combine them with the thick batter.

Fresh cranberries are added to orange flavored muffin batter.

Fill the Muffin Cups

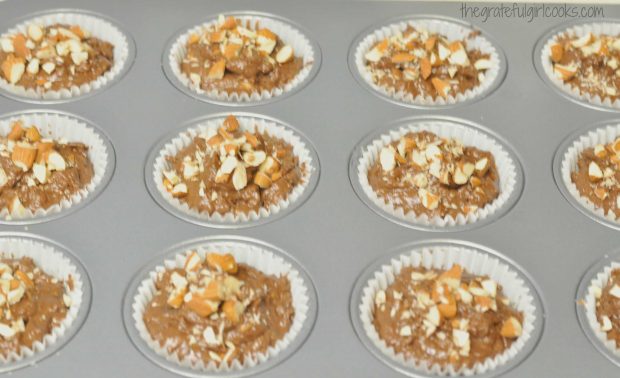
Spoon batter into a sprayed and paper lined muffin pan, filling them almost up to the top.

Please ignore my really old and dingy muffin pan. It works great, but looks horrible (Dear Santa… what would I like for Christmas?).

TIP:**Spray the paper muffin cup holders with non-stick spray (an old secret I learned from a friend whose hubby was a professional baker).

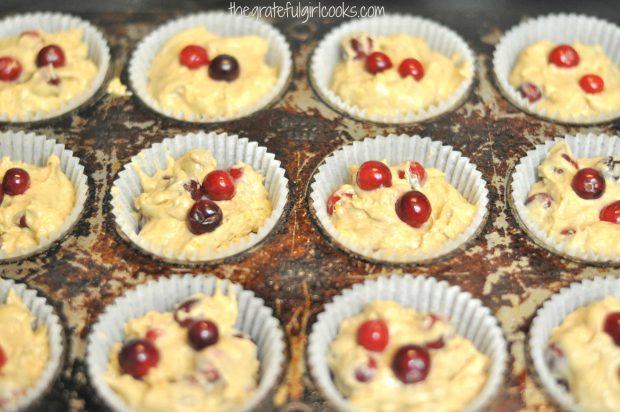
Put a couple cranberries on top of each of the cranberry orange muffins for garnish before baking.

Cranberry orange muffins batter is placed into paper liners in pan before baking.

Bake The Cranberry Orange Muffins

Bake the cranberry orange muffins in a preheated 425 degree oven for 5 minutes.

Reduce the heat to 350 degrees and continue baking for 18-20 minutes (or until done/light golden color).

Remove from oven, once done. Let the cranberry orange muffins cool for a minute or two, then remove them from the pan onto a wire rack to cool.

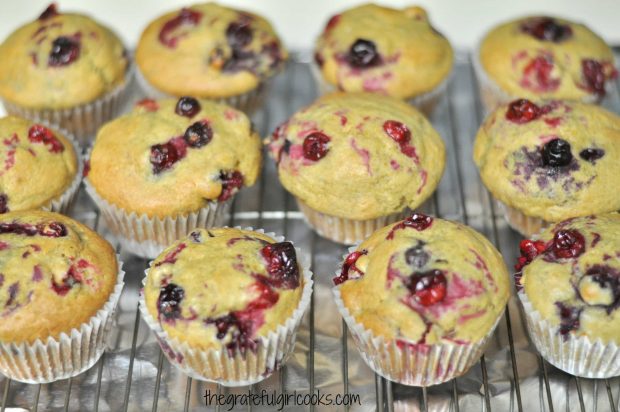
Cranberry orange muffins, cooling on wire rack after baking.

Prepare The Icing For The Muffins

While the cranberry orange muffins are cooling off a bit, make the orange glaze by mixing orange juice and powdered sugar together in a bowl.

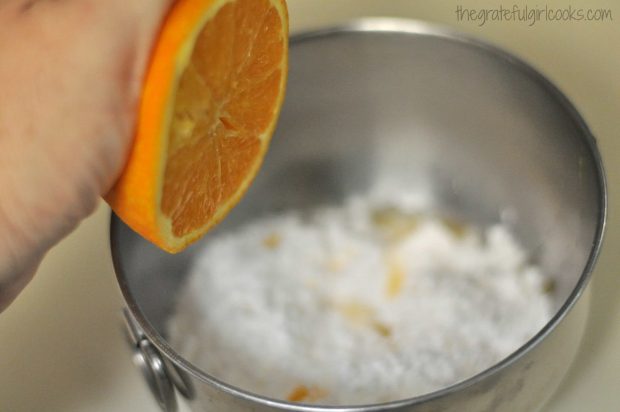
Squeezing orange juice into glaze mixture for icing cranberry orange muffins.

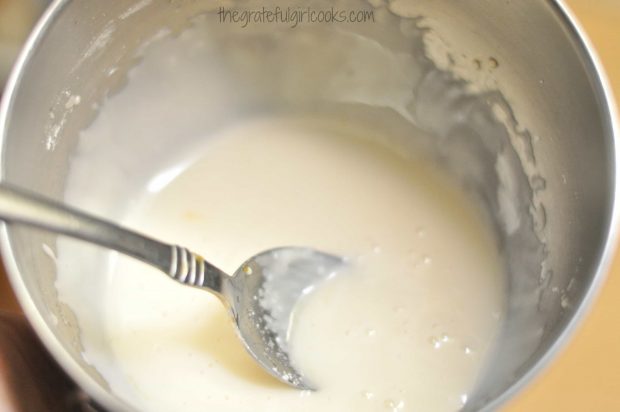
Orange glaze is ready to drizzle on top of cranberry orange muffins.

Glaze The Cooled Muffins 

TIP: Put a sheet of aluminum foil under the rack, to help catch any drips while glazing the muffins.

Once muffins have cooled off, it’s time to glaze them. Drizzle the glaze over the top of each muffin, going side to side.

Turn the rack one quarter turn and drizzle the muffins again, going the opposite direction (side to side, then top to bottom).

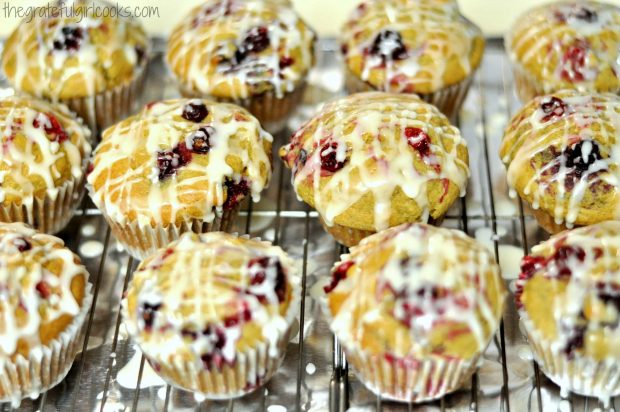
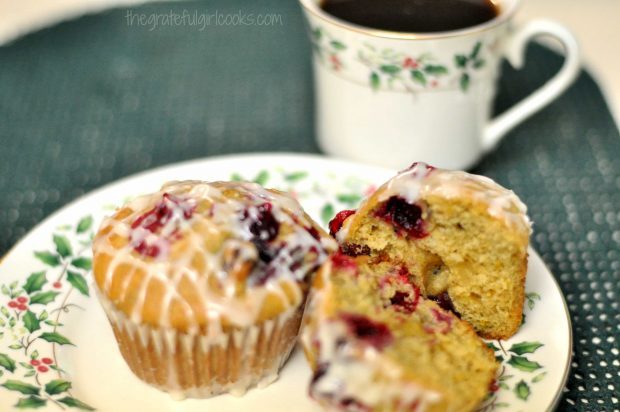
Cranberry orange muffins, drizzled with orange flavored glaze, before serving.

Time To Enjoy A Cranberry Orange Muffin!

Let the glaze firm up, and then these absolutely yummy cranberry orange muffins are ready to enjoy!

Hope you will give these delicious muffins a try. They are really packed with lots of wonderful citrus flavor!

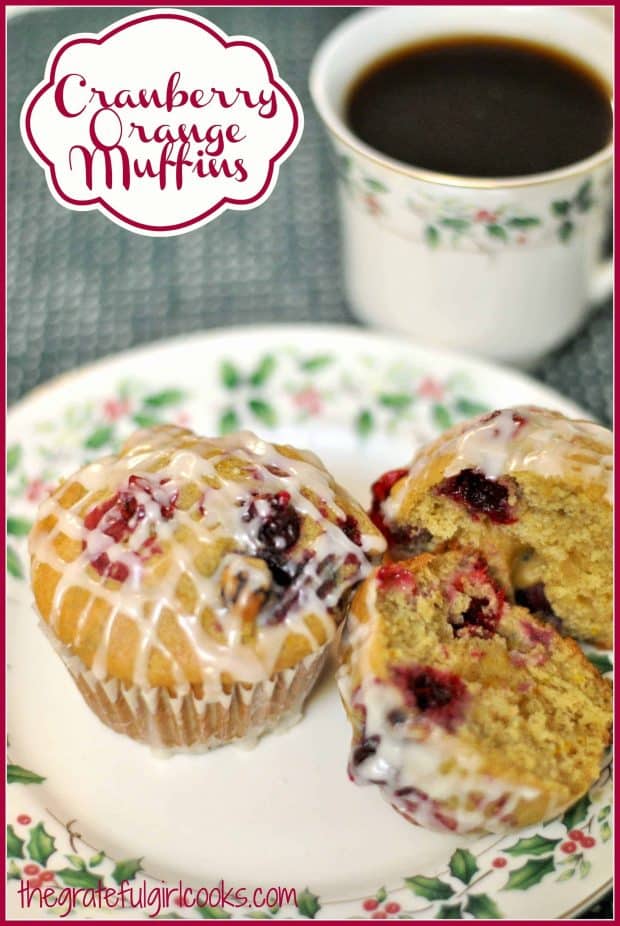
Two cranberry orange muffins on a plate, with a cup of coffee on the side.

I hope you have the opportunity to try these cranberry orange muffins. They’re fabulous, and I’m confident you (and those you love) will enjoy them.  

Thanks for stopping by, and I hope you will come back soon for more great family-friendly recipes. Have a great day, and may God bless you in all you do!

Looking For More MUFFIN Recipes?

You can find ALL my recipes in the Recipe Index, which is located at the top of the page. I have lots of delicious muffin recipes to check out, including:

Want More Recipes? Get My FREE Newsletter!

I publish a newsletter 2 times per month (1st and 15th) with lots of recipes, tips, etc..
Would you like to join our growing list of subscribers?

There is a Newsletter subscription box on the top right (or bottom) of each blog post, depending on the device you use.
You can submit your e-mail address there, to be added to my mailing list.

Find Me On Social Media:

Facebook page: The Grateful Girl Cooks!
Pinterest:
The Grateful Girl Cooks!
Instagram:
jbatthegratefulgirlcooks

Author's signatureRecipe Source: http://sallysbakingaddiction.com/2014/11/06/cranberry-orange-muffins/

↓↓ PRINTABLE RECIPE BELOW ↓↓

0 from 0 votes
Cranberry Orange Muffins
Prep Time
15 mins
Cook Time
25 mins
Total Time
40 mins
 
Cranberry Orange Muffins are easy to make, loaded with orange zest and juice, and drizzled with a sweet citrus glaze! They're a delicious breakfast treat!
Category: Breakfast
Cuisine: American
Keyword: cranberry orange muffins
Servings: 12 muffins
Calories Per Serving: 255 kcal
Author: JB @ The Grateful Girl Cooks!
Ingredients
For the muffins:
  • 1/2 cup unsalted butter (room temperature/soft)
  • 1/2 cup granulated sugar
  • 1/4 cup light or brown sugar , packed
  • 2 large eggs (room temp. is best)
  • 1/2 cup plain yogurt (I used Greek)
  • 2 teaspoons vanilla extract
  • zest from 2 oranges
  • 1 3/4 cups all purpose flour
  • 1 teaspoon baking soda
  • 1 teaspoon baking powder
  • 1/2 teaspoon ground cinnamon
  • 1/2 teaspoon salt
  • 2 Tablespoons orange juice
  • 2 Tablespoons milk
  • 1 1/2 cups fresh or frozen cranberries (if frozen, do not thaw!)
For citrus drizzle:
  • 1 cup powdered sugar
  • 3 Tablespoons orange juice
Instructions
  1. Line a 12 count muffin pan with paper liners. Spray each liner with non-stick spray. If not using liners, spray pan with non-stick spray. Set muffin pan aside.
  2. Preheat your oven to 425 degrees F.
  3. In the bowl of a stand mixer (or in a medium sized bowl using a handheld mixer), beat soft butter until smooth (on high speed), for about one minute. Add the granulated and brown sugars and continue beating for approximately 1-2 minutes, until fully combined. Add eggs, yogurt, and the vanilla extract; beat until combined. Scrape down the sides of the bowl, if needed. Add the orange zest and combine. Remove bowl and set aside.
  4. In a large mixing bowl, whisk together all purpose flour, baking powder, baking soda, cinnamon and salt. Pour the wet ingredients into the bowl of dry ingredients and mix well. Add the orange juice and the milk; stir until fairly smooth (you might have some little lumps (that's okay).
  5. Fold in the fresh or frozen cranberries (saving 24 to garnish muffins with), only until mixed in. Do not overmix.
  6. Distribute the batter into the muffin cups (they will almost be filled to the top). Add a couple of cranberries to the top of each muffin.
  7. Bake muffins at 425 degrees for 5 minutes, then reduce heat in oven to 350 degrees, and bake for an additional 18-20 minutes, until done and golden in color. Remove pan from oven. After muffins have cooled a couple minutes, remove them to a wire rack (with aluminum foil or wax paper underneath to completely cool.
  8. While muffins are cooking or cooling, make the citrus drizzle by mixing orange juice and powdered sugar together in a small bowl. Decoratively drizzle the glaze over warm muffins. Let muffin drizzle cool and firm up before serving! Enjoy!
Recipe Notes

If you wrap the muffins really well with plastic wrap and aluminum foil, you should be able to freeze them for up to 2 months.

Nutrition Facts
Cranberry Orange Muffins
Amount Per Serving (1 muffin)
Calories 255 Calories from Fat 72
% Daily Value*
Fat 8g12%
Saturated Fat 5g31%
Cholesterol 48mg16%
Sodium 207mg9%
Potassium 101mg3%
Carbohydrates 40g13%
Fiber 1g4%
Sugar 24g27%
Protein 4g8%
Vitamin A 310IU6%
Vitamin C 7.9mg10%
Calcium 45mg5%
Iron 1.1mg6%
* Percent Daily Values are based on a 2000 calorie diet.

Here’s one more to pin on your Pinterest boards!
Cranberry Orange Muffins are easy to make, loaded with orange zest and juice, and drizzled with a sweet citrus glaze! They're a delicious breakfast treat!


Save

Save

Save

Pumpkin Chocolate Chip Pancakes

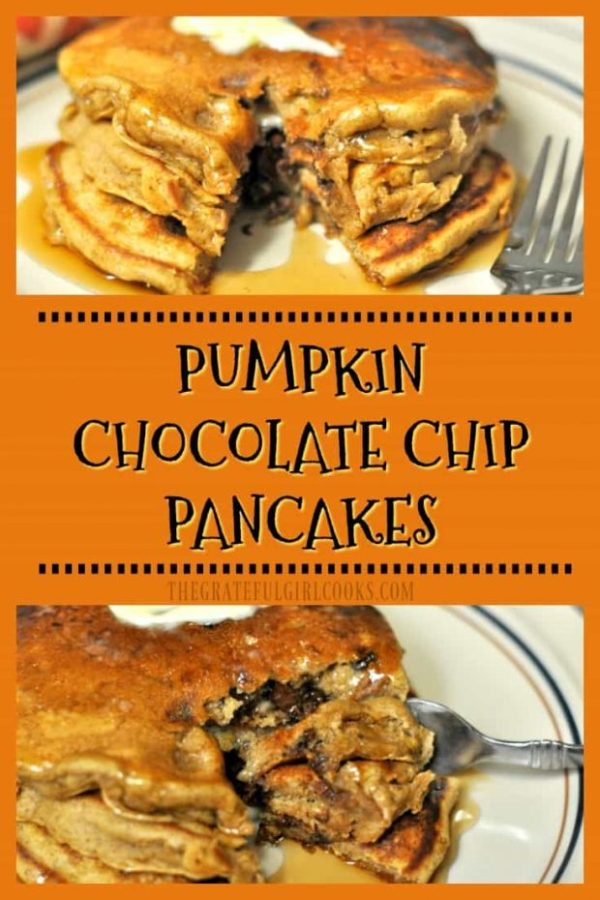
Need a taste of Fall for breakfast? Try these delicious, fluffy, pumpkin chocolate chip pancakes, with chocolate chips, pumpkin puree, cinnamon and allspice!Need a taste of Fall for breakfast? Try these delicious, fluffy, pumpkin chocolate chip pancakes, with chocolate chips, pumpkin puree, cinnamon and allspice!
As a kid, one of my favorite occasional “treats” was when my Mom would make our family chocolate chip pancakes. We ALL loved them!  I’ve made them for my family for many years, but when I stumbled upon this recipe for PUMPKIN Chocolate Chip Pancakes, I knew I had to make these…stat!

Scroll Down For A Printable Recipe Card At The Bottom Of The Page

This past week I made Pumpkin Spice Latte Biscotti, and had some leftover pumpkin puree in the fridge… (conveniently the exact amount I needed for this recipe). So, into the kitchen I went to make this breakfast! The recipe was very simple to prepare (only took 5 minutes to prep), and the “from scratch” pancakes are delicious!

The taste of pumpkin, cinnamon, allspice, and chocolate chips are amazing in these pancakes! Yes, they are a bit sweet, but I figured since we only have pancakes occasionally, it wouldn’t be TOO bad. Here’s how you whip up a batch of these delicious pumpkin chocolate chip pancakes:

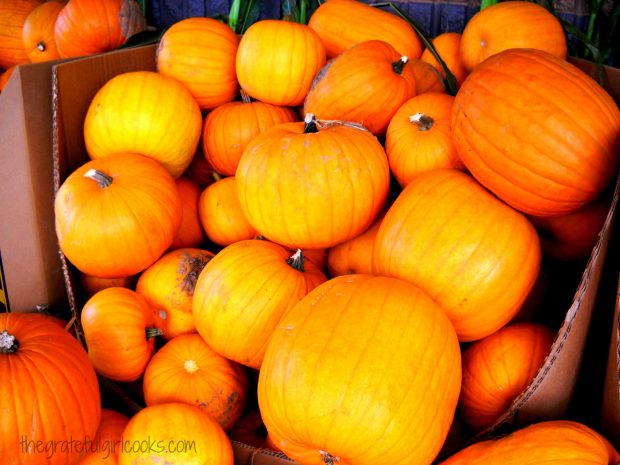
Pumpkins are a sign of Fall and that means it is time for pumpkin pancakes!

How To Make Pumpkin Chocolate Chip Pancakes

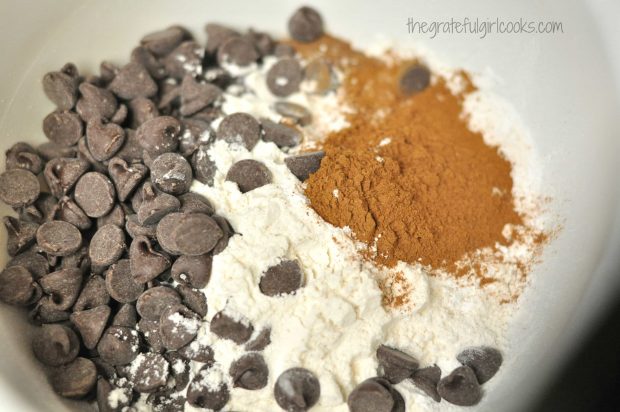
In a large bowl, stir together flour, baking powder, baking soda, cinnamon, allspice and semi-sweet chocolate chips. (Bet you didn’t even break into a sweat…)

Adding ingredients to make pumpkin pancake batter.

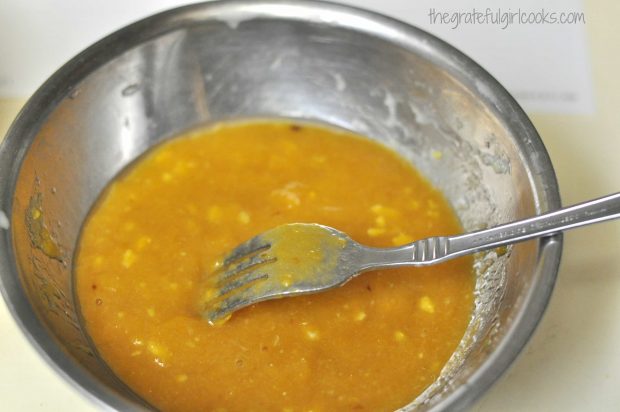
In a separate bowl, stir the brown sugar, egg, vanilla, pumpkin puree, and oil together until fully combined.

Pumpkin puree, eggs, etc. are mixed to add to pancake batter.

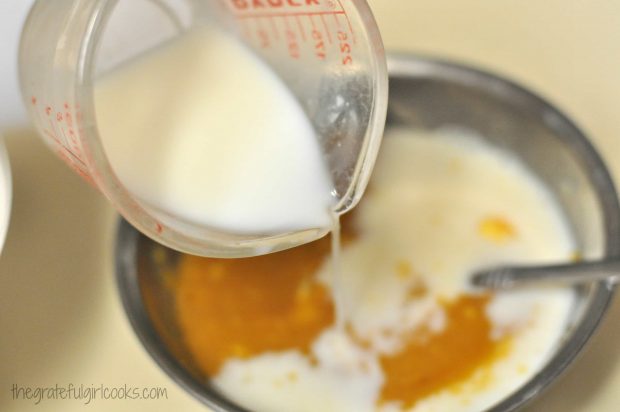
Stir in the buttermilk and blend well.

Buttermilk is added to pumpkin chocolate chip pancakes batter

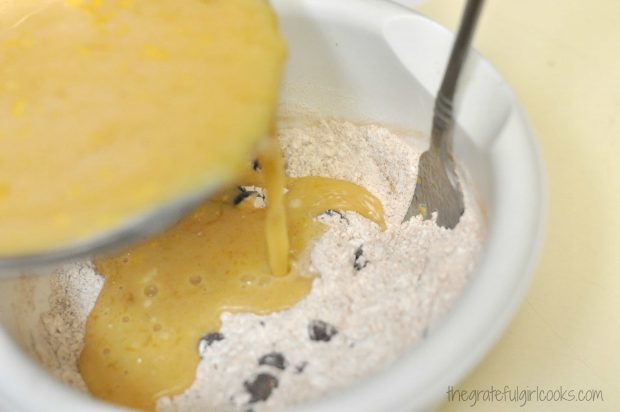
Add the wet ingredients to the dry ingredients and stir well, until mixture is fully blended. Do not overstir.

Wet ingredients added to dry ingredients to make pancake batter.

Time To Cook The Pancakes!

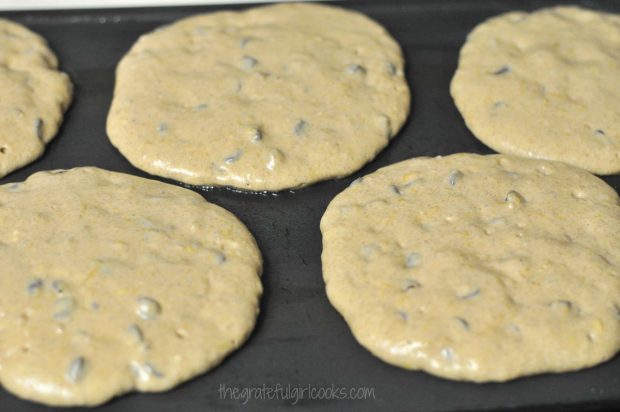
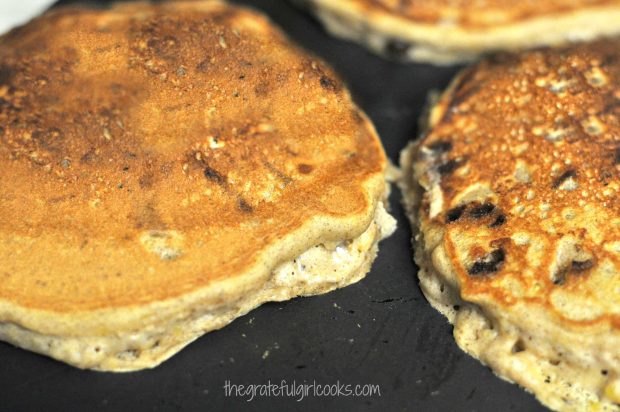
Pour pancake batter onto a pre-heated griddle (350 degrees) or large skillet (heated on medium-high) that has been sprayed with a non-stick spray or a little oil. Cook pancakes about 3 minutes or until little air bubbles form on top of the batter.

Pumpkin chocolate chip pancakes cooking on a griddle.

Carefully flip the pancakes over and continue cooking other side for 2-3 minutes.

Pumpkin chocolate chip pancakes are flipped when they get brown.

Time To EAT!

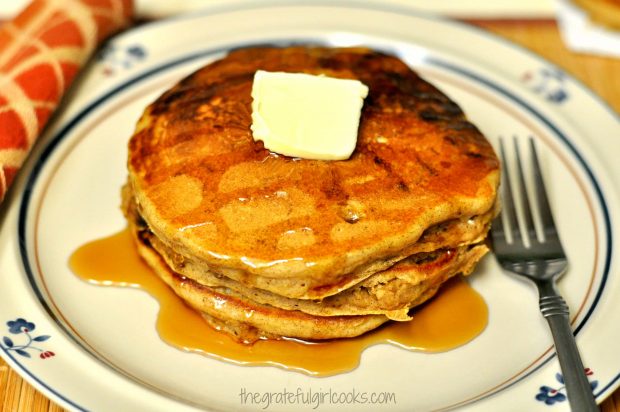
When done, serve immediately with some butter and maple syrup, and ENJOY!

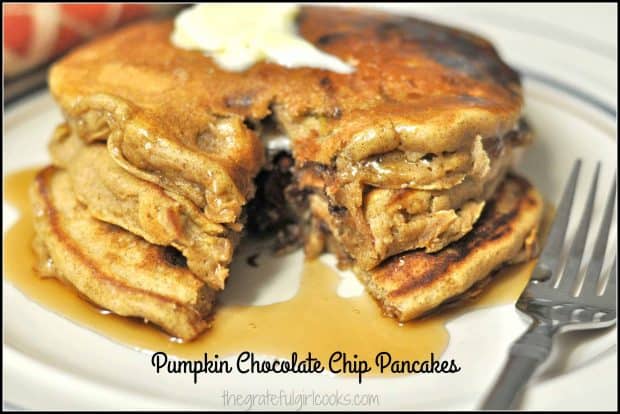
Pumpkin chocolate chip pancakes served with butter and maple syrup.

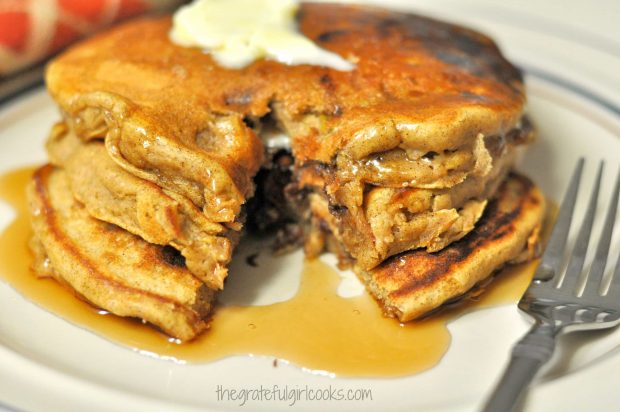
Pumpkin chocolate chip pancakes on plate with fork.

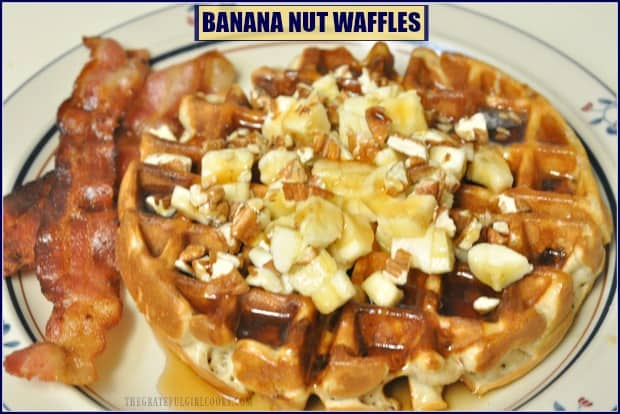
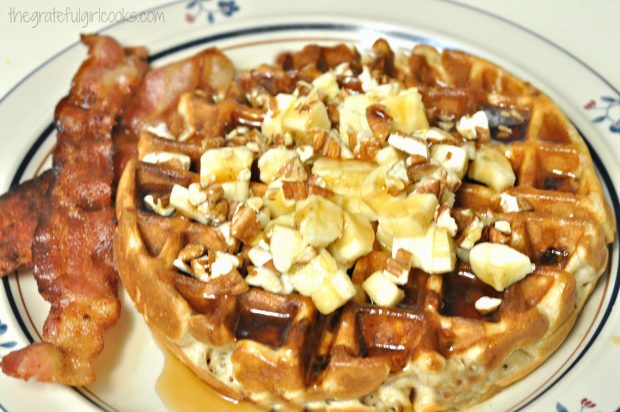
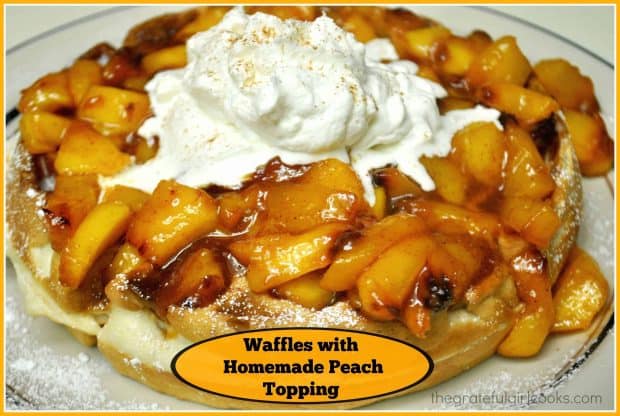
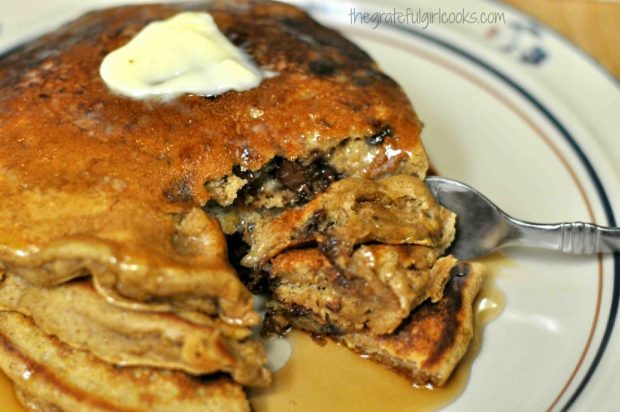
I saved you a bite, but only ONE. You’re welcome!  Here you go, and isn’t that delicious? Hey, if you enjoy pancakes for breakfast, chances are you will also enjoy Homemade Blueberry Pancakes,  Banana Nut Waffles, or Waffles with Homemade Peach Topping!

Cutting into the pumpkin chocolate chip pancakes with a fork.

Hope you will these scrumptious pumpkin chocolate chip pancakes a try. I think you will really enjoy them. (I made half a recipe and it made 5 good sized pancakes). The full recipe (shown below in printable form) yields approximately 10-12 pancakes.

Have a great day, friends. Make every moment count for good! Be sure to check out ALL my recipes in the Recipe Index, located at the top of the page. There’s a LOT of them!

Interested In More Recipes?

Thank you for visiting this website. I appreciate you using some of your valuable time to do soIf you’re interested, I publish a newsletter 2 times per month (1st and 15th) with all the latest recipes, and other fun info. I would be honored to have you join our growing list of subscribers, so you never miss a great recipe!
There is a Newsletter subscription box on the top right side (or bottom) of each blog post, depending on the device you use, where you can easily submit your e-mail address (only) to be included in my mailing list.

You Can Also Find Me On Social Media:

Facebook page: The Grateful Girl Cooks!
Pinterest:
The Grateful Girl Cooks!
Instagram:
jbatthegratefulgirlcooks

Author's signature

Recipe Source: Erin, at http://dinnersdishesanddesserts.com/pumpkin-chocolate-chip-pancakes/

0 from 0 votes
Pumpkin Chocolate Chip Pancakes
Prep Time
5 mins
Cook Time
10 mins
Total Time
15 mins
 
Need a taste of Fall for breakfast? Try these delicious, fluffy, pumpkin chocolate chip pancakes, with chocolate chips, pumpkin puree, cinnamon and allspice!
Category: Breakfast
Cuisine: American
Keyword: pumpkin chocolate chip pancakes
Servings: 12 pancakes
Calories Per Serving: 243 kcal
Author: JB @ The Grateful Girl Cooks!
Ingredients
  • 2 cups all purpose flour
  • 2 teaspoons baking powder
  • 1 teaspoon baking soda
  • 2 teaspoon cinnamon
  • 1/2 teaspoon allspice
  • 1 cup semi-sweet chocolate chips
  • 1/4 cup brown sugar
  • 1 egg
  • 1 teaspoon vanilla extract
  • 1 cup pumpkin puree (not pumpkin pie mix)
  • 3 Tablespoons vegetable or canola oil
  • 1 1/2 cups buttermilk (*see notes)
  • non-stick spray or a bit of oil (used to grease griddle or skillet)
Instructions
  1. In a large bowl, whisk together the all purpose flour, baking powder, baking soda, cinnamon, allspice and the chocolate chips. Set aside.
  2. In another bowl, blend together the brown sugar, egg, vanilla extract, pumpkin puree and oil. Mix well, then add in the buttermilk, stirring well.
  3. Add the wet ingredients to the dry ingredients. Stir until combined, but do not over stir.
  4. Spray a griddle or large skillet with non-stick spray or lightly grease with oil.
  5. Preheat grill to 350 degrees or heat skillet on medium-high. When hot, pour batter for pancakes onto griddle. Cook for about 3 minutes, or until tiny air bubbles begin to form on top of each pancake. Carefully flip the pancakes over, and continue cooking for another 2-3 minutes.
  6. Serve pancakes hot, and top with a dollop of butter and some maple syrup. Enjoy!
Recipe Notes

If you do not have buttermilk, you can easily make your own (I did this for the pancakes): Place 1 1/2 Tablespoons white vinegar in a large measuring cup. Add milk up to the 1 1/2 cup level. Stir. Let it sit for 5 minutes, then use it in the recipe as indicated. It is a perfect substitution!!!

Nutrition Facts
Pumpkin Chocolate Chip Pancakes
Amount Per Serving (1 pancake)
Calories 243 Calories from Fat 90
% Daily Value*
Fat 10g15%
Saturated Fat 6g38%
Cholesterol 17mg6%
Sodium 132mg6%
Potassium 268mg8%
Carbohydrates 32g11%
Fiber 2g8%
Sugar 12g13%
Protein 4g8%
Vitamin A 3255IU65%
Vitamin C 0.8mg1%
Calcium 90mg9%
Iron 2.4mg13%
* Percent Daily Values are based on a 2000 calorie diet.

Here’s one more to pin on your Pinterest boards!Need a taste of Fall for breakfast? Try these delicious, fluffy, pumpkin chocolate chip pancakes, with chocolate chips, pumpkin puree, cinnamon and allspice!


Save

Save

Pumpkin Spice Latte Biscotti

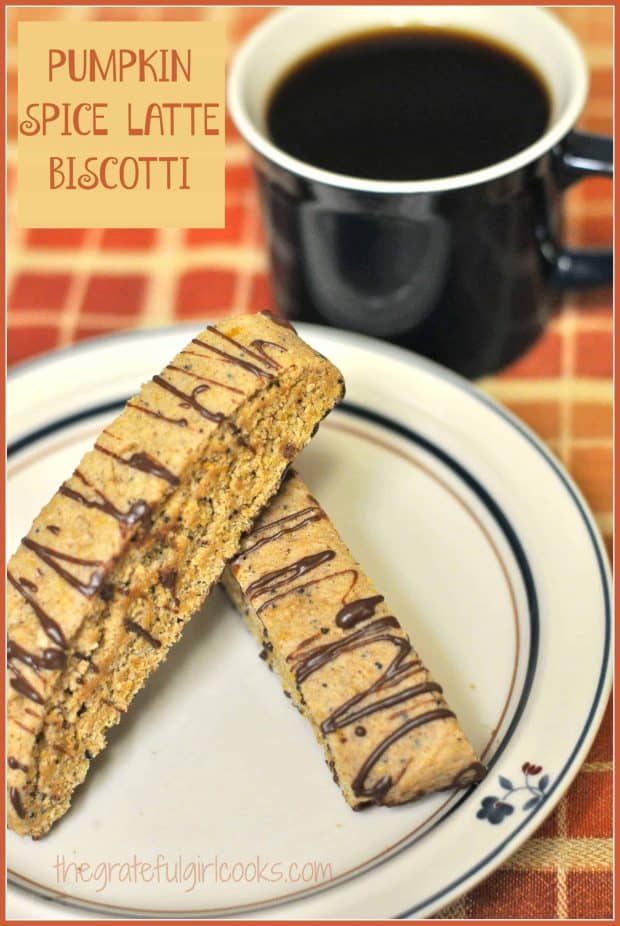
If you enjoy Fall & pumpkin spiced “everything”, you’ll love pumpkin spice latte biscotti, a yummy, crispy & dunkable cookie with lots of flavor!I have several friends who "do the happy dance" each Fall, when their local coffee stand begins offering their seasonal Pumpkin Spice Lattes. Cracks me up to see how fast the "news" spreads via Social Media. Well... if you like Pumpkin Spice Lattes, then I would be willing to bet you will love these Pumpkin Spice Latte Biscotti!

I have several friends who “do the happy dance” each Fall, when their local coffee stand begins offering their seasonal Pumpkin Spice Lattes. Cracks me up to see how fast the “news” spreads via Social Media. Well… if you like Pumpkin Spice Lattes, then I’m willing to bet you will love these Pumpkin Spice Latte Biscotti!

I saw this recipe pop up on Pinterest and thought I would give it a try. I’ve made biscotti before (here’s my recipe for Orange Almond Biscotti -yum!), so I knew I would enjoy the flavor combination of these biscotti.

How can you go wrong with a yummy coffee drink in COOKIE FORM? It’s practically impossible! Here’s how easy these pumpkin spice latte biscotti are to make:

Scroll Down For A Printable Recipe Card At The Bottom Of The Page

Prepare Batter For The Pumpkin Spice Latte Biscotti

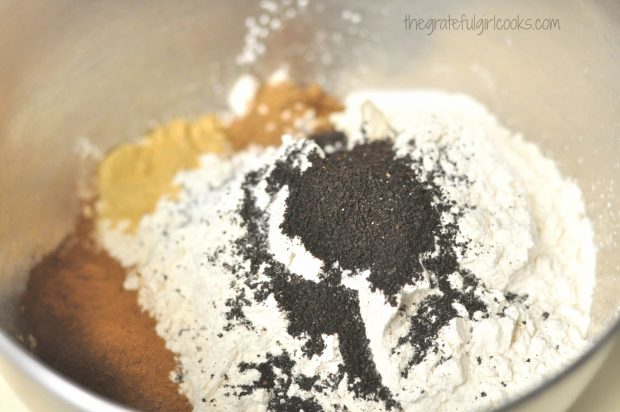
In a medium sized bowl, whisk together flour, baking powder, salt and spices, then set aside. See the ground coffee in the middle of the pile? Yes!

Dry ingredients for biscotti are mixed together in large bowl.

Using a hand mixer or a stand mixer, cream the butter and sugar together until creamy, and then add in eggs, and beat well.

A stand mixer is used to blend butter, sugar and eggs to make biscotti batter.

Add the pumpkin puree and vanilla extract to the batter, and beat these, until incorporated.

Pumpkin puree and vanilla extract are added to the biscotti batter, to combine.

Now add the dry ingredients to the wet ingredients, a little at a time, beating well until ingredients are fully combined.

Dry ingredients are now added to the wet ingredients to make the pumpkin spice latte biscotti batter.

Prepare The Pumpkin Spice Latte Biscotti Batter For Baking

The batter for the pumpkin spice latte biscotti will look like this when done… see the little coffee granules? Ooh…

Flecks of instant coffee are visible in the biscotti batter.

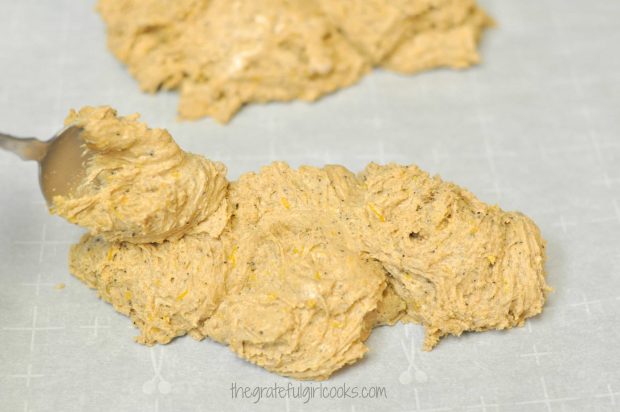
Spoon the soft dough onto a parchment paper lined baking sheet. Make two separate mounds (about 3 inches wide by 12 inches long) of dough several inches away from each other. Don’t forget to do this, because the dough will spread while baking.

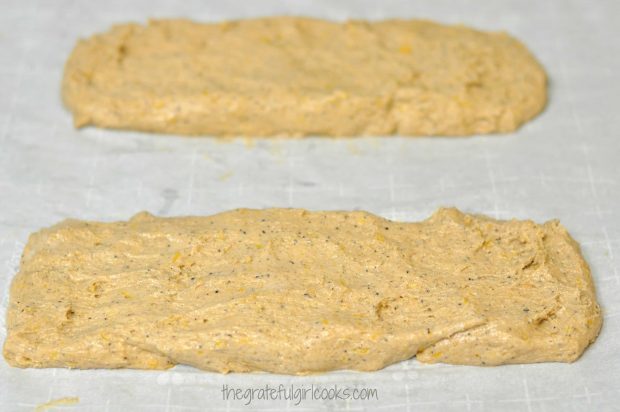
Two log shapes are formed by spreading out the pumpkin spice latte biscotti batter on parchment paper.

Shape The Biscotti Logs

Using moistened hands, shape the dough into 3 inch wide by 12 inch long logs, remembering to leave several inches space between logs, cause they will spread when baking.

Batter is shaped into 2 log shapes before baking for the first time.

Bake The Biscotti

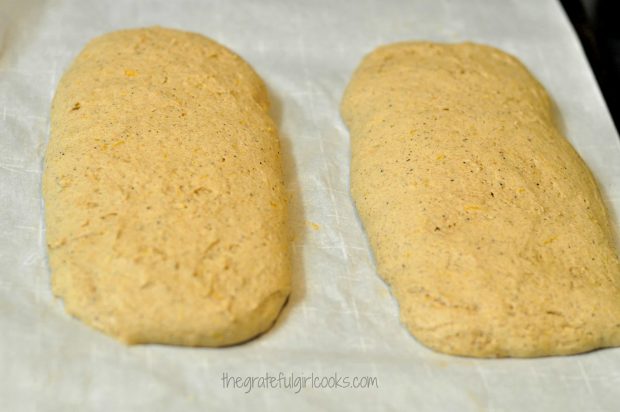
Bake the biscotti logs in a preheated 300 degree oven for 35-40 minutes, until firm (mine took 40 minutes). Please see my note on oven temp. in the NOTES section of the printable recipe! When done, remove the pan from the oven, and let the biscotti rest for a full 10 minutes.

After baking, the biscotti dough has spread considerably, and cools on parchment paper.

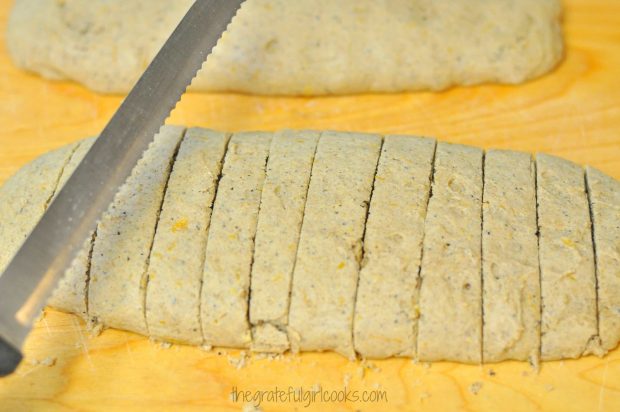
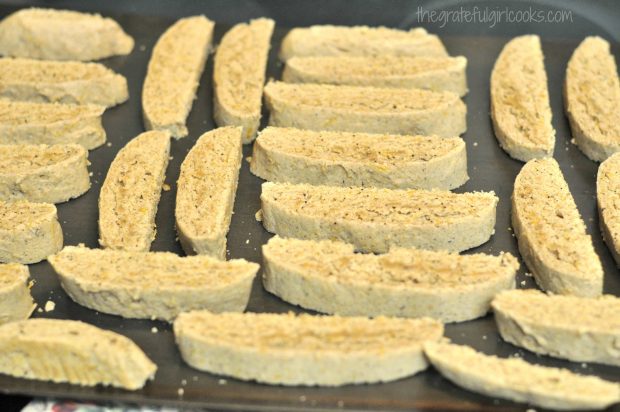
After 10 minutes, remove the biscotti logs to a cutting board, and remove the parchment paper. Carefully slice each log into 12 (one inch) slices along the short side, using a serrated knife to cut.

Each of the biscotti logs are sliced into 12 portions before they are baked again.

Time To Bake The Pumpkin Spice Latte Biscotti AGAIN

Once cut, carefully move the slices one at a time (I used the blade of the knife) back to a baking sheet (no parchment paper needed this time), making sure to place the cut side down. 

After 15 minutes, remove the biscotti from the oven, and turn them over. Put them back in the oven and bake an additional 15-20 minutes until golden brown and crispy. I actually let the second cooking go for 20 minutes.

Pumpkin Spice Latte Biscotti slices are baked a second time, cut side down.

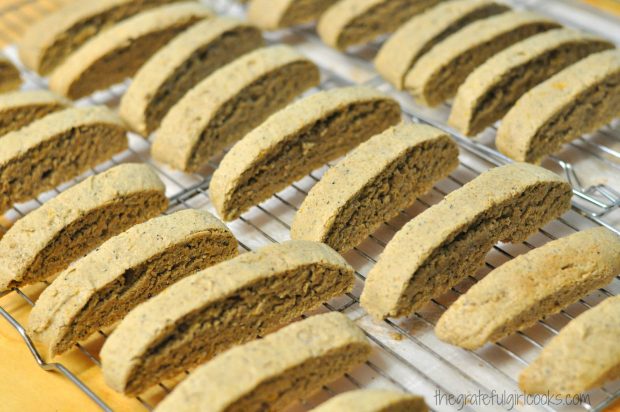
When done, remove the biscotti to a wire rack and let the cookies cool down completely.

Baked biscotti slices, cooling on a wire rack.

Make The Chocolate Drizzle

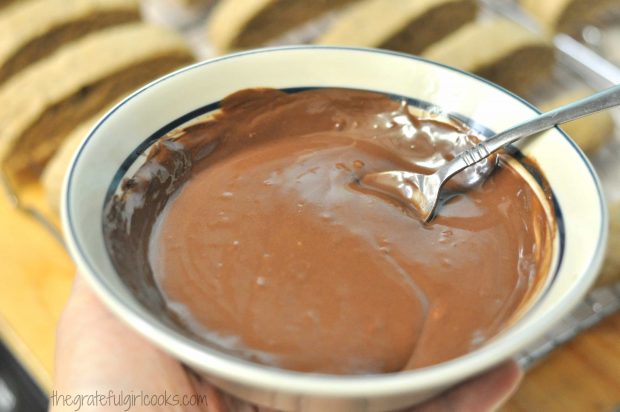
While the biscotti cools, make a chocolate drizzle to decorate them with, once completely cooled. Melt chocolate chips and a little bit of vegetable shortening in the microwave. Microwave 30 seconds on high. Stir. Microwave again for 30 seconds on high. Stir.

Chocolate is melted with shortening, to make a drizzle for topping the biscotti.

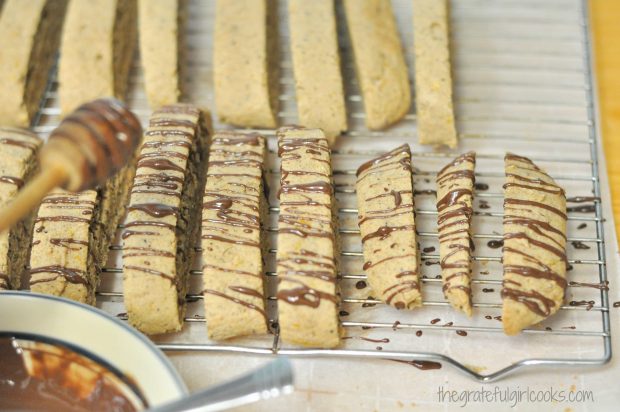
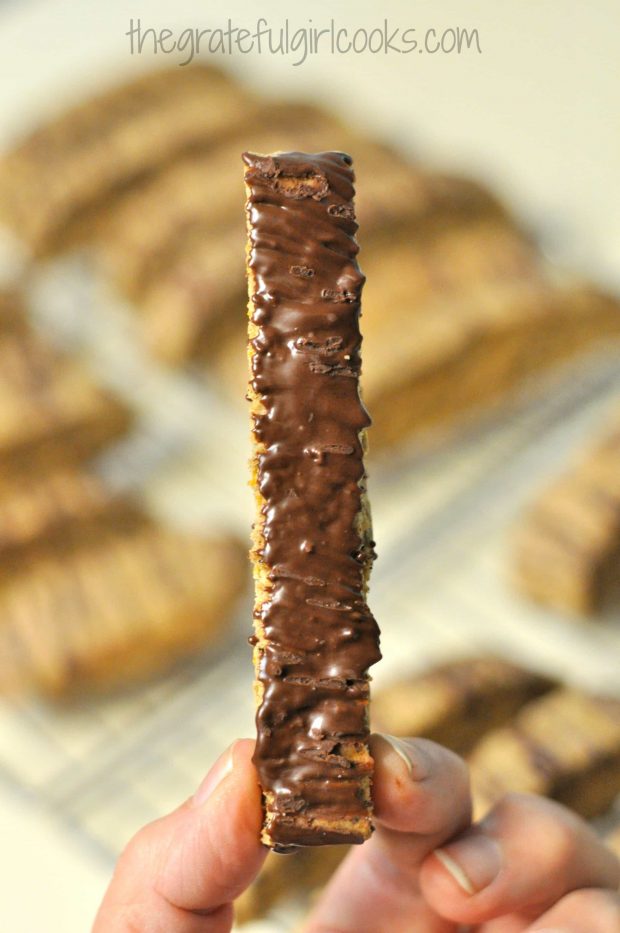
Drizzle the tops of the biscotti with the melted chocolate. II use a honey dipper, but you can use a fork, etc.. Let the chocolate harden, then “PAINT” the bottoms of each biscotti with the melted chocolate, using a pastry brush. Let the chocolate firm up fully before serving.

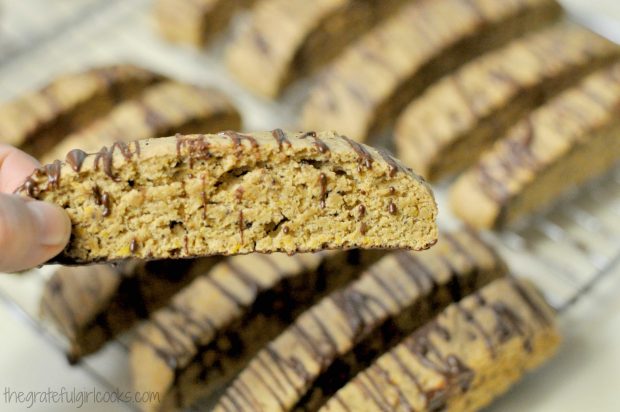
Melted chocolate is drizzled over the tops of the baked biscotti.

The bottom of each piece of biscotti is brushed with melted chocolate.

Ready To Serve And Eat!

Once the chocolate has hardened up on the top and bottom of each cookie, the pumpkin spice latte biscotti are ready to eat… or dunk in a hot cup of coffee!

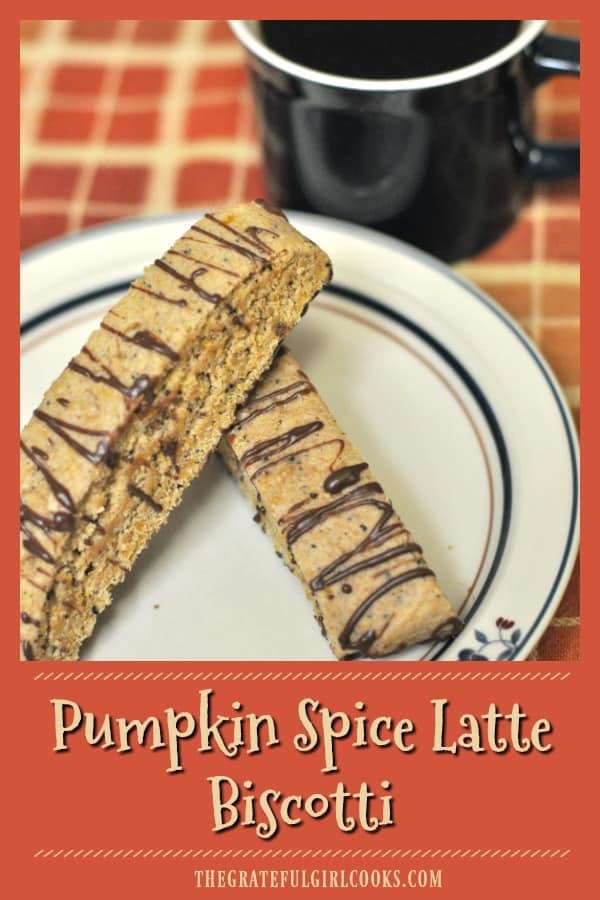
Pumpkin Spice Latte Biscotti is ready to eat once the chocolate has firmed up.

Hope you enjoy this little taste of FALL with these delicious pumpkin spice latte biscotti!  Be sure to check out ALL of my recipes in the Recipe Index, located at the top of the page. Have a great day, and may God bless the work of your hands!
Interested In More Recipes?

Thank you for visiting this website. I appreciate you using some of your valuable time to do soIf you’re interested, I publish a newsletter 2 times per month (1st and 15th) with all the latest recipes, and other fun info. I would be honored to have you join our growing list of subscribers, so you never miss a great recipe!
There is a Newsletter subscription box on the top right side (or bottom) of each blog post, depending on the device you use, where you can easily submit your e-mail address (only) to be included in my mailing list.

You Can Also Find Me On Social Media:
Facebook page: The Grateful Girl Cooks!
Pinterest: The Grateful Girl Cooks!
Instagram: jbatthegratefulgirlcooks

Author's signatureRecipe Source: Jennifer, at http://www.seasonsandsuppers.ca/pumpkin-spice-latte-biscotti

0 from 0 votes
Pumpkin Spice Latte Biscotti
Prep Time
20 mins
Cook Time
1 hr 10 mins
Total Time
1 hr 30 mins
 

If you enjoy Fall & pumpkin spiced "everything", you'll love pumpkin spice latte biscotti, a yummy, crispy & dunkable cookie with lots of flavor!

Category: Breakfast, Cookie
Cuisine: American
Keyword: pumpkin spice latte biscotti
Servings: 24
Calories Per Serving: 185 kcal
Author: JB @ The Grateful Girl Cooks!

Ingredients
For the biscotti:
  • 3 cups all purpose flour
  • 1 1/2 teaspoons baking powder
  • 2 1/2 teaspoons finely ground coffee (grounds)
  • 1/4 teaspoon salt
  • 2 teaspoons cinnamon
  • 1 teaspoon ginger
  • 1/2 teaspoon nutmeg
  • 1/2 cup butter (at room temperature!)
  • 1 cup granulated sugar
  • 3 large eggs
  • 1 teaspoon vanilla extract
  • ½ cup canned pumpkin puree (not pie filling)
For The Chocolate Drizzle:
  • 1 cup semi-sweet chocolate chips
  • 1 1/2 Tablespoons vegetable shortening
Instructions
  1. Preheat your oven to 300 degrees.
  2. In a large bowl, whisk together the flour, baking powder, coffee grounds, and spices until well combined. Set bowl aside.
  3. Place the room temp. butter and sugar in a mixing bowl or the bowl of a stand mixer. Beat with mixer on high until completely smooth. Add the eggs, one at a time. Beat the mixture well after adding each egg. When smooth, add the pumpkin puree and the vanilla extract. Beat this well.
  4. Turn the mixer to low and gradually add the dry ingredients to the wet ingredients (a little at a time), while mixer is running, until completely combined.
  5. Spoon the dough out onto a parchment paper-covered baking sheet. Divide dough evenly into 2 separate log shapes, about 12 inches long by 3 inches wide (approx.). Wet your hands and shape the dough into a smooth log (12 x 3). REMEMBER TO KEEP LOGS SEVERAL INCHES APART AS THEY WILL SPREAD WHILE BAKING!

  6. Bake the dough at 300 degrees for 35-40 minutes or until firm. When done, remove pan from oven and let dough rest for 10 minutes.
  7. Remove dough logs to a cutting board (remove parchment paper). Carefully slice each log into 12 one inch slices, using a serrated knife. Place biscotti slices, CUT SIDE DOWN onto baking sheet. Bake for 15 minutes; remove pan from oven. Turn the biscotti slices over, return pan to oven, and cook an additional 15-20 minutes. When done, remove from oven. Carefully place biscotti on wire racks to completely cool.
To make chocolate drizzle:
  1. Place chocolate chips and vegetable shortening in microwave safe bowl. Microwave on HIGH for 30 seconds. Stir. Microwave again for 30 seconds. Remove from microwave and stir well, until smooth. Drizzle over each biscotti. Let chocolate harden. Use a pastry brush to brush chocolate on the bottom of each biscotti. Let chocolate fully harden, then they are ready to eat!
Recipe Notes

*FYI- I noticed that these biscotti were not as crunchy the day after I made them. After looking at my other recipes for biscotti, I'm convinced the lower oven temp. for this particular recipe played a part. Next time, I will bake these at 350 degrees, then place the cut slices standing upright on sheet (as opposed to flipping to both sides), and bake for approx. 20-25 min. until firm and set... cause we want crunchy biscotti, right?

Nutrition Facts
Pumpkin Spice Latte Biscotti
Amount Per Serving (1 g)
Calories 185 Calories from Fat 72
% Daily Value*
Fat 8g12%
Saturated Fat 4g25%
Trans Fat 1g
Polyunsaturated Fat 1g
Monounsaturated Fat 2g
Cholesterol 31mg10%
Sodium 68mg3%
Potassium 105mg3%
Carbohydrates 25g8%
Fiber 1g4%
Sugar 11g12%
Protein 3g6%
Vitamin A 947IU19%
Vitamin C 1mg1%
Calcium 25mg3%
Iron 1mg6%
* Percent Daily Values are based on a 2000 calorie diet.

Here’s one more to pin on your Pinterest boards!If you enjoy Fall & pumpkin spiced "everything", you'll love pumpkin spice latte biscotti, a yummy, crispy & dunkable cookie with lots of flavor!


Save

Save

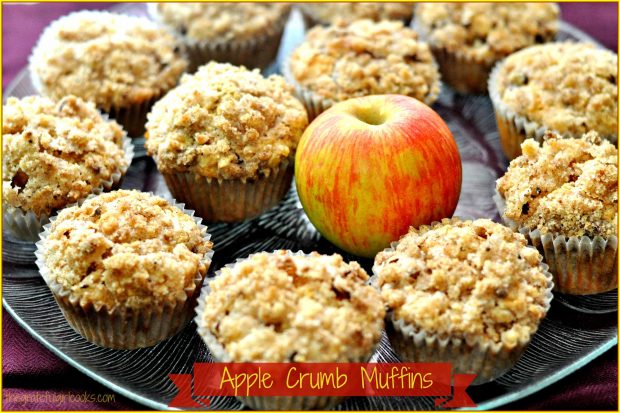
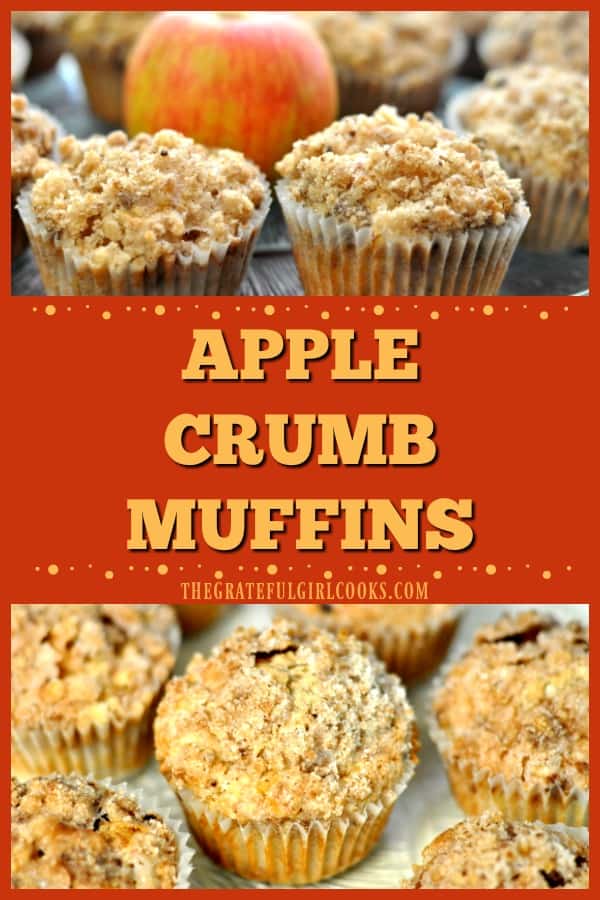
Apple Crumb Muffins

Apple crumb muffins with streusel topping, are moist, delicious, easy to make and will become a family favorite breakfast treat!Apple crumb muffins with streusel topping, are moist, delicious, easy to make and will become a family favorite breakfast treat!

This past weekend we have had quite lot of wind and heavy rain hit us here in Portland. The temperature has dropped quite a bit from the consistent HOT temps we’ve been experiencing all summer long.

To celebrate what FEELS like Fall, I made these Apple Crumb Muffins! Apples and cool, rainy weather just seem to go together well! So does a hungry tummy and these yummy muffins! 

I found the recipe for these delicious, easy-to-prepare muffins on a blog site that I enjoy, called “Heather’s French Press”, and decided to give ’em a try.

These apple crumb muffins are SO EASY to make… really! Here’s how you make them:

Scroll Down For A Printable Recipe Card At The Bottom Of The Page

How To Make Apple Crumb Muffins

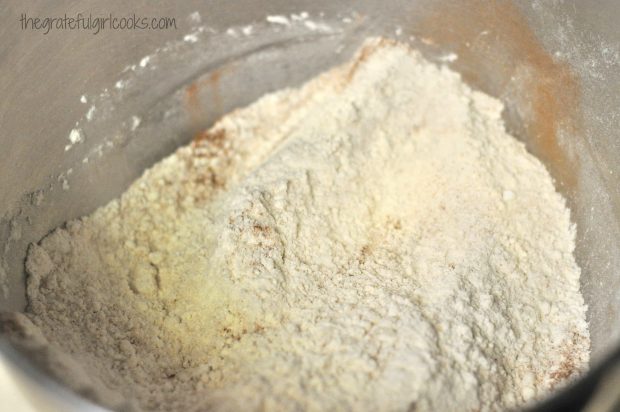
First you whisk together flour, baking powder, granulated sugar, salt and cinnamon. You have to use cinnamon to make any good apple recipe a hit, right?

Flour and spices in bowl

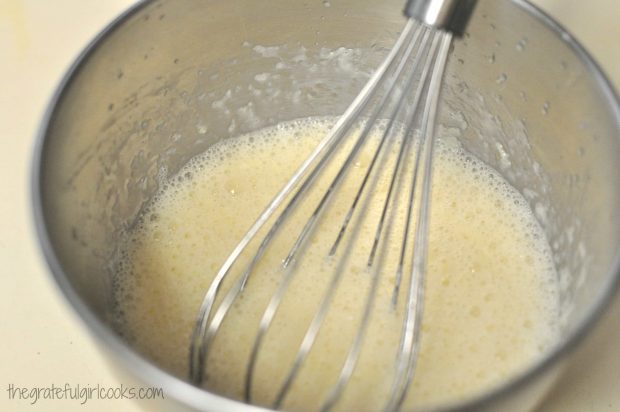
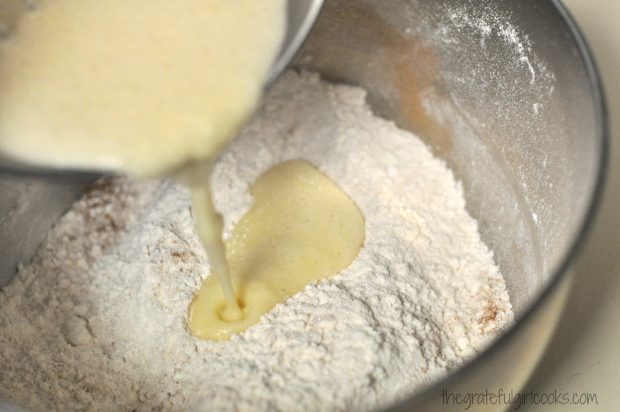
Next, whisk together one egg, some milk and a bit of melted butter. Whisk it up good, then pour it into the flour mixture.

Egg, milk and butter with whisk in bowlPouring muffin batter into dry ingredients in bowl

Stir to combine the ingredients (just until blended in), then fold in the chopped apples.

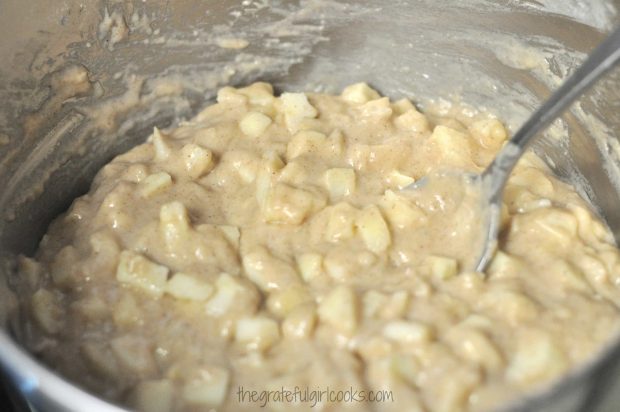
Muffin batter with apple chunks in bowl

Time To Fill the Muffin Tins!

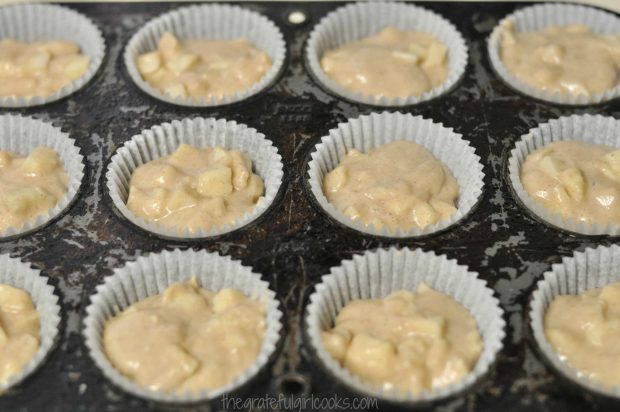
Fill paper-lined muffin cups with the apple mixture. Fill each muffin cup about 2/3 full. Now it’s time to bake the muffins.

PLEASE IGNORE my totally ancient/much-abused, horrible-looking muffin pans that have seen a LOT of use over the years! They are a little worse for the wear, but “work” just fine, so I can live with that.

Batter in paper-lined muffin cup tins

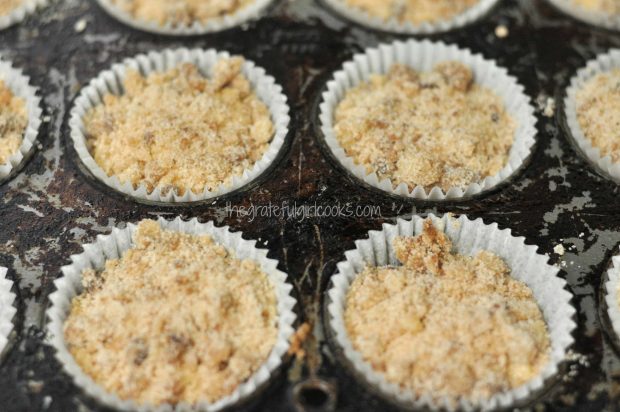
Now it’s time to make the crumb/streusel topping. Easy. Mix the ingredients together in a small bowl, then distribute the streusel over the top of each muffin.

Batter with streusel on top in muffin tins

Bake The Apple Crumb Muffins!

Bake the muffins at 400°F. for about 20 minutes, then remove the pan from the oven. The streusel topping on the muffins will be golden brown in color.

You can check for doneness by inserting a toothpick into the center of a muffin. If the toothpick comes out clean, the muffins are done!

Transfer the muffin tin to a wire rack and let the muffins cool slightly (2-3 minutes) before removing the muffins and serving.

Serve The Apple Crumb Muffins

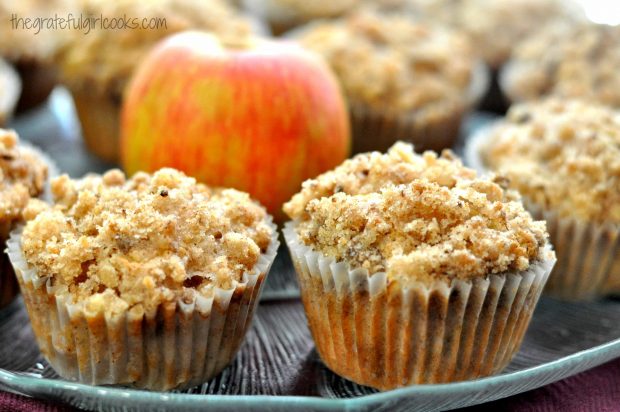
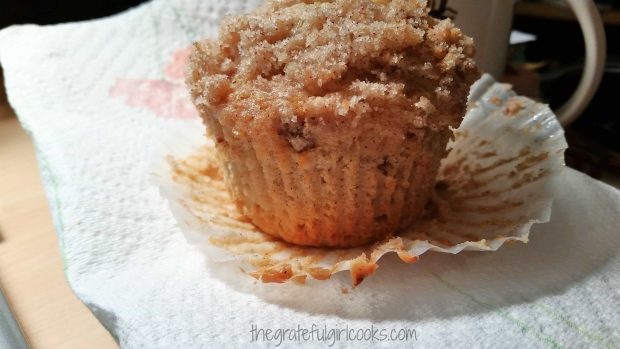
Remove the muffins from the pan and serve these delicious breakfast or snack treats to those you love. See how nice the streusel topping looks?

Two muffins close up with apple on plateBaked apple crumb muffin on a paper towel

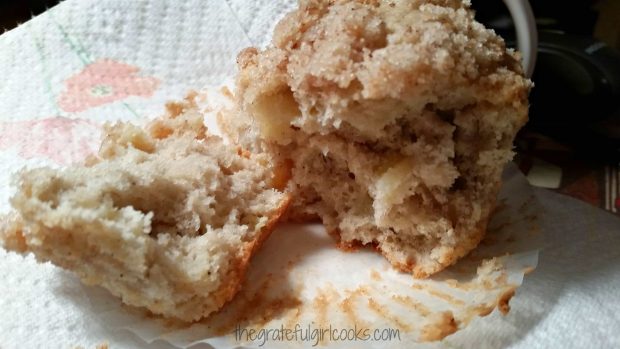
Here’s an apple crumb muffin that has been cut in half. See those apple chunks inside the muffin? YUM.

You can see the apple chunks inside the muffin!

These apple crumb muffins also freeze well, if wrapped securely! Sure hope you will find some time to give this recipe a try! I’m sure you will LOVE these muffins!

Thanks for stopping by, and I invite you to come back soon for more family-friendly recipes. Take care, and have a GREAT day!

Looking For More MUFFIN Recipes?

You can find ALL my recipes in the Recipe Index, which is located at the top of the page! I have lots of muffin recipes to choose from, including:

Want More Recipes? Get My FREE Newsletter!

I publish a newsletter 2 times per month (1st and 15th) with lots of recipes, tips, etc..
Would you like to join our growing list of subscribers?

There is a Newsletter subscription box on the top right (or bottom) of each blog post, depending on the device you use.
You can submit your e-mail address there, to be added to my mailing list.

Find Me On Social Media:

Facebook page: The Grateful Girl Cooks!
Pinterest:
The Grateful Girl Cooks!
Instagram:
jbatthegratefulgirlcooks

Author's signatureRecipe Source: http://www.heathersfrenchpress.com/2015/08/apple-streusel-coffee-cake-muffins.html

↓↓ PRINTABLE RECIPE BELOW ↓↓

0 from 0 votes
Apple Crumb Muffins
Prep Time
15 mins
Cook Time
20 mins
Total Time
35 mins
 
Apple crumb muffins with streusel topping, are moist, delicious, easy to make and will become a family favorite breakfast treat!
Category: Breakfast
Cuisine: American
Keyword: apple crumb muffins
Servings: 12 muffins
Calories Per Serving: 202 kcal
Author: JB @ The Grateful Girl Cooks!
Ingredients
For The Muffins:
  • 1 1/2 cups all purpose flour
  • 2 teaspoons baking powder
  • 1/2 cup granulated sugar
  • 1/2 teaspoon salt
  • 1/2 teaspoon cinnamon
  • 1 egg
  • 1/2 cup + 2 Tablespoons milk
  • 4 Tablespoons butter , melted
  • 2 cups apples , peeled, and diced
For The Crumb Topping:
  • 1/2 cup granulated sugar
  • 1/4 cup flour
  • 1/2 teaspoon cinnamon
  • 2 Tablespoons butter , melted
Instructions
  1. Preheat your oven to 400 degrees F.
  2. In a medium sized bowl, combine the flour, granulated sugar, baking powder, cinnamon and salt.
  3. In a separate bowl, whisk the egg, milk and melted butter (cooled) together.
  4. Add the egg mixture to the flour mixture. Stir this until is is just barely combined.
  5. Add the diced apples; fold them into the batter.
  6. Spoon the mixture into paper-lined or spayed standard sized muffin cups.
  7. In separate small bowl, mix together the crumb topping ingredients. Sprinkle the crumb topping over the top of each of the muffins. Use all the topping mixture.
  8. Bake the muffins at 400 degrees for 20 minutes. Remove to a wire rack, and let cool before serving. Enjoy!
Nutrition Facts
Apple Crumb Muffins
Amount Per Serving (1 muffin)
Calories 202 Calories from Fat 54
% Daily Value*
Fat 6g9%
Saturated Fat 3g19%
Cholesterol 29mg10%
Sodium 157mg7%
Potassium 126mg4%
Carbohydrates 34g11%
Fiber 1g4%
Sugar 19g21%
Protein 2g4%
Vitamin A 225IU5%
Vitamin C 1mg1%
Calcium 48mg5%
Iron 1mg6%
* Percent Daily Values are based on a 2000 calorie diet.

Here’s one more to pin on your Pinterest boards!Apple crumb muffins with streusel topping, are moist, delicious, easy to make and will become a family favorite breakfast treat!


Save

Save

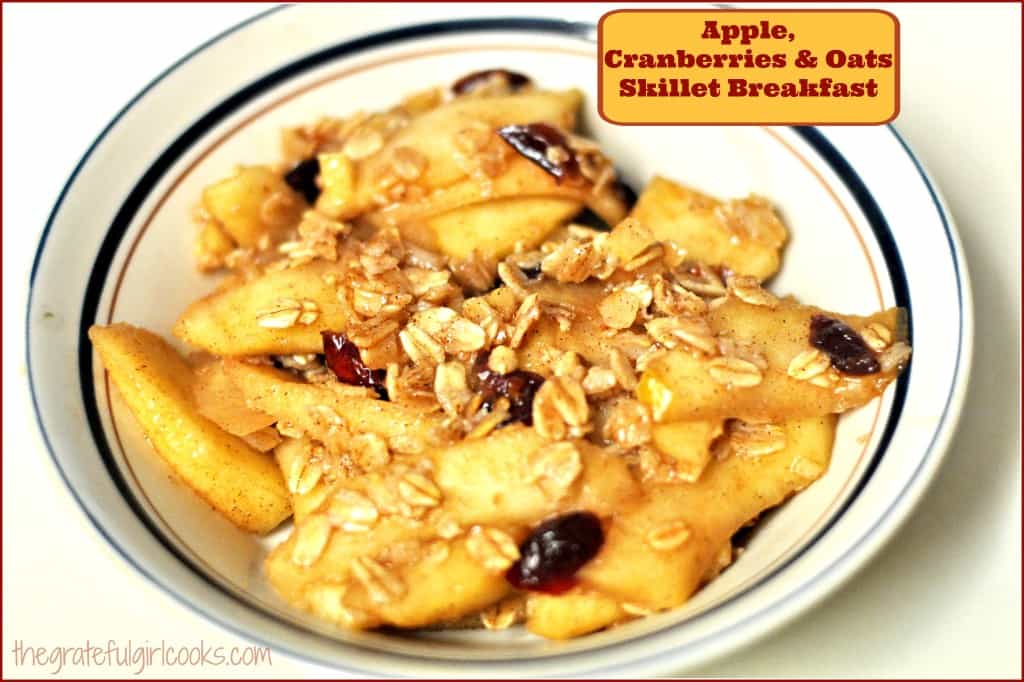
Apple, Cranberries & Oats Skillet Breakfast

Comforting and delicious, this easy and healthy apple cranberries oats skillet breakfast will make you think you’re eating apple pie for breakfast!Comforting and delicious, this easy and healthy apple cranberries oats skillet breakfast will make you think you're eating apple pie for breakfast!

A few mornings ago, I was trying to decide what to eat for breakfast. I decided to eat a LARGE apple, but then thought it sounded rather boring. I wanted to eat a fairly healthy breakfast, but wanted it to taste fantastic and help fill me up.  So I made an Apple Cranberries Oats Skillet Breakfast and it was wonderful, delicious, and filling!

I decided to cook the apple slices in my trusty skillet, then added in additional flavor with some extra goodies (like cinnamon, dried cranberries, a smidge of brown sugar, etc.) and some “good for you” old-fashioned oats. What I ended up with was a healthy, satisfying meal… with a huge apple as the main ingredient!

Scroll Down For A Printable Recipe Card At The Bottom Of The Page

How to Make This Apple Cranberries Oats Skillet Breakfast

I love to cook oatmeal with fresh apples in it, but this time I reversed the process. I cooked an entire large apple, and added in only 1 Tablespoon of raw oats and dried cranberries while cooking (for extra texture and fiber).

I liberally sprinkled the mixture with cinnamon, lemon juice, a tiny pinch of brown sugar, and cooked the apples down until they were softened, but NOT mushy.

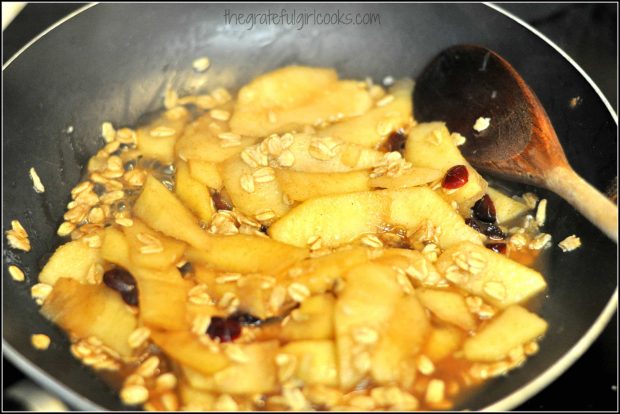
Apple slices, oats and cranberries cooking in skillet
I added a bit of water to my skillet while cooking to help the oats and apple soften up. That’s it!  Once the apples had softened (about 5 minutes later), I spooned the entire mixture into a bowl, let it cool just a bit, and ate the whole thing!

Truthfully it felt like I was eating apple crisp (kinda) for breakfast. It was delicious, and was a totally EASY and very satisfying start to my day! Another breakfast recipe (one of my faves) you might want to check out is my post for Apple Cinnamon Steel Cut Oats With Pecans! Yum.

Hope you will give this quick breakfast a try! Have a great day; my hope is that God blesses you with moments where you see evidence of HIS beauty, kindness, and love as you go through this day!

Interested In More Recipes?

Thank you for visiting this website. I appreciate you using some of your valuable time to do soIf you’re interested, I publish a newsletter 2 times per month (1st and 15th) with all the latest recipes, and other fun info. I would be honored to have you join our growing list of subscribers, so you never miss a great recipe!
There is a Newsletter subscription box on the top right side (or bottom) of each blog post, depending on the device you use, where you can easily submit your e-mail address (only) to be included in my mailing list.

You Can Also Find Me On Social Media:

Facebook page: The Grateful Girl Cooks!
Pinterest:
The Grateful Girl Cooks!
Instagram:
jbatthegratefulgirlcooks

Author's signatureRecipe source: My brain (and 2 cups of coffee)

0 from 0 votes
Apple, Cranberries & Oats Skillet Breakfast
Prep Time
5 mins
Cook Time
8 mins
Total Time
13 mins
 
Comforting and delicious, this easy and healthy apple cranberries oats skillet breakfast will make you think you're eating apple pie for breakfast!
Category: Breakfast
Cuisine: American
Keyword: apple cranberries oats skillet
Servings: 1 serving
Calories Per Serving: 181 kcal
Author: JB @ The Grateful Girl Cooks!
Ingredients
  • 1 apple , large, peeled, cored and sliced into thin slices
  • 1 Tablespoon fresh lemon juice
  • 3/4 teaspoon cinnamon
  • 3/4 teaspoon brown sugar
  • 1 Tablespoon dried cranberries
  • 1 Tablespoon old-fashioned oats (dry)
  • 1/4 cup water
Instructions
  1. Peel, core, and slice the apple into thin slices. Place in skillet. Stir in lemon juice. Cook apple slices on medium-low heat until apples begin to soften (2-3 minutes).

  2. Add cinnamon, brown sugar, dried cranberries, and oats. Stir together.
  3. Add water, stir to combine and continue cooking until apple mixture is hot, most of the water has cooked away, and the apples have softened (approx. 5 minutes). That's it! Serve while warm. Enjoy.
Nutrition Facts
Apple, Cranberries & Oats Skillet Breakfast
Amount Per Serving (1 serving)
Calories 181
% Daily Value*
Sodium 6mg0%
Potassium 194mg6%
Carbohydrates 46g15%
Fiber 6g25%
Sugar 32g36%
Protein 1g2%
Vitamin A 100IU2%
Vitamin C 14.2mg17%
Calcium 26mg3%
Iron 0.5mg3%
* Percent Daily Values are based on a 2000 calorie diet.

Here’s one more to pin on your Pinterest boards!Comforting and delicious, this easy and healthy apple cranberries oats skillet breakfast will make you think you're eating apple pie for breakfast!


Save

Save

Pecan Sticky Rolls

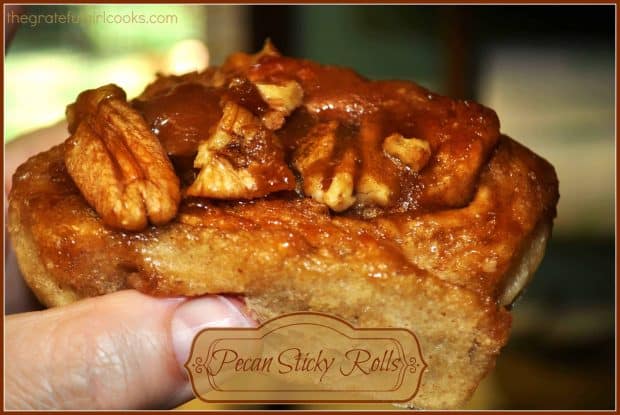
If you like Cinnamon Rolls, then you’ll love these scrumptious homemade Pecan Sticky Rolls! Raised yeast rolls, dripping with a caramel-pecan topping.If you like Cinnamon Rolls, then you'll love these scrumptious homemade Pecan Sticky Rolls! Raised yeast rolls, dripping with a caramel-pecan topping.
Oh my goodness… these pecan sticky rolls are so delicious! They are a wonderful treat to enjoy (occasionally) over a cup of morning coffee or tea! I found this easy recipe in the user manual for my bread machine years ago. After making them ONCE, I decided this was a “keeper” recipe, and have enjoyed making these rolls many times since then.

The method used for making pecan sticky rolls is very similar to making cinnamon rolls (with only a couple changes). Here’s how to make them:

Scroll Down For A Printable Recipe Card At The Bottom Of The Page

Make The Dough In A Bread Machine OR By Hand

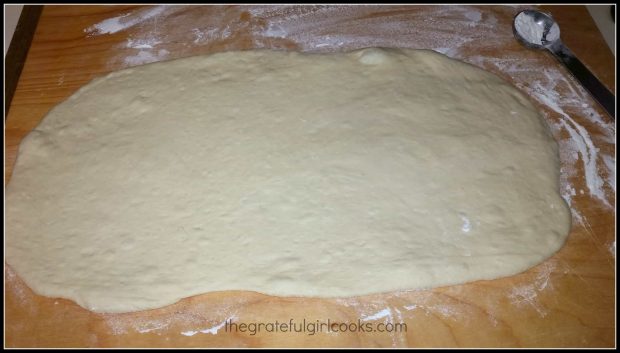
I made the dough in my bread machine. It’s possible to make these even without a machine , and I’ve included directions in the printable recipe at the bottom of this post. Make the dough on the DOUGH cycle of your bread machine, or follow instructions to make by hand. When the dough is done, roll it out to a 15×10 inch rectangle on a lightly floured surface.

The dough is rolled out into a large rectangle.
Spray a 9 x 13 x 2 inch pan with non-stick spray. In a small bowl, mix the topping ingredients (melted butter, brown sugar, corn syrup, and pecan halves). Spread this mixture all over the bottom of the baking pan. The rolls are baked on top of this sticky butter pecan mixture, and then flipped over, which lets all the gooey topping drip down and coat the sweet rolls.

Prepare The Pecan Sticky Rolls

Combine granulated sugar and cinnamon in a small bowl. Spread 2 teaspoons of softened butter over the surface of the dough, then sprinkle with the cinnamon-sugar mixture. Roll up the dough tightly (starting at the LONG side), and seal the edges when done. Cut the pecan sticky rolls into 1 inch slices, then arrange them in the baking pan on top of the caramel-pecan mixture.

Let The Dough For The Pecan Sticky Rolls Rise

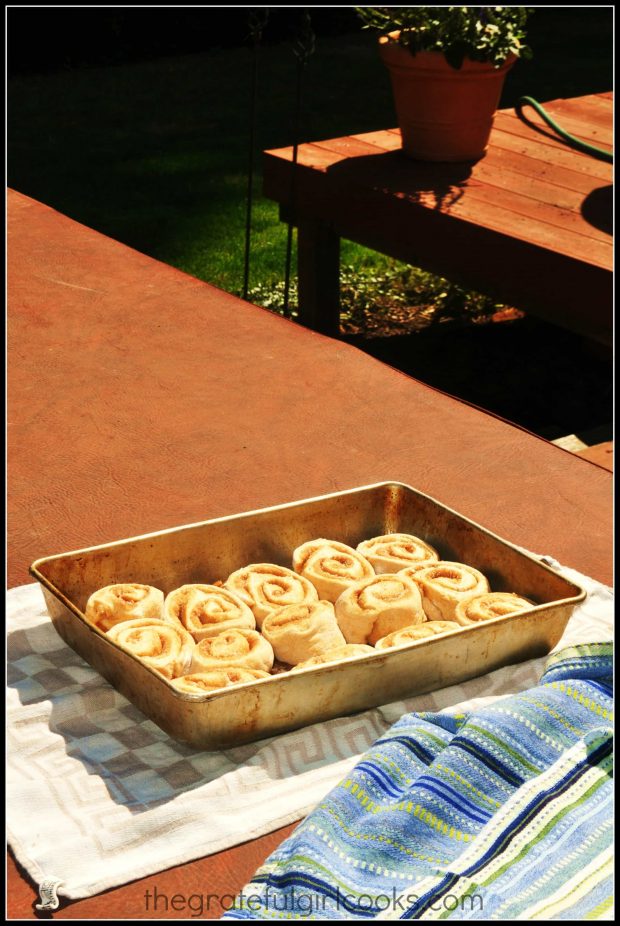
Cover the pan with a dish towel and let the dough rise in a warm place until the dough has doubled in size. Shhh- here’s a secret! I actually put them outside on top of our jacuzzi to rise, because it was a really hot day!

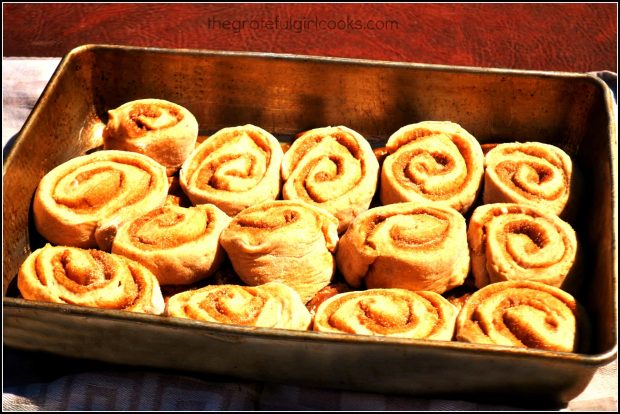
Pecan sticky rolls in pan rising in a warm place!The dough for the sweet rolls has risen, and is now ready to bake.

Bake, Then Invert The Pecan Sticky Rolls!

Once the rolls have risen, bake them (uncovered) in a 375 degree oven for about 25 minutes, until golden brown. As soon as they are done, remove the pan from the oven and immediately INVERT the pan onto a heat proof serving platter. Let the pan stay inverted (upside down) for a minute, so that yummy caramel-pecan topping can drizzle all over the hot rolls. Now you can see why they are called pecan sticky rolls!

Remove the pan from the inverted rolls, and spoon any excess topping onto the tops of the rolls. Let the pecan sticky rolls cool just a bit before serving them! The recipe makes 14-15 rolls… and they are wonderful. Sweet, full of cinnamon, and sticky… just the way we like ’em.

Sure hope you will give this recipe a try! If you enjoy this, be sure to check out my recipes for homemade cinnamon rolls or cinnamon roll crescents. Yum! You can also find ALL of my recipes in the Recipe Index, located at the top of the page. Have a great day.

Interested In More Recipes?

Thank you for visiting this website. I appreciate you using some of your valuable time to do soIf you’re interested, I publish a newsletter 2 times per month (1st and 15th) with all the latest recipes, and other fun info. I would be honored to have you join our growing list of subscribers, so you never miss a great recipe!
There is a Newsletter subscription box on the top right side (or bottom) of each blog post, depending on the device you use, where you can easily submit your e-mail address (only) to be included in my mailing list.

You Can Also Find Me On Social Media:

Facebook page: The Grateful Girl Cooks!
Pinterest:
The Grateful Girl Cooks!
Instagram:
jbatthegratefulgirlcooks

Author's signatureRecipe Source: Oster Deluxe Bread & Dough Maker User Handbook, published 1994, Sunbeam-Oster Household Products, page 55

0 from 0 votes
Pecan Sticky Rolls
Prep Time
2 hrs 30 mins
Cook Time
25 mins
Total Time
2 hrs 55 mins
 

If you like Cinnamon Rolls, then you'll love these scrumptious homemade Pecan Sticky Rolls! Raised yeast rolls, dripping with a caramel-pecan topping.

Category: Breakfast
Cuisine: American
Keyword: pecan sticky rolls
Servings: 14
Calories Per Serving: 294 kcal
Author: JB @ The Grateful Girl Cooks!
Ingredients
For Dough:
  • 1 cup water
  • 1 egg
  • 2 Tablespoons butter , softened
  • 3 1/4 cups all-purpose flour
  • 1/4 cup granulated sugar
  • 1 teaspoon salt
  • 3 teaspoons reg. active dry yeast OR 3 teaspoons bread machine yeast OR quick acting yeast
For Spreadable Filling (to spread on rolled out dough)
  • 2 Tablespoons butter , softened (to spread on rolled out dough)
  • 1/2 cup granulated sugar (to spread on rolled dough)
  • 2 teaspoons ground cinnamon (to spread on rolled out dough)
For Caramel-Pecan Topping:
  • 1/3 cup butter , melted
  • 1/2 cup packed brown sugar
  • 1 Tablespoon corn syrup
  • 2/3 cup pecan halves
Instructions
  1. Place all dough ingredients ( into bread machine and select DOUGH cycle. (If making by hand, see NOTES section for directions).
  2. Spray a 13x9x2 inch baking pan with non-stick spray
  3. In a medium bowl, combine 1/3 cup melted butter, brown sugar, corn syrup, and pecan halves. Mix well. Spread this in the bottom of the baking pan.
  4. In a small bowl, mix together the spreadable filling (1/2 cup sugar and 2 teaspoons cinnamon). Set aside.
  5. When dough is ready, roll it out to a 15x10 inch rectangle on a lightly floured surface. Spread the 2 Tablespoons of softened butter over the surface of the dough, all the way to the edges. Sprinkle the buttered dough with the cinnamon-sugar mixture, all the way to the edges.
  6. Roll up the dough very tightly, beginning at the long (15 inch) side of the dough. Tuck in the ends and pinch the dough into the roll to seal. Using a sharp knife, cut the dough roll into 14-15 one inch slices. Arrange the cut slices on top of the pecan mixture in baking pan. Cover with a dish towel, and let rise in a warm place for about an hour (or until dough has doubled in size).
  7. Once dough has risen, place the uncovered pan in a preheated 375 degree oven. Bake rolls for 22-27 minutes (mine took 25), or until they turn golden brown. Remove the pan from the oven and immediately invert (flip over) the entire pan onto a heat proof serving platter (or tray). Don't remove the pan for about a minute or so, because you want all that sticky caramel-pecan topping to drip onto the rolls. Remove the pan after a minute or so, and spoon any remaining topping over the top of the rolls. Let cool slightly, then serve!
Recipe Notes

If you are NOT using a bread machine: In a LARGE mixing bowl, dissolve the yeast into 1 cup warm water (not hot). Let sit for about 5 minutes to make sure it bubbles (meaning the yeast is good). Add/mix in the egg, and the softened butter. Stir in the flour, sugar and salt. Mix ingredients very well. Knead dough on a lightly floured surface (for about 10 minutes) into a large ball, using lightly flour-dusted hands. Spray a LARGE bowl with non-stick spray. Place dough ball in bowl. Flip the dough over, to coat it with the spray from the bowl. Cover dough with dish towel. Let rise in a warm place for about an hour (or until doubled in size). Once dough has doubled in size, continue with recipe, as directed.

Nutrition Facts
Pecan Sticky Rolls
Amount Per Serving (1 roll)
Calories 294 Calories from Fat 99
% Daily Value*
Fat 11g17%
Saturated Fat 5g31%
Cholesterol 31mg10%
Sodium 242mg11%
Potassium 89mg3%
Carbohydrates 43g14%
Fiber 2g8%
Sugar 19g21%
Protein 4g8%
Vitamin A 250IU5%
Calcium 21mg2%
Iron 1.7mg9%
* Percent Daily Values are based on a 2000 calorie diet.

Here’s one more to pin on your Pinterest boards!If you like Cinnamon Rolls, then you'll love these scrumptious homemade Pecan Sticky Rolls! Raised yeast rolls, dripping with a caramel-pecan topping.


Save

Save

Cranberry-Orange Scones

Cranberry Orange Scones, with a sweet citrus glaze, are a perfect breakfast treat or snack! They’re delicious, and the easy recipe makes 8 scones!Cranberry Orange Scones, with a sweet citrus glaze, are a perfect breakfast treat or snack! They're delicious, and the easy recipe makes 8 scones!
One of my flavor combinations is that of oranges and cranberries. That flavor combo has been a favorite of mine for years, which is why I LOVE these cranberry orange scones!

That same flavor combo enhances these amazing, absolutely yummy Cranberry-Orange Scones! I’ve been making these for years and years, and absolutely LOVE them!

Scroll Down For A Printable Recipe Card At The Bottom Of The Page

Making Scones From Scratch Will Save You Money

I love making scones, because they are a wonderful breakfast treat or afternoon snack, especially with a good cup of coffee or tea. Scones are made often in our home, because they are so delicious, quick, and easy to prepare. By making cranberry orange scones at home, I can save lots of money by NOT buying them at a coffee house. Have you seen how much ONE scone costs nowadays?

This recipe makes 8 scones, and is budget friendly. The cranberry orange scones freeze well, so you can have one any time you want, for a fraction of the cost of BUYING 8 scones! By making them at home from scratch, I also can know exactly what is in them! THAT is another winning combination, in my humble opinion!

Other Scone Recipes On This Blog

If you enjoy a good scone, you might be interested in some of my other scone recipes. These scone recipes include:

Apple Cinnamon, Cinnamon Chip, White Chocolate Raspberry, Blackberry, Banana Nut, Chocolate Chip Orange, Lemon Cream, and Gingerbread.

These, and additional scone recipes can be found in the Recipe Index at the top of the page.

Collage of scones on this blog, including this one for cranberry orange scones.

Process For Making Scones

If you would like to see pictures of the “process” of how to make scones, I would invite you to view my post for Chocolate Chip Orange Scones, which I posted last year, for pictures of the “how-to’s”.

It is very detailed and will show you how simple it is to make scones, step by step! Follow the pictures for the process, and you’ll be a master scone baker, making these delicious cranberry orange scones in NO time! This recipe for Cranberry-Orange Scones is very similar, and follows the same process. I simply didn’t take any pictures (except the finished product) while making this particular scone.

The finished cranberry orange scones, with a mint leaf garnish, ready to eat!

All that said, these Cranberry-Orange Scones are DELICIOUS, and I sure hope you will give them a try! You’re gonna LOVE them!

Interested In More Recipes?

Thank you for visiting this website. I appreciate you using some of your valuable time to do soIf you’re interested, I publish a newsletter 2 times per month (1st and 15th) with all the latest recipes, and other fun info. I would be honored to have you join our growing list of subscribers, so you never miss a great recipe! 

There is a Newsletter subscription box on the top right side (or bottom) of each blog post, depending on the device you use, where you can easily submit your e-mail address (only) to be included in my mailing list.

You Can Also Find Me On Social Media:

Facebook page: The Grateful Girl Cooks!
Pinterest:
The Grateful Girl Cooks!
Instagram:
jbatthegratefulgirlcooks

Author's signatureOriginal Recipe Source: unknown

0 from 0 votes
Cranberry-Orange Scones
Prep Time
20 mins
Cook Time
20 mins
Total Time
40 mins
 
These delicious Cranberry-Orange Scones are perfect for a breakfast treat, or an afternoon snack! Yum!
Category: Breakfast, Snack
Cuisine: American
Keyword: cranberry orange scones
Servings: 8 scones
Calories Per Serving: 395 kcal
Author: JB @ The Grateful Girl Cooks!
Ingredients
For Scones:
  • 2 cups all-purpose flour
  • 1/3 cup granulated sugar
  • 2 teaspoons baking powder
  • 1/2 teaspoon salt
  • 1/2 cup (1 cube) unsalted butter, very cold
  • 2 large eggs
  • 1/4 cup orange juice
  • 1 teaspoon vanilla
  • 1/2 teaspoon grated orange peel (finely grated; I use a micro-plane zester)
  • 3/4 cup dried cranberries
  • 1 egg white + 1/2 tsp. water
For Glaze:
  • 1 1/2 cups powdered sugar (can always add more if you need extra)
  • 1/4 teaspoon vanilla extract
  • 1/4 teaspoon orange extract (I use it for enhanced flavor, but optional)
  • 1 teaspoon finely grated orange zest
  • 3-4 teaspoons orange juice (to make glaze painting consistency)
Instructions
  1. Preheat oven to 425 degrees.  In a food processor (or cut in by hand with a pastry blender in a large bowl), mix flour, sugar, baking powder, salt and chilled butter together until well combined.

  2. In a separate bowl, mix together the eggs, orange juice, vanilla, and grated orange peel. Add egg mixture to the flour mixture; combine till fully blended. Stir in dried cranberries until fully incorporated into dough.

  3. Pour the dough out onto a lightly floured work surface. Knead the dough with floured hands until the dough comes together...(continue to sprinkle the dough and surface with additional flour as needed, as dough is usually fairly "sticky"-I usually do this 3-4 times).

  4. Shape dough into an 8" circle with your hands. Using a pizza cutter or very sharp knife, cut the scones into 8 equal-sized wedges.  Mix the egg white and water together in small bowl. Using a pastry brush, brush the tops of the scones with this mixture.

  5. Spray a baking sheet with cooking spray. Place wedges on baking sheet and bake at 425 degrees for 20-25 minutes (mine are usually ready at the 20 minute mark), or until golden brown on top. When done, remove scones from oven to a wire rack, with foil or parchment paper underneath.

  6. When scones have cooled, "paint" the glaze on with a pastry brush (glaze is made by mixing up the ingredients listed, in a small bowl). Completely cover the tops of the scones with the glaze. Let scones cool until glaze has hardened. ENJOY!

Nutrition Facts
Cranberry-Orange Scones
Amount Per Serving (1 scone)
Calories 395 Calories from Fat 117
% Daily Value*
Fat 13g20%
Saturated Fat 7g44%
Cholesterol 71mg24%
Sodium 171mg7%
Potassium 181mg5%
Carbohydrates 65g22%
Fiber 1g4%
Sugar 38g42%
Protein 5g10%
Vitamin A 430IU9%
Vitamin C 5.7mg7%
Calcium 58mg6%
Iron 1.8mg10%
* Percent Daily Values are based on a 2000 calorie diet.

Here’s one more to pin on your Pinterest boards!Cranberry Orange Scones, with a sweet citrus glaze, are a perfect breakfast treat or snack! They're delicious, and the easy recipe makes 8 scones!


Save

Save

Maple Twists

Maple Twists are delicious, made from scratch, maple-glazed pastry rings! The recipe makes 3 pastries (24 servings), so there’s plenty for everyone to enjoy!
Maple Twists are delicious, made from scratch, maple-glazed pastry rings! The recipe makes 3 pastries (24 servings), so there's plenty for everyone to enjoy!
I recently stumbled upon a recipe on the internet for Maple Twists that really intrigued me. I love the flavor of maple, so how could I go wrong with a maple glazed pull-apart breakfast pastry ring, especially one as cute as this?

As an added bonus, this recipe makes 3 pastry rings! (I froze two of them for another time, and one was eaten… quite quickly, I might add). Because the recipe makes 3, it is a perfect item to make for a large family, a brunch or to take to a potluck!).

This is a great “pull-apart” pastry ring, so you can grab one or two twists and enjoy them with a cup of good coffee or tea! Seriously good, AND they were actually kind of FUN to make.

Scroll Down For A Printable Recipe Card At the Bottom Of The Page

How To Make Maple Twists

First, I made the streusel (easy!) and set it aside while I made the dough.

Streusel topping is made for maple twists.
Next I made the dough, and let it rise for 45 minutes. Here it is before rising.

Dough for maple twists sits to let it rise before making pastries.
After dough had risen, I divided it into 3 equal pieces, and formed each piece into a ball. Then I rolled each dough ball out into a 12 inch circle. The dough was then placed it on a sprayed baking sheet (or on lightly sprayed parchment paper on a baking sheet).

Dough for maple twists is divided into 3 pieces, and rolled into circle.
Add The Filling To the Dough

When I took these next couple of pictures, I took them while dough was still on my cutting board… oops! PLEASE put the dough circles on baking sheet BEFORE doing the next steps (trust me-much easier!) Spread each of the dough circles with the streusel mixture. Spread it out as thinly as you can.

Streusel mixture is spread onto each of the maple twist dough circles.
Take something that is 2 inches across (I cut off the bottom of a small dixie cup), center it on top of the dough circle and press down slightly. Leave an indentation in the dough (without going all the way through).

Paper cup is used to make a two inch circle indentation in center of maple twists.
Using scissors or a pizza cutter, cut the dough circles into 16 equal sized wedges. Cut from the outside edge of the circle in. Stop at the indentation you made in the dough previously.

Each pastry is cut into 16 pieces.
If you look closely you can see where the slices stopped at the middle circle indentation.

Maple Twists are sliced into 16 wedges, but center of dough is not cut.
Twist And Turn The Maple Twists!

Now comes the FUN part! Carefully lift up each wedge, and twirl it 5 TIMES and then flatten the end down a bit so each wedge stays twisted. I literally counted every single twist. 1..2..3..4..5! It’s a tiny bit messy, but kinda fun!

Do this for each of the pastry rings! I used both hands, but for this picture, I had to snap the pic, so you get one freakishly pink set of fingers only!

Each wedge of maple twist dough is twisted several times.Time To Bake!

Once all are twisted, cover rings with plastic wrap and let them rise again for about an hour, then bake in a 375 degree oven for 18-22 minutes (mine took about 20). This is what the maple twists look like prior to baking.

Maple twists are ready to go into oven.Make The Maple Glaze

While they are baking, mix up the maple glaze (Easy!) The ingredients are simply mixed together to form a nice topping!

Maple glaze is mixed to brush onto the baked maple twists once done.
This is what the maple twists will look like once removed from oven. Let them cool down for about 5 minutes BEFORE you put the glaze on them.

Maple twists, fresh from the oven, before glazing.Glaze The Baked Maple Twists

Put aluminum foil UNDER the baking rack (to catch drips. After they have cooled for 5 minutes, drizzle the maple glaze over the top of each of the twists.

Use a pastry brush to help spread the glaze out, on each of the warm maple twists. Re-use any glaze that has dripped onto the foil. You want to get it all on top of these pastries.  Don’t they look good enough to eat? YUM.

Maple glaze has been brushed onto the pastry twists.
That’s it. Delicious, and full of maple flavor! Remember to wrap the maple twists really good after they have cooled completely, if you wish to freeze them. It was fun for me learning how to make these wonderful Maple Twists. Sure hope you will give them a try!

Looking For More PASTRY Recipes?

You can find ALL my recipes in the Recipe Index, located at the top of the page. I have a nice variety of pastry recipes you might want to check out, including:

Interested In More Recipes?

Thank you for visiting this website. I appreciate you using some of your valuable time to do soIf you’re interested, I publish a newsletter 2 times per month (1st and 15th) with all the latest recipes, and other fun info. I would be honored to have you join our growing list of subscribers, so you never miss a great recipe!
There is a Newsletter subscription box on the top right side (or bottom) of each blog post, depending on the device you use, where you can easily submit your e-mail address (only) to be included in my mailing list.

You Can Also Find Me On Social Media:

Facebook page: The Grateful Girl Cooks!
Pinterest:
The Grateful Girl Cooks!
Instagram:
jbatthegratefulgirlcooks

Author's signatureRecipe Source: http://fakeginger.com/2009/10/05/maple-twists/

0 from 0 votes
Maple Twists
Prep Time
2 hrs 30 mins
Cook Time
18 mins
Total Time
2 hrs 48 mins
 
Maple Twists are delicious, made from scratch, maple-glazed pastry rings! The recipe makes 3 pastries (24 servings), so there's plenty for everyone to enjoy!
Category: Breakfast
Cuisine: American
Keyword: maple twists
Servings: 24 (total of 3 pastry rings)
Calories Per Serving: 155 kcal
Author: JB @ The Grateful Girl Cooks!
Ingredients
For Dough:
  • 2 .75 cups all purpose flour
  • 3/4 cup milk
  • 1/4 cup butter
  • 3 Tablespoons granulated sugar
  • 1/2 teaspoon salt
  • 1 Tablespoon active dry yeast
  • 1 teaspoon Maple extract (or Mapleine imitation extract)
  • 1 egg
For Streusel:
  • 1/4 cup melted butter
  • 1/2 cup granulated sugar
  • 1/3 cup chopped pecans
  • 1 teaspoon cinnamon
  • 1 teaspoon Maple extract (or Mapleine imitation extract)
For Glaze:
  • 1 cup powdered sugar
  • 2 Tablespoons melted butter
  • 1-2 Tablespoons milk (I used 2)
  • 1/2 teaspoon Maple extract (or Mapleine imitation extract)
  • 1/2 teaspoon vanilla extract
Instructions
  1. Make the streusel: Combine streusel ingredients in small bowl; set aside.
  2. Make the dough: In a small saucepan, heat the milk and butter on low until very warm (but not too hot or boiling!).
  3. In the bowl of a stand mixer using a dough hook, place the warm milk/butter mixture. Add 1 cup of flour, granulated sugar, salt, yeast, egg, and the maple extract. Beat on low for a couple of minutes, then add the rest of the flour, in 1/2 cup increments, until dough is completely mixed together. Knead this in mixer for 5 minutes. Remove mixer bowl; cover with plastic wrap, and let dough rise in a warm place for 45 minutes (until it doubles in size).
  4. Once dough rises, remove it to a lightly floured surface. Divide dough into 3 equal-sized pieces. Roll into a ball. Roll each dough ball into a 12 inch wide circle. Put each dough circle onto prepared baking pan (sprayed with non-stick spray or covered with parchment paper that has been lightly sprayed). Evenly distribute streusel topping over each circle, spreading it as thin as you can to the edges.
  5. Use a 2" sized cup (or other instrument); press gently down; make a circle indentation in center of each circle. Do not cut all the way through.
  6. Use a pizza cutter or sharp knife; cut each circle into 16 equal sized wedges. Cut from outside of circle to the indentation mark.
  7. Carefully lift each "wedge" or section. Twist it 5 times, then press end down, so dough stays twisted. Twirl each section the same direction, using same process. Once done, cover each pastry circle with plastic wrap; let dough rise again for an hour.
  8. Preheat oven to 375 degrees. Uncover pastry rings, and bake in a 375 degree oven for 18-22 minutes. (oven times vary, so check it at 18 minutes. Mine took 20 minutes). The pastry should be golden brown. Remove to wire racks. Let cool for 5 minutes before glazing.
  9. While pastry is cooling down, whisk together glaze ingredients. Place aluminum foil under wire rack (to catch drips); after twists have cooled for 5 minutes, drizzle the glaze over the top of each pastry. I also used a pastry brush to brush the glaze across the top. Serve, and enjoy!
Recipe Notes

Most of the prep time is "inactive" time, waiting for dough to rise.

Nutrition Facts
Maple Twists
Amount Per Serving (2 strips)
Calories 155 Calories from Fat 54
% Daily Value*
Fat 6g9%
Saturated Fat 3g19%
Cholesterol 20mg7%
Sodium 97mg4%
Potassium 37mg1%
Carbohydrates 22g7%
Sugar 11g12%
Protein 2g4%
Vitamin A 170IU3%
Calcium 16mg2%
Iron 0.7mg4%
* Percent Daily Values are based on a 2000 calorie diet.

Here’s one more to pin on your Pinterest boards!Maple Twists are delicious, made from scratch, maple-glazed pastry rings! The recipe makes 3 pastries (24 servings), so there's plenty for everyone to enjoy!


Save

Save

Egg, Cheese & Veggie Breakfast Casserole

My husband and I hosted Easter brunch at our home this year. One of the dishes I made was this Egg, Cheese & Veggie Breakfast Casserole. I wanted a “meatless” egg dish that our son and his girlfriend, who are vegetarians, could enjoy with the rest of us.Egg, Cheese & Veggie Breakfast Casserole / The Grateful Girl Cooks!So… in addition to our Easter ham, roasted potatoes, fresh asparagus, fruit platter, scones and deviled eggs, I made this breakfast casserole. It tasted fantastic… which was a GOOD thing, since I tweaked my own recipe for Ham n’ Cheese Breakfast Soufflé!

I substituted green chiles, broccoli, asparagus, green onions, and red pepper for the meat in the original recipe (and added pepper jack cheese).

The casserole needs to be prepared and refrigerated the night before you bake it, so the bread soaks up a lot of the egg mixture. Other than a little planning ahead, the rest of the casserole is a breeze to throw together… and it was wonderful to have it all assembled on Easter and ONLY have to put it in the oven. Here’s what I did:

I cut the crust off some french bread (any white bread will do), then cut it into cubes and placed it in a baking pan that had been sprayed with non-stick spray.

Egg, Cheese & Veggie Breakfast Casserole / The Grateful Girl Cooks!
I then spread green chiles over the bread cubes, followed by lightly steamed pieces of broccoli, asparagus, followed by green onions, and red peppers.

Egg, Cheese & Veggie Breakfast Casserole / The Grateful Girl Cooks!
The next thing I did was add a layer of grated pepper jack cheese.

Egg, Cheese & Veggie Breakfast Casserole / The Grateful Girl Cooks!
Next was a layer of cheddar cheese.

Egg, Cheese & Veggie Breakfast Casserole / The Grateful Girl Cooks!
I whisked together eggs, milk, half n’ half, salt and spices in a medium sized bowl.

Egg, Cheese & Veggie Breakfast Casserole / The Grateful Girl Cooks!
I poured the egg mixture evenly over the casserole.

Egg, Cheese & Veggie Breakfast Casserole / The Grateful Girl Cooks!
Casserole was covered with plastic wrap and refrigerated over night. The next day I brought the casserole out of the refrigerator about half an hour before baking (to take the chill off).  I baked the casserole for one hour, then removed it to a wire rack to cool down just a bit before cutting into 12 pieces and serving.

Egg, Cheese & Veggie Breakfast Casserole / The Grateful Girl Cooks!
It really was delicious! The leftovers are easily reheated in the microwave and stay quite yummy! Hope you will give this egg, cheese & veggie casserole a try!

Egg, Cheese & Veggie Breakfast Casserole / The Grateful Girl Cooks!

Hope you enjoy this delicious breakfast casserole! Have a great day.

Interested In More Recipes?

Thank you for visiting this website. I appreciate you using some of your valuable time to do soIf you’re interested, I publish a newsletter 2 times per month (1st and 15th) with all the latest recipes, and other fun info. I would be honored to have you join our growing list of subscribers, so you never miss a great recipe!
There is a Newsletter subscription box on the top right side (or bottom) of each blog post, depending on the device you use, where you can easily submit your e-mail address (only) to be included in my mailing list.

You Can Also Find Me On Social Media:

Facebook page: The Grateful Girl Cooks!
Pinterest:
The Grateful Girl Cooks!
Instagram:
jbatthegratefulgirlcooks

Egg, Cheese & Veggie Breakfast Casserole / The Grateful Girl Cooks!

0 from 0 votes
Egg, Cheese & Veggie Breakfast Casserole
Prep Time
20 mins
Cook Time
1 hr
Total Time
1 hr 20 mins
 
A delicious (and meatless) breakfast casserole filled with eggs, cheddar & pepper jack cheese, broccoli, asparagus, scallions, and red peppers.
Category: Breakfast, Casserole
Cuisine: American
Keyword: veggie breakfast casserole
Servings: 12 servings
Calories Per Serving: 226 kcal
Author: JB @ The Grateful Girl Cooks!
Ingredients
  • 10 slices white bread , crusts removed
  • 1 can (4 ounces) chopped green chiles, drained
  • 1 cup grated cheddar cheese
  • 1 cup grated pepper jack cheese
  • 1 cup chopped broccoli (chopped and lightly steamed)
  • 1 cup fresh asparagus (cut into 1 " pieces, and lightly steamed)
  • 2 green onion stalks (white and green sections), sliced
  • 1/4 cup chopped red pepper
  • 6 eggs , slightly beaten
  • 2 cups milk
  • 1 cup half n' half
  • 1 teaspoon salt
  • 3/4 teaspoon dry mustard powder
  • 2 Tablespoons dried parsley flakes
Instructions
  1. Spray a 9x13 pan with non-stick spray.
  2. Remove the crusts from the bread and discard. Cut remaining bread into cubes. Spread bread cubes in prepared baking dish. Add the following ingredients in layers, distributing evenly across the pan:
  3. Add diced green chiles.
  4. Add lightly steamed and chopped broccoli and asparagus. Next, add sliced green onions, and chopped red peppers.
  5. Add grated pepper jack cheese
  6. Add grated cheddar cheese.
  7. In a medium bowl, whisk together the eggs, milk, half n' half, salt, mustard powder, and dried parsley until fully combined. Pour this mixture evenly over the top of the casserole. Cover pan with plastic wrap; refrigerate overnight.
  8. On the day you are going to bake it, remove pan from refrigerator and let it sit for about 30-40 minutes, to take the chill off the pan. While it sits, preheat oven to 350 degrees.
  9. When ready, remove plastic wrap from casserole; place casserole in oven.
  10. Bake for 1 hour at 350 degrees (or until the eggs are "set" in the middle of pan).**If you forget, and end up taking the dish straight from refrigerator to oven, remember to add another 25-30 minutes of baking time!
  11. When casserole is done baking, remove pan to wire rack. Let it cool for about 10 minutes, then cut into serving pieces. This dish is at it's very best when it has had a chance to cool down just a bit. Enjoy!
Recipe Notes

The prep time does not include the overnight refrigeration required for this dish...FYI.

Nutrition Facts
Egg, Cheese & Veggie Breakfast Casserole
Amount Per Serving (1 g)
Calories 226 Calories from Fat 108
% Daily Value*
Fat 12g18%
Saturated Fat 6g38%
Cholesterol 111mg37%
Sodium 541mg24%
Potassium 314mg9%
Carbohydrates 16g5%
Fiber 1g4%
Sugar 5g6%
Protein 12g24%
Vitamin A 820IU16%
Vitamin C 14.4mg17%
Calcium 287mg29%
Iron 1.9mg11%
* Percent Daily Values are based on a 2000 calorie diet.

Here’s one more to pin on your Pinterest boards!Egg, Cheese & Veggie Breakfast Casserole / The Grateful Girl Cooks!


Save

Save

Save

Homemade “Everything” Bagels

Enjoy some delicious homemade everything bagels (New York style) that are made from scratch, boiled, and then baked until chewy and golden brown!Enjoy some delicious homemade everything bagels (New York style) that are made from scratch, boiled, and then baked until chewy and golden brown!

Last week I decided to try another homemade bagel recipe I found on Pinterest. This time I decided to make Homemade Everything Bagels… chewy, boiled-then-baked bagels. These bagels are topped with a mixture of poppy seeds, sesame seeds, minced garlic and dried onion on top.

The original recipe I found only used sesame and poppy seeds, but I added dried minced garlic and dried minced onions for a true “everything” bagel taste. YUM!!!  This recipe makes 8 delicious bagels! Believe it or not, chewy New York style bagels are actually fairly easy to make. Most of the prep time is spent hanging around, waiting for the dough to rise.

I decided about a year and a half ago to make my own bagels, to learn HOW to make bagels, and save some bucks by making my own. I’ve ended up making quite a few varieties of bagels since then.

Scroll Down For A Printable Recipe Card At The Bottom Of The Page

How To Make Homemade Everything Bagels

Here’s what you do to make these homemade everything bagels:  First you make the dough. It didn’t take long at all in my good ol’ stand mixer.

Dough for the bagels is made using a stand mixer.
Mix the dough up, cover it, and then let it rise in a warm spot for about an hour. So far pretty easy, right?

Once dough is mixed together, it is removed and covered while it rises.
After an hour, you can see that the dough has risen to nearly double it’s original size.

Bagel dough has risen to double it's original size.
Flatten the dough with a good punch, to deflate it. The dough is flattened to remove air bubbles and then it needs to rest for 10 minutes.

The dough is punched to deflate it after rising, and placed on flour covered work surface.
Shape The Homemade Everything Bagels

Divide the dough into 8 equal pieces, then form each piece into a ball. Using your fingers, open a hole in the middle of each dough ball. Let the dough rest for another 10 minutes.

Homemade everything bagel dough is shaped into 8 portions.
Make The Everything Seasoning To Top The Bagels

While the bagel dough is “resting”, make the “everything” topping by combining sesame seeds, poppy seeds, minced garlic, and dried onion in a small bowl. Once mixed together, set the mix aside.

Everything toppings are mixed together for the bagels.
Boil the Bagels

Before boiling the bagels, preheat the oven to 425 degrees. Once the dough has finished “resting”, place bagels, two at a time, into a large pan of lightly boiling water. Boil for 1 minute, then flip and cook the other side for 1 minute.

Bagels are boiled for a couple minutes before baking.
TIP FOR TURNING BAGELS: Use two chopsticks to flip the bagels. One on the outside, one in the middle. Works like a charm!

Chopsticks were used to flip bagels during the boiling process.
Top The Boiled Bagels With “Everything” Mixture

Once bagels have been removed from water, place them on a large baking sheet. Sprinkle the top of the wet bagel with the spice mixture, lightly pressing the mixture into the dough to adhere. Finish boiling the remaining bagels using the same process, until all are done and topped with spice mixture, and ready to bake. 

Boiled bagels are topped with everything mix before baking.Time To Bake The Homemade Everything Bagels

Bake the bagels in 425 degree oven for 22-26 minutes (or until golden brown). Remove the cooked bagels to a wire rack to cool slightly. Serve, and enjoy! They taste wonderful with butter and/or cream cheese.

The finished, baked homemade everything bagels are ready to eat.Time to eat these delicious bagels.

If you want to slice and toast the bagels after cooking, be sure to do this under an oven broiler, and not in a standard toaster (because of all the toppings!).

Hope you enjoy these bagels. If you enjoy homemade bagels, be sure to check out my recipes for NY Style blueberry bagels, cranberry orange, and jalapeno cheddar bagels. Other bagel recipes can be found in my Recipe Index, located at the top of the page. Have a great day!

Interested In More Recipes?

Thank you for visiting this website. I appreciate you using some of your valuable time to do soIf you’re interested, I publish a newsletter 2 times per month (1st and 15th) with all the latest recipes, and other fun info. I would be honored to have you join our growing list of subscribers, so you never miss a great recipe!
There is a Newsletter subscription box on the top right side (or bottom) of each blog post, depending on the device you use, where you can easily submit your e-mail address (only) to be included in my mailing list.

You Can Also Find Me On Social Media:

Facebook page: The Grateful Girl Cooks!
Pinterest:
The Grateful Girl Cooks!
Instagram:
jbatthegratefulgirlcooks

Author's signature

Recipe Source: http://deliciouslyyum.com/two-hour-bagels/

↓↓ PRINTABLE RECIPE BELOW ↓↓

0 from 0 votes
Homemade "Everything" Bagels
Prep Time
1 hr 30 mins
Cook Time
22 mins
Total Time
1 hr 52 mins
 

Enjoy some delicious homemade everything bagels (New York style) that are made from scratch, boiled, and then baked until chewy and golden brown!

Category: Breakfast
Cuisine: American
Keyword: homemade everything bagels
Servings: 8 bagels
Calories Per Serving: 241 kcal
Author: JB @ The Grateful Girl Cooks!
Ingredients
  • 2 1/4 teaspoons active dry yeast (1 packet)
  • 2 teaspoons granulated sugar
  • 3 1/2 cups bread flour (plus additional for kneading the dough)
  • 1 3/4 teaspoons salt
  • 1 1/3 cups warm water (110 degrees)
  • 2 Tablespoons Poppy seeds
  • 2 Tablespoons Sesame seeds
  • 1 Tablespoon Minced dried garlic
  • 1 Tablespoon Dried minced onion
Instructions
  1. Place a dough hook onto a stand mixer. Into the bowl of the mixer, add yeast, sugar, flour and salt (in that order). Pour the warm (110 degree) water slowly into the bowl, with machine on low and mix on low for 3-4 minutes to fully incorporate the ingredients together. Once fully combined, increase the speed on the mixer to Medium. Continue kneading the dough on Medium speed for 10 minutes.
  2. Lightly flour a large work surface. Punch down the dough to deflate it, and remove it from the mixer bowl to the floured surface. Cover dough with dish towel; let it rest for 10 minutes.
  3. Dive the dough into 8 equal sized pieces. Using your fingers, flatten each dough ball (to help get rid of air bubbles). Roll each piece into a ball, working the seams toward the underside of each ball with your fingers. Press your finger through the middle of each dough ball, Stretch the hole out a bit, as you form the bagel shape. Place each formed bagel onto parchment paper (or lined baking sheet). Let them rest for another 10 minutes (it's HARD work being bagel dough!)
  4. While the dough is "resting", mix the topping ingredients together into a small bowl. Add more, as desired. Set topping aside.
  5. Preheat oven to 425 degrees. Bring a large pan of water to a rolling boil, then reduce heat to a simmer/low boil.
  6. Carefully put two bagels at a time into the lightly boiling water. Cook for 1 minute. Flip the bagels over; cook for another minute. Remove to baking sheet. While bagels are wet, sprinkle the top with spice mixture, pressing lightly to adhere spices to bagel.
  7. Repeat process with remaining bagels until all are done, and ready to bake.
  8. Bake bagels at 425 degrees for 22-26 minutes (my oven took the full 26 minutes). Bagels should be light golden brown when done. Remove bagels to wire rack to cool slightly, then serve.
  9. Enjoy!
Nutrition Facts
Homemade "Everything" Bagels
Amount Per Serving (1 g)
Calories 241 Calories from Fat 27
% Daily Value*
Fat 3g5%
Sodium 513mg22%
Potassium 133mg4%
Carbohydrates 44g15%
Fiber 3g13%
Sugar 1g1%
Protein 8g16%
Vitamin C 0.2mg0%
Calcium 63mg6%
Iron 1.2mg7%
* Percent Daily Values are based on a 2000 calorie diet.

Here’s one more to pin on your Pinterest boards!Enjoy some delicious homemade everything bagels (New York style) that are made from scratch, boiled, and then baked until chewy and golden brown!


Save

Save

Save