Cook these cute mini skillet brownies for two on a pellet grill OR in an oven! It’s fun & romantic to share this EASY dessert with those you love!

My husband and I went out to dinner for our anniversary last year (#41), and the restaurant gave us free dessert to celebrate! They presented us with the cutest little warm skillet brownie in a cast iron skillet, topped with ice cream and sauce, for us to share.
Oh. My. Goodness. The skillet brownies for two tasted AMAZING, and it was fun to share this unique, sweet treat with the man I love! I’ve posted instructions to make them in an oven OR on a pellet grill (a great way to keep the kitchen cool in the heat of summer!).

Well, we enjoyed that cute little dessert so much, I knew I wanted to make it at home! We have tried them cooked in an oven, and on our Traeger grill. I whip up this dessert and bake it in 6 inch mini cast iron skillets, and use a store bought chocolate brownie mix to save time!
The mini-skillets (recipe makes 4 skillets at 2 servings each) are also a convenient, cute way to serve a number of dinner guests (especially couples)!
Scroll Down For A Printable Recipe Card At The Bottom Of The Page
Using A Box Mix Is An Easy Timesaver!
Almost always I make homemade brownies from scratch, but sometimes I just want dessert made fast, without much effort! This shortcut method (using a boxed brownie mix) allows me to quickly get FOUR of these cute little desserts made, lickety split! If you would rather make the brownies from scratch, I recommend my favorite brownies!
We have also taken warm skillet brownies for two with scoops of ice cream and chocolate sauce to our neighbors to enjoy! One evening my husband took one (still warm) to a neighbors home when it was raining. He carried the warm brownie skillet, (topped with chocolate syrup and a scoop of ice cream) under an umbrella and delivered it right to their front door!
How To Make Skillet Brownies For Two (EASY PEASY!)
When using a box brownie mix (I used Duncan Hines dark chocolate for these photos), be sure to follow directions (if provided) for “fudgy” texture brownies. This usually means simply reducing the number of eggs used from 2 to 1. That is what I do when I make these skillet desserts.
Mix one box of brownie mix (18.2 ounces) with one egg, water, and vegetable oil in a large bowl. Easy peasy, and no mixer needed. Just whisk or stir with a spoon until ingredients are fully blended. If you wish, you can add chocolate chips or chopped nuts to the batter, as well.


Grease (or spray) 4- six inch cast iron skillets. I got mine (Wilton 6 inch skillets) on Amazon using a gift card from my family! They have sure been fun to use for various “individual sized” desserts! Evenly divide the brownie batter between the skillets, and level out the batter with a spatula or the back of a spoon.

Making Skillet Brownies For Two In An Oven
If you are baking these desserts in your oven, preheat it to 350 degrees. Once at temperature, place the skillets on the middle rack. Bake for between 17-22 minutes, checking them at the 17 minute mark, by inserting a toothpick into the middle.
Ovens can have temperature variances, so your baking time may be a little different. When done, remove from oven and let them cool for 3-5 minutes. TIP: If you like brownies slightly underdone and gooey : they’re “usually” ready at about 17 minutes. If you like brownies more done: they’re “usually” ready at about 20- 22 minutes.
Making Skillet Brownies For Two On a Traeger Or Pellet Grill
To make these skillet brownies on a Traeger or pellet grill, here’s how: Make sure hopper is full of pellets. Turn to SMOKE setting (lid open) and let fire get established (about 4-5 minutes). Once smoking and fire is established, turn temperature setting to 350° F. Close the lid and let grill preheat for 10-15 minutes to reach temperature.
Place skillet brownies directly onto grill grate once temp. has been reached. Bake the brownies (lid closed) for 20-25 minutes, or until a toothpick inserted into middle of brownie comes out fairly clean. Cover skillet with foil, if the edges begin to brown too quickly. When done, remove skillets from grill, and let them cool for 3-5 minutes.

Let the skillet brownies cool for 3-5 minutes before serving.

Time To Serve The Skillet Brownies For Two!
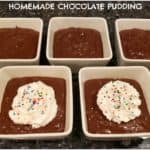
While the brownies are still warm, top each dessert with a big ol’ scoop of ice cream . Drizzle with chocolate or caramel sauce (or both!), and garnish with a maraschino cherry! Each of the skillet brownies is 2 servings, so give everyone a spoon or fork, and let them dig in!


Hope you enjoy these cute little skillet brownies for two! We sure do (and so did several of our neighbors)! Have a wonderful day.
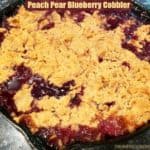
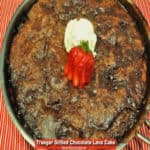
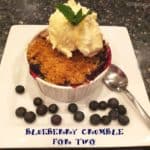
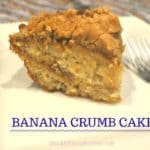
Looking For More Traeger/Pellet Grill Desserts?
You can find all of my recipes in the Recipe Index, located at the top of the page. A couple dessert recipes for a Traeger or pellet grill you might also enjoy include:
Interested In More Recipes?
Thank you for visiting this website. I appreciate you using some of your valuable time to do so. If you’re interested, I publish a newsletter 2 times per month (1st and 15th) with all the latest recipes, and other fun info. I would be honored to have you join our growing list of subscribers, so you never miss a great recipe!
There is a Newsletter subscription box on the top right side (or bottom) of each blog post, depending on the device you use, where you can easily submit your e-mail address (only) to be included in my mailing list.
You Can Also Find Me On Social Media:
Facebook page: The Grateful Girl Cooks!
Pinterest: The Grateful Girl Cooks!
Instagram: jbatthegratefulgirlcooks

Original recipe source: Box of Duncan Hines dark chocolate brownie mix

Cook these cute mini skillet brownies for two on a pellet grill OR in an oven! It's fun & romantic to share this EASY dessert with those you love!
- 18.2 ounces chocolate fudge brownie mix , I used Duncan Hines dark chocolate brand
- 1 large egg
- ⅓ cup water
- ⅓ cup vegetable oil
- OPTIONAL Add-Ins: chopped pecans, walnuts, and/or chocolate chips
Mix one box of brownie mix (18.2 ounces) with one egg, water, and vegetable oil in a large bowl. Stir or whisk until ingredients are fully blended. If you want, you can add chocolate chips or chopped nuts to the batter, as well.
Grease (or spray) 4- six inch cast iron skillets. Evenly divide the brownie batter between the skillets, and level it out with a spatula or the back of a spoon.
Preheat oven to 350° F. Once at temperature, place skillets on the middle rack. Bake for 17-22 minutes. Ovens can have temperature fluctuations, so your baking time may be a little different. Check them at the 17 minute mark by inserting a toothpick into the middle of one. If it comes out fairly clean, it is done. When done, remove from oven and let them cool for 3-5 minutes.
TIP: If you like brownies slightly underdone and gooey : oven-baked are "usually" ready at about 17 minutes. If you like brownies more done: they're "usually" ready at about 20- 22 minutes.
Make sure hopper is full of pellets. Turn to SMOKE setting (lid open) and let fire get established (about 4-5 minutes). Once smoking and established, turn temperature setting to 350° F. Close lid and preheat for 10-15 minutes to reach temperature. Place skillet brownies directly onto grill grate once temp. has been reached. Bake (lid closed) for 20-25 minutes until your desired done-ness, or until a toothpick inserted into middle of brownie comes out fairly clean. Cover skillet with foil, if the edges begin to brown too quickly. When done, remove skillets from grill, and let them cool for 3-5 minutes.
While brownies are still warm, top each skillet with a scoop of ice cream. Drizzle with chocolate or caramel sauce (or both!), and garnish with a maraschino cherry, or other toppings (as desired)! Each of the skillet brownies is 2 servings, so give everyone a spoon or fork, and let them dig in! Enjoy!
Optional Toppings: vanilla ice cream, chocolate sauce, whipped cream, maraschino cherries, chopped nuts, caramel sauce, sprinkles, etc.
Here’s one more to pin on your Pinterest boards!


 on a smoker or pellet grill! Easy to make dessert that tastes amazing, and is done in 35 minutes. / The Grateful Girl Cooks!")


 on a smoker or pellet grill! Easy to make dessert that tastes amazing, and is done in 35 minutes. / The Grateful Girl Cooks!")


