Category: Desserts

Homemade Hot Fudge Sauce

Thick, creamy, decadent and ready in 10 minutes, this easy homemade chocolate hot fudge sauce is so scrumptious you may never want to buy it at the store again!Thick, creamy, decadent and ready in 10 minutes, this easy homemade chocolate hot fudge sauce is so scrumptious you may never want to buy it at the store again!
It’s the middle of summer, it’s extremely HOT in Oregon this week, with temps expected to reach 108-110 degrees. However… we do have some yummy ice cream in the freezer!

We also have this amazing, thick Homemade Hot Fudge Sauce ready to drizzle on the ice cream, so it’s all GOOD! We may be HOT, but at least we will have a smile on our faces!

This recipe for homemade hot fudge sauce is a keeper, folks. It’s fudge-y, creamy, and is ready in under 10 minutes!  I’m NOT kidding… it tastes amazing!  Here’s how you can make this decadent sauce at home, rather than buying it at the local grocery store!

Scroll Down For A Printable Recipe Card At The Bottom Of The Page

How To Make Homemade Hot Fudge Sauce

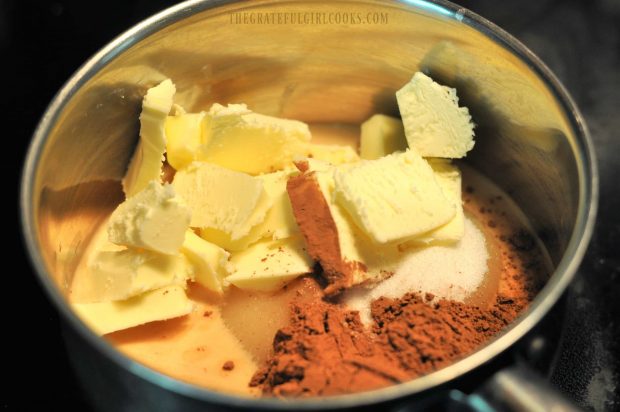
In a large saucepan, bring the whipping cream, corn syrup, dark brown sugar, salt, and HALF of the finely chopped chocolate to a boil over medium heat. Stir often, until all the chocolate has melted.

Reduce the heat under the pan and simmer (a low boil) for 5 minutes. While cooking, make sure to stir the mixture frequently to prevent scorching.

Whipping cream, brown sugar and chocolate for fudge sauce, in saucepan

Remove the pan from the heat. Add butter, vanilla extract and the rest of the chocolate to the pan.

Stir the homemade hot fudge sauce until the chocolate is smooth and lump-free. Let the HOT fudge sauce cool just a bit before serving.

Butter and chocolate added to hot fudge sauce in pan

Spoon the hot fudge sauce over ice cream, cake, or even drizzled on top of dessert crepes!  It tastes soooo good!

Homemade hot fudge sauce served over vanilla ice cream in dish.

Storing The Sauce

Store the unused sauce in a covered jar or container with a lid for up to a week in the refrigerator. Once the sauce has been refrigerated, it will thicken considerably.

How To Reheat Hot Fudge Sauce Once It Has Been Refrigerated

When ready to use it again, remove the thick hot fudge sauce from the refrigerator.  The sauce can either be cooked in a saucepan on the stove, or in a microwave.

  • TO MICROWAVE: Place the amount you will be using in the microwave (in a microwave-safe container). Re-heat hot fudge sauce for 10-15 seconds on high setting. Give it a stir. If it needs just a bit more time, place it back in microwave for a few seconds.
  • TO REHEAT ON STOVE: The hot fudge sauce can also be reheated in a small saucepan on your stovetop using low heat.

Spoonful of thick hot fudge sauce, over a glass jar

Spoon some of the homemade hot fudge sauce over ice cream, cake, or whatever you want to top with it!

My favorite way to use this thick, delicious sauce is to top homemade vanilla ice cream with it! Oh YUM.

Hot fudge sauce as topping for ice cream

This homemade hot fudge sauce is so delicious, thick and fudgy, you might be tempted to grab a spoon and eat it straight out of the jar! NOT that I would know anything about that, of course… wink, wink!.

This recipe is most definitely going into my “keeper” file!  Hope you will give it a try – I just KNOW you’re gonna love it, too!

Looking For More DESSERT SAUCE Recipes? 

Be sure to check out ALL my recipes in the Recipe Index, located at the top of the page. If you are interested in finding other delicious dessert sauces to serve over ice cream, you might want to try these:

Want More Recipes? Get My FREE Newsletter!

I publish a newsletter 2 times per month (1st and 15th) with lots of recipes, tips, etc..
Would you like to join our growing list of subscribers?

There is a Newsletter subscription box on the top right (or bottom) of each blog post, depending on the device you use.
You can submit your e-mail address there, to be added to my mailing list.

Find Me On Social Media:

Facebook page: The Grateful Girl Cooks!
Pinterest:
The Grateful Girl Cooks!
Instagram:
jbatthegratefulgirlcooks

Author's signature

Recipe Adapted From: https://www.averiecooks.com/2013/04/10-minute-homemade-hot-fudge-html

↓↓ PRINTABLE RECIPE BELOW ↓↓

0 from 0 votes
Homemade Hot Fudge Sauce
Prep Time
5 mins
Cook Time
5 mins
Total Time
10 mins
 

Thick, creamy, decadent and ready in 10 minutes, this easy homemade chocolate hot fudge sauce is so scrumptious you may never want to buy it at the store again!

Category: Dessert Sauce
Cuisine: American
Keyword: homemade hot fudge sauce
Servings: 16 (2 cups-2 Tablespoons per serving)
Calories Per Serving: 160 kcal
Author: JB @ The Grateful Girl Cooks!
Ingredients
  • 2/3 cup heavy whipping cream
  • 1/2 cup light corn syrup
  • 1/3 cup dark brown sugar , packed
  • 1/4 cup unsweetened cocoa powder
  • 1/4 teaspoon salt
  • 6 ounces semi-sweet chocolate (can also use dark or bittersweet), finely chopped
  • 2 Tablespoons butter
  • 2 teaspoons vanilla extract
Instructions
  1. In a large saucepan, bring whipping cream, corn syrup, dark brown sugar, salt, and HALF of the finely chopped chocolate to a boil over medium heat. Stir often until chocolate has melted. Reduce the heat under the pan and simmer (a low boil) for 5 minutes, making sure to stir the mixture frequently to prevent scorching.
  2. Remove pan from the heat. Add butter, vanilla extract and the rest of the chocolate. Stir until chocolate is smooth and lump-free. Let the hot fudge sauce cool just a bit before serving.
  3. Store the unused sauce in a covered jar or container with a lid for up to a week in the refrigerator. Once refrigerated, the sauce will thicken considerably. When ready to use it again, place the amount you will be using in the microwave (in a microwave-safe container) and re-heat for 10-15 seconds. The sauce can also be reheated on your stovetop. Enjoy!
Nutrition Facts
Homemade Hot Fudge Sauce
Amount Per Serving (2 Tablespoons)
Calories 160 Calories from Fat 81
% Daily Value*
Fat 9g14%
Saturated Fat 5g31%
Cholesterol 17mg6%
Sodium 61mg3%
Potassium 94mg3%
Carbohydrates 19g6%
Fiber 1g4%
Sugar 16g18%
Protein 1g2%
Vitamin A 195IU4%
Vitamin C 0.1mg0%
Calcium 20mg2%
Iron 0.9mg5%
* Percent Daily Values are based on a 2000 calorie diet.

Here’s one more to pin on your Pinterest boards!Thick, creamy, decadent and ready in 10 minutes, this easy homemade chocolate hot fudge sauce is so scrumptious you may never want to buy it at the store again!

Save

Save

Save

Save

Save

Save

Save

Save

Save

Save

Save

Save

Save

Save

Save

Pecan Chewies

Looking for a new recipe for bar cookies? How about trying this one for Pecan Chewies? They are buttery, chewy, simple to make, taste delicious, and the recipe makes two dozen… in hardly any time at all!Pecan Chewies are bar cookies that are absolutely buttery, chewy and delicious! You can make 2 dozen of these yummy family friendly treats in no time at all!
I found this recipe on Pinterest (thanks to Stacey at Southern Bite) and decided to make a batch, using some of the Texas pecans my Mom orders for us each year. It was a sacrifice making yummy bar cookies, but hey… someone’s gotta do it!

These Pecan Chewies are just that… a little bit chewy, not overly sweet, yet they are wonderfully buttery and delicious! They’re also incredibly easy to make! Here’s how to whip up 2 dozen in no time at all:

Scroll Down For A Printable Recipe Card At The Bottom Of The Page

Prepare The Batter

Preheat oven to 300 degrees F.  Spray a 13×9 inch cake pan with some non-stick baking spray before beginning.  Melt butter, and add it to a large bowl. Add granulated sugar and brown sugar, and mix it well by hand (no mixer needed!).  Add the beaten eggs, then the flour.

Stir the dough really well, until all ingredients are incorporated into batter and no lumps remain.  Next, add in the chopped pecans and vanilla.

Dough is made for pecan chewies...

Stir well, then evenly spread dough into prepared 13×9 inch baking pan.

Dough for the pecan chewies is spread in a 13x9" baking pan.

Baking The Pecan Chewies

Bake at 300 degrees F for between 40 and 50 minutes (oven temps vary).  Make sure to NOT over bake the bar cookies.  I checked mine at the 40 minute mark and they were done!  When done, remove pan to a wire rack and let the Pecan Chewies cool.  Once they are at room temperature, cut into 24 portions.

The pecan chewies are cut into 24 pieces.

That’s it! See how simple they were to make with only about 10 minutes work?  The bars all came out of the baking pan very easily, as well.  And they REALLY are good!  See those yummy chopped pecan pieces in them? YUM.

A plate full of pecan chewies, ready to eat.You can see the nuts in the bar cookies.

Time To Eat

Look- I even saved you one. Want a bite? I love that these bars are not overly sweet.  I “might” have even had one with my morning coffee this morning! I think you will really enjoy these chewy bar cookies, and there’s certainly enough to share!

Holding up the bar cookie for the camera to photograph up close.

I hope you enjoy this recipe. It’s always fun to try new recipes and I love it when I find a really GOOD one, like this! Speaking of good bar cookie recipes, check out my recipes for Chocolate Pecan Pie Bars, Blackberry Pie Bars, Lemon Bars or my decadent Best Brownies. I think you will LOVE them all! You can find ALL my recipes in the Recipe Index, located at the top of the page.

Have a wonderful day, and remember to be KIND to those you cross paths with today!  They may really need someone like YOU to encourage them!

Interested In More Recipes?

Thank you for visiting this website. I appreciate you using some of your valuable time to do soIf you’re interested, I publish a newsletter 2 times per month (1st and 15th) with all the latest recipes, and other fun info. I would be honored to have you join our growing list of subscribers, so you never miss a great recipe!
There is a Newsletter subscription box on the top right side (or bottom) of each blog post, depending on the device you use, where you can easily submit your e-mail address (only) to be included in my mailing list.

You Can Also Find Me On Social Media:
Facebook page: The Grateful Girl Cooks!
Pinterest: The Grateful Girl Cooks!
Instagram: jbatthegratefulgirlcooks

Author's signature

Recipe Source: http://southernbite.com/pecan-chewies/

0 from 0 votes
Pecan Chewies
Prep Time
10 mins
Cook Time
45 mins
Total Time
55 mins
 

Pecan Chewies are bar cookies that are absolutely buttery, chewy and delicious! You can make 2 dozen of these yummy family friendly treats in no time at all!

Category: Dessert
Cuisine: American
Keyword: pecan chewies
Servings: 24 bars
Calories Per Serving: 210 kcal
Author: JB @ The Grateful Girl Cooks!
Ingredients
  • 1 cup (2 cubes) butter
  • 1 cup granulated sugar
  • 1 cup firmly packed brown sugar (light or dark-I used dark)
  • 2 eggs , beaten well
  • 2 cups self-rising flour (See NOTES for self-rising flour substitution)
  • 1 cup chopped pecans
  • 2 teaspoons vanilla extract
Instructions
  1. Preheat oven to 300 degrees F. Spray a 13x9 inch cake pan (bottom and sides) with non-stick baking spray.
  2. Melt butter; add it to a large bowl. Add granulated sugar and brown sugar; mix well, by hand (no mixer needed!). Add beaten eggs, then the flour. Stir dough really well, until all ingredients are incorporated into batter and no lumps remain. Next add in the chopped pecans and vanilla extract. Stir well, then evenly spread dough into prepared 13x9 inch baking pan.
  3. Bake at 300 degrees for about 40 to 50 minutes (oven temps vary). Make sure NOT to over bake. I checked mine at the 40 minute mark and they were done! When done, remove pan to a wire rack and let the Pecan Chewies cool. Once at room temperature, cut into 24 portions. Serve, and enjoy!
Recipe Notes

If you do not have self-rising flour you can substitute 2 C all-purpose flour + 3 tsp. baking powder+1 tsp. salt.

Nutrition Facts
Pecan Chewies
Amount Per Serving (1 bar)
Calories 210 Calories from Fat 99
% Daily Value*
Fat 11g17%
Saturated Fat 5g31%
Cholesterol 33mg11%
Sodium 75mg3%
Potassium 48mg1%
Carbohydrates 25g8%
Sugar 17g19%
Protein 2g4%
Vitamin A 260IU5%
Vitamin C 0.1mg0%
Calcium 17mg2%
Iron 0.3mg2%
* Percent Daily Values are based on a 2000 calorie diet.

Here’s one more to pin on your Pinterest boards!Pecan Chewies are bar cookies that are absolutely buttery, chewy and delicious! You can make 2 dozen of these yummy family friendly treats in no time at all!

Save

Save

Save

Save

Save

Save

Save

Save

Save

Save

Save

Save

Save

Save

Save

Save

Save

Save

Save

Save

Save

Save

Strawberry Cheesecake Ice Cream

It’s easy to make delicious, fresh homemade strawberry cheesecake ice cream, with an ice cream maker and only a few common ingredients!It's easy to make delicious, fresh homemade strawberry cheesecake ice cream, with an ice cream maker and only a few common ingredients!
I love cheesecake, and I love strawberries. Believe it or not, I also love cheesecake with strawberry topping! So it stands to reason that I would also love homemade Strawberry Cheesecake Ice Cream!

It’s fun making homemade ice cream in my little electric ice cream maker that I received several years ago for my birthday. The kind I have is perfect for a quick batch… no ice cubes and no salt to freeze it.

It just sits on my kitchen counter waiting patiently for me.  I pour in the ice cream mixture and a little over 20 minutes later… boom… ice cream! It’s fun (and dangerous) to be able to make homemade ice cream, even when it’s snowing or pouring down rain outside.

Scroll Down For A Printable Recipe Card At The Bottom Of The Page

How I Came Up With Recipe

This recipe for strawberry cheesecake ice cream is an easy recipe I tried one summer while experimenting with a LOT of ice cream recipes. For this recipe I added in a few ingredients that I thought would make a great ice cream to my standard vanilla base.

Did I mention that I ate all the different kinds of ice cream I made that summer? Well… SOMEONE had to do it.  Heh heh heh. This recipe for Strawberry Cheesecake ice cream tasted great, and is very simple to make. Here’s how:

How To Make Strawberry Cheesecake Ice Cream

Place cleaned, stemmed, cored and sliced fresh strawberries, sugar and lemon juice into a blender. Blend on high until mixture is pureed.  Add 8 ounces of room temperature cream cheese (cut into chunks) to the liquid. Blend again until mixture is well pureed.

Transfer the strawberry/cream cheese mixture to a large bowl.  Stir in whipping cream, milk, and vanilla extract, to fully combine. This is you strawberry cheesecake ice cream base.

Fresh strawberries will be used to make strawberry cheesecake ice cream.

Pour the ice cream mixture into the cannister of an ice cream machine. Freeze, per manufacturer instructions until done. My beloved ice cream machine takes just over 20 minutes to freeze to soft-serve consistency.

The strawberry cheesecake ice cream is ready to eat right then and there, but I suggest transferring ice cream to a freezable container with a lid, and freeze for 2-3 additional hours to firm ice cream up to a more “scoopable” consistency.

My Cuisinart ice cream machine.That’s it!  When the ice cream is done, grab a big ol’ scoop, plop down into the nearest chair and enjoy this delicious strawberry cheesecake ice cream.  Sure hope you enjoy it… we sure do!

Looking For More HOMEMADE ICE CREAM Recipes?

You can find all of my recipes in the Recipe Index, located at the top of the page. I have many ice cream recipes, including:

Interested In More Recipes?

Thank you for visiting this website. I appreciate you using some of your valuable time to do soIf you’re interested, I publish a newsletter 2 times per month (1st and 15th) with all the latest recipes, and other fun info. I would be honored to have you join our growing list of subscribers, so you never miss a great recipe!
There is a Newsletter subscription box on the top right side (or bottom) of each blog post, depending on the device you use, where you can easily submit your e-mail address (only) to be included in my mailing list.

You Can Also Find Me On Social Media:
Facebook page: The Grateful Girl Cooks!
Pinterest: The Grateful Girl Cooks!
Instagram: jbatthegratefulgirlcooks

Author's signature

0 from 0 votes
Strawberry Cheesecake Ice Cream
Prep Time
30 mins
Cook Time
0 mins
Total Time
30 mins
 
It's easy to make delicious, fresh homemade strawberry cheesecake ice cream, with an ice cream maker and only a few common ingredients!
Category: Dessert
Cuisine: American
Keyword: strawberry cheesecake ice cream
Servings: 10 (1/2 cup servings)
Calories Per Serving: 203 kcal
Author: JB @ The Grateful Girl Cooks!
Ingredients
  • 2 cups fresh strawberries , de-stemmed, cored, sliced
  • 3/4 cup granulated sugar
  • 2 teaspoons fresh lemon juice
  • 8 ounces cream cheese (room temp)
  • 1 cup whipping cream
  • 1/2 cup whole milk
  • 1 teaspoon vanilla extract
Instructions
  1. Combine strawberries, sugar and lemon juice in blender. Blend until mixture is smooth and pureed.
  2. Cut softened cream cheese into chunks and add to blender. Blend until smooth. Transfer fruit puree into a large mixing bowl.
  3. Stir in whipping cream, milk and vanilla until blended.
  4. Pour ingredients into freezer cannister of ice cream machine and freeze according to manufacturer instructions (usually between 20 and 25 minutes).
  5. When done, transfer ice cream to a covered freezer container and place in freezer for 2-3 hours to firm up to a scoopable consistency.
  6. Serve, and enjoy!
Nutrition Facts
Strawberry Cheesecake Ice Cream
Amount Per Serving (1 (1/2 cup serving))
Calories 203 Calories from Fat 108
% Daily Value*
Fat 12g18%
Saturated Fat 7g44%
Cholesterol 46mg15%
Sodium 121mg5%
Potassium 134mg4%
Carbohydrates 20g7%
Sugar 18g20%
Protein 2g4%
Vitamin A 495IU10%
Vitamin C 17.5mg21%
Calcium 67mg7%
Iron 0.2mg1%
* Percent Daily Values are based on a 2000 calorie diet.

Here’s one more to pin on your Pinterest boards!It's easy to make delicious, fresh homemade strawberry cheesecake ice cream, with an ice cream maker and only a few common ingredients!

Save

Save

Save

Save

Save

Save

Save

Save

Save

Save

Save

Piña Colada Ice Cream

Enjoy a taste of the tropics with yummy Piña Colada Ice Cream, with pineapple, cream of coconut, rum extract, coconut milk, & grated toasted coconut.Enjoy a taste of the tropics with yummy Piña Colada Ice Cream, with pineapple, cream of coconut, rum extract, coconut milk, & grated toasted coconut.
Summertime is coming… blue skies, warm weather, evenings spent out on the back deck by the fire pit… enjoying a dish of homemade Piña Colada Ice Cream! Oh boy – I can hardly wait! We have had the wettest winter I can remember in a LONG time here in Oregon, and we are LONGING for sunshine and hot weather to finally make it’s appearance!

One of the traditions we have is to make homemade ice cream throughout the year… at least this Piña Colada Ice Cream makes it FEEL like summer, thanks to it’s coconut/pineapple tropical flavor!

Scroll Down For A Printable Recipe Card At The Bottom Of The Page

How To Make Piña Colada Ice Cream

In a large mixing bowl, combine whipping cream, cream of coconut, coconut milk, and pineapple juice. (If desired, you can add 1/4 teaspoon of Rum extract, but it is not necessary).  Stir until combined.  Add coconut flakes and stir.

Pour this mixture into the canister of an ice cream maker and freeze according to manufacturer instructions. I use an electric indoor machine and it takes 20-25 minutes for soft serve consistency.  About 5 minutes BEFORE the piña colada ice cream is done, add the drained, crushed pineapple.

Ice cream base is poured into machine for freezing.

Let Ice Cream Firm Up In Freezer, Then Serve!

When ice cream is done, transfer it to a freezer safe container with a lid. Freeze an additional 3-4 hours until firm.  When it is ready to serve, garnish each scoop of piña colada ice cream with toasted coconut flakes. NOTE: See the notes section of the printable recipe (below) for instructions on how to toast the coconut.

The pina colada ice cream is garnished with toasted shredded coconut to serve.

That’s it! Enjoy a “taste of the tropics” any time of the year with this simple and delicious piña colada ice cream! Sure hope you enjoy it.

Looking For More ICE CREAM Recipes?

You can find all of my recipes in the Recipe Index, located at the top of the page. I have quite a few recipes for ice cream. they include:

Interested In More Recipes?

Thank you for visiting this website. I appreciate you using some of your valuable time to do soIf you’re interested, I publish a newsletter 2 times per month (1st and 15th) with all the latest recipes, and other fun info. I would be honored to have you join our growing list of subscribers, so you never miss a great recipe!
There is a Newsletter subscription box on the top right side (or bottom) of each blog post, depending on the device you use, where you can easily submit your e-mail address (only) to be included in my mailing list.

You Can Also Find Me On Social Media:
Facebook page: The Grateful Girl Cooks!
Pinterest: The Grateful Girl Cooks!
Instagram: jbatthegratefulgirlcooks

Author's signatureRecipe Source:  Unknown. Copied recipe onto notebook paper many, many years ago, but did not write down the source. Oops.

0 from 0 votes
Piña Colada Ice Cream
Prep Time
30 mins
Cook Time
0 mins
Total Time
30 mins
 

Enjoy a taste of the tropics with yummy Piña Colada Ice Cream, with pineapple, cream of coconut, rum extract, coconut milk, & grated toasted coconut.

Category: Dessert
Cuisine: American
Keyword: piña colada ice cream
Servings: 10 ½ cup servings
Calories Per Serving: 387 kcal
Author: JB @ The Grateful Girl Cooks!
Ingredients
  • 3/4 cup whipping cream
  • 1 can cream of coconut use 15 oz. or 13.5 oz (brands vary in weight)
  • 1 cup coconut milk unsweetened (canned=13.66 oz.)
  • 2 Tablespoons pineapple juice (reserved from can of crushed pineapple)
  • 1/4 teaspoon Rum extract (optional-not necessary)
  • 1 cup coconut flakes
  • 3/4 cup canned crushed pineapple , drained (juice reserved)
  • 1/4 cup TOASTED coconut flakes , for garnish (see Notes section for instructions)
Instructions
  1. In a large mixing bowl, combine whipping cream, cream of coconut, coconut milk, and pineapple juice. (you can also add 1/4 teaspoon of Rum extract, if desired). Stir until combined. Add coconut flakes and stir to incorporate. Pour this mixture into canister of ice cream maker and freeze according to manufacturer instructions. About 5 minutes BEFORE the ice cream is done, add drained crushed pineapple.
  2. When ice cream is done, transfer it to a freezer safe container with a lid. Freeze for an additional 3-4 hours until firm. When it is ready to serve, garnish each scoop with toasted coconut flakes (see notes section of printable recipe for instructions on how to toast the coconut).
Recipe Notes

To toast coconut flakes for garnish: Preheat oven to 325 degrees. Spread coconut evenly on cookie sheet lined with parchment paper. Bake for about 15-20 minutes. Check it every 5 minutes. Remove from oven when coconut is golden brown. Remove coconut from cookie sheet; let cool completely before garnishing ice cream.

Nutrition Facts
Piña Colada Ice Cream
Amount Per Serving (0.5 cup)
Calories 387 Calories from Fat 225
% Daily Value*
Fat 25g38%
Saturated Fat 20g125%
Cholesterol 24mg8%
Sodium 35mg2%
Potassium 177mg5%
Carbohydrates 40g13%
Fiber 3g13%
Sugar 35g39%
Protein 1g2%
Vitamin A 285IU6%
Vitamin C 4.8mg6%
Calcium 25mg3%
Iron 1.2mg7%
* Percent Daily Values are based on a 2000 calorie diet.

Here’s one more to pin on your Pinterest boards!Enjoy a taste of the tropics with yummy Piña Colada Ice Cream, with pineapple, cream of coconut, rum extract, coconut milk, & grated toasted coconut.

Save

Save

Save

Save

Save

Save

Save

Save

Save

Save

Save

Save

Save

Irish Chocolate Pots de Crème

Easy, decadent, Irish chocolate pots de créme dessert, with Irish cream liqueur, is made in under 10 minutes in a blender! It’s a PERFECT recipe for St. Patrick’s Day!Easy, decadent, Irish chocolate pots de créme dessert, with Irish cream liqueur, is made in under 10 minutes in a blender! Perfect for St. Patrick's Day!
Decadent, rich, simple to prepare (in under 10 minutes!) and extremely delicious. Those are the first words that come to mind when describing these Irish Chocolate Pots de Crème!

“Pots de Crème” is actually a French dessert “custard” that dates back to the 17th century. It’s name literally means “pots of cream”.

I made this amazing dessert a couple weeks ago for a family get together, and oh my goodness! Soooo good!  Let me tell you, pots de crème are much thicker than pudding or mousse and  extremely rich.

I told our guests they were so rich it would put hair on their chests!. It may be rich, but oh boy, it is DELICIOUS! Here’s how to make it:

Scroll Down For A Printable Recipe Card At the Bottom Of The Page

How I Got This Recipe

The preparation takes less than 10 minutes, which is an added benefit!  I’d been drooling over the recipe posted on a website called “The Café Sucre Farine”, so I gave in and decided to make it!  If you’ve never checked out this website, I would encourage you to do so.

Chris shares phenomenal recipes, and her husband Scott shares in the fun with his amazing photography work. It’s a wonderful, creative website for food lovers.

Making Irish Chocolate Pots de Crème Is Incredibly EASY!

Anyways… the method to making these is to simply use a blender. Yep… that’s right! Ingredients are blended together, then poured into small dessert cups (the dessert is very rich, so small servings are the best!).

I also made a Bailey’s Irish Cream syrup which was drizzled onto the tops of the finished Pots de Créme, then they were garnished with whipped cream, a sprig of fresh mint (and dessert cookies!).  Easy and delicious… you’re gonna LOVE this dessert!  Here’s how to make it:

How To Make This Decadent Dessert

Before you begin, make sure you have your dessert dishes ready to go. Place them on a baking sheet. The dessert bowls I used (Libby Tasting Bowls) hold 4.25 ounces (just over 1/2 cup), so I ended up with 6 portions (I set out 8 cups but only needed 6).

The total amount of servings will depend on the size dish you use. The recipe, as written, will yield 8 (1/3 cup) servings.

Small serving dishes are used for Irish Chocolate Pots de Crème.

Place chocolate chips, sugar, Bailey’s Irish Cream Liqueur, an egg, and sea salt into a blender.  The ingredients are pulsed several times, just to mix them up a bit! NOTE: they will not be fully blended at this point.

Ingredients for the pots de crème are placed into a blender and pulsed.

Irish Chocolate Pots de Crème ingredients are chopped up in a blender.

Take out the center cap from the blender lid and place a funnel directly into the opening. Place the lid (with the funnel in it) back onto the blender (NOTE: I took it off to take the photo).

A funnel is placed into the top of a blender lid, in order to add hot whipping cream.

Heat The Whipping Cream In A Microwave

Pour the whipping cream into a large microwave safe bowl.  TIP: Make sure to use a large bowl, because the cream will be microwaved, and will rise up as it heats

I used a glass bowl so I could see to make sure the whipping cream didn’t bubble up and over the top of the bowl, as it cooked. Heat the whipping cream in the microwave on high power for 2 to 2½ minutes, until the cream is really bubbling. 

You can see from the photo below how high the cream rose in the bowl, and what the bubbling cream looked like when I took it out of microwave.

Whipping cream is microwaved before adding to Irish Chocolate Pots de Crème in blender.

Turn blender on LOW and blend ingredients already in there for 15 seconds. SLOWLY pour the hot whipping cream through the funnel into the chocolate mixture while mixing on low.

Once you’ve added all the cream, put your hand over the top of the funnel (to cover), and turn the speed of the blender to HIGH. Let the Irish pots de crème mixture blend on HIGH speed for one minute.

When done, carefully pour the chocolate into the serving bowls. Refrigerate for at least 2 hours before serving.

The Irish Chocolate Pots de Crème is poured into serving dishes.

Irish Chocolate Pots de Crème are refrigerated for several hours before serving.

Once fully chilled, the Chocolate Pots de  Crème are PERFECT to serve just as they are, BUT… if you want to kick it up a notch, read on! Make some Bailey’s Irish Cream Syrup to garnish the finished dessert!

The syrup can easily be made while the pots de crème are chilling.  It’s VERY SIMPLE to prepare, and adds an extra pop of flavor to the finished dessert.

Make Irish Cream Syrup For The Pots de Crème

Pour Irish Cream liqueur into a little saucepan and bring to a boil, on medium heat.  Boil the liqueur, stirring constantly for 2-3 minutes, until it has reduced in volume and turned syrupy.

Remove the syrup from the heat and let it cool. As the Irish cream syrup cools down, it will thicken a little bit more. Let the syrup cool to room temperature before serving.

Irish cream syrup is cooked to drizzle onto finished dessert.

I also decided to add some more calories fancy cookies to garnish the finished Irish Chocolate Pots de Crème, so I found these at our local grocery store… perfect!

Cookies are used to garnish the finished Irish Chocolate Pots de Crème.

To Serve Irish Chocolate Pots de Crème

When ready to serve, garnish each serving with whipped cream and a sprig of fresh mint, then drizzle a tiny bit of the Bailey’s syrup over the top!
Finish this decadent dessert off by Inserting a couple fancy cookies into the chocolate!  You can see in the picture below the drizzle of Bailey’s syrup on top of the chocolate.

Irish Chocolate Pots de Crème, garnished with cookies, whipped cream, mint, and Irish cream syrup.

That, my friends, is how you make this incredible dessert, with very little effort or time involved, but with amazing results!  I made the Irish Chocolate Pots de Crème in the morning, then simply added the garnishes when ready to serve later that evening! Easy!

Garnished Irish Chocolate Pots de Crème are ready to serve and eat!

NOTE: If you want to make this easy dessert without the alcohol, be sure to check out the recipe for chocolate pots de crème (a version made without any alcohol). Just as decadent and delicious!

Sure hope you will consider making this wonderful, decadent chocolate dessert.  I will definitely be making Irish Chocolate Pots de Crème again! 

Have a wonderful day, and remember to show love, respect and kindness to all you meet today. They may need your kindness more than you will ever know! God Bless You.

Looking For More CHOCOLATE DESSERT Recipes?

You can find all my recipes in the Recipe Index, located at the top of the page. I have some yummy chocolate dessert recipes you will love, including:

Want More Recipes? Get My FREE Newsletter!

I publish a newsletter 2 times per month (1st and 15th) with lots of recipes, tips, etc..
Would you like to join our growing list of subscribers?

There is a Newsletter subscription box on the top right (or bottom) of each blog post, depending on the device you use.
You can submit your e-mail address there, to be added to my mailing list.

Find Me On Social Media:

Facebook page: The Grateful Girl Cooks!
Pinterest:
The Grateful Girl Cooks!
Instagram:
jbatthegratefulgirlcooks

Author's signature

Recipe Source:  https://thecafesucrefarine.com/2015/03/five-minute-irish-chocolate-pots-de-creme

↓↓ PRINTABLE RECIPE BELOW ↓↓

4 from 1 vote
Irish Chocolate Pots de Crème
Prep Time
10 mins
Cook Time
0 mins
Refrigeration
2 hrs
Total Time
10 mins
 

Easy, decadent, Irish chocolate pots de créme dessert, with Irish cream liqueur, is made in under 10 minutes in a blender! Perfect for St. Patrick's Day!

Category: Dessert
Cuisine: Irish
Keyword: Irish chocolate pots de creme
Servings: 8 servings (1/3 cup per)
Calories Per Serving: 351 kcal
Author: JB @ The Grateful Girl Cooks!
Ingredients
For Pots de Crème:
  • 10 ounces semi-sweet chocolate chips (good quality)
  • 3 Tablespoons granulated sugar
  • 3 Tablespoons Bailey's Irish Cream Liqueur
  • 1 large egg
  • pinch of kosher or sea salt
  • 1 cup heavy cream (can substitute Half n' Half)
For Bailey's Irish Cream Syrup (Optional-not included in caloric calculation) :
  • 6 Tablespoons Bailey's Irish Cream liqueur
For Garnish (Optional-not included in caloric calculation):
  • Whipped Cream
  • Fresh mint sprigs
  • Cookies (optional)
  • Bailey's syrup
Instructions
  1. Put small serving dishes onto a baking sheet before beginning.
  2. Put the chocolate chips, sugar, Bailey's Irish Cream, egg, and sea salt into a blender. Pulse the ingredients several times, just to mix them up a bit (they won't be fully blended). Take out the center cap from blender lid and place a funnel directly into the opening.
  3. Pour the whipping cream into a large microwave safe bowl. Use a large bowl, because the cream will be microwaved, and will rise up as it heats. (I used a glass bowl so I could see to make sure the whipping cream didn't bubble up and over the top of the bowl). Heat whipping cream in microwave on high power for 2 to 2½ minutes, until the cream is REALLY bubbling.
  4. Turn blender on LOW and blend ingredients for 15 seconds. SLOWLY pour the hot whipping cream through the funnel into the chocolate mixture while blending on LOW (the very hot cream will help cook the raw egg). Once you've added all the cream, put your hand over the top of the funnel (to cover), and turn speed up to HIGH. Let the mixture blend on high for one minute. When done, carefully pour the chocolate into the serving bowls. Refrigerate for at least 2 hours before serving.
To Make The Bailey's syrup (optional):
  1. If you want Bailey's Irish Cream Syrup to garnish the finished dessert, it can be made while the desserts are chilling. Irish Cream liqueur is poured into a little saucepan, then brought up to a boil on medium heat. The liqueur is boiled for 2-3 minutes until it has reduced in volume and turned syrupy. Remove from heat and let cool. As the syrup cools, it will thicken a little bit more. Let syrup cool to room temperature before serving.
To serve:
  1. Garnish each of the chilled pots de crème with whipped cream, and a sprig of fresh mint, then drizzle a little bit of the Bailey's syrup over the top. Add a couple fancy cookies to the chocolate, if desired! Serve, and enjoy!
Nutrition Facts
Irish Chocolate Pots de Crème
Amount Per Serving (1 serving (w/out syrup, cookies or whipping cream))
Calories 351 Calories from Fat 225
% Daily Value*
Fat 25g38%
Saturated Fat 15g94%
Cholesterol 63mg21%
Sodium 22mg1%
Potassium 230mg7%
Carbohydrates 25g8%
Fiber 2g8%
Sugar 18g20%
Protein 3g6%
Vitamin A 485IU10%
Vitamin C 0.2mg0%
Calcium 44mg4%
Iron 2.3mg13%
* Percent Daily Values are based on a 2000 calorie diet.

Here’s one more to pin on your Pinterest boards!Easy, decadent, Irish chocolate pots de créme dessert, with Irish cream liqueur, is made in under 10 minutes in a blender! Perfect for St. Patrick's Day!

Save

Save

Save

Save

Save

Save

Save

Save

Save

Save

Save

Save

Save

Save

Save

Save

Save

Save

Save

Save

Save

Save

Save

Peanut Butter Chocolate Chip n’ Nut Cookies

Soft peanut butter chocolate chip cookies filled with milk chocolate chips and chopped peanuts make these simple old-fashioned cookies a real treat!Soft peanut butter chocolate chip cookies filled with milk chocolate chips and chopped peanuts make these simple old-fashioned cookies a real treat!

I recently made a batch of Peanut Butter Chocolate Chip n’ Nut Cookies using a recipe a dear friend gave me over 20 years ago. Soft peanut butter cookies filled with milk chocolate chips and chopped peanuts make these simple old-fashioned cookies a real taste treat!

I slightly tweaked her delicious recipe to include chopped dry roasted peanuts to the mix (you can also use cocktail peanuts), and enjoy the extra little bit of crunch and peanut flavor the nuts bring to the cookie.  I made large cookies and the recipe yielded about 3½ dozen, but if you need a larger quantity, simply make the cookies smaller! Here’s how easy the cookies are to prepare:

Scroll Down For A Printable Recipe Card At The Bottom Of The Page

How To Make Peanut Butter Chocolate Chip Cookies

Preheat oven to 375 degrees.  Cream together room temperature butter, creamy peanut butter, granulated sugar, brown sugar and eggs until well combined.  In a separate bowl, stir together flour, baking powder, baking soda and salt.

Slowly add the flour mixture to the peanut butter mixture. Continue to beat on low, adding a little flour at a time, until all dough is fully mixed together.

Peanut Butter Chocolate Chip n' Nut Cookies / The Grateful Girl Cooks!

Stir in milk chocolate chips and chopped peanuts. I used chopped dry roasted peanuts, but cocktail peanuts would be fine, as well.

Peanut Butter Chocolate Chip n' Nut Cookies / The Grateful Girl Cooks!Large Or Small Cookies?

If making large cookies, drop the dough by heaping Tablespoons onto parchment paper-lined baking sheet. If you’re going to make smaller cookies (with greater quantity), drop by rounded teaspoons.

Keep the dough for the cookies about 2 inches apart because they will spread while baking.  I try to form each one into a circle shape by using my clean hands around the edges, then pat them down on top a bit, to flatten them slightly.

Peanut Butter Chocolate Chip n' Nut Cookies / The Grateful Girl Cooks!

Bake Times For Peanut Butter Chocolate Chip Cookies

Bake the large cookies at 375 degrees.  They take between 12 and 14 minutes to fully cook and turn slightly golden brown around edges. Smaller cookies will cook in about 9-10 minutes. When done, remove cookies from oven; let them cool for 2-3 minutes, then transfer them to a wire rack to finish cooling.

Peanut Butter Chocolate Chip n' Nut Cookies / The Grateful Girl Cooks!

Peanut Butter Chocolate Chip n' Nut Cookies / The Grateful Girl Cooks!

Peanut Butter Chocolate Chip n' Nut Cookies / The Grateful Girl Cooks!

That’s it, except for taking a big old bite out of that cookie when you just can’t stand it anymore! While you’re at it, grab a cup of ice cold milk to wash this delicious treat down!

Peanut Butter Chocolate Chip n' Nut Cookies / The Grateful Girl Cooks!

Now you know how to make this simple old-fashioned, delicious cookie for those you love.  I think they get better as they sit, because they seem to get more chewy the next day!

You Can Freeze The Peanut Butter Chocolate Chip Cookies Dough

I set aside some of the dough, shaped it into 2 logs, then tightly wrapped each in plastic wrap, then aluminum foil, and froze 2 packages of dough to use another time! That way, when we crave homemade cookies, all I have to do is cut, slice and bake a small batch of these yummy cookies!

Peanut Butter Chocolate Chip n' Nut Cookies / The Grateful Girl Cooks!

These really are delicious peanut butter chocolate chip cookies, and I hope you enjoy them. Have a wonderful day!

Looking For More COOKIE Recipes?

You can find all of my recipes in the Recipe Index, located at the top of the page. A few of our favorites include:

Interested In More Recipes?

Thank you for visiting this website. I appreciate you using some of your valuable time to do soIf you’re interested, I publish a newsletter 2 times per month (1st and 15th) with all the latest recipes, and other fun info. I would be honored to have you join our growing list of subscribers, so you never miss a great recipe!
There is a Newsletter subscription box on the top right side (or bottom) of each blog post, depending on the device you use, where you can easily submit your e-mail address (only) to be included in my mailing list.

You Can Also Find Me On Social Media:
Facebook page: The Grateful Girl Cooks!
Pinterest: The Grateful Girl Cooks!
Instagram: jbatthegratefulgirlcooks

Author's signature

Recipe Adapted From: Carla Merrill

0 from 0 votes
Peanut Butter Chocolate Chip n' Nut Cookies
Prep Time
10 mins
Cook Time
12 mins
Total Time
22 mins
 

Soft peanut butter chocolate chip cookies filled with milk chocolate chips and chopped peanuts make these simple old-fashioned cookies a real treat!

Category: Dessert
Cuisine: American
Keyword: peanut butter chocolate chip cookies
Servings: 42 (approx. 3½ dozen)
Calories Per Serving: 268 kcal
Author: JB @ The Grateful Girl Cooks!
Ingredients
  • cups butter (room temp.)
  • cups creamy peanut butter
  • cups granulated sugar
  • cups packed brown sugar
  • 3 large eggs
  • cups all purpose flour
  • teaspoons baking powder
  • teaspoons baking soda
  • 3/4 teaspoon salt
  • 2 cups milk chocolate chips
  • 1/2 cup chopped dry roasted peanuts (can substitute cocktail peanuts)
Instructions
  1. Preheat oven to 375 degrees. Using electric mixer, cream softened butter, creamy peanut butter, granulated sugar, brown sugar and eggs until well combined. In a separate bowl, stir together flour, baking powder, baking soda, and salt. Slowly add flour mix to peanut butter mixture. Continue to beat on low, adding a little flour at a time, until ingredients are fully combined.
  2. Stir in milk chocolate chips and chopped peanuts.
  3. If making large sized cookies, drop dough by heaping Tablespoonfuls onto parchment paper-lined baking sheet (*small cookies, drop by teaspoonfuls). Keep cookie dough about 2 inches apart as they will spread while baking. Shape each cookie into a circle by using hands around the edges; pat down the top to flatten them slightly.
  4. Bake cookies at 375 degrees. Large cookies will take 12 -14 minutes to fully cook and turn slightly golden brown around edges. Smaller cookies will take about 9-10 minutes. When done, remove cookies from oven; let them rest for 2-3 minutes, then transfer to a wire rack to finish cooling.
Recipe Notes

The large cookies are about 3 inches in diameter. If you want to make smaller cookers (more quantity), just use rounded teaspoonfuls, instead of Tablespoonfuls of dough, and bake for less time.

Nutrition Facts
Peanut Butter Chocolate Chip n' Nut Cookies
Amount Per Serving (1 cookie)
Calories 268 Calories from Fat 126
% Daily Value*
Fat 14g22%
Saturated Fat 6g38%
Cholesterol 30mg10%
Sodium 225mg10%
Potassium 114mg3%
Carbohydrates 31g10%
Fiber 1g4%
Sugar 21g23%
Protein 4g8%
Vitamin A 240IU5%
Vitamin C 0.1mg0%
Calcium 33mg3%
Iron 1mg6%
* Percent Daily Values are based on a 2000 calorie diet.

Here’s one more to pin on your Pinterest boards!Soft peanut butter chocolate chip cookies filled with milk chocolate chips and chopped peanuts make these simple old-fashioned cookies a real treat!


Save

Save

Save

Save

Save

Save

Save

Save

Save

Mom’s Easy Chocolate Cake

Mom’s EASY Chocolate Cake, with chocolate frosting, is a delicious dessert for the whole family, and can be made from scratch in practically no time at all!Mom's EASY Chocolate Cake, with chocolate frosting, is a delicious dessert for the whole family, and can be made from scratch in practically no time at all!

 Today I want to share with you an old family favorite recipe for Mom’s Easy Chocolate Cake! It is super easy to make, and will be a big hit with everyone who gets to enjoy a piece I have such great memories of having this cake as I was growing up, and I have my sweet Mom to thank for that!

Scroll Down For A Printable Recipe Card At The Bottom Of The Page

Sweet Memories Of This Chocolate Cake

When I was growing up, occasionally my Mom would sneak back into the kitchen after dinner (while we were watching TV or doing homework) and whip up a delicious chocolate cake from scratch for our family of 5 as a surprise.  We LOVED it! Within a few minutes of the cake going into the oven, the smell coming out of our little kitchen would alert us to the surprise treat ahead for us!

What a great memory! We didn’t have a lot of money or a fancy home growing up, but my Mom sure could cook and make wonderful meals with simple items from our pantry.  I am grateful for the inspiration I have received from her, to this very day!

The cake is very simple to make, and so is the easy frosting!  Instead of waiting for the cake to “cool down” after it was finished baking, Mom would poke holes in the cake when it came out of the oven, and pour/spread the creamy chocolate frosting all over the cake. The frosting would drip down into the holes in the cake, so we had small tunnels of chocolate throughout our slices when we would eat it!  Oh boy… this is a GREAT tasting chocolate cake.  Here’s how to make it!

How To Make Mom’s Easy Chocolate Cake Batter

Cream together sugar, vegetable shortening and eggs in a large bowl, using an electric hand mixer or a stand mixer. Beat the ingredients well, for 2-3 minutes.

Sugar, eggs, and shortening mixed together for cake batter

In a separate large bowl, sift together the all purpose flour, cocoa, baking soda and salt.

Flour, cocoa, and other dry ingredients sifted for chocolate cake batter

Add the dry, sifted ingredients to the wet ingredients, along with 1 cup of buttermilk.  Once blended, slowly pour in 3/4 cup of boiling water, and a teaspoon of vanilla extract. Blend on low until batter is fully mixed together.

Time To Bake!

Pour the batter for Mom’s easy chocolate cake into a greased and floured 9×13 baking pan, and distribute the batter evenly. Bake the cake at 350 degrees for 35 minutes, or until a toothpick inserted into middle of cake comes out clean..

Mom's chocolate cake batter poured into pan

Make The Frosting

While the cake is baking, make up the frosting. Melt butter in saucepan on low heat.  Add cocoa powder and mix well with a spoon.  Add salt, vanilla, and milk; mix well.  Add the powdered sugar to the frosting ingredients. Mix until the frosting is not too thick, but “pourable”. Add additional milk to thin… or add additional powdered sugar to thicken, as needed.

4 photos showing chocolate frosting for cake being made

Frosting Mom’s Easy Chocolate Cake!

When Mom’s easy chocolate cake is done, remove the pan from the oven, and place pan on a wire rack. Let the cake rest for 2-3 minutes, then poke holes all over surface of cake every couple inches (I use a chopstick!).  Pour the chocolate frosting over the surface of Mom’s easy chocolate cake, and spread it out, to cover.Baked chocolate cake, in pan on wire rack, cooling down

Holes poked into cake once baked

Chocolate frosting poured over baked cake
When finished, Mom’s easy chocolate cake should look like this.  The frosting will be fairly “fluid” since the cake is still hot. Continue to spread the warm frosting over the holes as they “re-appear”. As the frosting oozes down into the cake, the holes on top surface will open up again.

Mom's easy cake is baked then frosted with chocolate icing

Time To EAT!

Let the frosting firm up and the cake cool down!  Once Mom’s easy chocolate cake is at room temperature, you can slice and serve it up!  It’s as simple as that! By the way, in the picture below the frosting looks darker than in previous photo. Don’t know what’s up with that- it IS the very same cake!.
Piece of Mom's chocolate cake on white plate with forkPiece of chocolate cake with frosting dripping through the middle

I have such vivid memories of enjoying Mom’s easy chocolate cake from my childhood. That MUST be where I got my love of cake from, right?  Ha Ha! Hope you will give this easy, simple and delicious recipe a try!  The chocolate cake and creamy chocolate frosting taste fantastic!  Thanks, Mom!

Looking For More CAKE Recipes?

You can find all of my recipes in the Recipe Index, located at the top of the page. My cake recipes are all delicious, and include:

Interested In More Recipes?

Thank you for visiting this website. I appreciate you using some of your valuable time to do soIf you’re interested, I publish a newsletter 2 times per month (1st and 15th) with all the latest recipes, and other fun info. I would be honored to have you join our growing list of subscribers, so you never miss a great recipe!
There is a Newsletter subscription box on the top right side (or bottom) of each blog post, depending on the device you use, where you can easily submit your e-mail address (only) to be included in my mailing list.

You Can Also Find Me On Social Media:

Facebook page: The Grateful Girl Cooks!
Pinterest:
The Grateful Girl Cooks!
Instagram:
jbatthegratefulgirlcooks

Author's signatureRecipe Source: My Mom

0 from 0 votes
Mom's Easy Chocolate Cake
Prep Time
10 mins
Cook Time
35 mins
Total Time
45 mins
 
Mom's EASY Chocolate Cake, with chocolate frosting, is a delicious dessert for the whole family, and can be made from scratch in practically no time at all!
Category: Dessert
Cuisine: American
Keyword: Mom's easy chocolate cake
Servings: 16 servings (9x13 cake)
Calories Per Serving: 363 kcal
Author: JB @ The Grateful Girl Cooks!
Ingredients
For Cake:
  • 2 cups granulated sugar
  • 2 eggs
  • 3/4 cup vegetable shortening
  • cups all purpose flour
  • 1/2 cup unsweetened cocoa powder
  • 2 teaspoons baking soda
  • 1/2 teaspoon salt
  • 1 cup buttermilk
  • 3/4 cup boiling water
  • 1 teaspoon vanilla
For Chocolate Frosting:
  • 3/4 cube butter
  • 4 Tablespoons unsweetened cocoa powder
  • Dash of salt
  • 1 teaspoon vanilla extract
  • 12 ounces powdered sugar (about 3/4 of a one pound box)
  • 1/4 to 1/2 cup milk (enough to make frosting pourable, but not too thin)
Instructions
  1. Preheat oven to 350 degrees. Lightly grease and flour a 9x13 cake pan.
  2. Cream together sugar, vegetable shortening and eggs, using an electric hand mixer or stand mixer. Beat well for 2-3 minutes.
  3. In a separate large bowl, sift together flour, cocoa, baking soda and salt. Add dry, sifted ingredients to the wet ingredients, along with 1 cup of buttermilk, and mix well on LOW speed.
  4. Once blended, slowly pour in 3/4 cup of boiling water, and a teaspoon of vanilla extract. Blend on low until batter is fully mixed together. Pour batter into a greased and floured 9x13 baking pan, and distribute batter evenly.
  5. Bake at 350 degrees for 35 minutes, or until toothpick inserted into middle of cake comes out clean.
To Make Frosting:
  1. While cake is baking, make frosting. Melt butter in saucepan on low heat. Add cocoa powder and mix well with a spoon. Add salt, vanilla, and milk; mix well. Add powdered sugar. Mix until frosting is not too thick, but "pourable". Add additional milk to thin... add additional powdered sugar to thicken, as needed.
  2. When cake is done, remove from oven. Let rest for 2-3 minutes, then poke holes over surface of cake every couple inches (I use a chopstick!). Pour frosting over surface of cake, and spread to cover. Let cake cool to room temperature, then slice and serve!
Nutrition Facts
Mom's Easy Chocolate Cake
Amount Per Serving (1 piece (1/16th))
Calories 363 Calories from Fat 99
% Daily Value*
Fat 11g17%
Saturated Fat 3g19%
Cholesterol 22mg7%
Sodium 238mg10%
Potassium 108mg3%
Carbohydrates 64g21%
Fiber 1g4%
Sugar 46g51%
Protein 3g6%
Vitamin A 55IU1%
Calcium 28mg3%
Iron 1.6mg9%
* Percent Daily Values are based on a 2000 calorie diet.

Here’s one more to pin on your Pinterest boards!Mom's EASY Chocolate Cake, with chocolate frosting, is a delicious dessert for the whole family, and can be made from scratch in practically no time at all!


Save

Save

Save

Save

Save

Save

Save

Save

Save

Save

Save

Save

Save

Save

Save

Save

Giant Chocolate Chip Cookie Pizza

Make a delicious, GIANT chocolate chip cookie pizza as a sweet, unique gift for a birthday or other occasion! Recipe serves 12!Make a delicious, GIANT chocolate chip cookie pizza as a sweet, unique gift for a birthday or other occasion! Recipe serves 12!
Wouldn’t it be fun to receive an absolutely delicious Giant Chocolate Chip Cookie Pizza for a birthday surprise? Sometimes I think it’s even more fun to GIVE one as a birthday surprise!

Scroll Down For A Printable Recipe Card At The Bottom Of The Page

Make A Giant Chocolate Chip Cookie Pizza As A Gift!

I made the giant cookie pizza, pictured above, as a birthday gift for a friend. The chocolate chip cookie pizza was placed inside a pizza box, and hand delivered right to her front doorstep. There was no tipping of the delivery driver necessary!  What a fun way to honor them in a unique way on their special day.

Giant cookie pizza, out of oven, and ready to be decorated!

This Chocolate Chip Cookie Pizza Is HUGE

The cookie itself is very easy to make, and it is BIG! This cookie is baked on a traditional 12 inch round pizza pan. It is a big dessert, which can be cut into 12 individual servings.

Once baked and cooled, the cookie is drizzled decoratively with semi-sweet chocolate and white chocolate for a finishing touch. Once the chocolate icing has firmed up, the cookie is ready to be served (or boxed up for delivery).

Fire Up The Birthday Candles!

Add some little birthday candles once the pizza box is opened, to make it an extra special birthday gift! This treat is so easy, and once delivered in a pizza box, it becomes a unique treat for a special friend or family member. 

The cookie can be sliced into 12 pie shaped wedges with a pizza cutter. Just remember… if your friend decides to eat the WHOLE cookie themselves, they’re going to need a HUGE glass of milk!

The chocolate chip cookie pizza, decorated with chocolate icing, and birthday candles!

Hope you try this recipe for this delicious, giant chocolate chip cookie pizza. It’s a fun and creative way to make a dessert cookie that actually serves 12 people!  Make it a special occasion to remember! By the way – if you enjoy BIG cookies, be sure to check out my recipe for Giant Sugar Cookies! Have a GREAT day!

Looking For More COOKIE Recipes?

You can find all of my recipes in the Recipe Index, located at the top of the page. I have some delicious cookie recipes you might enjoy, including:

Interested In More Recipes?

Thank you for visiting this website. I appreciate you using some of your valuable time to do soIf you’re interested, I publish a newsletter 2 times per month (1st and 15th) with all the latest recipes, and other fun info. I would be honored to have you join our growing list of subscribers, so you never miss a great recipe!
There is a Newsletter subscription box on the top right side (or bottom) of each blog post, depending on the device you use, where you can easily submit your e-mail address (only) to be included in my mailing list.

You Can Also Find Me On Social Media:
Facebook page: The Grateful Girl Cooks!
Pinterest: The Grateful Girl Cooks!
Instagram: jbatthegratefulgirlcooks

Have a FANTASTIC day!

Author's signature

Recipe Adapted From: http://sallysbakingaddiction.com/2016/06/27/chocolate-chip-cookie-pizza/

0 from 0 votes
Giant Chocolate Chip Cookie Pizza
Prep Time
10 mins
Cook Time
25 mins
Total Time
35 mins
 
Make a delicious, GIANT chocolate chip cookie pizza as a sweet, unique gift for a birthday or other occasion! Recipe serves 12!
Category: Dessert
Cuisine: American
Keyword: chocolate chip cookie pizza
Servings: 12 servings
Calories Per Serving: 454 kcal
Author: JB @ The Grateful Girl Cooks!
Ingredients
For Cookie Dough
  • 2 cups all purpose flour
  • 2 teaspoons cornstarch
  • 1 teaspoon baking soda
  • 1/2 teaspoon salt
  • 3/4 cup butter , room temp (1½ cubes)
  • 3/4 cup brown sugar , firmly packed (light or dark brown sugar is okay)
  • 1/4 cup granulated sugar
  • 1 large egg
  • 2 teaspoons vanilla extract
  • cups semi-sweet chocolate chips
For Decorative Drizzle:
  • 1/2 cup semi-sweet chocolate chips
  • 2 teaspoons vegetable shortening , divided (1 for semi-sweet, 1 for white chocolate)
  • 1/2 cup white chocolate chips
Instructions
To Make Cookie:
  1. Preheat your oven to 350 degrees F. Lightly coat a pizza pan with non-stick cooking spray.
  2. In medium bowl, mix flour, cornstarch, baking soda and salt together. Set bowl aside.
  3. Cream butter, brown sugar, and granulated sugar together on medium speed until well combined (about 2 minutes). Add egg; beat for 1 minute on high. Add vanilla extract, and beat well to combine.
  4. Add the flour mixture to the wet ingredients. Slowly mix on low until they are fully combined. Stir in the chocolate chips.
  5. Place the dough onto prepared pizza pan. Use a rubber spatula or your clean fingers to spread and flatten out the thick dough until the dough just about reaches the edges of pan.
  6. Bake cookie for 22-25 minutes. When done, the cookie should be lightly browned on top. If you want crispy edges on the cookie, let it bake a couple minutes longer. When done, remove pan to a wire rack and let cookie cool (still on the pan).
To Make Decorative Drizzle:
  1. Place semi-sweet chocolate chips and white chocolate chips in two separate bowls. Add 1 teaspoon vegetable shortening to each bowl. Microwave each on high for 30 seconds. Stir until smooth. If necessary, heat additional 15 seconds, then stir, until smooth. Do not over cook as the chocolate can burn. Drizzle the chocolate over the cooled cookie in a decorative pattern. Let chocolate firm up on pizza before wrapping as a gift or slicing. For packaging, place cookie on parchment paper (cut to fit) and place cookie "pizza" inside a clean pizza box.
Recipe Notes

Dough can be prepared ahead of time. Prepare dough as directed. Wrap dough in plastic wrap then cover with foil. May be stored 3 days in fridge or up to 3 months in freezer. If freezing, thaw dough in fridge before placing/spreading onto pizza pan.

Nutrition Facts
Giant Chocolate Chip Cookie Pizza
Amount Per Serving (1 slice)
Calories 454 Calories from Fat 225
% Daily Value*
Fat 25g38%
Saturated Fat 14g88%
Cholesterol 47mg16%
Sodium 308mg13%
Potassium 219mg6%
Carbohydrates 52g17%
Fiber 2g8%
Sugar 31g34%
Protein 4g8%
Vitamin A 385IU8%
Calcium 51mg5%
Iron 2.8mg16%
* Percent Daily Values are based on a 2000 calorie diet.

Here’s one more to pin on your Pinterest boards!Make a delicious, GIANT chocolate chip cookie pizza as a sweet, unique gift for a birthday or other occasion! Recipe serves 12!


Save

Save

Save

Save

Save

Save

Save

Save

Save

Save

Save

Save

Save

Save

Save

Save

Save

Butterscotch Chip Cookies

Your family will LOVE these crispy, chewy, easy to make, flavor-filled Butterscotch Chip Cookies for dessert or snack time!Your family will LOVE these crispy, chewy, easy to make, flavor-filled Butterscotch Chip Cookies for dessert or snack time!
I recently experimented with a cookie recipe I found on Pinterest many months ago. These Butterscotch Chip Cookies were wonderful!  The use of browned butter and butterscotch chips in the recipe add even more unique flavor to these chewy, crispy, fabulous tasting treats!

These delicious butterscotch chip cookies were so EASY to make, and they truly have a wonderful butterscotch flavor!  The recipe makes about 4½ dozen small cookies, but (as you will be able to see from my photos) I made them slightly larger than original recipe instructed, so my net yield was 28 cookies. Whether you choose to prepare large or small cookies, here’s how to make them:

Scroll Down For A Printable Recipe Card At The Bottom Of The Page

How To Make Butterscotch Chip Cookies

Begin by browning the butter. To do this, place 1½ cubes of butter in a skillet. Melt butter using medium heat, until the butter melts, begins to bubble, froths up, then slightly browns (don’t let butter get too brown… just barely!). Once done, remove skillet from heat.

One and a half cubes of butter in a copper skillet

Melted butter for cookie dough in copper skillet

Add browned butter and brown sugar to a large mixer bowl. Beat these together on medium speed. Once mixed, let mixture sit for a couple minutes, stirring occasionally to let the mixture cool down a bit before adding other ingredients.

You don’t want the mixture hot when you add eggs or they could begin to scramble. Definitely… you really DON’T want that to happen! Once the mixture has cooled down a bit, add salt, eggs, and vanilla extract.  Mix well.

Melted butter, brown sugar in metal mixing bowl

Eggs, vanilla, butter mixture in metal bowl with spatula

After this, STIR in the flour, baking powder, and baking soda. Once mixed, add butterscotch chips and stir well to combine. Set aside.

Flour, salt, etc. for cookie dough added to mixing bowl

Butterscotch chips added to cookie dough

Roll The Cookie Dough Into Round Balls

In a separate small bowl, mix together brown sugar and granulated sugar, for topping.  Use a 1 Tablespoon sized scoop to scoop dough from bowl and roll dough between your clean hands to form a ball.

*Note: This is where I used a slightly larger scoop to make cookies larger. Process is still the same, though. Once dough is a ball, place it in brown sugar/granulated sugar topping. Roll dough around to cover completely with sugar topping.

Cookie dough rolled into ball

Cookie dough ball rolled in brown sugar mixture

Bake The Butterscotch Chip Cookies

Place topping covered balls of dough onto a parchment paper lined baking sheet. Keep the dough balls about 2 inches apart, as they spread a bit while baking. Bake butterscotch chip cookies in a 375 degree oven for 10 minutes.

Cookie dough balls on parchment paper lined baking sheet

When done, remove the baking sheet from the oven. Let the cookies rest for about a minute on baking sheet, then carefully remove them with a spatula to a wire rack, to finish cooling.

Baked butterscotch cookies, cooling on wire rackOnce cookies have cooled, they are good to go!  Enjoy the slight crunch on the outside!  I think they’re at their best once they have completely cooled (I know it’s hard to wait, but trust me on this!).

Once cooled, pile some on a plate, pour yourself a big old glass of milk… and dig in! They’re delicious!

Close up of butterscotch cookies on white platter

I hope you enjoy these wonderful cookies! My husband was unexpectedly rushed to the ER and hospitalized earlier this week, and making these butterscotch chip cookies ( a few for us, and the rest for friends) helped take my mind off of everything. He is doing okay now, and we are very grateful to God for his recovery and the additional medical care he is receiving.

Have a blessed day. Be kind.

Looking For More COOKIE Recipes?

You can find ALL of my cookie recipes in the Recipe Index, which is located at the top of the page. I have LOTS of scrumptious cookies for you to enjoy, including:

Interested In More Recipes?

Thank you for visiting this website. I appreciate you using some of your valuable time to do soIf you’re interested, I publish a newsletter 2 times per month (1st and 15th) with all the latest recipes, and other fun info. I would be honored to have you join our growing list of subscribers, so you never miss a great recipe!
There is a Newsletter subscription box on the top right side (or bottom) of each blog post, depending on the device you use, where you can easily submit your e-mail address (only) to be included in my mailing list.

You Can Also Find Me On Social Media:

Facebook page: The Grateful Girl Cooks!
Pinterest:
The Grateful Girl Cooks!
Instagram:
jbatthegratefulgirlcooks

Author's signature

Recipe Adapted From: http://www.shugarysweets.com/2011/09/butterscotch-cookies

0 from 0 votes
Butterscotch Chip Cookies
Prep Time
15 mins
Cook Time
10 mins
Total Time
25 mins
 

Easy to make and delicious to eat, these crispy chewy cookies feature browned butter and butterscotch chips for GREAT flavor!

Category: Cookies
Cuisine: American
Keyword: butterscotch chip cookies
Servings: 54 cookies (total 4.5 dozen)
Calories Per Serving: 91 kcal
Author: JB @ The Grateful Girl Cooks!
Ingredients
For cookie dough:
  • 3/4 cup cubes butter (12 Tablespoons)
  • cups brown sugar
  • ½ teaspoon salt
  • 2 eggs
  • 1 teaspoon vanilla extract
  • cups all purpose flour
  • 1 teaspoon baking powder
  • ½ teaspoon baking soda
  • 1 cup butterscotch chips
For topping:
  • 1/4 cup brown sugar
  • 2 Tablespoons granulated sugar
Instructions
  1. Place 1½ cubes of butter in a skillet. Melt butter on medium heat, until butter melts, begins to bubble, froths up, then slightly browns. Once done, remove skillet from heat.
  2. Add browned butter and brown sugar to large mixer bowl. Beat together on medium speed. Once mixed, let mixture sit for a couple minutes, stirring occasionally to let mixture cool down slightly, before adding other ingredients.
  3. Once cooled down a bit, add salt, eggs, and vanilla extract. Mix well.
  4. STIR in flour, baking powder, and baking soda. Once mixed, add butterscotch chips; stir well to combine. Set aside.
  5. In a separate small bowl, mix brown sugar and granulated sugar for topping. Use a 1 Tablespoon sized scoop to scoop dough from bowl and roll dough between your clean hands to form a ball. (*Note: This is where I used a slightly larger scoop to make cookies larger. Process is still the same, though). Once dough is a ball, place it in brown sugar/granulated sugar topping. Roll dough around to cover completely with sugar topping.
  6. Place dough balls onto parchment paper lined baking sheets. Keep dough balls about 2 inches apart, as they spread a bit while baking. Bake cookies in a 375 degree oven for 10 minutes.
  7. Remove baking sheet from oven; let cookies cool for a minute, then remove cookies to a wire rack to cool completely. Enjoy!
Nutrition Facts
Butterscotch Chip Cookies
Amount Per Serving (1 cookie)
Calories 91 Calories from Fat 18
% Daily Value*
Fat 2g3%
Saturated Fat 1g6%
Cholesterol 13mg4%
Sodium 71mg3%
Potassium 27mg1%
Carbohydrates 15g5%
Sugar 10g11%
Vitamin A 90IU2%
Calcium 13mg1%
Iron 0.4mg2%
* Percent Daily Values are based on a 2000 calorie diet.

Here’s one more to pin on your Pinterest boards!Your family will LOVE these crispy, chewy, easy to make, flavor-filled Butterscotch Chip Cookies for dessert or snack time!


Save

Save

Save

Save

Save

Save

Save

Save

Save

Save

Save

Save

Save

Save

Save

Save

Save

Chocolate Peanut Butter Muddy Buddies

Chocolate Peanut Butter Muddy Buddies are powdered sugar dusted chocolate peanut butter crispy treats you will love! They’re yummy snacks or holiday gifts!Chocolate Peanut Butter Muddy Buddies are powdered sugar dusted chocolate peanut butter crispy treats you will love! They're yummy snacks or holiday gifts!
Chocolate Peanut Butter Muddy Buddies are a fun little snack during the holidays… or anytime, for that matter. Perfect for snacking OR giving to friends as a food gift… they are sure to make someone smile!

I love these decadent little snacks… with a crunch and the taste of chocolate and peanut butter, they are perfect for serving at a party, or sitting in front of the TV watching a football game!  Best part… they are so easy to make!

Scroll Down For A Printable Recipe Card At The Bottom Of The Page

How To Make Chocolate Peanut Butter Muddy Buddies

Measure out the Chex cereal into a LARGE bowl. I used corn and rice for this recipe.

The different crispy cereals for muddy buddies are placed into a large bowl.

Melt chocolate chips, peanut butter and butter in a microwavable bowl on High for 1 minute. Remove and stir until creamy smooth. If necessary, microwave an additional 15 seconds, then stir until smooth. Do NOT overcook or chocolate will burn.

Mine was smooth after first minute of cooking and stirring well.  Once totally smooth, add the vanilla extract. Stir.  Pour the chocolate mixture over the cereal. Stir well, to fully coat all the cereal.

Chocolate, peanut butter and butter are placed in bowl in microwave to melt.

Chocolate Peanut Butter Muddy Buddies mixture is melted and ready to add to cereal.

Chocolate Peanut Butter Muddy Buddies sauce is poured over crispy cereal.

Time To Coat The Muddy Buddies

Once all cereal has been coated with chocolate, place HALF the mixture into a separate clean LARGE bowl.  Add HALF the powdered sugar, and stir to fully coat. When done, remove the chocolate peanut butter muddy buddies to wax paper. Repeat this process with the other half of the cereal and powdered sugar.

Chocolate Peanut Butter Muddy Buddies are coated with powdered sugar in bowl.

Let The Chocolate Peanut Butter Muddy Buddies Cool

Spread the chocolate peanut butter muddy buddies out on wax paper and let them cool completely, before serving.

Chocolate Peanut Butter Muddy Buddies are laid on wax paper, to dry.

Store the Muddy Buddies in an airtight covered container in refrigerator for up to 2 weeks.  Try to stay out of them, cause they are ADDICTING! It’s also fun to divide the mix up into fancy covered containers or jars and give this simple gift to friends over the holidays.

Chocolate Peanut Butter Muddy Buddies should be stored in airtight container.

If you’re looking for another recipe using Chex cereal I hope you will check out my Chex Mix Munchies!  They are another great snack, made in the microwave!

Have a wonderful day! I sincerely hope you can find time during this busy time of year to quietly reflect on the true meaning of Christmas. You are deeply loved by the One who created you, and sent His only Son to earth that first Christmas to draw us all back to Him.

Looking For More Snack Recipes?

You can find all of my recipes in the Recipe Index, located at the top of the page. I have some wonderful snack recipes you might enjoy, including:

Interested In More Recipes?

Thank you for visiting this website. I appreciate you using some of your valuable time to do soIf you’re interested, I publish a newsletter 2 times per month (1st and 15th) with all the latest recipes, and other fun info. I would be honored to have you join our growing list of subscribers, so you never miss a great recipe!
There is a Newsletter subscription box on the top right side (or bottom) of each blog post, depending on the device you use, where you can easily submit your e-mail address (only) to be included in my mailing list.

You Can Also Find Me On Social Media:
Facebook page: The Grateful Girl Cooks!
Pinterest: The Grateful Girl Cooks!
Instagram: jbatthegratefulgirlcooks

Author's signature

Recipe Adapted From: The cookbook titled : “Betty Crocker Christmas Cookbook”, Page 278, Wiley Publishing, Inc., Copyright 2010, General Mills.

0 from 0 votes
Chocolate Peanut Butter Muddy Buddies
Prep Time
10 mins
Cook Time
0 mins
Total Time
10 mins
 
Chocolate Peanut Butter Muddy Buddies are powdered sugar dusted chocolate peanut butter crispy treats you will love! They're yummy snacks or holiday gifts!
Category: Snack
Cuisine: American
Keyword: muddy buddies
Servings: 36 (approx. 9 cups total)
Calories Per Serving: 134 kcal
Author: JB @ The Grateful Girl Cooks!
Ingredients
  • 9 cups Chex cereal (any variety- I used half corn and half rice)
  • 1 cup semi-sweet chocolate chips
  • 1/2 cup peanut butter
  • 1/4 cup butter
  • 1 teaspoon vanilla extract
  • 1 1/2 cups powdered sugar
Instructions
  1. Place the cereal into a large bowl. Set the bowl aside.
  2. Place the chocolate chips, peanut butter and butter into a microwaveable bowl. Cook this uncovered on the HIGH setting for 1 minute. Remove from microwave, and stir well. It is ready when all ingredients become smooth. If necessary, place back in microwave for15 additional seconds, then stir again until mixture is smooth.
  3. Stir vanilla extract into melted chocolate peanut butter mixture. Pour this mixture over the cereal. Stir well, until all is coated with chocolate. Once coated, pour HALF the cereal into a separate large clean bowl. Add HALF the powdered sugar. Stir well, until completely coated.
  4. Remove powdered sugar coated cereal to wax paper. Repeat process with other half of cereal and powdered sugar. Spread finished cereal on wax paper, until cool. This is the method I used.
  5. (Note: If desired, you can place all the cereal and powdered sugar in a 2 gallon plastic storage bag, and shake until covered).
  6. Store muddy buddies in a sealed, airtight container in refrigerator for up to 2 weeks
Nutrition Facts
Chocolate Peanut Butter Muddy Buddies
Amount Per Serving (1 (1/4 cup serving))
Calories 134 Calories from Fat 45
% Daily Value*
Fat 5g8%
Saturated Fat 2g13%
Cholesterol 3mg1%
Sodium 116mg5%
Potassium 108mg3%
Carbohydrates 21g7%
Fiber 2g8%
Sugar 8g9%
Protein 2g4%
Vitamin A 205IU4%
Vitamin C 2mg2%
Calcium 38mg4%
Iron 5.1mg28%
* Percent Daily Values are based on a 2000 calorie diet.

Here’s one more to pin on your Pinterest boards!Chocolate Peanut Butter Muddy Buddies are powdered sugar dusted chocolate peanut butter crispy treats you will love! They're yummy snacks or holiday gifts!


Save

Save

Save

Save

Save

Save

Save

Save

Save

Save

Save

Save

Save

Save

Save

Save