Category: Pies/Tarts

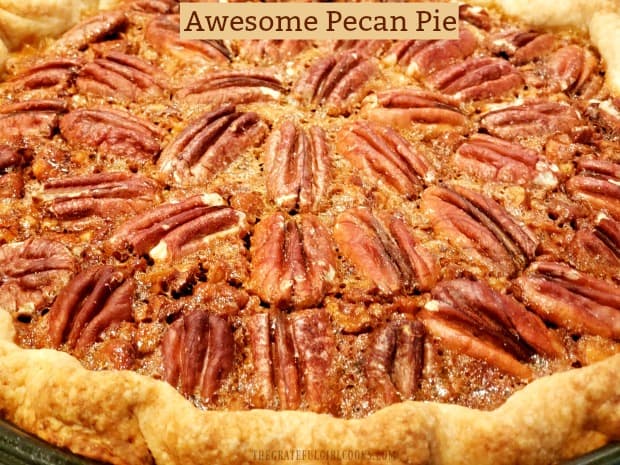
Awesome Pecan Pie

Ready for the holidays? Why not bake an awesome pecan pie from scratch? This pie is absolutely delicious, and it’s very simple to make.
Ready for the holidays? Why not bake an awesome pecan pie from scratch? This pie is absolutely delicious, and it's very simple to make. My husband absolutely LOVES pecan pie. For many, many years I have made pecan pies, using the recipe found on the bottle of corn syrup (one of the ingredients).

All that has changed now, ever since I began making awesome pecan pie using another recipe. It’s a total KEEPER, and I want to share the recipe here with you today, and show you how to make it.

One of the unique things about this recipe that sets it apart is in its use of pecans. The recipe calls for finely chopped pecans, quartered pecans, and whole pecan halves used to decorate the top of this delicious pie.

This is also a vey easy pie to make. The flaky buttery crust, as written in the recipe is fantastic, but if really pressed for time, you could always use a pie dough shell. Let me show you how to make an awesome pecan pie!

Scroll Down For A Printable Recipe Card At The Bottom Of The Page

Make The Pie Crust

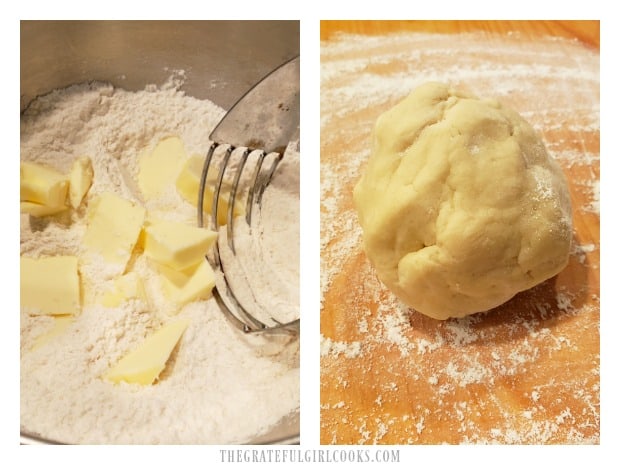
Measure all purpose flour, granulated sugar and salt into a large mixing bowl. Use a pastry cutter to “cut” chunks of very cold butter into the flour mixture. Do this until the butter has been “cut” into the crumbs (and becomes about the size of peas).

Sprinkle the dough with ice water, and stir until the pastry dough is bound together enough to form a dough ball.

Tip: You can also do this step in a food processor, if desired. Pulse cold butter chunks into flour mixture until butter is the size of peas. Drizzle in cold water while machine is running, until dough ball is formed.

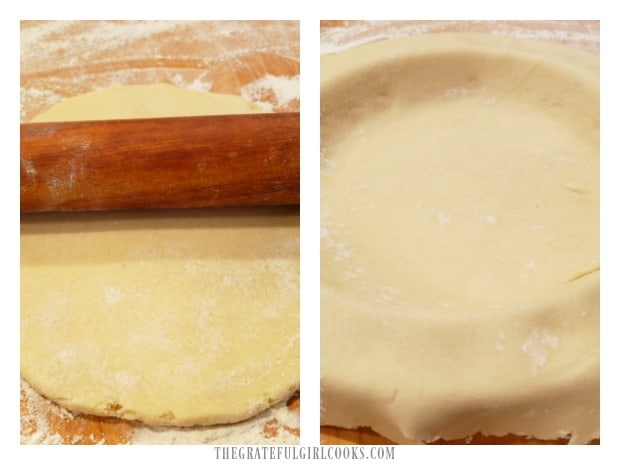
Place the dough ball on a lightly floured work surface. Roll the dough out until it becomes a circle that is at least an inch larger than the pie pan you will be using.

Carefully transfer the pie crust to the pie pan (I fold the dough circle in half, then lift it up and place it into the pie pan). PLACE THE PIE CRUST IN YOUR REFRIGERATOR TO KEEP IT COLD WHILE YOU MAKE THE FILLING!

Butter is cut into pie crust ingredients, and then a ball of dough is formed.Pie crust is rolled out, then put in pie pan, leaving crust overhanging the sides.

Make The Awesome Pecan Pie Filling

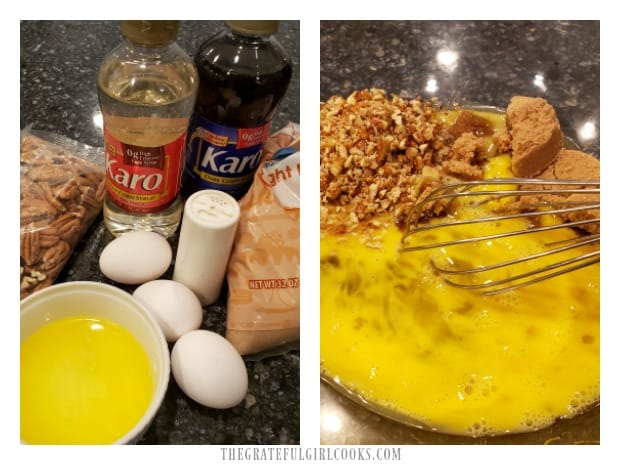
Now it’s time to make the pie filling. The ingredients for the filling are eggs, light and dark corn syrup, butter, brown sugar, a pinch of salt, and finely chopped pecans.

Whisk or stir these ingredients together in a medium sized mixing bowl until they are fully combined. I usually whisk the eggs lightly, then stir in the rest!

The pie filling ingredients are whisked together before adding to the crust.

Fill The Pie

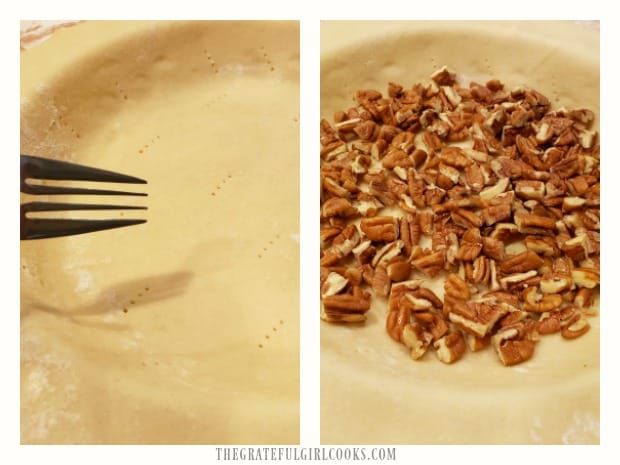
Use the tines of a fork to puncture the crust dough in several places on the bottom and sides. This helps to prevent air pockets from forming.

Add the quartered pecans to the crust, spreading them in a single layer, to cover the bottom as much as possible.

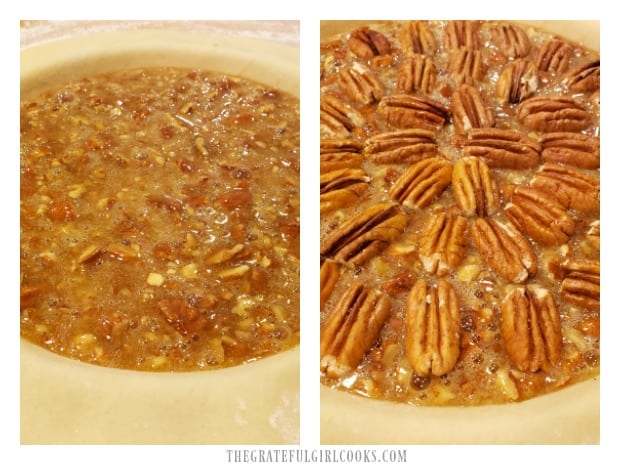
Pie crust is pierced with fork tines, then quartered pecans are added.Carefully pour the pie filling over the quartered pecans in the pie crust. Once the filling is in, decoratively arrange the remaining pecan halves over the top of the pie.

I start by going around the edge, and then work my way into the center with the pecan halves. They will lay right on top of the filling.
The pie filling is poured into crust, and then topped with pecan halves.

Bake Your Awesome Pecan Pie

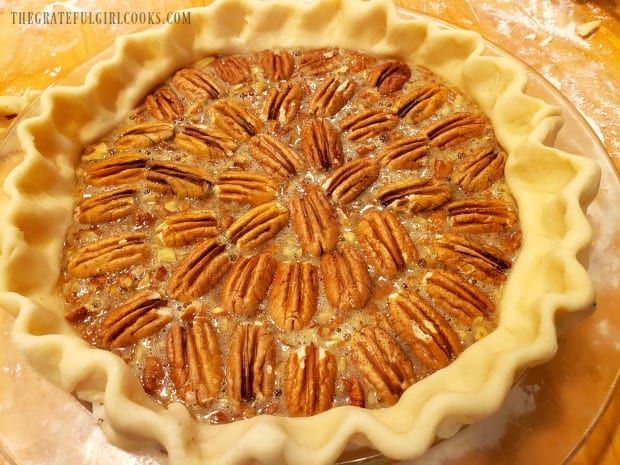
The last thing you will need to do is trim off any excess dough, then crimp the edges of your pie crust decoratively. Once that’s done, place the pie on the middle rack of a preheated 350°F oven.

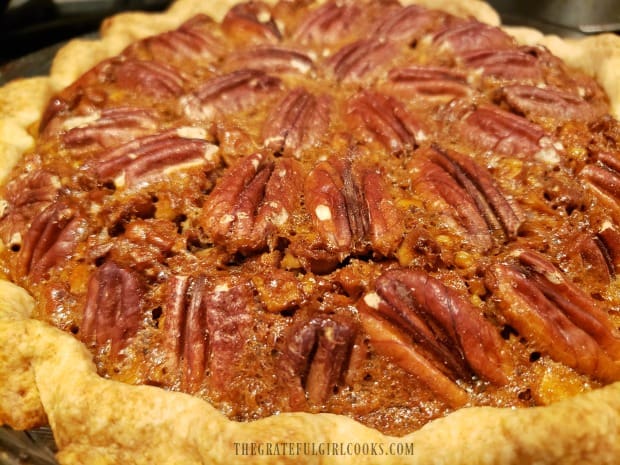
Bake the pie for 1 hour, or until firm and nicely browned. The crust should be golden and flaky when done.

Pecans decorate the top of the pie before it is baked.The top of the awesome pecan pie is golden browned after baking.

Time For A Slice Of Pecan Pie!

Once the pie has cooled (for about an hour), it is ready to serve (it slices better, too!). We actually prefer it served at room temperature.

If you want, you can serve it warm with a tiny scoop of vanilla ice cream! The pie is rich and sweet, so we “usually” eat it without ice cream.

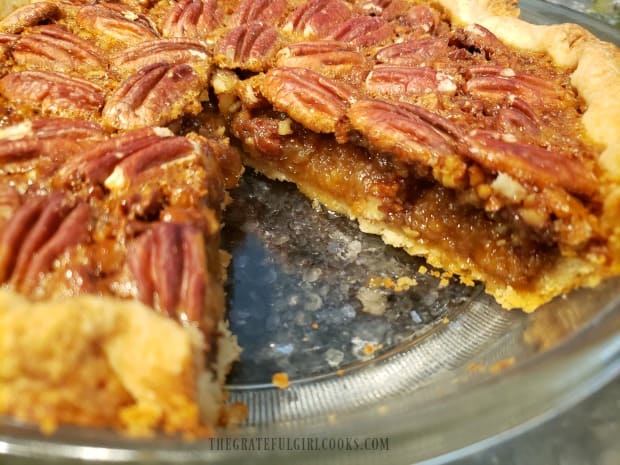
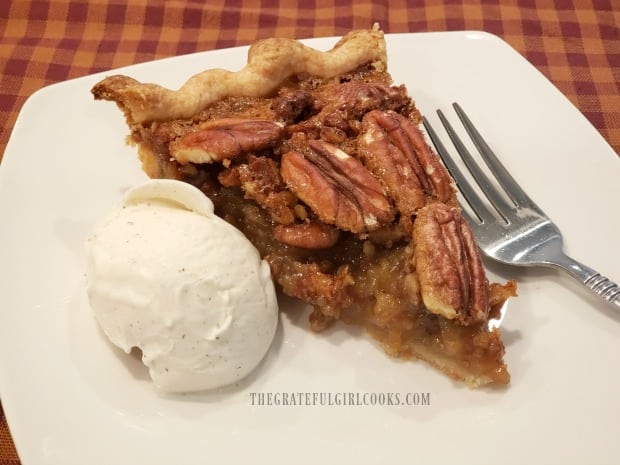
Once cooled, the pie can be easily sliced into 12 thin wedges and transferred to individual plates, for serving. Grab a fork, and dig in. I really think you will LOVE this awesome pecan pie!

Taking a peek at the inside of the finished pecan pie.A slice of awesome pecan pie, with a scoop of ice cream on the side.

I really hope you enjoy this awesome pecan pie! We absolutely LOVE it, and trust you will find it delicious, too! Thank you for stopping by today. I hope you will come back soon.

Looking For More PIE Recipes?

You can find all my pie recipes in the Recipe Index, located at the top of the page. I have quite a few, including:

Want More Recipes? Get My FREE Newsletter!

I publish a newsletter 2 times per month (1st and 15th) with lots of recipes, tips, etc..
Would you like to join our growing list of subscribers?

There is a Newsletter subscription box on the top right (or bottom) of each blog post, depending on the device you use.
You can submit your e-mail address there, to be added to my mailing list.

Find Me On Social Media:

Facebook page: The Grateful Girl Cooks!
Pinterest:
The Grateful Girl Cooks!
Instagram:
jbatthegratefulgirlcooks

Author's signature

Original recipe source: allrecipes.com/recipe/18433/irresistible-pecan-pie/

↓↓ PRINTABLE RECIPE BELOW ↓↓

0 from 0 votes
Awesome Pecan Pie
Prep Time
30 mins
Cook Time
1 hr
Total Time
1 hr 30 mins
 

Ready for the holidays? Why not bake an awesome pecan pie from scratch? This pie is absolutely delicious, and it's very simple to make.

Category: Dessert
Cuisine: American
Keyword: awesome pecan pie
Servings: 12
Calories Per Serving: 444 kcal
Author: JB @ The Grateful Girl Cooks!
Ingredients
For Crust:
  • cups all purpose flour
  • 2 Tablespoons granulated sugar
  • ½ teaspoon salt
  • ½ cup butter (1 stick) , very cold & cut in chunks
  • 4 Tablespoons ice water
For Pie Filling:
  • 3 large eggs
  • ¾ cup light corn syrup
  • 2 Tablespoons dark corn syrup
  • ¾ cup light brown sugar
  • 3 Tablespoons butter , melted
  • 1 pinch salt
  • ½ cup pecans, finely chopped
  • 1 cup pecan halves, quartered (each half cut in 4 pcs.)
  • 1 cup pecan halves
Instructions
  1. Preheat oven to 350°F.

  2. Make The Crust: Mix flour, sugar and salt in a medium mixing bowl. Cut chunks of cold butter into flour mixture, using two forks or a pastry blender. Continue until butter has been reduced to about the size of peas). Sprinkle dough with ice water, and stir well until the pastry dough is bound together enough to form a dough ball. Tip: You can also do this step in a food processor, if desired. Pulse cold butter chunks into flour mixture until butter is the size of peas. Drizzle in cold water while machine is running, until dough ball is formed.

    Place dough ball on floured work surface. Roll out until it becomes a circle an inch larger than the pie pan. Transfer crust to pan (fold circle in half, lift it up, place it in pie pan, unfold). PLACE PIE CRUST (IN PAN) INTO REFRIGERATOR TO KEEP IT COLD WHILE YOU MAKE THE PIE FILLING!

  3. Make The Filling: Whisk/stir eggs, light and dark corn syrups, melted butter, brown sugar, salt, and finely chopped pecans in medium mixing bowl until fully combined.

  4. Remove crust from refrigerator. Use fork tines to pierce crust in several places (bottom and sides). Spread quartered pecans on bottom of crust in a single layer. Pour pie filling evenly over the quartered pecans. Decoratively arrange remaining pecan halves over the top. Trim excess dough and crimp edges of pie crust.

  5. Bake pie at 350°F (on the middle rack of oven) for 1 hour, or until firm/nicely browned on top. Crust should be golden/flaky. Let pie cool for an hour, before slicing and serving. Enjoy!

Nutrition Facts
Awesome Pecan Pie
Amount Per Serving (1 slice (1/12th of total))
Calories 444 Calories from Fat 243
% Daily Value*
Fat 27g42%
Saturated Fat 8g50%
Cholesterol 74mg25%
Sodium 233mg10%
Potassium 139mg4%
Carbohydrates 50g17%
Fiber 2g8%
Sugar 35g39%
Protein 5g10%
Vitamin A 401IU8%
Vitamin C 1mg1%
Calcium 41mg4%
Iron 2mg11%
* Percent Daily Values are based on a 2000 calorie diet.

Here’s one more to pin on your Pinterest boards!

Ready for the holidays? Why not bake an awesome pecan pie from scratch? This pie is absolutely delicious, and it's very simple to make.

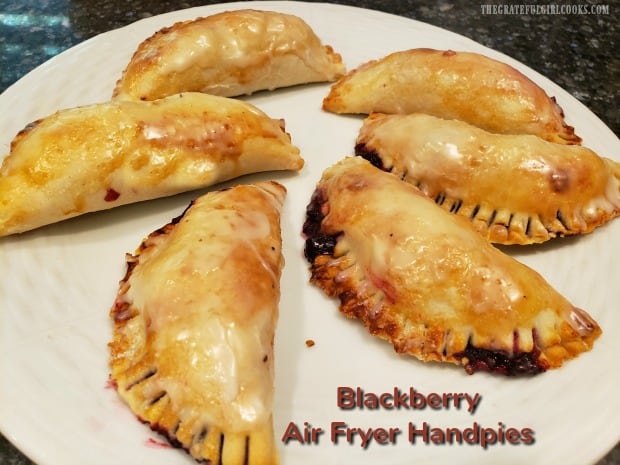
Blackberry Air Fryer Handpies

Make six delicious, glazed blackberry air fryer handpies in about 20 minutes total! They’re easy to make, with purchased or homemade pie crust dough!
Make six delicious, glazed blackberry air fryer handpies in about 20 minutes total! They're easy to make, with purchased or homemade pie crust dough!

Do you like “fried” handpies? I sure do! When I was growing up, my grandma would come and live with us for a few months at a time. I have great memories of seeing her frying fruit pies (apricot, peach, berry, etc) in hot oil in a large skillet. Boy, they sure tasted great when Grandma made them!

I’ve made apricot mini-fried pies (now that I’m all grown up), and always enjoy those, because they remind me of her. Now that I own an air fryer (a birthday gift!), I am longing to create different recipes for air fried “fried pies” (without the oil!).

A couple months ago I decided to try my hand at making blackberry air fryer handpies. I used my standard blackberry pie filling (but cut the recipe in half), and my homemade pie dough (you can use store bought) to make these treats. Guess what? They taste fantastic, so I want to share the easy recipe here on the ol’ blog. Here’s how to make ’em:

Scroll Down For A Printable Recipe Card At The Bottom Of The Page

Prepare The Blackberry Filling

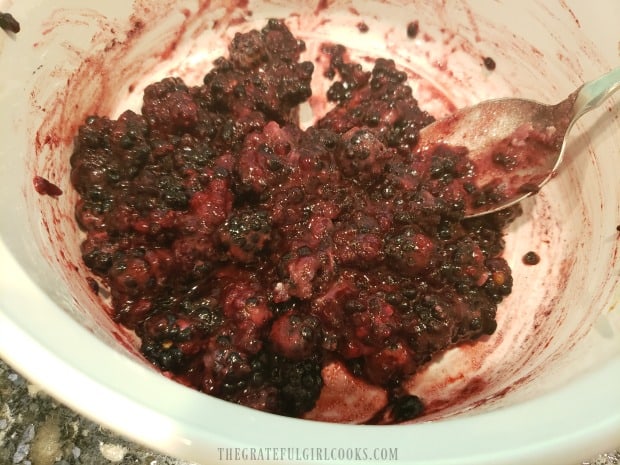
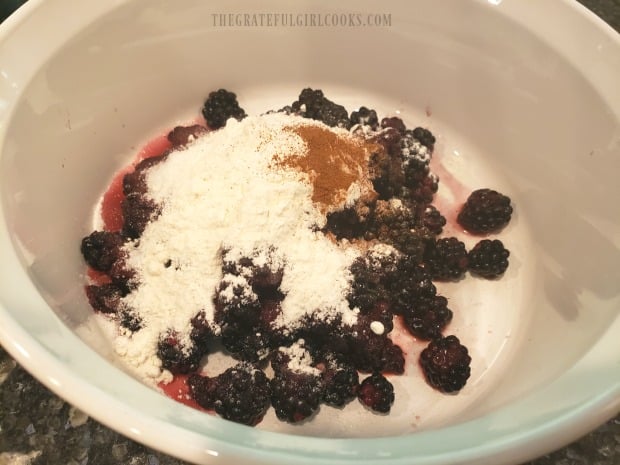
Place the blackberries, sugar, flour and cinnamon in a medium sized bowl. NOTE: If you will be using frozen blackberries, please let them thaw first, and then drain off any accumulated juice before adding the other ingredients.

Stir gently, until these ingredients are combined. This is the filling for your blackberry air fryer handpies. See how easy that was? Set the bowl aside while you cut out the pie dough circles.

Blackberries, flour, cinnamon and sugar are combined in a medium sized bowl.Once mixed, the fruit filling is ready to make the blackberry handpies.

Cutting Out The Pie Crust Dough

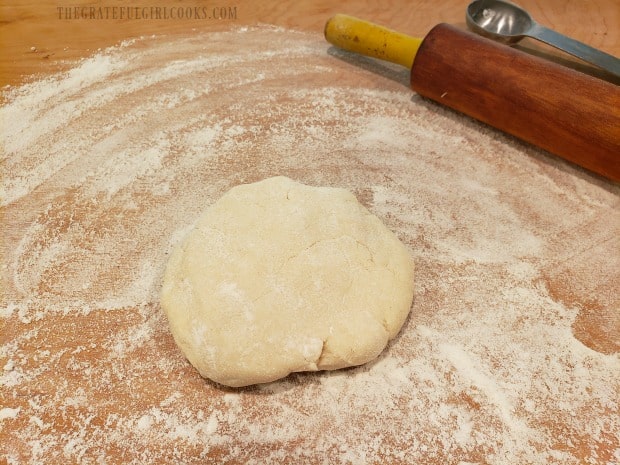
Roll out the pie crust dough (mine shown below is homemade) into a circle shape, large enough for at least a 9″ pie. If using a purchased pie dough crust, you may need to roll it out a bit more, so you have enough dough for 6 handpies!

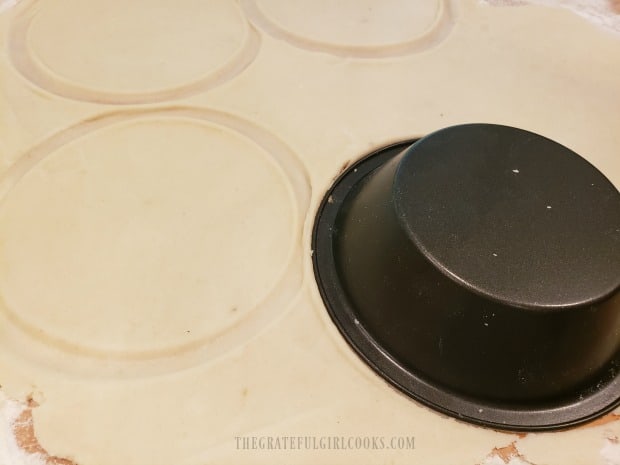
Cut the dough into six 5″ circles. You can use a wide mug or glass, or a mini pie tin (like I used) to cut the shape. Collect any leftover scraps of dough, then roll them out again to get enough dough for 6 handpies.

Pie dough is rolled out before cutting into circle shapes for handpies.The pie dough is cut into 6 circles for the blackberry handpies.

Fill The Blackberry Handpies

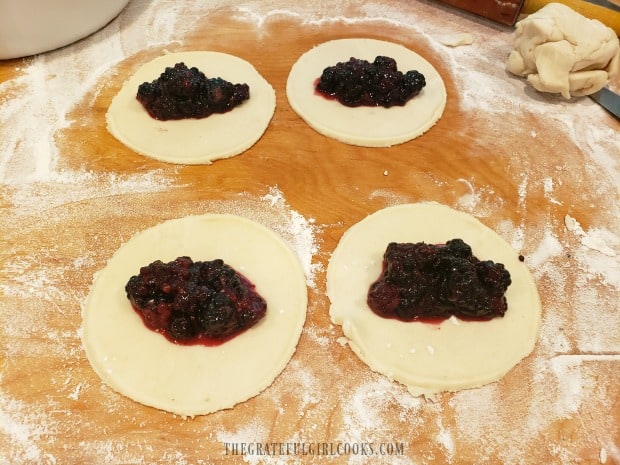
Place a heaping Tablespoonful of the blackberry filling into the center of the dough circles. Be careful not to overfill, or the filling will ooze out! I speak from experience! *cough, cough*

Also, be sure to leave some empty dough around all the circle. Do NOT spread the filling out to the edges, because you need to fold the dough over the blackberry filling, and seal the edges.

A spoonful of blackberry pie filling is placed onto each pie dough circle.

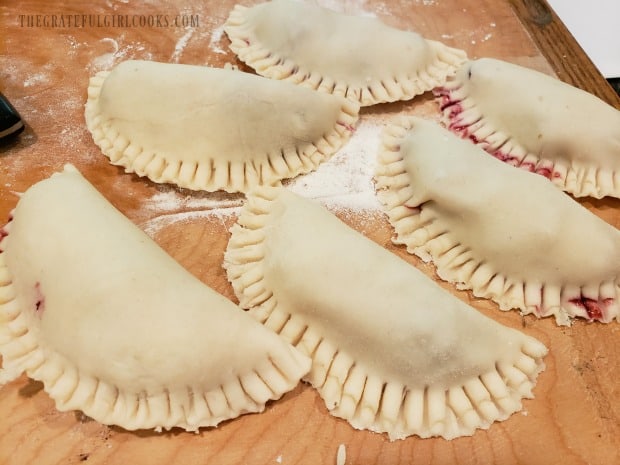
Anyways… pull the dough up and over the blackberry filling to the other edge of the pie dough. Use the tines of a fork (the backside) and press down on the edges of the handpie to seal the two crusts together. Make sure they are sealed together well, so the pies don’t open up while they are cooking.

You can see where some of the filling juiced out of a couple of the handpies when I crimped the edges.. No big deal, it just looks nicer if they don’t look like they are part of a murder scene! Just sayin’.

Dough is folded over the pie filling, and edges are crimped to seal.

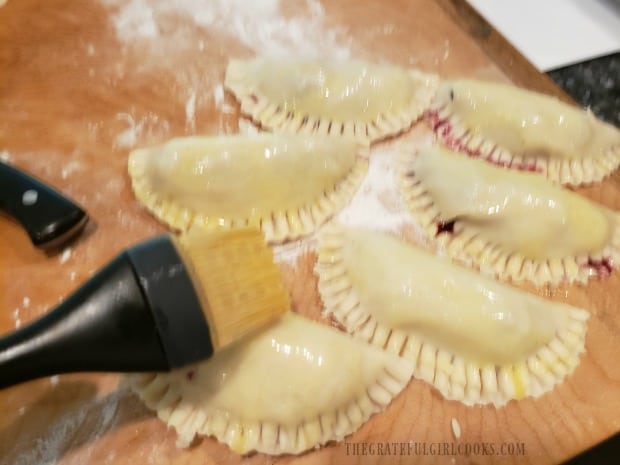
Brush the beaten egg over the entire top surface of the dough. This helps the crust to brown nicely while cooking in the air fryer.

A beaten egg is brushed over the handpies before cooking.

Time To Cook Some Blackberry Air Fryer Handpies!

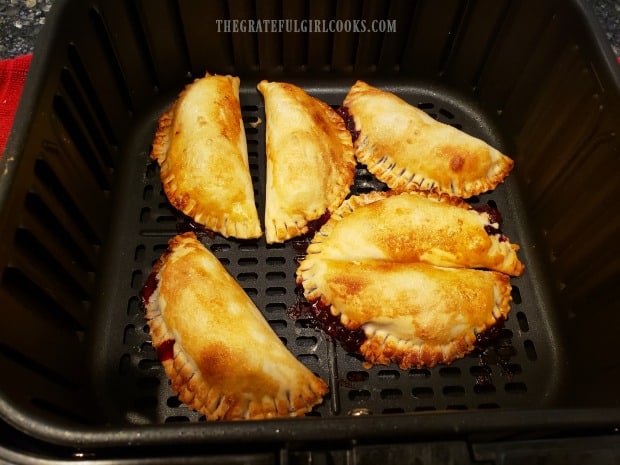
Preheat your air fryer to 370°F. This will take a few minutes. Once pre-heated, carefully place the handpies into the basket. I was able to get all 6 of them into the basket at the same time, but you can cook them in batches, if your air fryer is smaller.

Cook the blackberry air fryer handpies at 370°F for 7-8 minutes. Check them at the 7 minute mark, since air fryer temps can vary greatly with different machines. When the dough is nicely golden brown and crispy on the outside, they are done.

Carefully remove them from the air fryer once done, and transfer them to a wire rack (with wax paper of aluminum foil UNDER the rack. The wax paper or foil will help catch any drips when you brush on the glaze.

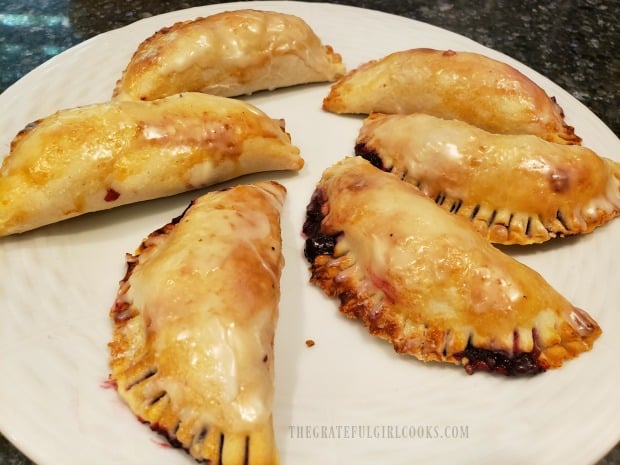
Blackberry air fryer handpies are golden brown once fully cooked.

Glaze The Blackberry Air Fryer Handpies

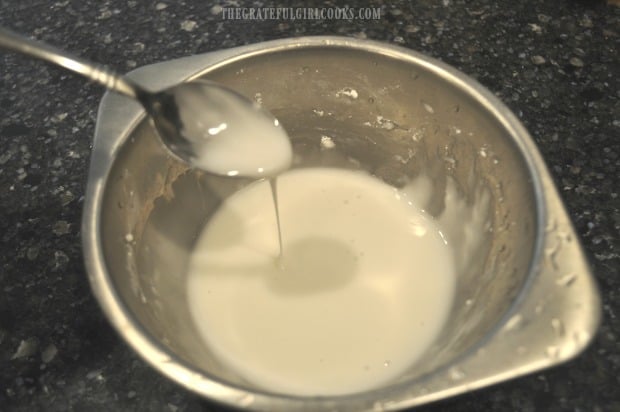
While the handpies cool down just a bit, mix the powdered sugar with drops of water in a small bowl, to make a fairly thin glaze.

Once the blackberry handpies have cooled a bit, use a pastry brush to brush the glaze all over the top of the pastry. When the glaze has hardened, the handpies are ready to serve!

A glaze is made with water and powdered sugar.

The blackberry handpies are brushed with the glaze, and then are ready to eat!

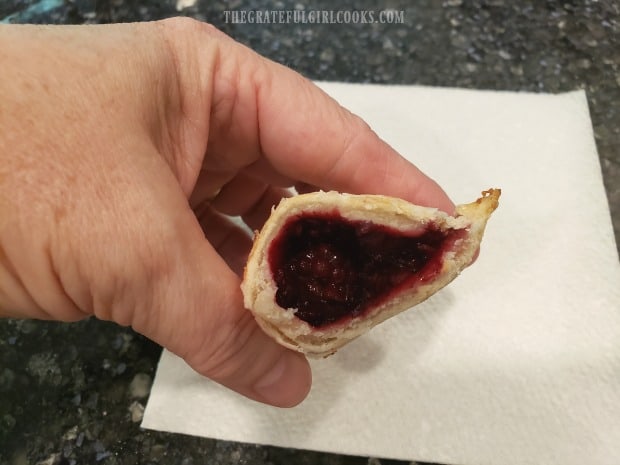
Here’s a peek inside one of the blackberry air fryer handpies.  See that yummy looking blackberry filling inside? Go on… take a big bite… you know you want to, right?

A peek at the inside of one of the handpies, after cooking.

Hope you will consider trying this recipe! I really love my fairly new air fryer, and these mini handpies were absolutely delicious! Have a great day.

Looking For More AIR FRYER Recipes?

You can find all of my recipes in the Recipe Index, located at the top of the page. I have some delicious air fryer recipes you might enjoy, including:

Interested In More Recipes?

Thank you for visiting this website. I appreciate you using some of your valuable time to do soIf you’re interested, I publish a newsletter 2 times per month (1st and 15th) with all the latest recipes, and other fun info. I would be honored to have you join our growing list of subscribers, so you never miss a great recipe!
There is a Newsletter subscription box on the top right side (or bottom) of each blog post, depending on the device you use, where you can easily submit your e-mail address (only) to be included in my mailing list.

You Can Also Find Me On Social Media:
Facebook page: The Grateful Girl Cooks!
Pinterest: The Grateful Girl Cooks!
Instagram: jbatthegratefulgirlcooks

Author's signature


0 from 0 votes
Blackberry Air Fryer Handpies
Prep Time
15 mins
Cook Time
7 mins
Total Time
22 mins
 

Make six delicious, glazed blackberry air fryer handpies in about 20 minutes total! They're easy to make, with purchased or homemade pie crust dough!

Category: Desssert
Cuisine: American
Keyword: blackberry air fryer handpies
Servings: 6
Calories Per Serving: 322 kcal
Author: JB @ The Grateful Girl Cooks!
Ingredients
  • 2 cups blackberries
  • ½ cup granulated sugar
  • Tablespoons all purpose flour
  • teaspoon ground cinnamon
  • 1 pie crust (unbaked) homemade or store bought
  • 1 egg beaten
For Icing:
  • ½ cup powdered sugar
  • 3-4 drops water
Instructions
  1. Place blackberries, sugar, flour and cinnamon in a medium sized bowl. Stir gently, until ingredients are combined. Set bowl aside. NOTE: If using frozen blackberries, thaw first, and then drain off any accumulated juice before adding other ingredients.

  2. Roll pie crust dough into a circle shape, large enough for a 9" pie. If using a purchased pie dough crust, you might need to roll it out more, so you have enough dough for 6 handpies! Cut dough into six 5" circles. Collect leftover scraps of dough, then roll them out again to get enough dough for 6 handpies.

  3. Place a heaping Tablespoonful of blackberry filling into center of each circle. Don't overfill the handpies, or the filling will leak out! Be sure to leave a dough edge around the circle. Do NOT spread the filling out to the edge.

  4. Pull the dough (gently) up and over the blackberry filling to the other edge of the dough. Use the tines of a fork (the backside) and press down on the edges of the handpie to crimp and seal the two crusts together. Make sure they are sealed together well, so the pies don't open up while they are cooking. Brush beaten egg over the top of the handpies. This helps the crust to brown nicely while cooking in the air fryer.

  5. Preheat air fryer to 370°F. Once pre-heated, carefully place handpies into basket. You can cook them in batches, if necessary. Cook handpies at 370°F for 7-8 minutes. Check them at the 7 minute mark, as temperatures can vary with air fryers. When handpies are golden brown and crispy on the outside, they are done. Carefully remove them from air fryer, and transfer to a wire rack.

  6. While the handpies cool, mix the powdered sugar with drops of water in a small bowl, to make a fairly thin glaze. Once handpies have cooled a bit, use a pastry brush to brush the glaze all over the top. When glaze hardens, the handpies are ready to serve! Enjoy!

Nutrition Facts
Blackberry Air Fryer Handpies
Amount Per Serving (1 g)
Calories 322 Calories from Fat 108
% Daily Value*
Fat 12g18%
Saturated Fat 3g19%
Cholesterol 27mg9%
Sodium 144mg6%
Potassium 122mg3%
Carbohydrates 51g17%
Fiber 3g13%
Sugar 29g32%
Protein 4g8%
Vitamin A 142IU3%
Vitamin C 10mg12%
Calcium 26mg3%
Iron 1mg6%
* Percent Daily Values are based on a 2000 calorie diet.

Here’s one more to pin on your Pinterest boards!Make six delicious, glazed blackberry air fryer handpies in about 20 minutes total! They're easy to make, with purchased or homemade pie crust dough!

Coconut Chocolate Chip Pie

Coconut Chocolate Chip Pie is a tasty, crust-less, easy dessert to make! Mix ingredients in blender, pour into pie pan, add chocolate chips, & bake!

Well, if you like desserts that don’t take a lot of prep work, this is the pie for you! With a MINIMAL amount of prep time (5 minutes or less), this coconut chocolate chip pie will surprise you with just how EASY it is to make!

I found this recipe in one of my old (from 1998) Taste of Home magazines that I keep in my home office. Occasionally I browse through my old cooking magazines for new recipe ideas, and when I saw this old recipe for a quickly (made in a blender) coconut pie, I knew I wanted to try it.

Personally I like coconut and chocolate together, so I slightly tweaked the original recipe to include chocolate chips, and before I knew it, this pie was made and baked! Even if you don’t know how to cook, YOU can make this tasty pie!

Scroll Down For A Printable Recipe Card At The Bottom Of The Page

Blend The Coconut Pie Filling

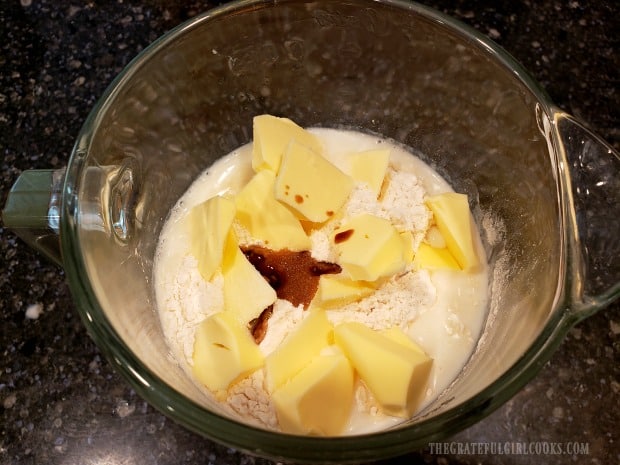
Place milk, eggs, sugar, flour, butter, vanilla and salt into a blender. Cover the blender, and process for about 15 seconds, Scrape the sides down of the blender, put the lid back on, and blend for another 15 seconds.

Ingredients for the pie are mixed in a blender.

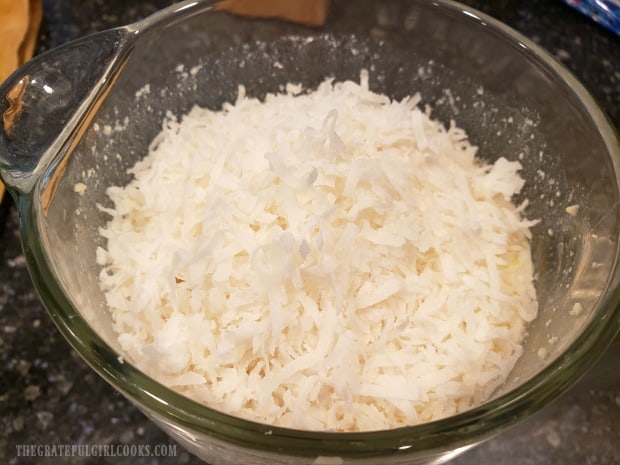
Add the shredded coconut to the blended pie filling. Put the lid on the blender and blend this for only 5 seconds. Yep… only 5 seconds! See how EASY this is?

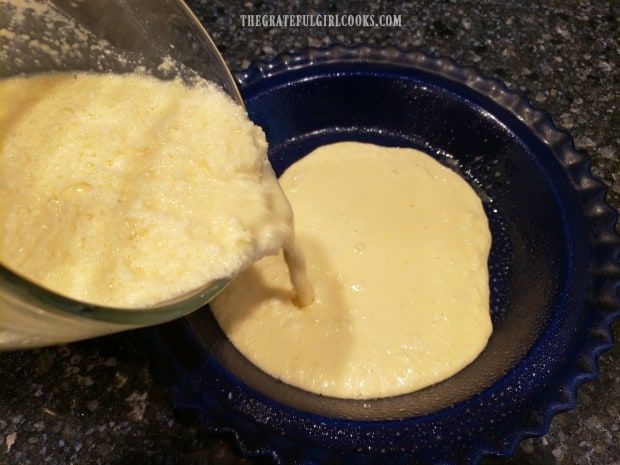
Spray a 9″ or 10″ pie pan with non-stick baking spray (or grease bottom and sides with vegetable shortening or butter. Once done, pour all of the blended coconut pie filling into the pie pan.

Shredded coconut is added to pie filling ingredients in blender.Coconut pie filling is poured into a greased pie pan.

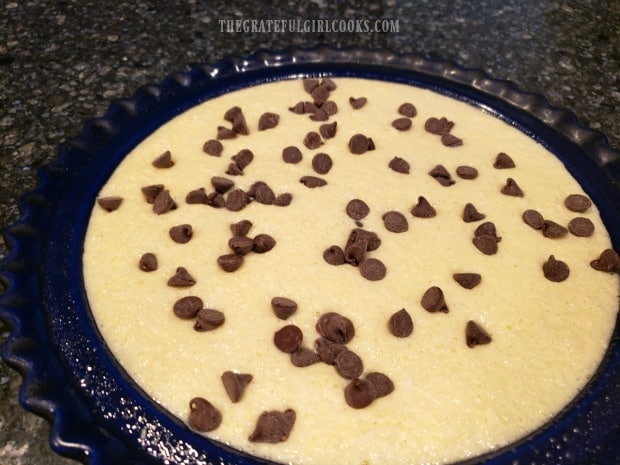
Sprinkle the chocolate chips around the top of the pie, and then push them (with the back of a spoon or a spatula) until they are submerged below the surface.

Chocolate chips are added to the pie filling, and then submerged.

Time To Bake The Coconut Chocolate Chip Pie!

Once you have “submerged” the chocolate chips into the pie filling, the pie is ready to bake! Carefully place the coconut chocolate chip pie on the middle rack of a preheated 350° F. oven.

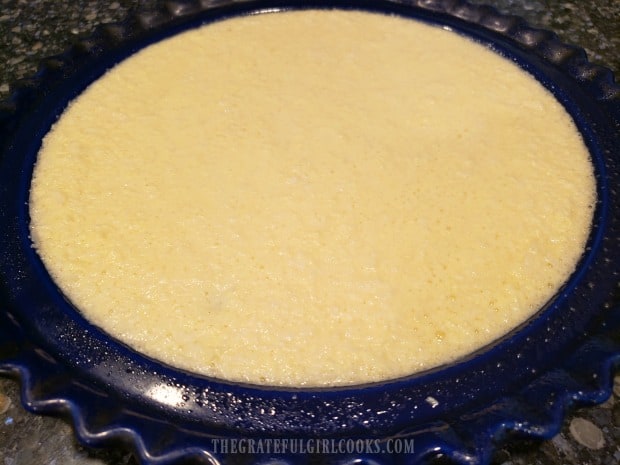
Coconut pie in pie pan is ready for the oven.

Bake the pie at 350° F. oven for 50-55 minutes (mine took 55 minutes). When done, the pie will be golden brown, and a knife inserted in the top/middle of the pie will come out clean. Remove the pie from the oven and transfer the pan to a wire rack to cool.

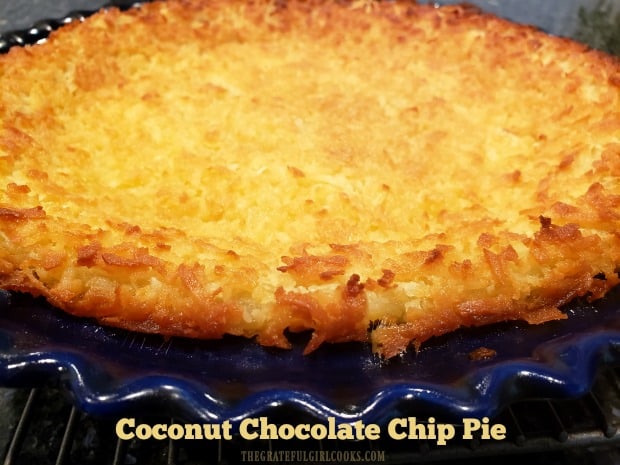
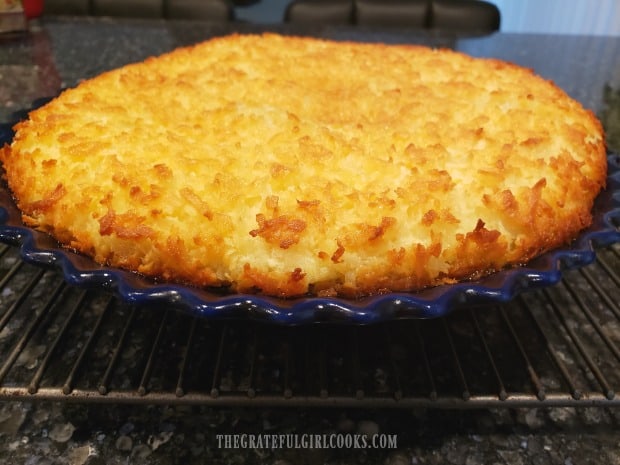
The pie will puff up considerably during the baking process. As you can see in the photo below, it rises well above the rim. The coconut chocolate chip pie will flatten out as the filling cools, and the air inside dissipates.

The coconut chocolate chip pie has finished baking and cools on wire rack.

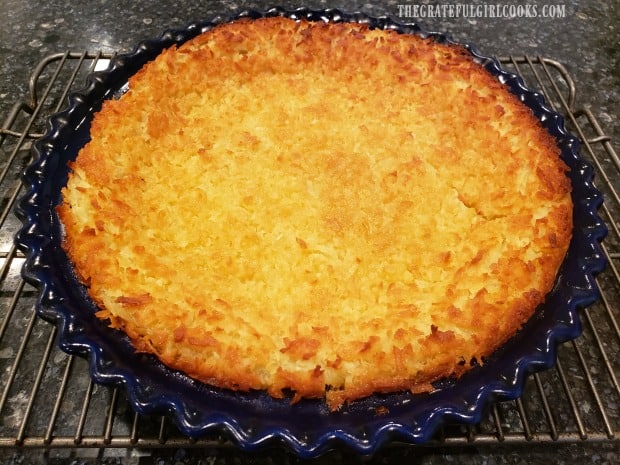
A coconut chocolate chip pie cools in the pie pan, on a wire rack.

Slice, Serve, and Enjoy Coconut Chocolate Chip Pie

Let the coconut pie cool down for about 15-20 minutes before slicing, if you will be eating it while warm. The pie slices very easily and cleanly! This coconut pie can be served while still warm, or you can wait until it has completely cooled off completely, before serving.

Slice the pie into 8 pieces, serve, and enjoy! Any leftovers may be stored (covered) in the refrigerator, for 3-4 days.

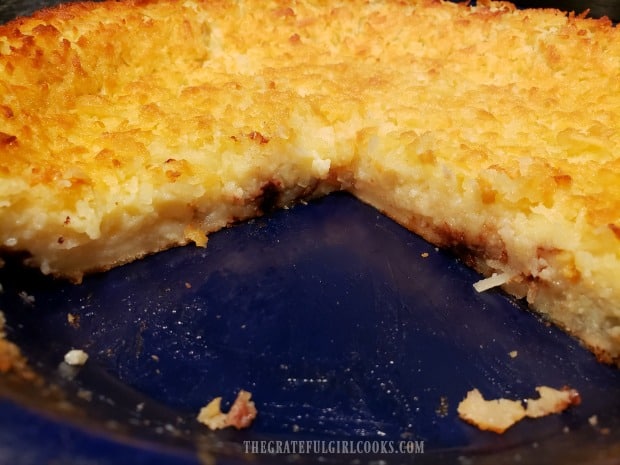
A look at the inside of a sliced into coconut pie in the pan.

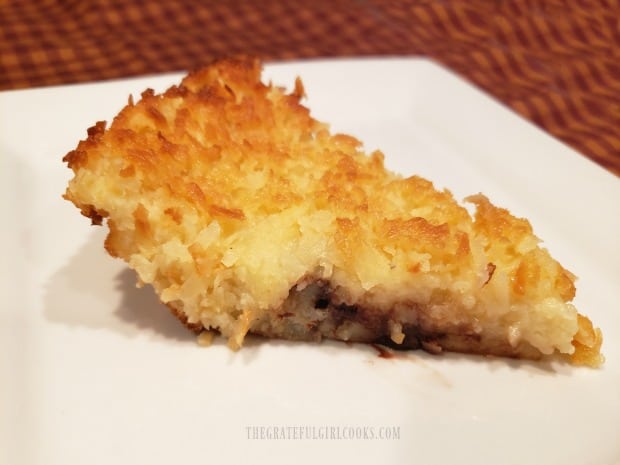
Even without an “official” crust, you can see that a slice of this “crust-less” coconut pie holds its shape well! Now all that is left to do is eat it warm or at room temperature!

A slice of the coconut chocolate chip pie is served on a white plate.

I really hope you enjoy this easy to make coconut pie! It truly could not be any easier to make, which is pretty handy, when you need a quick dessert! Have a great day, friends.

Looking For More PIE Recipes?

You can find all of my pie recipes in the Recipe Index, located at the top of the page. A few favorite pie recipes you may enjoy include:

Interested In More Recipes?

Thank you for visiting this website. I appreciate you using some of your valuable time to do soIf you’re interested, I publish a newsletter 2 times per month (1st and 15th) with all the latest recipes, and other fun info. I would be honored to have you join our growing list of subscribers, so you never miss a great recipe!
There is a Newsletter subscription box on the top right side (or bottom) of each blog post, depending on the device you use, where you can easily submit your e-mail address (only) to be included in my mailing list.

You Can Also Find Me On Social Media:
Facebook page: The Grateful Girl Cooks!
Pinterest: The Grateful Girl Cooks!
Instagram: jbatthegratefulgirlcooks

Author's signature

Recipe Adapted From: Taste of Home Magazine, published by Reiman Publications, December/January 1998 issue (Volume 5, No.6), page 13

0 from 0 votes
Coconut Chocolate Chip Pie
Prep Time
5 mins
Cook Time
50 mins
Total Time
55 mins
 

Coconut Chocolate Chip Pie is a tasty, crust-less, easy dessert to make! Mix ingredients in blender, pour into pie pan, add chocolate chips, & bake!

Category: Dessert
Cuisine: American
Keyword: coconut chocolate chip pie
Servings: 8
Calories Per Serving: 367.02 kcal
Author: JB @ The Grateful Girl Cooks!
Ingredients
  • 2 cups milk
  • 4 large eggs
  • 1 cup granulated sugar
  • ½ cup all purpose flour
  • 6 Tablespoons butter
  • 1 teaspoon vanilla extract
  • ½ teaspoon salt
  • 1 cup shredded coconut
  • cup semi-sweet chocolate chips
Instructions
  1. Preheat oven to 350° F. Spray bottom and sides of a 9 or 10" pie pan with non-stick cooking spray (or grease pan with vegetable shortening)

  2. Place milk, eggs, sugar, flour, butter, vanilla and salt into a blender. Cover blender, and process for 15 seconds, Scrape sides of the blender down, put lid back on, and blend for another 15 seconds. Add shredded coconut to the blended pie filling. Put id on blender and blend this for only 5 seconds. Pour the blended coconut pie filling into the greased pie pan. Sprinkle chocolate chips around the top of the pie, and then push them (with the back of a spoon or a spatula) until they are submerged below surface.

  3. Carefully place pie on the middle rack of preheated oven. Bake at 350° F. for 50-55 minutes. When done, pie will be golden brown, and knife inserted in the top/middle of the pie will come out clean. Remove from oven, and transfer pan to a wire rack to cool. Let pie cool for 15-20 minutes before slicing. Pie can be served warm, or at room temperature. Enjoy! *Leftovers may be stored (covered) in refrigerator, for 3-4 days.

Nutrition Facts
Coconut Chocolate Chip Pie
Amount Per Serving (1 slice (1/8th of pie))
Calories 367.02 Calories from Fat 169
% Daily Value*
Fat 18.73g29%
Saturated Fat 11.86g74%
Cholesterol 131.44mg44%
Sodium 317.21mg14%
Potassium 216.42mg6%
Carbohydrates 43.47g14%
Fiber 1.32g6%
Sugar 35.82g40%
Protein 7.23g14%
Vitamin A 531.13IU11%
Calcium 98.48mg10%
Iron 1.55mg9%
* Percent Daily Values are based on a 2000 calorie diet.

Here’s one more to pin on your Pinterest boards!Coconut Chocolate Chip Pie is a tasty, crust-less, easy dessert to make! Mix ingredients in blender, pour into pie pan, add chocolate chips, & bake!

How To Can Apple Pie Filling

Learn how to can apple pie filling for your pantry! Once canned, having homemade pie filling already made for pies, cobblers, etc. is a real time saver!
Learn how to can apple pie filling for your pantry! Once canned, having homemade pie filling already made for pies, cobblers, etc. is a time saver!

Okay, lets be honest. Making canned apple pie filling takes some time to pull off, but can I remind you that the results will be worth it, in time saved down the road? You will be able to pull a jar right out of your pantry and whip up a dessert in much less time! YEEHAW!

This “recipe” came straight out of my treasured canning book called “Ball Complete Book Of Home Preserving”, and it’s a real keeper! Once made, you can use this apple pie filling for pies, cobblers or crisps, turnovers, or even as a topping for PANCAKES!

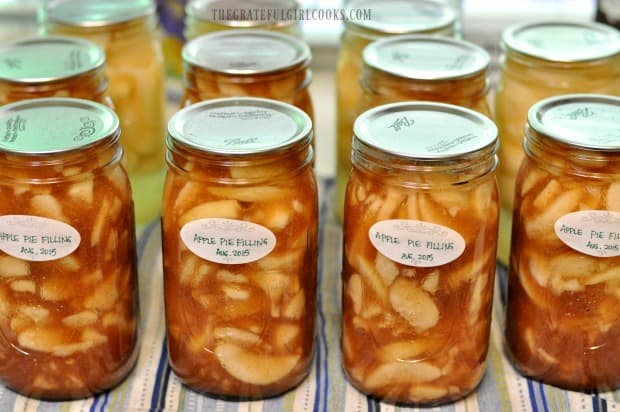
The recipe (as written below in the recipe card) will give you a yield of 3 quart jars (plus a pint) OR it will give you about 7 smaller pint jars of apple pie filling. **Please note that I DOUBLED the recipe, and made 7 QUART sized jars of pie filling (as shown in photos)!

Scroll Down for A Printable Recipe Card At The bottom Of The Page

Prepare Canning Equipment

Before canning apple pie filling, prepare quart (or pint) size canning jars, flat lids and screw bands, as well as a water bath canner, according to the manufacturer instructions, and USDA safe canning guidelines.

Prepare The Apples

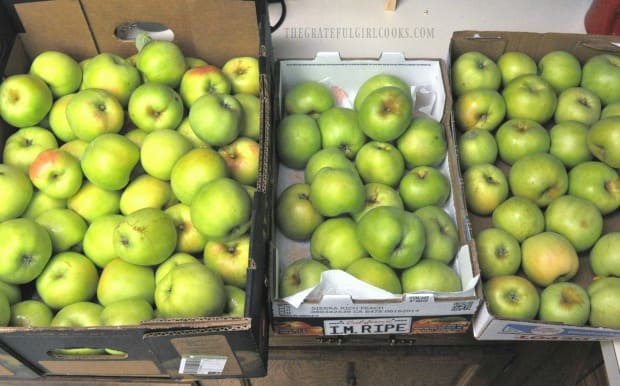
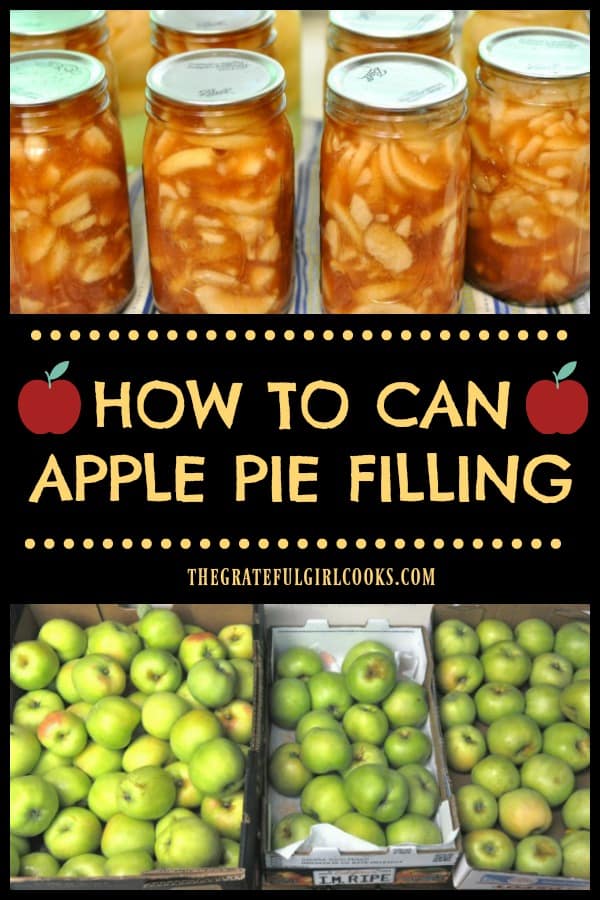
There are several wonderful varieties of apples that are great for pie filling. A few that come to mind are Granny Smith, Honeycrisp, Jonathan, and my favorite, Gravensteins (shown below). I love to go pick them at local U-Pick Farms! It takes quite a few apples to make 7 quarts, as you can imagine! Basically, each quart sized jar will require approximately 3 pounds of apples!

Picked some Gravenstein apples to use in many recipes.

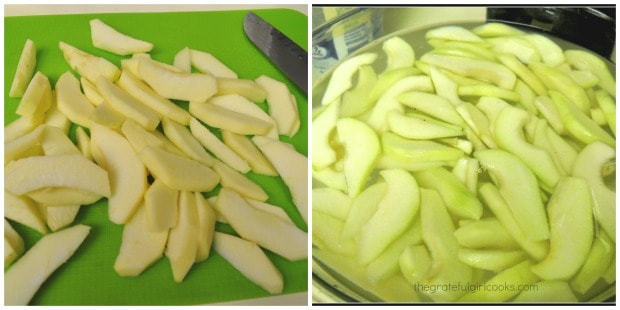
Peel, remove the core, and slice the apples. Treat the apples with lemon juice, fruit fresh or follow my old-fashioned tip here, to keep the apples from darkening once exposed to air.

It will take about 3-40 minutes to peel, slice and treat all those apples. My suggestion is to get someone to help you, if possible! This is a GREAT way to get a friend or other family member involved, in order to save time! This is especially helpful if doubling the recipe!

Blanch The Apple Slices

You will need to blanch the apple slices (once they’re peeled , sliced and treated). Bring a large pot of water to a boil. Add 6 cups of sliced apples at a time to the boiling water. Cook for 1 minute, then remove and keep them warm while you finish blanching all the apples.

Apples are peeled, cored, sliced and treated to prevent browning.

Prepare The Pie Filling

A lot of folks thicken pie fillings with flour or cornstarch. That’s fine for making a pie. However, when CANNING apple pie filling, these ingredients don’t hold up too well in storage, so a product called ClearJel (for cooking, not instant) is typically used. ClearJel is a type of cooking starch (approved for home canning) that can be ordered online from many retailers.

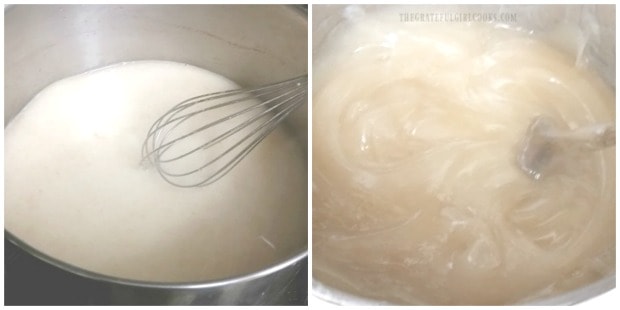
To make the pie filling, measure granulated sugar, ClearJel, water, apple juice, cinnamon and nutmeg into a LARGE stainless steel saucepan. Bring this to a boil on medium-high heat. Stir constantly, and continue to cook until it starts to bubble and thickens. Add the lemon juice, and cook for 1 more minute, continuing to stir constantly! Take off heat when done.

The thickener for the apple pie filling is cooked until thickened.

Add The Apple Slices To Pie Filling

Transfer the warm (drained) apple slices to this thickened pie filling in the large saucepan, and fold them into the mixture. Heat the apple pie filling just until heated through, before placing the filling into your hot, prepared jars.

Time To Can Apple Pie Filling!

Once heated through, ladle the hot pie filling into prepared canning jars, being sure to leave 1 inch of headspace in each jar. Use a plastic utensil to remove the air bubbles from the jars, making adjustments to the headspace if necessary, by adding or removing filling.

Wipe the jar rims clean with a wet cloth or paper towel, to help ensure a good seal. Place flat lid centered on top, and add the jar ring. Screw the band on until it is fingertip tight.

How To Can Apple Pie Filling

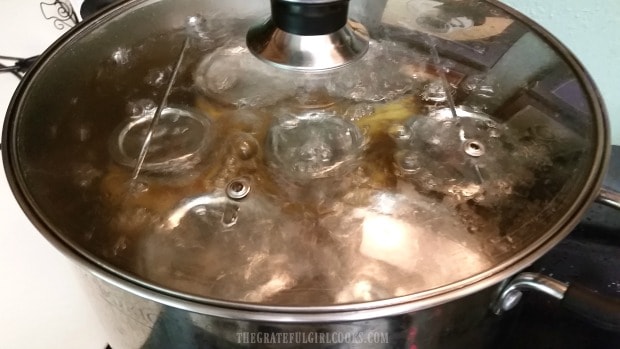
Place the hot jars on an elevated rack and lower into simmering water in canner. Make sure that the water completely covers the tops of the jars (by about an inch). Place lid on canner. Bring the water to a gentle rolling boil, and process the jars for 25 minutes AFTER it begins boiling. The processing time is the same for both pint and quart sized jars.

When you can apple pie filling, the jars must be processed in a water bath canner.

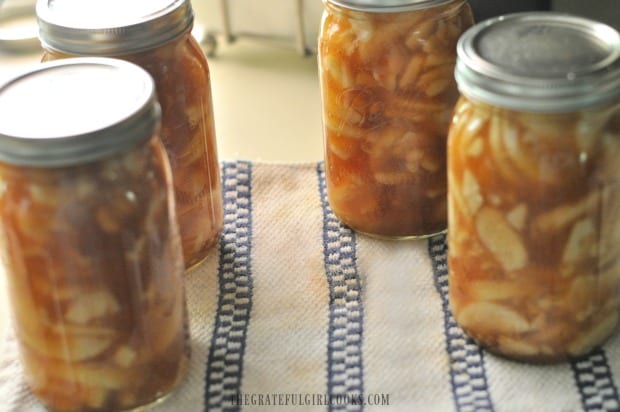
When processing time is finished, turn off heat, and carefully remove lid from the pan. Wait for 5-10 minutes, and then remove the HOT jars from the pan, using canning tongs. Transfer jars to a dish towel on counter. IMPORTANT NOTE: Don’t place hot jars directly onto your counter top, as temperature variances (hot jars vs. cold counter top) might cause jars to crack.

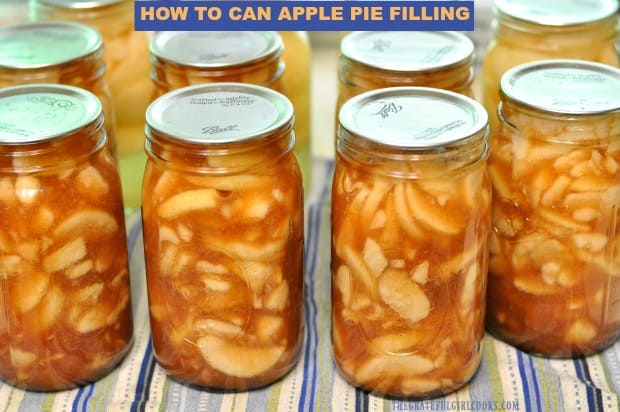
Four jars of apple pie filling resting on dish towel after processing.

Let The Jars Cool Completely

Let the jars of apple pie filling cool completely (overnight or 12 hours) without disturbing. Once completely cooled, check to make sure jars sealed. The jar lids should have NO GIVE in them if properly sealed. If you find one has not sealed properly, it is not safe to store. Refrigerate it, and use it within a week.

Wipe the jars clean with a wet cloth, then label (with date canned), and place them in your pantry for long term storage. There you go… you just learned how to can apple pie filling!

The jars of apple pie filling are cleaned, seal is checked, and are labeled for storage.

Even though it is a labor-intensive process to make pie filling, the benefit comes later! It’s very convenient to make a pie, cobbler or dessert requiring apple pie filling by grabbing an “already made” jar right out of the pantry!

Looking For More CANNING Recipes?

You can find all of my canning recipes in the Recipe Index, located at the top of the page. I have recipes for a variety of foods and jams. They include:

Interested In More Recipes?

Thank you for visiting this website. I appreciate you using some of your valuable time to do soIf you’re interested, I publish a newsletter 2 times per month (1st and 15th) with all the latest recipes, and other fun info. I would be honored to have you join our growing list of subscribers, so you never miss a great recipe!
There is a Newsletter subscription box on the top right side (or bottom) of each blog post, depending on the device you use, where you can easily submit your e-mail address (only) to be included in my mailing list.

You Can Also Find Me On Social Media:
Facebook page: The Grateful Girl Cooks!
Pinterest: The Grateful Girl Cooks!
Instagram: jbatthegratefulgirlcooks

Author's signature

Original recipe source: my beloved “Ball Complete book Of Home Preserving”, published 2006, The Jarden Corporation, page 170.

0 from 0 votes
How To Can Apple Pie Filling
Prep Time
45 mins
Cook Time
25 mins
Total Time
1 hr 10 mins
 

Learn how to can apple pie filling for your pantry! Once canned, having homemade pie filling already made for pies, cobblers, etc. is a time saver!

Category: Canning and Preserving, Dessert
Cuisine: American
Keyword: can apple pie filling
Servings: 7 pints (or 3 qts + 1 pint)
Calories Per Serving: 462 kcal
Author: JB @ The Grateful Girl Cooks!
Ingredients
  • 12 cups apples , peeled, cored, sliced, treated to prevent browning
  • cups granulated sugar
  • ¾ cup ClearJel
  • teaspoons ground cinnamon
  • ½ teaspoon ground nutmeg
  • cups cold water
  • cups unsweetened apple juice
  • ½ cup lemon juice
Instructions
  1. Prepare quart (or pint) size canning jars, flat lids and screw bands, and water bath canner, according to the manufacturer instructions, and USDA safe canning guidelines.

  2. Peel, remove the core, and slice the apples. Treat the apples with lemon juice (not from the ingredient list), fruit fresh or another method, to keep the apples from darkening once exposed to air. Once they're peeled , sliced and treated, blanch the slices . Bring a large pot of water to a boil. Add 6 cups of sliced apples at a time to the boiling water. Cook for 1 minute, then remove and keep them warm while you finish blanching all the apples.

  3. To make the pie filling, measure granulated sugar, ClearJel, water, apple juice, cinnamon and nutmeg into a LARGE stainless steel saucepan. Bring this to a boil on medium-high heat. Stir constantly, and continue to cook until it bubbles and thickens. Add ½ cup lemon juice, and cook for 1 more minute, stirring constantly! Take off heat when done. Transfer warm (drained) apple slices into pie filling in large saucepan, and fold them into the mixture. Re-heat filling only until heated through, before placing the filling into hot, prepared jars.

  4. Ladle hot pie filling into prepared canning jars, leaving 1 inch of headspace in each jar. Use a long utensil inserted several times into jars, to remove the air bubbles, making adjustments to the headspace if necessary, by adding or removing filling. Wipe jar rims clean, to help ensure a good seal. Place flat lid on top, and add the jar ring. Screw the band on until it is fingertip tight. Place the hot jars onto an elevated rack and lower rack and jars into simmering water in canner. Make sure the water completely covers the tops of the jars (by about an inch). Place lid on canner.

  5. Bring the water to a gentle rolling boil, and process the jars for 25 minutes AFTER it begins boiling. When processing time is finished, turn off heat. Remove lid from pan. Wait 5-10 minutes, and then remove the VERY HOT jars from the pan, using canning tongs. Transfer jars to a dish towel on counter. IMPORTANT NOTE: Don't place hot jars directly onto your counter top, as temperature variances (boiling hot jars vs. cold counter top) might cause jars to crack. Let the jars of apple pie filling cool completely (overnight or 12 hours) without disturbing.

  6. Once completely cooled, check to make sure jars sealed. The jar lids should have NO GIVE in them if properly sealed. If you find one has not sealed properly, it is not safe to store. Refrigerate it, and use it within a couple weeks. Wipe the jars clean with a wet cloth, then label (with date canned), and place them in your pantry for long term storage. Enjoy!

Recipe Notes

NOTE: If treating apples with lemon juice to prevent browning, you will need a couple extra lemons for this purpose.

Nutrition Facts
How To Can Apple Pie Filling
Amount Per Serving (1 g)
Calories 462 Calories from Fat 9
% Daily Value*
Fat 1g2%
Saturated Fat 1g6%
Sodium 9mg0%
Potassium 337mg10%
Carbohydrates 120g40%
Fiber 6g25%
Sugar 110g122%
Protein 1g2%
Vitamin A 116IU2%
Vitamin C 17mg21%
Calcium 25mg3%
Iron 1mg6%
* Percent Daily Values are based on a 2000 calorie diet.

Here’s one more to pin on your Pinterest boards!Learn how to can apple pie filling for your pantry! Once canned, having homemade pie filling already made for pies, cobblers, etc. is a time saver!

Streusel Topped Peach Galette

It’s EASY to make this streusel topped peach galette, featuring fresh peach and cinnamon filling, a buttery crumb topping, all in a free form, flaky pie crust!
It's EASY to make this streusel topped peach galette, featuring fresh peach and cinnamon filling, a buttery crumb topping, all in a free form, flaky pie crust!

If you love the taste of fresh peach pie, but don’t like to mess with forming and crimping the edges on a traditional pie crust, may I suggest making a peach galette? Guess what? It’s baked ON a baking sheet, instead of IN a pie pan!

Rustic looking, and delicious, this easy to prepare dessert can be made with minimal effort! You can make your own homemade pie crust dough, or to save time you can purchase it! The pie crust dough is slightly wrapped, up and around the yummy pie filling, then topped with crumbly streusel, then baked. It’s SO EASY! Here’s how to make a peach galette:

Scroll Down For A Printable Recipe Card At The Bottom Of The Page

Prepare Pastry Dough For Peach Galette

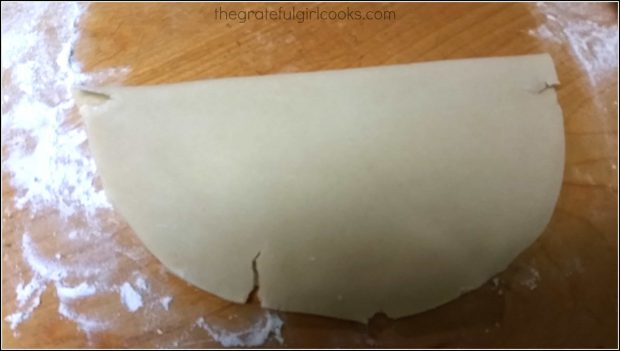
To prepare the pie dough “crust”, first roll out pastry dough to a 10 inch circle on a lightly floured surface. You can use homemade pie crust dough or purchased pie dough. There is no need to trim the edges , because a “rustic” look is perfect! Fold the dough circle in half, and carefully transfer dough to the middle of a 13×9 inch baking sheet. Set aside.

Make The Streusel Topping

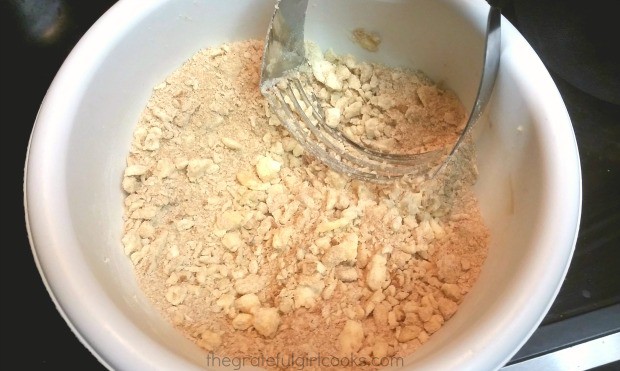
In a small mixing bowl, combine flour, brown sugar, cinnamon, and cold butter. Cut in the butter, using a pastry blender or two forks. Cut the butter in until the mixture is crumbly and the butter has been reduced to the size of peas. Stir in chopped pecans (or walnuts). Set aside.

Preparing the streusel topping for the peach galette.

Prepare The Peach Filling

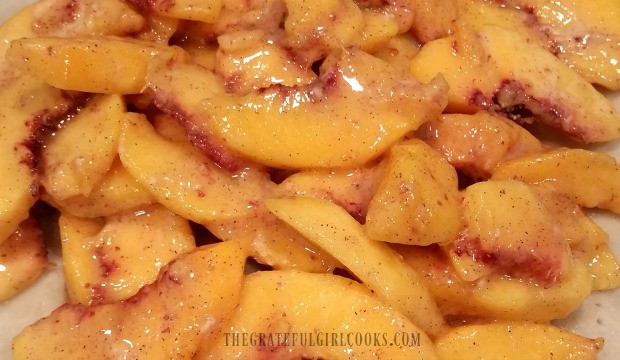
In a large mixing bowl, mix together peeled, thinly sliced fresh peaches, granulated sugar, flour, cinnamon, and lemon juice. Stir gently, to combine. This is the filling for the peach galette. NOTE: If you are using frozen peaches, make sure they are not packed in syrup. Thaw peach slices completely, before using.

Fresh peach slices are mixed with cinnamon and sugar for filling used in peach galette.

To Assemble Peach Galette

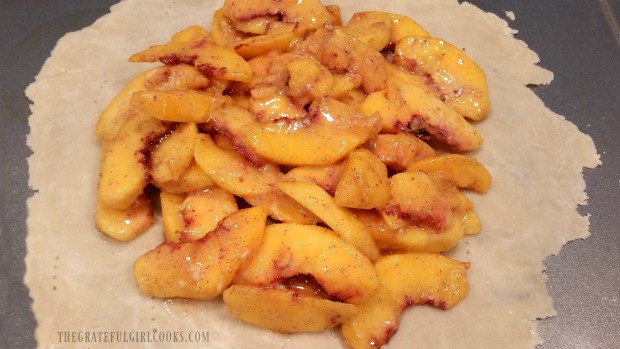
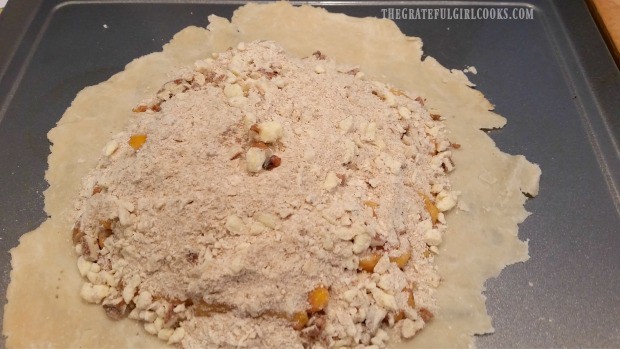
First, place the peach filling into the center of crust, slightly mounding up in middle. Be sure to leave about a 2-3 inch rim of BARE crust all around the edges of the dough.

Fresh peaches, with cinnamon and sugar are piled onto free form pastry dough.

The next thing to do is evenly distribute all of the streusel topping over the peach filling. Mound this up in the middle, as well.

Streusel topping is added to peach galette before baking.

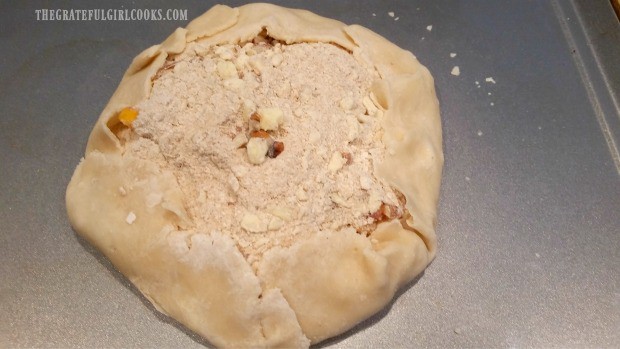
Gently pull the crust up and slightly over the edges of pie/streusel filling. This will form a roughly shaped “crust” that holds the peach galette filling in.

The beauty of making a galette like this is you do NOT have to form a pretty “crust” and crimp the edges like a typical pie in a pie pan. This method is much easier, and makes the finished dessert look a bit more rustic!

Dough is loosely folded over peach galette filling before it is baked.

Bake The Streusel Topped Peach Galette

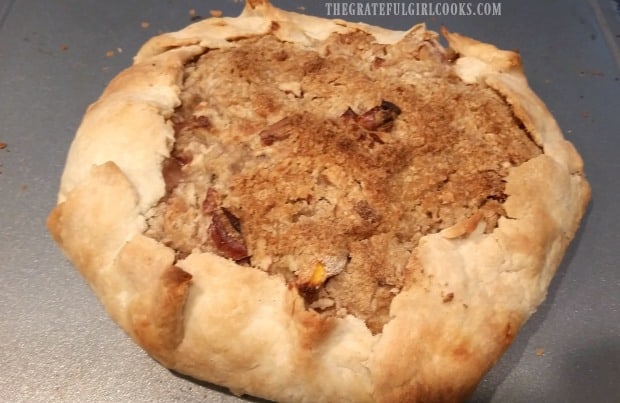
Place the peach galette into a 425°F  preheated oven. Bake for approx. 30-35 minutes, or until streusel topping and crust are golden brown. When done, the pie filling should also be cooked through and bubbly.  Remove baking sheet from oven to a wire rack.

The peach galette is golden brown and flaky when it comes out of oven.

Time To Enjoy The Streusel Topped Peach Galette

Let the galette cool on the baking sheet for 10-15 minutes, before slicing or transferring to a serving plate.

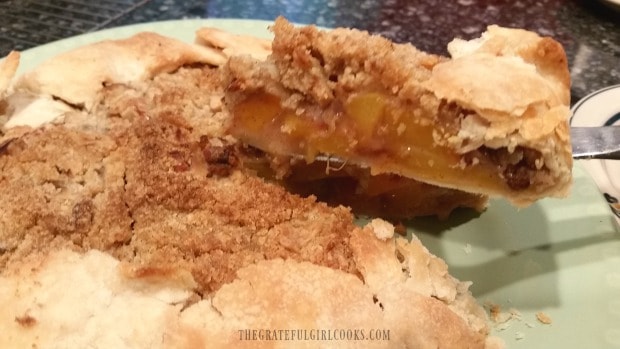
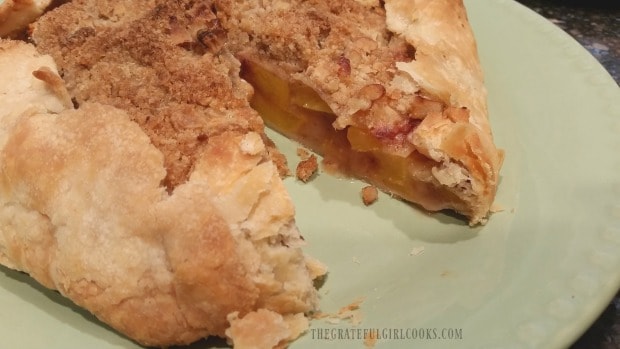
Removing a slice from the peach galette.

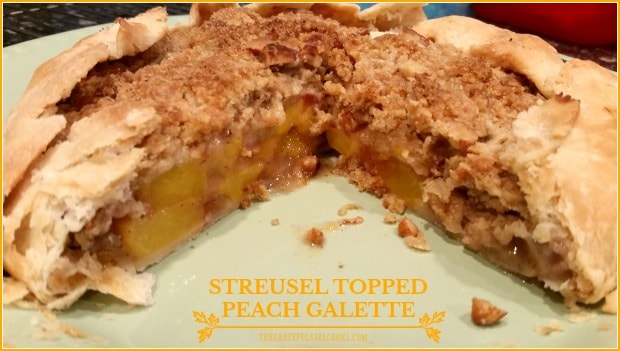
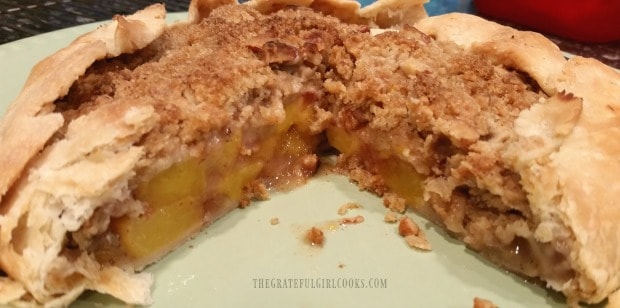
One piece has been cut out of the peach galette, revealing the peaches inside.

Serve the peach galette as is, or top each slice with a scoop of vanilla ice cream. Whether you serve this dessert “plain”, or “a la mode”… either way tastes fantastic! Hope you will enjoy the flaky crust, fresh fruit filling, and the buttery streusel topping on this delicious dessert!

The inside of the baked peach galette, after a couple slices are gone.

I hope you enjoy this delicious tasting peach galette! We sure did! It was all I could do to keep my husband out of it, because it was so good… ha ha!  Have a wonderful day, and please come back again soon!

Looking For More Recipes Featuring PEACHES?

You can find ALL my recipes in the Recipe Index, located at the top of the page. I have some absolutely wonderful recipes featuring peaches, including:

Interested In More Recipes?

Thank you for visiting this website. I appreciate you using some of your valuable time to do soIf you’re interested, I publish a newsletter 2 times per month (1st and 15th) with all the latest recipes, and other fun info. I would be honored to have you join our growing list of subscribers, so you never miss a great recipe! 

There is a Newsletter subscription box on the top right side (or bottom) of each blog post, depending on the device you use, where you can easily submit your e-mail address (only) to be included in my mailing list.

You Can Also Find Me On Social Media:

Facebook page: The Grateful Girl Cooks!
Pinterest:
The Grateful Girl Cooks!
Instagram:
jbatthegratefulgirlcooks

Author's signature

↓↓ PRINTABLE RECIPE BELOW ↓↓

0 from 0 votes
Streusel Topped Peach Galette
Prep Time
15 mins
Cook Time
30 mins
Total Time
45 mins
 
It's EASY to make this streusel topped peach galette, featuring fresh peach and cinnamon filling, a buttery crumb topping, all in a free form, flaky pie crust!
Category: Desssert
Cuisine: American
Keyword: peach galette
Servings: 6
Calories Per Serving: 517 kcal
Author: JB @ The Grateful Girl Cooks!
Ingredients
  • 1 9" pie crust dough , homemade or purchased
For Peach Filling:
  • cups sliced, peeled peaches (approx 3 large) , see NOTE below
  • 1/3 cup granulated sugar
  • 2 Tablespoons all purpose flour (heaping Tablespoons)
  • 1/2 teaspoon ground cinnamon
  • 2 teaspoons fresh squeezed lemon juice
For Streusel Topping:
  • 1 cup all purpose flour
  • 1/2 cup brown sugar , packed
  • 1/2 teaspoon cinnamon
  • 1/4 cup pecans (or walnuts) , chopped
  • ½ cup butter (very cold) (1 stick)
Instructions
  1. Preheat oven to 425°F.

  2. PREPARE CRUST: Roll out pastry dough to a 9-10 inch circle on a lightly floured surface. You can use a homemade pie crust dough or purchased one. There is no need to trim the edges. A "rustic" look is perfect! Fold dough in half, and carefully transfer dough to the middle of a 13x9 inch baking sheet. Unfold dough. Set aside.

  3. PREPARE PEACH FILLING: In a large mixing bowl, mix together peeled, thinly sliced peaches (thawed and drained, if using frozen), granulated sugar, flour, cinnamon and lemon juice. Stir gently, to combine.

  4. MAKE STREUSEL TOPPING: In a small mixing bowl, combine flour, brown sugar, cinnamon, and cold butter. Cut in butter using a pastry blender or two forks. Cut the butter in until the mixture is crumbly and the butter has been reduced to the size of peas. Stir in chopped pecans (or walnuts). Set aside.

  5. ASSEMBLE GALETTE: Place the peach pie filling into the center of crust, slightly mounding up in middle. Be sure to leave about a 2-3 inch rim of BARE crust all around edges.  Evenly distribute all of the streusel topping over peach filling, mounding up in the middle, also. Gently pull the crust up and slightly over the edges of pie/streusel filling, to form a roughly shaped "crust" that holds the filling in.

  6. BAKE GALETTE: Place galette into preheated oven; bake for approx. 30-35 minutes, or until streusel topping and crust are golden brown. Pie filling should be cooked through and bubbly.  Remove pan from oven to wire rack. Let galette cool (on baking sheet) for 10-15 minutes, before slicing (or transferring to serving platter. Serve as is, or with a scoop of vanilla ice cream. Enjoy!

Recipe Notes

NOTE: May use frozen peach slices, packed without syrup. Thaw completely and drain, before preparing filling.

Nutrition Facts
Streusel Topped Peach Galette
Amount Per Serving (1 slice (1/6 of total))
Calories 517 Calories from Fat 234
% Daily Value*
Fat 26g40%
Saturated Fat 12g75%
Cholesterol 41mg14%
Sodium 257mg11%
Potassium 213mg6%
Carbohydrates 68g23%
Fiber 3g13%
Sugar 35g39%
Protein 5g10%
Vitamin A 682IU14%
Vitamin C 5mg6%
Calcium 35mg4%
Iron 2mg11%
* Percent Daily Values are based on a 2000 calorie diet.

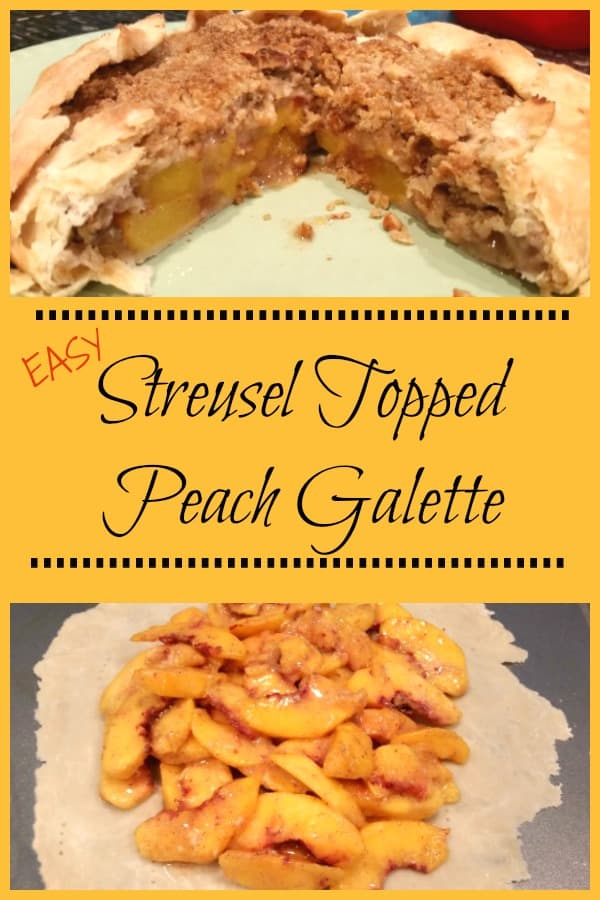
Here’s one more to pin on your Pinterest boards!It's EASY to make this streusel topped peach galette, featuring fresh peach and cinnamon filling, a buttery crumb topping, all in a free form, flaky pie crust!


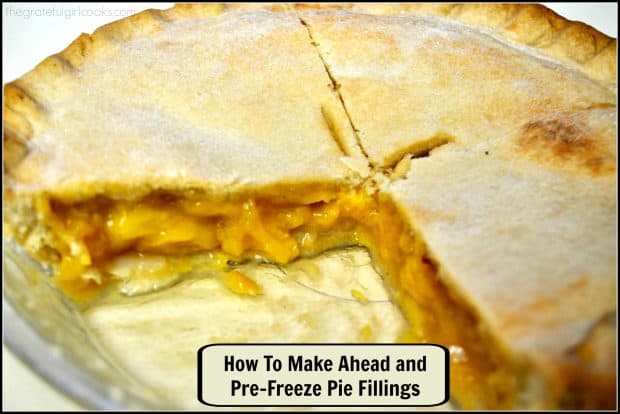
How To Make Ahead and Pre-Freeze Pie Fillings

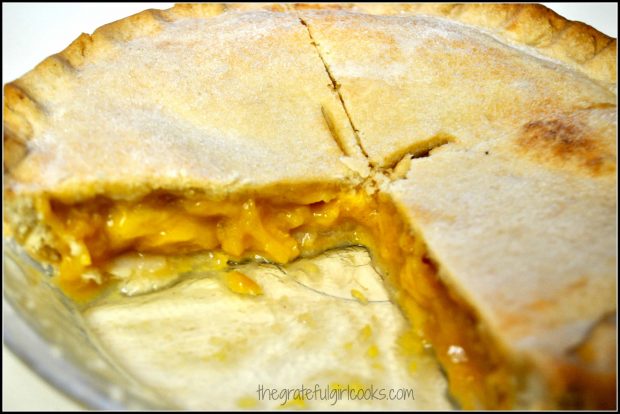
Learn how to make and pre-freeze pie fillings for your favorite fruit pie with this easy tutorial. This is a great way to save time making pies!Learn how to make and pre-freeze pie fillings for your favorite fruit pie with this easy tutorial. This is a great way to save time making pies!
I am grateful I was shown how to make ahead and pre-freeze pie fillings. Have you ever done this before? If you haven’t… it’s a real time saver, especially if you have lots of fruit pies to prepare!

Having the filling already made for a pie or two and frozen is very convenient! Not too great if you are trying to watch your calories, but handy, nonetheless!

How To Pre-Freeze Pie Fillings

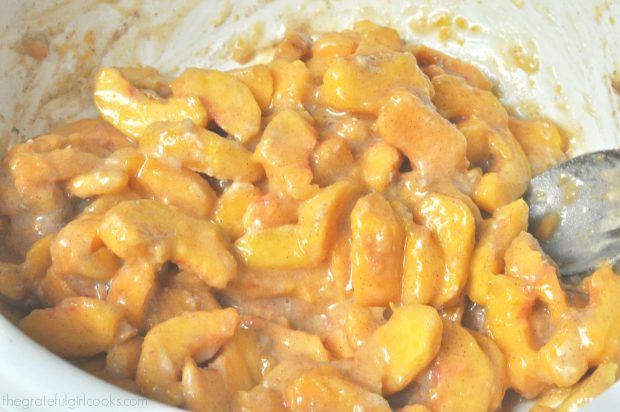
This tip works on just about all fruit pies. To pre-freeze pie fillings, begin by making a fruit pie filling according to your recipe’s instructions. Here is a photo of peach pie filling, for example.

Filling for fruit pies is made up according to your own recipe.

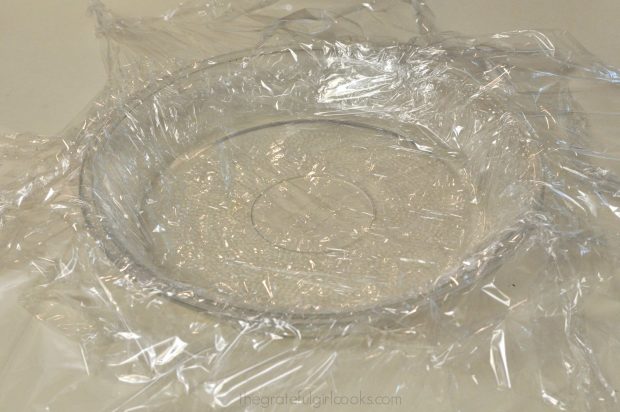
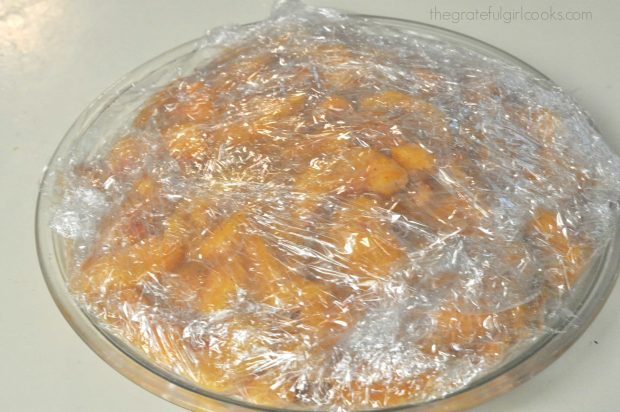
Cover a standard sized pie dish with several layers of plastic wrap, making sure to let the edges extend about 4-5 inches over the rim of the pie plate on all sides.

A standard pie dish is completely covered with plastic wrap.

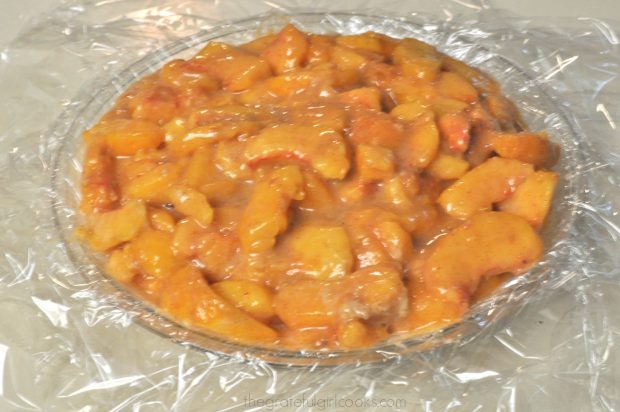
Pour the pie filling into the prepared pie dish, and evenly distribute ingredients.  Bring in all the sides of the plastic wrap, to completely cover the pie filling.

All of the prepared filling for one pie is then added to dish.

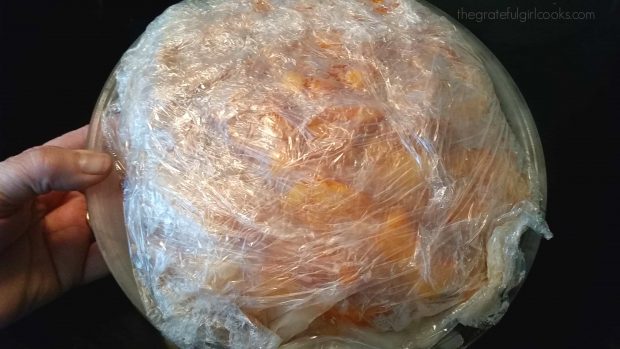
Tightly seal the pie filling with the plastic wrap.

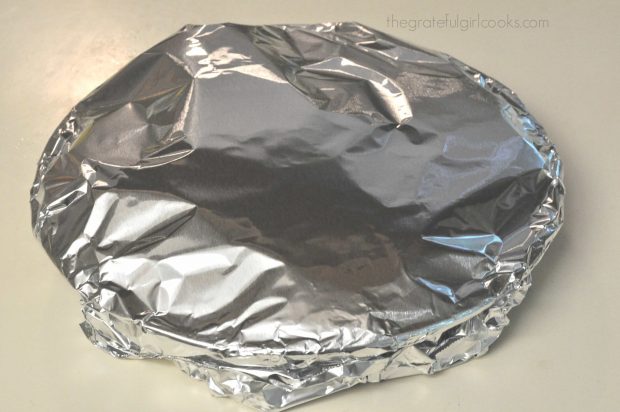
Now wrap the pie filling (pie dish included) in aluminum foil. Cover completely.  Place pie plate into freezer, and let the filling completely freeze (overnight is best!).

Aluminum foil covers the plastic wrapped pie filling.

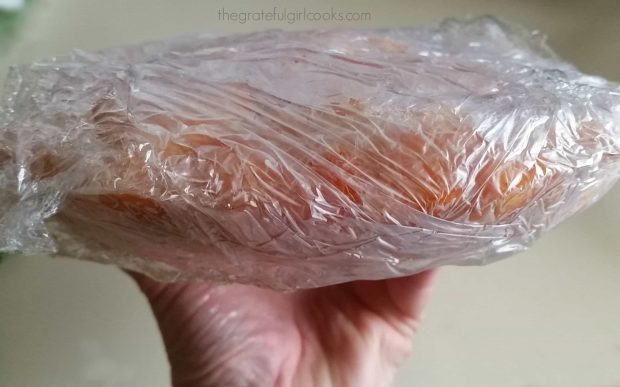
Remove the pie plate after the filling is solidly frozen. Re-cover pie filling with aluminum foil, label, and freeze until you’re ready to bake pie.

Once frozen solidly, the pie plate is removed and filling stays in freezer. When you pre-freeze pie fillings, they will hold their shape in freezer.

What Do I Do When I’m Ready To Bake My Pie?

Once you are ready to bake a pie, remove the aluminum foil and plastic wrap from pie filling. Place the frozen pie filling, unthawed, into an unbaked pie crust (using same pie plate the filling was frozen in).

If using a double crust, place additional pie dough on top of frozen filling, and crimp edges to form crust. Make small slits on top of pie to let steam release.  Your pie can go into the oven frozen.

Baking A Pie AFTER You Pre-Freeze Pie Fillings

Bake your pie at the temperature given for the recipe you are using, but remember you will need to bake pie longer (on average 25-35 minutes longer), because the pie filling is frozen.

To make sure pie is fully baked, look for slow bubbling juices to come to the top of the crust without bursting. That is a good sign the inside is fully cooked through.  If the crust begins to brown too much, simply add aluminum foil strips over the crimped crust edges.

When done, remove and let pie cool slightly before serving.  That’s it! This is a convenient way to get pies ready ahead of time, to save you precious minutes (especially around the holidays) when there are a bazillion other things to do.
Baked and ready to enjoy!

Hope you will give this handy tip a try! It really can be a real time-saver!  Blessings.

Interested In More Recipes?

Thank you for visiting this website. I appreciate you using some of your valuable time to do soIf you’re interested, I publish a newsletter 2 times per month (1st and 15th) with all the latest recipes, and other fun info. I would be honored to have you join our growing list of subscribers, so you never miss a great recipe!
There is a Newsletter subscription box on the top right side (or bottom) of each blog post, depending on the device you use, where you can easily submit your e-mail address (only) to be included in my mailing list.

You Can Also Find Me On Social Media:
Facebook page: The Grateful Girl Cooks!
Pinterest: The Grateful Girl Cooks!
Instagram: jbatthegratefulgirlcooks

Author's signature

Here’s one more to pin on your Pinterest boards!How To Make Ahead And Pre-Freeze Pie Fillings / The Grateful Girl Cooks!

Save

Save

Save

Save

Save

Save

Save

Save

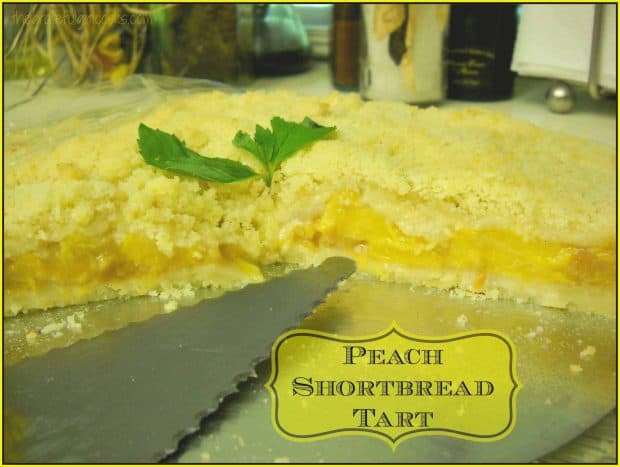
Peach Shortbread Tart

Peach Shortbread Tart with fresh peach filling on a shortbread crust, and crumb topping, is a simple, delicious dessert that will be a favorite!Peach Shortbread Tart with fresh peach filling on a shortbread crust, and a crumb topping, is a simple delicious dessert tart that will be an absolute favorite!A couple years ago I decided to make my own birthday “cake” (really…who does that?).  But I really didn’t want a cake, so I made this delicious Peach Shortbread Tart for myself and my family.  And let me tell you I enjoyed every single bite of it! Happy Birthday to ME!

I had recently been out to a local orchard and had picked about 40 pounds of fresh, juicy peaches (my birthday is in July, the time for the ripest Northwest peaches!). The decision was made to use some of the peaches and “tweak” one of my favorite tart recipes that I received from a friend of mine years ago.

The original recipe is for an Apple Shortbread Tart, and I’ve also used the same basic recipe to make a Boysenberry Shortbread Tart. This time I made it a PEACH Shortbread Tart, and it tastes wonderful! Here’s how to make a peach shortbread tart:

Scroll Down For A Printable Recipe Card At The Bottom Of The Page

Making the Peach Shortbread Tart Crust

The basic recipe is simple. First, you make a shortbread crust, and then you make the filling. Top the filling with some of the reserved shortbread crust crumbs. Bake it, then eat it. You will totally LOVE it! End of story! The shortbread crust is extremely simple to make. It’s ready in a jiff.

Ingredients are processed for the tart crust.

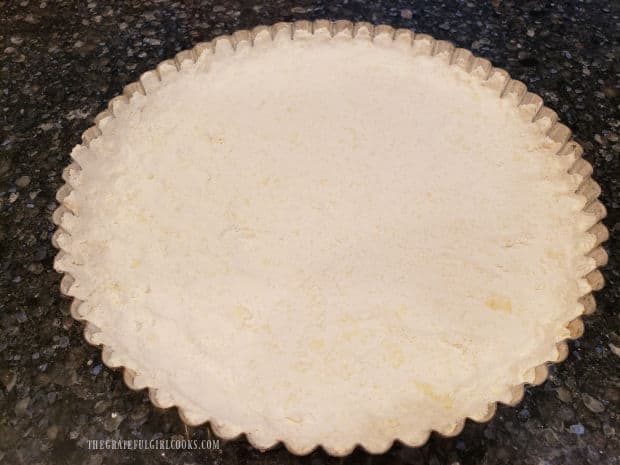
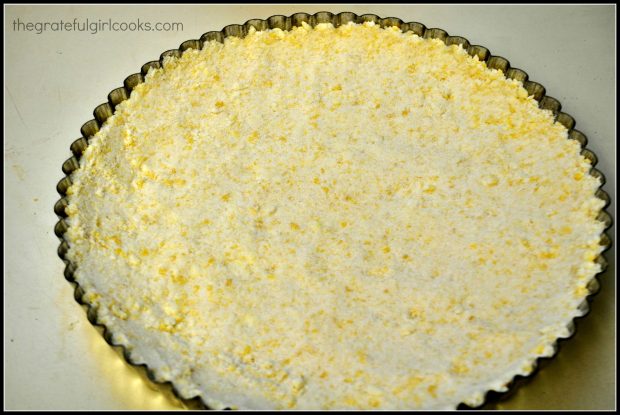
Here’s the crust before putting all the goodies in it! The crust is firmly packed down into the tart pan before baking.

Shortbread crust is packed into a tart pan.

See these gorgeous peaches? Yep. I picked about 40 pounds of ’em at a local You-Pick farm. Fresh peaches are what I use to make this tart, because they are lip smacking good.

Fresh peaches to be picked and used for shortbread tart.

Can’t Wait To Eat The Peach Shortbread Tart

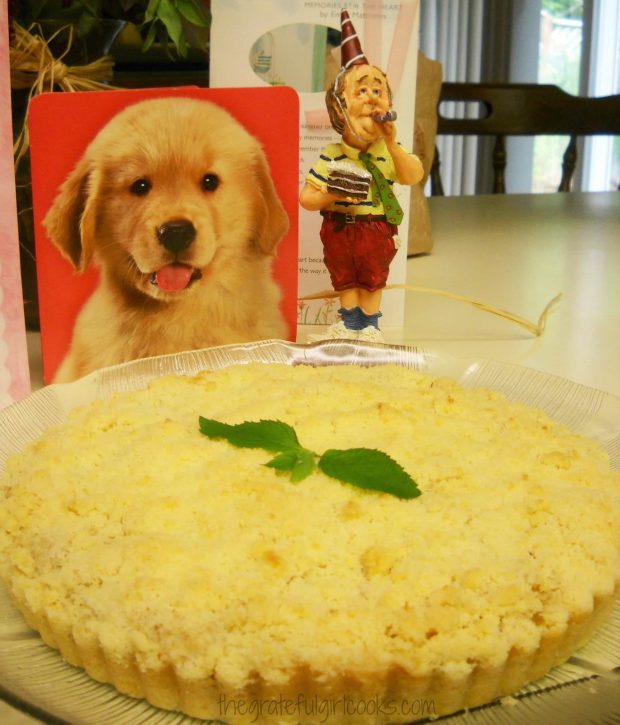
Here’s my finished birthday dessert, a peach shortbread tart, which will be served with vanilla ice cream. You can also see one of our family fixtures. We call him the “Boring Birthday Guy”. He makes an appearance at all of our family birthday celebrations. He’s really quite the party animal.

Peach Shortbread Tart ready to eat for my birthday dessert!

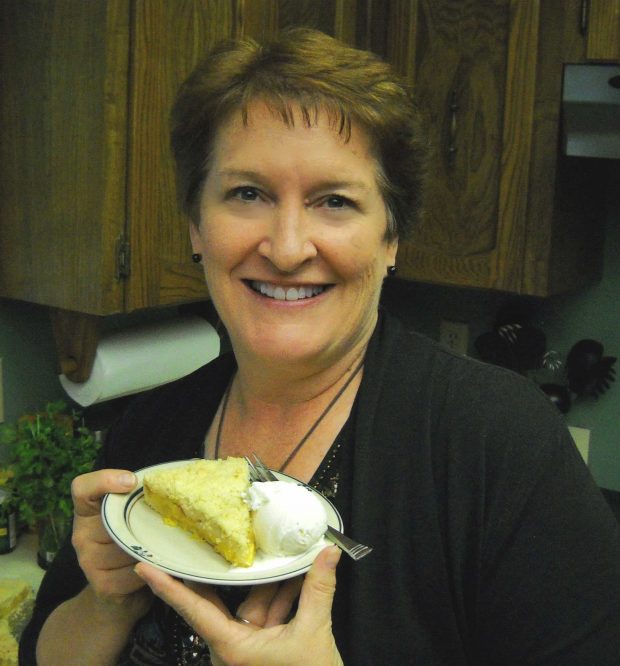
And this is me- the birthday girl, totally ready to dig into a scrumptious birthday dessert I made for myself. Go figure! I polished off that piece or peach shortbread tart and the mandatory scoop of ice cream in no time flat! HA HA! Some birthdays are like that!

Birthday girl with peach shortbread tart for dessert!
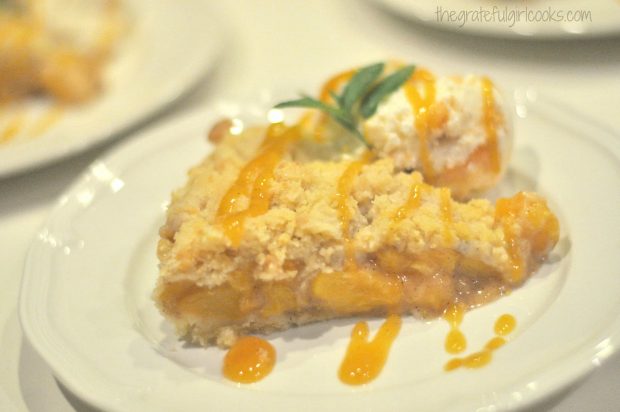
Anyways… if you like fresh peach pie, then you will LOVE this Peach Shortbread Tart, even if it’s NOT your birthday. It’s absolutely delicious! Here’s another photo of another time I made this dessert for a “Peach-themed” dinner party!  I made a Peach Coulis (sauce) to drizzle on top! YUM.

Peach Shortbread Tart served with peach coulis drizzle and ice cream.

Sure hope you will consider making this delicious peach shortbread tart.  Have a fantastic, “peachy” kind of day!

Looking For More Recipes For PEACH DESSERTS?

You can find ALL of my recipes in the Recipe Index, located at the top of the page. I have quite a few desserts featuring peaches, including:

Interested In More Recipes?

Thank you for visiting this website. I appreciate you using some of your valuable time to do soIf you’re interested, I publish a newsletter 2 times per month (1st and 15th) with all the latest recipes, and other fun info. I would be honored to have you join our growing list of subscribers, so you never miss a great recipe!
There is a Newsletter subscription box on the top right side (or bottom) of each blog post, depending on the device you use, where you can easily submit your e-mail address (only) to be included in my mailing list.

You Can Also Find Me On Social Media:
Facebook page: The Grateful Girl Cooks!
Pinterest: The Grateful Girl Cooks!
Instagram: jbatthegratefulgirlcooks

Author's signature

Recipe Adapted from my friend, Shari Altree’s recipe for Apple Shortbread Tart

5 from 1 vote
Peach Shortbread Tart
Prep Time
20 mins
Cook Time
45 mins
Total Time
1 hr 5 mins
 
Peach Shortbread Tart with fresh peach filling on a shortbread crust, and a crumb topping, is a simple delicious dessert tart that will be an absolute favorite!
Category: Dessert
Cuisine: American
Keyword: peach shortbread tart
Servings: 8 servings
Calories Per Serving: 387 kcal
Author: JB @ The Grateful Girl Cooks!
Ingredients
For the crust:
  • 2 cups all-purpose flour
  • 1/2 cup granulated sugar
  • 1/4 teaspoon salt
  • 3/4 cup butter
  • 2 egg yolks
For the filling:
  • 1 1/4 pounds fresh peaches (about 6-7 large peaches), peeled, and sliced thin
  • 1 Tablespoon lemon juice
  • 1/4 cup brown sugar , packed
  • 1 Tablespoon all-purpose flour
  • 1/2 teaspoon cinnamon
Instructions
  1. Preheat oven to 400 degrees.
  2. Blend all crust ingredients (except for egg yolks) until they are the texture of coarse meal. (You can use a fork, a pastry blender or a food processor). Add the 2 egg yolks and mix well to blend. **Set aside 1/4 of this mixture and save for later**. Using the remaining 3/4 of the crumbs, pat them down over the bottom and up the sides of a tart pan with removable bottom disk (this is what I use) or a pie pan. Make sure crust is firmly pressed down into the pan and the sides to form a solid crust.

  3. Peel and slice the peaches into thin slices. Place the sliced peaches in a large bowl and mix with lemon juice. Add 1/4 cup brown sugar, 1 TBSP flour and 1/2 tsp. cinnamon. Mix well to coat the peaches.
  4. Once peach slices and dry ingredients are mixed together, gently "pour" or spoon the peaches onto the crust. I use my (clean) fingers to place the slices and fill in the holes; position the slices so they mound in the center and fill in the crust.
  5. Sprinkle the reserved 1/4 of the crust mixture over the top. I find it helpful to hold one hand up around the edge of the pan to try and catch the crumbles before they fall off the tart. Just scoop up any crumbles that fall onto your work surface and put them back on that tart! Cover the entire top of the tart.
  6. Bake the tart at 400 degrees for 15 minutes, then reduce heat to 350 degrees and bake until the top begins to turn a golden brown (approx. 25-30 minutes, depending on your oven). Just keep an eye on it and remove tart when top is golden brown. Let cool just a bit. If using a tart pan, hold your hand on the bottom of the tart and gently press upward on the metal disk to release the tart from the pan. Place the tart (keeping disk on the bottom of tart) on serving dish, slice and serve.
  7. Serve warm, with a scoop of vanilla ice cream...and ENJOY!
Nutrition Facts
Peach Shortbread Tart
Amount Per Serving (1 slice)
Calories 387 Calories from Fat 162
% Daily Value*
Fat 18g28%
Saturated Fat 11g69%
Cholesterol 94mg31%
Sodium 229mg10%
Potassium 187mg5%
Carbohydrates 50g17%
Fiber 1g4%
Sugar 25g28%
Protein 4g8%
Vitamin A 830IU17%
Vitamin C 5.4mg7%
Calcium 26mg3%
Iron 1.8mg10%
* Percent Daily Values are based on a 2000 calorie diet.

Here’s one more to pin on your Pinterest boards!Peach Shortbread Tart with fresh peach filling on a shortbread crust, and a crumb topping, is a simple delicious dessert tart that will be an absolute favorite!


Save

Save

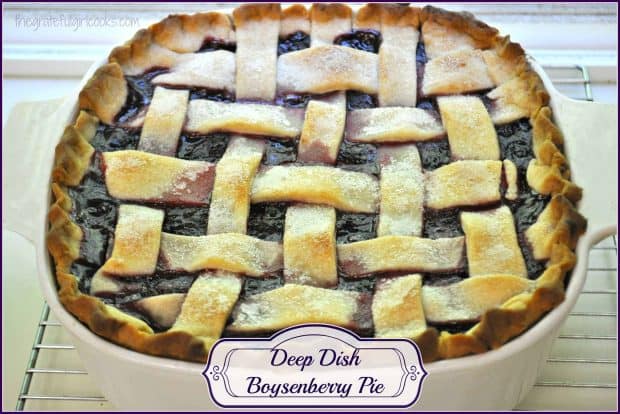
Deep Dish Boysenberry Pie

Deep dish boysenberry pie is easy to prepare with fresh or frozen berries. The perfect summer dessert, especially with a scoop of vanilla ice cream!Deep dish boysenberry pie is easy to prepare with fresh or frozen berries, and is the perfect summer dessert, especially with a scoop of vanilla ice cream!One of my favorite fruit pies is Boysenberry Pie…so it stands to reason that one of my absolute favorite DEEP DISH pies is Deep Dish Boysenberry Pie! I figure it’s just MORE of a good thing, so how can that be anything but DELICIOUS? It just SCREAMS Summer to me!

Scroll Down For A Printable Recipe Card At The Bottom Of The Page

Deep dish boysenberry pie is easy to prepare with fresh or frozen berries, and is the perfect summer dessert, especially with a scoop of vanilla ice cream! I love to go berry picking each summer here in the fertile farmlands surrounding Portland. It’s fun to get out and pick boysenberries during their short growing season. YUM!!! See how big they are?

I have great memories of my Great Aunt Juanita in Southern California growing boysenberries and making us cobblers when we came to visit her in the summer.

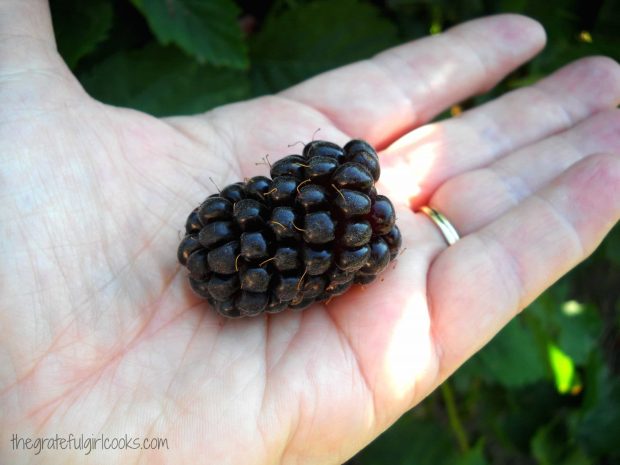
Look at the size of that fresh picked boysenberry!

I usually end up making cobblers, jams, and “regular sized” pies when I pick my berries, but I also wanted to try my hand at making a DEEP DISH boysenberry pie…bursting with fresh sun-ripened boysenberries, and crowned with a large scoop of homemade vanilla ice cream. I made my deep dish pie in a Corningware baking dish, and not in a pie pan. It was easy. Here’s what you do:

Make The Filling For The Deep Dish Boysenberry Pie

Preheat your oven to 425 degrees.  Rinse and completely drain the boysenberries.

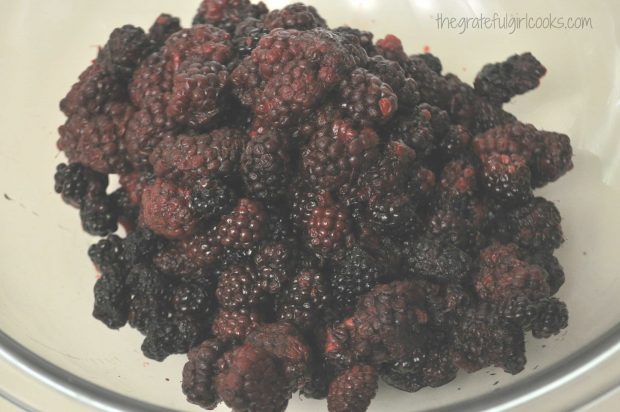
Fresh boysenberries are rinsed then drained.

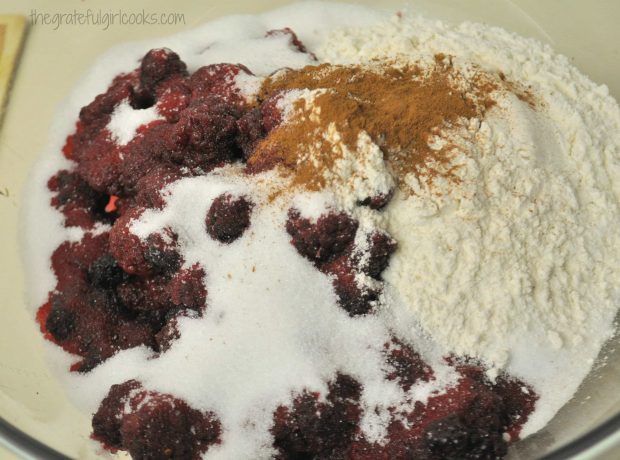
Gently mix the boysenberries with sugar, flour (or cornstarch), and cinnamon.

Boysenberries are tossed with flour, sugar and cinnamon.

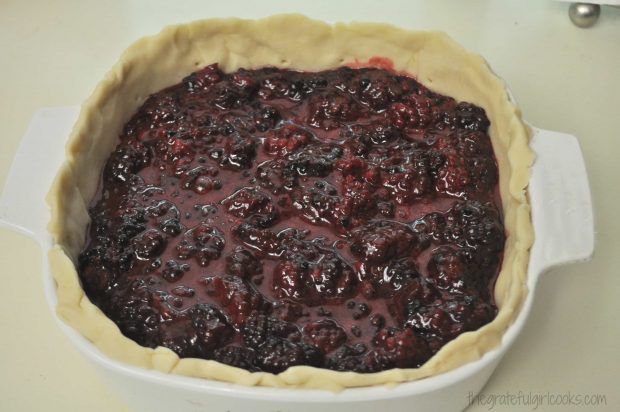
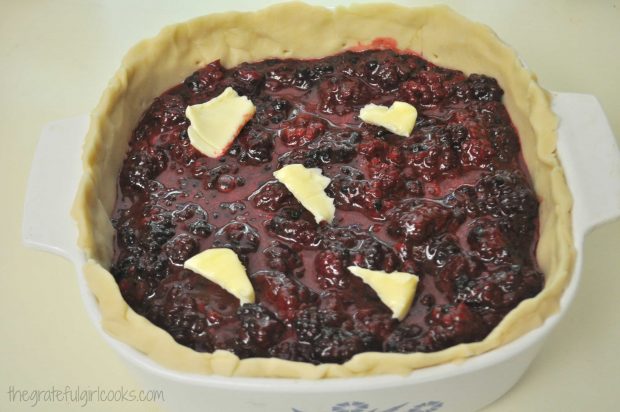
Roll out and place one of the pie crusts into the baking dish. Make sure it comes up to the rim of the dish. Prick the dough with the tines of a fork all over the sides and bottom of crust. Gently pour in the berry mixture.

Boysenberry pie filling is placed into pastry lined deep dish

Dot the top of the pie with chunks of butter.

Butter chunks are placed on top of boysenberry pie filling.

Making the Lattice Crust

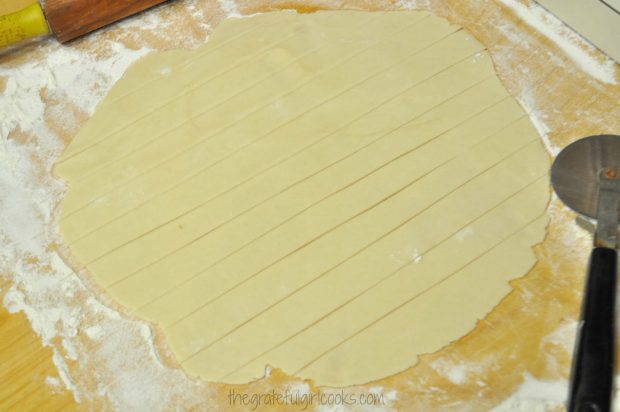
Roll out the remaining pie crust (I always use my Mom’s recipe for all my pie crusts). Cut strips for a lattice crust (I like using a pizza cutter for easy cutting- a sharp knife will also work well).

Pie dough is cut into strips for lattice top for deep dish pie.

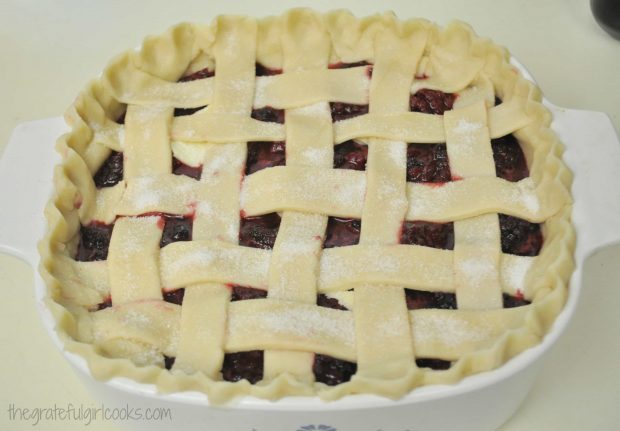
Weave the top crust onto top of pie, and pinch edges together with the bottom crust to seal crust.  Flute the edges to form crust. Lightly brush the top weaved crust with a little milk (or water), then sprinkle with sugar (lightly). This will give the top crust a little shine and a sugary top.

Top lattice crust is arranged on deep dish boysenberry pie.

Bake The Deep Dish Boysenberry Pie

Bake in preheated 425 degree oven for 45-50 minutes (or longer), until crust is light golden brown and juices are bubbling up in the center and around the sides of the pie.  Let pie cool down a bit on a wire rack before attempting to serve. This will give the juices time to coagulate a bit.

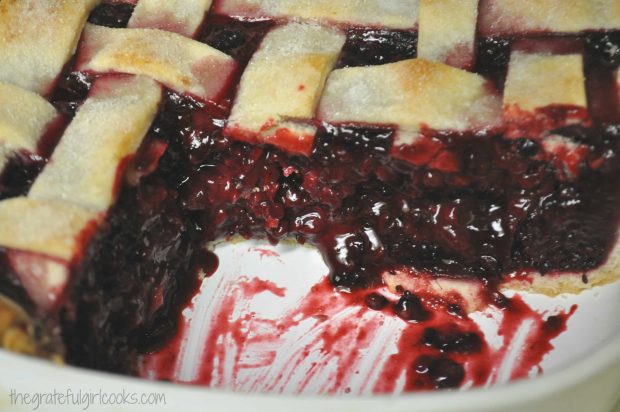
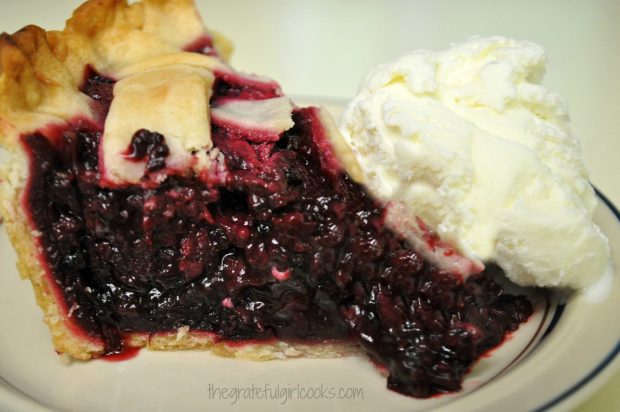
Here’s a peek at the inside of the pie, once that first piece was dished up!

Inside look at the boysenberry pie after a piece was removed.

Here it is on the plate with a large scoop of homemade vanilla ice cream. You can’t really tell in this picture, but the heighth of the pie was about 2 ½ inches high. Well… at least it was BEFORE I dumped a large scoop of ice cream on it.. ha ha! Smashed that pie right down…

Deep dish boysenberry pie with a scoop of vanilla ice cream

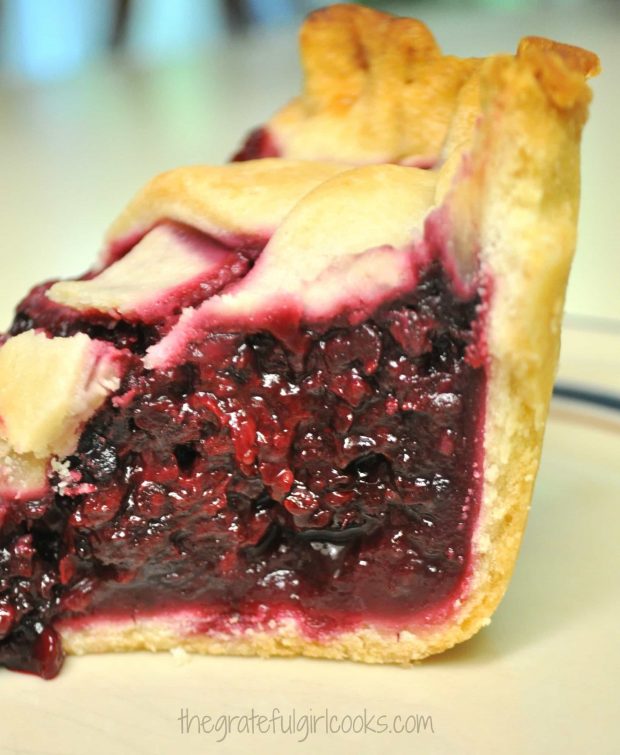
Here’s another shot from the other side of this yummy pie!

A side view of the deep dish boysenberry pie.

I hope you will consider making this delicious deep dish boysenberry pie! If you are interested in my recipe for a “regular sized” boysenberry pie (not deep dish) , you can find it here.

Looking For More PIE Recipes?

You can find all of my recipes in the Recipe Index, located at the top of the page. I have quite a few delicious pie recipes, including:

Interested In More Recipes?

Thank you for visiting this website. I appreciate you using some of your valuable time to do soIf you’re interested, I publish a newsletter 2 times per month (1st and 15th) with all the latest recipes, and other fun info. I would be honored to have you join our growing list of subscribers, so you never miss a great recipe!
There is a Newsletter subscription box on the top right side (or bottom) of each blog post, depending on the device you use, where you can easily submit your e-mail address (only) to be included in my mailing list.

You Can Also Find Me On Social Media:
Facebook page: The Grateful Girl Cooks!
Pinterest: The Grateful Girl Cooks!
Instagram: jbatthegratefulgirlcooks

Have a blessed day!

Author's signatureRecipe Adapted From:  The New Pillsbury Family Cookbook, Published by the Pillsbury Company, 1973, page 149

0 from 0 votes
Deep Dish Boysenberry Pie
Prep Time
15 mins
Cook Time
45 mins
Total Time
1 hr
 
Deep dish boysenberry pie is easy to prepare with fresh or frozen berries, and is the perfect summer dessert, especially with a scoop of vanilla ice cream!
Category: Desserts
Cuisine: American
Keyword: deep dish boysenberry pie
Servings: 8 servings
Calories Per Serving: 420 kcal
Author: JB @ The Grateful Girl Cooks!
Ingredients
  • 6 cups fresh boysenberries (rinsed and drained)
  • 1 1/4 cup granulated sugar
  • 1/2 cup flour OR 1/4 cup plus 2 Tablespoons corn starch
  • 1/2 teaspoon cinnamon
  • 2 Tablespoons cold butter (cut into chunks)
  • 2 Pastry Pie Dough Crusts (homemade or store bought)
  • A little bit of granulated sugar to sprinkle on top of crust
Instructions
  1. Preheat oven to 425 degrees F.
  2. Place boysenberries, sugar, flour (or cornstarch), and cinnamon in a large mixing bowl. Gently toss to combine fully.
  3. Roll out pie dough so you have 2 .Place 1 crust into 2 quart baking dish. Press it into dish so that it covers bottom and comes all the way up to rim of dish. Prick bottom and sides of crust with tines of fork.
  4. Gently pour the berry mixture into prepared pie crust. Dot the top of pie with chunks of butter. Cover the pie filling with the other pie crust. Seal edges. Flute edges. Cut vents to let out steam. IF MAKING LATTICE TOP CRUST: Roll out dough. Cut into approx. 1/2 inch wide strips. Lay half of strips in parallel rows on top of pie filling (about 1 inch apart). To weave, place another row of strips parallel to first rows, but lift every other strip as new strips are added. (up, under, up, under). Seal edges of crusts together. Form standing edge/rim. Flute edges.
  5. Brush top crust lightly with milk or water. Immediately sprinkle wet crust lightly with granulated sugar.
  6. Bake at 425 degrees for 45-50 minutes, or until crust is golden brown, and juices are bubbling. Remove to a wire rack and let cool down slightly, before serving. Serve with ice cream...enjoy!
Recipe Notes

NOTE: Unsweetened frozen boysenberries may be used if fresh berries are unavailable. Mix frozen fruit in with the sugar and flour, etc. Do not use sweetened frozen fruit, as that would mess up the recipe (and be WAY TOO SWEET and the syrup consistency would change!)

Nutrition Facts
Deep Dish Boysenberry Pie
Amount Per Serving (1 slice)
Calories 420 Calories from Fat 126
% Daily Value*
Fat 14g22%
Saturated Fat 5g31%
Cholesterol 7mg2%
Sodium 200mg9%
Potassium 187mg5%
Carbohydrates 70g23%
Fiber 6g25%
Sugar 38g42%
Protein 4g8%
Vitamin A 155IU3%
Vitamin C 3.1mg4%
Calcium 35mg4%
Iron 2.3mg13%
* Percent Daily Values are based on a 2000 calorie diet.

Here’s one more to pin on your Pinterest boards!Deep dish boysenberry pie is easy to prepare with fresh or frozen berries, and is the perfect summer dessert, especially with a scoop of vanilla ice cream!


Save

Save

Blueberry Galette

Enjoy this rustic, freeform shaped blueberry galette dessert… it’s simple and delicious, uses pie crust dough, and is easier than making a pie!Enjoy this rustic, freeform shaped blueberry galette dessert... it's simple and delicious, uses pie crust dough, and is easier than making a pie!!

I had finished making my pies for Thanksgiving and had a medium sized ball of pie crust dough left over… what to do, what to do? I could throw it away or freeze it… but the practical side of me won out. Guess what I did? I made a small Blueberry Galette!!! YUM!

What exactly IS a galette? It is a French term used to describe different kinds of flat, round, or free form pies or cakes. This one is a free form pie galette. Very rustic, but so easy!

Scroll Down for A Printable Recipe Card At The Bottom Of The Page

Form The Dough For The Blueberry Galette

I had the equivalent dough leftover of one half of a pie crust. (I used DIY – Mom’s Pie Crust for the dough, but you can use any prepared pie crust).  Roll the dough out  to form a rustic round shape (it absolutely does NOT have to be perfectly round). Transfer the dough to a baking sheet (fold dough in half, then transfer- it’s easy!)

Free-form galette crust made with pie dough, on baking sheet

Make The Blueberry Topping For The Galette

I knew I had some blueberries in the freezer, so decided to make a small galette, then just made it up as I went. I’ve made thickened blueberry compote many times before, for various recipes, so quickly made up the blueberry filling.

Place frozen blueberries, lemon juice, cinnamon, sugar, lemon zest in a large saucepan. Add a water/cornstarch slurry to the blueberries, and cook the mixture down until it has thickened (about 10 minutes).

Blueberries are cooked in saucepan until thickened sauce is created

Blueberry sauce, thickened and cooked, in saucepan

Let the blueberries cool down a bit, then spoon the mixture into the center of the dough. Be sure to leave the edges free from filling. Carefully roll the edges up and over the filling (just enough to hold the filling in – try hard not to overfill the dough).

Ready To Bake The Blueberry Galette

Brush the “crust” with a beaten egg, then sprinkle the crust with raw sugar (larger than granulated). Pop it into the oven for about 30 minutes, or until the crust is golden brown, and the blueberry filling is bubbly.

Blueberry Galette crust sprinkled with sugar, on baking sheet

Let the blueberry galette cool completely on the baking sheet. Once cooled completely, carefully transfer (using two spatulas and a prayer) to the serving dish. I served it at Thanksgiving, alongside the other pies, and it was a big hit! We cut the blueberry galette into 6 small slices and it was really good! It’s always fun to see what you can make with odds and ends!

Blueberry galette on plate

The blueberry galette cuts easily, and was very simple to serve up individual slices! Didn’t think of it at the time, but a dollop of whipped cream would be awesome on a slice! If you enjoy this galette, be sure to check out my recipe for a delicious streusel topped peach galette.

Have a blessed day, friends. Choose to be thankful for the “things” that cross your path today! Thanks for stopping by, and hope you will come back again soon.

Looking For More Recipes Featuring BLUEBERRIES?

You can find all of my recipes in the Recipe Index, located at the top of the page. I have lots of recipes featuring blueberries that you’re gonna love, including:

Interested In More Recipes?

Thank you for visiting this website. I appreciate you using some of your valuable time to do soIf you’re interested, I publish a newsletter 2 times per month (1st and 15th) with all the latest recipes, and other fun info. I would be honored to have you join our growing list of subscribers, so you never miss a great recipe!
There is a Newsletter subscription box on the top right side (or bottom) of each blog post, depending on the device you use, where you can easily submit your e-mail address (only) to be included in my mailing list.

You Can Also Find Me On Social Media:
Facebook page: The Grateful Girl Cooks!
Pinterest: The Grateful Girl Cooks!
Instagram: jbatthegratefulgirlcooks

Author's signatureRecipe source: my brain, on Thanksgiving overload

0 from 0 votes
Blueberry Galette
Prep Time
15 mins
Cook Time
30 mins
Total Time
45 mins
 

You'll enjoy this blueberry galette- a simple, rustic, freeform shaped dessert that has all the flavor of blueberry pie... it still uses pastry dough, but is easier to make!

Category: Dessert
Cuisine: American
Keyword: blueberry galette
Servings: 6 servings
Calories Per Serving: 114 kcal
Author: JB @ The Grateful Girl Cooks!
Ingredients
  • 1 1/2 cups blueberries (I used frozen)
  • zest of 1/2 a lemon
  • 3 Tablespoons granulated sugar
  • 1 Tablespoon lemon juice
  • 1/4 teaspoon cinnamon
  • 1/3 cup water
  • 1 Tablespoon cornstarch
  • 1/2 pie crust (yep! I only used half)
Instructions
  1. Preheat oven to 425 degrees F.
  2. Roll out pie crust.. No need to trim it... this is a rustic looking galette! Place onto baking sheet.
  3. In a medium sized saucepan, combine the blueberries, lemon zest, sugar, lemon juice, and cinnamon.
  4. Mix the cornstarch into the water and stir well, to combine. Add the cornstarch mixture into the saucepan with the other ingredients. Heat on medium heat. Bring to a boil, then reduce heat and cook for about 10 minutes until mixture has thickened considerably.
  5. Let pie filling cool until almost room temp., then carefully spoon the cooled blueberry filling into the center of the pie dough circle. Make sure to leave at least an inch and a half of the outer edges with no filling. Roll the outer edges up and over the blueberry filling.
  6. Beat an egg with a fork. Brush the egg mixture over the crust, then sprinkle crust with raw sugar (can use regular granulated sugar if needed).
  7. Bake galette at 425 degrees F for approximatel30-35 minutes (for small size-more time if you are making a galette using the entire pie crust. When done, the crust should be golden brown and the filling should be bubbly. Remove from oven-let galette cool completely before transferring to serving dish. Enjoy!
Recipe Notes

If you want to use a whole pie crust (I only used a half to make a mini-galette), then remember to double the ingredients for the filling. OR make two small galettes (still doubling the filling). If making the small version, the slices are small, but were perfect side by side with other desserts!
Nutrition Facts
Blueberry Galette
Amount Per Serving (1 slice)
Calories 114 Calories from Fat 27
% Daily Value*
Fat 3g5%
Saturated Fat 1g6%
Sodium 59mg3%
Potassium 42mg1%
Carbohydrates 19g6%
Fiber 1g4%
Sugar 9g10%
Protein 1g2%
Vitamin A 20IU0%
Vitamin C 4.5mg5%
Calcium 5mg1%
Iron 0.5mg3%
* Percent Daily Values are based on a 2000 calorie diet.

Here’s one more to pin on your Pinterest boards!Enjoy this rustic, freeform shaped blueberry galette dessert... it's simple and delicious, uses pie crust dough, and is easier than making a pie!

Save

Save

Blueberry Ice Cream Tart

A blueberry ice cream tart is a delicious, frozen dessert treat! Ice cream in a graham cracker crust, served with fresh blueberry sauce on the side!A blueberry ice cream tart is a delicious, frozen dessert treat! Ice cream in a graham cracker crust, served with fresh blueberry sauce on the side!

I love taking a tried and true recipe and tweaking and morphing it into a different recipe. Do you do that? That was the case when I took my recipe for Blueberry Ice Cream and changed it into a delicious, small Blueberry Ice Cream Tart for each guest at a dinner & dessert party.

I thought long and hard about what I wanted to make for dessert, then decided to make my blueberry ice cream, and add a graham cracker crust from another of my recipes. Then I decided to server it with a simple blueberry sauce on the side. Voila! That is how I came up with this recipe for these wonderful frozen dessert tarts! And boy… were they ever good, if I do say so myself!

Scroll Down For A Printable Recipe Card At The Bottom Of The Page

Do I Need An Ice Cream Machine?

I have an electric indoor Krups ice cream maker, which makes homemade ice cream in about 20 minutes. If you don’t have one or don’t want to take the time, just buy a good quality blueberry ice cream or gelato at the grocery store, and shave some time off of this recipe!

This recipe is actually very easy to prepare… it just needs to be done in steps. Make the ice cream, make the crumb topping, make the blueberry sauce, assemble the tarts, freeze, then serve!

Make Or Buy Blueberry Ice Cream

First make (or buy) the blueberry ice cream. If making homemade ice cream, put it back into your kitchen freezer after the initial freezing to really firm it up. My homemade blueberry ice cream also has cream cheese in it, so it has more of a blueberry cheesecake flavor!

My homemade blueberry ice cream looks like this photo below, when done. Here it is scooped up nice and pretty:

Blueberry ice cream is the main ingredient for these delicious frozen tarts.

Make The Crust Mix

The next thing I do is prepare a simple graham cracker crust mixture. This is made by mixing graham cracker crumbs with melted butter and sugar! EASY!

Ingredients for the graham cracker crust are mixed together in bowl.

Making The Blueberry Sauce Is Simple!

Prepare the blueberry sauce, by cooking blueberries, sugar, cornstarch and water until the sauce thickens and the blueberries “pop” open (6-7 minutes). Once the sauce thickens, remove the pan from the heat and let it cool completely. Set aside.

A thickened blueberry sauce is made to garnish the ice cream tart.

The blueberry sauce and graham cracker crust mix are ready to use.

Make The Crust For The Tarts

Firmly pack the graham cracker crumb mixture (reserve 1/2 cup for garnish) onto the bottom of 4 small tart pans (with removable bottoms). The crusts are baked for 6-7 minutes. Once they’re done, let them cool completely.

Graham cracker mixture is baked in mini tart pans.

Cover the crust and fill each cooled tart pan with slightly softened blueberry ice cream. Put each blueberry ice cream tart (in the pans) back into the freezer for 2 hours to firm up.

Ready To Serve The Blueberry Ice Cream Tart

Spread some of the thickened blueberry sauce onto each dessert plate. Sprinkle the sauce with some reserved graham cracker crumb mix. Carefully remove each blueberry ice cream tart from the removable bottom tart pans, and set them on top of the blueberry sauce.

Garnish the top of each blueberry ice cream tart with a spoonful of sauce, and sprinkle with graham cracker crumb mixture. Let each dessert sit on the plates for a couple minutes at room temp. to let the ice cream soften slightly, before serving! Serve and enjoy, because this dessert is delicious!!!!

Blueberry Ice Cream Tart is garnished with sauce, and sprinkled with graham cracker crumbs to serve.

What If I Don’t Have Small Tart Pans?

If you don’t have removable bottom tart pans, think outside the box! This recipe could be easily adapted to make into a pie. Make a graham cracker crust (using this recipe you might have to double amounts) or buy a graham cracker crust, then follow the rest of the directions.

You will have a delicious frozen pie, rather than a tart, but a slice of THAT pie would be fantastic, garnished with the blueberry sauce and graham cracker crumbs. It’s ALL good. Hope you will give this blueberry ice cream tart recipe  a try… it’s worth it!

Looking For More Recipes Featuring BLUEBERRIES?

You can find all of my recipes in the Recipe Index, located at the top of the page. I have lots of recipes that feature blueberries, including:

Interested In More Recipes?

Thank you for visiting this website. I appreciate you using some of your valuable time to do soIf you’re interested, I publish a newsletter 2 times per month (1st and 15th) with all the latest recipes, and other fun info. I would be honored to have you join our growing list of subscribers, so you never miss a great recipe!
There is a Newsletter subscription box on the top right side (or bottom) of each blog post, depending on the device you use, where you can easily submit your e-mail address (only) to be included in my mailing list.

You Can Also Find Me On Social Media:

Facebook page: The Grateful Girl Cooks!
Pinterest:
The Grateful Girl Cooks!
Instagram:
jbatthegratefulgirlcooks

Author's signature

↓↓ PRINTABLE RECIPE BELOW ↓↓

0 from 0 votes
Blueberry Ice Cream Tart
Prep Time
1 hr
Cook Time
7 mins
Inactive Freezer Time
2 hrs
Total Time
3 hrs 7 mins
 

A blueberry ice cream tart is a delicious, frozen dessert treat! Ice cream in a graham cracker crust, served with fresh blueberry sauce on the side!

Category: Dessert
Cuisine: American
Keyword: blueberry ice cream tart
Servings: 4 servings
Calories Per Serving: 789 kcal
Author: JB @ The Grateful Girl Cooks!
Ingredients
For Blueberry Ice Cream:
  • 2 cups blueberries (fresh or frozen)
  • 1/2 cup granulated sugar
  • 8 oz. cream cheese , room temp, and cut into chunks
  • 1/2 teaspoon vanilla extract
  • 3/4 cup whole milk
  • 3/4 cup heavy whipping cream
  • 3 drops blue food coloring (optional, but it helps enhances the color)
For Graham Cracker Crust and Garnish:
  • 1 cube butter , melted
  • 1 1/2 cups finely crushed graham cracker crumbs
  • 1/3 cup granulated sugar
For Blueberry Sauce:
  • 2 cups blueberries
  • 1/2 cup water
  • 2 Tablespoons granulated sugar
  • 1 Tablespoon cornstarch
Instructions
Prepare the ice cream:
  1. Place blueberries and sugar into blender or food processor. Blend/pulse until liquified. Add cream cheese chunks and vanilla. Mix until fairly smooth. Add milk; blend well. Pour mixture into large bowl. Add whipping cream and whisk to combine. Pour mixture into canister of ice cream maker, and freeze per manufacturer instructions. When done, remove to a covered container and place in freezer.

Prepare Blueberry Sauce:
  1. Place the water, sugar and cornstarch into a medium sized sauce pan. Stir until smooth. Add the blueberries. Cook on medium heat, stirring often, for about 6-7 minutes, until blueberries have popped, and the sauce has thickened. Remove from heat, and cool completely.
Prepare Graham Cracker Crust:
  1. Mix graham cracker crust ingredients until well blended. Reserve about 1/2 cup for garnish. Set aside. Divide the rest between 4 small tart pans with removable bottoms. Press crumb mixture firmly down to form bottom crust in pan. Bake at 375 degrees for about 7 minutes. Remove from oven. Cool completely. Do not remove crust from pan. Once crust has cooled completely, spoon blueberry ice cream into each shell to fill to top of the tart pan. Place in freezer for 2 hours to completely firm up.

To Assemble/Serve:
  1. Spread some blueberry sauce onto individual serving plates. Sprinkle with a little of the graham crumb mixture. Carefully remove ice cream tart from the pan by gently pushing up on the bottom to remove from pan, then slide the tart off the bottom tray onto the blueberry sauce on serving plate. Spoon a little sauce on top of the tart, then sprinkle with additional graham cracker crumbs. Let finished plates sit for several minutes to soften ice cream slightly, then serve and enjoy!

Recipe Notes

Most of the prep time is INACTIVE time... just waiting for ice cream to harden in freezer. I made up the ice cream, sauce and crust early in the day, then it was a snap to assemble later in the evening. ALL can be made ahead of time, if needed.
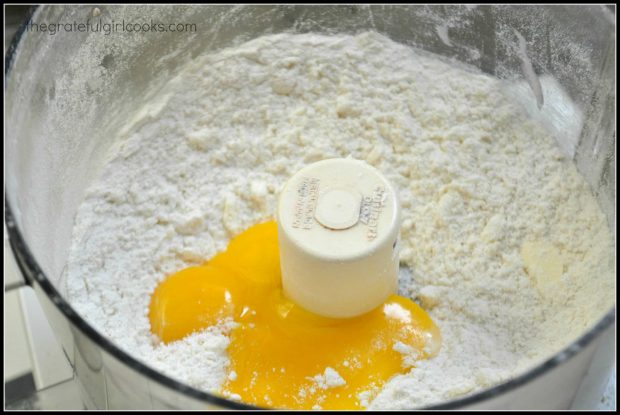
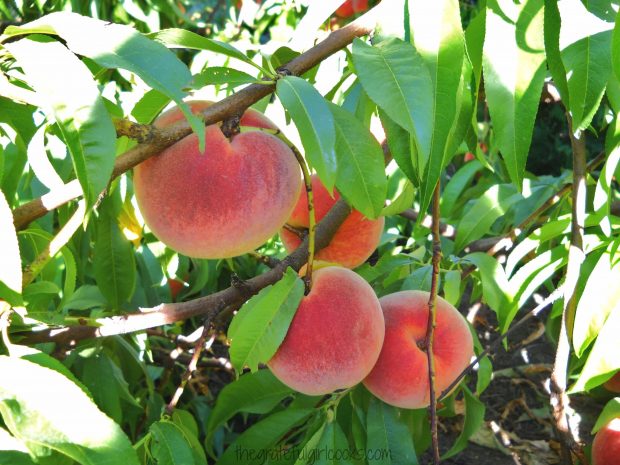
Nutrition Facts
Blueberry Ice Cream Tart
Amount Per Serving (1 tart)
Calories 789 Calories from Fat 369
% Daily Value*
Fat 41g63%
Saturated Fat 22g138%
Cholesterol 128mg43%
Sodium 430mg19%
Potassium 341mg10%
Carbohydrates 100g33%
Fiber 4g17%
Sugar 73g81%
Protein 9g18%
Vitamin A 1570IU31%
Vitamin C 14.6mg18%
Calcium 170mg17%
Iron 1.9mg11%
* Percent Daily Values are based on a 2000 calorie diet.

Here’s one more to pin on your Pinterest boards!A blueberry ice cream tart is a delicious, frozen dessert treat! Ice cream in a graham cracker crust, served with fresh blueberry sauce on the side!


Save

Save

Save