Category: Main Dishes

Grilled Cherry Tomatoes

Make grilled cherry tomatoes on a BBQ! Lightly seasoned, topped with Parmesan and parsley, these colorful tomatoes burst with juicy flavor!

One of the dishes I enjoyed creating and also enjoy making (especially when we’re using the BBQ for meals) is Grilled Cherry Tomatoes! I grow lots of cherry tomatoes in our little garden, so in the summer I tend to keep bowls of them in our kitchen for quick snacks.

If you’ve never tried grilling these little “snacks”, I want to show you today how to do that! They only take a few minutes to cook so I recommend making them when you are using your BBQ grill for a main dish.

The “recipe” I am sharing today makes enough for two servings, but it can EASILY be doubled or tripled to make the quantity you need for a favorite meal.

As soon as we finish grilling chicken (or other meats), for example, we remove the meat from the grill and add the tomatoes for a quick finish! Here’s how to make delicious, juicy grilled cherry tomatoes.

Scroll Down For A Printable Recipe Card At The Bottom Of The Page

Prepare The Tomatoes

For this recipe I use about 20 cherry tomatoes, which is enough for a simple side dish or an “add-on” to a main dish for my husband and myself.

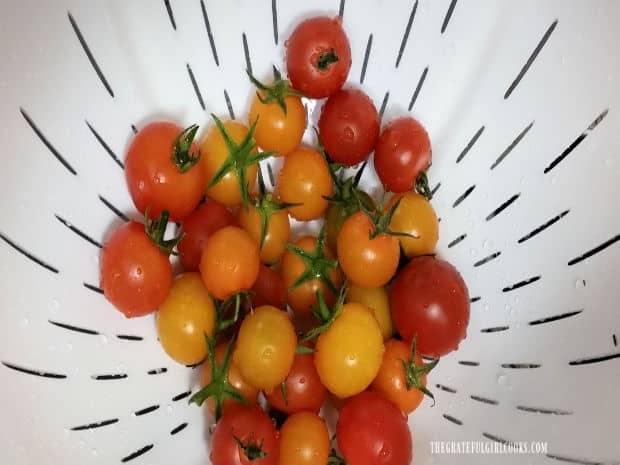
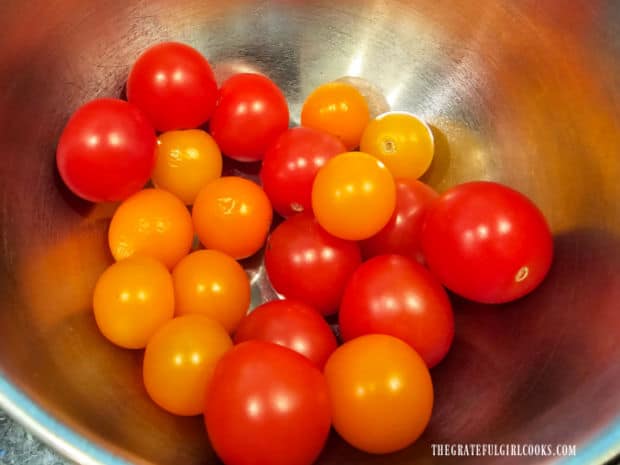
To make this dish more colorful, consider using multi-colored cherry tomatoes, which is preferred, if possible. Rinse the tomatoes, remove the stems and let the tomatoes dry.

Cherry tomatoes are rinsed, then stems are removed.

Place the tomatoes in a bowl that is big enough to hold them and stir them.

After the cherry tomatoes dry, they are placed in a bowl.

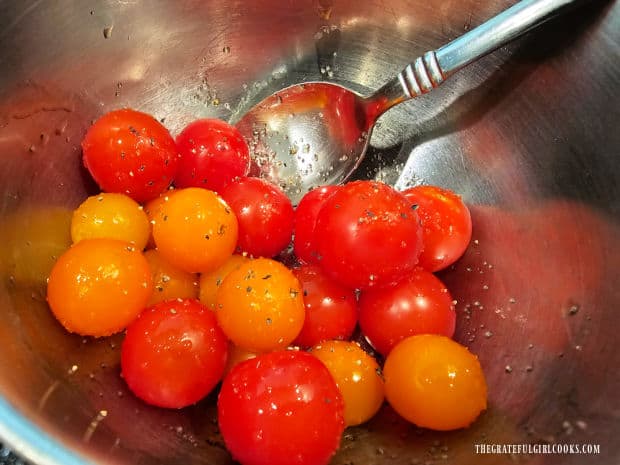
Drizzle extra virgin olive oil over the tomatoes and gently give them a stir to coat them with the oil. Season lightly with salt, pepper, garlic powder and Italian seasoning and gently toss until combined.

TIP: The cherry tomatoes only need a light seasoning, so don’t use a “heavy hand” when adding the spices. Use only enough to lightly season (but not overpower) the natural tomato flavor!

Tomatoes are seasoned with olive oil, and then tossed with spices.

Time To GRILL the Tomatoes

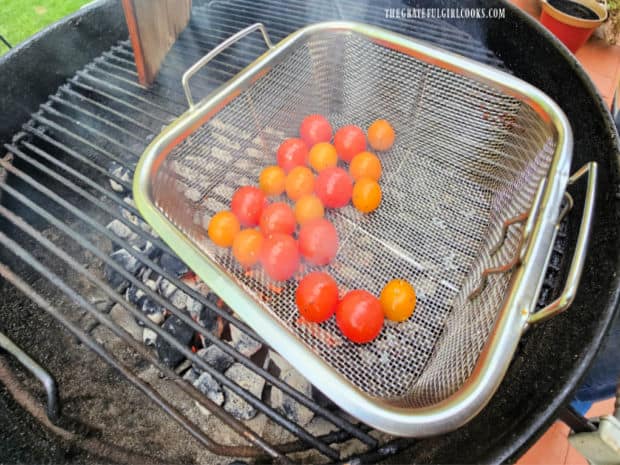
Place the seasoned cherry tomatoes in a metal grill basket and place the basket on a grill grate directly above very hot briquets in the BBQ.

TIP: Grilled cherry tomatoes only take 2-3 minutes to cook, so we usually make this dish AFTER we’ve finished grilling a meat dish. This way the charcoal briquets are already HOT, so we don’t have to fire everything up for only a couple minutes of cooking time!

A metal basket holds the cherry tomatoes directly over the hot coals of the BBQ.

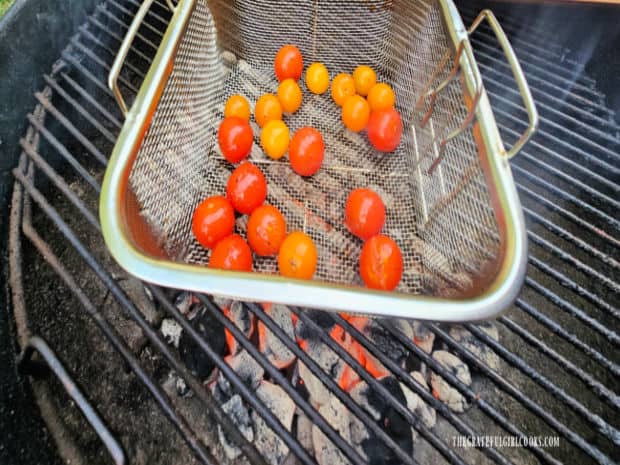
Cook the tomatoes for 2-3 minutes, gently turning them often as they cook. They’re very delicate and juicy, so be careful when turning them!

Grilled cherry tomatoes are cooked for 2-3 minutes, turning them often as they cook.

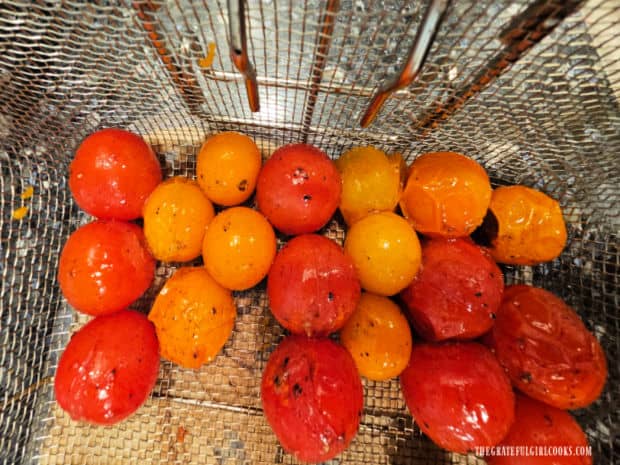
Once the cherry tomatoes have “blistered” and become slightly wrinkly, they are done! Don’t overcook them or they could pop open from the juices inside.

Remove the basket off of the heat once they have blistered and take them inside to garnish them before serving.

When done, grilled cherry tomatoes are slightly "blistered" on the outside.

Serve The Grilled Cherry Tomatoes

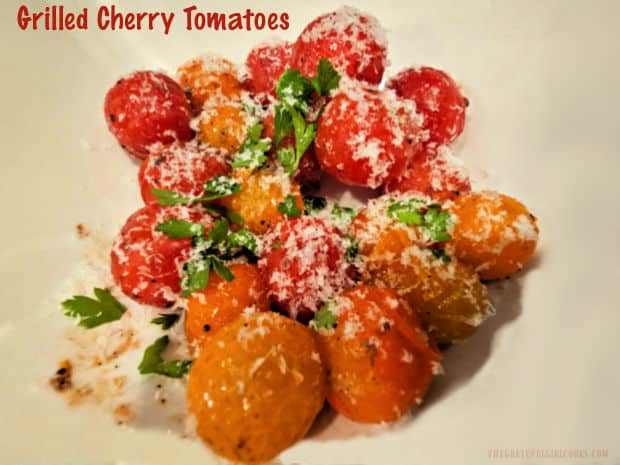
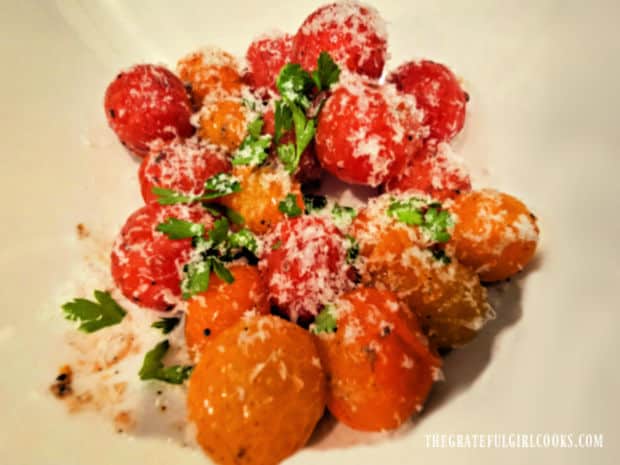
To serve the grilled cherry tomatoes, place them in a small serving bowl. Immediately (while they’re still hot), finely grate fresh Parmesan cheese over the top. Sprinkle the tomatoes with chopped fresh parsley and serve immediately!

Garnished with grated Parmesan and fresh parsley, the grilled cherry tomatoes are served.

The cherry tomatoes are delicious served “as is” as a stand-alone dish, and the grilled tomatoes literally “pop with sweet juicy flavor” when you bite into them. They’re so good!

Colorful grilled cherry tomatoes also can be used as an accompaniment for a variety of main dishes. Shown below are the colorful tomatoes served with grilled salmon, and they also pair well with chicken, pork and beef!

Some grilled cherry tomatoes, served along with grilled salmon fillets.

I hope you have the chance to make some grilled cherry tomatoes so you can see how simple they are to make and how delicious they are! If you’re making them for a larger group, this recipe can very easily be doubled or tripled, to suit your needs!

Thank you for stopping by, and I invite you to come back again soon for more family-friendly recipes. Take care, may God bless you, and have a wonderful day!

Looking For More GRILLED VEGGIE Recipes?

You can find ALL of my recipes in the Recipe Index, which is located at the top of the page. I have a LOT of veggie recipes, including some that are delicious grilled, including:

Author's signature

↓↓ PRINTABLE RECIPE BELOW ↓↓

0 from 0 votes
Grilled Cherry Tomatoes
Prep Time
5 mins
Cook Time
3 mins
Total Time
8 mins
 

Make grilled cherry tomatoes on a BBQ! Lightly seasoned, topped with Parmesan and parsley, these colorful tomatoes burst with juicy flavor

Category: Side Dish, Vegetable Dish
Cuisine: All Cuisines
Keyword: grilled cherry tomatoes
Servings: 2
Calories Per Serving: 89 kcal
Author: JB @ The Grateful Girl Cooks!
Ingredients
  • 20 cherry tomatoes multi-colored, if available
  • 2 teaspoons extra virgin olive oil
  • ¼ teaspoon salt or enough to lightly season
  • ¼ teaspoon black pepper or enough to lightly season
  • teaspoon garlic powder or enough to lightly season
  • teaspoon Italian seasoning or enough to lightly season
  • 2 Tablespoons finely grated Parmesan cheese* *fresh is best!
  • 1 Tablespoon chopped fresh parsley leaves
Instructions
  1. Rinse tomatoes, remove stems; let tomatoes dry. Place dry tomatoes in a bowl.

  2. Drizzle olive oil on tomatoes; gently stir to coat tomatoes. Season lightly with salt, pepper, garlic powder and Italian seasoning; gently toss until combined.

  3. Place tomatoes in a metal grill basket; place basket on BBQ grill grate directly over very hot briquets. Cook tomatoes 2-3 minutes, gently turning them often as they cook. They're delicate and juicy, so be careful when turning them!

  4. Once tomatoes have "blistered" (become slightly wrinkled), they're done! Don't overcook or they could pop open from the juices inside. Remove basket from BBQ; take tomatoes inside to garnish before serving.

  5. To serve, place tomatoes in a serving bowl. Immediately (while they're still hot), finely grate fresh Parmesan cheese on top. Sprinkle with chopped fresh parsley; serve immediately. Enjoy!

Nutrition Facts
Grilled Cherry Tomatoes
Amount Per Serving (1 (1/2 of total))
Calories 89 Calories from Fat 54
% Daily Value*
Fat 6g9%
Saturated Fat 1g6%
Polyunsaturated Fat 1g
Monounsaturated Fat 3g
Cholesterol 4mg1%
Sodium 398mg17%
Potassium 398mg11%
Carbohydrates 8g3%
Fiber 1g4%
Sugar 4g4%
Protein 3g6%
Vitamin A 1047IU21%
Vitamin C 41mg50%
Calcium 69mg7%
Iron 1mg6%
* Percent Daily Values are based on a 2000 calorie diet.

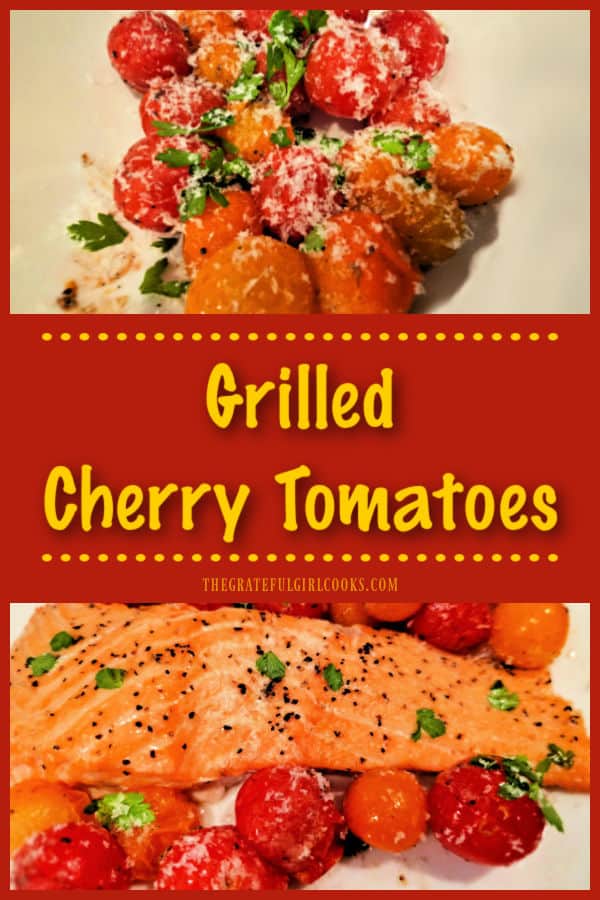
Here’s one more to pin on your Pinterest boards!Make grilled cherry tomatoes on a BBQ! Lightly seasoned, topped with Parmesan and parsley, these colorful tomatoes burst with juicy flavor!

Instant Pot Boneless Pork Chops

Make Instant Pot Boneless Pork Chops for a dinner for two! These pork chops are brined, well-seasoned, easy to make, juicy and delicious!

Today I want to share a yummy recipe for Instant Pot boneless pork chops that serves two people. This fantastic recipe is very simple to make in my opinion and is perfect served any time of the year.

When I photographed the steps to make this dish it was extremely HOT outside and I appreciated being able to use my Instant Pot in order to keep our kitchen cool!

All in all, it is a very simple dish to make, however you do need to allow an extra hour (or two) to brine the pork chops (a simple salt/water mixture) before you cook them. Don’t skip this step, though, because it makes the chops so tender and juicy!

The brining is SIMPLE and involves inactive prep, so if you’ve got the time, and want to enjoy delicious boneless pork chops, then this recipe is for you! Here’s how to make Instant Pot Boneless Pork Chops.

Scroll Down For A Printable Recipe Card At The Bottom Of The Page

Brine the Pork Chops

The first thing you will need to do is brine the pork chops for 1-2 hours before you cook them. You will need to plan ahead for this step, because it makes the pork chops juicy and flavorful.

Use a shallow rimmed dish (just big enough to lay the pork chops down in a single layer). Mix a brining solution in this dish by stirring together 4 cups of water with 4 Tablespoons of salt until all the salt has dissolved. TIP: I use a glass loaf pan for this because it’s the perfect size for two large boneless chops!

Lay the pork chops in the brine, placing them in the brine in a single layer. The brine should cover the pork chops. NOTE: If the dish you’re using is too big, you may have to turn the pork chops over halfway through the “brining” time for best results.

Place the dish in the refrigerator and let the meat “marinate” in the brine for 1-2 hours. When done, remove the pork chops and then lightly blot them with a paper towel.

A boneless pork chop is placed in a saltwater brine for 1-2 hours before cooking.Two 1" thick boneless pork chops in saltwater brine.

Prepare The Seasoning Mix

While the pork is brining, mix up the spices you’ll be using to season the meat. The spices you will use are brown sugar, paprika, salt, pepper, and onion powder.

Stir these spices in a small bowl until they’re fully combined and set them aside until the pork chops are ready to be cooked.

Spices are combined to make a seasoning mixture for the brined pork chops.

Season the two boneless pork chops with the spice mixture, covering BOTH sides of the pork chops. Press the spices into the meat to help it adhere. Once the meat is fully covered in spices, it is ready to be cooked.

Both sides of the thick pork chops are covered with the spice mixture.

Sauté The Pork Chops In the Instant Pot

Plug in the Instant Pot and press the SAUTÉ button (High heat). Add a Tablespoon of butter and once it has melted, add the seasoned pork chops in a single layer.

Pork chops are sautéed in melted butter in the Instant Pot.

Brown the pork chops on both sides (about 1-2 minutes per side). Once they have a light brown “sear” on them, remove the pork chops from the Instant Pot and set them aside on a plate.

Both sides of the seasoned pork chops are lightly browned in the Instant Pot.Pork chops are removed from the pot to rest on a plate after they're lightly browned.

Make A Quick Cooking Sauce

While the empty Instant Pot is still set to SAUTÉ, add 1 cup of chicken broth. Now you need to “de-glaze” the pot. De-glazing means getting any leftover browned bits from searing the pork chops scraped off the bottom of the pot. They have lots of FLAVOR to contribute to the sauce.

Stir the liquid with a wooden spoon to scrape up all the little bits left in the bottom of the pot from searing the pork chops. This will only take a minute or two.

When done, add Worcestershire sauce and Liquid Smoke to the liquid and stir to combine. Press The CANCEL button on the Instant Pot to turn off the Sauté function.

Instant Pot is deglazed with chicken broth, then Worcestershire and Liquid Smoke is added.

Add the seasoned, browned pork chops back into the sauce in the Instant Pot. Now it’s time to pressure cook the chops!

The browned pork chops are added back into the sauce in the Instant Pot.

Pressure Cook The Instant Pot Boneless Pork Chops

Place the lid on the Instant Pot and lock it into place. Flip the pressure valve to SEALING. Program the Instant Pot to cook on MANUAL (High Pressure) for 7 minutes.

It will take about 7-10 minutes for the Instant Pot to reach full pressure and the cooking timer to begin. When the cooking program ends, let the pressure release NATURALLY (don’t do anything) for 12 minutes, and then perform a quick release of any remaining steam by flipping the pressure release knob to VENTING. 

The Instant Pot Boneless Pork Chops cook at high pressure for 7 minutes.

When ALL of the steam has been released (and pressure gauge button drops back down), it is safe to open the lid. Unlock and remove the lid.

Let the Instant Pot boneless pork chops rest for 5 minutes before removing them from the sauce and serving them. This resting time allows to allow the internal juices time to redistribute inside the meat.

Fully cooked pork chops rest for 5 minutes after pressure cooking (and before serving).

Transfer the pork chops to individual plated and spoon some of the sauce from the Instant Pot over the meat, if desired. Serve the Instant Pot Boneless Pork Chops with veggies or other sides and dig in!

We loved these pork chops and enjoyed them served with Garlic Butter Red Potatoes and Air Fryer Veggies For Two on the side. It was a delicious dinner partly because it was so easy!

The pork chops were very juicy inside (yay!) and tasted wonderful, because of the spice mix and smoky “sauce” the meat was cooked in. I highly recommend this pork chop recipe and am confident you will enjoy it, too!

Red potatoes and veggies are served along with the Instant Pot Boneless Pork Chops.

I hope you have the opportunity to try this delicious Instant Pot recipe. It was a great main dish to make on a very HOT day outside because it didn’t require me to heat up our kitchen!

Thanks so much for stopping by, and I invite you to come back again soon for more family-friendly recipes. Take care, may God bless you, and have a wonderful day.

Looking For More INSTANT POT Recipes?

You can find ALL of my recipes in the Recipe Index, which is located at the top of the page. I have a nice variety of Instant Pot recipes to choose from, including:

Want More Recipes? Get My FREE Newsletter!

I publish a newsletter 2 times per month (1st and 15th) with lots of recipes, tips, etc.
Would you like to join our growing list of subscribers?

There is a Newsletter subscription box on the top right (or bottom) of each blog post, depending on the device you use.
You can submit your e-mail address there, to be added to my mailing list.

Find Me On Social Media:

Facebook page: The Grateful Girl Cooks!
Pinterest:
The Grateful Girl Cooks!
Instagram:
jbatthegratefulgirlcooks

Author's signature

Original recipe source, and with thanks to Jason at Best Damn Instant Pot Boneless Pork Chops – RecipeTeacher

↓↓ PRINTABLE RECIPE BELOW ↓↓

0 from 0 votes
Instant Pot Boneless Pork Chops
Prep Time
10 mins
Cook Time
7 mins
Inactive Prep Time (brining/pressure release)
1 hr 12 mins
Total Time
1 hr 29 mins
 

Make Instant Pot Boneless Pork Chops for a dinner for two! These pork chops are brined, well-seasoned, easy to make, juicy and delicious!

Category: Main Dish
Cuisine: All Cuisines
Keyword: instant pot boneless pork chops
Servings: 2
Calories Per Serving: 329 kcal
Author: JB @ The Grateful Girl Cooks!
Ingredients
For Brine: 4 cups water and 4 Tablespoons salt
  • 2 1" thick boneless pork chops (about 6 oz. each) * See Note Below
For Seasoning Mix and Remaining Ingredients:
  • 2 Tablespoons brown sugar
  • 1 teaspoon paprika
  • 1 teaspoon salt
  • 1 teaspoon black pepper
  • ½ teaspoon onion powder
  • 1 Tablespoon butter
  • 1 cup chicken broth
  • ½ Tablespoon Worcestershire sauce
  • 1 teaspoon Liquid Smoke
Instructions
  1. Brine Pork Chops: Mix brine in a loaf-sized dish by stirring water with salt until salt dissolves. Add chops in single layer (brine should cover chops). Refrigerate 1-2 hours. Remove chops; lightly blot with a paper towel.

  2. Make Spice Mix: Stir brown sugar, paprika, salt, pepper and onion powder in a small bowl until combined. Season BOTH sides of the brined pork chops with spice mixture, pressing it into the meat to adhere.

  3. Cook: Plug in the Instant Pot; press SAUTÉ button (High heat). Add butter. Once melted, add pork chops in a single layer. Lightly brown chops on both sides (1-2 minutes per side). Remove pork chops from Instant Pot; set them aside on a plate.

  4. Keep Instant Pot on SAUTÉ. Add chicken broth; stir with wooden spoon, scraping up browned bits left in the pot (from browning pork chops). Add Worcestershire sauce and Liquid Smoke; stir to combine. Press CANCEL button. Add pork chops back into the sauce in a single layer.

  5. Place lid on the Instant Pot; lock into place. Flip pressure valve to SEALING. Program Instant Pot to cook on MANUAL (High Pressure) for 7 minutes. It will take 7-10 minutes to reach full pressure before the cooking program timer begins. When done, let the pressure release NATURALLY for 12 minutes (do nothing), then perform a quick release of any remaining steam by flipping the pressure release knob to VENTING. When ALL steam has been released (and pressure gauge button drops down), it's safe to open the lid. Unlock/remove lid. Let pork chops rest 5 minutes before removing them (to redistribute internal juices in the meat).

  6. Transfer pork chops to individual plates. Drizzle some of the remaining sauce in the pot over the meat, if desired. Serve and enjoy!

Recipe Notes

Note: It is important to use 1" thick boneless pork chops for this recipe to ensure the Instant Pot cooking time used creates juicy, tender chops. If they are too thin, they may not cook properly (and be overdone).

Nutrition Facts
Instant Pot Boneless Pork Chops
Amount Per Serving (1 pork chop)
Calories 329 Calories from Fat 108
% Daily Value*
Fat 12g18%
Saturated Fat 6g38%
Trans Fat 0.3g
Polyunsaturated Fat 1g
Monounsaturated Fat 4g
Cholesterol 130mg43%
Sodium 1792mg78%
Potassium 772mg22%
Carbohydrates 15g5%
Fiber 1g4%
Sugar 13g14%
Protein 39g78%
Vitamin A 679IU14%
Vitamin C 1mg1%
Calcium 39mg4%
Iron 2mg11%
* Percent Daily Values are based on a 2000 calorie diet.

Here’s one more to pin on your Pinterest boards!Make Instant Pot Boneless Pork Chops for a dinner for two! These pork chops are brined, well-seasoned, easy to make, juicy and delicious!

Shrimp and Broccoli Stir-Fry

Shrimp and Broccoli Stir-Fry is a delicious dish, with pan-seared shrimp, broccoli, bell peppers, and sugar snap peas in teriyaki sauce.Shrimp And Broccoli Stir-Fry is a delicious dish, with pan-seared shrimp, broccoli, bell peppers, and sugar snap peas in teriyaki sauce.

If you enjoy stir-fry meals, then you may enjoy the recipe I am posting today for shrimp and broccoli stir-fry! Years ago, I found a recipe for a stir fry dish online from Sara Welch, from “Dinner at the Zoo”.

Over the years, I’ve tweaked and changed her original recipe (and ingredients) many times to suit our taste and ended up with this tasty shrimp stir-fry recipe.

This dish features fresh broccoli florets, bell pepper slices, sugar snap peas and large shrimp al pan-seared and covered in a delicious Asian-inspired sauce. If desired, you can serve this yummy stir-fry on top of a bed of steamed brown or white rice for a very filling, all-in-one-bowl dinner!

I’m confident you will enjoy it, so here’s how to make this delicious shrimp and broccoli stir-fry, step by step.

Scroll Down For A Printable Recipe Card At The Bottom Of The Page

Make The Stir-Fry Sauce

Place soy sauce, water, brown sugar, fresh minced ginger, honey, minced garlic and sesame oil in a small saucepan. Stir to combine and cook this on Medium-High heat, stirring often until the sugar has dissolved.

The sauce is fairly thin at this point, so the next thing you will do is make a “slurry” with water and cornstarch to help thicken the sauce.

Asian sauce for the stir fry is heated in a small saucepan.

Make a “slurry” by mixing a small amount of water and cornstarch in a container until the mixture is smooth and lump-free. Pour the slurry into the sauce and stir or whisk it well, until combined.

Bring the sauce to a boil, stirring often and let it boil for 1-2 minutes or until the sauce has thickened. Once thickened, remove the sauce from the heat source and set it aside.

A corn starch and water slurry is added to the sauce to thicken it.Asian stir fry sauce is thickened and ready to add to the shrimp and broccoli stir-fry.

Stir-Fry The Vegetables

Heat 1 teaspoon of vegetable oil in a large skillet on Medium-High heat. When the oil and skillet are hot (but not smoking), add the broccoli florets, sugar snap peas and red and orange bell pepper slices.

TIP: I love to use a combination of red and orange bell pepper slices for extra pops of color, but if you only have one of those colors (red OR orange) simply use that!

Toss to coat the veggies slightly with the oil, then season them lightly with salt and pepper, to taste. Cook the vegetables for 3-4 minutes, stirring often until they become tender and are only very lightly browned. 

Add 2 Tablespoons of water to the skillet and continue to cook the veggies only until the water has evaporated. Remove the veggies from the skillet, put them on a plate and cover to keep them warm.

Broccoli, snap peas, red and orange bell peppers are stir-fried in skillet.

Prepare The Shrimp

Make sure all the shrimp is de-veined, and the shell and tails are removed. Pat the shrimp dry using several paper towels. If you’re using large shrimp, use between 25-30 count and if you’re using JUMBO shrimp, use about 18-20 count.

Add remaining vegetable oil to the same skillet you cooked the veggies in. Heat it on High until the oil and skillet are hot again (but not smoking).

Place the shrimp in the hot skillet in a single layer and season very lightly with salt and pepper. Cook the shrimp for 2-3 minutes, turning them halfway through the cooking time until they are cooked through and pink on all sides.

Shrimp is deveined, tails are removed and then shrimp is patted dry.The shrimp are quickly pan-seared in oil until done.

Add the stir-fried veggies back into the skillet of shrimp, then pour the thickened Asian sauce on top. Turn the heat DOWN under the skillet to Medium.

Stir-fried veggies are added to the cooked shrimp in the skillet.Asian sauce is combined with the veggies and shrimp in the skillet.

Stir to fully cover the shrimp and veggies with the sauce and cook on Medium heat, stirring often, but only until everything is heated through. Don’t overcook the shrimp, simply get the dish hot enough to serve.

Shrimp and Broccoli Stir-Fry is heated through and then served.

Serve And Enjoy The Shrimp and Broccoli Stir-Fry

Once the shrimp and broccoli stir-fry is heated through, it is ready to be enjoyed! For each serving, place brown rice (or white steamed rice) in a bowl and then add the shrimp, veggies and sauce on top.

OPTIONAL GARNISH (highly recommend): If desired, sprinkle the top of each serving with a few chopped green onions and some sesame seeds. This makes the presentation really nice (and those chopped green onions add another little “pop” of flavor!

A white bowl with shrimp and broccoli stir-fry served on top of brown rice.

I hope you have the opportunity to make this delicious shrimp and broccoli stir-fry for yourself and for those you love. It’s really pretty easy to make and tastes wonderful! When you serve it on top of brown rice, it makes this a very filling and complete meal I’m sure you will enjoy.

Thank you for stopping by, and I invite you to come back again soon for more family-friendly recipes. Take care, may God bless you, and have a wonderful day.

Looking For More SHRIMP Recipes?

You can find ALL of my recipes in the Recipe Index, which is located at the top of the page. I have some fantastic, delicious shrimp recipes to choose from, including:

Want More Recipes? Get My FREE Newsletter!

I publish a newsletter 2 times per month (1st and 15th) with lots of recipes, tips, etc..
Would you like to join our growing list of subscribers?

There is a Newsletter subscription box on the top right (or bottom) of each blog post, depending on the device you use.
You can submit your e-mail address there, to be added to my mailing list.

Find Me On Social Media:

Facebook page: The Grateful Girl Cooks!
Pinterest:
The Grateful Girl Cooks!
Instagram:
jbatthegratefulgirlcooks

Author's signature

↓↓ PRINTABLE RECIPE BELOW ↓↓

0 from 0 votes
Shrimp and Broccoli Stir-Fry
Prep Time
15 mins
Cook Time
15 mins
Total Time
30 mins
 

Shrimp And Broccoli Stir-Fry is a delicious dish, with pan-seared shrimp, broccoli, bell peppers, and sugar snap peas in teriyaki sauce.

Category: Main Dish
Cuisine: Asian
Keyword: shrimp and broccoli stir-fry
Servings: 4
Calories Per Serving: 260 kcal
Author: JB @ The Grateful Girl Cooks!
Ingredients
For Asian Sauce:
  • ¼ cup low sodium soy sauce
  • ½ cup water
  • 3 Tablespoons brown sugar dark or light
  • 1 Tablespoon honey
  • 2 teaspoons finely minced fresh ginger
  • 2 teaspoons finely minced garlic
  • teaspoons toasted sesame oil
  • 2 Tablespoons cold water for slurry
  • 4 teaspoons cornstarch for slurry
For Stir Fry:
  • 3 teaspoons vegetable oil* *DIVIDED USE
  • pounds large raw shrimp deveined, shells/tails removed
  • cups fresh broccoli florets* *small bite-sized florets
  • 1 cup red and orange bell peppers (combination of) seeded, thinly sliced lengthwise
  • ½ cup sugar snap pea pods
  • 2 Tablespoons water
  • salt and black pepper, to taste to lightly season shrimp and veggies
For Serving (optional, but good): Steamed rice, chopped green onions, sesame seeds
    Instructions
    Make The Sauce:
    1. Combine soy sauce, water, brown sugar, honey, minced ginger, garlic and sesame oil in a small saucepan. Cook on Medium-high, stirring often, until sugar dissolves. Make a "slurry" by mixing 2 Tbsp. cold water and cornstarch in a container until smooth. Add the slurry to the sauce; stir or whisk until combined. Bring sauce to a boil, stirring often; boil 1-2 minutes or until sauce has thickened. Remove pan from the heat; set aside.

    Stir-Fry Veggies And Shrimp:
    1. Heat 1 tsp. vegetable oil in a large skillet on Medium-High. Once hot, add broccoli florets, sugar snap peas and red/ orange bell pepper slices. Toss to coat veggies lightly with oil; season lightly with salt and pepper, to taste. Cook 3-4 minutes, stirring often until veggies are tender. Add 2 Tbsp. water to the skillet; continue to cook veggies only until water evaporates. Transfer veggies out of the skillet and onto a plate; cover/keep warm.

    2. Add remaining 2 tsp. vegetable oil to the same skillet. Heat on Medium-High until oil is hot (but not smoking). Put shrimp in skillet in a single layer, season lightly with salt/pepper. Cook shrimp 2-3 minutes, turning them over halfway through cooking time until they're cooked through and pink on all sides.

    3. Add veggies back into the skillet of shrimp; pour sauce on top. Turn the heat DOWN to Medium. Stir to fully coat shrimp and veggies with sauce; cook on stirring often but only until everything is heated through. Don't overcook shrimp, simply get this dish hot enough to serve.

    4. For each serving, place brown or white steamed rice in a bowl (rice is optional but highly recommended). Add shrimp, veggies and sauce on top. OPTIONAL GARNISH: If desired, sprinkle each serving with chopped green onions and sesame seeds. Serve and enjoy!

    Recipe Notes

    The caloric and nutritional calculation provided does not include rice, green onions or sesame seeds for optional serving recommendations, so please plan accordingly.

    Nutrition Facts
    Shrimp and Broccoli Stir-Fry
    Amount Per Serving (1 (1/4 of total))
    Calories 260 Calories from Fat 54
    % Daily Value*
    Fat 6g9%
    Saturated Fat 1g6%
    Trans Fat 0.03g
    Polyunsaturated Fat 3g
    Monounsaturated Fat 2g
    Cholesterol 228mg76%
    Sodium 761mg33%
    Potassium 666mg19%
    Carbohydrates 22g7%
    Fiber 2g8%
    Sugar 16g18%
    Protein 32g64%
    Vitamin A 1512IU30%
    Vitamin C 86mg104%
    Calcium 131mg13%
    Iron 2mg11%
    * Percent Daily Values are based on a 2000 calorie diet.

    Here’s one more to pin on your Pinterest boards!Shrimp And Broccoli Stir-Fry is a delicious dish, with pan-seared shrimp, broccoli, bell peppers, and sugar snap peas in teriyaki sauce.


    Bowtie Pasta Alfredo and Chicken

    Bowtie Pasta Alfredo and Chicken is a delicious 30-minute dish, with pasta, chicken and fresh spinach in a creamy butter Parmesan sauce.
    Bowtie Pasta Alfredo and Chicken is a delicious 30-minute dish, with pasta, chicken and fresh spinach in a creamy butter Parmesan sauce.

    The recipe I am sharing with you today is one I’ve made for years. I love this dish because it is so delicious and easy, thanks in part to using a leftover, already cooked chicken breast.

    Using a pre-cooked (baked or grilled) chicken breast saves so much preparation time, and then it’s simply a matter of heating the sauce and cooking the pasta! All in all, this is a scrumptiously satisfying meal.

    Honestly, this dish is really simple to make and I’m confident you’re going to love it! Here’s how to make Bowtie Pasta alfredo and Chicken.

    Scroll Down For A Printable Recipe Card At The Bottom Of The Page

    Make The Alfredo Sauce

    Melt 4 Tablespoons of butter (½ stick) on Low heat in a saucepan. Once the butter has melted, pour in 1 cup of heavy whipping cream and stir to combine.

    Continue to cook the butter and whipping cream on a low simmer for 3-4 minutes, stirring often, but do NOT let the mixture come to a boil.

    Heavy whipping cream is added to melted butter in a saucepan.

    Add 1 cup of finely grated Parmesan cheese (fresh is the absolute best and is recommended) but you can use “shaker can” cheese if necessary.

    Stir to combine, then stir gently until the cheese has melted and the sauce thickens slightly. Again, be careful to not let the sauce boil. Lightly season the sauce with garlic powder, salt and a small pinch of black pepper, then stir to combine.

    TIP: If necessary, you can make the sauce ahead of time, then you simply need to re-heat it a few minutes before the pasta is finished cooking.

    Finely grated Parmesan cheese is added to the butter and whipping cream sauce.As the Alfredo sauce cooks, it thickens slightly and then it's ready for the pasta.

    Prepare The Chicken And Fresh Spinach

    For this recipe I use pre-cooked (baked or grilled) chicken, which is a real time-saver. I use1 large, cooked chicken breast and cut it into small bite-sized cubes, then set the chicken aside.

    TIP: You can always use a cooked rotisserie chicken breast if that’s more convenient but remove (and discard) the skin before you cut it into cubes.

    A large, cooked chicken breast is cut into small cubes before it's added to hot pasta.

    Chop enough fresh spinach to measure 1½ heaping cups. Set the chopped spinach aside until the pasta has finished cooking.

    Fresh spinach is chopped into pieces before it is added to the pasta.

    Cook The Bowtie Pasta

    Bring a large saucepan of lightly salted water to a boil and cook the bowtie pasta according to the package directions. The cooking time is typically between 10-12 minutes.

    Once the pasta is fully cooked, drain off the water (but do NOT rinse the pasta), and then immediately add the drained pasta back into the large pan (while it is still hot).

    Bowtie pasta is cooked for 10-12 minutes in boiling water.

    Combine All Ingredients

    Once the drained bowtie pasta is back into the saucepan, immediately add warm, cubed chicken pieces and the chopped spinach.

    Chicken and chopped spinach are added to drained, hot bowtie pasta.

    Pour the creamy hot alfredo sauce over the top and then toss everything gently, until the bowtie pasta and all the other ingredients are combined and covered with sauce.

    If the sauce appears to be too thick, drizzle in a little bit more of the heavy whipping cream (or milk, if desired) and stir to combine.

    Hot alfredo sauce is added to the pasta, chicken and spinach in the saucepan.

    Once all the ingredients are combined (and still hot), take a quick bite of the pasta and add additional salt and pepper, to suit your taste. Now the bowtie pasta alfredo and chicken is ready to be served.

    After combining, the bowtie pasta alfredo and chicken is seasoned with salt and pepper.

    Serve The Bowtie Pasta Alfredo And Chicken

    Transfer the hot pasta into individual serving bowls (or plates). If you want to garnish this dish, add some more Parmesan cheese on top. I do this (along with a pinch of coarse black pepper) and it looks nice as a finishing touch AND adds even more flavor to this dish!

    This is a nice “all-in-one” main dish, with the pasta, chicken and spinach. We enjoy it, especially when served with a small mixed green salad on the side. The delicious pasta dish (with chicken) and a salad on the side becomes a filling and delicious meal!

    A bowl of bowtie pasta alfredo and chicken is served, topped with Parmesan cheese and pepper.

    I hope you have the opportunity to make this delicious bowtie pasta alfredo and chicken dish for yourself and those you love. It’s really delicious, and I’m confident you’ll enjoy it!

    Thanks so much for stopping by and I invite you to come back again soon for more family-friendly recipes. Take care, may God bless you, and have a wonderful day!

    Looking For More PASTA Recipes?

    You can find ALL of my recipes in the Recipe Index, which is located at the top of the page. I have lots of yummy pasta recipes to choose from, including:

    Want More Recipes? Get My FREE Newsletter!

    I publish a newsletter 2 times per month (1st and 15th) with lots of recipes, tips, etc.
    Would you like to join our growing list of subscribers?

    There is a Newsletter subscription box on the top right (or bottom) of each blog post, depending on the device you use.
    You can submit your e-mail address there, to be added to my mailing list.

    Find Me On Social Media:

    Facebook page: The Grateful Girl Cooks!
    Pinterest:
    The Grateful Girl Cooks!
    Instagram:
    jbatthegratefulgirlcooks

    Author's signature

    ↓↓ PRINTABLE RECIPE BELOW ↓↓

    0 from 0 votes
    Bowtie Pasta Alfredo and Chicken
    Prep Time
    15 mins
    Cook Time
    12 mins
    Total Time
    27 mins
     

    Bowtie Pasta Alfredo and Chicken is a delicious 30-minute dish, with pasta, chicken and fresh spinach in a creamy butter Parmesan sauce.

    Category: Main Dish
    Cuisine: Italian
    Keyword: bowtie pasta alfredo and chicken
    Servings: 4
    Calories Per Serving: 670 kcal
    Author: JB @ The Grateful Girl Cooks!
    Ingredients
    For Alfredo Sauce:
    • 4 Tablespoons butter
    • 1 cups heavy whipping cream
    • ¼ teaspoon garlic powder
    • teaspoon salt add more later if needed, to taste
    • 1 pinch ground black pepper a small pinch + more later, if needed
    • 1 cup finely grated Parmesan cheese fresh cheese is recommended
    For Pasta, etc.:
    • 8 ounces uncooked bowtie pasta
    • 6 ounces pre-cooked chicken breast 1 large chicken breast, cut in small cubes
    • cups fresh chopped spinach
    • additional salt and pepper as desired, to taste
    • additional grated Parmesan (optional-for garnish)
    Instructions
    1. Melt butter on Low heat in a saucepan. Once melted, add heavy whipping cream; stir to combine. Cook on a low simmer for 3-4 minutes, stirring often, but do NOT let the mixture come to a boil.

    2. Add Parmesan cheese. Stir to combine until the cheese has melted and the sauce thickens slightly (don't let the sauce boil. Add garlic powder, salt and a small pinch of black pepper, then stir to combine. TIP: If necessary, make the sauce ahead of time, then re-heat it a few minutes before the pasta has finished cooking.

    3. Bring a large saucepan of lightly salted water to a boil; cook pasta according to package directions (cook time is usually 10-12 minutes). Once pasta is fully cooked, drain the water (don't rinse the pasta), then immediately put the hot, drained pasta back into the pan. Add warm, cubed chicken and chopped spinach.

    4. Pour hot alfredo sauce on top; toss gently until all ingredients are combined and covered with sauce. If sauce seems too thick, add a bit more cream (or milk); stir to combine. Taste pasta, add more salt and pepper, if desired.

    5. Serve immediately while hot. If desired (optional)-garnish pasta with additional Parmesan and/or clack pepper. Enjoy!

    Nutrition Facts
    Bowtie Pasta Alfredo and Chicken
    Amount Per Serving (1 (1/4 of total))
    Calories 670 Calories from Fat 378
    % Daily Value*
    Fat 42g65%
    Saturated Fat 25g156%
    Trans Fat 0.5g
    Polyunsaturated Fat 2g
    Monounsaturated Fat 10g
    Cholesterol 146mg49%
    Sodium 678mg29%
    Potassium 455mg13%
    Carbohydrates 48g16%
    Fiber 2g8%
    Sugar 3g3%
    Protein 26g52%
    Vitamin A 2509IU50%
    Vitamin C 4mg5%
    Calcium 289mg29%
    Iron 1mg6%
    * Percent Daily Values are based on a 2000 calorie diet.

    Here’s one more to pin on your Pinterest boards!Bowtie Pasta Alfredo and Chicken is a delicious 30-minute dish, with pasta, chicken and fresh spinach in a creamy butter Parmesan sauce.

    Panzanella Salad

    Panzanella Salad is a classic Mediterranean dish with tomatoes, croutons, white beans, arugula, Parmesan & herbs in oil and vinegar dressing.Panzanella Salad is a classic Mediterranean dish with tomatoes, croutons, white beans, arugula, Parmesan & herbs in oil and vinegar dressing.

    Panzanella salad is a classic dish, famous throughout the Mediterranean region, especially the Tuscan region of Italy where it is generally thought to have its roots.

    Apparently, this dish started out as a simple way for “common people” to use up their stale homemade bread. They would combine it with oil, vinegar, herbs, and vegetables like cucumbers, etc. to make a meal.

    Once tomatoes were introduced into Europe, they were added to the basic salad and soon this simple peasant salad became a favorite “bread and tomato” salad. Eventually even the royal class came to love this flavorful salad and the rest is history, as they say.

    Today I want to show you how easy a panzanella salad (with cannellini beans and arugula) is to make. I can assure you it’s really delicious and hopefully this encourages you to try it! Here’s how to make it.

    Scroll Down For A Printable Recipe Card At The Bottom Of The Page

    Prepare The Bread Croutons

    TIP: I recommend baking the croutons while the salad is marinating (see further below) in order to save time.

    Cut STALE Italian Bread (or sourdough) into bite-sized cubes (crust included). Using stale bread is the best way to ensure the croutons hold their shape and don’t get soggy!

    You will need about 2 cups of cubed stale bread for this salad. Toss the bread cubes with a Tablespoon of extra virgin olive oil to cover and then lightly season with salt and black pepper.

    Place them in a single layer on a baking sheet. Bake in a preheated 350°F. oven for 15-20 minutes, being sure to stir them every 4-5 minutes until they become lightly browned and crisp.

    The two photos shown below are from a previous blog post of mine showing how to make Air Fryer salad croutons (with butter and spices). I used these nicely seasoned croutons when I photographed this recipe.

    Stale Italian or sourdough bread is cut into bite-sized cubes.Crispy bread croutons are a main ingredient in a panzanella salad.

    Make A Simple Dressing For The Salad

    The salad dressing for panzanella salad is very simple to make and uses only a few ingredients. The key is to make the dressing in the same bowl you will serve the salad in because the remaining salad ingredients will be added into the bowl.

    Whisk together 1½ Tablespoons of red wine vinegar and ⅛ teaspoon salt. Slowly drizzle in 1½ Tablespoons of extra virgin olive oil, WHISKING CONSTANTLY while you add it!

    Olive oil is drizzled and whisked into olive oil and salt in a salad bowl.

    Once the oil and vinegar mixture has emulsified (completely blended), the dressing is ready for the final ingredient additions.

    Salad dressing is whisked until the oil and vinegar become emulsified.

    Add Tomatoes, Beans, Herbs And Let Marinate

    Chop the tomatoes, saving all the juice and seeds. Place the chopped tomatoes and all the seeds and juice into the bowl. The dressing will take on a slightly red color.

    Next add drained cannellini beans (for protein!), thin red onion slices, fresh basil and fresh oregano (½ the total amount of basil and oregano called for).

    Cannellini beans, tomatoes, onion and fresh basil and oregano added to salad dressing.

    Toss these salad ingredients together well, to ensure they are all covered fairly well with the oil and vinegar salad dressing.

    Once they’re fully combined, let the salad “rest and marinate” for 20 minutes. This is a perfect time to bake the croutons!

    Mixture is tossed to combine with salad dressing, then marinates for 20 minutes.

    Finish The Panzanella Salad

    After the panzanella salad has marinated for 20 minutes, add 1½ cups of baby arugula to the salad. I was fortunate to be able to use our first picking of baby arugula from our backyard raised bed garden! Whoo Hoo!

    Baby arugula leaves are added to the panzanella salad and tossed to combine.

    Now add the toasted (cooled) croutons and toss the panzanella salad very well, to cover everything with the salad dressing. I’m always amazed at how good this salad smells, because of the fresh basil and oregano!

    Take a small bite and season with additional salt and black pepper, if desired. Now the last step is to garnish the salad with Parmesan cheese and serve!

    Crisp homemade croutons are tossed into the panzanella salad before serving.

    Right before serving, add the Parmesan. You can finely grate it on top of the salad (shown in the 1st photo below) or use the other way, shown in the 2nd photo below.

    Finely grated parmesan cheese can be used to garnish the finished salad.

    The other way we enjoy adding the fresh Parmesan is to very thinly slice the cheese and add the thin ribbons of cheese to the salad (shown below).

    There’s no right or wrong way to add the parmesan cheese… just make sure you add it! The Parmesan adds another layer of fantastic flavor to this delicious savory salad.

    Serve the panzanella salad immediately and enjoy it’s fantastic Mediterranean-inspired flavor! We enjoyed it this time served alongside a small piece of grilled halibut (and salsa). YUM!

    Thin slices of Parmesan are added to the panzanella salad on a plate with halibut.

    I hope you have the opportunity to make this classic salad for yourself and those you love. My hope is that you enjoy it as much as we do!

    Thank you so much for stopping by, and I invite you to come back again soon for more family-friendly recipes. Take care, may God bless you, and have a wonderful day!

    Looking For More SALAD Recipes?

    You can find ALL of my recipes in the Recipe Index, which is located at the top of the page. I have lots of delicious salad recipes (savory and sweet) you may enjoy, including:

    Want More Recipes? Get My FREE Newsletter!

    I publish a newsletter 2 times per month (1st and 15th) with lots of recipes, tips, etc..
    Would you like to join our growing list of subscribers?

    There is a Newsletter subscription box on the top right (or bottom) of each blog post, depending on the device you use.
    You can submit your e-mail address there, to be added to my mailing list.

    Find Me On Social Media:

    Facebook page: The Grateful Girl Cooks!
    Pinterest:
    The Grateful Girl Cooks!
    Instagram:
    jbatthegratefulgirlcooks

    Author's signature

    Recipe adapted from: “The Complete Mediterranean Cookbook”, page 91, published in 2016 by The Editors of America’s Test Kitchen

    ↓↓ PRINTABLE RECIPE BELOW ↓↓

    0 from 0 votes
    Panzanella Salad
    Prep Time
    10 mins
    Cook Time
    0 mins
    Resting Time (inactive prep)
    20 mins
    Total Time
    30 mins
     

    Panzanella Salad is a classic Mediterranean dish with tomatoes, croutons, white beans, arugula, Parmesan & herbs in oil and vinegar dressing.

    Category: Salad
    Cuisine: Mediterranean
    Keyword: panzanella salad
    Servings: 3
    Calories Per Serving: 324 kcal
    Author: JB @ The Grateful Girl Cooks!
    Ingredients
    For Croutons:
    • 2 cups stale Italian or sourdough bread cubes
    • 1 Tablespoon extra virgin olive oil
    • salt and pepper, to lightly season
    For Dressing And Salad:
    • Tablespoons red wine vinegar
    • teaspoon salt
    • Tablespoons extra virgin olive oil
    • ¾ pound ripe red tomatoes* *cored/ chopped (SAVE JUICE/SEEDS)
    • 1 cup cannellini beans drained and rinsed
    • ½ small red onion very thinly sliced
    • Tablespoons fresh basil* chopped *DIVIDED USE
    • 1 Tablespoon fresh oregano minced *DIVIDED USE
    • cup baby arugula
    • salt and pepper to taste
    • 1 ounce Parmesan cheese grated or shaved
    Instructions
    For Simple Homemade Croutons:
    1. Cut STALE bread into bite-sized cubes. Toss bread cubes well with 1 Tbsp. olive oil then season lightly with salt/pepper. Place cubes in a single layer on baking sheet. Bake at 350°F. for 15-20 minutes, stirring every 4-5 minutes until lightly browned and crisp. Remove from pan; let cool.

    Salad Dressing And Salad:
    1. Make salad dressing in the same bowl you will serve the salad in. Whisk together 1½ Tbsp. red wine vinegar and ⅛ tsp. salt. Slowly drizzle in 1½ Tbsp. olive oil, WHISKING CONSTANTLY while adding!

    2. Chop tomatoes, saving the juice and seeds. Place tomatoes, seeds and juice into bowl with salad dressing. Add cannellini beans, red onion, ¾ Tbsp. fresh basil and ½Tbsp. oregano (this is half of total amt. called for). Toss well, to cover everything with salad dressing. Set bowl aside. Let salad "rest and marinate" for 20 minutes.

    3. Add arugula and croutons to salad; toss to combine everything. Take a bite, season with additional salt and black pepper, if desired.

    4. Garnish salad with grated or shaved Parmesan cheese. Serve immediately. Enjoy!

    Recipe Notes

    TIP: I recommend baking the croutons while the salad "rests" (for 20 minutes). in order to save time!

    Nutrition Facts
    Panzanella Salad
    Amount Per Serving (1 (1/3 of total))
    Calories 324 Calories from Fat 189
    % Daily Value*
    Fat 21g32%
    Saturated Fat 7g44%
    Trans Fat 0.05g
    Polyunsaturated Fat 3g
    Monounsaturated Fat 11g
    Cholesterol 6mg2%
    Sodium 715mg31%
    Potassium 415mg12%
    Carbohydrates 27g9%
    Fiber 6g25%
    Sugar 10g11%
    Protein 10g20%
    Vitamin A 1377IU28%
    Vitamin C 19mg23%
    Calcium 211mg21%
    Iron 3mg17%
    * Percent Daily Values are based on a 2000 calorie diet.

    Here’s one more to pin on your Pinterest boards!Panzanella Salad is a classic Mediterranean dish with tomatoes, croutons, white beans, arugula, Parmesan and herbs in oil and vinegar dressing.

    Broiled Honey Dijon Salmon

    Looking for a quick dinner? Make Broiled Honey Dijon Salmon in 10 minutes! Coated in honey Dijon sauce and broiled, it’s easy and delicious!
    Looking for a quick dinner? Make Broiled Honey Dijon Salmon in 10 minutes! Coated in honey Dijon sauce and broiled, it's easy and delicious!

    Today I want to share a delicious dinner recipe featuring skinless salmon fillets! You know those nights when you need to get something good on the table for dinner, but it’s been a CRAZY busy day? That’s when this recipe will come in handy.

    It’s as simple as whipping up a super easy sauce in under a minute, basting it on salmon fillets and cooking it under an oven broiler until done. That’s it!

    How easy is that? The whole thing is typically on the table in about 10 minutes, from start to finish and has wonderful flavor. It’s EASY, it’s QUICK, and it’s GOOD! Here’s how to make Broiled Honey Dijon Salmon.

    Scroll Down For A Printable Recipe Card At The Bottom Of The Page

    Make the Honey Dijon Sauce

    The only other ingredients you’ll need besides the salmon fillets are the ones used to make the delicious seasoning sauce. They are sea salt, chili powder, apple cider vinegar, cayenne pepper, honey, Dijon mustard and ground black pepper.

    The spices and condiments used to season the salmon fillets are shown.

    Combine all the sauce ingredients in a small bowl and stir well, until they are fully combined. This mixture is what you will use to bring additional flavor to the salmon.

    Ingredients used to season the salmon fillet are combined in a small bowl.

    Prepare The Salmon

    Pat boneless, skinless salmon fillet dry by blotting them well using a paper towel to remove excess moisture.

    Two thin salmon fillets are patted dry using a paper towel.

    The salmon I used this time were fairly thin (about ¾” thick), which means less cooking time, because thinner fillets take less time to cook through (approx. 7 minutes).

    I normally use fillets that are 1″-1¾” thick, but either size is perfectly fine for this recipe, and both will yield good results if you simply keep an eye on them as they cook.

    Place the fillets on parchment paper or aluminum foil and then place them on a rimmed baking sheet before seasoning the salmon. 

    Two salmon fillets are placed on a parchment paper-lined baking sheet.

    Here’s a photo of two thicker salmon fillets. If using fillets this size (about 1″-1¾” thick) it will usually take about 8-9 minutes to fully finish cooking them through.

    Two thicker salmon fillets are shown as a comparison.

    Add The Honey Dijon Sauce And Then Broil

    Use a pastry brush to fully coat each salmon fillet with the honey Dijon sauce. Put the sauce on thick and use it all to cover the top and sides of each piece.

    Two skinless salmon fillets are covered with a honey Dijon seasoning sauce before broiling.

    Turn your oven setting to BROIL. Place the baking sheet about 5″-6″ away from the heat source. Broil the salmon for 7-10 minutes, depending on the thickness of the fillets you are using. 

    Rotate the pan once during the broiling time to ensure even cooking. Keep an eye on the salmon as it cooks, to make sure it doesn’t “overcook” and dry out. The salmon, when done, should be cooked to a safe internal temperature of 145° and should flake easily with a fork.

    After cooking, the broiled honey Dijon salmon is cooked through and flakes easily.

    Serve the broiled honey Dijon salmon with some of your favorite sides and enjoy this quick and easy seafood meal!

    Two pieces of broiled honey Dijon salmon shown on a plate with rice and asparagus.

    Steamed white rice and some crisp-tender steamed asparagus were the side dishes that were enjoyed with the salmon. Both pieces are shown on the plate in the photo below. It was all quite delicious!

    Asparagus and white rice, served on a white plate with broiled honey Dijon salmon.

    I hope you have the opportunity to try broiled honey Dijon salmon and trust you will enjoy it as much as we do! It is such a quick prep for a really delicious dinner.

    Thanks for stopping by, and I invite you to come back again soon for more family-friendly recipes. Take care, may God bless you, and have a wonderful day, friend.

    Looking For More SALMON Recipes?

    You can find ALL of my recipes in the Recipe Index, which is located at the top of the page. I have lots of delicious salmon recipes to choose from, including:

    Want More Recipes? Get My FREE Newsletter!

    I publish a newsletter 2 times per month (1st and 15th) with lots of recipes, tips, etc..
    Would you like to join our growing list of subscribers?

    There is a Newsletter subscription box on the top right (or bottom) of each blog post, depending on the device you use.
    You can submit your e-mail address there, to be added to my mailing list.

    Find Me On Social Media:

    Facebook page: The Grateful Girl Cooks!
    Pinterest:
    The Grateful Girl Cooks!
    Instagram:
    jbatthegratefulgirlcooks

    Author's signature

    Original recipe source: unknown

    ↓↓ PRINTABLE RECIPE BELOW ↓↓

    0 from 0 votes
    Broiled Honey Dijon Salmon
    Prep Time
    2 mins
    Cook Time
    8 mins
    Total Time
    10 mins
     

    Looking for a quick dinner? Make Broiled Honey Dijon Salmon in 10 minutes! Coated in honey Dijon sauce and broiled, it's easy and delicious!

    Category: Entree-Seafood
    Cuisine: All Cuisines
    Keyword: broiled honey Dijon salmon
    Servings: 2
    Calories Per Serving: 201 kcal
    Author: JB @ The Grateful Girl Cooks!
    Ingredients
    • 2 (4-5 oz.) skinless salmon fillets approx. 1" thick
    For Seasoning Sauce:
    • 1 Tablespoon honey
    • 1 Tablespoon Dijon mustard
    • 1 Tablespoon apple cider vinegar
    • ½ teaspoon chili powder
    • ¼ teaspoon sea salt
    • 1 pinch ground black pepper
    • 1 pinch cayenne pepper
    Instructions
    1. Turn oven to BROILER setting to preheat. Cover a baking sheet with parchment paper or aluminum foil.

    2. Combine all sauce ingredients in a small bowl; stir until fully combined.

    3. Blot salmon fillets dry using a paper towel. Place fillets on prepared baking sheet. Use a pastry brush to fully coat each salmon fillet (top and sides) with sauce.

    4. Place baking sheet 5"-6" away from the heat source. Broil salmon for 7-10 minutes, depending on the thickness of the fillets. Rotate the pan once during broiling to ensure even cooking. Keep an eye on the salmon as it cooks, so it doesn't "overcook" and dry out. The salmon should be cooked to a safe internal temperature of 145° and flake easily with a fork when done.

    5. Serve and enjoy!

    Nutrition Facts
    Broiled Honey Dijon Salmon
    Amount Per Serving (1 g)
    Calories 201 Calories from Fat 72
    % Daily Value*
    Fat 8g12%
    Saturated Fat 1g6%
    Polyunsaturated Fat 3g
    Monounsaturated Fat 3g
    Cholesterol 62mg21%
    Sodium 432mg19%
    Potassium 589mg17%
    Carbohydrates 9g3%
    Fiber 1g4%
    Sugar 9g10%
    Protein 23g46%
    Vitamin A 220IU4%
    Vitamin C 0.1mg0%
    Calcium 22mg2%
    Iron 1mg6%
    * Percent Daily Values are based on a 2000 calorie diet.

    Here’s one more to pin on your Pinterest boards!Looking for a quick dinner? Make Broiled Honey Dijon Salmon in 10 minutes! Coated in honey Dijon sauce and broiled, it's easy and delicious!

    Skillet Chicken and Garbanzo Salad

    Skillet Chicken and Garbanzo Salad is an easy meal, with a Mediterranean-inspired salad and dressing served with (and on) pan-seared chicken.
    Skillet Chicken and Garbanzo Salad is an easy meal, with a Mediterranean-inspired salad and dressing served with (and on) pan-seared chicken.

    If you’re looking for a quick-and-easy meal to prepare, I want to share this recipe for Skillet Chicken and Garbanzo Salad. I found the original recipe in one of the cookbooks I own and slightly adapted it for my husband and I.

    This is an all-in-one meal, because pan-seared chicken AND garbanzo salad (also known as chickpeas) are prepared separately but served together sharing a common flavorful salad dressing.

    The garbanzo salad takes a minute or two to make, because it only has 3 main ingredients: garbanzo beans, mint and red onion slices. This simple salad is then tossed with an easy to make salad dressing (with traditional Mediterranean flavors of olive oil, lemon juice, honey, mint and spices).

    The beauty of this yummy salad dressing is that part of it is reserved to drizzle (like sauce) over the pan-seared chicken once it’s done! This means the salad and the chicken share similar flavors making it a great combination of main dish and side dish!

    This recipe will serve two people (one chicken breast and half the salad per person), but it can EASILY be doubled or tripled to meet your needs! Here’s how to make skillet chicken and garbanzo salad. 

    Scroll Down For A Printable Recipe Card At The Bottom Of The Page

    Make The Dressing For The Salad And Chicken

    Measure 2 Tbsp. extra virgin olive oil and 2 Tbsp. of fresh lemon juice into a medium-sized bowl. Add honey, smoked paprika, ground cumin, salt and black pepper. Use a whisk to combine all these ingredients until they are fully incorporated. 

    Olive oil, lemon juice, honey and spices are combined to make a salad dressing.

    IMPORTANT: Divide the prepared salad dressing in half, reserving one half in a small separate bowl for later to drizzle on chicken when you serve it).

    Set the other half of the remaining dressing aside. You will use this half to add to the garbanzo salad.

    Salad dressing is divided into two portions for two different uses.

    Prepare The Garbanzo Bean Salad

    Drain and then rinse the garbanzo beans. Place the rinsed garbanzos in a bowl, then add thinly sliced red onion and chopped fresh mint leaves.

    Drained garbanzo beans are mixed with fresh chopped mint and thinly sliced red onions.

    Add the salad dressing (use one of the two portions set aside), and toss well, to fully combine the salad ingredients and dressing. Take a small bite of the salad and add additional salt and pepper, if desired, to suit your taste.

    Set the salad aside while you cook the chicken. There’s no need to refrigerate it because the chicken will cook very quickly!

    The garbanzo salad is tossed with homemade salad dressing until combined.

    Prepare The Chicken Breasts

    Trim any visible fat off two boneless, skinless chicken breasts. Pat the chicken dry using paper towels. Place each piece in between two sheets of plastic wrap (on a cutting board).

    Pound the chicken with the flat side of a meat mallet until the thicker parts of the chicken breast have flattened out slightly. This will help the chicken breast to cook faster, so don’t skip this step.

    A chicken breast (between plastic wrap) is pounded with flat side of meat mallet.

    Repeat this with the second piece of chicken, then lightly season each chicken breast with enough salt and black pepper to suit your taste.

    Chicken is flattened and then seasoned with ground pepper and salt.

    Place 3 heaping Tablespoons of flour on a dinner plate and spread it out slightly. Dredge chicken breasts in the flour (one at a time), turning until all the sides are coated.

    A chicken breast, coated in flour, seasoned with salt and pepper rests on a plate.

    Pan-Sear The Chicken Breasts

    Heat 1 Tablespoon of extra virgin olive oil in a medium-sized skillet on Medium-High heat. Heat the oil until it is very hot, but only BARELY smoking.

    Carefully add both of the seasoned, floured chicken breasts into the hot skillet. Once you add the chicken breasts, do not move them in the skillet, because you want to “sear” the underside of the meat well.

    Cook the chicken, undisturbed for 4-5 minutes. The bottom of the chicken should be nicely browned and have a slight “crust” on it. 

    A couple of seasoned, floured chicken breasts cooking in hot oil in skillet.

    Carefully turn the chicken to the other side with tongs and continue cooking the chicken breasts for 4-5 more minutes. When done, the chicken should be nicely browned on both sides and have an internal temperature of 160°F.

    NOTE: Typically, the chicken breasts take about 8-10 minutes total time to cook through, but this time may vary slightly, due to the thickness of the chicken breasts you use.

    Remove the pan-seared chicken from the skillet. Cover the chicken loosely with foil to keep it hot, and let it rest for 3-4 minutes so the internal juices have a chance to redistribute in the meat. The internal temperature of the chicken will continue to slightly rise as it rests.

    Two pan-seared chicken breasts cooking in olive oil in a skillet.

    Serve The Skillet Chicken And Garbanzo Salad

    Now you’re ready to serve the skillet chicken and garbanzo salad! Place the chicken breasts onto two dinner plates and evenly divide the garbanzo salad next to each piece of chicken.

    Remember that reserved portion of salad dressing you set aside earlier? Grab that bowl and then spoon or drizzle that delicious dressing over the top of each piece of chicken.

    Garlic bread accompanies the skillet chicken and garbanzo salad on the plate.

    Pretty easy to make this simple Mediterranean-style dinner for two, right? Serve with other favorite side dishes or a piece of crusty garlic bread and you’ve got yourself a delicious meal!

    The garbanzo salad is simple yet delicious, and the chicken is tender and enhanced with the same yummy dressing flavor!

    Skillet chicken and garbanzo salad is served with garlic bread on a white plate.

    I hope you have the opportunity to make this delicious combination of skillet chicken and garbanzo salad, and trust you’ll enjoy it like we do! It’s such an easy recipe to pull together quickly after a busy day.

    Thank you for stopping by, and I invite you to come back again soon for more family-friendly recipes. Take care, may God bless you, and have a wonderful day.

    Looking For More CHICKEN Recipes?

    You can find ALL of my recipes in the Recipe Index, which is located at the top of the page. I have LOTS of delicious chicken recipes to choose from, including:

    Want More Recipes? Get My FREE Newsletter!

    I publish a newsletter 2 times per month (1st and 15th) with lots of recipes, tips, etc..
    Would you like to join our growing list of subscribers?

    There is a Newsletter subscription box on the top right (or bottom) of each blog post, depending on the device you use.
    You can submit your e-mail address there, to be added to my mailing list.

    Find Me On Social Media:

    Facebook page: The Grateful Girl Cooks!
    Pinterest:
    The Grateful Girl Cooks!
    Instagram:
    jbatthegratefulgirlcooks

    Author's signature

    Recipe adapted from: “The Complete Mediterranean Cookbook”, page 293, published in 2016 by The Editors at America’s Test Kitchen

    ↓↓ PRINTABLE RECIPE BELOW ↓↓

    0 from 0 votes
    Skillet Chicken And Garbanzo Salad
    Prep Time
    10 mins
    Cook Time
    10 mins
    Total Time
    20 mins
     

    Skillet Chicken and Garbanzo Salad is an easy meal, with a Mediterranean-inspired salad and dressing served with (and on) pan-seared chicken.

    Category: Main Dish
    Cuisine: Mediterranean
    Keyword: garbanzo salad, skillet chicken
    Servings: 2
    Calories Per Serving: 563 kcal
    Author: JB @ The Grateful Girl Cooks!
    Ingredients
    • 3 Tablespoons extra virgin olive oil* *DIVIDED USE
    • 2 Tablespoons fresh lemon juice
    • ½ teaspoon honey
    • ½ teaspoon smoked paprika
    • ¼ teaspoon ground cumin
    • teaspoon salt
    • teaspoon ground pepper + more to taste, if desired
    • 15 ounces canned garbanzo beans (chickpeas) drained, rinsed
    • ¼ small red onion very thinly sliced
    • 2 Tablespoons fresh mint leaves, chopped
    • 8 ounces boneless skinless chicken breast* *2 breasts, about 4-6 oz. each
    • 3 Tablespoons all-purpose flour* *use heaping Tablespoons
    • salt and pepper, to season chicken as desired
    Instructions
    Salad Dressing:
    1. Measure 2 Tablespoons olive oil (not the entire amt. listed) and lemon juice into a small bowl. Add honey, smoked paprika, cumin, salt and pepper. Whisk these ingredients until fully incorporated. Divide salad dressing in half, reserving one half in a small separate bowl for later. Set remaining half of the dressing aside (this half is for the salad.

    Salad:
    1. Drain/rinse garbanzo beans. Place garbanzos, red onion and mint in a bowl. Add salad dressing one of the two portions set aside). Toss until combined. Taste; add more salt & pepper, if desired. Set salad aside while you cook the chicken.

    Chicken:
    1. Trim visible fat off chicken; pat chicken dry with paper towels. Place each piece in between two sheets of plastic wrap (on a cutting board). Pound chicken with flat side of a meat mallet until thicker parts are flattened (helps it cook faster, don't skip this). Lightly season chicken with salt and pepper to suit your taste. Measure flour onto a plate; spread it out. Dredge chicken breasts in flour (one at a time), turning until all sides are coated.

    2. Heat remaining 1 Tbsp. oil in a medium skillet on Medium-High heat. Heat until oil is very hot, but only BARELY smoking. Add chicken breasts, then don't move them in the skillet. Cook the chicken, undisturbed, for 4-5 minutes. The bottom of each piece should be nicely browned and develop a slight "crust". 

    3. Turn chicken over; continue cooking 4-5 more minutes. When done, chicken should be golden brown on both sides and have an internal temp. of 160°F. NOTE: The chicken typically takes about 8-10 minutes total to cook through, but time may vary slightly, due to the thickness of the chicken breasts you use. Remove chicken from skillet. Cover with foil loosely and let it rest 3-4 minutes to let internal juices redistribute in the chicken.

    4. To serve, place 1 chicken breast and half the garbanzo salad on each plate. Drizzle reserved dressing over each chicken breast, serve and enjoy!

    Recipe Notes

    NOTE: Caloric calculation was made using two, 4-ounce boneless, skinless chicken breasts.

    Nutrition Facts
    Skillet Chicken And Garbanzo Salad
    Amount Per Serving (1 piece chicken + salad)
    Calories 563 Calories from Fat 252
    % Daily Value*
    Fat 28g43%
    Saturated Fat 4g25%
    Trans Fat 0.01g
    Polyunsaturated Fat 5g
    Monounsaturated Fat 17g
    Cholesterol 73mg24%
    Sodium 872mg38%
    Potassium 820mg23%
    Carbohydrates 42g14%
    Fiber 11g46%
    Sugar 2g2%
    Protein 36g72%
    Vitamin A 530IU11%
    Vitamin C 10mg12%
    Calcium 102mg10%
    Iron 4mg22%
    * Percent Daily Values are based on a 2000 calorie diet.

    Here’s one more to pin on your Pinterest boards! Skillet Chicken and Garbanzo Salad is an easy meal, with a Mediterranean-inspired salad and dressing served with (and on) pan-seared chicken.
     

    Grilled Plank Salmon and Tomatoes

    Enjoy delicious Grilled Plank Salmon and Tomatoes for a BBQ! Salmon cooked on cedar planks is served with grilled, seasoned cherry tomatoes.
    Enjoy delicious Grilled Plank Salmon and Tomatoes for a BBQ! Salmon cooked on cedar planks is served with grilled, seasoned cherry tomatoes.

    I don’t know about you, but we enjoy grilling outside when Oregon’s rainy season is gone and the days heat up! My husband is our family’s “Grill-Master”, so he did the grilling you will see for this blog post!

    We love salmon so much and today I want to share a recipe that shows how to make Grilled Plank Salmon and Tomatoes on a BBQ. This time we grilled 2 small salmon fillets (about 5 oz. each) for my husband and myself on a cedar plank.

    In the past I’ve shared another great recipe for grilling a large salmon fillet on a cedar plank (with spices, lemon slices, etc.) for a larger number of servings. You can check out that recipe for Cedar Plank Grilled Salmon here.

    Both recipes are wonderful and I’m confident you’ll enjoy them. But for now… here’s how easy it is to make absolutely delicious Grilled Plank Salmon and Tomatoes.

    Scroll Down For A Printable Recipe Card At The Bottom Of The Page

    First Thing – Soak The Cedar Plank!

    NOTE: You can purchase cedar planks at most grocery stores nowadays. They usually come in packs of 3-4, are fairly inexpensive and typically are located near a fresh seafood counter.

    You will need to plan ahead because cedar planks must be thoroughly soaked in water before they are put on the grill. The soaking of the wood ensures the wood won’t burn right in front of your eyes while you’re grilling! Do NOT skip this step!

    Stop up your kitchen sink and soak the cedar board (completely covered in water) for at least 35-40 minutes before putting it on the grill. You will have to weigh the board down in the water.

    I usually fill several pans or large bowls with water to weigh it down and keep the board fully submerged in the water. Whatever item(s) you choose to use for this, the key is to use something heavy on top of the board! Once fully soaked, remove the plank from the water.

    A cedar plank is necessary to cook the salmon fillets for this recipe on a BBQ.

    Prepare The Salmon Fillets For The BBQ

    Pat two salmon fillets dry using paper towels. The spices you will need to season the fillets are onion powder, garlic powder, salt (table salt or sea salt) and black pepper.

    Two salmon fillets along with spices used when cooking the fish.

    Lightly season the salmon with the spices on both sides. Lay the salmon fillets on top of the soaked cedar plank, leaving only a small space in between them. Sprinkle each one with a few chopped fresh parsley leaves on top.

    The seasoned salmon fillets rest on a soaked cedar plank before grilling.

    Season The Cherry Tomatoes

    In a separate bowl, place de-stemmed cherry tomatoes (use about 20 of them for this recipe). Any kind of cherry tomatoes will be fine, but I enjoy using multi-colored tomatoes, so they look more interesting on the serving plate!

    Drizzle the tomatoes lightly with extra virgin olive oil and gently toss them to coat. Season them lightly with salt, pepper, garlic powder and some Italian seasoning.

    The cherry tomatoes don’t need much seasoning, so go easy when sprinkling it on. Gently stir the tomatoes to distribute the seasoning evenly.

    Colorful cherry tomatoes are covered with olive oil and spices before grilling.

    Cook The Salmon

    Heat your BBQ (gas or briquettes) until it’s really hot. Lay the soaked cedar plank (with salmon on top) directly on the hot grill grate over the hot coals.

    Put the lid on the BBQ and let the salmon cook (and smoke) for 25-30 minutes undisturbed. The cooking time may vary slightly depending on the thickness of the salmon fillets you are using. 

    The grilled plank salmon cooks over a bed of hot coals on a BBQ.

    The grilled plank salmon is done when it is cooked through, flakes easily, and has reached an internal temperature of 145°F. Remove the plank from the grill, take it inside, and cover the salmon to keep it warm while you grill the tomatoes.

    Two grilled cedar plank salmon fillets rest after they are fully cooked.

    Grill The Cherry Tomatoes

    As soon as the salmon is done, place the seasoned tomatoes in a grilling basket and place the basket directly on the grill grate over the hot coals. Cook the tomatoes for 2-3 minutes total, turning them often (and gently) as they cook. 

    Cherry tomatoes are grilled in a wire basket over hot BBQ coals.

    The cherry tomatoes will begin to “blister” as they cook and are exposed to the high heat of the grill. They may even get a few light char marks. Once they’re blistered (don’t overcook!), remove the basket immediately from the grill and take inside.

    When finished grilling, the cherry tomatoes are blistered on the outside.

    Garnish The Grilled Tomatoes

    Sprinkle the blistered, hot tomatoes with grated fresh Parmesan cheese, sprinkle with fresh chopped parsley, and GENTLY toss to cover them all.

    Topped with parmesan and parsley, the grilled tomatoes are ready to serve.

    Serve The Grilled Plank Salmon And Tomatoes

    To serve the salmon fillets on a platter, place the grilled plank salmon and tomatoes onto the serving platter, surrounding the salmon with the hot grilled tomatoes for a colorful presentation. 

    Grilled Plank Salmon and Tomatoes are served on a large platter.

    To serve on individual plates, place a salmon fillet on each plate and surround it with some of the grilled, “blistered” tomatoes. 

    When you take a bite of those little grilled tomatoes, they pop with juices and sweet flavor and are a great addition to the smoky grilled salmon. YUM!

    We also enjoyed having some homemade potato gnocchi along with the salmon and tomatoes to round out the meal.

    A white dinner plate with potato gnocchi and Grilled Plank Salmon and Tomatoes on it.

    I hope you have a chance to grill this delicious salmon dish and trust you will find it as enjoyable as we do! It’s such a simple meal to prepare, but it tastes SO GOOD!

    Thanks for stopping by today and I invite you to come back again soon for more family-friendly recipes. Take care, may God bless you, and I hope you enjoy a wonderful day.

    Looking For More SALMON Recipes?

    You can find ALL of my recipes in the Recipe Index, which is located at the top of the page. I have a nice variety of delicious salmon recipes to check out, including:

    Want More Recipes? Get My FREE Newsletter!

    I publish a newsletter 2 times per month (1st and 15th) with lots of recipes, tips, etc..
    Would you like to join our growing list of subscribers?

    There is a Newsletter subscription box on the top right (or bottom) of each blog post, depending on the device you use.
    You can submit your e-mail address there, to be added to my mailing list.

    Find Me On Social Media:

    Facebook page: The Grateful Girl Cooks!
    Pinterest:
    The Grateful Girl Cooks!
    Instagram:
    jbatthegratefulgirlcooks

    Author's signature

    ↓↓ PRINTABLE RECIPE BELOW ↓↓

    0 from 0 votes
    Grilled Plank Salmon and Tomatoes
    Prep Time
    10 mins
    Cook Time
    25 mins
    Soaking Time for Cedar Plank
    40 mins
    Total Time
    1 hr 15 mins
     

    Enjoy delicious Grilled Plank Salmon and Tomatoes for a BBQ! Salmon cooked on cedar planks is served with grilled, seasoned cherry tomatoes.

    Category: Main Dish
    Cuisine: All Cuisines
    Keyword: grilled plank salmon and tomatoes
    Servings: 2
    Calories Per Serving: 307 kcal
    Author: JB @ The Grateful Girl Cooks!
    Ingredients
    For Salmon:
    • 10 ounces skinless salmon fillets 2 fillets- 5 oz. each
    • * garlic powder *Enough to lightly season fish (both sides)
    • * onion powder *Enough to lightly season fish (both sides)
    • * salt and pepper *Enough to lightly season fish (both sides)
    • * chopped fresh parsley *Enough to lightly garnish fish
    For Tomatoes:
    • 20 small cherry tomatoes multi-colored, if available
    • 2 tsp. extra virgin olive oil
    • * garlic powder *Enough to lightly season tomatoes
    • * salt and pepper *Enough to lightly season tomatoes
    • * Italian seasoning *Enough to lightly season tomatoes
    To Garnish Grilled Tomatoes:
    • 1 Tbsp. fresh grated Parmesan cheese
    • 1 teaspoon chopped fresh parsley
    Instructions
    1. Soak cedar plank: Plan ahead because cedar planks must be thoroughly soaked in water before they are put on the grill. Soaking ensures the wood won't burn up while grilling! Do NOT skip this step! Stop up your kitchen sink; soak the cedar board (covered in water) at least 35-40 minutes before putting it on the grill. Weigh the board down to keep it submerged.
    2. Prepare Salmon: Pat salmon dry using paper towels. Lightly season salmon with spices on both sides. Lay salmon fillets on top of soaked cedar plank, leaving small space in between them. Sprinkle salmon with chopped fresh parsley.

    3. Prepare tomatoes: Place de-stemmed cherry tomatoes in small bowl. Drizzle with olive oil; toss gently to coat. Season lightly with salt, pepper, garlic powder and Italian seasoning. Gently stir tomatoes to distribute seasoning evenly. Set aside.

    4. Grill Salmon: Heat BBQ (gas or briquettes) until really hot. Lay soaked cedar plank (with salmon on top) directly on the hot grill grate over hot coals. Cover BBQ; let salmon cook (covered) undisturbed for 25-30 minutes. Cooking time may vary slightly depending on thickness of the salmon. Salmon is done when cooked through, flakes easily, and has reached an internal temp. of 145°F. Remove plank from grill, take inside; cover salmon; keep it warm while you grill the tomatoes.

    5. Grill Tomatoes: As soon as plank is removed, place tomatoes in a grilling basket; place basket directly on the grill grate over hot coals. Cook 2-3 minutes, turning often (and gently). Remove when tomatoes are blistered; take inside. Sprinkle tomatoes with Parmesan and fresh parsley.

    6. Serve the salmon fillets with the grilled tomatoes and enjoy!

    Recipe Notes

    NOTE: The seasoning amounts are not specified in some cases. Use only enough of each one to lightly season the fish (on both sides) and the tomatoes. If no amount is identified, this seasoning was not included in the dietary calculation as amounts used may vary.

    Nutrition Facts
    Grilled Plank Salmon and Tomatoes
    Amount Per Serving (1 (1/2 of total))
    Calories 307 Calories from Fat 144
    % Daily Value*
    Fat 16g25%
    Saturated Fat 3g19%
    Polyunsaturated Fat 4g
    Monounsaturated Fat 7g
    Cholesterol 84mg28%
    Sodium 211mg9%
    Potassium 1079mg31%
    Carbohydrates 8g3%
    Fiber 1g4%
    Sugar 4g4%
    Protein 32g64%
    Vitamin A 956IU19%
    Vitamin C 39mg47%
    Calcium 101mg10%
    Iron 2mg11%
    * Percent Daily Values are based on a 2000 calorie diet.

    Here’s one more to pin on your Pinterest boards!Enjoy delicious Grilled Plank Salmon and Tomatoes for a BBQ! Salmon cooked on cedar planks is served with grilled, seasoned cherry tomatoes.

    Lemon Garlic Baked Chicken

    Lemon Garlic Baked Chicken is a one-skillet meal for 2 that’s delicious and easy to make! Chicken cooks in a simple lemon garlic wine sauce.
    Lemon Garlic Baked Chicken is a one-skillet meal for 2 that's delicious and easy to make! Chicken cooks in a simple lemon garlic wine sauce.

    I don’t know about you, but I LOVE chicken and constantly keep my eyes open to find and try “new” chicken recipes. My husband is my willing guinea pig and has taste-tested way too many chicken recipes I’ve made over the years to count!

    Today I want to share a recipe that I’m pretty sure originated with Ina Garten. Somewhere along the way I forgot how, where, or from who I got the original recipe (handwritten on paper) but do know I made a few slight changes to it, to suit our tastes. If you like garlic, then you’ll be happy with this dish!

    This is a one skillet recipe, so there’s not a lot of cleaning up to do, which always makes me deliriously happy (wink, wink)! The finished chicken breasts have a LOT of lemony garlic flavor which we love, and I’m confident you’ll enjoy it, as well. Here’s how to make lemon garlic baked chicken.

    Scroll Down For A Printable Recipe Card At The Bottom Of The Page

    Make The Lemon Garlic Sauce

    In a medium-sized oven-safe skillet, heat extra virgin olive oil on low heat. Once the oil is WARM, add minced garlic and cook it, stirring often, for about 1 minute. Be careful to not let the garlic burn or it can become bitter.

    Minced garlic cooks in warm olive oil until fragrant.

    Add white wine, lemon juice, lemon zest, dried oregano, thyme, and a pinch of salt and pepper to the garlic mixture. Stir to combine these ingredients and you’ll have the flavorful sauce for the chicken ready to go!

    White wine, lemon juice, lemon zest and spices are added to the garlic mixture.This is the lemon garlic wine sauce the chicken will bake in.

    Pat two boneless, skinless chicken breasts dry using paper towels, then season lightly with salt and black pepper on both sides. Lay the seasoned breasts in the lemon garlic sauce in the skillet.

    Boneless skinless chicken breasts are seasoned then laid in skillet with lemon garlic sauce.

    Spoon some of the lemon garlic sauce on top of each piece of chicken. Now the chicken is ready for the oven.

    The lemon garlic sauce is spooned over the top of the chicken before baking.

    Bake The Chicken

    Place the skillet (uncovered) on a middle rack in a preheated 400°F. oven and let it cook for about 15 minutes, then remove the skillet from the oven.

    Lemon Garlic Baked Chicken cooks in an oven-safe skillet on the middle rack.

    Quickly place thinly slices of a fresh lemon around the edges of the chicken breasts and put the skillet right back in the oven again.

    Lemon slices are wedged around the chicken breasts during the baking time.

    Continue baking the chicken for another 15-25 minutes until it is cooked all the way through or until the internal temperature of the chicken reaches 165°F.

    Turn the oven to BROIL and let the chicken sit under the broiler (about 6″ away from the heat source) for 2-3 minutes to lightly brown it. Keep an eye on it while broiling!

    When done, remove the skillet from the oven, spoon some of the remaining sauce over each piece of chicken, and let the chicken “rest” for 2-3 minutes so the internal juices can redistribute through the meat.

    Chicken (and lemons are finished by putting skillet under a broiler for a couple minutes.

    Garnish And Serve The Lemon Garlic Baked Chicken

    When the chicken has “rested” for 2-3 minutes it is ready to be served. Place the lemon garlic baked chicken on individual plates and drizzle the sauce over the top. Garnish each serving with 1-2 baked lemon slices and fresh chopped parsley, if desired.

    We enjoyed this dish served with a baked stuffed sweet potato and a small portion of spinach apple quinoa salad on the side. Everything was so delicious and flavorful!

    Lemon garlic baked chicken is served with a sweet potato and a small salad on the side.

    I hope you have the opportunity to try this recipe for lemon garlic baked chicken, and trust you’ll enjoy it, too! Thanks for stopping by, and please come back again soon for more family-friendly recipes. Take care, may God bless you, and have a wonderful day!

    Looking For More CHICKEN Recipes?

    You can find ALL of my recipes in the Recipe Index, which is located at the top of the page. I have LOTS of fantastic chicken recipes to choose from, including:

    Want More Recipes? Get My FREE Newsletter!

    I publish a newsletter 2 times per month (1st and 15th) with lots of recipes, tips, etc..
    Would you like to join our growing list of subscribers?

    There is a Newsletter subscription box on the top right (or bottom) of each blog post, depending on the device you use.
    You can submit your e-mail address there, to be added to my mailing list.

    Find Me On Social Media:

    Facebook page: The Grateful Girl Cooks!
    Pinterest:
    The Grateful Girl Cooks!
    Instagram:
    jbatthegratefulgirlcooks

    Author's signature

    Recipe adapted from: Ina Garten (at least I think that’s where it originated)

    ↓↓ PRINTABLE RECIPE BELOW ↓↓

    0 from 0 votes
    Lemon Garlic Baked Chicken
    Prep Time
    10 mins
    Cook Time
    30 mins
    Total Time
    40 mins
     

    Lemon Garlic Baked Chicken is a one-skillet meal for 2 that's delicious and easy to make! Chicken cooks in a simple lemon garlic wine sauce.

    Category: Main Dish
    Cuisine: All Cuisines
    Keyword: lemon garlic baked chicken
    Servings: 2
    Calories Per Serving: 340 kcal
    Author: JB @ The Grateful Girl Cooks!
    Ingredients
    • 2 Tablespoons extra virgin olive oil
    • 2 Tablespoons minced garlic
    • ¼ cup dry white wine
    • 1 lemon ZEST from 1 lemon (yellow peel only for zest)
    • 2 Tablespoons fresh lemon juice
    • ¾ teaspoon dried oregano
    • ½ teaspoon dried thyme
    • 10 ounces boneless skinless chicken breasts (2) =2 breasts (approx. 5 oz. each)
    • salt and black pepper enough to lightly season chicken
    • ¾ medium lemon cut in thin rounds
    • 2 teaspoons chopped fresh parsley, for garnish OPTIONAL
    Instructions
    1. Preheat oven to 400℉.

    2. In a medium oven-safe skillet, heat olive oil on low heat. Once the oil is WARM, add minced garlic and cook it, stirring often for about 1 minute.

    3. Add white wine, lemon juice, lemon zest, dried oregano, thyme and a pinch of salt and pepper to the garlic in skillet. Stir to combine.

    4. Pat chicken dry with paper towels; season with salt and pepper (both sides). Lay chicken breasts in the lemon garlic sauce. Spoon sauce on top of each piece.

    5. Place skillet (uncovered) on middle rack in oven. Bake at 400℉. for 15 minutes, then remove skillet from oven. Place lemon slices around edges of the chicken and put the skillet quickly back in the oven. Continue baking for 15-25 minutes until cooked through or until internal temperature of the chicken reaches 165°F.

    6. Turn oven setting to BROIL; leave chicken under the broiler (about 6" away from the heat source) for 2-3 minutes to lightly brown it. Keep an eye on it! When lightly browned, remove skillet from the oven. Spoon sauce over each piece of chicken; let chicken "rest" in skillet 2-3 minutes before serving. Place on plates, drizzle with more sauce, garnish with chopped parsley and baked lemon slices.

    Nutrition Facts
    Lemon Garlic Baked Chicken
    Amount Per Serving (1 g)
    Calories 340 Calories from Fat 162
    % Daily Value*
    Fat 18g28%
    Saturated Fat 3g19%
    Trans Fat 0.01g
    Polyunsaturated Fat 2g
    Monounsaturated Fat 11g
    Cholesterol 91mg30%
    Sodium 169mg7%
    Potassium 662mg19%
    Carbohydrates 9g3%
    Fiber 2g8%
    Sugar 2g2%
    Protein 31g62%
    Vitamin A 84IU2%
    Vitamin C 32mg39%
    Calcium 53mg5%
    Iron 2mg11%
    * Percent Daily Values are based on a 2000 calorie diet.

    Here’s one more to pin on your Pinterest boards!Lemon Garlic Baked Chicken is a one-skillet meal for 2 that's delicious and easy to make! Chicken cooks in a simple lemon garlic wine sauce.

    Greek Chicken Salad Wrap

    Make an easy Greek Chicken Salad Wrap with chicken, feta cheese, cucumber, onion, tomato, spices and salad dressing in under 10 minutes!
    Make an easy Greek Chicken Salad Wrap with chicken, feta cheese, cucumber, onion, tomato, spices and salad dressing in under 10 minutes!

    Today I want to share a recipe for a quick and easy lunch wrap I originally found online about 9 years ago. I only made a few slight tweaks to the original recipe and really enjoy this yummy wrap for a quick lunch occasionally.

    It’s a Greek chicken salad wrap that is delicious and filling and best of all it is made in under 10 minutes! Whoo Hoo! The recipe is simple and if you can chop, stir, and roll up a filled tortilla (or flatbread) you can make this dish, too! Here’s how to make a Greek Chicken Salad Wrap!

    Scroll Down For A Printable Recipe Card At The Bottom Of The Page

    Prepare The Ingredients

    The ingredients for one Greek salad wrap are pre-cooked chicken breast, onions (green or red), feta cheese, tomatoes, and cucumbers (unpeeled). Using a rotisserie chicken is extremely quick and yummy, so that is what I used this time!

    You can use either red onion or green onion, to suit your personal taste. Red onion would be the more traditional “Greek” ingredient, but I enjoy green onions, too, so that is what I used when I photographed this recipe.

    Chop the chicken into bite-sized pieces, then finely chop the onions, tomatoes and cucumbers. Crumble feta cheese (regular or low-fat) into small pieces. This will only take a couple of minutes, so you can see how quick and easy this dish is to make!

    Chopped chicken, onion, feta cheese, tomatoes and cucumber for the wrap.

    Place these “salad” ingredients in a small bowl, then set it aside while you whip up the salad dressing.

    Wrap ingredients are combined in a small bowl.

    Make The Salad Dressing

    In a small bowl, whisk together extra virgin olive oil, red wine vinegar, dried oregano and garlic powder until they are fully combined, then season the dressing to taste with salt and black pepper.

    Ingredients for the Greek salad dressing are combined in a small dish.

    After all the salad dressing is fully combined, pour it over the chicken salad mixture in the bowl.

    The salad dressing is poured over the chicken mixture and tossed to combine.

    Toss the salad really well, until all the ingredients are nicely covered with the Greek salad dressing. This mixture is the filling for the tortilla or flatbread you are using.

    Greek salad dressing is added to the chicken wrap filling.Chicken salad filling is covered with salad dressing and is ready for the tortilla wrap.

    Fill And Roll The Tortilla Or Flatbread

    Lay an 8″ flour tortilla (or flatbread, if using) on a flat surface. Spoon the chicken salad filling evenly down the middle of the tortilla stopping about 1″ from each end.

    Wrap the tortilla tightly like a burrito by pulling one side of the tortilla up and over the filling and tucking it in tightly against the mixture. Next, fold both sides in securely and finish tightly rolling the tortilla until it resembles a burrito. Place the wrap seam-side down on a cutting surface.

    the seasoned chicken filling is laid down the middle of the tortilla.One Greek Chicken Salad Wrap rolled up tightly like a burrito.

    You can eat the wrap just as it is OR you can slice it (that’s what I do!) Place the filled wrap seam side down. Use a sharp, serrated knife to slice the Greek Chicken Salad Wrap in half when you’re ready to enjoy this meal.

    Sorry you can’t see those beautiful red tomato chunks in this photo below, but trust me, they’re in there! REALLY!

    A serrated knife is used to slice the wrap in half before serving.

    Serve And Enjoy The Greek Chicken Salad Wrap

    Serve the Greek Chicken Salad Wrap with your favorite sandwich sides. I enjoyed the wrap with some apple slices and a few cheddar sun chips and was very full and satisfied once I was done!

    The sandwich has really good flavor thanks to the combination of fresh ingredients and the tasty salad dressing on everything! Those creamy soft feta cheese crumbles in the wrap provide a tang and creaminess which pair very well with the crunchy cucumbers!

    A white plate with two chicken wrap halves, apple slices and cheddar chips on the side.

    See? There really ARE tomatoes in the chicken salad wrap…ha ha! I guess they were hiding, so all I had to do was take a bite and lo and behold, there they were!

    A close look at the inside of the Greek Chicken Salad Wrap.

    Perhaps you will have the chance to make this delicious chicken wrap for yourself or for someone you love. I am confident you’ll enjoy this quick meal.

    The recipe as written below makes ONE wrap (or two very small halves), but it is ridiculously easy to double or triple the amount of ingredients to meet your needs.

    Thank you for stopping by today, and I invite you to come back again soon for more family-friendly recipes. Take care, may God bless you, and have a wonderful day!

    Looking For More SANDWICH or WRAP Recipes?

    You can find ALL of my recipes in the Recipe Index, which is located at the top of the page. I have a nice variety of sandwich or wrap recipes to check out, including:

    Want More Recipes? Get My FREE Newsletter!

    I publish a newsletter 2 times per month (1st and 15th) with lots of recipes, tips, etc..
    Would you like to join our growing list of subscribers?

    There is a Newsletter subscription box on the top right (or bottom) of each blog post, depending on the device you use.
    You can submit your e-mail address there, to be added to my mailing list.

    Find Me On Social Media:

    Facebook page: The Grateful Girl Cooks!
    Pinterest:
    The Grateful Girl Cooks!
    Instagram:
    jbatthegratefulgirlcooks

    Author's signature

    Recipe adapted from: Lisa Huff at http://snappygourmet.com/easy-chicken-greek-salad-wrap-sandwich/

    ↓↓ PRINTABLE RECIPE BELOW ↓↓

    0 from 0 votes
    Greek Chicken Salad Wrap
    Prep Time
    7 mins
    Cook Time
    0 mins
    Total Time
    7 mins
     

    Make an easy Greek Chicken Salad Wrap with chicken, feta cheese, cucumber, onion, tomato, spices and salad dressing in under 10 minutes!

    Category: Lunch, Main Dish, Sandwich
    Cuisine: Greek
    Keyword: Greek Chicken Salad Wrap
    Servings: 1 wrap
    Calories Per Serving: 264 kcal
    Author: JB @ The Grateful Girl Cooks!
    Ingredients
    • ½ cup precooked chicken breast chopped
    • cup cucumber chopped
    • cup fresh tomato chopped
    • 2 Tablespoons feta cheese crumbles regular or low-fat
    • 2 teaspoons green or red onion finely chopped
    • 1 teaspoon extra virgin olive oil
    • ¾ teaspoon red wine vinegar
    • ¼ teaspoon dried oregano
    • ¼ teaspoon garlic powder
    • salt and pepper, to taste
    • 1 8" flour tortilla or flatbread
    Instructions
    1. Chop chicken into small pieces. Finely chop onion, tomato and cucumber. Crumble feta cheese into small pieces. Combine in a small bowl, then set aside.

    2. In separate small bowl, whisk olive oil, red wine vinegar, oregano and garlic powder until fully combined; season to taste with salt and black pepper. Pour it over chicken mixture and toss until well-combined.

    3. Lay tortilla (or flatbread) on a flat surface. Spoon chicken mixture evenly down the middle of the tortilla, stopping about 1" from each end. Wrap the tortilla tightly like a burrito by pulling one side of the tortilla up and over the filling and tucking it in tightly against the mixture. Next, fold both sides in securely and finish tightly rolling the tortilla until it resembles a burrito.

    4. Place seam-side down on a cutting surface. Use a serrated knife to slice the Greek Chicken Salad Wrap in half. Serve and enjoy.

    Nutrition Facts
    Greek Chicken Salad Wrap
    Amount Per Serving (1 wrap)
    Calories 264 Calories from Fat 126
    % Daily Value*
    Fat 14g22%
    Saturated Fat 6g38%
    Polyunsaturated Fat 1g
    Monounsaturated Fat 5g
    Cholesterol 90mg30%
    Sodium 1226mg53%
    Potassium 416mg12%
    Carbohydrates 6g2%
    Fiber 1g4%
    Sugar 2g2%
    Protein 27g54%
    Vitamin A 691IU14%
    Vitamin C 10mg12%
    Calcium 201mg20%
    Iron 1mg6%
    * Percent Daily Values are based on a 2000 calorie diet.

    Here’s one more to pin on your Pinterest boards!Make an easy Greek Chicken Salad Wrap with chicken, feta cheese, cucumber, onion, tomato, spices and salad dressing in under 10 minutes!