Month: February 2015

Ken’s Garlic Bread

Ken’s Garlic Bread is an easy, crunchy, side dish for salads, soup or main courses. Broiled baguette has Parmesan, garlic, butter, paprika & parsley!Ken's Garlic Bread is an easy, crunchy, tasty side dish for salads, soup or main courses. Broiled baguette has Parmesan, garlic, butter, paprika and parsley!
I named this “recipe” after my husband, Ken… a total bread-lover, who ALWAYS enjoys this garlic bread with a meal. Seriously… the guy can put away the garlic bread. Therefore I named it “Ken’s Garlic Bread”. Amen.

I felt rather foolish thinking I could put this garlic bread “recipe” (if you can call it that) on my blog, but then I realized there’s people who suffer in silence, somberly eating a plain, ordinary, buttered slice of bread, while our family scarfs down completely delicious, crispy, flavor-filled garlic bread! Yeah… if you believe that, I’ve got some swampland down in Florida for ya!

Family Traditions… Even For Garlic Bread!

I finally decided… why NOT put our tried and true Ken’s garlic bread “recipe” out there?  (Hey… it IS my blog, right?)  I get it… most people have “their way” of making garlic bread, and that’s awesome. Well, this is our family’s way. Maybe you will like it as much as we do. Maybe one of our grown sons has been laying awake wondering HOW does Mom make that good garlic bread we always used to have for dinner?

That is why I posted this recipe for my dear sweet husband Ken’s garlic bread. And believe it or not… there really is no “recipe”. Just some pictures that will show you what we do. Nine times out of 10 we start with sourdough bread, but French bread is a good runner up.

Use pre-sliced bread, or slice an entire loaf or a small baguette in half horizontally (lengthwise)… whatever you want! You can use virtually any kind of bread, and chances are, you’re gonna like it!  Follow these easy directions, then cook the bread on a rack under your oven broiler. That’s it!!

How To Make Ken’s Garlic Bread

Here’s how: Slice the loaf or baguette in half length-wise with a serrated knife, and do the following:

Yep, that’s right… I used the kind of parmesan cheese that comes in the green can for this version. Both “shaker can parmesan” and fresh grated Parmesan cheese are perfect for this bread. I keep both around my home, but wrote this recipe using the type of Parmesan cheese that most people commonly have in their home. Guess you’ll have to choose which kind to use.

Bread is buttered, then sprinkled with Parmesan cheese.

Lightly sprinkle with garlic powder. Don’t be too heavy handed, folks! We don’t need to chase away any vampires today!

Bread is then sprinkled lightly with garlic powder.

Now lightly sprinkle Ken’s garlic bread with paprika…

Garlic bread is sprinkled lightly with paprika.

Lightly sprinkle with dried parsley. Now put Ken’s garlic bread on a rack under the broiler. Keep an eye on it so it doesn’t burn… You want it to look nice and golden brown…

Garlic bread is sprinkled with dried parsley flakes.

Time To Eat Ken’s Garlic Bread!

And there ya have it! Congratulations. You made my hubby Ken’s favorite garlic bread. Aren’t you proud? Now insert bread into your mouth and enjoy!

Ken's garlic bread is golden and toasty after broiling in the oven!

Hope you will give this a try… It’s DEFINITELY not rocket science, and it works like a charm every time. Absolutely delicious! ENJOY!

Looking For More BREAD Recipes?

You can find all of my recipes in the Recipe Index, located at the top of the page. A few of our favorite bread recipes, (perfect for accompanying a variety of dishes) include:

Interested In More Recipes?

Thank you for visiting this website. I appreciate you using some of your valuable time to do soIf you’re interested, I publish a newsletter 2 times per month (1st and 15th) with all the latest recipes, and other fun info. I would be honored to have you join our growing list of subscribers, so you never miss a great recipe! 

There is a Newsletter subscription box on the top right side (or bottom) of each blog post, depending on the device you use, where you can easily submit your e-mail address (only) to be included in my mailing list.

You Can Also Find Me On Social Media:

Facebook page: The Grateful Girl Cooks!
Pinterest:
The Grateful Girl Cooks!
Instagram:
jbatthegratefulgirlcooks

Have a GREAT day!

Author's signature

Here’s one more to pin on your Pinterest boards!Ken's Garlic Bread is an easy, crunchy, tasty side dish for salads, soup or main courses. Broiled baguette has Parmesan, garlic, butter, paprika and parsley!

Save

Save

Spinach and Orzo Salad

This delicious spinach and orzo salad is an easy to make dish, with feta cheese, capers, kalamata olives, and a simple homemade salad dressing!This delicious spinach and orzo salad is an easy to make dish, with feta cheese, capers, kalamata olives, and a simple homemade salad dressing!

A couple of days ago I was looking through some old recipe books I’ve acquired over the years. I found this Spinach and Orzo Salad recipe, (contributed by a friend of mine) in a church cookbook I received at a Women’s Christmas event 12 years ago.

I made this spinach and orzo salad for my husband and I to enjoy with our dinner. It was delicious (thanks, Monica). Tender baby spinach leaves are mixed with orzo pasta, kalamata olives, green onions, capers, red bell pepper, and feta cheese.

The finished salad is tossed in a wonderful, lemon and white wine vinegar based dressing. I loved having the orzo pasta in this salad, because it added a unique touch!

We really did enjoy this “loaded with flavor” spinach and orzo salad. From start to finish, I think it only took me about 15 minutes to make. My tip is to make the entire salad ahead of time, then let it refrigerate until you’re ready to serve.

Scroll Down For A Printable Recipe Card At The Bottom Of The Page

Are Spinach And Orzo Salad Leftovers Good The Next Day?

YES!!!  When I first made it, the salad was served right after it was tossed with the salad dressing. We had some extra salad leftover (which I usually don’t like cause the lettuce “wilts” overnight), and I ended up saving it in a container. Whoa!

Even the leftovers of this salad were delicious! IT WAS ABSOLUTELY FANTASTIC  (and NOT wilted) the next day for lunch.

Refrigerating the salad for several hours (AFTER the dressing was added) absolutely enhanced the flavors, and it was just as amazing, if not more, than the night before!

It’s EASY To Make Spinach And Orzo Salad!

The ingredients for the simple dressing are mixed together in a small bowl. Whisk them together until they are well incorporated.

Spinach and Orzo Salad / The Grateful Girl Cooks!

Combine all the spinach and orzo salad “add-ins” in a medium bowl. They include sliced olives, green onions, chopped red pepper, crumbled feta cheese, and capers. Set aside.

Spinach and Orzo Salad / The Grateful Girl Cooks!

Cook The Orzo

Add orzo pasta to lightly salted, boiling water. Cook the orzo for 9-10 minutes, according to package directions.

Spinach and Orzo Salad / The Grateful Girl Cooks!

Once the orzo has finished cooking, drain it in a colander. Add a small amount of olive oil, and toss gently, to coat.

Set the pan with the orzo aside, until ready to add it to the salad.  Let the cooked orzo cool completely.

Spinach and Orzo Salad / The Grateful Girl Cooks!

Time To Put the Spinach And Orzo Salad Together

When you are ready to “build” the spinach and orzo salad, place baby spinach leaves into the serving bowl.

Spinach and Orzo Salad / The Grateful Girl Cooks!

Place the orzo, kalamata olives, red pepper, green onions, capers and feta cheese on top of the spinach leaves.

Spinach and Orzo Salad / The Grateful Girl Cooks!

Mix all the spinach and orzo salad ingredients until they are well combined.

Spinach and Orzo Salad / The Grateful Girl Cooks!

Give the prepared salad dressing a final stir, then pour it onto the spinach and orzo salad. Give the salad another toss, to distribute the salad dressing throughout.

Spinach and Orzo Salad / The Grateful Girl Cooks!

Time To EAT!

Once mixed together, the spinach and orzo salad is ready to serve and enjoy! Hope you like it too, because it is delicious!

Spinach and Orzo Salad / The Grateful Girl Cooks!

Hope you will give this delicious spinach and orzo salad a try!  It’s simple to make, and really tastes quite amazing! Have a fantastic day!

Looking For More SALAD Recipes?

You can find ALL my recipes in the Recipe Index, located at the top of the page. I have lots of yummy salad recipes you’ll enjoy, including:

Interested In More Recipes?

Thank you for visiting this website. I appreciate you using some of your valuable time to do soIf you’re interested, I publish a newsletter 2 times per month (1st and 15th) with all the latest recipes, and other fun info. I would be honored to have you join our growing list of subscribers, so you never miss a great recipe!
There is a Newsletter subscription box on the top right side (or bottom) of each blog post, depending on the device you use, where you can easily submit your e-mail address (only) to be included in my mailing list.

You Can Also Find Me On Social Media:

Facebook page: The Grateful Girl Cooks!
Pinterest:
The Grateful Girl Cooks!
Instagram:
jbatthegratefulgirlcooks

Spinach and Orzo Salad / The Grateful Girl Cooks!Recipe Source: Monica Martin, in “A Real Simple Christmas”, Family Favorites, 2002

↓↓ PRINTABLE RECIPE BELOW ↓↓

0 from 0 votes
Spinach and Orzo Salad
Prep Time
15 mins
Cook Time
9 mins
Total Time
24 mins
 
This delicious spinach and orzo salad is an easy to make dish, with feta cheese, capers, kalamata olives, and a simple homemade salad dressing!
Category: Salad
Cuisine: American
Keyword: spinach and orzo salad
Servings: 4 servings
Calories Per Serving: 313 kcal
Author: JB @ The Grateful Girl Cooks!
Ingredients
  • 4 ounces orzo pasta (about 1/2 cup)
  • 1 Tablespoon olive oil
For the salad dressing:
  • 1 teaspoon lemon juice
  • 1/4 cup olive oil
  • 1 1/2 Tablespoons white wine vinegar
  • 1/2 teaspoon Dijon mustard
  • 1/2 garlic clove , minced
  • small pinch dried thyme
  • 1/4 teaspoon oregano
  • 1/8 teaspoon cumin
  • Salt & pepper (to taste)
For Salad:
  • 1 bag baby spinach leaves (or use 1 bunch spinach, then chop)
  • 1/4 cup sliced kalamata olives
  • 1/2 red bell pepper , chopped
  • 1 stalk green onion (white and green parts), minced
  • 1/2 Tablespoon capers
  • 2 oz. feta cheese , crumbled
Instructions
  1. Make the salad dressing: In a small bowl, mix together the lemon juice, olive oil, white wine vinegar, dijon, garlic, thyme, oregano, cumin and salt & pepper, until fully combined.
  2. Bring medium saucepan of water to a full boil Add the orzo. Cook for 9 minutes. Drain and toss with 1 Tablespoon of olive oil. Set aside to cool.
  3. Put the spinach leaves into a large salad bowl. Add the cooked and cooled orzo, sliced olives, chopped red peppers, minced green onion, capers and feta cheese. Mix to combine.
  4. Pour the salad dressing over the salad. Toss to fully combine. Refrigerate until ready to serve.
  5. Enjoy!
Recipe Notes

Tip: I think the flavors go together (even better than they already do) when you completely make the salad (including the dressing), then refrigerate the salad for a few hours.

Nutrition Facts
Spinach and Orzo Salad
Amount Per Serving (1 serving)
Calories 313 Calories from Fat 189
% Daily Value*
Fat 21g32%
Saturated Fat 4g25%
Cholesterol 12mg4%
Sodium 328mg14%
Potassium 94mg3%
Carbohydrates 23g8%
Fiber 1g4%
Sugar 2g2%
Protein 6g12%
Vitamin A 610IU12%
Vitamin C 20mg24%
Calcium 80mg8%
Iron 0.6mg3%
* Percent Daily Values are based on a 2000 calorie diet.

Here’s one more to pin on your Pinterest boards!This delicious spinach and orzo salad is an easy to make dish, with feta cheese, capers, kalamata olives, and a simple homemade salad dressing!

.


Save

Save

Ham ‘n Cheese Breakfast Soufflé

Ham ‘n Cheese Breakfast Soufflé is a light, fluffy, scrumptious “all in one” breakfast or brunch baked dish containing eggs, milk, ham, cheese and sourdough bread.Ham 'n Cheese Breakfast Soufflé is a light, fluffy, scrumptious "all in one" breakfast or brunch baked dish containing eggs, milk, ham, cheese and sourdough bread.What do you get when you morph the best of two breakfast casseroles into one dish? This delicious “all-in-one” ham ‘n cheese breakfast soufflé that will get your morning started out just right.

A few days ago, one of my friends asked me if I had a good “breakfast casserole” that would feed quite a few people. She needed a recipe for a brunch she was going to be attending this coming weekend. I told her I did, and immediately thought of this recipe! It serves 12, is super easy to make, plus it is always a hit at a brunch or potluck. So here ya go, Sherry. This one is for YOU!

Scroll Down For A Printable Recipe Card At The Bottom Of The Page

How I Came Up With This Recipe

When I got married, I was given a recipe for a Cheese Soufflé from two friends. I’ve made that recipe many times over the past 37 years. I ended up blending that original recipe with parts of another recipe (source unknown), and came up with this delicious breakfast dish years ago. It really is an all-in-one breakfast dish, because it contains eggs, bread, milk, cheese, and ham.

Plan Ahead!

This dish takes only a few minutes of prep to get ready;  but PLAN AHEAD! It chills in the fridge overnight, then is baked for one hour. That’s it! Easy… and delicious! The mixture puffs up during the cooking process, which is why it is has the word “soufflé” in the title.  And there you have it! Here’s a few photos taken while preparing this ham cheese breakfast soufflé.

Making The Ham ‘n Cheese Breakfast Soufflé

First things first… cut the crusts off the bread. Discard crust. Cut bread into small cubes.

Crusts cut off bread for breakfast soufflê.

Place a layer of bread cubes into the pan first, followed by the ham cubes.

Bread cubes are topped with ham cubes for breakfast souffle.

The next layer to be added is the grated cheddar cheese. YUM.

Grated cheddar cheese is added to breakfast souffle.

Whisk the egg mixture together, then pour it over the bread, ham, and cheese mixture.

Eggs, half n' half, and spices are blended for breakfast souffle

Let It Soak In Overnight

Pour the egg mixture into the baking dish. Cover the baking dish with plastic wrap, and let it sit and soak overnight in the refrigerator. This allows enough time for the liquid to be absorbed into the bread. in the filling. In the oven, let it come to room temp, then bake!

Egg mixture is poured on top of breakfast souffle and casserole is refrigerated overnight.

Time To Eat The Ham ‘n Cheese Breakfast Soufflé

When finished baking, the ham ‘n cheese breakfast soufflé will be puffed up, and will be light golden brown on the top. The photo below shows what it looks like right out of the oven. See how this breakfast soufflé puffs up? Pretty!

Let it cool a bit before slicing. As it cools, you will notice the top deflates a bit, as the hot air escapes. That is absolutely normal! Let the casserole cool just a little bit before slicing.

Ham 'n Cheese Breakfast Soufflé , hot out of the oven... all puffed up!

Here’s what a piece looks like after being cut and served… time to dig in! That one piece of ham ‘n cheese breakfast soufflé has bread, eggs, ham, and cheese in it! Add some fruit on the side, and you’ve got a great breakfast!

A piece of ham 'n cheese breakfast souffle on a plate, with orange slices.

Hope you will give this breakfast soufflé recipe a try. The leftovers are easily reheated, so this one can go the distance. I think you will enjoy it! I hope you have a great day, and trust you will come back soon for more recipes.

Looking For More EGG Dishes?

You can find all of my recipes in the Recipe Index, located at the top of the page. I have quite a few breakfast dishes featuring eggs I think you’ll enjoy, including:

Interested In More Recipes?

Thank you for visiting this website. I appreciate you using some of your valuable time to do soIf you’re interested, I publish a newsletter 2 times per month (1st and 15th) with all the latest recipes, and other fun info. I would be honored to have you join our growing list of subscribers, so you never miss a great recipe!
There is a Newsletter subscription box on the top right side (or bottom) of each blog post, depending on the device you use, where you can easily submit your e-mail address (only) to be included in my mailing list.

You Can Also Find Me On Social Media:

Facebook page: The Grateful Girl Cooks!
Pinterest:
The Grateful Girl Cooks!
Instagram:
jbatthegratefulgirlcooks

Author's signatureOriginal Recipe adapted from: Dee Gustafson and Faye Johnson

↓↓ PRINTABLE RECIPE BELOW ↓↓

0 from 0 votes
Ham 'n Cheese Breakfast Soufflé
Prep Time
20 mins
Cook Time
1 hr
Total Time
1 hr 20 mins
 

Ham 'n Cheese Breakfast Soufflé is a light, fluffy, scrumptious "all in one" breakfast or brunch baked dish containing eggs, milk, ham, cheese and sourdough bread.

Category: Breakfast
Cuisine: American
Keyword: breakfast souffle
Servings: 12 servings
Calories Per Serving: 234 kcal
Author: JB @ The Grateful Girl Cooks!
Ingredients
  • 10 slices white bread , crusts removed (I used 5 really large slices sourdough bread)
  • 2 cups chopped ham
  • 2 cups grated Cheddar cheese
  • 6 eggs , slightly beaten
  • 2 cups milk
  • 1 cup half n' half
  • 1 teaspoon salt
  • ¾ teaspoon dry mustard powder
  • 2 Tablespoons dried parsley
Instructions
  1. Spray a 9x13 pan with non-stick spray.
  2. Remove the crusts from the bread and discard. Cut the remaining bread into cubes. Spread in baking dish.
  3. Cut the ham into cubes. Layer on top of the bread cubes.
  4. Layer the grated cheese on top of the ham.
  5. In a medium bowl, whisk together the eggs, milk, half n' half, salt, mustard powder, and dried parsley, until fully combined. Pour this evenly over the top of the cheese in baking pan. Cover pan with plastic wrap, and refrigerate overnight.
  6. On the day you are going to bake it, remove the pan from refrigerator and let it sit for about 30-40 minutes, to take the chill off the pan. Preheat your oven to 350 degrees.
  7. When ready, remove plastic wrap, and place in oven.
  8. Bake for 1 hour at 350 degrees (or until it is eggs are "set" in the middle of pan). **If you forget, and end up taking the dish straight from the refrigerator to the oven, remember to add another 25-30 minutes of baking time!
  9. When done baking, remove pan to wire rack. Let it cool for about 10 minutes, then cut it into pieces. This dish is at it's very best once it has cooled down a bit. Enjoy!
Recipe Notes

Prep time does NOT include overnight refrigeration time.
Any white bread will work in this recipe. this time I used 5 LARGE slices sourdough bread. Usually I just use regular old, cheap white bread.
If you would like a bit more flavor, try adding a small can of diced green chiles to this dish. Just mix the drained chiles in with the eggs, Really good!

Nutrition Facts
Ham 'n Cheese Breakfast Soufflé
Amount Per Serving (1 (1/12th of total))
Calories 234 Calories from Fat 117
% Daily Value*
Fat 13g20%
Saturated Fat 7g44%
Cholesterol 123mg41%
Sodium 719mg31%
Potassium 161mg5%
Carbohydrates 13g4%
Sugar 3g3%
Protein 14g28%
Vitamin A 450IU9%
Vitamin C 0.6mg1%
Calcium 273mg27%
Iron 1.5mg8%
* Percent Daily Values are based on a 2000 calorie diet.

Here’s one more to pin on your Pinterest boards!Ham 'n Cheese Breakfast Soufflé is a light, fluffy, scrumptious "all in one" breakfast or brunch baked dish containing eggs, milk, ham, cheese and sourdough bread.


Save

Save

Save

Save

Chili & Cheese Stuffed Spud

Need a quick, filling lunch or dinner that is REALLY easy? Why not make a chili cheese stuffed spud, with sour cream, cheddar cheese and green onions!Need a quick, filling lunch or dinner that is REALLY easy? Why not make a chili cheese stuffed spud, with sour cream, cheddar cheese and green onions!
Ever have those moments when you just don’t want to cook dinner? What? You do, too??? Shocking! I had one of those moments recently (several times, actually). I ended up making a Chili Cheese Stuffed Spud for my husband and I.

I was too tired to “want” to fix anything, so I  heated up some leftover chili I had in the fridge (Mom’s Old-Fashioned Chili). Use any kind of chili you like! Then I stuffed a big beast-like “baker” potato with the chili.  You know – the BIG potatoes!

That humongous potato was filled with the chili, then topped with cheese, sour cream and green onions, and POOF! Dinner was served! Or as I like to say: “Dinner is served. I am offering two choices tonight for your dining pleasure. 1) Take It, or 2) Leave It.”

A Chili Cheese Stuffed Spud Is A Filling Meal!

This was a delicious, filling, “all-in-one” dinner.  “Ya got your potato, ya got your chili with meat and beans, ya got your cheese, ya got your sour cream, and ya got your green onions” (said with a deep New York accent, of course!). Geepers, if you threw some chocolate on there, you would have almost ALL the food groups represented… but I digress.

I threw (translation: gently and lovingly placed) the potatoes in the oven and baked them, but if you’re pressed for time, just microwave them… easy peasy, either way! Did you know that potatoes are the world’s 4th largest field crop? Yep. It’s true. (Random factoid for the day).

This is such an easy dish to prepare… and it really did fill up our hungry tummies! It’s so versatile… you can take away, or add anything you want (like veggies) to “make it yours”. Just thought I’d share it with you on the ol’ blog today. We sure don’t eat these too often at our house, but every now and then, it’s a quick, economical, and filling meal.

Chili cheese stuffed spud, topped with sour cream, grated cheese & scallions.

The Basics of Making A Chili Cheese Stuffed Spud

I’m not even going to post a recipe for this, because it’s so very basic… Bake (or microwave) a large potato, slice open, generously fill it with hot chili, then top with grated cheddar cheese, a generous dollop of sour cream, and some sliced green onions.

Seriously… how easy is that? Hope you will consider making these Chili & Cheese Stuffed Spuds, especially for those moments when your private chef, caterer, or entire kitchen staff get horribly sick and can’t prepare your evening meal. (*cough, cough*).  But we ALL know this situation would NEVER happen on Downton Abbey, would it now?

Have a wonderful day. Be sure and check out ALL of my recipes in the Recipe Index, which is located at the top of the page. I have a LOT of family-friends recipes I am confident you will enjoy.

Interested In More Recipes?

Thank you for visiting this website. I appreciate you using some of your valuable time to do soIf you’re interested, I publish a newsletter 2 times per month (1st and 15th) with all the latest recipes, and other fun info. I would be honored to have you join our growing list of subscribers, so you never miss a great recipe! 

There is a Newsletter subscription box on the top right side (or bottom) of each blog post, depending on the device you use, where you can easily submit your e-mail address (only) to be included in my mailing list.

You Can Also Find Me On Social Media:

Facebook page: The Grateful Girl Cooks!
Pinterest:
The Grateful Girl Cooks!
Instagram:
jbatthegratefulgirlcooks

Author's signature

Here’s one more to pin on your Pinterest boards!Need a quick, filling lunch or dinner that is REALLY easy? Why not make a chili cheese stuffed spud, with sour cream, cheddar cheese and green onions!

Save

Save

Shrimp and Noodles in Spicy Garlic Sauce

Why order take-out when you can make this delicious Asian shrimp and noodles in spicy garlic sauce in under 20 minutes from start to finish?Why order take-out when you can make this delicious Asian shrimp and noodles in spicy garlic sauce in under 20 minutes from start to finish?
Well… it’s been quite a week. I made Shrimp and Noodles in Spicy Garlic Sauce to cap it off.  This delicious shrimp really hit the spot after such a wild week! Work for my husband and myself was CRAZY busy, a family member is facing very serious medical issues, our phone account was breached (someone fraudulently bought an IPhone using our account and shipped it to YEMEN, of all places!). To top it all off, day before yesterday I got a flat tire AND had the keys to our other car with me (oops), so my husband couldn’t come help me.  Some weeks are like that, right?

Oh well.  I am extremely grateful for the nice gentleman named Mark (a kind stranger) who, in absolutely POURING rain (we were sopping wet) helped me get enough air into the tire to enable me to drive a few miles to a tire store, where a lovely an evil bolt was removed and the tire was patched. There really are wonderful people in this big, old world, who still will go out of their way to help others in need.

At least my husband and I were able to end this crazy week with a great dinner last night… Shrimp and Noodles in a Spicy Garlic Sauce really hit the spot… we were tired and hungry by the time Friday night rolled around. My husband had been up working since 3 AM (remember… crazy busy), so in reality, I could have made cereal for dinner and he probably wouldn’t have noticed as he nodded off into the bowl.

We LOVED This Simple Dish!

BUT I made this great recipe instead! EASY, EASY, EASY, quick, and incredibly delicious. Absolutely perfect is the best way I can describe this dish. The shrimp was so flavorful due to a fantastic Asian-inspired garlic sauce, and the ramen noodles helped make the dish very filling!

I found the recipe for the shrimp and sauce on Pinterest,  and decided to cook some ramen noodles to add to it. YUM! Seriously, I think the entire meal took under 20 minutes to make, from start to finish! I sure hope you’ll give this recipe a try. I know you will really LOVE it! Here’s how to make it:

Scroll Down For A Printable Recipe Card At The Bottom Of The Page

For this recipe, you will need some large shrimp that have been rinsed and deveined, but with the tail left on. Set the cleaned shrimp aside until they are needed later.

Rinsed and de-veined shrimp are left with their tails on for this dish.

Make The Spicy Garlic Sauce

The spicy garlic sauce takes just a minute to make. It’s as simple as stirring the ingredients together… really!

A spicy garlic sauce is quickly made by stirring ingredients together in a bowl.

The noodles required for this dish are very easy to find. Yep… you guessed it! You will need one package of good old cheap Ramen noodles, with the sauce packet removed.

A package of Ramen noodles are needed for this recipe, minus the seasoning packet.

Cook the noodles in boiling water for 3 minutes, then drain off all the water.

Ramen noodles are cooked in boiling water for 3 minutes, then drained.

Stir and quickly cook the garlic in olive oil, until fragrant. Be careful NOT to let it burn, or it will become bitter.

Minced garlic is quickly cooked in hot oil before adding other ingredients.

Add The Shrimp

Add the shrimp to the skillet, and cook for just a few minutes, until slightly pink in color and cooked through.

Shrimp is added to the skillet with the cooked garlic and oil.

Now add the garlic sauce and cooked noodles into the skillet with the shrimp. Mix together and cook, until all ingredients are heated through.

Ramen noodles are added to the cooked shrimp in the skillet.

Sprinkle with sliced green onions and sesame seeds. When hot, divide into portions and serve.

The shrimp and noodles in spicy garlic sauce is heated through in the skillet.

Time To Enjoy Some Shrimp And Noodles In Spicy Garlic Sauce

Garnish each serving with a few more sesame seeds and green onion slices. Serve, and enjoy! This shrimp is DELICIOUS!

A serving of shrimp and noodles in spicy garlic sauce on a plate, ready to be enjoyed.

I really hope you will consider trying this recipe for shrimp and noodles in spicy garlic sauce! I’m confident you and those you love will enjoy it. Have a great day!

Looking For More SHRIMP Recipes?

You can find ALL of my recipes in the Recipe Index, located at the top of the page. I have some delicious shrimp recipes for you to enjoy, which include:

Interested In More Recipes?

Thank you for visiting this website. I appreciate you using some of your valuable time to do soIf you’re interested, I publish a newsletter 2 times per month (1st and 15th) with all the latest recipes, and other fun info. I would be honored to have you join our growing list of subscribers, so you never miss a great recipe!

There is a Newsletter subscription box on the top right side (or bottom) of each blog post, depending on the device you use, where you can easily submit your e-mail address (only) to be included in my mailing list.

You Can Also Find Me On Social Media:
Facebook page: The Grateful Girl Cooks!
Pinterest: The Grateful Girl Cooks!
Instagram: jbatthegratefulgirlcooks

Author's signature

Recipe Adapted From: http://appetiteforchina.com/recipes/shrimp-garlic-sauce

↓↓ PRINTABLE RECIPE BELOW ↓↓

0 from 0 votes
Shrimp and Noodles in Spicy Garlic Sauce
Prep Time
15 mins
Cook Time
5 mins
Total Time
20 mins
 

Why order take-out when you can make this delicious Asian shrimp and noodles in spicy garlic sauce in under 20 minutes from start to finish?

Category: Entree
Cuisine: Asian
Keyword: shrimp and noodles
Servings: 2 servings
Calories Per Serving: 565 kcal
Author: JB @ The Grateful Girl Cooks!
Ingredients
  • 3/4 pound uncooked large shrimp , deveined
  • 3 Tablespoons soy sauce
  • 2 Tablespoons chili sauce (I used Mae Ploy)
  • 2 teaspoons sesame oil
  • 2 teaspoons cooking sherry (can also use Chinese rice wine-I used cooking sherry)
  • 1 teaspoon granulated sugar
  • 1 3 ounce package dry ramen noodles (sauce packet removed-don't need it)
  • 2 Tablespoons olive oil
  • 4 cloves garlic , crushed or finely chopped (equals 2 Tablespoons minced garlic)
  • 1 green onion (green and white parts), thinly sliced (for garnish)
  • Sesame seeds (for garnish)
Instructions
  1. Peel the shrimp, but leave the tail intact. (Devein shrimp, if not already done).
  2. Make the sauce: In a little bowl, mix together the soy sauce, chili sauce, sesame oil, cooking sherry (or Chinese rice wine), and granulated sugar until well combined. Set sauce aside.
  3. Bring a small pan of water to a boil on high heat. Add ramen noodles; cook noodles for 3 minutes. Drain noodles. Set aside.
  4. Heat the olive oil on medium-high heat in a large skillet. Add the minced garlic to the hot pan; stir and cook for about 30 seconds (be careful NOT to burn it!).
  5. Add shrimp to skillet. Cook shrimp for about 2 minutes per side, until both sides are pink. Add the sauce mixture and the noodles to the skillet. Mix gently to combine. Cook until heated through (a minute or so). Sprinkle with a bit of the green onions and sesame seeds.
  6. Place shrimp and noodles on individual serving plates. Garnish with additional green onions and sesame seeds. Enjoy!
Recipe Notes

You can also make the shrimp (without the noodles). The original recipe serves 4 (shrimp and sauce only- no noodles). Use 1 1/2 pounds of shrimp, and keep all other ingredient amounts the same.

Nutrition Facts
Shrimp and Noodles in Spicy Garlic Sauce
Amount Per Serving (1 serving)
Calories 565 Calories from Fat 243
% Daily Value*
Fat 27g42%
Saturated Fat 6g38%
Cholesterol 428mg143%
Sodium 3190mg139%
Potassium 334mg10%
Carbohydrates 36g12%
Fiber 2g8%
Sugar 4g4%
Protein 41g82%
Vitamin A 160IU3%
Vitamin C 12.4mg15%
Calcium 270mg27%
Iron 6mg33%
* Percent Daily Values are based on a 2000 calorie diet.

Here’s one more to pin on your Pinterest boards!Why order take-out when you can make this delicious Asian shrimp and noodles in spicy garlic sauce in under 20 minutes from start to finish?


Save

Save

Beer Battered Fish and Chips

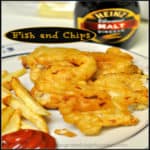
Can’t get to England? Why not make your own crunchy beer battered fish and homemade “chips” (french fries) for dinner, in the comfort of your home!Can't get to England? Why not make your own crunchy beer battered fish and homemade "chips" (french fries) for dinner, in the comfort of your own home!
I don’t fry food too much these days as a rule… every couple of months I will make fried chicken to honor our family’s Southern roots, BUT THEN I SAW IT… a recipe on Pinterest for Beer Battered Fish and Chips.

Against all my common sense, I think I heard the recipe calling to me, bringing back memories of a summer I spent in England years ago.

Fish and chips seemed to be available everywhere, and were served wrapped up in paper, and piping hot! I loved buying fish and chips from local vendors in several of the towns I visited. Such a great memory.

Occasionally my husband or I will now order this meal in a restaurant; but the thought of making my own seemed daunting. However, I love to learn and challenge myself to try new things.

But Could I Make Beer Battered Fish And Chips At Home?

I decided to try and make my own replica of British fish and chips. GULP. I crossed my fingers, toes, eyes, and anything else I could cross, and plunged in!

Well- I used thick pieces of frozen cod for this recipe and found it, as well as the batter, to be wonderful! Plus… “chips”? How can ya go wrong with some good “chips”… FRIES???

I enjoyed every single bite of my crispy coated pieces of fish (with Malt Vinegar on them), and loved the delicious “chips” dipped in ketchup. The chips (fries) are cooked twice to get them nice and crispy, and let me tell you… they were tasty!

So there you have it, and I’m really glad I made this recipe that very first time. Yum! The only thing missing was having this meal served, wrapped up in a big piece of greasy paper… but I can live without that! Here’s a peek at the “process” for making this dish:

Scroll Down For A Printable Recipe Card At The Bottom Of The Page

Prepare The Potatoes For Frying

Peel the potatoes, then cut them into sticks for the “chips” (fries). Pat them very dry with paper towels, trying to absorb as much moisture as possible.

Potatoes are peeled, then sliced to make British style "chips"

Cook the fries in HOT oil (350°F.) for about 8 minutes.

Potatoes cook in hot oil for 8 minutes

After cooking the “chips” for about 8 minutes, remove them from the oil with a slotted spoon or spatula. Let these semi-cooked “chips” drain on paper towels while you cook the fish.

Fries are drained after first cooking

Prep The Fish for Frying

Lightly coat all the pieces of fish in a flour/salt/pepper mixture and then set them aside to rest, while you mix the batter.

Fish pieces are coated in seasoned flour

Once the beer batter has been made, dip the flour coated fish pieces in it, one at a time. Fully coat the fish pieces with the batter before frying.

Beer batter is made for the fish

Cook The Beer Battered Fish

Cook the battered fish pieces in HOT oil (350°F) for 7-8 minutes until golden brown and crispy on all sides. It is very important for the oil to be at the temperature before adding the fish.

Cook the beer battered fish for approximately 7-8 minutes, turning the pieces over halfway though the cooking time.

Once done, the batter coating should be golden brown and crispy on all sides. The fish should be fully cooked through.

Beer battered fish pieces are cooked in hot oil

Drain the hot, cooked pieces of fish on layers of paper towels to absorb any excess oil. Reheat the oil back to 350°F. so you can fry the “chips” you set aside earlier a second time.

Beer battered fish drains on paper towel after cooking

Cook The “Chips” (Fries) A Second Time

Put the half-cooked “chips” (fries) back into the 350°F. hot oil (after removing the fish). Cook them for an additional 3-4 minutes, until they’re golden brown and crispy.

The "chips" (french fries) go back into hot oil for 2nd cooking

Time To Eat Some Beer Battered Fish And Chips!

Okay… now the beer battered fish and chips are hot, and ready to gobble up! Grab some Malt Vinegar or tartar sauce to serve with the fish.

Serve this delicious beer battered fish and chips, and enjoy! The fish has a crisp outer coating and is flaky inside, and the “chips” taste amazing, too. They’re so good!

Beer battered fish and chips are now served!

I love experimenting with food in our kitchen. I enjoy getting out of my comfort zone, learning about and trying new recipes for the first time!

Maybe if you’re feeling adventurous too, you will give this fish and chips recipe a try. I highly recommend it!

Thank you for stopping by today, and I invite you to come back soon for more delicious recipes. Take care, and have a great day.

Looking For More FISH Recipes?

You can find ALL of my recipes in the Recipe Index, which is located at the top of the page. I have LOTS of absolutely delicious fish recipes you can check out, including:

Want More Recipes? Get My FREE Newsletter!

I publish a newsletter 2 times per month (1st and 15th) with lots of recipes, tips, etc..
Would you like to join our growing list of subscribers?

There is a Newsletter subscription box on the top right (or bottom) of each blog post, depending on the device you use.
You can submit your e-mail address there, to be added to my mailing list.

Find Me On Social Media:

Facebook page: The Grateful Girl Cooks!
Pinterest:
The Grateful Girl Cooks!
Instagram:
jbatthegratefulgirlcooks

Author's signature

Recipe Source: http://www.lovefoodies.com/british-beer-battered-fish–chips.html

↓↓ PRINTABLE RECIPE BELOW ↓↓

0 from 0 votes
Fish and Chips
Prep Time
20 mins
Cook Time
20 mins
Total Time
40 mins
 
Can't get to England? Why not make your own crunchy beer battered fish and homemade "chips" (french fries) for dinner, in the comfort of your own home!
Category: Entree
Cuisine: British
Keyword: fish and chips
Servings: 2 servings
Calories Per Serving: 901 kcal
Author: JB @ The Grateful Girl Cooks!
Ingredients
For fish:
  • 4 pieces cod (thick pieces-about 1 1/2 inches thick- I used frozen cod pieces)
  • 1 cup all purpose flour
  • Salt and pepper , to season fish
For batter:
  • 1 cup all purpose flour
  • 1 1/2 teaspoons baking powder
  • 7 Tablespoons milk
  • 1/2 Tablespoon olive oil
  • 1 Tablespoon water
  • 6-7 Tablespoons beer (light beer is best). Club soda may be substituted.
For Chips:
  • 2 small to medium potatoes per person (peeled , cut into "finger thickness"
Serve With:
  • Malt Vinegar and/or Tartar Sauce
Instructions
  1. Pat fish filets dry with a paper towel. In a medium sized bowl, whisk together the flour, salt and pepper. Gently dredge the fish in the flour, turning to coat completely. Shake off excess flour; set flour covered filets aside.
  2. Make the batter for the fish: Add all batter ingredients to a medium bowl, except for the beer (or club soda). Whisk to combine. There will be some lumps. That's okay. Set batter aside.
  3. Make the chips: Peel, then cut potatoes into finger thickness. Slice potatoes lengthwise, then into strips. Dry the potatoes as much as you can by patting them dry with paper towels.
  4. Heat oil in large skillet or stock pot until it reaches 350 degrees. (No thermometer? Try dropping a tiny bit of batter into oil... it should really sizzle, and come to the surface!). Carefully put cut potatoes into hot oil. Let them cook for about 8 minutes. Remove potatoes from hot oil (I used a spatula to help remove them). Place hot potatoes onto a baking pan or a wire rack with paper towels underneath, to drain, while you cook the fish. (You will cook the potatoes a 2nd time AFTER the fish has cooked).
  5. Add the beer or club soda to the batter, and gently mix to combine. The batter should have the consistency of slightly thinned yogurt. If it is too thick, add just a touch more beer, and stir.
  6. Heat the oil back up to 350 degrees. While it is heating back up, place parchment paper on baking sheet (to hold the fish after you remove it from the hot oil). If you are cooking for more than two people, see notes section for tip). Place flour covered fish pieces, one at a time, into the batter and fully cover with batter. Let excess batter run off fish back into bowl. Gently put battered fish into 350 degree (HOT) oil. Cook a few pieces at a time. Cook fish for 7-8 minutes, turning once, until golden brown and crispy on both sides. Remove cooked fish to parchment paper lined baking sheet to keep warm while you cook additional fish, then re-cook the "chips".
  7. When done cooking the fish, heat the oil back to 350 degrees. Carefully add the chips. Cook for 3-4 additional minutes, until crispy and hot! Remove chips, drain.
  8. Serve hot pieces of fish, a serving of "chips" on the side, along with some Malt Vinegar and/or tartar sauce. Enjoy!
Recipe Notes

I only cooked enough fish for two people. If you're cooking for more than 2, cook the fish in batches. Keep your oven heated to 300 degrees. As you remove cooked fish from oil, place it on paper-lined baking sheets; keep fish warm in oven until ready to serve.
Calculate about 5 ounces fish per person. Malt vinegar and tartar sauce not included in caloric calculation.

Nutrition Facts
Fish and Chips
Amount Per Serving (2 pieces fish+ fries)
Calories 901 Calories from Fat 63
% Daily Value*
Fat 7g11%
Saturated Fat 1g6%
Cholesterol 148mg49%
Sodium 231mg10%
Potassium 2621mg75%
Carbohydrates 121g40%
Fiber 7g29%
Sugar 3g3%
Protein 79g158%
Vitamin A 240IU5%
Vitamin C 22.8mg28%
Calcium 320mg32%
Iron 12.9mg72%
* Percent Daily Values are based on a 2000 calorie diet.

Here’s one more to pin on your Pinterest boards!Can't get to England? Why not make your own crunchy beer battered fish and homemade "chips" (french fries) for dinner, in the comfort of your own home!


Save

Save

Save

Save

Save

Baked Pork Chops with Stuffing

Baked pork chops with stuffing, topped with a creamy mushroom sauce is comfort food at it’s best! They’re easy to make, and the chops are tender and delicious!Baked pork chops with stuffing, topped with a creamy mushroom sauce is comfort food at it's best! They're easy to make, and the chops are tender and delicious!
Ever have a dinner recipe you’ve made for years, have no clue where you got the recipe from, but it’s ALWAYS good? THIS recipe for Baked Pork Chops with Stuffing is one of them! I know  I’ve been making this recipe for over 20 years. Originally I copied it onto a 3×5 index card way back in the day, but don’t remember where I got the recipe from.

I made these baked pork chops for our dinner last night, and decided to share it on the ol’ blog today. They taste REALLY GOOD!

Baked pork chops with stuffing are “comfort food” at it’s easiest and best, folks. It only takes about 15 minutes of prep time to get them ready.  The pork chops are then baked for an hour.  While they are baking, you can paint your home, finish your thesis, jog 2-3 miles… whatever.

Scroll Down For A Printable Recipe Card At The Bottom Of The Page

Busy? Want To Make These Pork Chops Ahead Of Time?

Baked pork chops with stuffing are easy to make AND delicious! You can easily prep them ahead of time, too! The pork chops were prepped early in the day, then put into the refrigerator BEFORE baking.

About 1/2 hour before baking I took the pork chops out of the fridge, to take the chill off the meat. When ready to bake, I popped the dish into the oven. This would be a great dish for busy people to make. Prepare it early in the day, and have it ready to throw in the oven later.

It’s EASY To Make Baked Pork Chops With Stuffing

The pork chops are browned in a skillet, then topped with a simple “stuffing” (heh heh… the “stuffing” goes on TOP of the chops). I’m not sure why it is called “stuffing”. One of life’s great mysteries, I suppose.

It’s extremely easy to make the sauce, and pour it over the stuffing and chops. Once that is done, into the oven the dish goes. See? EASY! Now you can sit back and relax!

Making Baked Pork Chops With Stuffing

The “stuffing” is easy. Soft bread cubes are mixed with onion, butter, and spices. I use sourdough bread… crust and all. It’s very basic, but trust me… it will be delicious!

Stuffing for baked pork chops, made with soft bread cubes, butter and onions in small metal bowl

Pan-Sear The Pork Chops

Into a hot skillet the chops go, for a quick sear (to brown them). I prefer to use boneless pork chops, but bone-in chops will do just fine in this recipe, as well.

Pork chops are seared in skillet until lightly browned before baking.

Pork chops are quickly browned on both sides, then removed to a baking dish.

Pork chops are browned on both sides in skillet before being baked.

The “stuffing” is then piled on top of each pork chop.

Stuffing is placed on top of browned pork chops before baking.

Making The Sauce For The Baked Pork Chops With Stuffing

The sauce is heated through on the stove, on medium low heat. Best part? The sauce only has a few ingredients. EASY. The sauce is then poured over the stuffing and pork chops, then into the oven it goes for 1 hour!

Creamy mushroom sauce heating on stove top in skillet before toppng pork chops.

This is what it looks like when the chops with stuffing first come out of the oven. The top of the sauce and stuffing is golden brown and bubbly. Now all that’s left is to serve it up! The baked pork chops smell so good!

Bubbly sauce and stuffing on top of baked pork chops, right out of the oven.

Serving The Baked Pork Chops With Stuffing

Use a spatula to lift each pork chop out of the baking pan and onto individual plates. This helps to keep the stuffing intact on the baked pork chops. Now you are ready to eat! Yum. The chops were served with green beans and rice on the side.

Baked pork chops with stuffing on plate with green beans and rice on the side.

Sure hope you’ll give this recipe a try… I’m confident you will love it!  The pork chops come out of the oven very tender, and coated with a luscious stuffing and sauce. Trust me – make these pork chops! Congratulations! You’ve just made a fantastic, fairly inexpensive, and not too labor intensive meal!

Looking For More PORK Recipes?

You can find all of my recipes in the Recipe Index, located at the top of the page. I have lots of recipes that use pork, including:

Interested In More Recipes?

Thank you for visiting this website. I appreciate you using some of your valuable time to do soIf you’re interested, I publish a newsletter 2 times per month (1st and 15th) with all the latest recipes, and other fun info. I would be honored to have you join our growing list of subscribers, so you never miss a great recipe!
There is a Newsletter subscription box on the top right side (or bottom) of each blog post, depending on the device you use, where you can easily submit your e-mail address (only) to be included in my mailing list.

You Can Also Find Me On Social Media:

Facebook page: The Grateful Girl Cooks!
Pinterest:
The Grateful Girl Cooks!
Instagram:
jbatthegratefulgirlcooks

Author's signature

↓↓ PRINTABLE RECIPE BELOW ↓↓

0 from 0 votes
Baked Pork Chops with Stuffing
Prep Time
15 mins
Cook Time
1 hr
Total Time
1 hr 15 mins
 
Baked pork chops with stuffing, topped with a creamy mushroom sauce is comfort food at it's best! They're easy to make, and the chops are tender and delicious!
Category: Entree
Cuisine: American
Keyword: baked pork chops
Servings: 4 servings
Calories Per Serving: 345 kcal
Author: JB @ The Grateful Girl Cooks!
Ingredients
  • 4 boneless pork chops (or bone-in)
  • 2 Tablespoons olive oil
For stuffing:
  • 2 cups soft sourdough bread cubes (cut into small cubes-any bread will do...)
  • 2 Tablespoons brown onion , finely chopped
  • 2 Tablespoons butter , melted
  • 2 Tablespoons water
  • 1/2 teaspoon poultry seasoning (can substitute thyme, if desired)
For sauce:
  • 1 can cream of mushroom soup (undiluted)
  • 3-4 white button mushrooms , chopped
  • 1/3 cup cooking sherry (can substitute water, if desired)
Instructions
  1. Preheat oven to 350 degrees. Spray a 13x9 baking pan with non-stick spray.
  2. Heat the olive oil in a large skillet until very hot. Add the pork chops. Brown the chops on medium heat until browned on both sides. Remove chops from skillet; place in a single layer in prepared baking pan. Set aside.
  3. In a small bowl, mix the bread cubes, onion, melted butter, water, and poultry seasoning. Mix well to combine.
  4. Using the same skillet that you cooked the pork chops in, combine the can of soup, sherry (or water), and the chopped mushrooms. Heat through. Remove from heat.
  5. Place 1/4 of the stuffing mix on top of each chop. Pour (or ladle) the sauce mixture over the top of the stuffing and chops, to cover. Bake pork chops, uncovered, for 1 hour at 350 degrees. Serve, and enjoy!
Nutrition Facts
Baked Pork Chops with Stuffing
Amount Per Serving (1 pork chop)
Calories 345 Calories from Fat 153
% Daily Value*
Fat 17g26%
Saturated Fat 6g38%
Cholesterol 103mg34%
Sodium 191mg8%
Potassium 598mg17%
Carbohydrates 9g3%
Sugar 1g1%
Protein 32g64%
Vitamin A 175IU4%
Vitamin C 0.7mg1%
Calcium 13mg1%
Iron 1.4mg8%
* Percent Daily Values are based on a 2000 calorie diet.

Here’s one more to pin on your Pinterest boards!Baked pork chops with stuffing, topped with a creamy mushroom sauce is comfort food at it's best! They're easy to make, and the chops are tender and delicious!


Save

Blueberry Ice Cream

Grab the ol’ ice cream maker and get ready to make some creamy and delicious homemade blueberry ice cream, filled with lots of yummy blueberries!Grab the ol' ice cream maker and get ready to make some creamy and delicious homemade blueberry ice cream, filled with lots of yummy blueberries!
Two years ago I made blueberry ice cream as part of an Ice Cream Experiment, where I made many different varieties of ice cream with my Cuisinart ice cream maker over the course of the summer.  We really enjoyed this ice cream, and I loved using some of the blueberries I picked at a local U-Pick Farm and had stored in our freezer.

I experimented with grinding frozen blueberries and sugar in my food processor until liquified. This was done, as opposed to the more “traditional” method of cooking them until the blueberries “pop” and make a thick sauce. My wish was to have little bits of “fresh, uncooked” blueberries throughout the ice cream. It worked!

This was a very easy to prepare ice cream. I also added in a block of cream cheese, to enhance to the flavor and creamy thickness of this delicious ice cream, and I’m very glad I did!

Scroll Down For A Printable Recipe Card At The Bottom Of The Page

Blueberries Ready For The Picking!

Here are the blueberries at my local U-Pick Farm, in their natural state… before I got to them! Fresh blueberries, ready for the picking!

Blueberries ready to pick to make homemade blueberry ice cream!

Yeehaw! Here are the blueberries after I got to them. Look at all of them! That’s not bad, for 1½  hours of my time at our local U-Pick Farm.

These are the fresh blueberries I picked at a local farm.

I also ended up using some of the blueberry ice cream in another recipe, which we took to a friend’s home. It was a blueberry ice cream tart, and it was so yummy! I sure hope you will give this yummy blueberry ice cream a try… and really hope you enjoy it!  I think the color of this ice cream is amazing!

One scoop of blueberry ice cream, in a glass dish.

Blueberry ice cream is good year round, and so I really hope you will try this recipe out! Have a great day!

Looking For More ICE CREAM Recipes?

You can find all of my recipes for ice cream in the Recipe Index, located at the top of the page. A few favorites include:

Interested In More Recipes?

Thank you for visiting this website. I appreciate you using some of your valuable time to do soIf you’re interested, I publish a newsletter 2 times per month (1st and 15th) with all the latest recipes, and other fun info. I would be honored to have you join our growing list of subscribers, so you never miss a great recipe!
There is a Newsletter subscription box on the top right side (or bottom) of each blog post, depending on the device you use, where you can easily submit your e-mail address (only) to be included in my mailing list.

You Can Also Find Me On Social Media:

Facebook page: The Grateful Girl Cooks!
Pinterest:
The Grateful Girl Cooks!
Instagram:
jbatthegratefulgirlcooks

Author's signature

Recipe source: my brain, prior to “brain-freeze” (Ice cream induced!)

↓↓ PRINTABLE RECIPE BELOW ↓↓

0 from 0 votes
Blueberry Ice Cream
Prep Time
25 mins
Cook Time
0 mins
Freezing time
2 hrs
Total Time
2 hrs 25 mins
 

Grab the ol' ice cream maker and get ready to make some creamy and delicious homemade blueberry ice cream, filled with lots of yummy blueberries!

Category: Dessert
Cuisine: American
Keyword: blueberry ice cream
Servings: 8 servings
Calories Per Serving: 258 kcal
Author: JB @ The Grateful Girl Cooks!
Ingredients
  • 2 cups blueberries (fresh or frozen)
  • 1/2 cup granulated sugar
  • 8 oz. cream cheese
  • 1/2 teaspoon vanilla extract
  • 3/4 cup whole milk
  • 3/4 cup heavy whipping cream
  • 3 drops blue food coloring (this is optional...but it does enhance the color)
Instructions
  1. Place the blueberries and granulated sugar into a food processor or heavy duty blender. (If using frozen blueberries, put them in frozen... no need to defrost). Pulse or blend until liquified.
  2. Cut the cream cheese into chunks and add to the blueberry mixture. Add the vanilla extract. Mix until mixture is fairly smooth.
  3. Add milk to mixture. Mix until well blended. Pour mixture into large bowl.
  4. Lightly whisk in the heavy whipping cream, until well combined.
  5. Pour into ice cream maker canister. Freeze according to the manufacturer's instructions. Once done, remove to sealed container, and place in freezer for an hour or two to "ripen" and firm up.
  6. Scoop it up when ice cream is firm... and enjoy!
Nutrition Facts
Blueberry Ice Cream
Amount Per Serving (1 (1/2 cup) serving)
Calories 258 Calories from Fat 162
% Daily Value*
Fat 18g28%
Saturated Fat 11g69%
Cholesterol 64mg21%
Sodium 109mg5%
Potassium 114mg3%
Carbohydrates 20g7%
Sugar 18g20%
Protein 3g6%
Vitamin A 765IU15%
Vitamin C 3.7mg4%
Calcium 70mg7%
Iron 0.2mg1%
* Percent Daily Values are based on a 2000 calorie diet.

Here’s one more to pin on your Pinterest boards!Grab the ol' ice cream maker and get ready to make some creamy and delicious homemade blueberry ice cream, filled with lots of yummy blueberries!


Save