Month: February 2015

Mom’s Tuna Noodle Casserole

Nothing says “old school comfort food” like Mom’s Tuna Noodle Casserole! This classic dish has been around for years, is delicious, and easy on the budget!Nothing says "old school comfort food" like Mom's Tuna Noodle Casserole! This classic dish has been around for years, is delicious, and easy on the budget!
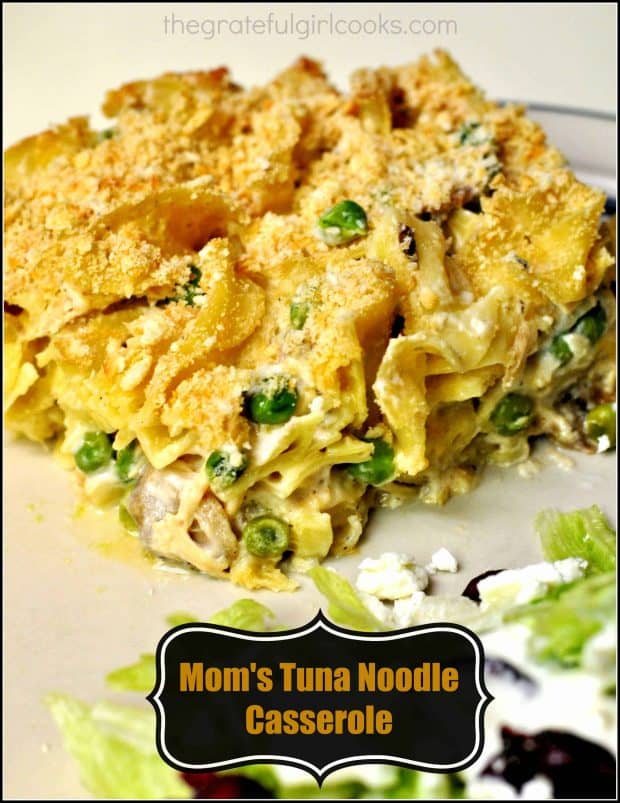
If my Mom’s Tuna Noodle Casserole isn’t “Old School”, I don’t know what is!  I’ve been sick for a few days, so “comfort food” and EASY were on the menu for one of our dinners. Mom made this for our family as I was growing up. That was back in the 60’s when we were footloose and fancy free kids, without a care in the world. You know- back in the day where we played outside for hours with our buddies, because we didn’t have computers or cell phones to stare at all day inside!

I think my Mom probably made this tuna noodle casserole for us because it was a very economical and tasty way to feed our family of 5, but it also tasted GOOD! Nothing fancy… just yummy food (and the leftovers taste great, also!)

When I made this the other night, my husband’s first words were “Wow… this brings back childhood memories. My Mom used to make tuna noodle casseroles, also!” I guess it must have been what Moms across America cooked back then. Here’s how to prepare this classic dish:

Scroll Down For A Printable Recipe Card At The Bottom Of The Page

How To Make Mom’s Tuna Noodle Casserole

In a large bowl, combine the cream of mushroom soup, sour cream, milk, salt, pepper, garlic powder, and grated Parmesan cheese. Stir to combine.
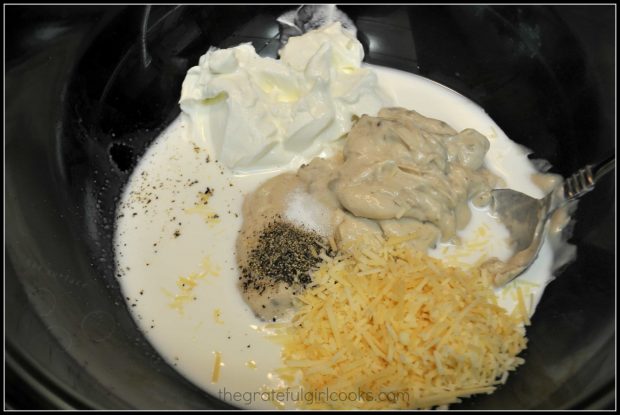
Mixing up the sauce for the tuna noodle casserole.
Add frozen peas (yes… still frozen!), sliced mushrooms, tuna, and grated cheddar cheese. Fold these in gently to the other ingredients in the bowl..
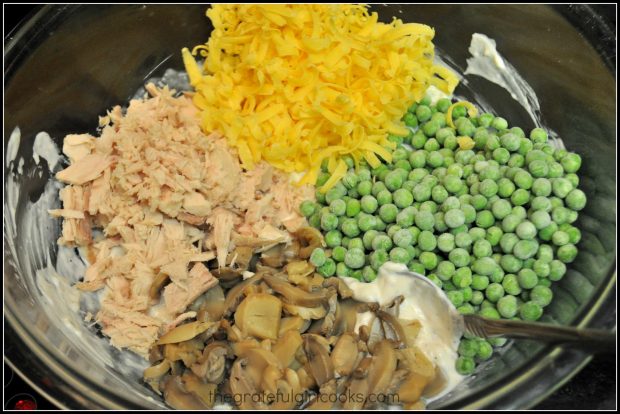
Tuna, mushrooms, cheddar cheese and peas are added to sauce for tuna noodle casserole.
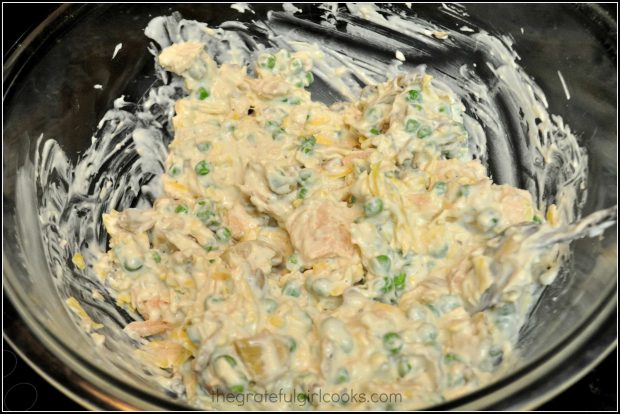
This is what the tuna noodle casserole ingredients looks like once all ingredients except noodles are folded in. It’s not pretty, but that’s okay!

All ingredients except for noodles are mixed together for tuna noodle casserole.

Cook the Egg Noodles

Cook the egg noodles for 7 minutes in a large pot of boiling water.
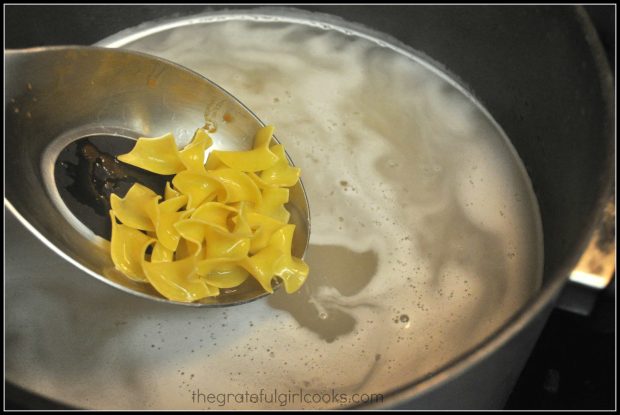
Egg noodles for tuna noodle casserole are cooked for 7 minutes.
Drain the egg noodles well once done, then add the drained noodles to the rest of the ingredients. Stir to combine.
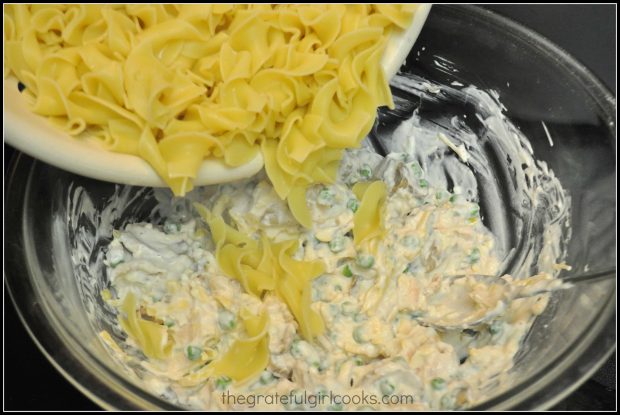
Cooked, drained pasta is added to tuna noodle casserole ingredients.
Pour ingredients into a 2 qt. baking dish that is coated with non-stick spray. Spread evenly in pan.
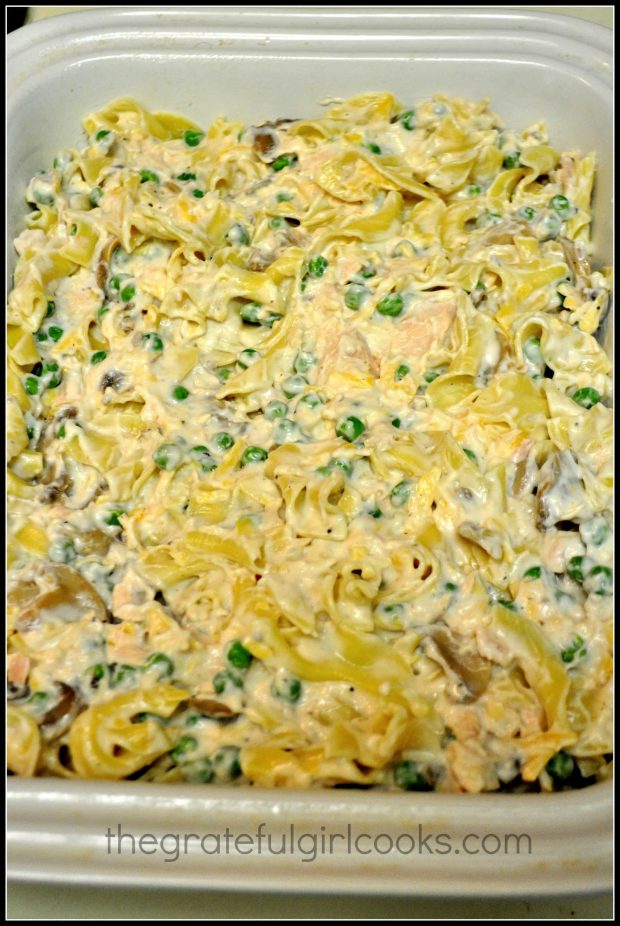
Tuna noodle casserole placed in baking dish, before going into the oven.
Crush some Ritz crackers in a baggie. I like to use a rolling pin to really break them down.
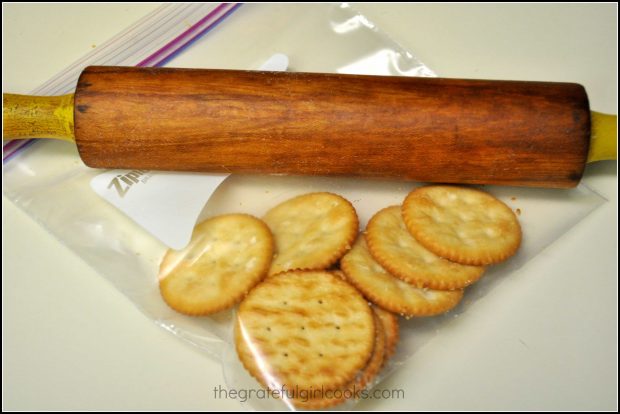
Buttery crackers are crushed to make a topping for tuna noodle casserole.
Bake Mom’s Tuna Noodle Casserole

Spread the crushed cracker crumbs evenly over the top of the casserole, then bake, uncovered at 350 degrees for 40 minutes.
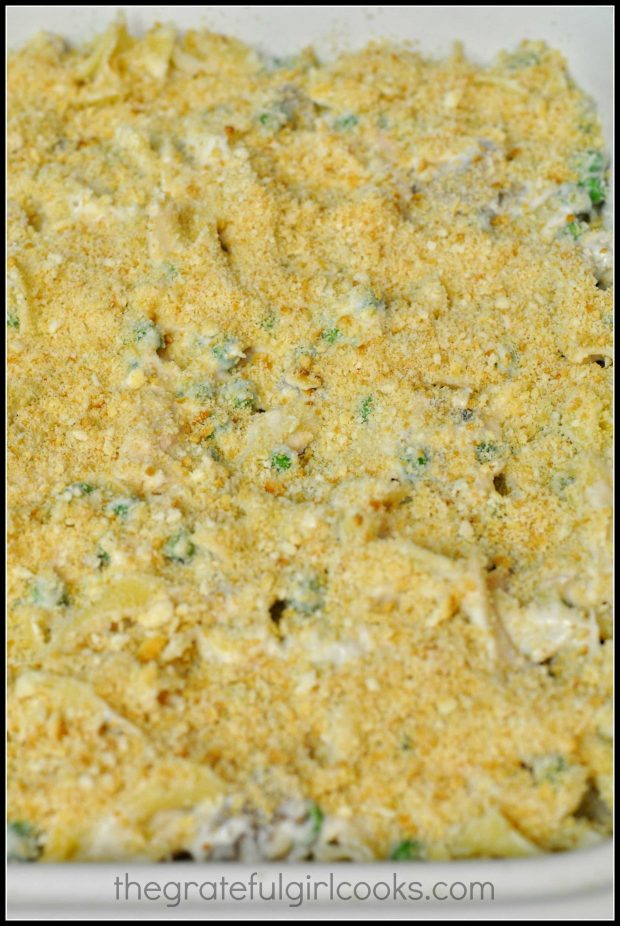
Buttery cracker crumbs are spread on top of tuna noodle casserole before baking.
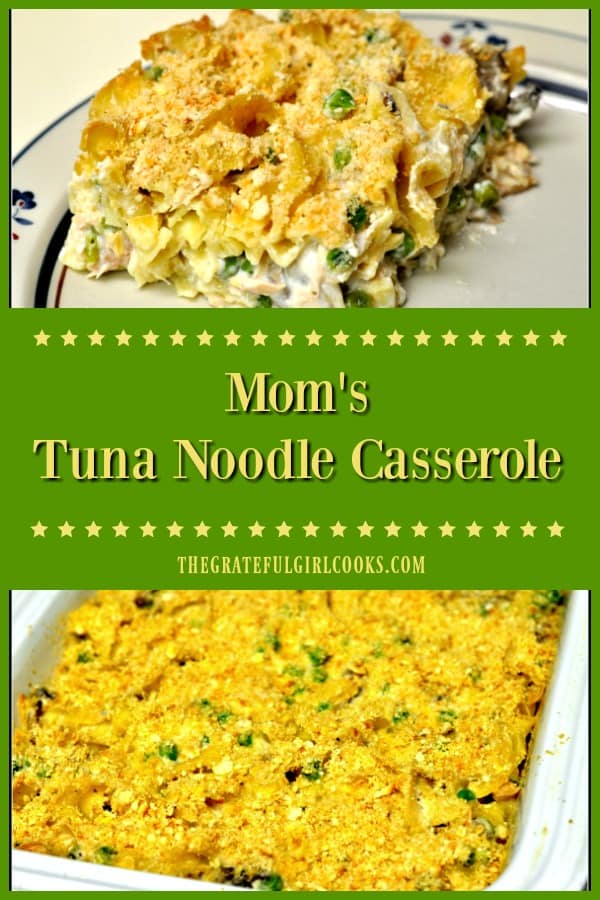
This is how it looks when it comes out of the oven. Let the casserole sit on a wire rack and cool for a few minutes before cutting into serving pieces.
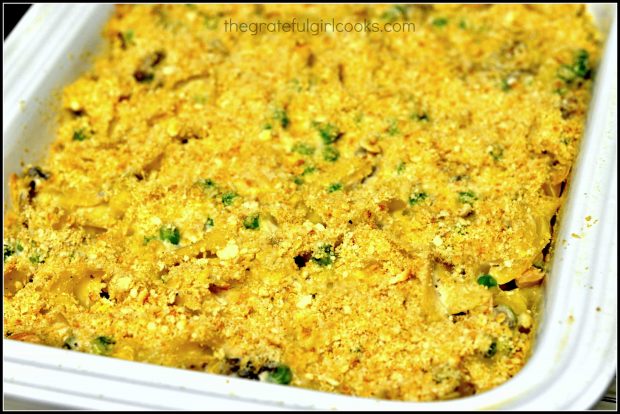
Mom's Tuna Noodle Casserole after baking. Ready to cut and serve!
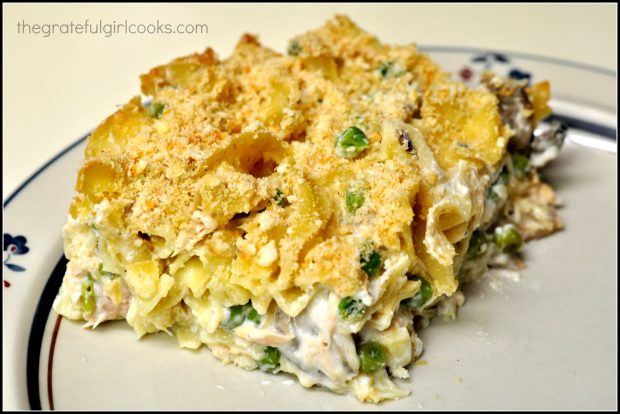
After casserole has “firmed” back up for a few minutes as it sits… slice with sharp knife into pieces, and use a spatula to place piece onto individual plates. Grab a fork, and enjoy this delicious, comfort food meal, just how good ol’ MOM used to make it!

Mom's Tuna Noodle Casserole cut into serving size on a plate.

This tuna noodle casserole is easy to prepare, feeds quite a few, is easy on the ol’ budget per serving, and it tastes great! Go figure! If you enjoy dishes that include tuna, you might also enjoy my recipes for Tuna Pasta Salad, “Old School” Tuna Cashew Casserole, or Quick and Easy Open-Faced Tuna Melts.

Hope you enjoy this simple blast from the past! Have a great day, and I hope you will come back again soon. Be sure to check out ALL my recipes in the Recipe Index, located at the top of the page. Have a great day, and come back soon.

Interested In More Recipes?

Thank you for visiting this website. I appreciate you using some of your valuable time to do soIf you’re interested, I publish a newsletter 2 times per month (1st and 15th) with all the latest recipes, and other fun info. I would be honored to have you join our growing list of subscribers, so you never miss a great recipe!
There is a Newsletter subscription box on the top right side (or bottom) of each blog post, depending on the device you use, where you can easily submit your e-mail address (only) to be included in my mailing list.

You Can Also Find Me On Social Media:

Facebook page: The Grateful Girl Cooks!
Pinterest:
The Grateful Girl Cooks!
Instagram:
jbatthegratefulgirlcooks

Author's signatureRecipe Source: My Mom

0 from 0 votes
Mom's Tuna Noodle Casserole
Prep Time
15 mins
Cook Time
40 mins
Total Time
55 mins
 
Nothing says "old school comfort food" like Mom's Tuna Noodle Casserole! This classic dish has been around for years, is delicious, and easy on the budget!
Category: Entree
Cuisine: American
Keyword: tuna noodle casserole
Servings: 8 servings
Calories Per Serving: 316 kcal
Author: JB @ The Grateful Girl Cooks!
Ingredients
  • 6 cups dry egg noodles (9 ounces)
  • 1 can cream of mushroom soup
  • 3/4 cup sour cream
  • 1/2 cup milk
  • 1/2 teaspoon salt
  • 1/4 teaspoon black pepper
  • 1/4 teaspoon garlic powder
  • 1/4 cup grated Parmesan cheese
  • 1 cup frozen peas (un-thawed)
  • 1 can sliced mushrooms (7 ounces)
  • 1 can albacore tuna , drained (6 ounces)
  • 1 cup grated cheddar cheese
  • 10-12 Ritz crackers (or Saltines, if you prefer)
Instructions
  1. Preheat oven to 350 degrees.
  2. In a large bowl, stir together the cream of mushroom soup, sour cream, milk, salt, pepper, garlic powder, and Parmesan cheese. Gently fold in the frozen peas, mushrooms, tuna, and cheddar cheese. Set aside.

  3. Cook egg noodles, according to pkg. instructions (add to boiling water, cook for 7 minutes). When done cooking, drain the noodles, and gently stir them into the rest of the ingredients until thoroughly combined.
  4. Spray a 2 quart baking dish with non-stick spray. Pour in the casserole ingredients; spread evenly. Finely crush Ritz crackers into small crumbs (put them in a baggie and use a rolling pin to crush them). Once crushed, sprinkle crumbs over the top of the casserole.

  5. Bake (uncovered) at 350 degrees for 40 minutes. Remove pan to a wire rack. Let it cool for a few minutes before slicing (letting it cool a bit will let you make better cuts, and make it easier to dish up!) Serve, and enjoy!

Nutrition Facts
Mom's Tuna Noodle Casserole
Amount Per Serving (1 (1/8th of total))
Calories 316 Calories from Fat 108
% Daily Value*
Fat 12g18%
Saturated Fat 6g38%
Cholesterol 64mg21%
Sodium 694mg30%
Potassium 312mg9%
Carbohydrates 32g11%
Fiber 2g8%
Sugar 2g2%
Protein 18g36%
Vitamin A 420IU8%
Vitamin C 7.4mg9%
Calcium 210mg21%
Iron 1.6mg9%
* Percent Daily Values are based on a 2000 calorie diet.

Here’s one more to pin on your Pinterest boards!Nothing says "old school comfort food" like Mom's Tuna Noodle Casserole! This classic dish has been around for years, is delicious, and easy on the budget!


Save

Save

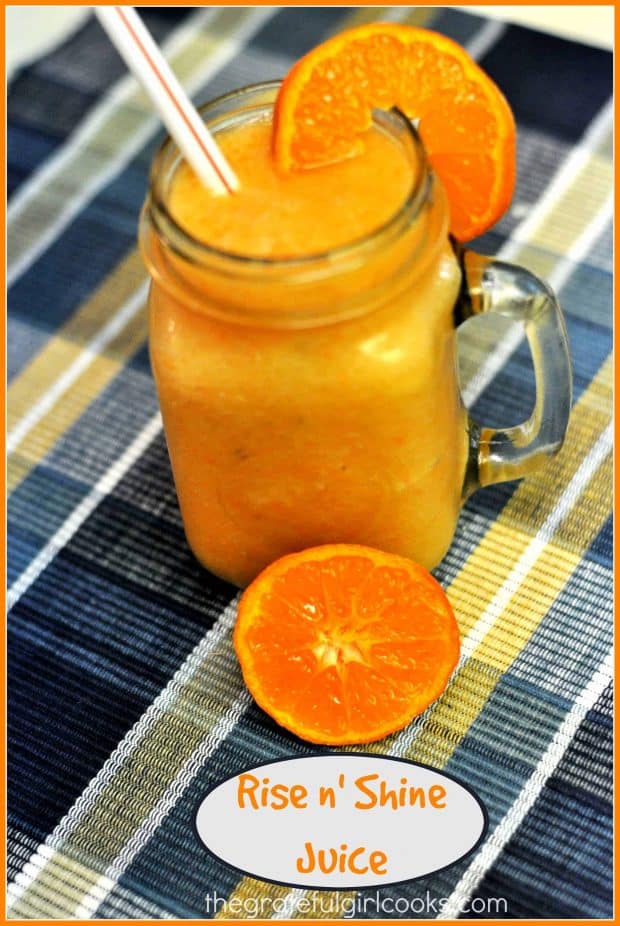
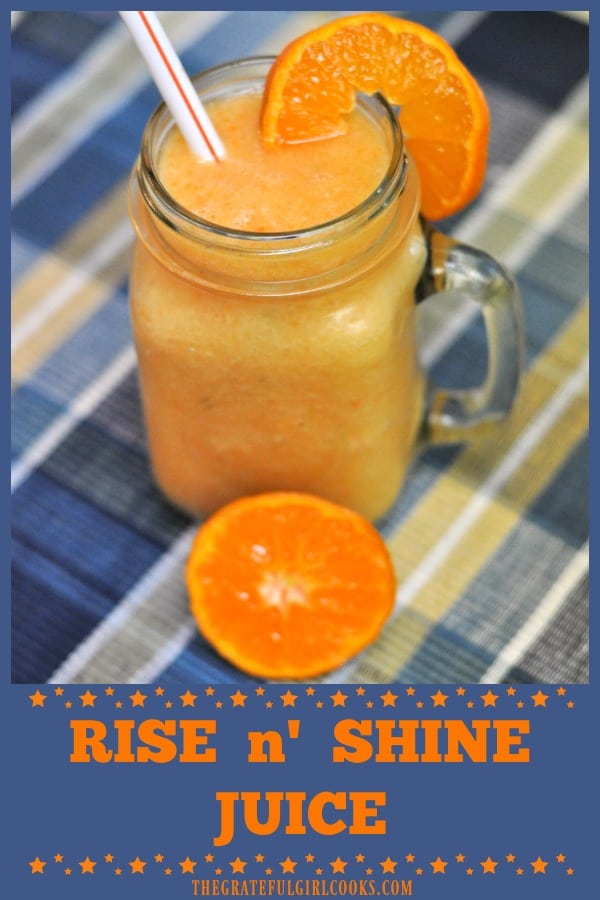
Rise n’ Shine Juice

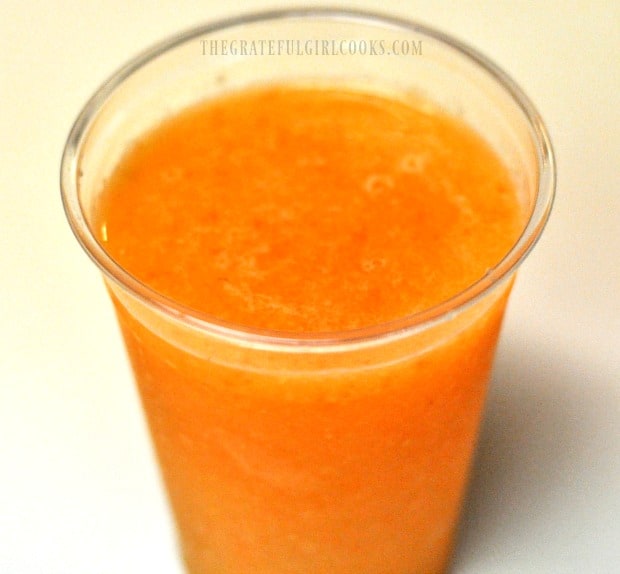
Rise n’ Shine Juice is a delicious citrus beverage flavored with red grapefruit, mandarins, oranges, lemons, apples, carrots, ginger, and a frozen banana!Rise n' Shine Juice is a delicious citrus beverage flavored with red grapefruit, mandarins, oranges, lemons, apples, carrots, ginger, and a frozen banana!

The other day I wanted a healthy, filling, and BIG blended juice for my breakfast. I ended up juicing a ruby red grapefruit, mandarin oranges, valencia oranges, half a lemon, and then… if that wasn’t enough, I added apples, carrots, fresh ginger, half a frozen banana, and a handful of crushed ice into the mix. I called it “Rise n’ Shine Juice”! YUM!

Scroll Down For A Printable Recipe Card At The Bottom Of The Page

Making Rise n’ Shine Juice In A Food Processor

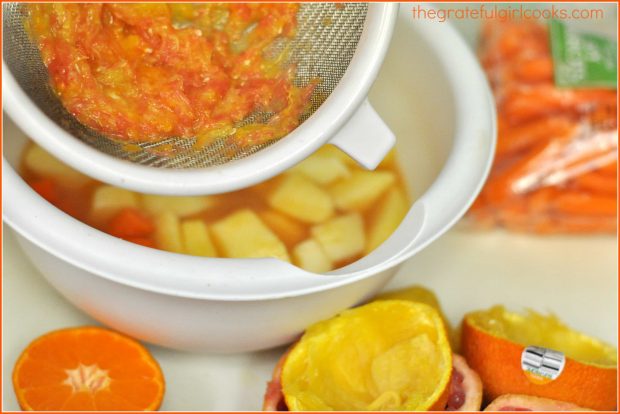
After juicing the citrus fruits, I strained out the pulp, then added the juice, along with sliced raw carrots, a small knob of fresh ginger, 2 sliced apples, and half a frozen banana into my food processor. (FYI) * I have not made this juice using a blender, but if you want to try it, you will definitely need to grate the carrots and apples, not slice them, to give them a better chance of being fully blended*.

See all the pulp? That’s a lot of citrus pulp strained out of the juice… Now all that is left to do is “pulverize” all the ingredients into a thick, cold citrus juice drink!

After juicing the citrus, strain and discard the pulp.

Time For A Cold Citrus Juice!

I blended all the ingredients up in the food processor, then added a small handful of ice to get it really cold, and mixed that in, as well. The beauty of it is that it actually tasted good, after completely pulverizing it!

The result was a delicious, slightly thicker than normal juice (thanks to the apple and carrots).  I liked it, certainly got my fruit requirement for the day in, it filled me up, and I froze the leftovers (recipe makes enough for 2!) for another day!

Cold leftover Rise n' Shine Juice is delicious, even the next day!

I really hope you enjoy this great tasting rise n’ shine juice!  If you enjoy cold breakfast smoothies or juice drinks, you might also enjoy my recipes for Triple Berry Banana Smoothies, Strawberry Smoothies , or a copycat version of an Orange Julius.

Thanks for stopping by, and I hope you will come back again soon. Remember that you can find ALL of my recipes in the Recipe Index, located at the top of the page. Have a great day.

Interested In More Recipes?

Thank you for visiting this website. I appreciate you using some of your valuable time to do soIf you’re interested, I publish a newsletter 2 times per month (1st and 15th) with all the latest recipes, and other fun info. I would be honored to have you join our growing list of subscribers, so you never miss a great recipe!
There is a Newsletter subscription box on the top right side (or bottom) of each blog post, depending on the device you use, where you can easily submit your e-mail address (only) to be included in my mailing list.

You Can Also Find Me On Social Media:
Facebook page: The Grateful Girl Cooks!
Pinterest: The Grateful Girl Cooks!
Instagram: jbatthegratefulgirlcooks

Hope you enjoy it!

Author's signature

0 from 0 votes
Rise n' Shine Juice
Prep Time
15 mins
Cook Time
0 mins
Total Time
15 mins
 

Rise n' Shine Juice is a delicious citrus beverage flavored with red grapefruit, mandarins, oranges, lemons, apples, carrots, ginger, and a frozen banana!

Category: Beverage
Cuisine: American
Keyword: rise n' shine juice
Servings: 2
Calories Per Serving: 324 kcal
Author: JB @ The Grateful Girl Cooks!
Ingredients
  • 1 Ruby red grapefruit
  • 3 oranges
  • 2 mandarin oranges
  • 2 small apples , peeled, seeded, cored, and sliced
  • 7 baby carrots , sliced
  • 1/2 banana (frozen)
  • 1 teaspoon fresh ginger , minced
  • handful of ice
Instructions
  1. Juice the grapefruit, oranges, and mandarin oranges. Pour juice through a strainer to remove pulp. Pour juice into food processor (or heavy duty blender).
  2. Add apple slices, sliced carrots, frozen banana and ginger to processor. Process for several minutes until almost all of the apples and carrots have broken down.
  3. Add a handful of crushed ice to the processor. Process again, until ice is fully incorporated into liquid.
  4. Pour into serving glasses. Garnish with an orange slice, if desired.  Enjoy your fruit fix for the day!

Recipe Notes

If you are going to use a blender, be sure to GRATE the carrots and apple (instead of cutting and slicing them) before adding them to ensure they blend easier!

Nutrition Facts
Rise n' Shine Juice
Amount Per Serving (1 g)
Calories 324 Calories from Fat 9
% Daily Value*
Fat 1g2%
Sodium 31mg1%
Potassium 1051mg30%
Carbohydrates 82g27%
Fiber 14g58%
Sugar 60g67%
Protein 4g8%
Vitamin A 7380IU148%
Vitamin C 178.3mg216%
Calcium 160mg16%
Iron 1mg6%
* Percent Daily Values are based on a 2000 calorie diet.

Here’s one more to pin on your Pinterest boards!Rise n' Shine Juice is a delicious citrus beverage flavored with red grapefruit, mandarins, oranges, lemons, apples, carrots, ginger, and a frozen banana!
 

Save

Save

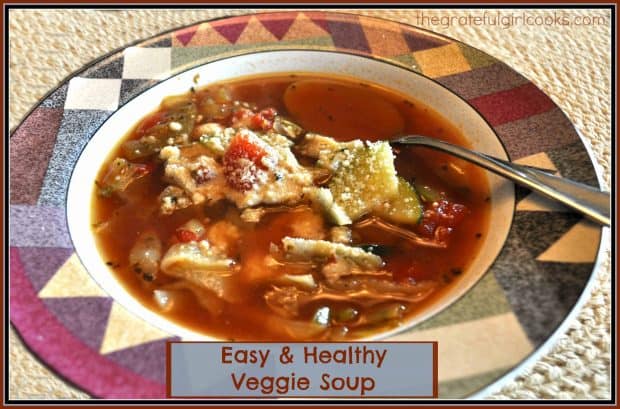
Easy & Healthy Veggie Soup

You’re gonna love this yummy Weight Watchers recipe for easy to make Italian healthy veggie soup, with carrots, zucchini, onions, tomatoes, garlic and cabbage!You're gonna love this yummy Weight Watchers recipe for easy to make Italian healthy veggie soup, w/carrots, zucchini, onions, tomatoes, garlic and cabbage!
Years and years ago, both of my parents were members of Weight Watchers. My mom found a recipe in their membership book for an Easy & Healthy Veggie Soup that they loved, and she shared it with me. I quickly became a huge fan, because it is absolutely delicious!

My Mom loved to cook this healthy veggie soup and have it around for a quick lunch or dinner, because not only was it delicious, it was good for you. 

She tweaked the original recipe a bit, but loved that it was extremely low in calories and fat, but high in fiber, to keep them both feeling full while dieting.

We LOVE This Healthy Veggie Soup!

For years now I have been making this healthy veggie soup whether I’ve been dieting or not dieting, but simply because I LOVE IT! This is a very easy recipe to make, as well. It is simply a matter of cooking some veggies, and then adding the rest of the ingredients, and cooking until done.

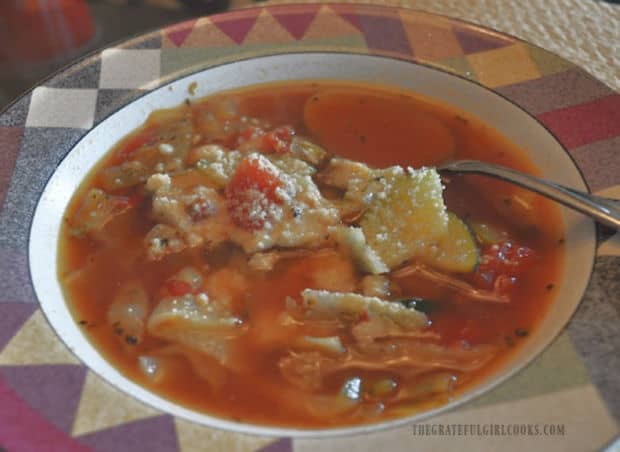
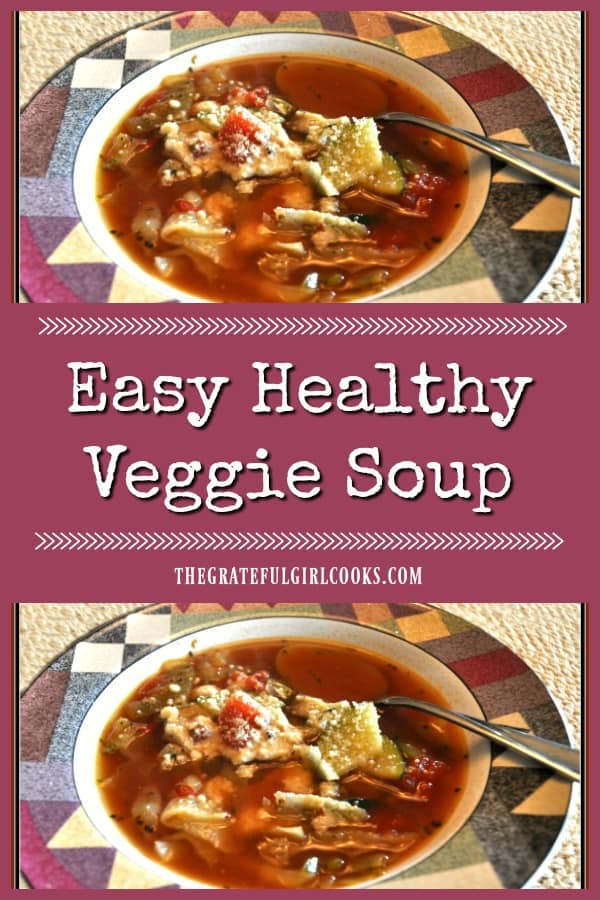
The picture (below) is from a time I made this soup for her, when I was home visiting. I suppose it is kind of a “full-circle” kind of thing!

Sorry I don’t have any more photos… at the time, I didn’t even think of it! Honestly, though, this truly is a simple, delicious healthy veggie soup, that I’m confident you’ll enjoy, too.

Healthy Veggie Soup is very easy to make, ridiculously LOW in calories, and frankly, with the seasonings in it, tastes like a wonderful Italian-flavored soup.

It’s wonderful (whether you’re on a diet or not) and DELICIOUS! We even like to sprinkle it with a bit of Parmesan cheese right when it’s served hot. YUM!

Close up of easy healthy veggie soup in bowl.

Just like my Mom did, I have found it to be a hearty and healthy veggie soup (filled with carrots, onions, beans, cabbage, and zucchini), that I love to have extra of in my refrigerator, for a quick lunch or dinner meal.

Hope you enjoy making and eating this delicious healthy veggie soup, too! Thanks for stopping by, and I invite you to come back soon for more family-friendly recipes.

Looking For More SOUP Recipes?

You can find all of my recipes in the Recipe Index, located at the top of the page. I have LOTS of great soup recipes, including:

Want More Recipes? Get My FREE Newsletter!

I publish a newsletter 2 times per month (1st and 15th) with lots of recipes, tips, etc..
Would you like to join our growing list of subscribers?

There is a Newsletter subscription box on the top right (or bottom) of each blog post, depending on the device you use.
You can submit your e-mail address there, to be added to my mailing list.

Find Me On Social Media:

Facebook page: The Grateful Girl Cooks!
Pinterest:
The Grateful Girl Cooks!
Instagram:
jbatthegratefulgirlcooks

Author's signatureRecipe slightly adapted from: Weight Watcher membership booklet from years ago.

↓↓ PRINTABLE RECIPE BELOW ↓↓

0 from 0 votes
Easy & Healthy Veggie Soup
Prep Time
15 mins
Cook Time
45 mins
Total Time
1 hr
 

You're gonna love this yummy Weight Watchers recipe for easy to make Italian healthy veggie soup, w/carrots, zucchini, onions, tomatoes, garlic and cabbage!

Category: Dinner, Soup
Cuisine: American
Keyword: healthy veggie soup
Servings: 6
Calories Per Serving: 49 kcal
Author: JB @ The Grateful Girl Cooks!
Ingredients
  • Non-stick cooking spray
  • 1 cup carrots , sliced thinly
  • 1/2 cup brown onion , chopped
  • 2 teaspoons minced garlic
  • 12 oz. can diced tomatoes
  • 3 beef bouillon cubes (can also use beef or vegetable broth)
  • 3 cups water
  • 1 cup chopped frozen spinach (cooked according to pkg. directions, then drained)
  • 1 cup green cabbage , sliced, chopped
  • 1/2 cup canned green beans (or frozen)
  • 1/2 Tablespoon dried oregano
  • 2 teaspoons dried basil
  • 1 teaspoon salt
  • black pepper (to taste)
  • 1 1/2 cups uncooked , thinly sliced zucchini (added during last 10 minutes of cooking)
  • Parmesan cheese (optional as garnish, but it really add to the flavor!)
Instructions
  1. Spray a soup pot with non-stick spray.
  2. Cook the carrots and onions in soup pot for 4 minutes on medium-high heat. Add the garlic and cook for additional 45 seconds, stirring constantly, to prevent garlic from burning.
  3. Add the rest of the ingredients (EXCEPT for the zucchini and Parmesan cheese).. Stir to combine. Bring to a boil, then reduce heat and cook on low for 30 minutes, or until carrots have become tender.
  4. Add the zucchini and cook an additional 10 minutes (adding the zucchini in toward the end of cooking time prevents the zucchini from getting soggy or falling apart).
  5. When heated through, ladle soup into serving bowls. Garnish with a few sprinkles of Parmesan cheese.
  6. Enjoy!
  7. Heat
Recipe Notes

NOTE: Caloric calculation does not include optional Parmesan cheese for garnish.
If using bouillon cubes instead of store bought broth, toss them in whole with the other ingredients. As soup cooks, they will dissolve and help flavor the soup.

Nutrition Facts
Easy & Healthy Veggie Soup
Amount Per Serving (1 serving)
Calories 49 Calories from Fat 9
% Daily Value*
Fat 1g2%
Saturated Fat 0.1g1%
Polyunsaturated Fat 0.1g
Monounsaturated Fat 0.1g
Cholesterol 0.1mg0%
Sodium 995mg43%
Potassium 431mg12%
Carbohydrates 10g3%
Fiber 3g13%
Sugar 5g6%
Protein 3g6%
Vitamin A 6826IU137%
Vitamin C 20mg24%
Calcium 95mg10%
Iron 2mg11%
* Percent Daily Values are based on a 2000 calorie diet.

Here’s one more to pin on your Pinterest boards!You're gonna love this yummy Weight Watchers recipe for easy to make Italian healthy veggie soup, w/carrots, zucchini, onions, tomatoes, garlic and cabbage!


Save

Save

BBQ Shredded Pork Hoagies with Spicy Slaw

Classic BBQ Shredded Pork Hoagies, topped with a slightly spicy and crunchy slaw. This is a great way to use leftover pork to make a new lunch or dinner!Classic BBQ Shredded Pork Hoagies, topped with a slightly spicy and crunchy slaw. This is a great way to use leftover pork to make a new lunch or dinner!
Do you like leftovers? We like them, but sometimes it can get “old” eating leftovers (even if original recipe was fantastic!). Such was the case a few weeks ago, so I “morphed” the leftovers from a pork roast into  BBQ Shredded Pork Hoagies with Spicy Slaw. YUM.

We had leftovers from a  Pork Tenderloin with Cranberry-Raspberry Sauce recently.  Since there was a bit of pork still waiting to be eaten (there’s only 2 of us), I decided to morph the leftover pork into a completely new meal!

That’s how we ended up with these delicious BBQ Shredded Pork Hoagies with Spicy Slaw. The spicy slaw recipe is from a previous recipe I posted for a Fried Chicken, Spicy Mayo and Slaw Sandwich.

Scroll Down For A Printable Recipe Card At the Bottom Of the Page

How I Made The BBQ Shredded Pork Hoagies

I took the leftover pork slices and added lots of BBQ sauce. Then I threw it all back into my slow cooker and let it cook all day (at least 5-6 hours).

Note: ANY leftover boneless pork chops or pork roast will work fine!  You can also BUY precooked BBQ pork if you want. This would allow you to skip this next part, but this is how I did it (to use up our leftovers).

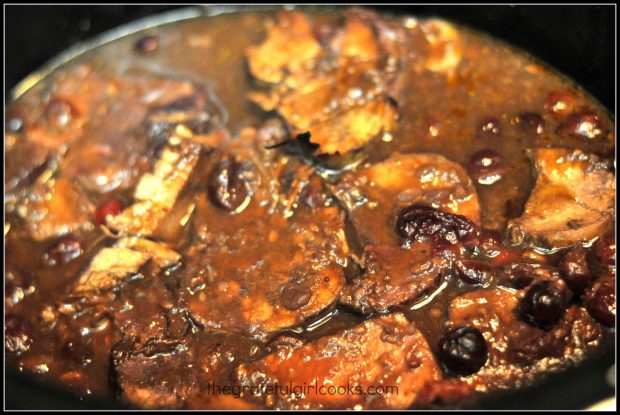
The leftover pork had some of the sauce from the pork tenderloin left on it. You can also see some of the leftover cranberries, too. I threw the pork slices into the crock pot, along with the BBQ sauce and a tiny bit of water. You can see a few of the cranberries floating around in this photo.

Pieces of pork for BBQ shredded pork hoagies, cooking in crock pot.

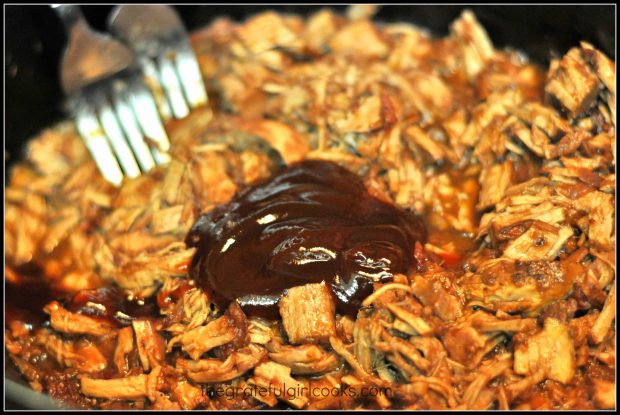
After the meat and sauce had cooked for 5-6 hours I easily shredded the pork (with two forks) and added even more BBQ sauce.

Shredding meat and bbq sauce for BBQ shredded pork hoagies with two forks

Another Way To Make The Shredded Pork Without Using A Crock Pot

You can always shred leftover pieces of tender pork roast (without any sauce on it), THEN add the BBQ sauce. That way, you don’t have to use a crock pot.

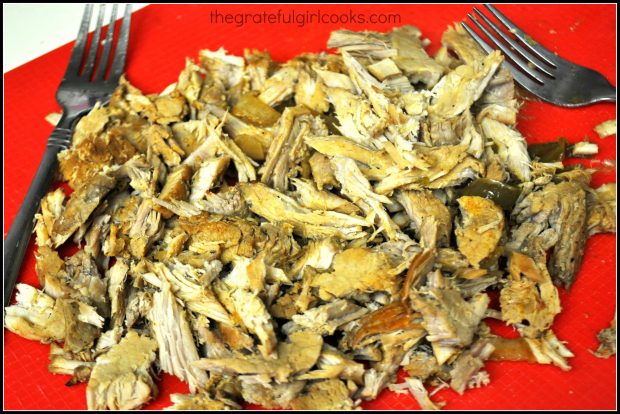
All you need to do is mix the plain shredded pork with BBQ sauce and heat, before making the hoagies. The picture below shows this plain, unadorned shredded pork.

Shredded pieces of pork roast for BBQ shredded pork hoagies

Making The Spicy Slaw For Sandwich

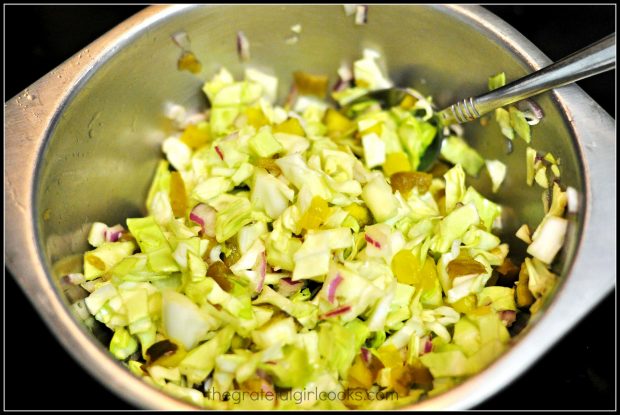
Once pork is shredded, coated with BBQ sauce and reheated, all you need to do is prepare the spicy slaw mixture. Make the spicy slaw by mixing ingredients in a small bowl. There are only 5 simple ingredients, and it is EASY to make! Refrigerate slaw until you’re ready to put it on the hoagies!

Spicy coleslaw for BBQ shredded pork hoagies, in small metal bowl

To Make BBQ Shredded Pork Hoagies

Spread some hoagie rolls with butter, then lightly grill them until golden brown and slightly crisp.  This will help the bread to not get too soggy, once you add the BBQ shredded pork.

Grilling hoagie rolls in skillet, for BBQ shredded pork hoagies.

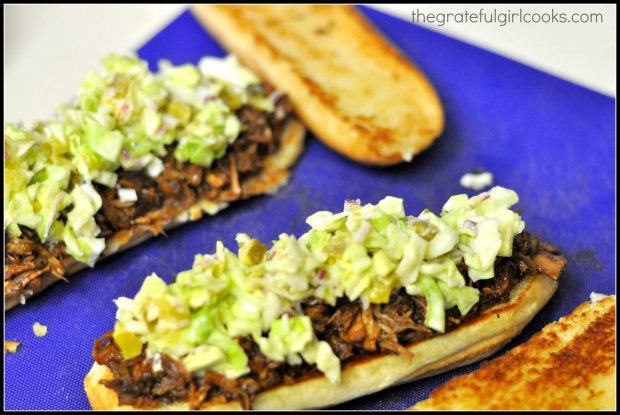
Top the toasted hoagie rolls with hot shredded BBQ pork, then add the cold, spicy slaw.

BBQ shredded pork hoagies with spicy slaw.

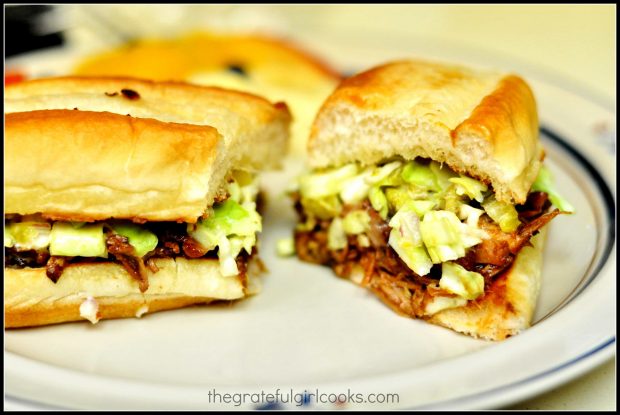
If desired, you can slice the BBQ shredded pork hoagies in half.  Serve this delicious sandwich hot, and enjoy!!!

BBQ shredded pork hoagies, cut in half on a plate

Hope you enjoy these BBQ shredded pork hoagies! It’s a great way to use leftover pork, without having to toss it or have it dry out in the refrigerator!

Looking For More SANDWICH Recipes?

You can find ALL of my recipes in the Recipe Index, located at the top of the page. I have some sandwich recipes that you’ll enjoy, including:

Interested In More Recipes?

Thank you for visiting this website. I appreciate you using some of your valuable time to do soIf you’re interested, I publish a newsletter 2 times per month (1st and 15th) with all the latest recipes, and other fun info. I would be honored to have you join our growing list of subscribers, so you never miss a great recipe!
There is a Newsletter subscription box on the top right side (or bottom) of each blog post, depending on the device you use, where you can easily submit your e-mail address (only) to be included in my mailing list.

You Can Also Find Me On Social Media:

Facebook page: The Grateful Girl Cooks!
Pinterest:
The Grateful Girl Cooks!
Instagram:
jbatthegratefulgirlcooks

Author's signature

0 from 0 votes
BBQ Shredded Pork Hoagies with Spicy Slaw
Prep Time
20 mins
Cook Time
15 mins
Total Time
35 mins
 
Classic BBQ Shredded Pork Hoagies, topped with a slightly spicy and crunchy slaw. This is a great way to use leftover pork to make a new lunch or dinner!
Category: Sandwich
Cuisine: American
Keyword: BBQ shredded pork hoagies
Servings: 4 sandwiches
Calories Per Serving: 615 kcal
Author: JB @ The Grateful Girl Cooks!
Ingredients
  • Shredded pork (quantity-as much or as little as you wish)
  • BBQ sauce (enough to fully saturate the amount of shredded pork you will use)
  • 4 Hoagie rolls (one per sandwich)
  • 4 Tablespoons Butter (to spread on rolls before grilling)
For spicy slaw:
  • 1 garlic clove , finely chopped
  • 1/2 small red onion , thinly sliced, chopped
  • 1 jalapeno , finely chopped
  • 4 cups thinly sliced green cabbage
  • 1/2 cup Bread and Butter pickle slices , plus 1/4 cup pickle juice from jar
Instructions
  1. Cook pork or leftover pork in slow cooker for several hours until completely tender. Using two forks, shred the pork. Put back into slow cooker and add sufficient BBQ sauce to completely coat meat. Heat thoroughly (can also heat the shredded BBQ pork in microwave, if desired).
  2. Make spicy slaw while pork is heating: Mix all slaw ingredients in a small bowl; toss to combine, then cover and refrigerate until ready to build the sandwiches.
  3. Spread each half of the hoagie rolls with butter. Grill until they are golden brown.
  4. Place grilled roll on serving dish. Spread hot BBQ shredded pork on top of one half of the roll. Spoon some cold spicy slaw evenly over the pork. Place top bun on the hoagie, and serve!
  5. Enjoy!
Recipe Notes

Cook time varies. Cooking time shown is based on having pre-cooked pork available when you start this recipe. Once you have the precooked, shredded pork coated with BBQ sauce and hot, you can have the sandwiches finished in about 10 minutes.
My other advice is to try and make the spicy slaw several hours before serving. The flavors really develop well, the longer it is refrigerated!

Nutrition Facts
BBQ Shredded Pork Hoagies with Spicy Slaw
Amount Per Serving (1 sandwich)
Calories 615
* Percent Daily Values are based on a 2000 calorie diet.

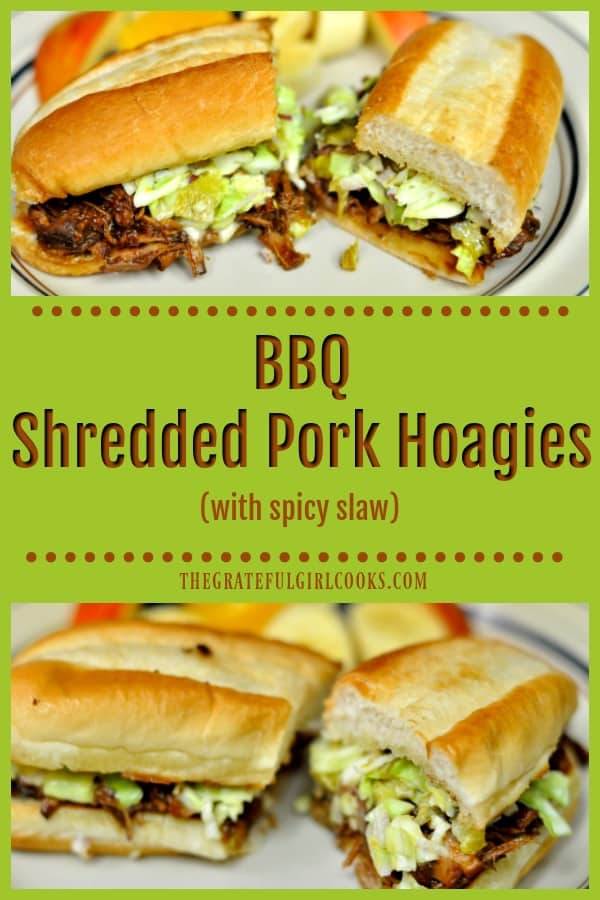
Here’s one more to pin on your Pinterest boards!Classic BBQ Shredded Pork Hoagies, topped with a slightly spicy and crunchy slaw. This is a great way to use leftover pork to make a new lunch or dinner!


Save

Fruit and Cheese Danish Pastry

Fruit and Cheese Danish Pastry is an easy to make treat using puff pastry dough, topped with cream cheese filling, assorted fruit jams, and icing.Fruit and Cheese Danish Pastry / The Grateful Girl Cooks!

I tried a new recipe for Fruit and Cheese Danish Pastry recently. The recipe was found on Pinterest after clicking through different websites looking for a great breakfast pastry recipe.  This recipe I landed on is absolutely delicious and easy to prepare.

I happened to have a box of Puff Pastry sitting in my freezer patiently waiting (for a few months) it’s turn to be transformed into something wonderful. Well… this recipe for fruit and cheese danish was a great way to utilize it!

The pastries were perfect for an “out of the ordinary” breakfast for my husband and myself. Honestly, munching on one of these and sipping a large cup of strong, HOT coffee was a nice way to start the day. This pastry recipe is pretty straightforward, doesn’t require a degree in rocket science to make, and they are delicious! Hope you’ll give these fruit and cheese danish pastries a try!

Scroll Down for A Printable Recipe Card At The Bottom Of The Page

How To Make Fruit and Cheese Danish Pastry

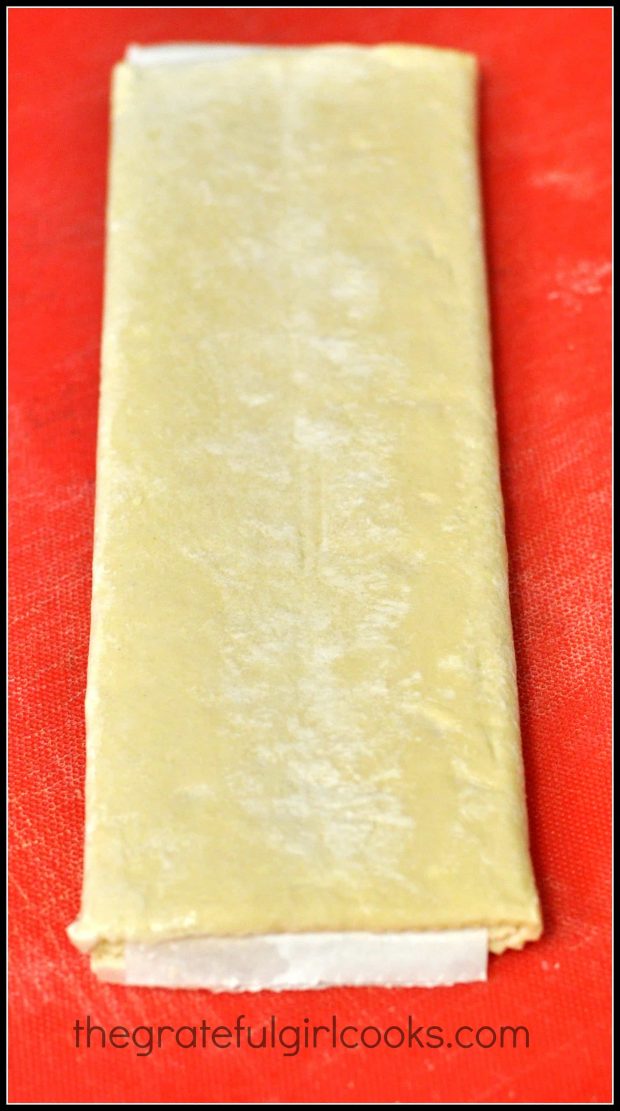
Here’s what you do:  First, remove one sheet of puff pastry from box and let it thaw slightly before unfolding it.

Puff pastry rests before unfolding it to make pastries.

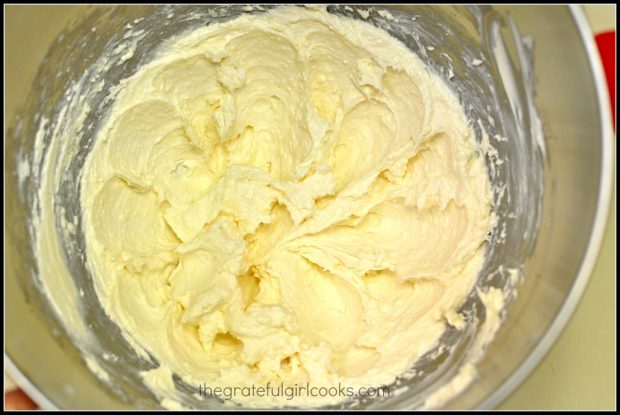
While the puff pastry dough is thawing, prepare the cream cheese filling… easy!

The cream cheese filling for the pastry is mixed together until creamy.
Cut The Pastry Dough In Steps

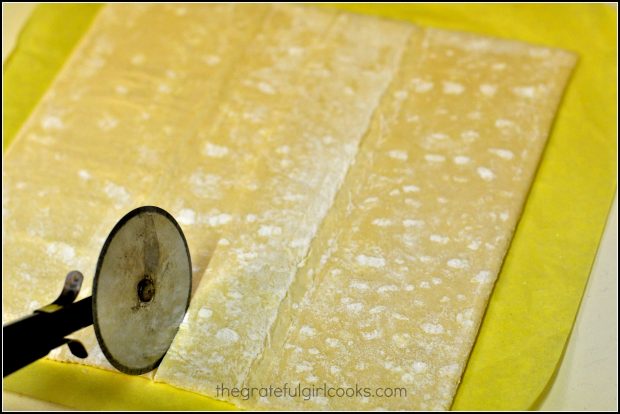
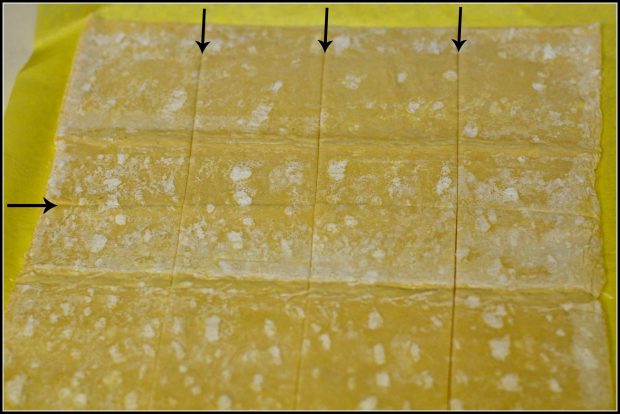
The next step is to unroll the dough. Press together the fold lines, and then cut the dough in half. I used my pizza cutter to make the cuts.

Cutting the pastry dough with a pizza cutter.Now you need to cut the dough in half again. You should now have 4 equal sized squares of puff pastry.

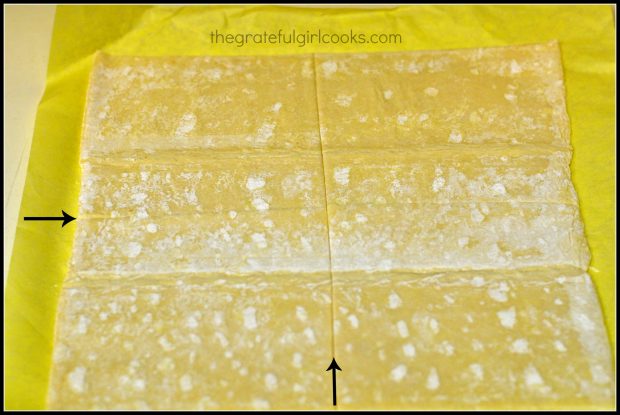
The pastry dough is cut in half again.Cut each of the 4 puff pastry squares in half. You should now have 8 rectangle sized pieces of pastry dough.

The last cut leaves 8 rectangular sized pieces of puff pastry.

Forming and Filling The Fruit and Cheese Danish

Place 4 pieces of the dough onto a parchment paper lined baking sheet. Place the remaining 4 pieces of  pastry dough onto another lined sheet, making sure to leave lots of space in between each piece.

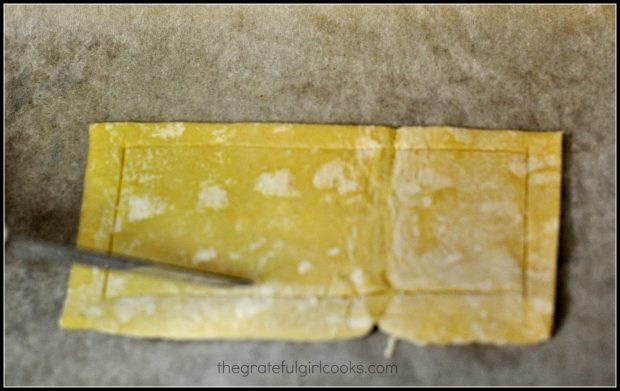
Using a sharp knife, cut a border all around the edge (but don’t cut all the way through the pastry dough!). The outside part will rise up nice and puffy. The inside pastry will also rise, but not as much, due to the weight of the fruit and cheese.

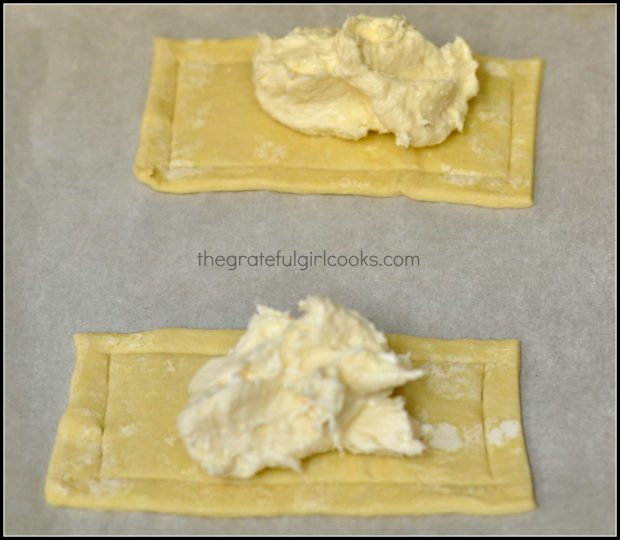
Each pastry dough piece is scored with a knife around the edges.Now spoon some of the cream cheese filling onto each piece of dough like this, as shown below.

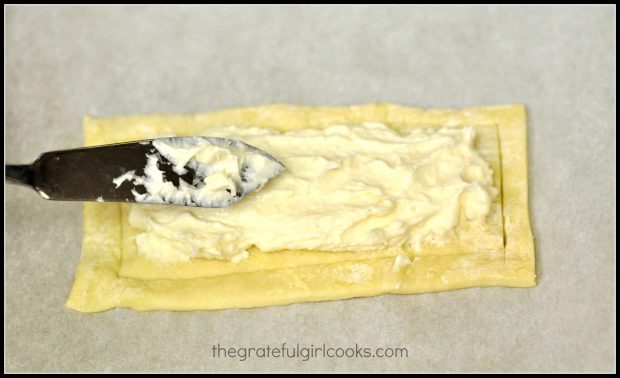
Spoonfuls for cream cheese filling are placed onto middle of dough.Carefully spread the cream cheese filling out, almost to the border. This is where you need to stay within the lines!

Cream cheese filling is spread out in inner rectangle of the dough.

Add The Fruit Toppings

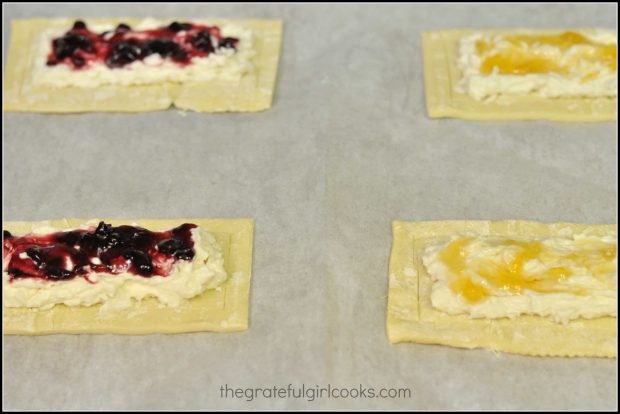
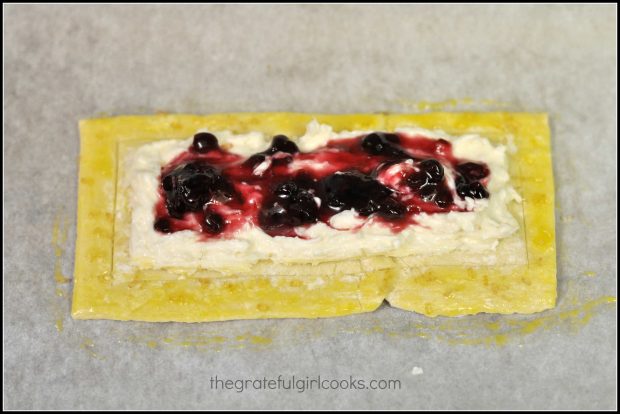
Now place a small dollop of your favorite jam on top of the cream cheese and swirl it around a bit to blend (I used a toothpick). Use any flavor jam you prefer. I used my homemade jams: orange marmalade, strawberry, raspberry, and boysenberry and made a couple pastries of each flavor. It should look kind of like this shown below:

Jam is added to each fruit and cheese danish before baking.Bake The Fruit And Cheese Danish
Brush the outside border of each pastry with an egg yolk mixture, then sprinkle the border with turbinado sugar. Place pans into the oven, and bake for 13-14 minutes (or until golden brown).

Egg yolk is brushed around edges, and sugar is sprinkled on before baking. The fruit and cheese danish pastries will look like this when you remove them from oven. Don’t they look colorful and good enough to eat?

Eight Fruit and Cheese Danish Pastries cool on a wire rack after baking. Here’s an “up close and personal” look at a boysenberry fruit and cheese danish. YUM.

An up close look at a boysenberry fruit and cheese danish.
Once the pastries have cooled, they are drizzled with a simple powdered sugar/lemon glaze. When the glaze has firmed up, they are ready to eat!

A vanilla glaze is drizzled over the baked fruit and cheese pastries before serving.
Dig in… and enjoy! We thought the fruit and cheese danish pastries were wonderful, and I really hope you do, too! If you enjoy this pastry, be sure and check out my recipe for Orange Cheese Danish Pastry (my very first recipe posted on the blog).

Looking For More BREAKFAST PASTRY Recipes?

You can find all of my recipes in the Recipe Index, located at the top of the page. I have some delicious pastry recipes you might enjoy, including:

Interested In More Recipes?

Thank you for visiting this website. I appreciate you using some of your valuable time to do soIf you’re interested, I publish a newsletter 2 times per month (1st and 15th) with all the latest recipes, and other fun info. I would be honored to have you join our growing list of subscribers, so you never miss a great recipe!
There is a Newsletter subscription box on the top right side (or bottom) of each blog post, depending on the device you use, where you can easily submit your e-mail address (only) to be included in my mailing list.

You Can Also Find Me On Social Media:

Facebook page: The Grateful Girl Cooks!
Pinterest:
The Grateful Girl Cooks!
Instagram:
jbatthegratefulgirlcooks

Author's signature

Original recipe source: https://sites.google.com/site/oakcottagerecipes/easy-fruit-and-cheese-danish

0 from 0 votes
Fruit and Cheese Danish Pastry
Prep Time
25 mins
Cook Time
13 mins
Total Time
38 mins
 

Fruit and Cheese Danish Pastry is an easy to make treat using puff pastry dough, topped with cream cheese filling, assorted fruit jams, and icing.
Category: Pastry
Cuisine: American
Keyword: fruit and cheese danish
Servings: 8
Calories Per Serving: 308 kcal
Author: JB @ The Grateful Girl Cooks!
Ingredients
For the pastry:
  • 1 sheet of frozen puff pastry
  • 4 ounces cream cheese , room temp.
  • 1/4 cup granulated sugar
  • 1/2 teaspoon vanilla extract
  • 1 Tablespoon heavy whipping cream (or half n' half)
  • 2 Tablespoons jam (of your choice)
  • 1 egg yolk , beaten with 1 teaspoon water
  • Turbinado sugar (to sprinkle on pastries before baking)
For the drizzle on the baked pastries:
  • 1 cup powdered sugar
  • 2-3 Tablespoons lemon juice
Instructions
  1. Preheat your oven to 400 degrees F.
  2. While oven is pre-heating, remove one sheet of puff pastry from freezer. Let it slightly thaw before unfolding dough (15 minutes or so).
  3. While dough is slightly thawing, prepare the cream cheese "filling". In a medium sized bowl, beat the cream cheese, granulated sugar, vanilla extract and whipping cream together, using an electric mixer. Mix for several minutes until mixture is smooth and spreadable. Set mixture aside.
  4. Unroll the puff pastry carefully, and try to press dough together where the fold lines were. Cut dough into 8 rectangles (dough is cut in half, then in half again, then each of the 4 squares is cut in half once more).
  5. Cover 2 baking sheets with parchment paper. Place 4 dough rectangles on each baking sheet, leaving ample space in between each piece. Take a sharp knife, and score a border all the way around the dough. Make sure to NOT cut all the way through to the bottom! (by cutting a border, the edges will rise up and hold the filling in better!-don't leave this step out!)
  6. Evenly distribute the cream cheese filling onto the middle of each dough rectangle. Use a knife or spatula to spread it out over the top of the pastry dough, but stay inside the cut border!
  7. Place a very small dollop of your favorite jam onto the cream cheese mixture. Use a toothpick and gently swirl the jam across the top of the pastry.
  8. Mix the egg yolk and water in a small bowl. Using a pastry brush, brush the egg yolk mixture around the outer border of each pastry. While the dough is still "wet", sprinkle the border lightly with turbinado sugar.
  9. Put the baking sheets into the oven and bake at 400 degrees F. for 13-14 minutes. The pastries should be golden around the edges. The dough should have also risen a bit. Take the pans from the oven and place them on a wire rack to cool completely.
  10. Once the pastries are cool, mix the powdered sugar and lemon juice in a small bowl. (if too thick to drizzle, just add a bit more lemon juice!). Use a spoon, and drizzle the glaze over the cooled pastries (I went side to side). Let the glaze firm up, then pastries are ready to be served.
  11. Enjoy!
Nutrition Facts
Fruit and Cheese Danish Pastry
Amount Per Serving (1 g)
Calories 308 Calories from Fat 135
% Daily Value*
Fat 15g23%
Saturated Fat 4g25%
Cholesterol 34mg11%
Sodium 146mg6%
Potassium 53mg2%
Carbohydrates 40g13%
Sugar 24g27%
Protein 3g6%
Vitamin A 140IU3%
Vitamin C 1.9mg2%
Calcium 27mg3%
Iron 0.9mg5%
* Percent Daily Values are based on a 2000 calorie diet.

Here’s one more to pin on your Pinterest boards!Fruit and Cheese Danish Pastry is an easy to make treat using puff pastry dough, topped with cream cheese filling, assorted fruit jams, and icing.
 

Save

Save

Save

Save

Pumpkin Bread

Make three mini-loaves of this traditional, delicious pumpkin bread, flavored with the warm Fall spices of of cinnamon, nutmeg and ginger! EASY!Make three mini-loaves of this traditional, and delicious pumpkin bread, flavored with the warm Fall spices of of cinnamon, nutmeg and ginger! EASY!
The taste and smell of freshly baked Pumpkin Bread is one I always enjoy! There is something so absolutely delicious about the spices (it SMELLS and TASTES like FALL) in this bread… that’s probably the reason I love it so much!  I’m really glad I don’t have to wait for the Fall season just to prepare this delicious pumpkin bread.

In the Fall, I buy “pie pumpkins” (the cute small ones) and make my own pumpkin puree when the season is over. I love having extra pumpkin in the freezer, just patiently waiting to be used in various recipes (like this pumpkin bread) throughout the year!

Scroll Down For A Printable Recipe Card At The Bottom Of The Page

You Can Use Store Bought Canned Pumpkin or Make Your Own

If you’re interested, you can check out my blog post on How To Make Pumpkin Puree. I freeze bags of pumpkin puree from our fresh pie pumpkins in the Fall. It’s really convenient to pull a bag out of our freezer with just the right amount of pumpkin in it to make these mini bread loaves!

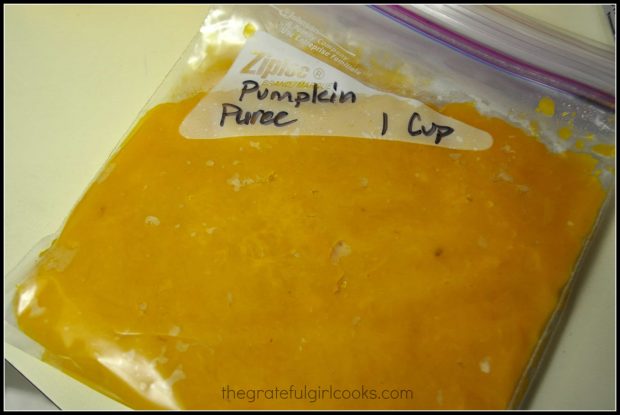
Pumpkin puree is used to make this pumpkin bread (homemade or store bought)

Most people tend to think of pumpkin bread as something that is most often served in the FALL. It’s the time when pumpkins seem to be sprouting on every street corner. With the convenience of modern grocery stores, it’s easy to make this tasty bread any time of the year.

How I Got This Recipe

I have used this recipe for many, many years. A friend named Catherine, (from one of the churches my husband served on staff at) gave me a loaf of this bread over 30 years ago. She also gave me her recipe which I still use, to this day.

The recipe yields 3 mini-loaves, so there’s a loaf or two to share with friends. At Christmas time, I like to double the recipe, and that way I have plenty of “food gifts” for our friends and neighbors!

How To Make Pumpkin Bread (it’s easy!)

The recipe is easy! Basically, you just mix all the ingredients together and bake. How hard is that? Hope you will give this one a try. It is a delicious, flavorful and moist pumpkin bread (and it freezes very well!) If you bake the pumpkin bread in disposable aluminum loaf pans, it is very convenient for gift-giving!

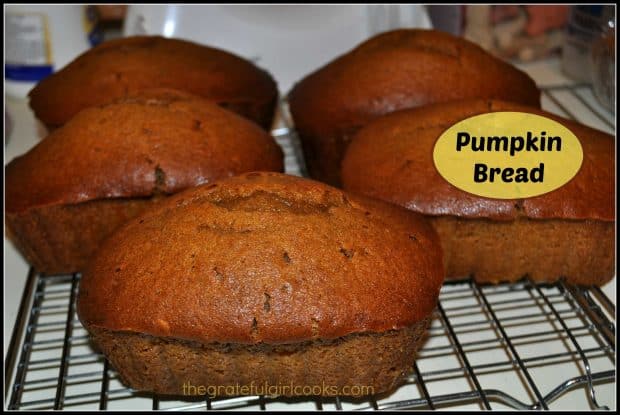
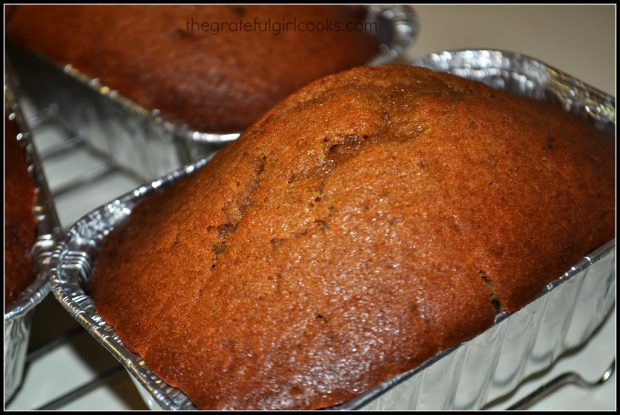
Once of the finished loaves of pumpkin bread.

Hope you enjoy making and eating this delicious pumpkin bread! Have a great day!

Looking For More BREAD Recipes?

You can find all of my bread recipes in the Recipe Index, located at the top of the page. A couple of favorites you might also enjoy include:

Interested In More Recipes?

Thank you for visiting this website. I appreciate you using some of your valuable time to do soIf you’re interested, I publish a newsletter 2 times per month (1st and 15th) with all the latest recipes, and other fun info. I would be honored to have you join our growing list of subscribers, so you never miss a great recipe! 
There is a Newsletter subscription box on the top right side (or bottom) of each blog post, depending on the device you use, where you can easily submit your e-mail address (only) to be included in my mailing list.

You Can Also Find Me On Social Media:

Facebook page: The Grateful Girl Cooks!
Pinterest:
The Grateful Girl Cooks!
Instagram:
jbatthegratefulgirlcooks

Author's signatureOriginal recipe source: Catherine Alexander

0 from 0 votes
Pumpkin Bread
Prep Time
10 mins
Cook Time
35 mins
Total Time
45 mins
 

Make three mini-loaves of this traditional, and delicious pumpkin bread, flavored with the warm Fall spices of of cinnamon, nutmeg and ginger! EASY!

Category: Bread
Cuisine: American
Keyword: pumpkin bread
Servings: 18 slices (3 mini loaves)
Calories Per Serving: 137 kcal
Author: JB @ The Grateful Girl Cooks!
Ingredients
  • 1 1/2 cups all purpose flour
  • 2 teaspoons baking powder
  • 1/2 teaspoon baking soda
  • 3/4 teaspoon salt
  • 1 cup granulated sugar
  • 1/2 teaspoon cinnamon
  • 1/2 teaspoon nutmeg
  • 1/4 teaspoon ginger
  • 1/2 cup chopped walnuts or pecans
  • 1 egg
  • 1/4 cup vegetable oil
  • 1 cup pumpkin puree (NOT pumpkin pie mix)
Instructions
  1. Preheat oven to 350 degrees.
  2. Spray 3 mini-loaf pans with a non-stick spray.
  3. Mix all ingredients in a large bowl with an electric mixer until ingredients are thoroughly combined.
  4. Divide batter evenly between 3 mini-loaf pans.
  5. Bake at 350 degrees for 35-40 minutes, or until toothpick inserted in center of loaf comes out dry.
  6. Remove loaf pans to wire rack and cool thoroughly, before removing bread from pans.
  7. Enjoy!
Nutrition Facts
Pumpkin Bread
Amount Per Serving (1 slice)
Calories 137 Calories from Fat 45
% Daily Value*
Fat 5g8%
Saturated Fat 2g13%
Cholesterol 9mg3%
Sodium 132mg6%
Potassium 101mg3%
Carbohydrates 20g7%
Sugar 11g12%
Protein 2g4%
Vitamin A 2130IU43%
Vitamin C 0.6mg1%
Calcium 29mg3%
Iron 0.8mg4%
* Percent Daily Values are based on a 2000 calorie diet.

Here’s one more to pin on your Pinterest boards!Make three mini-loaves of this traditional, and delicious pumpkin bread, flavored with the warm Fall spices of of cinnamon, nutmeg and ginger! EASY!


Save

Save

Oatmeal Raisin Cookies

This traditional recipe for soft, chewy Oatmeal Raisin Cookies is easy to prepare. The cookies are absolutely delicious, and the recipe makes 4 dozen. You’re gonna LOVE ’em!This traditional recipe for soft, chewy Oatmeal Raisin Cookies is easy to prepare. The cookies are absolutely delicious, and the recipe makes 4 dozen.
I love good old-fashioned Oatmeal Raisin Cookies. Do you? In the past couple years I’ve realized that I don’t make as many cookies as I used to when our sons were young and living in our home.

All that said… every now and then, a delicious cookie is a perfect little munchie my husband and I love to snack on! Sometimes we go a little crazy and eat 2 or 3! Ha Ha!

These classic oatmeal raisin cookies are a cinch to make, and I’m confident you’ll enjoy them, too!

Scroll down For A Printable Recipe Card At The Bottom Of The Page

Yummy Old-Fashioned Oatmeal Raisin Cookies

These Oatmeal Raisin Cookies are some of my favorites. I’ve seen a lot of “updated” recipes over the years for this simple cookie. Some versions use egg whites, applesauce, bananas, artificial sugar or agave, etc..

Those new variations may be absolutely delicious, but I find we still like the old-fashioned version for these oatmeal raisin cookies the best!

I started making oatmeal raisin cookies over 30 years ago when I tried a recipe that was printed on a container of oatmeal. The real stars of this show are the old fashioned oats and chewy raisins! They were an instant family favorite!

I’ve been using the same old recipe I wrote down on a 3×5 card ever since then (and that’s a long time!). It is definitely tried and true!

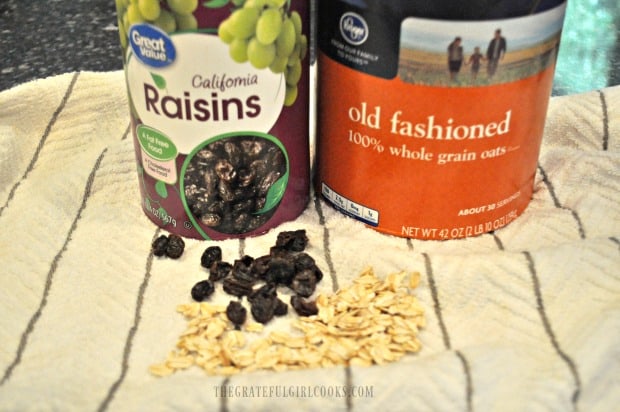
The stars of this cookie recipe: old fashioned oats and raisins!

How Many Oatmeal Raisin Cookies Will this Recipe Make?

The recipe is very simple to make, and will yield about 4 dozen of these delicious oatmeal raisin cookies. They’re golden-brown, chewy, and taste wonderful.

I hope you enjoy these oatmeal raisin cookies as much as I do, too! They’re a tasty snack that are sure to please almost everyone.

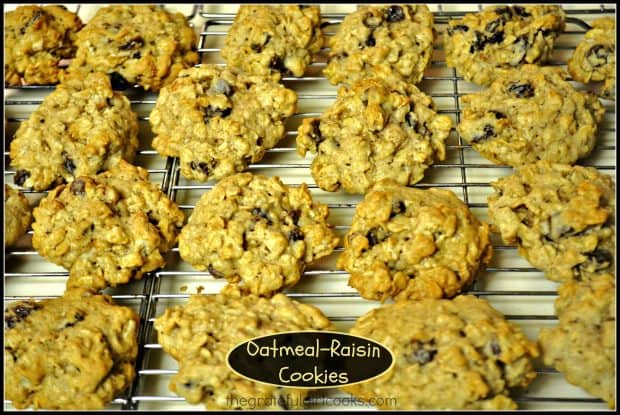
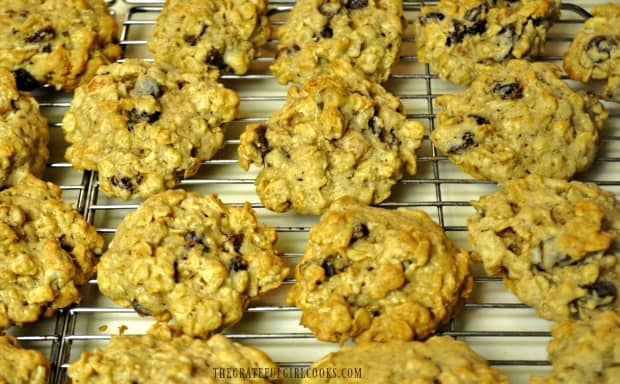
Oatmeal raisin cookies on wire rack, ready to eat!

Looking For More Cookie Recipes?

If you like these oatmeal raisin cookies, perhaps you would be interested in some of my other cookie recipes! Hint… I have a lot. Can you tell we love cookies?

You can find ALL of my recipes in the Recipe Index, which is located at the top of the page. I have quite a few delicious cookie recipes for you to check out, including:

Interested In More Recipes?

Thank you for visiting this website. I appreciate you using some of your valuable time to do soIf you’re interested, I publish a newsletter 2 times per month (1st and 15th) with all the latest recipes, and other fun info. I would be honored to have you join our growing list of subscribers, so you never miss a great recipe!
There is a Newsletter subscription box on the top right side (or bottom) of each blog post, depending on the device you use, where you can easily submit your e-mail address (only) to be included in my mailing list.

You Can Also Find Me On Social Media:

Facebook page: The Grateful Girl Cooks!
Pinterest:
The Grateful Girl Cooks!
Instagram:
jbatthegratefulgirlcooks

Author's signature

0 from 0 votes
Oatmeal Raisin Cookies
Prep Time
15 mins
Cook Time
8 mins
Total Time
23 mins
 
This traditional recipe for soft, chewy Oatmeal Raisin Cookies is easy to prepare. The cookies are absolutely delicious, and the recipe makes 4 dozen.
Category: Cookies
Cuisine: American
Keyword: oatmeal raisin cookies
Servings: 48 cookies (approx.)
Calories Per Serving: 95 kcal
Author: JB @ The Grateful Girl Cooks!
Ingredients
  • 14 Tablespoons butter (1 cube + 6 Tablespoons) , softened
  • 3/4 cup brown sugar , packed
  • 1/2 cup granulated sugar
  • 2 eggs
  • 1 teaspoon vanilla extract
  • 1 1/2 cups all-purpose flour
  • 1 teaspoon baking soda
  • 1 1/4 teaspoons cinnamon
  • 1/2 teaspoon salt
  • 3 cups old fashioned oats , uncooked
  • 1 cup raisins
Instructions
  1. Preheat oven to 350 degrees.
  2. In a large bowl, using electric beaters, mix together softened butter, brown sugar and granulated sugar until smooth and creamy. Add eggs and the vanilla extract to the butter mixture.

  3. In a medium sized bowl, whisk together the flour, baking soda, cinnamon, and salt. Once combined, add the flour mixture to the butter mixture. Mix well, to combine. Stir in oats and raisins. Mix all ingredients well, until thoroughly combined. Drop cookie dough by rounded Tablespoonfuls onto an ungreased baking sheet, leaving about an inch between cookies.

  4. Bake cookies for 8-10 minutes, or until light brown. Remove cookies from oven, but leave on cookie sheet for 1 minute to slightly cool, then remove cookies to a wire rack to completely cool. Store cookies in a covered container. Enjoy!

Nutrition Facts
Oatmeal Raisin Cookies
Amount Per Serving (1 cookie)
Calories 95 Calories from Fat 27
% Daily Value*
Fat 3g5%
Saturated Fat 2g13%
Cholesterol 15mg5%
Sodium 81mg4%
Potassium 55mg2%
Carbohydrates 14g5%
Sugar 5g6%
Protein 1g2%
Vitamin A 110IU2%
Vitamin C 0.2mg0%
Calcium 9mg1%
Iron 0.5mg3%
* Percent Daily Values are based on a 2000 calorie diet.

Here’s one more to pin on your Pinterest boards!This traditional recipe for soft, chewy Oatmeal Raisin Cookies is easy to prepare. The cookies are absolutely delicious, and the recipe makes 4 dozen.


Save

Save

BLT Wedge Salad

You’re gonna LOVE this classic BLT wedge salad with bacon, iceberg lettuce, crumbled blue cheese, and chopped tomatoes, topped with a thick, creamy, homemade blue cheese dressing!Classic BLT wedge salad with bacon, iceberg lettuce, crumbled blue cheese, and chopped tomatoes, topped with a thick, creamy, homemade blue cheese dressing.My husband LOVES wedge salads. I think they are his favorite salad. Ever.  When we have the opportunity to eat “out”, he will almost always order a wedge salad if it’s on the menu, to go with his meal. I, on the other hand, have NEVER ordered a wedge salad OR made a BLT wedge salad for that matter… until now.

My husband had hinted around that “we” should try making one at home (you know, the proverbial “we”). I wasn’t convinced I would even like it, but because I love my guy so much, I hunted around for recipes. The one I decided on is similar to the wedge salads on the menu at Morton’s – The Steak House. He LOVES those!

So… I made a couple little tweaks in the recipe, and fixed us a BLT Wedge Salad last week with our dinner. And guess what? We BOTH loved it! Who knew that a really cold quarter head of lettuce, covered with a delicious homemade dressing, chopped tomatoes, crisp bacon crumbles and chunks of blue cheese could be so good? We liked the salad and dressing so much that the following evening all we had for dinner was another BLT Wedge Salad! Nothing else… just the salad! (Can you tell we liked it?)

Scroll Down For A Printable Recipe Card At The Bottom Of The Page

How To Make The Dressing For A BLT Wedge Salad

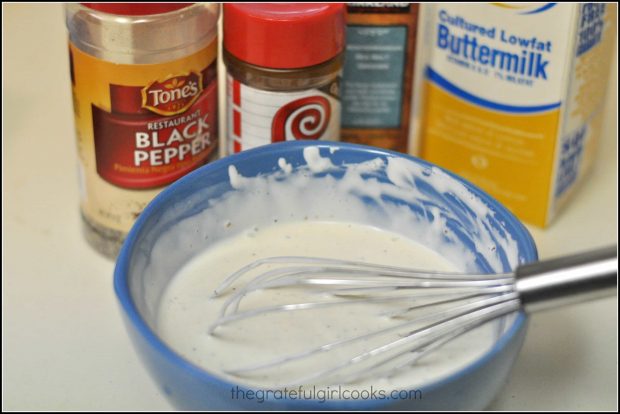
First you make the salad dressing by whisking together mayonnaise and sour cream. Then buttermilk , seasoning salt, Worcestershire sauce, minced garlic, and black pepper is added.

Buttermilk, sour cream, mayonnaise and spices are whisked together to make salad dressing.

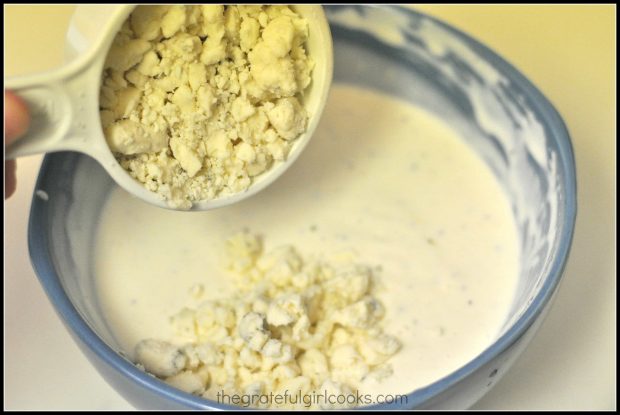
Gently fold in the crumbled blue cheese. Once blue cheese is folded in, salad dressing is covered and refrigerated for several hours, for the flavors to fully develop.

Crumbled blue cheese is added to salad dressing.

Prepare The Rest Of The Ingredients For The Salad

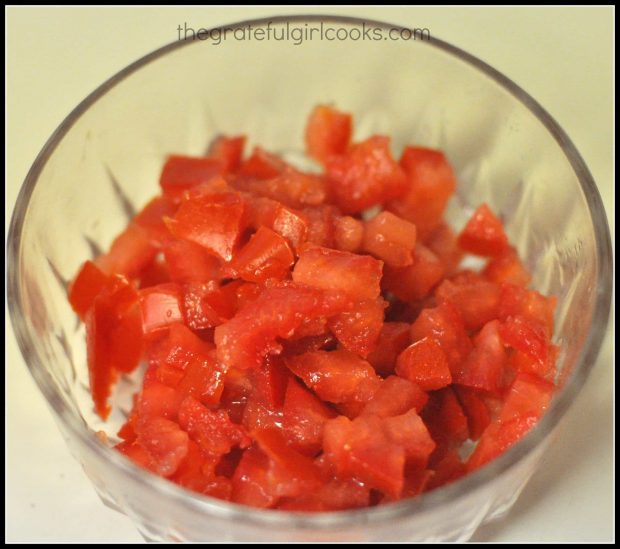
Chop and de-seed (as much as possible) 1-2 large Roma tomatoes.

Roma tomatoes are diced for adding to wedge salad.

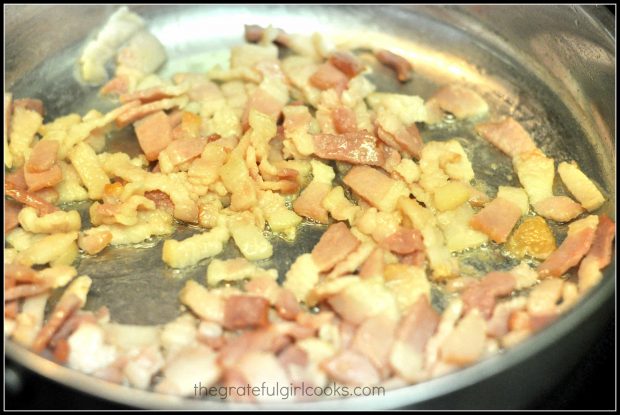
Cook the bacon pieces until very crisp. I like to cut up the bacon using kitchen shears before cooking, because it helps it to cook faster.

Bacon is diced, then cooked until crisp for BLT wedge salad.

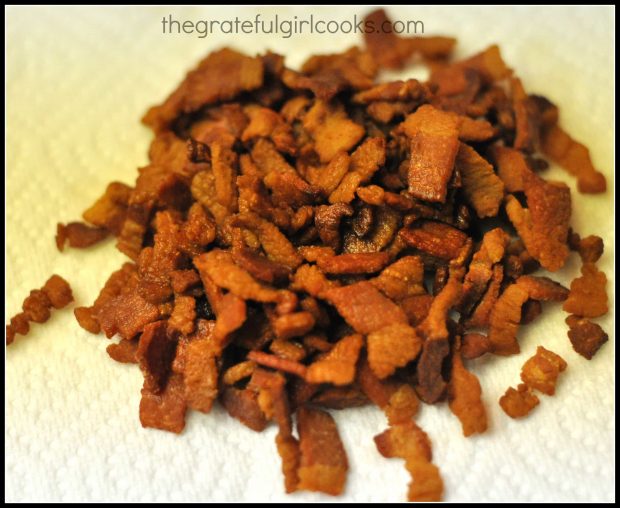
Once the bacon is fully cooked and crisp, remove it from the skillet. Drain it on paper towels, and set aside.

Crisp cooked bacon is ready to add to salad

Serve The BLT Wedge Salad

Make sure the iceberg lettuce is really cold. When ready to serve, take the core of the lettuce head out by holding the lettuce firmly and smacking the core (on the bottom) onto the kitchen counter. The core should be easy to remove after this. Cut the lettuce head, from top to bottom in half, then cut each half again.

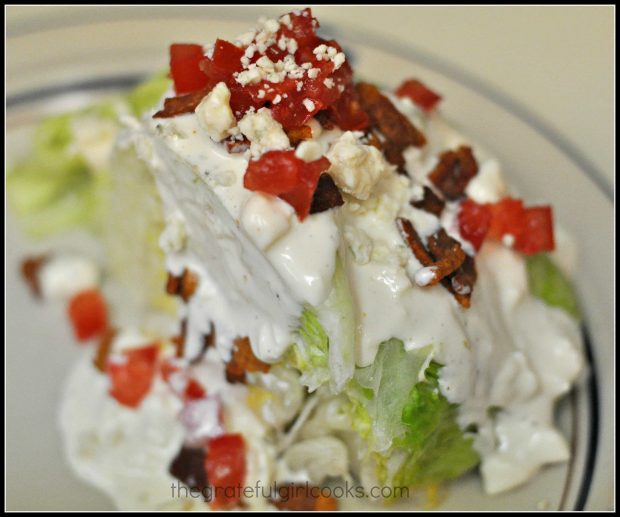
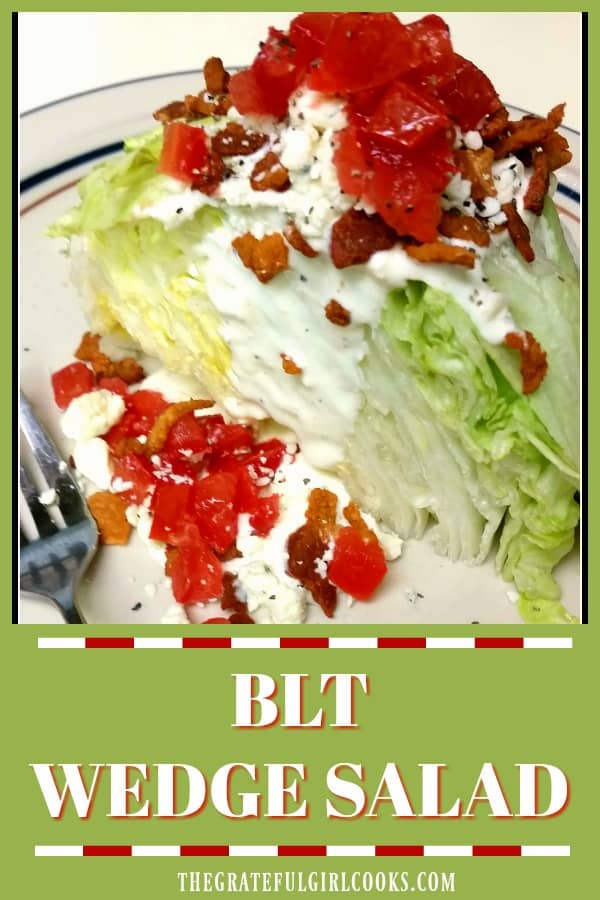
To serve, place one entire lettuce wedge onto serving plate, drizzle with salad dressing, then top with chopped tomatoes, crumbled blue cheese and bacon crumbles.

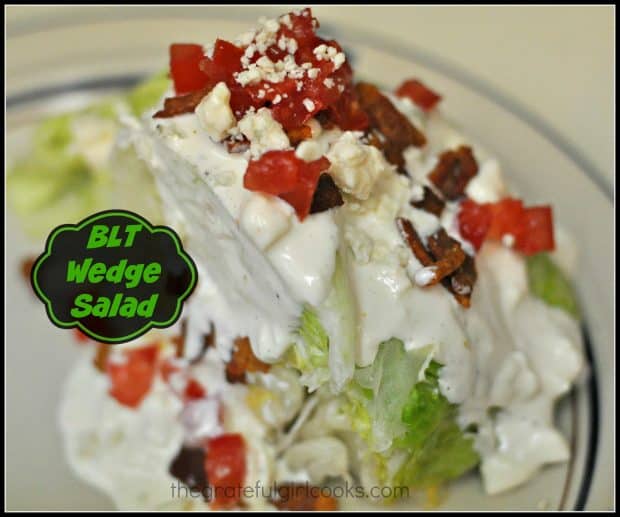
Cold crisp lettuce wedge is topped with blue cheese dressing, bacon, tomato and crumbled blue cheese

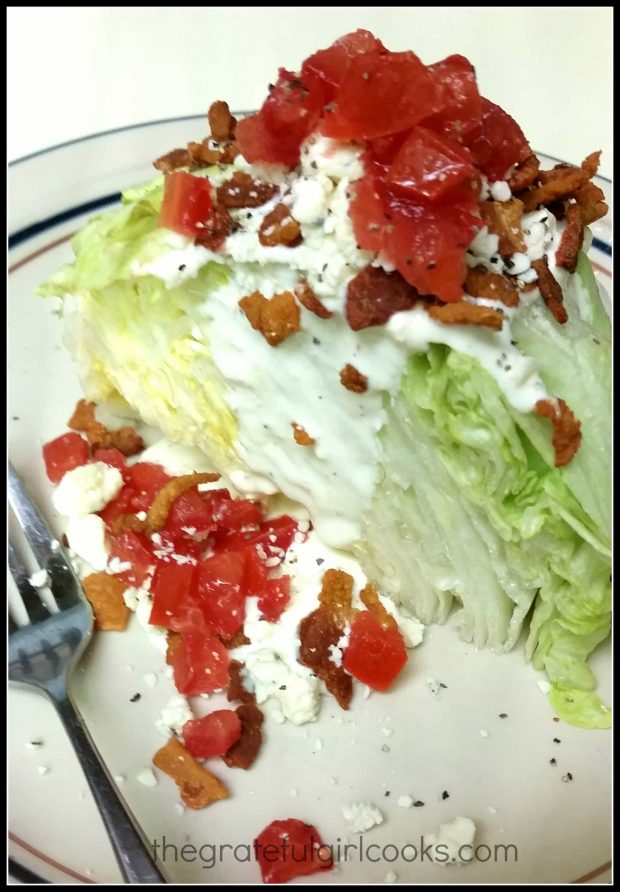
Enjoy the crunch as you cut through the chilled lettuce wedge!

BLT Wedge Salad on plate with fork.

I really hope you try and enjoy this restaurant style BLT Wedge Salad. It’s cold, crisp, and DELICIOUS! Have a wonderful day, friends, and come back again soon.

Looking For More SALAD Recipes?

You can find all of my recipes in the Recipe Index, located at the top of the page. I have LOTS of delicious salad recipes, including:


Interested In More Recipes?

Thank you for visiting this website. I appreciate you using some of your valuable time to do soIf you’re interested, I publish a newsletter 2 times per month (1st and 15th) with all the latest recipes, and other fun info. I would be honored to have you join our growing list of subscribers, so you never miss a great recipe!
There is a Newsletter subscription box on the top right side (or bottom) of each blog post, depending on the device you use, where you can easily submit your e-mail address (only) to be included in my mailing list.

You Can Also Find Me On Social Media:
Facebook page: The Grateful Girl Cooks!
Pinterest: The Grateful Girl Cooks!
Instagram: jbatthegratefulgirlcooks

Have a GREAT day!

Author's signature


Recipe Adapted From: http://pattycakescooking.blogspot.com.au/2012/01/mortons-steak-house-iceberg-blue-cheese.html

↓↓ PRINTABLE RECIPE BELOW ↓↓

0 from 0 votes
BLT Wedge Salad
Prep Time
15 mins
Cook Time
0 mins
Total Time
15 mins
 

Classic wedge salad with bacon, iceberg lettuce, blue cheese, and chopped tomatoes drizzled with a homemade creamy blue cheese dressing.

Category: Salad
Cuisine: American
Keyword: BLT wedge salad
Servings: 4 servings
Calories Per Serving: 605 kcal
Author: JB @ The Grateful Girl Cooks!
Ingredients
For the Sauce:
  • 1 cup real mayonnaise
  • 1/2 cup , plus 1 Tablespoon sour cream
  • 2 Tablespoons buttermilk (more if needed, for desired consistency)
  • 1/4 teaspoon Worcestershire sauce
  • 3/4 teaspoon minced garlic
  • 1/4 teaspoon seasoning salt
  • Salt and pepper (to taste)
  • 1/2 cup crumbled blue cheese
For salad:
  • 1 head iceberg lettuce (very cold)
  • 6 slices bacon , cooked crisp and crumbled
  • 1-2 Roma tomatoes , chopped and de-seeded as much as possible
Instructions
  1. Make the sauce several hours before assembling salad. Whisk the mayonnaise and sour cream together in a medium sized bowl. Add the buttermilk, Worcestershire sauce, garlic, and seasoning salt to this mixture. Mix well to combine. Season the dressing with salt and pepper. Gently fold in the blue cheese crumbles and stir to combine. Cover with plastic wrap and refrigerate for several hours (or even better- overnight!) until ready to serve.
  2. When ready to serve, take completely chilled lettuce out of refrigerator. Pull off any discolored outer leaves. Remove core by hitting the lettuce (core side down) onto kitchen counter to loosen up the core. Remove the core, and discard.
  3. Slice the lettuce into 4 wedges, slicing from the top of the lettuce to the bottom. Place a completely cold lettuce wedge onto each serving plate. Spoon the dressing over the top of the wedge, and allow the dressing to overflow and run down the side.
  4. Sprinkle the top of the wedge with crumbled bacon bits, chopped tomatoes, and additional blue cheese crumbles. Serve and enjoy!
Recipe Notes

The key to this salad is having the lettuce wedges be extremely COLD. You can cut the lettuce wedges and then refrigerate them for several hours, if desired. I even put our lettuce wedges in our freezer for 10 minutes right before serving, to get them even colder.

Nutrition Facts
BLT Wedge Salad
Amount Per Serving (1 wedge)
Calories 605 Calories from Fat 540
% Daily Value*
Fat 60g92%
Saturated Fat 14g88%
Cholesterol 58mg19%
Sodium 980mg43%
Potassium 356mg10%
Carbohydrates 6g2%
Fiber 1g4%
Sugar 4g4%
Protein 9g18%
Vitamin A 970IU19%
Vitamin C 5.9mg7%
Calcium 126mg13%
Iron 0.9mg5%
* Percent Daily Values are based on a 2000 calorie diet.

Here’s one more to pin on your Pinterest boards!Classic BLT wedge salad with bacon, iceberg lettuce, crumbled blue cheese, and chopped tomatoes, topped with a thick, creamy, homemade blue cheese dressing.

Save

Save

Peach Crumble Smoothie

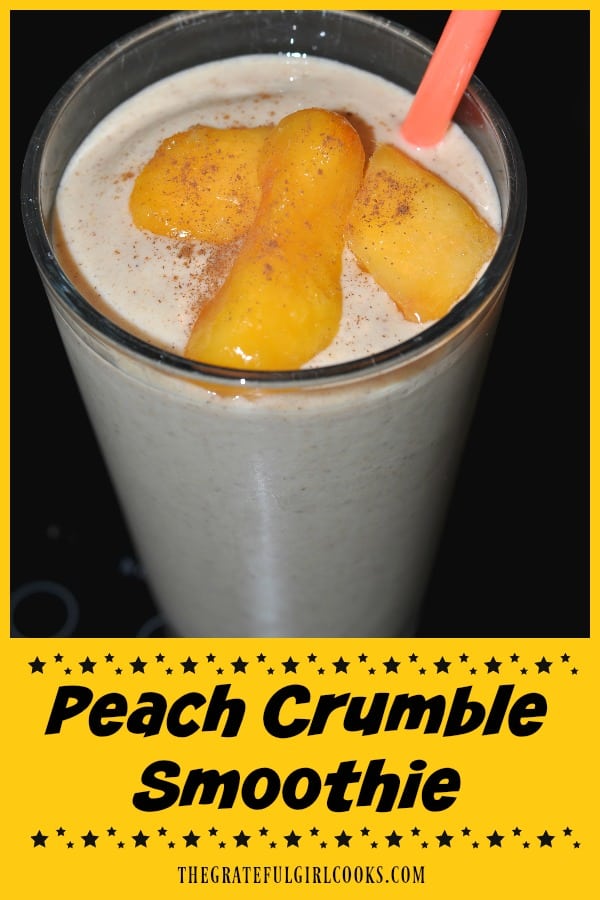
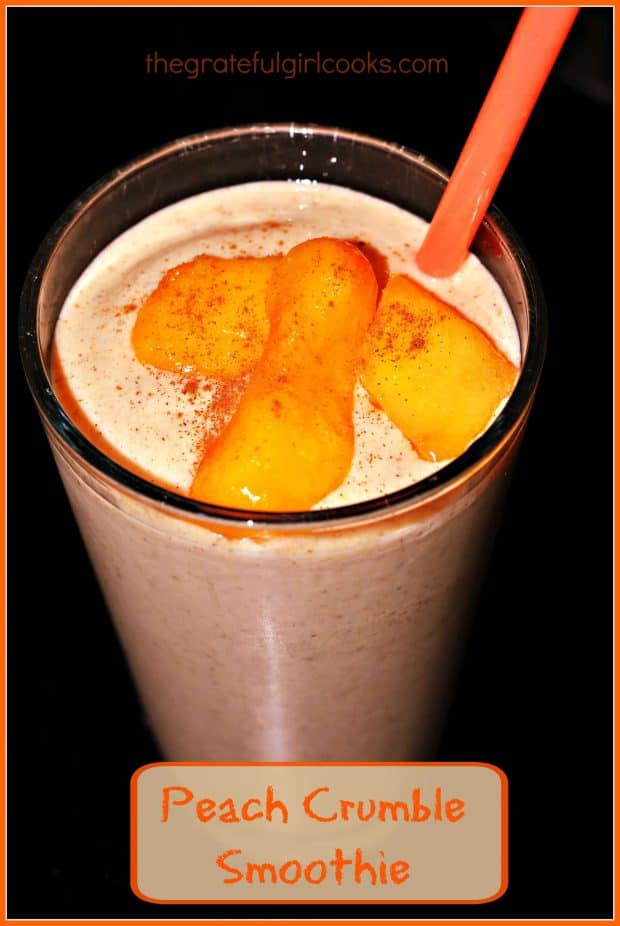
Craving a fruit smoothie? How about a peach crumble smoothie, with cinnamon, oats (fiber), vanilla yogurt and honey? Tastes great and is very filling!Craving a fruit smoothie? How about a peach crumble smoothie, with cinnamon, oats (fiber), vanilla yogurt and honey? Tastes great and is very filling!
It was a dark, cold, and stormy morning…and believe it or not… I wanted an ice cold fruit smoothie for breakfast! Not just any old smoothie, I wanted a Peach Crumble Smoothie!

I love making smoothies, especially during the hot summer months, but found a recipe from Samantha at Five Heart Home on Pinterest at the beginning of January that caught my attention. It had finely ground up oats in it, so I knew that it would not only taste good, but would be very filling.

I think the fact that I also love Peach Cobblers, Peach Crisps, Peach Pies and Peach Ice Cream played a huge part in trying this smoothie! That fact alone pushed all my “Now I’m Curious” buttons.

Scroll Down For A Printable Recipe Card At The Bottom Of The Page

Use Frozen Peaches To Make The Peach Crumble Smoothie

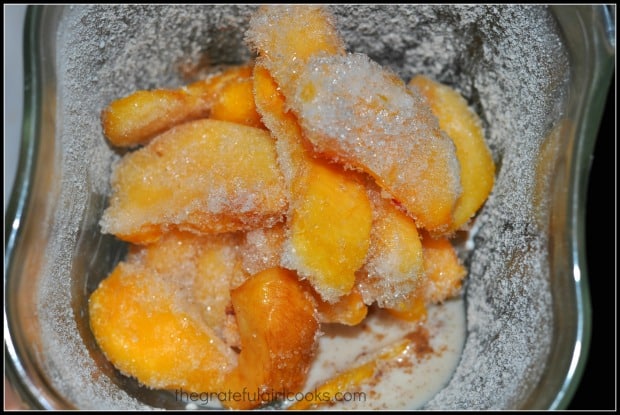
We happened to have a huge bag of sliced peaches left in my freezer from my picking adventure last summer at a U-Pick farm, so I grabbed the ingredients and made myself a smoothie for breakfast! Guess what? It was GOOD. It was THICK. It was FILLING!

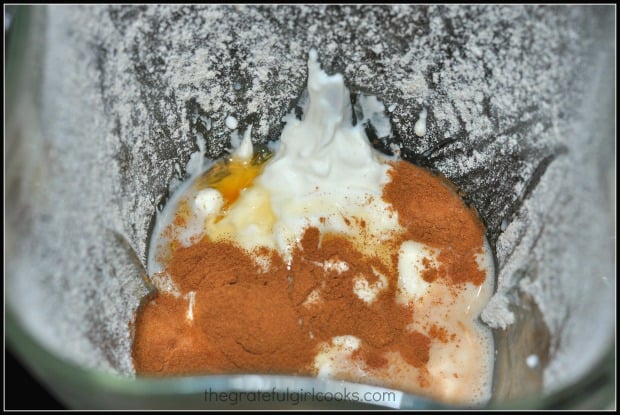
All you need to do is place the ingredients in a blender or food processor and blend away. The result is a cold, thick peach crumble smoothie that will help fill you up, because of the oats.

Ingredients for the smoothie go into a blender to mix together.Frozen peaches are used to make the peach crumble smoothie.

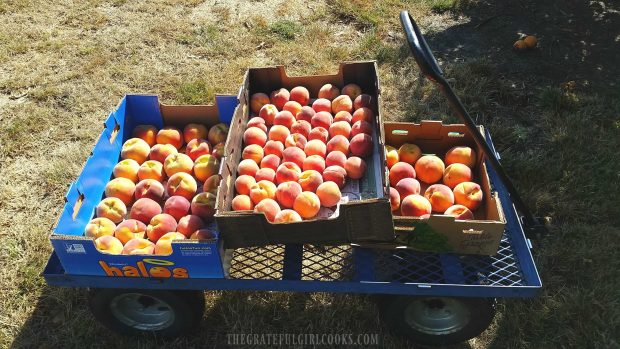
The recipe made 2 smoothies, so I froze half.  The next day I thawed it for another peach crumble smoothie! It’s important to use frozen peaches, which eliminates the need for ice. I used some of the peaches I had preserved in the freezer from my last picking!

Fresh peaches picked in the middle of summer!

I sure hope you’ll give this recipe a try. It kind of tastes like you’re drinking a piece of peach cobbler, AND I’m pretty sure it will keep your tummy full until lunch time.  Whoa!

Have a great day, and remember to be kind to those who cross your path today. It’s takes so little effort, but can make ALL the difference in that person’s day!

Looking For More SMOOTHIE Recipes?

You can find all of my smoothie recipes in the Recipe Index, located at the top of the page. A few favorites include:

Interested In More Recipes?

Thank you for visiting this website. I appreciate you using some of your valuable time to do soIf you’re interested, I publish a newsletter 2 times per month (1st and 15th) with all the latest recipes, and other fun info. I would be honored to have you join our growing list of subscribers, so you never miss a great recipe!
There is a Newsletter subscription box on the top right side (or bottom) of each blog post, depending on the device you use, where you can easily submit your e-mail address (only) to be included in my mailing list.

You Can Also Find Me On Social Media:

Facebook page: The Grateful Girl Cooks!
Pinterest:
The Grateful Girl Cooks!
Instagram:
jbatthegratefulgirlcooks

Author's signatureRecipe Adapted From: http://www.fivehearthome.com/2015/01/01/healthy-oat-smoothies-recipe-blueberry-muffin-smoothie-peach-cobbler-smoothie/

↓↓ PRINTABLE RECIPE BELOW ↓↓

0 from 0 votes
Peach Crumble Smoothie
Prep Time
5 mins
Cook Time
0 mins
Total Time
5 mins
 

Craving a fruit smoothie? How about a peach crumble smoothie, with cinnamon, oats (fiber), vanilla yogurt and honey? Tastes great and is very filling!

Category: Beverage
Cuisine: American
Keyword: peach crumble smoothie
Servings: 2 servings
Calories Per Serving: 313 kcal
Author: JB @ The Grateful Girl Cooks!
Ingredients
  • 1/2 cup old fashioned oats
  • 2 cups frozen peach slices
  • 1 cup vanilla yogurt
  • 1/2 cup milk
  • 1 Tablespoon honey
  • 1/4 teaspoon vanilla extract
  • 3/4 teaspoon cinnamon
  • Additional milk , if needed, to thin out the smoothie
Instructions
  1. Place the oats into a blender. Blend/grind the oats until they become a fine powder.
  2. Add the remaining ingredients. Blend until mixture becomes smooth. If necessary, add additional milk, to thin the smoothie out to your liking (it's pretty thick).
  3. Pour into 2 large glasses and serve. Enjoy!
Nutrition Facts
Peach Crumble Smoothie
Amount Per Serving (1 g)
Calories 313 Calories from Fat 45
% Daily Value*
Fat 5g8%
Saturated Fat 2g13%
Cholesterol 12mg4%
Sodium 109mg5%
Potassium 715mg20%
Carbohydrates 58g19%
Fiber 5g21%
Sugar 42g47%
Protein 12g24%
Vitamin A 655IU13%
Vitamin C 11.1mg13%
Calcium 306mg31%
Iron 1.2mg7%
* Percent Daily Values are based on a 2000 calorie diet.

Here’s one more to pin on your Pinterest boards!Craving a fruit smoothie? How about a peach crumble smoothie, with cinnamon, oats (fiber), vanilla yogurt and honey? Tastes great and is very filling!


Save

Save

Salmon in Lemon-Butter Herb Sauce

Grilled or pan-seared salmon in lemon-butter herb sauce is a delicious, simple and elegant looking dinner entree.Grilled or pan-seared salmon in a lemon-butter herb sauce is a delicious, simple and elegant looking dinner entree.
My husband and I love salmon. I’ve been preparing salmon the same way for quite a while (creatures of habit, but we like it), but finally decided to branch out, and start trying some new salmon recipes this year. Enter this delicious entree. Seriously delicious.

If I’m telling the truth I would tell you that I had to be on my best behavior not to “sample” the sauce multiple times until it was gone (somebody has to do Quality Control, right?). Yeah. The sauce is pretty amazing… not gonna lie! An extra benefit to making this at home versus ordering something like this at a restaurant is the cost factor. It’s so much less expensive to create this easy, but elegant seafood dish at home! I really like that!

I found the recipe on Pinterest, and decided to give it a try! I slightly modified the recipe as far as cooking the seafood goes… original recipe calls for grilling the salmon fillets. Since it was cold and damp outside (February in the Northwest), I pan-seared the fillets, then topped them with the sauce. Fantastic!

The sauce (with butter, white wine, lemon juice, and herbs) only takes about 10 minutes to pull together, and the fish only takes about 4-5 minutes per side to cook, so all in all, this was a very quick and elegant dish to prepare. I will absolutely make this again. I’m anxious to fire up the ol’ Weber grill and try this recipe with grilled salmon.

Scroll Down For A Printable Recipe Card At The Bottom Of The Page 

Make The Lemon Butter Herb Sauce

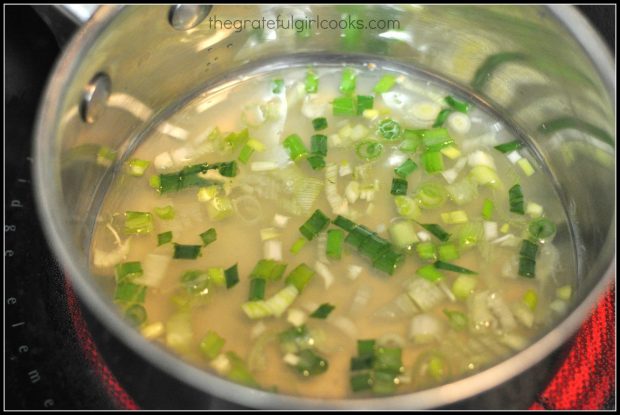
Cook white wine, lemon juice and green onions until the liquid has reduced down considerably…

Wine, lemon juice and green onions are cooked for sauce

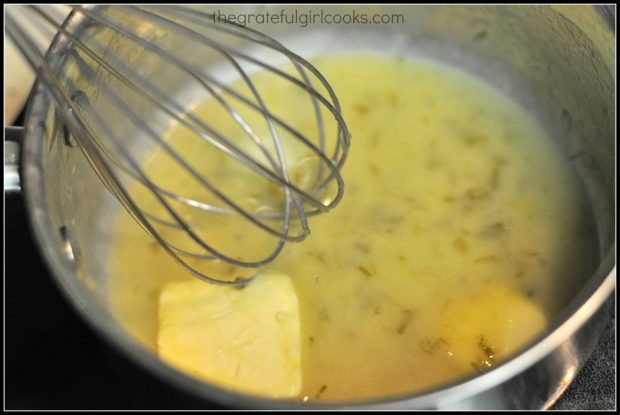
Add COLD butter, a little at a time, and blend it into the sauce.

Cold butter is blended into sauce in pan

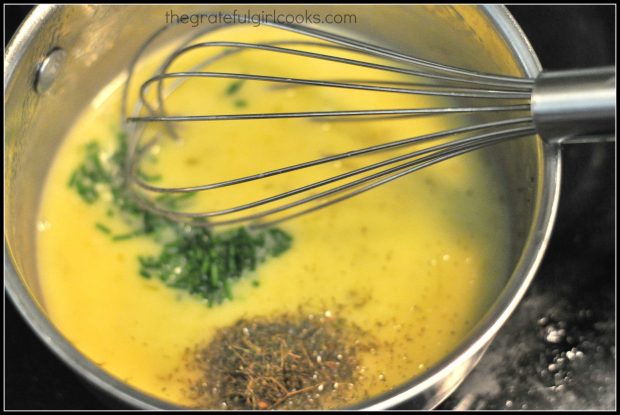
Now add dill, fresh chopped chives, and black pepper to the lemon-butter sauce, and whisk to combine..

Dill, chives and pepper are added to lemon butter sauce

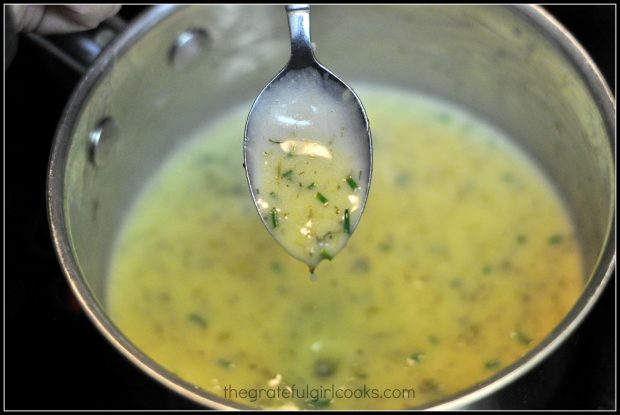
The lemon-butter herb sauce is done! Boy, does it taste amazing!

Lemon butter herb sauce is finished cooking

Prepare The Salmon

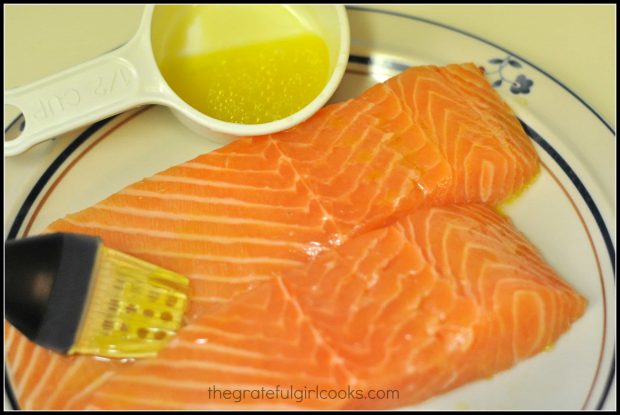
Brush boneless skinless fillets on all sides with a lemon juice/olive oil mixture before cooking..

Fish is brushed with lemon juice/olive oil mixture

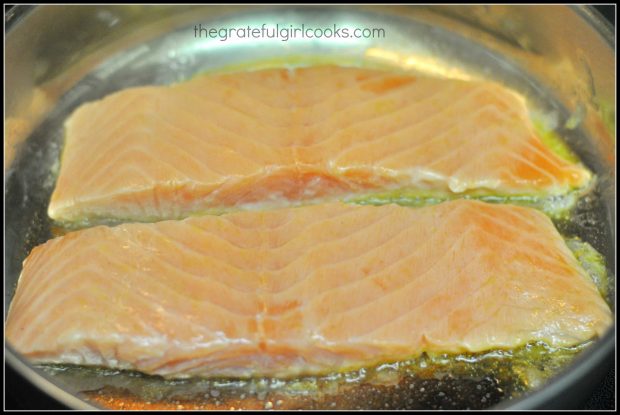
Place fillets into a hot skillet that has been sprayed with non-stick spray AND has olive oil in it to prevent sticking. Cook the fish on both sides (approx. 4-5 minutes per side), until done, and can be easily flaked with a fork.

Salmon fillets are pan-seared in skillet

Serve The Salmon In Lemon Butter Herb Sauce

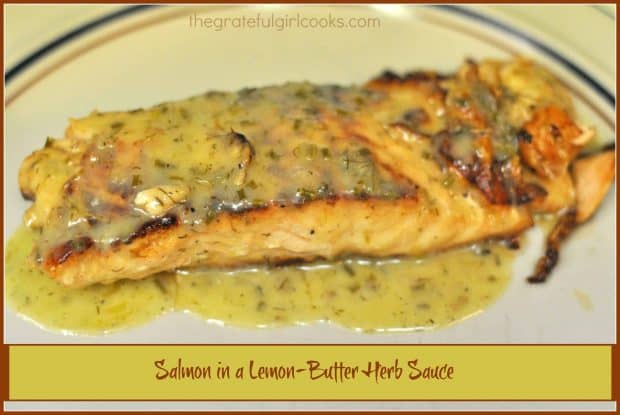
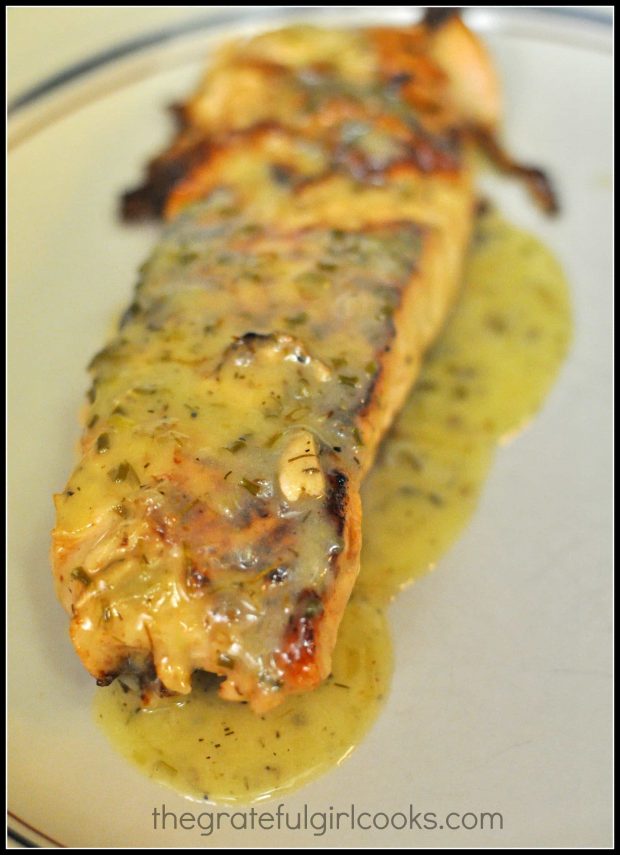
Once the fillets are done, carefully put the fillets onto individual serving plates. Spoon the lemon-butter herb sauce over the top of each piece of fish. Serve while hot, and enjoy!

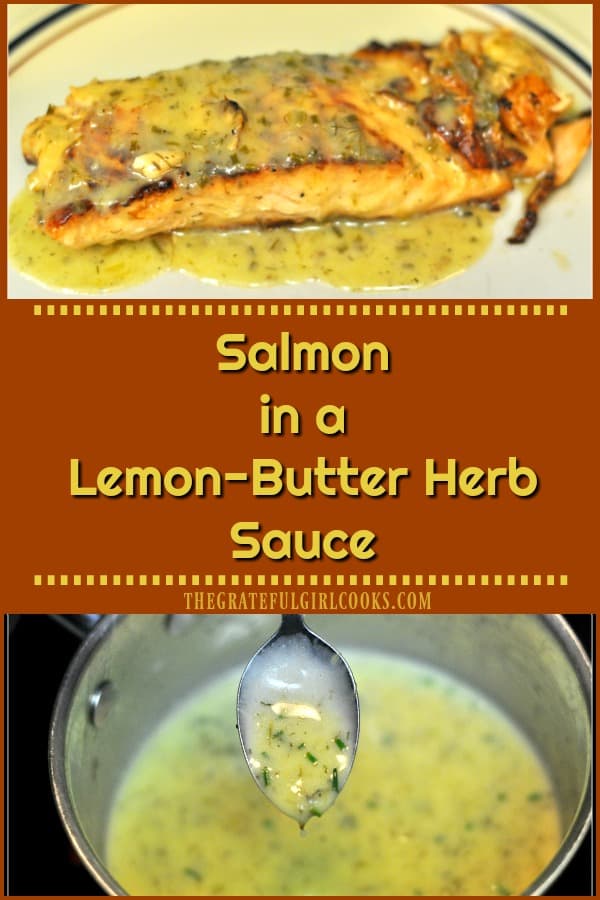
Finished salmon fillet, with lemon herb butter sauce on top

Sure hope you will give this recipe a try. It tastes amazing, and I think you will LOVE it! Thank you for stopping by, and I hope you will come back soon.

Looking for More SALMON Recipes?

You can find ALL my recipes in the Recipe Index, located at the top of the page. I have some wonderful salmon recipes you’ll enjoy, including:

Interested In More Recipes?

Thank you for visiting this website. I appreciate you using some of your valuable time to do soIf you’re interested, I publish a newsletter 2 times per month (1st and 15th) with all the latest recipes, and other fun info. I would be honored to have you join our growing list of subscribers, so you never miss a great recipe!
There is a Newsletter subscription box on the top right side (or bottom) of each blog post, depending on the device you use, where you can easily submit your e-mail address (only) to be included in my mailing list.

You Can Also Find Me On Social Media:

Facebook page: The Grateful Girl Cooks!
Pinterest:
The Grateful Girl Cooks!
Instagram:
jbatthegratefulgirlcooks

Have a great day!

Author's signatureRecipe slightly adapted from: http://www.tablespoon.com/recipes/grilled-salmon-with-lemon-herb-butter-sauce/8a8b4611-8bb4-430b-bf23-6aaddcce21a5?_szp=100295&_szi=23

↓↓ PRINTABLE RECIPE BELOW ↓↓

0 from 0 votes
Salmon in a Lemon-Butter Herb Sauce
Prep Time
15 mins
Cook Time
10 mins
Total Time
25 mins
 

Grilled or pan-seared salmon in a lemon-butter herb sauce is a delicious, simple and elegant looking dinner entree.

Category: Entree
Cuisine: American
Keyword: salmon
Servings: 4 servings
Calories Per Serving: 527 kcal
Author: JB @ The Grateful Girl Cooks!
Ingredients
For Lemon-Butter Herb Sauce:
  • 2 Tablespoons finely chopped green onions (shallots)
  • 1/4 cup dry white wine
  • 3 Tablespoons fresh lemon juice
  • 6 Tablespoons COLD butter
  • 1 Tablespoon dill (dried or fresh), chopped
  • 1 Tablespoon finely chopped chives
  • 1/8 teaspoon pepper
For salmon:
  • 3 Tablespoons olive oil
  • 1 Tablespoons fresh lemon juice
  • salmon (4 boneless, skinless fillets)
  • 1/4 teaspoon salt
  • 1/4 teaspoon pepper
  • 1 Tablespoon butter
Instructions
  1. Prepare the sauce: Place the finely chopped green onions, lemon juice and wine in a small saucepan. Bring to a boil on high heat, then reduce heat to medium and cook for 7-8 minutes, or until liquid has reduced to about 2-3 Tablespoons. Remove from heat. Add butter, 1 Tablespoon at a time, stirring continuously, until all butter has been melted and incorporated into sauce. Add dill, chopped chives and black pepper. Mix to combine. Set sauce aside while you cook the salmon.
  2. To cook salmon:
  3. In a small dish, combine 1 (ONE) Tablespoon of olive oil and 1 Tablespoon of lemon juice. Using a pastry brush, coat all sides of the salmon with this mixture.
  4. Spray a skillet with non-stick spray, then place the other 2 Tablespoons of olive oil into pan. Heat until VERY hot (but not smoking). When skillet is very hot, add the salmon fillets. It should sizzle when you add them to skillet. Cook salmon for about 4 minutes without moving them. After 4 minutes, carefully turn the salmon to the other side and continue cooking. Add 1 Tablespoon butter. As the butter melts, continuously spoon the melted butter onto the salmon as it cooks. Salt and pepper the salmon lightly. In about 3-4 minutes, the salmon should be done. Make sure the salmon is done, and flakes easily (due to differing thicknesses of salmon, you need to keep an eye on the salmon for done-ness).
  5. Reheat lemon-butter sauce if necessary right before the salmon is done.
  6. To serve, place salmon fillet on individual plate, then spoon some of the warm sauce over the top. Enjoy!
Recipe Notes

Salmon can also be grilled outside on a BBQ. Remember to coat it with olive oil and lemon juice mixture before adding it to the grill.

Nutrition Facts
Salmon in a Lemon-Butter Herb Sauce
Amount Per Serving (1 (6 oz. plus sauce))
Calories 527 Calories from Fat 369
% Daily Value*
Fat 41g63%
Saturated Fat 15g94%
Cholesterol 146mg49%
Sodium 396mg17%
Potassium 855mg24%
Carbohydrates 1g0%
Protein 34g68%
Vitamin A 745IU15%
Vitamin C 6.8mg8%
Calcium 25mg3%
Iron 1.4mg8%
* Percent Daily Values are based on a 2000 calorie diet.

Here’s one more to pin on your Pinterest boards!Grilled or pan-seared salmon in a lemon-butter herb sauce is a delicious, simple and elegant looking dinner entree.


Save

Save