Category: Chocolate

Rocky Road Ice Cream

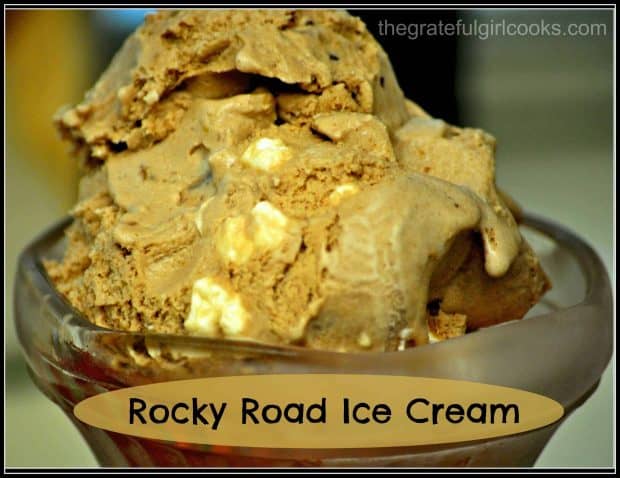
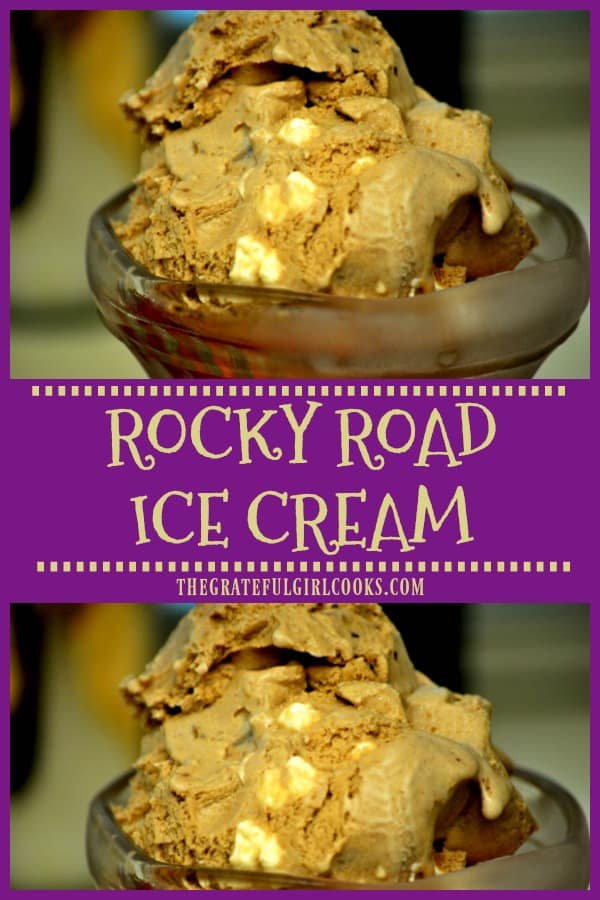
Grab the old ice cream maker and get ready to enjoy delicious Rocky Road Ice Cream, bursting with marshmallows, chocolate chips, and pecans!Grab the old ice cream maker and get ready to enjoy delicious Rocky Road Ice Cream, bursting with marshmallows, chocolate chips, and pecans!

Who wants some Rocky Road Ice Cream? This yummy ice cream is a personal favorite of mine. It doesn’t matter if it is hot or freezing cold outside, I will always enjoy a scoop of this ice cream, if offered! Today I want to share a wonderful recipe for homemade rocky road ice cream. It tastes wonderful, and is easy to prepare.

Scroll Down For A Printable Recipe Card At The Bottom Of The Page

Time For Homemade Ice Cream

As the weather here in Oregon has begun to warm up, I’ve started getting excited to prepare homemade ice cream! There’s just something about enjoying a cold dish of homemade ice cream on a warm night!

I get inspired to drag out my trusty, beloved Cuisinart ice cream maker and get busy in the kitchen! It’s been fun making ice cream using this machine, because you do not need rock salt OR ice to freeze the ice cream. EASY PEASY!

This is the ice cream machine I used to make rocky road ice cream.

Why I LOVE Rocky Road Ice Cream!

I found this delicious recipe for homemade Rocky Road Ice Cream online at “Taste Of Home”.  The recipe sounded pretty “spot on”, so I decided to give it a try, and now it is one of my favorite homemade ice creams! Rocky road ice cream is a chocolate based ice cream, packed full of marshmallows, chocolate chips and pecans. Because of those yummy ingredients, it’s a real taste treat!

How Much Rocky Road Ice Cream Will This Recipe Make?

The original rocky road ice cream recipe makes just over 4 quarts (using a standard sized ice cream maker). Those are the ingredient quantities I have listed here in the printable recipe below.

When I made this rocky road ice cream, I simply halved the recipe to work in my smaller indoor ice cream maker. If you want to make the full recipe, simply refrigerate the extra until ready to freeze another batch later in the day or the next day!

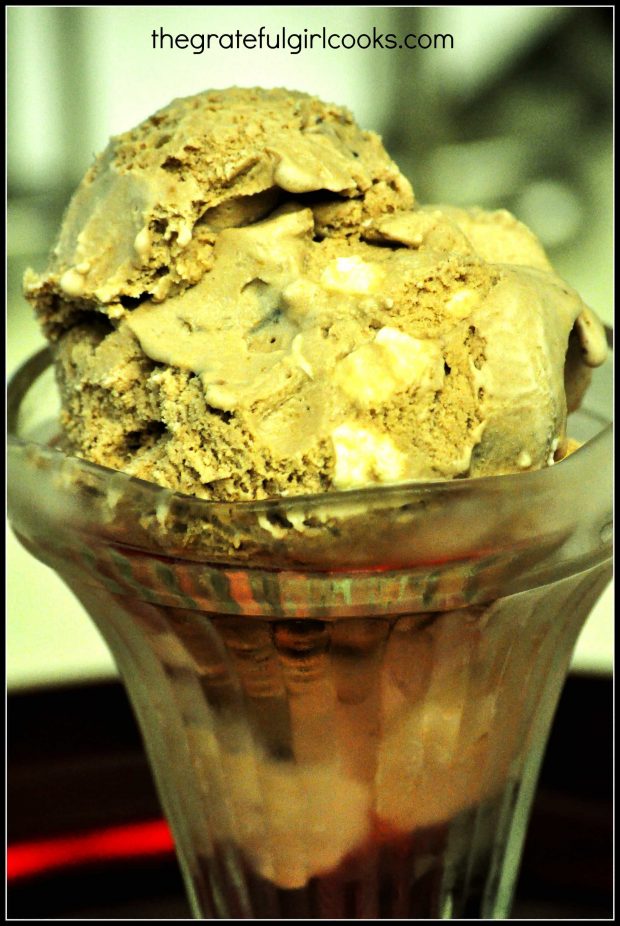
The rocky road ice cream is now ready to eat!

Hope you enjoy making some great homemade ice cream this summer! It’s very simple to make, and is always a big hit with everyone who tries it! Have a great day, friends. Make it a GOOD one! Please come back soon for more delicious recipes.

Looking For More ICE CREAM Recipes?

You can find all of my ice cream recipes in the Recipe Index, located at the top of the page. A few favorites are:

Interested In More Recipes?

Thank you for visiting this website. I appreciate you using some of your valuable time to do soIf you’re interested, I publish a newsletter 2 times per month (1st and 15th) with all the latest recipes, and other fun info. I would be honored to have you join our growing list of subscribers, so you never miss a great recipe!
There is a Newsletter subscription box on the top right side (or bottom) of each blog post, depending on the device you use, where you can easily submit your e-mail address (only) to be included in my mailing list.

You Can Also Find Me On Social Media:

Facebook page: The Grateful Girl Cooks!
Pinterest:
The Grateful Girl Cooks!
Instagram:
jbatthegratefulgirlcooks

Author's signature

Recipe Source: http://www.tasteofhome.com/recipes/rocky-road-ice-cream

↓↓ PRINTABLE RECIPE BELOW ↓↓

0 from 0 votes
Rocky Road Ice Cream
Prep Time
15 mins
Cook Time
25 mins
Total Time
40 mins
 

Grab the old ice cream maker and get ready to enjoy delicious Rocky Road Ice Cream, bursting with marshmallows, chocolate chips, and pecans!

Category: Ice Cream
Cuisine: American
Keyword: rocky road ice cream
Servings: 32 servings (4 quarts total)
Calories Per Serving: 407 kcal
Author: JB @ The Grateful Girl Cooks!
Ingredients
  • 3 cups whole milk
  • 3 cups half and half
  • 9 ounces semi-sweet chocolate , chopped
  • 2.75 cups granulated sugar
  • 3/4 teaspoon salt
  • 6 cups heavy whipping cream
  • 1,5 cups miniature marshmallows
  • 1.5 cups miniature semi-sweet chocolate chips
  • 1 cup chopped pecans
  • 6 teaspoons vanilla extract
Instructions
  1. Mix the milk and half and half in a large saucepan. Heat until the mixture is 175 degrees (do not boil!).
  2. Add the chopped chocolate, sugar and salt to the cream mixture, then stir until the sugar dissolves and the chocolate has melted.
  3. Remove pan from heat and cool it off quickly. Do this by placing the saucepan carefully in a large bowl of ice water, and stirring the mixture for a couple of minutes. When the ice cream mixture has cooled completely, pour it into a large bowl.

  4. Stir in the remaining ingredients. (Note: If using a smaller Cuisinart like mine, add the remaining ingredients in during the last 5 minutes of freezing time!). Cover bowl and refrigerate for at least 30 minutes (you want it cold!)

  5. When ready to make the ice cream, fill the cylinder of your machine 2/3 full. Freeze, according to the manufacturer's instructions for your ice cream maker. If you need to make this in two batches, cover bowl and refrigerate until you are ready to freeze.

  6. Once the ice cream has frozen, transfer it to a freezer container. Ice cream will need to "ripen" and firm up in your freezer for 2-4 hours before serving.
Nutrition Facts
Rocky Road Ice Cream
Amount Per Serving (1 (1/2 cup per serving))
Calories 407 Calories from Fat 261
% Daily Value*
Fat 29g45%
Saturated Fat 16g100%
Cholesterol 72mg24%
Sodium 94mg4%
Potassium 216mg6%
Carbohydrates 32g11%
Fiber 1g4%
Sugar 26g29%
Protein 3g6%
Vitamin A 785IU16%
Vitamin C 0.5mg1%
Calcium 93mg9%
Iron 1.3mg7%
* Percent Daily Values are based on a 2000 calorie diet.

Here’s one more to pin on your Pinterest boards!Grab the old ice cream maker and get ready to enjoy delicious Rocky Road Ice Cream, bursting with marshmallows, chocolate chips, and pecans!

Save

Save

Save

Glazed Chocolate Doughnuts

These delicious glazed chocolate doughnuts are baked, not fried! Make fresh doughnuts from scratch in the comfort of your own home in under 20 minutes!These delicious glazed chocolate doughnuts are baked, not fried! Make fresh doughnuts from scratch in the comfort of your own home in under 20 minutes!

Who wants Glazed Chocolate Doughnuts? Me, Me, Me…Every now and then I can’t help myself…I want a doughnut! Now I know all about how “unhealthy” they are, but truth is, sometimes I just want a doughnut! The End. That’s why I enjoy making doughnuts from home. No need to run out in my pajamas to buy some. Nope… I can make them at home, fairly quickly!

I found a very simple and delicious chocolate doughnut recipe on Pinterest (where else?), thanks to Karly at Buns In My Oven, and made some of these doughnuts to stare at…I mean wolf down. These doughnuts were very dense with chocolate flavor and delicious.

Scroll Down For A Printable Recipe Card At The Bottom Of The Page

Making Doughnuts

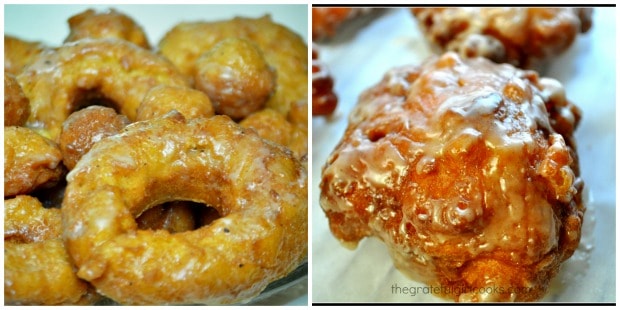
In the past I have made doughnuts the “traditional way”, fried in oil. I made some delicious Glazed Pumpkin Buttermilk Doughnuts and Amish Apple Fritters (my second most-pinned recipe) using that method and they tasted amazing!

Collage of glazed pumpkin buttermilk doughnuts (L) and Amish apple fritters (R).

Baking Glazed Chocolate Doughnuts Instead Of Frying Them

Last year I bought an inexpensive doughnut pan on Amazon for about $7.50 (with a gift card I received for my birthday…SCORE!).

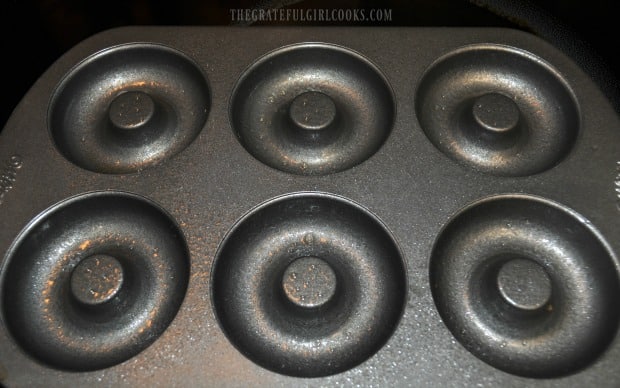
Pan used for baking glazed chocolate doughnuts.

The doughnut pan was not too expensive, but it gave me the option of BAKING doughnuts instead of FRYING them. Baking doughnuts is a very simple way to make this breakfast treat.

Doughnut batter is mixed, then poured into individual “wells” in a  doughnut pan. The doughnuts are then baked, and covered with icing once done! Baking glazed chocolate doughnuts instead of frying them is my way to enjoy a decadent treat occasionally! Cooking them in the oven helps to slightly reduce the number of calories in each doughnut!

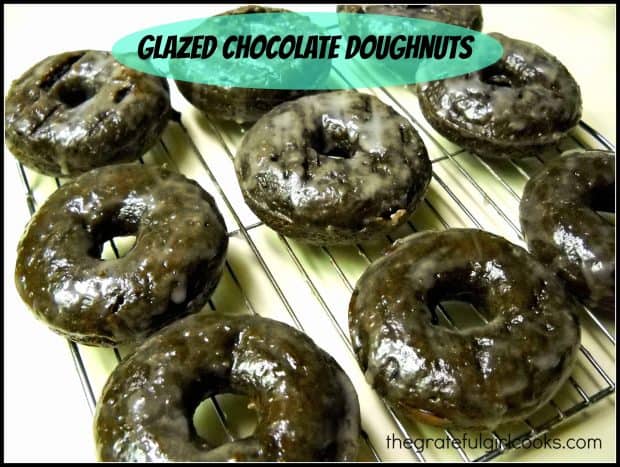
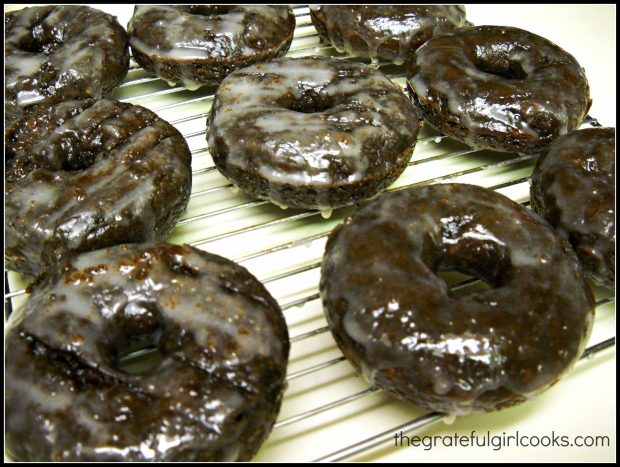
Glazed chocolate doughnuts cooling on wire rack after being iced.
Another Benefit To Making Homemade Glazed Chocolate Doughnuts

Another added benefit to making the doughnuts at home is I saved money by making the glazed chocolate doughnuts myself! I was also quite proud I didn’t have to put on an evening gown and pumps to go to the doughnut shop or grocery store to buy them when the mood struck.

This recipe makes 10 glazed chocolate doughnuts, so I made them in 2 batches (since my doughnut pan only has 6 spots). I hope you will give these breakfast treats a try.  You can find all of my recipes in the Recipe Index, located at the top of the page. If you enjoy making BAKED doughnuts, you might also want to check out my recipe for Glazed Lemon Poppy Seed Doughnuts.

Interested In More Recipes?

Thank you for visiting this website. I appreciate you using some of your valuable time to do soIf you’re interested, I publish a newsletter 2 times per month (1st and 15th) with all the latest recipes, and other fun info. I would be honored to have you join our growing list of subscribers, so you never miss a great recipe!
There is a Newsletter subscription box on the top right side (or bottom) of each blog post, depending on the device you use, where you can easily submit your e-mail address (only) to be included in my mailing list.

You Can Also Find Me On Social Media:

Facebook page: The Grateful Girl Cooks!
Pinterest:
The Grateful Girl Cooks!
Instagram:
jbatthegratefulgirlcooks

Author's signatureRecipe Source: http://www.bunsinmyoven.com/2013/04/01/glazed-chocolate-donuts/

↓↓ PRINTABLE RECIPE BELOW ↓↓

0 from 0 votes
Glazed Chocolate Doughnuts
Prep Time
10 mins
Cook Time
8 mins
Total Time
18 mins
 
These delicious glazed chocolate doughnuts are baked, not fried! Make fresh doughnuts from scratch in the comfort of your own home in under 20 minutes!
Category: Breakfast
Cuisine: American
Keyword: glazed chocolate doughnuts
Servings: 10
Calories Per Serving: 255 kcal
Author: JB @ The Grateful Girl Cooks!
Ingredients
For the doughnuts:
  • 1 cup all purpose flour
  • 1/2 cup granulated sugar
  • 1/4 cup cocoa powder
  • 1/4 cup mini chocolate chips (Optional)
  • 1/2 teaspoon baking soda
  • 1/2 teaspoon vanilla extract
  • 1 egg
  • 6 Tablespoons sour cream
  • 1/4 cup milk
  • 1/4 cup vegetable oil
For the glaze:
  • 1 1/2 cups powdered sugar
  • 6 Tablespoons milk
  • 1 teaspoon vanilla extract
Instructions
  1. Preheat the oven to 375 degrees.
  2. Make the doughnuts: In a medium sized bowl, mix the flour, sugar, cocoa, chocolate chips, and baking soda together.
  3. In another bowl, beat the vanilla, egg, sour cream, milk, and oil until well incorporated. Add the wet ingredients to the bowl of dry ingredients. Stir only until combined.

  4. Spoon the batter (or pipe it) into a greased doughnut pan. Fill each "well" about 3/4 of the way full with batter. Bake doughnuts at 375 degrees for 8 minutes, or until the top of the doughnut springs back when touched.

  5. Remove doughnut pan from oven when done, and let the doughnuts cool IN THE PAN for 2-3 minutes before you remove them to wax paper. Repeat with another batch to finish batter. Let doughnuts cool before icing.

  6. Make The Glaze: Mix the powdered sugar, milk and vanilla in a small pan over low heat. Mix well to combine. Remove the pan from the heat. Pour glaze into a large bowl. Carefully hold a cooled doughnut and "dunk" it in the glaze to coat it; set glazed doughnut on a wire rack to let the glaze harden. Enjoy!

Nutrition Facts
Glazed Chocolate Doughnuts
Amount Per Serving (1 doughnut)
Calories 255 Calories from Fat 72
% Daily Value*
Fat 8g12%
Saturated Fat 6g38%
Cholesterol 21mg7%
Sodium 76mg3%
Potassium 87mg2%
Carbohydrates 43g14%
Fiber 1g4%
Sugar 31g34%
Protein 3g6%
Vitamin A 80IU2%
Calcium 40mg4%
Iron 1mg6%
* Percent Daily Values are based on a 2000 calorie diet.

Here’s one more to pin on your Pinterest boards!These delicious glazed chocolate doughnuts are baked, not fried! Make fresh doughnuts from scratch in the comfort of your own home in under 20 minutes!


Save

Save

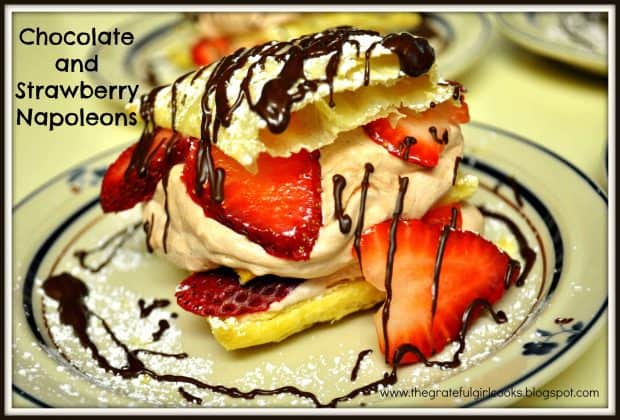
Chocolate And Strawberry Napoleons

Chocolate Strawberry Napoleons are delicious layered desserts, with strawberries, creamy chocolate filling, puff pastry, and a chocolate drizzle. Chocolate Strawberry Napoleons are delicious layered desserts, with strawberries, creamy chocolate filling, puff pastry, and a chocolate drizzle.

A couple of years ago, my husband and I were having our sons and their girlfriends over for dinner. I was a bit stumped by what to serve for dessert, because I didn’t want to prepare the same old desserts I usually make. I ended up making Chocolate and Strawberry Napoleons!

This dessert was created, because I knew I wanted to try something different. My DEEP CONTEMPLATION of WHAT that could be lasted about 4 minutes. I decided to make something using puff pastry, and we ended up with… Chocolate and Strawberry Napoleons!

Several changes were made to a recipe I found on the box, tried to make it look “fancy pants”…and voila! A beautiful, classy looking dessert was made, that we all enjoyed! The recipe actually looks harder to make than it really is, and with only 7 or 8 ingredients, it’s not too expensive, either!   Here’s how to make this delicious dessert!

Scroll Down For A Printable Recipe Card At The Bottom Of The Page

Prepare Strawberries

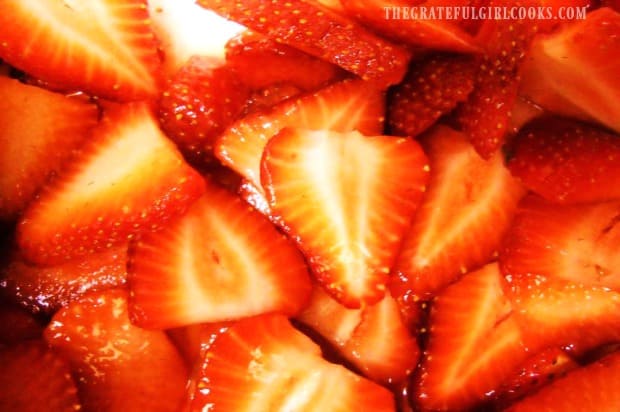
In a small bowl, mix the sliced strawberries with granulated sugar and water. Stir until the sugar dissolves and ingredients are fully combined.

Set the strawberries aside, and let them sit for about 30 minutes, then drain off the juice. This process is called “macerating” the berries, and helps to sweeten them.

Fresh strawberries are mascerated in sugar and water for chocolate strawberry napoleons.

Make The Chocolate Filling

In a large mixing bowl, beat the heavy cream, confectioner’s sugar, cocoa powder and vanilla on high speed until soft peaks form. This “chocolate mousse” type mixture will become the filling for the chocolate strawberry napoleons! Cover and place in refrigerator, until ready to use.

Prepare The  Puff Pastry For Chocolate Strawberry Napoleons

Take the thawed pastry sheet and gently unfold it onto a lightly floured work surface. Cut the pastry (along the fold marks) into 3 strips. Now cut each of the strips into 4 rectangles.

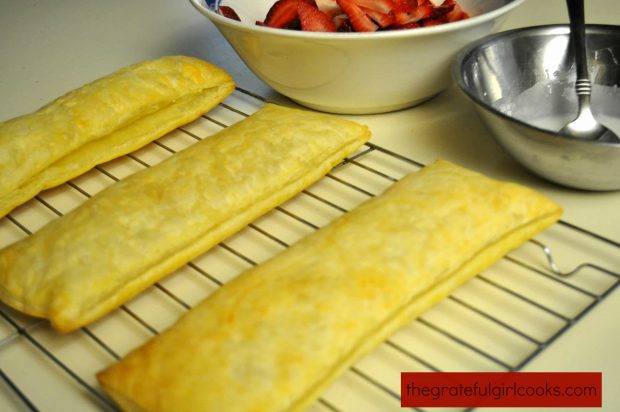
NOTE: You will notice (in the photo below) that I FORGOT to cut the three strips of puff pastry into 4 rectangles each until AFTER I baked them.  TRUST ME – they are much easier to cut BEFORE you bake them and they get all nice and crispy!

Bake The Puff Pastry

Put the 12 pastry rectangles onto 2 baking sheets. Bake at 400 degrees for 10 minutes, or until the pastries turn golden brown. Remove pastries from oven and place on wire racks. Let these cool for about 10 minutes.

Once cooled, take a sharp knife and carefully split each pastry into 2 layers (horizontally, of course!). You should now have 24 pastry rectangles (you will use 3 for each serving). **See NOTE above, regarding photo below.

Baked puff pastry, ready to slice and fill for chocolate strawberry napoleons dessert.

Serving Chocolate Strawberry Napoleons

Place a bottom pastry layer onto each individual serving plate (8 total). Divide HALF of the chocolate filling between all 8 portions. Spoon chocolate filling, to cover (and kind of spill over sides).

Divide and spoon HALF of the strawberries over the chocolate filling on each portion. Top each dessert with another pastry layer. Repeat process with an additional layer of chocolate and strawberries for each dessert. Top each dessert off with another pastry rectangle (use an original “top” piece).

Dust the pastry and plate with sifted powdered sugar. Decoratively drizzle each portion with chocolate syrup (or melted and slightly cooled semi-sweet chocolate chips) and serve!

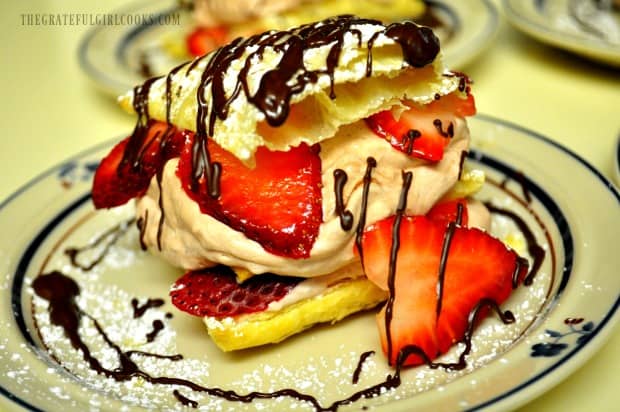
To serve, chocolate strawberry napoleons are dusted with powdered sugar and drizzled with chocolate.

Fresh strawberries, plus creamy chocolate filling, in between layers of flaky puff pastry, and drizzled with chocolate is so good. Yummm…what’s NOT to like?

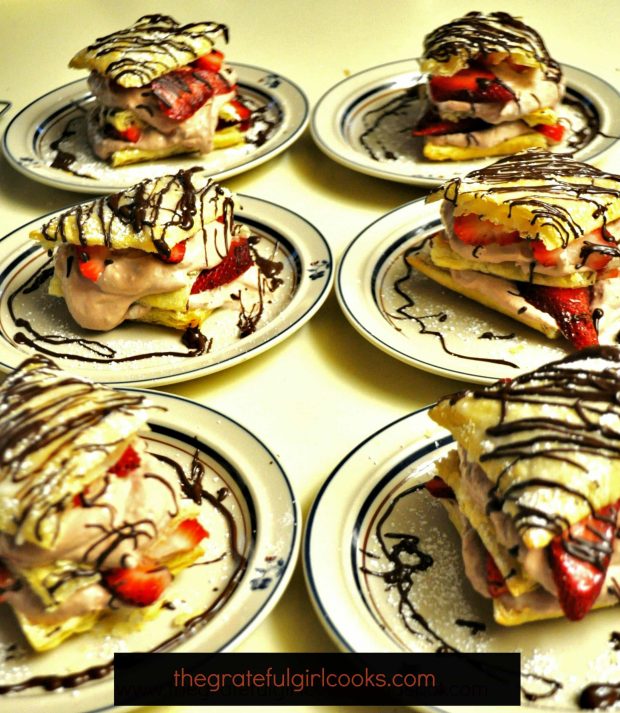
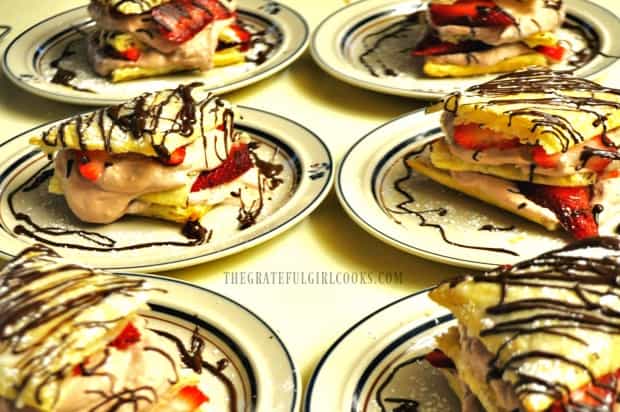
Chocolate strawberry napoleons on plates, ready to serve to guests!

We REALLY enjoyed these chocolate strawberry napoleons for dessert! They are at their very best when served on the same day you made them!

Close up photo of a chocolate strawberry napoleon on a serving plate.

Sure hope you will give it a try. This easy to make dessert will be a treat for your guest’s eyes AND taste buds! Have a GREAT day!

Looking For More DESSERT Recipes?

You can find ALL my recipes in the Recipe Index, located at the top of the page. A few of our favorite dessert recipes include:

Interested In More Recipes?

Thank you for visiting this website. I appreciate you using some of your valuable time to do soIf you’re interested, I publish a newsletter 2 times per month (1st and 15th) with all the latest recipes, and other fun info. I would be honored to have you join our growing list of subscribers, so you never miss a great recipe!
There is a Newsletter subscription box on the top right side (or bottom) of each blog post, depending on the device you use, where you can easily submit your e-mail address (only) to be included in my mailing list.

You Can Also Find Me On Social Media:

Facebook page: The Grateful Girl Cooks!
Pinterest:
The Grateful Girl Cooks!
Instagram:
jbatthegratefulgirlcooks

Chocolate and Strawberry Napoleons

Recipe Adapted From: The back of the box of Pepperidge Farm Puff Pastry Sheets (☺)

↓↓ PRINTABLE RECIPE BELOW ↓↓

0 from 0 votes
Chocolate And Strawberry Napoleons
Prep Time
40 mins
Cook Time
10 mins
Total Time
50 mins
 
A delicious chocolate, strawberry, and cream-filled pastry sure to impress your guests!
Category: Desserts
Cuisine: American
Keyword: chocolate strawberry napoleons
Servings: 8
Calories Per Serving: 296 kcal
Author: JB @ The Grateful Girl Cooks!
Ingredients
  • 1 sheet Puff Pastry (1/2 of a 17.3 oz. box) , thawed
  • 1 cup heavy whipping cream (very cold)
  • 3 Tablespoons confectioner's (powdered) sugar
  • 1 teaspoon vanilla extract
  • 1/4 cup unsweetened cocoa powder
  • 2 cups fresh , sliced strawberries (do not use frozen for this recipe)
  • 1 Tablespoon granulated sugar
  • 1 teaspoon water
  • *Optional: Confectioner's Sugar and Chocolate Syrup (or melted and slightly cooled chocolate chips) for garnish (you know...to make it purdy!!!)
Instructions
  1. Preheat the oven to 400 degrees F.
  2. Prepare strawberries: In a small bowl, mix the sliced strawberries with the granulated sugar and the water. Stir until combined. Set aside and let them sit quietly for approx. 30 minutes, then drain off the juice. This process is called "mascerating" the berries. Set asdide , until ready to use.

  3. Prepare Chocolate Filling: In a large mixing bowl, beat the heavy cream, confectioner's sugar, cocoa powder and vanilla on high speed until soft peaks form. Cover and refrigerate, until ready to use.

  4. Take the thawed pastry sheet and gently unfold it onto a lightly floured work surface. Cut the pastry (along the fold marks) into 3 strips. Now cut each of the strips into 4 rectangles. Put the 12 pastry rectangles onto 2 baking sheets. Bake at 400 degrees for 10 minutes, or until the pastries turn golden brown. Remove pastries from oven and place on wire racks. Let these cool for about 10 minutes.

  5. Once cooled, take a sharp knife and carefully split each pastry into 2 layers (horizontally, of course!). You should now have 24 pastry rectangles (you will use 3 for each serving).

To Make The Napoleons:
  1. Place a bottom pastry layer onto each individual serving plate (8 total). Divide HALF of the chocolate filling between all 8 portions. Spoon chocolate filling, to cover (and kind of spill over sides).

  2. Divide and spoon HALF of the strawberries over the chocolate filling on each portion. Top each dessert with another pastry layer. Repeat process with an additional layer of chocolate and strawberries for each dessert. Top each dessert off with another pastry rectangle (use an original "top" piece).

To Garnish and Serve:
  1. Dust pastry and plate with sifted powdered sugar. Decoratively drizzle with chocolate syrup (or melted and slightly cooled semi-sweet chocolate chips-that's what I did) and serve! ENJOY!
Recipe Notes

Caloric calculation does not include optional chocolate and powdered sugar used to garnish finished dish.

Nutrition Facts
Chocolate And Strawberry Napoleons
Amount Per Serving (1 g)
Calories 296 Calories from Fat 207
% Daily Value*
Fat 23g35%
Saturated Fat 10g63%
Cholesterol 40mg13%
Sodium 88mg4%
Potassium 137mg4%
Carbohydrates 26g9%
Fiber 2g8%
Sugar 3g3%
Protein 3g6%
Vitamin A 435IU9%
Vitamin C 21.4mg26%
Calcium 32mg3%
Iron 1.3mg7%
* Percent Daily Values are based on a 2000 calorie diet.

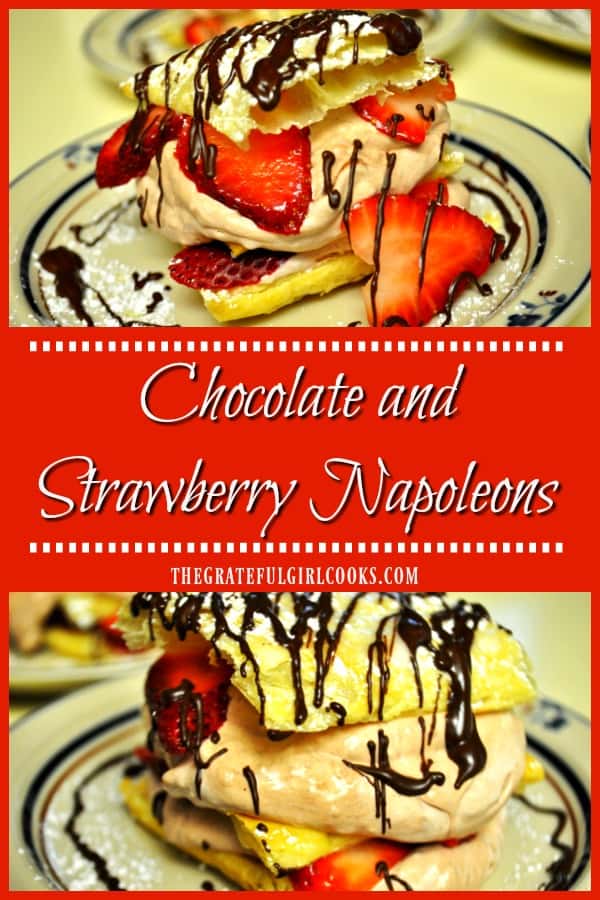
Here’s one more to pin on your Pinterest boards!Chocolate Strawberry Napoleons are delicious layered desserts, with strawberries, creamy chocolate filling, puff pastry, and a chocolate drizzle.


Save

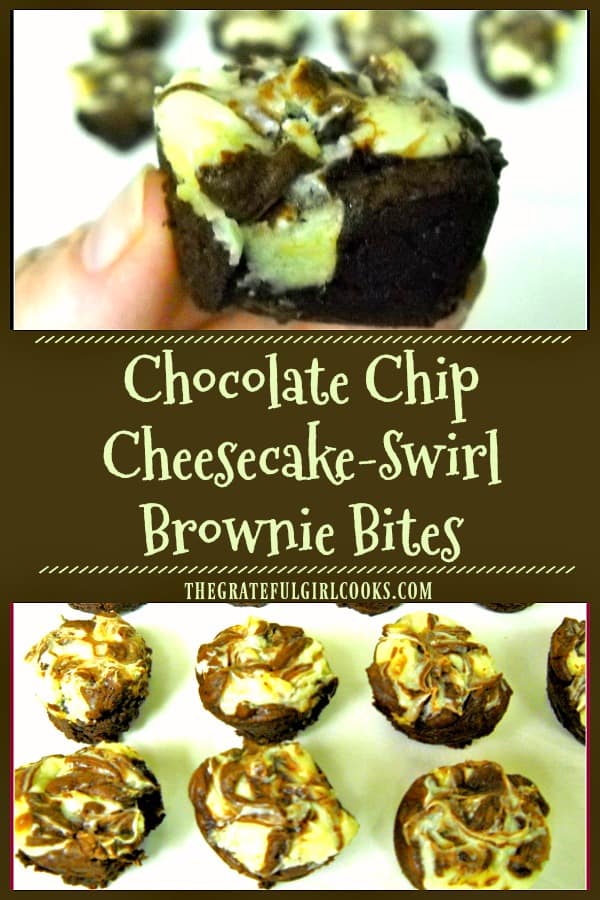
Chocolate Chip Cheesecake-Swirl Brownie Bites

Chocolate Chip Brownie Bites are absolutely decadent, bite-sized treats, overflowing with chocolate chips and cheesecake swirl filling.Chocolate Chip Brownie Bites are absolutely decadent, bite-sized treats, overflowing with chocolate chips and cheesecake swirl filling.

Looking for a great dessert treat?  This recipe is one of the “small bite” desserts I made for Easter brunch. I found the recipe on Pinterest, and decided to make some for everyone to enjoy!

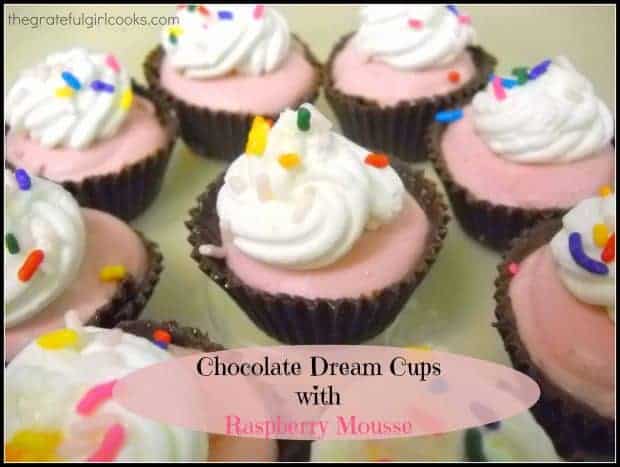
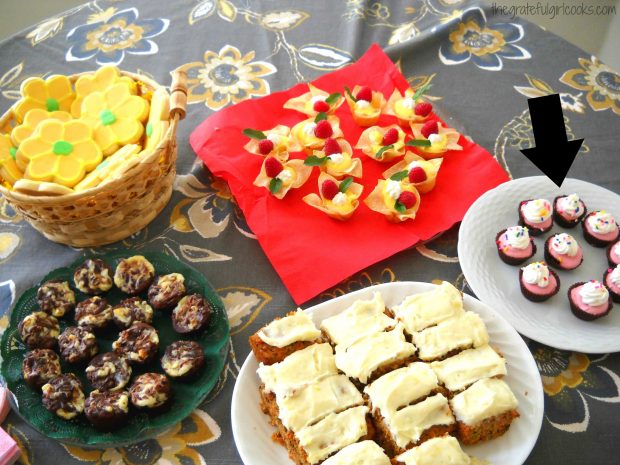
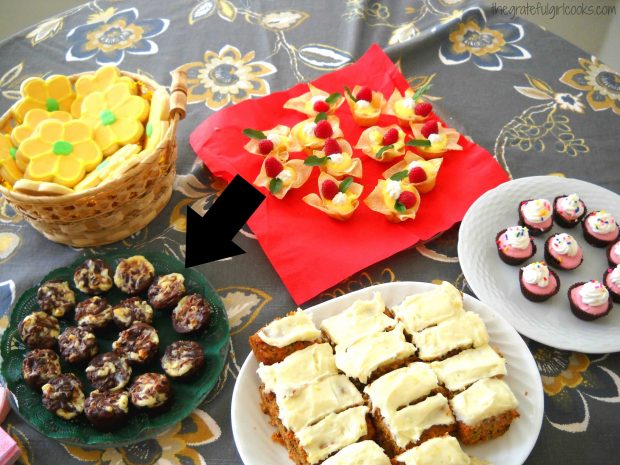
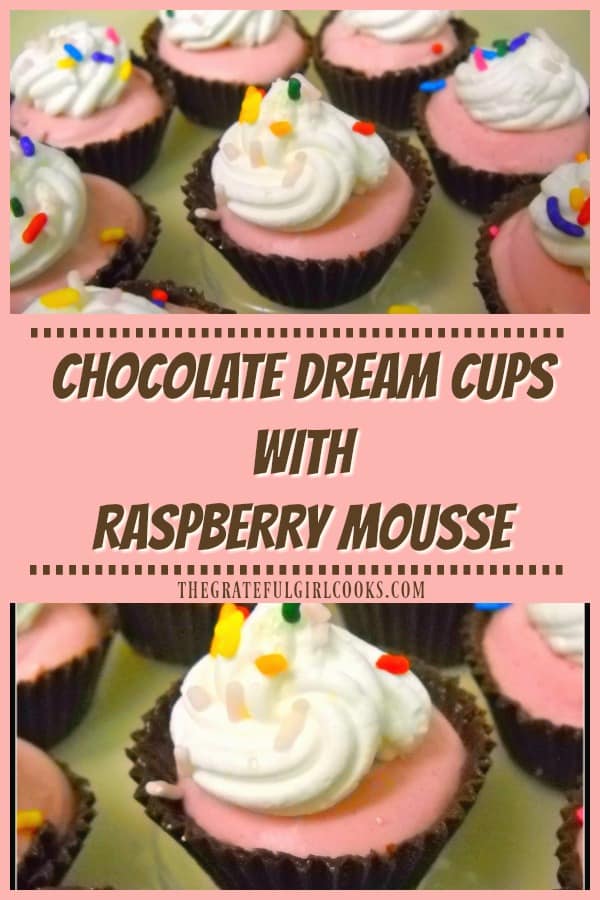
I loved making a variety of bite-sized desserts for our brunch. Here’s a photo of all of them, including Chocolate Dream Cups with Raspberry Mousse, Lemon Curd Filled Won Ton Cups, and Spring Flower Sugar Cookies!

A variety of small desserts, including the chocolate chip brownie bites!

Since the chocolate chip brownie bites are made in miniature muffin tins, the recipe yields approximately 32 little bite-sized treats! This is a wonderful, “easy to make” recipe for a large group. So yummy! Hope you enjoy them, friends! Here’s how to make them.

Make The Brownie Batter

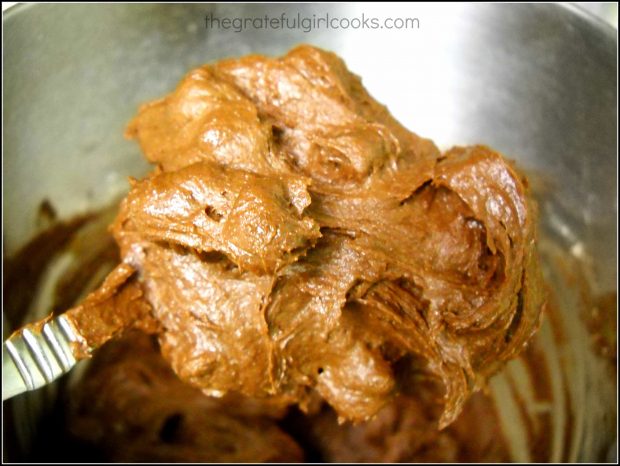
Melt  butter in a small saucepan over medium heat. Set the saucepan aside. Combine granulated sugar, cocoa powder and salt in a separate, large bowl. Add the melted butter and vanilla to this mixture, and mix until combined. 

Stir eggs into the batter, one at a time. Once batter is shiny and thick, add flour and mix it in well. Keep stirring until all the ingredients have been incorporated. Fold the chocolate chips into the batter. Set the batter aside while you make the cheesecake filling.

A brownie batter is mixed and then chocolate chips are stirred in.
Make The Cheesecake Filling

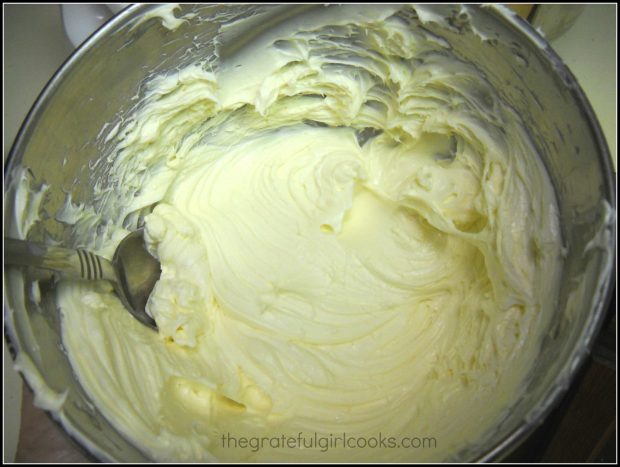
In a large mixing bowl, beat together all the ingredients for the cheesecake batter. This filling is made using cream cheese, powdered sugar, vanilla and an egg yolk. Once fully smooth and combined, set the bowl aside.

Cheesecake filling for the brownie bites is mixed together in a large bowl until smooth.
Time To Assemble The Brownie Bites

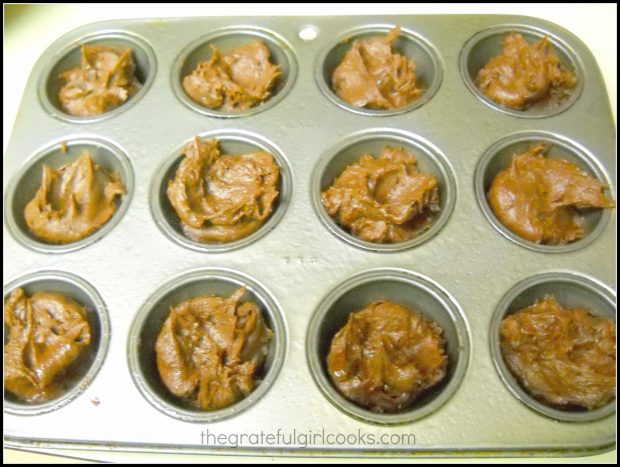
Lightly grease miniature muffin cups. Spoon about a tablespoon of the brownie batter into each of the wells of the prepared muffin tin(s).You may need to make chocolate chip brownie bites in batches, because this recipe yields about 32 brownie bites.

Brownie batter is divided into miniature muffin cups that have been lightly greased.
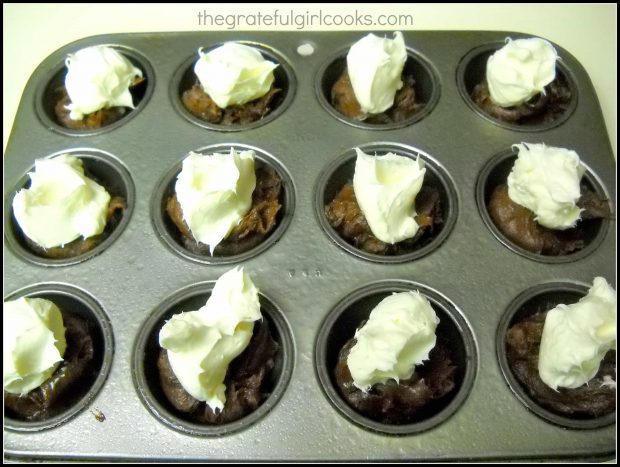
Add the cheesecake batter by large dollops onto each of the muffin cups of chocolate batter. Divide the cheesecake filling evenly between the cups.

Cheesecake filling is dolloped onto the brownie batter in the muffin cups.
Time to Bake These Little Treats!

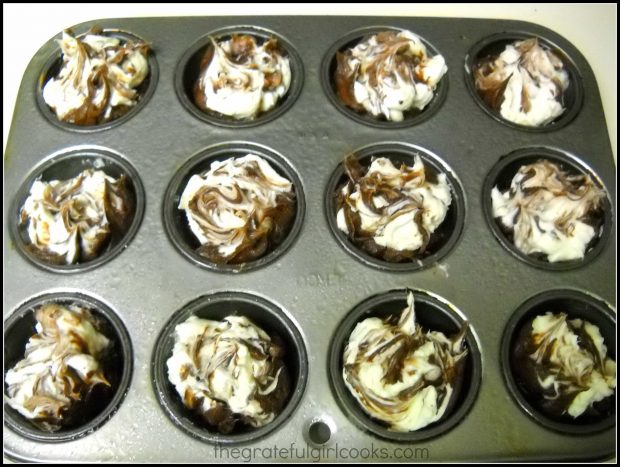
Use a knife to gently swirl the brownie batter and cheesecake batter together in each muffin cup. Place the muffin tin in the oven, and bake at 350°F for 15-20 minutes or until done.

It’s easy to test for doneness by inserting a toothpick down into the top of one of the brownie bites. If the toothpick comes out clean, they’re finished baking. Transfer pan to a wire rack to cool.

Cheesecake filling is swirled into the brownie batter in the muffin cups.
Enjoy The Chocolate Chip Cheesecake-Swirl Brownie Bites!

Once the chocolate chip brownie bites have cooled to room temperature, grab one and take a big bite! They’re very chocolatey and the cheesecake filling adds another level of taste to mini treats.

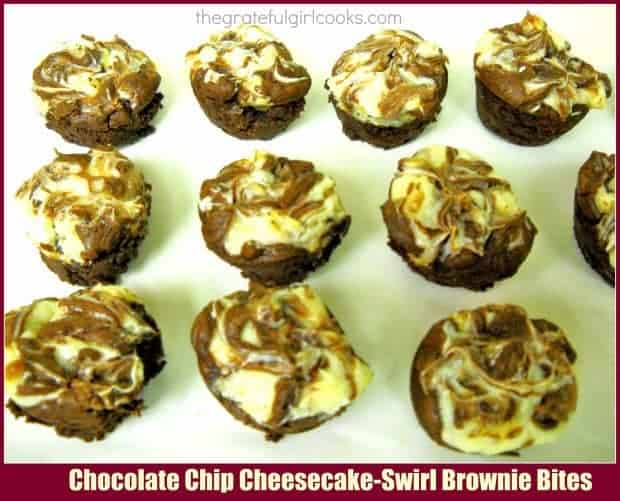
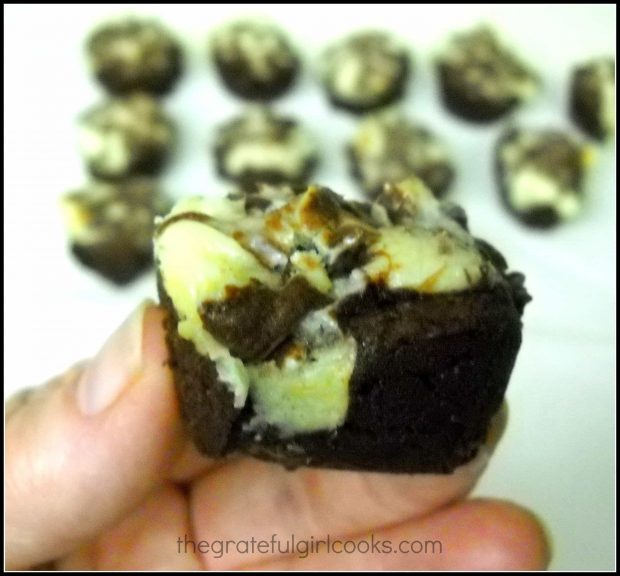
Here’s a close up look at one of these cute little Chocolate Chip Cheesecake-Swirl Brownie Bites (yum). See that cheesecake filling inside? Go for it… take a bite and see how good they are!

One of the chocolate chip brownie bites, with cheesecake swirl filling.

Sure hope you have the opportunity to try these chocolate chip brownie bites! They are really delicious! Thanks for stopping by, and please come back again soon for more family-friendly recipes.

Take care, God bless you, and have a GREAT day.

Looking For More DESSERT Recipes?

You can find ALL of my recipes in the Recipe Index, which is located at the top of the page. I have LOTS of amazing dessert recipes for you to enjoy, including:

Want More Recipes? Get My FREE Newsletter!

I publish a newsletter 2 times per month (1st and 15th) with lots of recipes, tips, etc..
Would you like to join our growing list of subscribers?

There is a Newsletter subscription box on the top right (or bottom) of each blog post, depending on the device you use.
You can submit your e-mail address there, to be added to my mailing list.

Find Me On Social Media:

Facebook page: The Grateful Girl Cooks!
Pinterest:
The Grateful Girl Cooks!
Instagram:
jbatthegratefulgirlcooks

Author's signatureRecipe Source: http://www.domesticate-me.com/chocolate-chip-cheesecake-swirl-brownie-bites/

↓↓ PRINTABLE RECIPE BELOW ↓↓

0 from 0 votes
Chocolate Chip Cheesecake-Swirl Brownie Bites
Prep Time
30 mins
Cook Time
15 mins
Total Time
45 mins
 

Chocolate Chip Brownie Bites are absolutely decadent, bite-sized treats, overflowing with chocolate chips and cheesecake swirl filling.

Category: Desserts
Cuisine: American
Keyword: chocolate chip brownie bites
Servings: 32
Calories Per Serving: 118 kcal
Author: JB @ The Grateful Girl Cooks!
Ingredients
For the brownie batter:
  • 1/2 cup butter (+ 2 Tablespoons)
  • 1 1/4 cups granulated sugar
  • 3/4 cup unsweetened cocoa powder (+ 2 Tablespoons)
  • 1/4 teaspoon salt
  • 1 teaspoon vanilla extract
  • 2 large eggs , cold
  • 1/2 cup all-purpose flour
  • 3/4 cup semi-sweet chocolate chips
For the cheesecake swirl:
  • 8 oz. cream cheese , softened
  • 1/4 cup granulated sugar (+ 2 Tablespoons)
  • 1/4 teaspoon vanilla extract
  • 1 large egg yolk
Instructions
  1. Preheat the oven to 350 degrees. Spray one or two miniature muffin tins with a non-stick cooking spray; set aside.
  2. Using a small saucepan, melt the butter over medium heat. Set aside.

  3. Combine granulated sugar, cocoa powder and salt in a large bowl. Add melted butter and vanilla. Mix into dry ingredients until well combined. Stir in eggs, one at a time. Once batter looks shiny and thick, add flour and mix it in well. Keep stirring until ingredients have been incorporated. Fold the chocolate chips into the batter. Spoon about a tablespoon of the brownie batter into each of the wells of prepared muffin tin(s).

  4. In a separate bowl, beat the cheesecake swirl ingredients (softened cream cheese, granulated sugar, vanilla extract and egg yolk) together until fully combined. Add a dollop of the cheesecake swirl batter (about 1/2 Tablespoon) to the top of each brownie cup. Take a knife and gently swirl the cheesecake batter down into the brownie batter.

  5. Bake at 350 degrees for 15-20 minutes (until toothpick comes out clean). Check them at 15 minutes. Keep an eye on them so you don't overcook them! When done, remove them to a wire rack to cool. Let brownie bites COOL before trying to remove them from the pan. Repeat process with remaining batter (if making them one muffin tin at a time)...then ENJOY!!!!!

Recipe Notes

***These brownie bites also freeze very well, if by some miracle there are any left... just sayin'!

Nutrition Facts
Chocolate Chip Cheesecake-Swirl Brownie Bites
Amount Per Serving (1 brownie bite)
Calories 118 Calories from Fat 54
% Daily Value*
Fat 6g9%
Saturated Fat 3g19%
Cholesterol 28mg9%
Sodium 81mg4%
Potassium 78mg2%
Carbohydrates 14g5%
Fiber 1g4%
Sugar 11g12%
Protein 1g2%
Vitamin A 155IU3%
Calcium 19mg2%
Iron 0.7mg4%
* Percent Daily Values are based on a 2000 calorie diet.

Here’s one more to pin on your Pinterest boards!

Chocolate Chip Brownie Bites are absolutely decadent, bite-sized treats, overflowing with chocolate chips and cheesecake swirl filling.


Save

Save

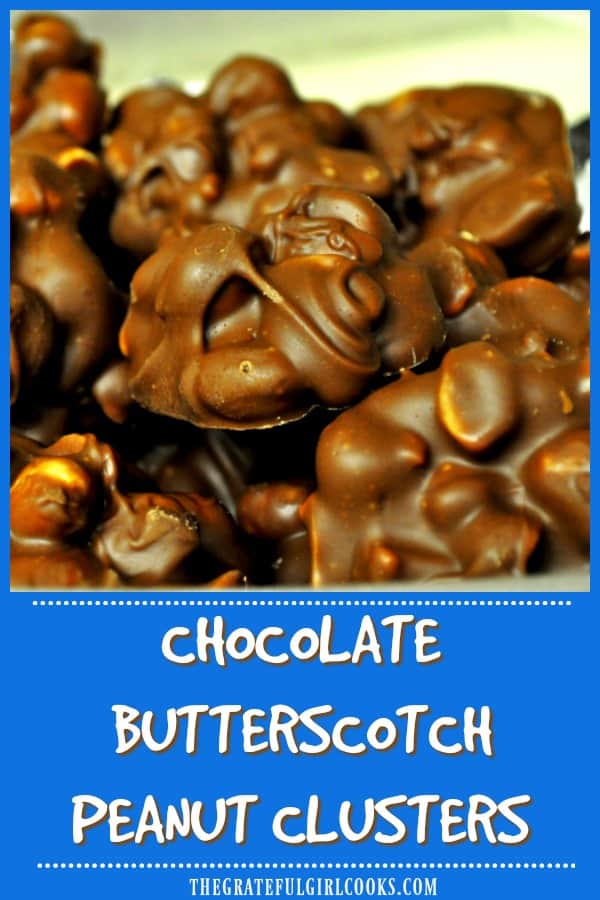
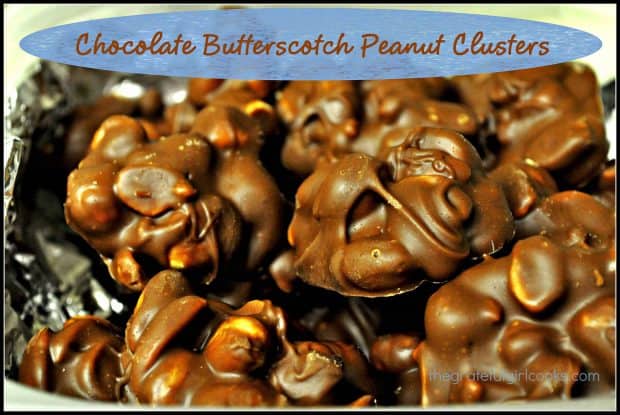
Chocolate Butterscotch Peanut Clusters

Chocolate Butterscotch Peanut Clusters are so yummy and EASY to make, using only 3 ingredients! Recipe makes 4 dozen- perfect for gift giving and holidays!Chocolate Butterscotch Peanut Clusters are so yummy and EASY to make, using only 3 ingredients! Recipe makes 4 dozen- perfect for gift giving and holidays!

If you’re looking for a totally easy “chocolate candy” recipe to have around the house to munch on OR give to friends…here ya go! Chocolate Butterscotch Peanut Clusters for the win! This is truly one of the easiest recipes ever!

Are Chocolate Butterscotch Peanut Clusters Easy To Make?  

YES!  These chocolates are ridiculously simple to make, but they sure taste GREAT! This is truly one of the easiest recipes you can find! These chocolate butterscotch peanut clusters only have 3 ingredients.

The ingredients are chocolate chips, butterscotch chips, and peanuts. Since this recipe makes approximately 4 dozen, there will be plenty to share with family and friends (we wouldn’t dare eat them all by ourselves, would we????)!

How Are They Made?

Chocolate chips and butterscotch chips are melted in a double boiler, and then combined with peanuts until coated. The chocolate butterscotch peanut clusters are then dropped by spoonfuls onto wax paper or aluminum foil, and allowed to firm up before eating.

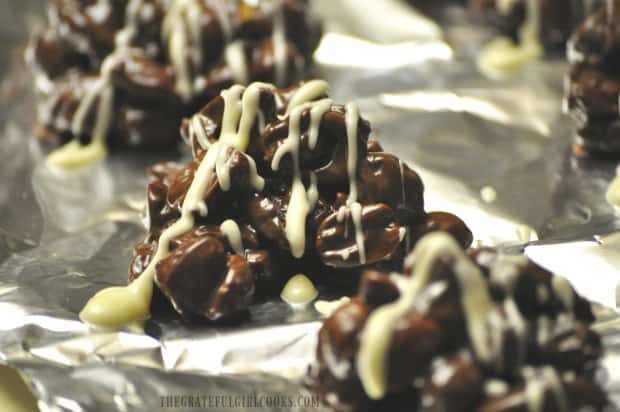
If you can pour and stir…you can make these! It’s THAT easy.  I’ve been making chocolate butterscotch peanut clusters for years, and have always enjoyed how quick to make and delicious they are. You can even get “fancy” and drizzle the chocolate butterscotch peanut clusters with a simple vanilla/powdered sugar icing, if desired (but not necessary). I’ve done that a couple times!

Chocolate butterscotch peanut clusters drizzled with icing.

The addition of butterscotch chips to “standard” chocolate covered peanut clusters takes these to the next level of awesomeness!  Hope you will give them a try! Have a great day, and come back soon for more family-friendly recipes.

Looking For More Candy or Chocolate Recipes?

You can find all of my recipes in the Recipe Index, located at the top of the page. In case you are searching for MORE chocolate covered candy to make for the holidays, etc., be sure to check out my recipes for Christmas Tree “Gumdrops”, Chocolate Covered Bacon, Mocha Truffles, Chocolate Orange Truffles. There’s more in the recipe index, and they are all are delicious!

Interested In More Recipes?

Thank you for visiting this website. I appreciate you using some of your valuable time to do soIf you’re interested, I publish a newsletter 2 times per month (1st and 15th) with all the latest recipes, and other fun info. I would be honored to have you join our growing list of subscribers, so you never miss a great recipe!
There is a Newsletter subscription box on the top right side (or bottom) of each blog post, depending on the device you use, where you can easily submit your e-mail address (only) to be included in my mailing list.

You Can Also Find Me On Social Media:
Facebook page: The Grateful Girl Cooks!
Pinterest: The Grateful Girl Cooks!
Instagram: jbatthegratefulgirlcooks

Author's signatureRecipe Source: Unknown

Here’s one more to pin on your Pinterest boards!Chocolate Butterscotch Peanut Clusters are so yummy and EASY to make, using only 3 ingredients! Recipe makes 4 dozen- perfect for gift giving and holidays!
5 from 3 votes
Chocolate Butterscotch Peanut Clusters
Prep Time
10 mins
Cook Time
5 mins
Total Time
15 mins
 
Chocolate Butterscotch Peanut Clusters are so yummy and EASY to make, using only 3 ingredients! Recipe makes 4 dozen- perfect for gift giving and holidays!
Category: Candy, Desserts
Cuisine: American
Keyword: chocolate butterscotch peanut clusters
Servings: 48 chocolates (approx.)
Calories Per Serving: 89 kcal
Author: JB @ The Grateful Girl Cooks!
Ingredients
  • 6 ounces semi-sweet chocolate chips
  • 2 cups butterscotch chips
  • 12 ounces salted cocktail peanuts
Instructions
  1. Melt the chocolate and butterscotch chips in a double boiler (chips in small pot, which is sitting on top of a pot of boiling water-be careful not to get any water into chocolate or chocolate will seize up).

  2. When chips have melted, remove from heat and stir in peanuts until coated.
  3. Drop peanut clusters by rounded spoonfuls onto wax paper.
  4. Let the chocolate butterscotch covering harden before serving. Enjoy!

Nutrition Facts
Chocolate Butterscotch Peanut Clusters
Amount Per Serving (1 chocolate)
Calories 89 Calories from Fat 45
% Daily Value*
Fat 5g8%
Saturated Fat 1g6%
Sodium 58mg3%
Potassium 75mg2%
Carbohydrates 9g3%
Sugar 7g8%
Protein 2g4%
Vitamin A 10IU0%
Calcium 10mg1%
Iron 0.4mg2%
* Percent Daily Values are based on a 2000 calorie diet.

Save

Save

Save

Save

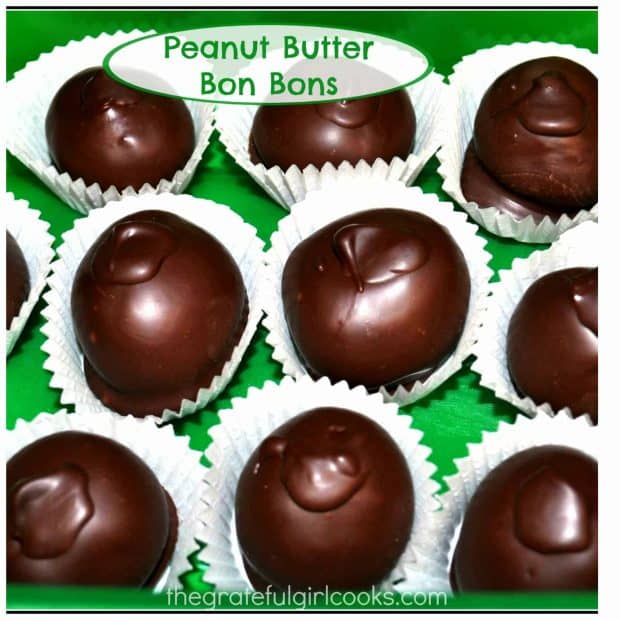
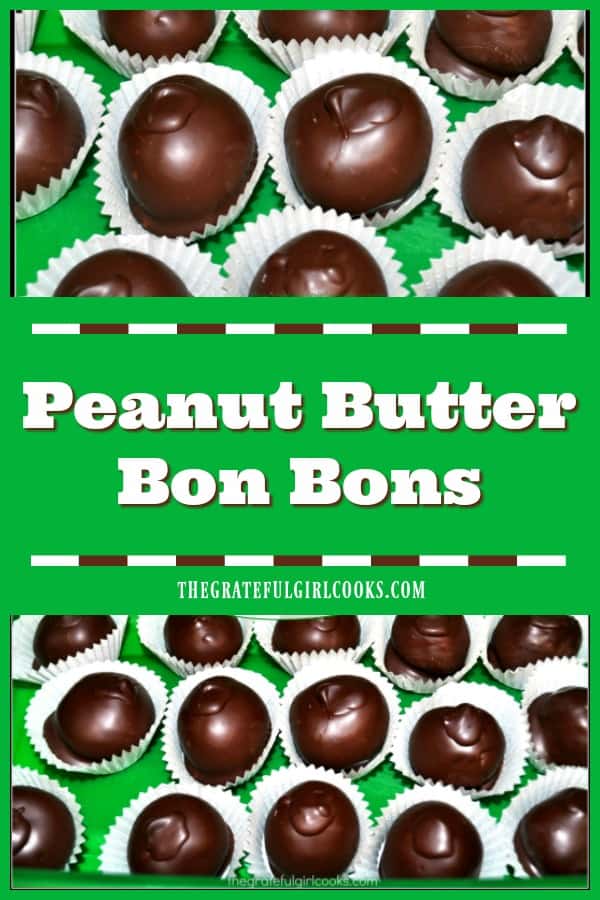
Peanut Butter Bon Bons

Chocolate dipped peanut butter bon bons (truffles) are creamy, rich and decadent. With only 5 ingredients, and so easy to make, what’s not to love?Chocolate dipped peanut butter bon bons (truffles) are creamy, rich and decadent. With only 5 ingredients, and so easy to make, what's not to love?

The quick and easy recipe for Peanut Butter Bon Bons (truffles) is one of our family’s favorites!  These chocolate covered treats are a tradition in our home over the Holidays!

I don’t know about you, but I love peanut butter!  Ever since I was a little girl, I’ve enjoyed eating peanut butter bon bons, peanut butter crunch cookies, peanut butter and jelly sandwiches, and many other dishes featuring peanut butter. I come by this love of peanut butter honestly, because one of my biggest memories of my old grandma was always seeing her eating peanut butter and banana sandwiches.

Scroll Down For A Printable Recipe Card At The Bottom Of The Page

Making Peanut Butter Bon Bons Is A Tradition

These simple bon bons (also known as truffles) are one of the goodies I almost always make at Christmas time for family and friends. These tasty peanut butter treats (whatever you want to call them) are so delicious, it’s hard to eat only one!

I’ve been making peanut butter bon bons (sometimes called “buckeyes”) for years and years. I don’t even know where I got the original recipe! My recipe is written out on an old, stained 3×5 index card – aren’t all the GOOD ones like that?

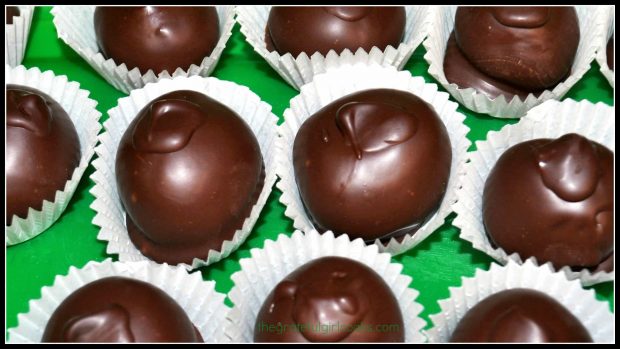
Chocolate covered peanut butter bon bons in paper wrappers, ready to eat!

How Are Peanut Butter Bon Bons Made?

The peanut butter bon bons are easy to make. A creamy peanut butter filling is blended, rolled into balls, and refrigerated until firm. They are coated in a chocolate covering, and refrigerated again, until the chocolate firms up. That’s it!

Sure do hope you will give the peanut butter bon bons a try. I tend to make them at Christmas time, but I think you will find them wonderfully delicious any time of the year!

Looking For Other Recipes For BON BONS or TRUFFLES?

You can find all of my recipes in the Recipe Index, located at the top of the page. A few bon bon or truffle recipes you might also enjoy include:

Interested In More Recipes?

Thank you for visiting this website. I appreciate you using some of your valuable time to do soIf you’re interested, I publish a newsletter 2 times per month (1st and 15th) with all the latest recipes, and other fun info. I would be honored to have you join our growing list of subscribers, so you never miss a great recipe!
There is a Newsletter subscription box on the top right side (or bottom) of each blog post, depending on the device you use, where you can easily submit your e-mail address (only) to be included in my mailing list.

You Can Also Find Me On Social Media:
Facebook page: The Grateful Girl Cooks!
Pinterest: The Grateful Girl Cooks!
Instagram: jbatthegratefulgirlcooks

Author's signature

Original Recipe Source: Unknown…handed down recipe from many years ago

0 from 0 votes
Peanut Butter Bon Bons
Prep Time
30 mins
Cook Time
0 mins
Refrigeration (inactive time)
2 hrs
Total Time
2 hrs 30 mins
 
Chocolate dipped peanut butter bon bons (truffles) are creamy, rich and decadent. With only 5 ingredients, and so easy to make, what's not to love?
Category: Candy, Desserts
Cuisine: American
Keyword: peanut butter bon bons
Servings: 30 bon bons (approx.)
Calories Per Serving: 239 kcal
Author: JB @ The Grateful Girl Cooks!
Ingredients
For bon bons:
  • 12 Tablespoons butter (1½ sticks) (or margarine-whatever floats your boat!)
  • 18 oz. creamy peanut butter (small jar)
  • 16 ounces powdered sugar (16 oz. box) (confectioner's)
For chocolate coating:
  • 6 ounces semi-sweet chocolate chips
  • 2 Tablespoons vegetable shortening
Instructions
  1. Using an electric mixer, cream the butter and peanut butter together in a large bowl until thoroughly mixed and creamy. Add powdered sugar; mix until smooth. Mixture will be thick.

  2. Using a spoon, scoop out mixture and roll/shape into (approx.) 1 inch balls between your hands. Place rolled bon bons onto a wax or parchment paper lined baking sheet. Store in refrigerator to chill for a couple of hours.

  3. Right before the bon bons are done "chilling", prepare chocolate coating mixture to dip them in: Place the chocolate chips and the vegetable shortening in a microwave-safe bowl. Microwave on high for 30 seconds. Remove. Stir chocolate and shortening. Place back in microwave and microwave for 30 additional seconds. Remove and stir. (You do it this way to prevent the chocolate from burning). By now the chocolate and shortening should be completely melted and smooth. If not (some microwave temps vary), put it back in for 15 seconds and stir. Remove from microwave. *Tip: If the chocolate is still too thick for dipping, just add a tiny bit more shortening and microwave for a few seconds.* (If you prefer, you can also prepare the chocolate and shortening in a double-boiler...again...whatever works for you).

  4. Remove bon bons from refrigerator and dip each one completely in melted chocolate. I use a toothpick inserted into bon bons to dip into chocolate, then remove the toothpick and fill in the small hole on top of bon bon with additional chocolate. As each bon bon is dipped, place on wax or parchment paper to allow chocolate time to "harden".

  5. When chilled, place each bon bon in a small paper candy holder, and refrigerate! Enjoy.

Nutrition Facts
Peanut Butter Bon Bons
Amount Per Serving (1 bon bon)
Calories 239 Calories from Fat 144
% Daily Value*
Fat 16g25%
Saturated Fat 6g38%
Cholesterol 12mg4%
Sodium 118mg5%
Potassium 143mg4%
Carbohydrates 21g7%
Fiber 1g4%
Sugar 18g20%
Protein 4g8%
Vitamin A 145IU3%
Calcium 12mg1%
Iron 0.7mg4%
* Percent Daily Values are based on a 2000 calorie diet.

Here’s one more to pin on your Pinterest boards!Chocolate dipped peanut butter bon bons (truffles) are creamy, rich and decadent. With only 5 ingredients, and so easy to make, what's not to love?


Save

Save

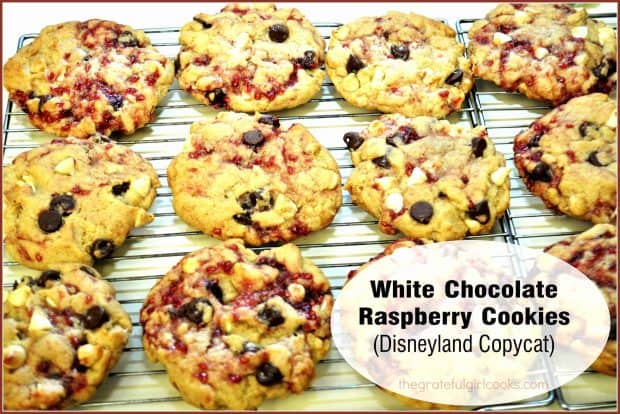
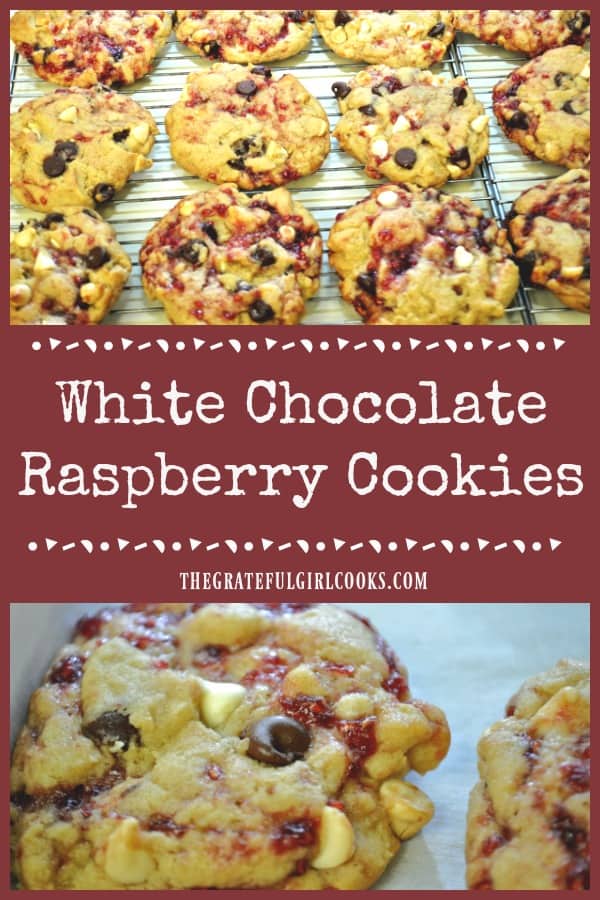
White Chocolate Raspberry Cookies (Disneyland Copycat)

White Chocolate Raspberry Cookies are Disneyland Main Street favorites, filled with white & semi-sweet chocolate chips and ribbons of raspberry jam. White Chocolate Raspberry Cookies are Disneyland Main Street favorites, filled with white & semi-sweet chocolate chips and ribbons of raspberry jam.
A few days ago I was on the prowl for a new cookie recipe to try. It was pouring down rain outside and I was itching for something to do besides laundry or dusting. Do you ever have those moments?

Well I was having that moment…big time! I found this recipe for White Chocolate Raspberry Cookies (a Disneyland copycat) and knew I wanted to try them!

I began searching for a recipe that I might already have all the ingredients for in my pantry. Voila! This recipe popped up on my Pinterest feed!

I checked out the recipe because the picture of the cookies drew me in. I was excited to read through the recipe and realize that I had all the necessary ingredients! So I made them, and the rest is history. Here’s how to make white chocolate raspberry cookies.

Scroll Down For A Printable Recipe Card At The Bottom Of The Page

About This Cookie

White chocolate raspberry cookies are available at Disneyland (at Pooh Corner and a few Main Street shops). I’ve never bought this cookie while at Disneyland (despite MANY times there). This original recipe was created by another blogger, and it sounded fabulous to me.

Who can resist a big old chewy cookie with not one, but TWO kinds of chocolate AND raspberry jam swirled throughout? I knew I HAD to make these white chocolate raspberry cookies right away!

To be truthful, I blame this urgency completely on our Oregon rain. When I am stuck inside and it’s raining, I like to experiment with recipes in our kitchen.

These cookies came together fairly quickly. They’re a bit messy to make, but the results are really delicious! I hope you will give these cookies a try (even if it’s not raining!). They are worth your valuable time and effort. 

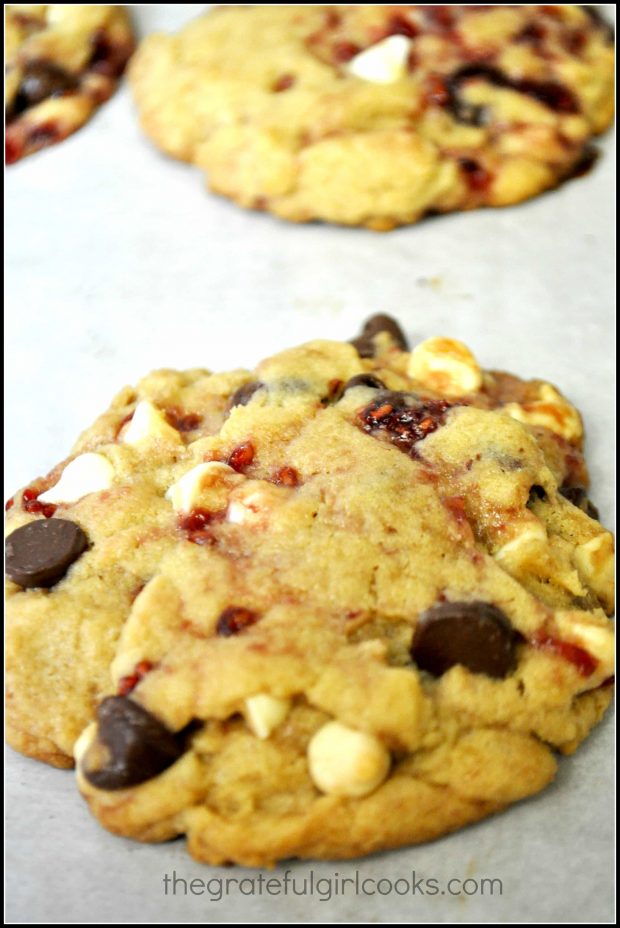
Some of the finished white chocolate raspberry cookies, ready to eat!

How To Make White Chocolate Raspberry Cookies

Preheat your oven, and whisk together the dry ingredients in a large bowl. In a separate bowl or stand mixer, cream the butter and sugars with an electric mixer. Now add the egg, egg yolk, vanilla and almond extracts to the dough.

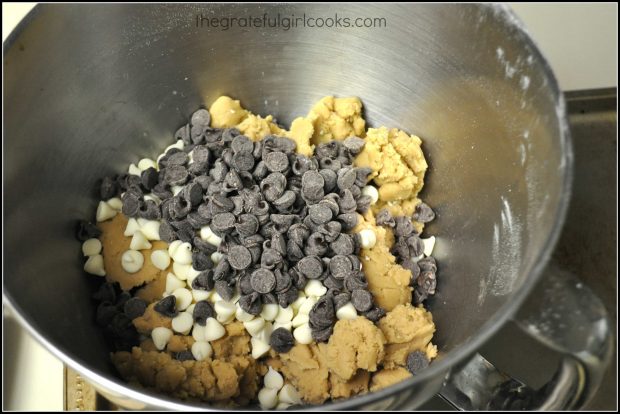
Add the dry ingredients to the wet ingredients, and mix only until the ingredients are combined. Stir in the white and semi-sweet chocolate chips until they’re fully incorporated into the dough.

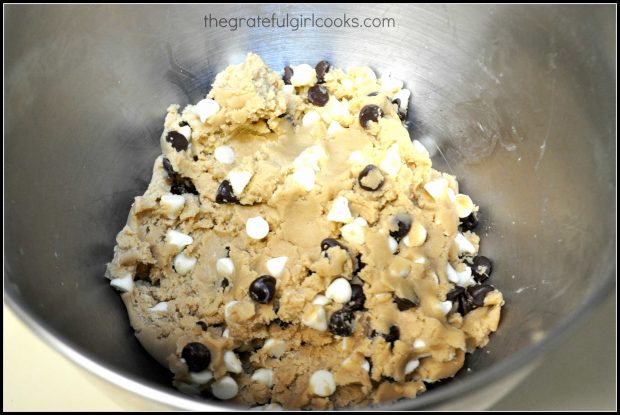
Semi sweet chocolate chips and white chocolate chips are added to cookie dough.The dough is ready to shape into cookies!
Now Here’s The Crazy, Messy Part!

Scoop out about ¼ of the cookie dough into a small bowl (it’s easiest to work with a small bit at a time).

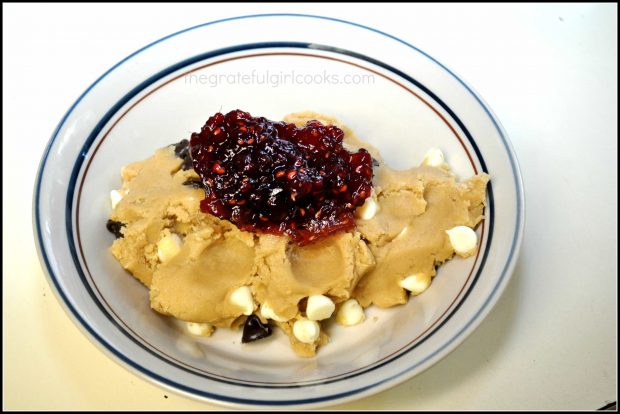
Add 1 TBSP of raspberry jam and “cut it” into the dough, using a butter knife. Be sure NOT to mix it in, because then the dough will turn completely pink, and frankly who wants a pink cookie?

Gently cut the jam into the dough. Think of it as stabbing the jam into the dough and dragging the knife through in a swirl, okay? Eventually you will work the jam into the dough.

Raspberry jam is added to a portion of the cookie dough.Shape The White Chocolate Raspberry Cookies

Take the jam swirled dough and drop it by large spoonfuls onto a baking sheet, lined with parchment paper. **TIP: You might find it easier (but messier) to scoop out the dough and shape it into a ball using your hands. It’s YOUR choice.

Yes, it was a bit messy, but this tip worked the best for me the next time I made this recipe. Flatten the dough balls slightly with clean hands or use the back of a spoon.

Repeat this step with the rest of the dough and jam until the cookie dough is all used. Now it’s time to bake them!

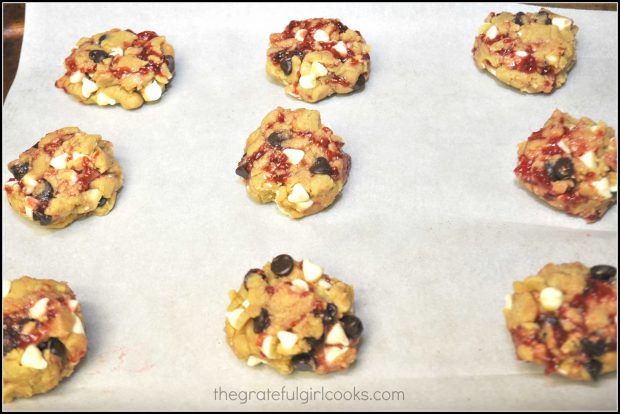
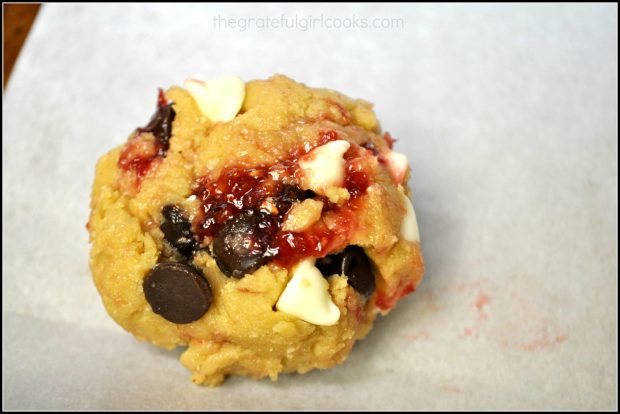
Chocolate Raspberry Cookies are formed and placed onto baking sheet.A close up view of a cookie (before baking), with raspberry jam and chocolate chips showing.Time To Bake The Cookies!

Bake the cookies at 350 degrees for 12-17 minutes (the time will depend on the size of the cookies). Keep an eye on the cookies after the 10 minute mark.

I wanted larger cookies so I cooked mine a bit longer. Remove the cookies from the oven when the edges of the cookie are set, but the center is is still slightly soft.

Cool the cookies on the baking sheet for 5 minutes before removing them from pan. After 5 minutes, transfer the cookies to a wire rack to cool completely. ENJOY!

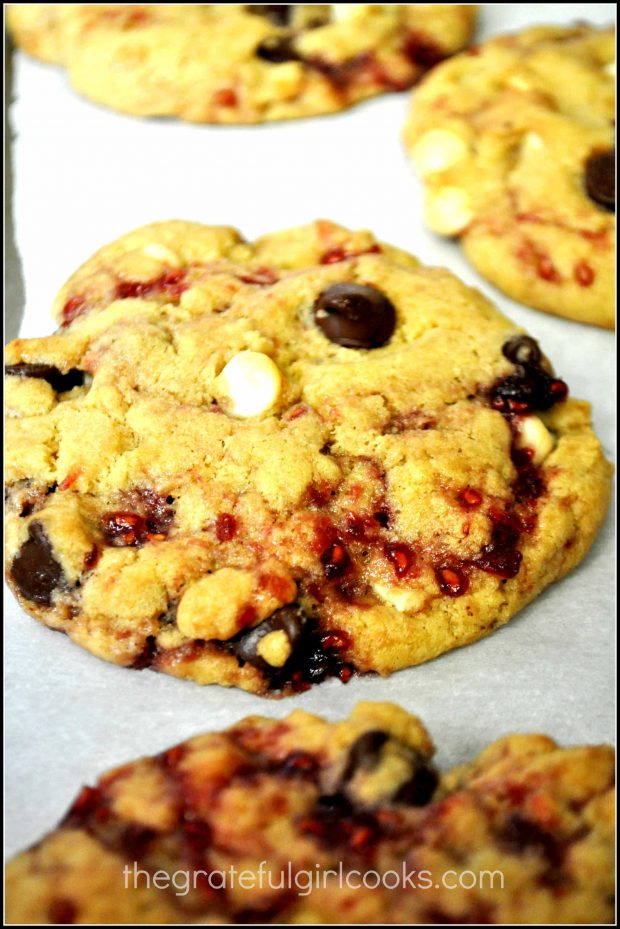
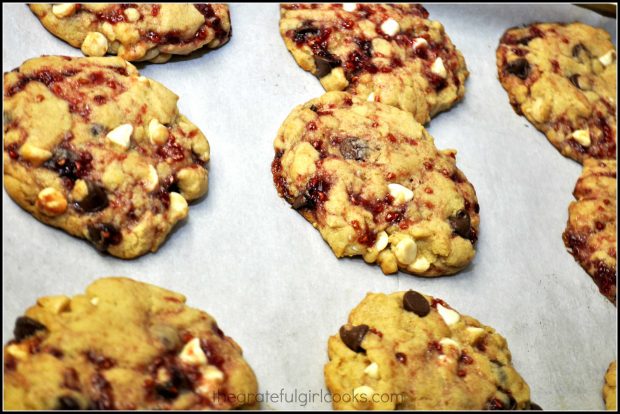
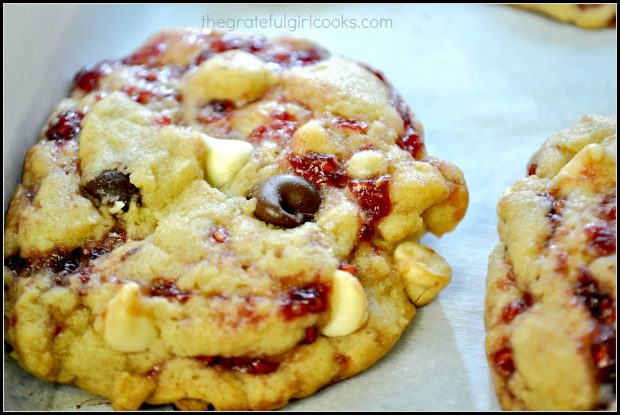
The baked white chocolate raspberry cookies are golden brown around edges.Some of the baked cookies, cooling on the baking sheet.
These white chocolate raspberry cookies really are delicious! I hope you will give them a try!

These white chocolate raspberry cookies look good enough to eat!

Hope you enjoy these delicious white chocolate raspberry cookies! They are really good, and I really believe you are going to like them.

Thanks for stopping by, and I invite you to come back soon for more family-friendly recipes. Take care, and have a great day!

Looking For More COOKIE Recipes?

You can find ALL of my recipes in the Recipe Index, located at the top of the page. I have lots of yummy cookie recipes to check out, including:

Want More Recipes? Get My FREE Newsletter!

I publish a newsletter 2 times per month (1st and 15th) with lots of recipes, tips, etc..
Would you like to join our growing list of subscribers?

There is a Newsletter subscription box on the top right (or bottom) of each blog post, depending on the device you use.
You can submit your e-mail address there, to be added to my mailing list.

Find Me On Social Media:

Facebook page: The Grateful Girl Cooks!
Pinterest:
The Grateful Girl Cooks!
Instagram:
jbatthegratefulgirlcooks

Author's signatureRecipe Source: http://cocinandoconalena.blogspot.com/2011/03/disneylands-white-chocolate-raspberry.html

↓↓ PRINTABLE RECIPE BELOW ↓↓

0 from 0 votes
White Chocolate Raspberry Cookies (Disneyland Copycat)
Prep Time
25 mins
Cook Time
12 mins
Total Time
37 mins
 

White Chocolate Raspberry Cookies are Disneyland Main Street favorites, filled with white & semi-sweet chocolate chips and ribbons of raspberry jam.

Category: Dessert
Cuisine: American
Keyword: white chocolate raspberry cookies
Servings: 20 large cookies
Calories Per Serving: 228 kcal
Author: JB @ The Grateful Girl Cooks!
Ingredients
  • 2 1/2 cups all-purpose flour
  • 1/4 tsp. baking soda
  • 1/4 tsp. baking powder
  • 1/4 tsp. cream of tartar
  • 1/4 tsp. salt
  • 1/2 cup butter (1 cube), room temperature
  • 1/2 cup granulated sugar
  • 1/2 cup brown sugar
  • 1 egg , plus 1 egg yolk
  • 1 tsp. vanilla extract
  • 1/4 tsp. almond extract
  • 4 Tablespoons Raspberry Jam , heaping
  • 3/4 cup white chocolate chips
  • 3/4 cup semi-sweet chocolate chips
Instructions
  1. Preheat the oven to 350 degrees F. In a medium bowl, whisk together the flour, baking soda, baking powder, cream of tartar, and salt. Set aside.
  2. In a large bowl, using an electric mixer, cream the butter, granulated and brown sugars until well combined, light and fluffy. Add egg, egg yolk, vanilla and almond extracts to this mixture. Mix well.
  3. Add the dry ingredients to the wet ingredients; mix just until combined. Stir in the white and semi-sweet chocolate chips.
  4. Scoop out about 1/4 of the cookie dough into a small bowl (it's easiest to work with a small bit at a time!) Add 1 TBSP of the raspberry jam and "cut it in" to the dough, using a butter knife. Be sure NOT to mix it in, because then the dough will turn completely pink, and frankly who wants a pink cookie? Just gently cut the jam into the dough. Think of it as stabbing the jam into the dough and dragging the knife through in a swirl, okay? Eventually you will work the jam into the dough...trust me!

  5. Take the jam swirled dough and place it by large spoonfuls onto a baking sheet, lined with parchment paper. **NOTE: I started out doing big spoonfuls, but found it easier (but messier) to just scoop out the dough and shape it into a ball using my (clean) hands. Yes, it was a bit messy (think jam), but worked the best for me. Flatten the dough balls slightly with your clean hands or the back of a spoon. *Repeat this process with the rest of the dough and jam until the dough is gone.*
  6. Bake the cookies at 350 degrees for 12-17 minutes (the time will depend on the size of the cookies). Keep an eye on the cookies after the 10 minute mark. I wanted larger cookies so I cooked mine a bit longer. You want to remove them from oven when the edges of the cookie are set, but the center is slightly soft. Cool the cookies on the baking sheet for 5 minutes before removing them from pan. After 5 minutes, transfer the cookies to a wire rack to cool completely. ENJOY!
Recipe Notes

If you make the cookies smaller, you will have a much larger quantity of cookies.

Nutrition Facts
White Chocolate Raspberry Cookies (Disneyland Copycat)
Amount Per Serving (1 cookie)
Calories 228 Calories from Fat 81
% Daily Value*
Fat 9g14%
Saturated Fat 5g31%
Cholesterol 22mg7%
Sodium 94mg4%
Potassium 104mg3%
Carbohydrates 32g11%
Fiber 1g4%
Sugar 18g20%
Protein 2g4%
Vitamin A 155IU3%
Vitamin C 0.3mg0%
Calcium 31mg3%
Iron 1.3mg7%
* Percent Daily Values are based on a 2000 calorie diet.

Here’s one more to pin on your Pinterest boards!White Chocolate Raspberry Cookies are Disneyland Main Street favorites, filled with white & semi-sweet chocolate chips and ribbons of raspberry jam.


Save

Save

Save

Mocha Truffles

You’ll love these easy to prepare mocha truffles, chocolate covered creamy treats that are perfect for eating or gift giving! Recipe makes 5 dozen!You'll love these easy to prepare mocha truffles, chocolate covered creamy treats that are perfect for eating or gift giving!
I LOVE to make truffles for our family and friends to enjoy any old time of the year. One of my “traditions” is to make Mocha Truffles each year at Christmas time, along with a couple other kinds of truffles.

I found this amazingly simple truffle recipe in one of my old “Taste of Home” magazines almost 20 years ago. They taste wonderful, and are surprisingly easy to make.

I’ve made good old mocha truffles countless times over the years, and they always are a big hit! Here’s how to make them.

Scroll Down For A Printable Recipe Card At The Bottom Of The Page

Do You Enjoy Truffles Or Bon Bons?

Do you enjoy truffles or bon bons? We sure do, and I try to make a new flavor every year at Christmas!

You can find all of my truffle and bon bon recipes in the Recipe Index at the top of the page. A few favorites include chocolate orange truffles, peanut butter bon bons, and maple cream bon bons.

Mocha truffles are some of my absolute favorite decadent treats! The rich chocolate and coffee flavor combination is the reason I have made these truffles so many times over the years.

They are so good, and so creamy… sigh. If only they were calorie-free! Oh well, it’s a good thing they are so DELICIOUS!

Close up photo of a few of the mocha truffles.
 

Even though I don’t have photos of the “process” for making these truffles, it is a fairly simple process. Creamy chocolate mocha filling is mixed, shaped into balls, refrigerated, then dipped into chocolate to cover. That’s basically it! Anyone can make mocha truffles… really!

I hope you will give these mocha truffles a try. They are great ANY time of the year, and are a wonderful “sweet” gift to give a friend or colleague. Trust me. Have a wonderful day!

Looking For More CHRISTMAS GOODIES?

You can find all of my recipes in the Recipe Index, which is located at the top of the page. I have lots of recipes for yummy treats, especially Christmas Goodies, including:

Want More Recipes? Get My FREE Newsletter!

I publish a newsletter 2 times per month (1st and 15th) with lots of recipes, tips, etc..
Would you like to join our growing list of subscribers?

There is a Newsletter subscription box on the top right (or bottom) of each blog post, depending on the device you use.
You can submit your e-mail address there, to be added to my mailing list.

Find Me On Social Media:

Facebook page: The Grateful Girl Cooks!
Pinterest:
The Grateful Girl Cooks!
Instagram:
jbatthegratefulgirlcooks

 
Author's signature
Original recipe source: Stacy Abell, via Taste of Home Magazine, Dec./Jan. 1995 issue, pg. 25
 

↓↓ PRINTABLE RECIPE BELOW ↓↓

0 from 0 votes
Mocha Truffles
Prep Time
2 hrs
Cook Time
0 mins
Total Time
2 hrs
 
You'll love these easy to prepare mocha truffles, chocolate covered creamy treats that are perfect for eating or gift giving! Recipe makes 5 dozen!
Category: Candy, Dessert
Cuisine: American
Keyword: mocha truffles
Servings: 60 truffles (approx.)
Calories Per Serving: 122 kcal
Author: JB @ The Grateful Girl Cooks!
Ingredients
  • 2 packages (12 oz. each) semi-sweet chocolate chips
  • 1 package (8 oz.) cream cheese, softened
  • 3 Tablespoons instant coffee granules
  • 2 teaspoon water
  • 1 lb. dark chocolate confectionery coating * (see note at end of recipe)
  • White confectionery coating for decorative "drizzle" (Optional)
Instructions
  1. To make the truffles: Melt the chocolate chips in a microwave-safe bowl (or in a double boiler). Add cream cheese, coffee granules and water to the chocolate and mix well. Cover bowl and refrigerate until chocolate is firm enough to shape.

  2. Shape the chilled chocolate mixture into 1 inch balls (Scoop chocolate out of bowl with spoon; use your hands to roll them-yes...it is a bit messy, but fun!). Place the chocolate balls onto a wax paper lined baking sheet, then refrigerate for 1-2 hours or until very firm.
  3. To make the chocolate coating: Melt the chocolate confectionery coating in a microwave-safe bowl or double boiler. Dip the truffles, one at a time in the chocolate to completely cover and then place covered truffle on waxed paper to let the chocolate harden. *I usually use a toothpick inserted into the chocolate ball to dip them. When dipped, I remove the toothpick and cover the hole where the toothpick was with additional chocolate. Once finished dipping and "drizzling" the truffles, let harden on waxed paper. Once hardened, I love to place them in individual mini-candy papers for a festive look! Keep the finished truffles refrigerated!
  4. **If desired, you can melt the white confectionery coating to decoratively "drizzle" over the truffles, or you can drizzle additional chocolate coating or sprinkles.
Recipe Notes

**Recipe creator says these truffles may be frozen for several months BEFORE dipping in chocolate. Thaw un-dipped truffles in the refrigerator before dipping.
**Chocolate or white confectionery coating can be found in the baking section of most grocery stores. Sometimes it is called "almond bark" or "candy coating". If you can't find it, a great substitute would be 1 cup semi-sweet or dark chocolate chips, plus 1 TBSP shortening, melted together (can double this amount). (I have done this...works like a charm!)

Nutrition Facts
Mocha Truffles
Amount Per Serving (1 truffle)
Calories 122 Calories from Fat 63
% Daily Value*
Fat 7g11%
Saturated Fat 5g31%
Cholesterol 4mg1%
Sodium 15mg1%
Potassium 78mg2%
Carbohydrates 11g4%
Sugar 9g10%
Vitamin A 55IU1%
Calcium 11mg1%
Iron 0.7mg4%
* Percent Daily Values are based on a 2000 calorie diet.

Here’s one more to pin on your Pinterest boards!You'll love these easy to prepare mocha truffles, chocolate covered creamy treats that are perfect for eating or gift giving! Recipe makes 5 dozen!


Save

Save

Save

Copycat Cherry Garcia Ice Cream

Dark chocolate and Bing cherries are featured in delicious Cherry Garcia Ice Cream (copycat) recipe, made in an electric ice cream maker!Dark chocolate and Bing cherries are featured in delicious Cherry Garcia Ice Cream (copycat) recipe, made in an electric ice cream maker! Here’s a great recipe for Copycat Cherry Garcia Ice Cream I discovered two years ago during my Summer Ice Cream Experiment! I spent the summer experimenting with many homemade ice cream recipes in my Cuisinart Ice Cream maker.

Scroll Down For A Printable Recipe Card At The Bottom Of The Page

About Cherry Garcia Ice Cream

I only managed to get one picture of this yummy cherry garcia ice cream before we dove in….YUM!  I love it when I can experiment and make “copycat” recipes. This is a knockoff recipe for one of the most famous (and wildly popular) of Ben and Jerry’s ice cream flavors. If you love the original, you will love this simple to make version! Cherry Garcia ice cream is filled with juicy Bing cherries, sweet cream, and chocolate. 

Summer is just around the corner, and I hope you will give this recipe a try…perfect for a hot summer evening (or let’s get real…ANYTIME you require ice cream…stat!). Have a great day, and hope you enjoy this recipe for Cherry Garcia ice cream!

Looking For More ICE CREAM Recipes?

You can find all of my recipes in the Recipe Index, which is located at the top of the page. I have LOTS of ice cream recipes you’ll enjoy, including:

Interested In More Recipes?

Thank you for visiting this website. I appreciate you using some of your valuable time to do soIf you’re interested, I publish a newsletter 2 times per month (1st and 15th) with all the latest recipes, and other fun info. I would be honored to have you join our growing list of subscribers, so you never miss a great recipe!
There is a Newsletter subscription box on the top right side (or bottom) of each blog post, depending on the device you use, where you can easily submit your e-mail address (only) to be included in my mailing list.

You Can Also Find Me On Social Media:
Facebook page: The Grateful Girl Cooks!
Pinterest: The Grateful Girl Cooks!
Instagram: jbatthegratefulgirlcooks

Author's signatureRecipe source: My regular vanilla base (from Cuisinart book) + experimenting

↓↓ PRINTABLE RECIPE BELOW ↓↓

0 from 0 votes
Copycat Cherry Garcia Ice Cream
Prep Time
30 mins
Cook Time
0 mins
Total Time
30 mins
 

Dark chocolate and Bing cherries are featured in delicious Cherry Garcia Ice Cream (copycat) recipe, made in an electric ice cream maker!

Category: Ice Cream
Cuisine: American
Keyword: cherry garcia ice cream
Servings: 10 (1/2 cup servings) 1.5 qts. total
Calories Per Serving: 299 kcal
Author: JB @ The Grateful Girl Cooks!
Ingredients
  • 1/2 cup dark chocolate , grated finely, then covered & refrigerated (to keep it cold)
  • 1/2 cup fresh Bing cherries , pitted, halved, & then covered & refrigerated (to keep them cold)
  • 1/2 cup Egg substitute
  • 3/4 cup granulated sugar
  • 1/4 teaspoon vanilla extract
  • 2 cups heavy whipping cream
  • 1 cup milk
Instructions
  1. Prepare the chocolate and the cherries as indicated in ingredient list. Place them in separate bowls; cover and keep refrigerated until just before ice cream has finished freezing.
  2. In a large bowl, whisk the egg substitute, sugar, and vanilla together until the sugar has dissolved (a couple minutes). Pour in the whipping cream and milk; continue whisking until fully blended.
  3. Transfer the ice cream mixture to your ice cream maker, and freeze according to the manufacturer's instructions. About 5 minutes before the ice cream is done (and has thickened), add the grated chocolate and cherries to the ice cream mixture. Continue churning the ice cream for remainder of time indicated for your machine. When done, transfer mixture to a container suitable for a freezer, and let it continue to "ripen" (i.e. firm up) in the freezer. When ready to serve, grab an ice cream scoop and dig in!
Nutrition Facts
Copycat Cherry Garcia Ice Cream
Amount Per Serving (1 (1/2 cup serving))
Calories 299 Calories from Fat 198
% Daily Value*
Fat 22g34%
Saturated Fat 13g81%
Cholesterol 67mg22%
Sodium 55mg2%
Potassium 170mg5%
Carbohydrates 22g7%
Fiber 1g4%
Sugar 19g21%
Protein 3g6%
Vitamin A 865IU17%
Vitamin C 1.1mg1%
Calcium 75mg8%
Iron 1.3mg7%
* Percent Daily Values are based on a 2000 calorie diet.

Here’s one more to pin on your Pinterest boards!Dark chocolate and Bing cherries are featured in delicious Cherry Garcia Ice Cream (copycat) recipe, made in an electric ice cream maker!


Save

Save

Triple Chocolate Zucchini Muffins

These triple chocolate zucchini muffins have a secret ingredient (shhh… it’s a vegetable!) and are an absolutely delicious treat your family will love!These triple chocolate zucchini muffins have a secret ingredient (shhh... it's a vegetable!) and are an absolutely delicious treat your family will love!
Ah… there’s nothing like a good cup of coffee and a good muffin – especially these Triple Chocolate Zucchini Muffins!  Chocolate AND zucchini for breakfast? They MUST be healthy, right? Seriously… chocolate AND zucchini? Who knew?

Scroll Down For A Printable Recipe Card At The Bottom Of The Pge

About Triple Chocolate Zucchini Muffins

I found this recipe for muffins on Pinterest several months ago (where else?). These are extremely “chocolate-y” muffins (3 types of chocolate)! Surprisingly, these yummy triple chocolate muffins have zucchini as a secret ingredient!

I’m pretty positive the fact that there is a vegetable inside these muffins makes them HEALTHY, right? RIGHT. I’ve found these muffins are a GREAT way to use up some of our summer garden zucchini!

Zucchini is the secret ingredient for these chocolate muffins!

Muffins and Morning Quiet Times Are A Good Combo

Here’s something I read this morning: “But I trust in Your unfailing love; my heart rejoices in your salvation. I will sing to the Lord for He has been good to me.” (Psalm 13:5-6).  I love those verses from the Bible, and am reminded daily of the never-ending love God has for me. He HAS been trustworthy, good, and faithful to me (and our family) over the course of a lifetime of good times, bad times, and everything else in-between…for that I am so grateful!

I love to have a little quiet time in the early morning hours. I delight in this time with God… just little old me and a couple cups of strong coffee. Occasionally I will make muffins and of course, I invite one of the muffins to join me in this special time… where I feed my soul and my tummy.

The Mystery Ingredient Is One Way To Eat More Veggies

Maybe you’re looking for a new muffin recipe. Maybe you get excited about camouflaging a vegetable in your child’s chocolate muffin (hey, we do what we have to, to get them to eat their veggies!).

Whatever your reasons, this is a fantastic recipe for triple chocolate zucchini muffins! See the grated zucchini that will be hiding in the muffins? You will never know it’s there, because all you can taste is the CHOCOLATE!
Grated zucchini ready to go into muffin batter

Below you see the triple chocolate zucchini muffins, right after they came out of the oven… all they need is to be lightly dusted with some sifted powdered sugar before serving! Don’t they look yummy?
Muffins out of oven- now they need a dusting of powdered sugar!

The finished chocolate zucchini muffins sure look good… see that CHOCOLATE? Time to take a bite! Ooh… they are so good! And by the way, if you like these you will probably also LOVE my Banana Espresso Chocolate Chip Muffins!

A dusting of powdered sugar and the muffins are ready to eat!

This Recipe Makes A LOT Of Triple Chocolate Zucchini Muffins!

These triple chocolate zucchini muffins are easy to make and extremely yummy; I sure hope you will enjoy them! The recipe as written makes quite a lot of muffins, 30 of them! If that sounds like a lot, cut the recipe in half! These muffins are easily “freezable”, if wrapped and sealed well! Then you will have some of them saved for another day after only cooking once!

Hope you will consider making these scrumptious triple chocolate zucchini muffins! They truly are delicious, and because you added zucchini, I’m POSITIVE they must be 100% healthy, as well! (wink, wink!). Have a wonderful day!

Looking For More MUFFIN Recipes?

You can find ALL my recipes in the Recipe Index, located at the top of the page. I have lots of delicious muffin recipes you’ll enjoy, including:

Interested In More Recipes?

Thank you for visiting this website. I appreciate you using some of your valuable time to do soIf you’re interested, I publish a newsletter 2 times per month (1st and 15th) with all the latest recipes, and other fun info. I would be honored to have you join our growing list of subscribers, so you never miss a great recipe!
There is a Newsletter subscription box on the top right side (or bottom) of each blog post, depending on the device you use, where you can easily submit your e-mail address (only) to be included in my mailing list.

You Can Also Find Me On Social Media:
Facebook page: The Grateful Girl Cooks!
Pinterest: The Grateful Girl Cooks!
Instagram: jbatthegratefulgirlcooks

Have a fantastic day.

Author's signatureRecipe source: carriesexperimentalkitchen.blogspot.com/2013/08/triple-chocolate-zucchini-muffins-html

↓↓ PRINTABLE RECIPE BELOW ↓↓

0 from 0 votes
Triple Chocolate Zucchini Muffins
Prep Time
15 mins
Cook Time
15 mins
Total Time
30 mins
 
These triple chocolate zucchini muffins have a secret ingredient (shhh... it's a vegetable!) and are an absolutely delicious treat your family will love!
Category: Breakfast
Cuisine: American
Keyword: chocolate zucchini muffins
Servings: 30 muffins
Calories Per Serving: 157 kcal
Author: JB @ The Grateful Girl Cooks!
Ingredients
  • 4 eggs
  • 2 cups granulated sugar
  • 1 cup canola oil (I used vegetable)
  • 3 1/2 cups all-purpose flour
  • 1 1/2 teaspoons baking soda
  • 1 teaspoon baking powder
  • 1 teaspoons salt
  • 3/4 cup cocoa powder
  • 2 1/2 cups grated zucchini (well drained/pressed to reduce water content)
  • 1/2 cup semi-sweet chocolate chips
  • 2 oz. dark chocolate , chopped
  • Cooking spray
  • 2 Tablespoons confectioners sugar (powdered), to sift on top of baked muffins
Instructions
  1. Preheat the oven to 350 degrees.
  2. In a large mixing bowl, place the eggs, sugar and oil. Whisk these together until smooth. 

  3. Add flour, baking soda, baking powder, salt and cocoa powder to the egg mixture; mix these ingredients very well.

  4. Add the drained/pressed grated zucchini, along with the chocolate chips and the dark chocolate pieces to the batter. Stir well by hand until ingredients are completely blended.

  5. Take the cooking spray and spray a standard sized muffin tins (liners are optional...I didn't use them). Fill the muffin holders about 3/4 of the way to the top with the batter. There is enough batter to yield approx. 30 muffins. Sprinkle a few extra chocolate chips on top before baking. (this is optional)

  6. Bake the muffins at 350 degrees for 15-20 minutes or until the top springs back when touched. Remove muffins from oven and cool on a wire rack. Dust with sifted powdered sugar for a nice presentation. Serve and enjoy!

Recipe Notes

That's a LOT of muffins! You can freeze extra muffins for another day, or easily cut the recipe in half and make 15 muffins.

Nutrition Facts
Triple Chocolate Zucchini Muffins
Amount Per Serving (1 muffin)
Calories 157 Calories from Fat 27
% Daily Value*
Fat 3g5%
Saturated Fat 1g6%
Cholesterol 22mg7%
Sodium 143mg6%
Potassium 127mg4%
Carbohydrates 29g10%
Fiber 1g4%
Sugar 15g17%
Protein 3g6%
Vitamin A 50IU1%
Vitamin C 1.8mg2%
Calcium 19mg2%
Iron 1.5mg8%
* Percent Daily Values are based on a 2000 calorie diet.
 Here’s one more to pin on your Pinterest boards!These triple chocolate zucchini muffins have a secret ingredient (shhh... it's a vegetable!) and are an absolutely delicious treat your family will love!


Save

Save

Save