Florentine manicotti, filled with ricotta, Parmesan and mozzarella cheeses, and covered with marinara sauce is a meatless, easy to make Italian dish.
My husband and I love Italian food! One of the dishes we enjoy occasionally is this “meatless” recipe for Florentine Manicotti. Pasta shells filled with three cheeses (creamy ricotta, mozzarella and Parmesan), spinach, and covered in spaghetti sauce. Yum. I like to think of manicotti as the Italian version of Mexican enchiladas!
For anyone unfamiliar with manicotti, it is a large, tube shaped type of pasta that is typically filled with meat or cheese and is baked in spaghetti sauce. This particular recipe is meatless; it’s delicious, and is a fairly easy dish to prepare. I use a recipe I found years ago on a box of pasta, and tweaked it a bit by adding cooked spinach and a couple additional spices to the cheesy filling, to give it a true “Florentine” touch!
Scroll Down For A Printable Recipe Card At The bottom Of The Page
Make The Filling For Florentine Manicotti
Cook a small box of frozen spinach, according to the package directions. Drain it very well, and let the spinach cool. When it has cooled off, mix up the cheese filling, and then add the spinach.

Prepare The Manicotti For Filling
Here’s what manicotti pasta shells look like BEFORE they are cooked. They’re each about 5 inches long. The tubes of pasta are fragile, so be very careful not to break them.
 Carefully add the pasta to a large pot of boiling, salted water, and cook it for 7 minutes.
 Once done cooking, carefully remove the manicotti shells to a colander and drain them well.

Before you begin filling the Florentine manicotti put a layer of spaghetti sauce on the bottom of a baking pan.

Make The Florentine Manicotti
Gently fill each of the pasta tubes with the cheese and spinach filling. I hold the shell in my hand and fill one side with the cheese/spinach filling (using a spoon and sometimes a butter knife) clear to the middle. Switch to the other end of the shell and fill the other side. Try to get as much filling into the shell as possible without splitting it.
 Once the Florentine manicotti shells are filled, lay them on top of the spaghetti sauce.
 Cover the manicotti with the rest of the spaghetti sauce. I cover the entire pasta shell with sauce, then sprinkle the top with Parmesan cheese (or grated mozzarella cheese).

Time To Bake!
Cover the baking pan with aluminum foil. Bake at 350 degrees for 40 minutes, then remove the foil and bake an additional 15 minutes longer. when done, the Florentine manicotti is heated through, and the cheese filling is bubbly.
Let cool for a minute or two (easier to serve up) , then remove the manicotti to serving plates using a spatula. The only thing left to do is grab a fork, dig in, and enjoy this tasty dish!
 Hope you will give this recipe a try! I may not have the most mouthwatering “professional” photos to share, but trust me. Florentine manicotti are delicious, and I really think you will enjoy them! Have a great day, and please come back soon.
Looking for More ITALIAN Recipes?
You can find all of my recipes in the Recipe Index, located at the top of the page. I have lots of delicious Italian dishes you might want to check out, including:
- Florentine Lasagna Roll
- Chicken Sausage and Spinach Pasta
- JB’s Homemade Lasagna
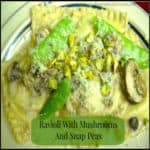
- Butternut Squash Ravioli with Browned Butter Sage Sauce
Interested In More Recipes?
Thank you for visiting this website. I appreciate you using some of your valuable time to do so. If you’re interested, I publish a newsletter 2 times per month (1st and 15th) with all the latest recipes, and other fun info. I would be honored to have you join our growing list of subscribers, so you never miss a great recipe!
There is a Newsletter subscription box on the top right side (or bottom) of each blog post, depending on the device you use, where you can easily submit your e-mail address (only) to be included in my mailing list.
You Can Also Find Me On Social Media:
Facebook page: The Grateful Girl Cooks!
Pinterest: The Grateful Girl Cooks!
Instagram: jbatthegratefulgirlcooks
 Recipe adapted from: Box of American Beauty Manicotti Pasta Shells.

- 6-8 uncooked manicotti pasta shells
- 15 ounces part-skim ricotta cheese (1 3/4 cups)
- 2 cups (8 ounces) grated mozzarella cheese
- 10 ounces frozen chopped spinach (cooked per package directions, and drained well)
- 1/4 cup grated Parmesan cheese
- 2 Tablespoons fresh parsley , chopped
- 1/2 teaspoon salt
- 1/4 teaspoon ground black pepper
- 1/8 teaspoon garlic powder
- 1/8 teaspoon ground oregano
- 3 cups (or one 28 ounce jar) prepared spaghetti sauce
- Additional Parmesan or mozzarella cheese (for garnish, optional)
- Preheat oven to 350 degrees F.
- Cook frozen chopped spinach per package instructions. Remove from heat; drain WELL. Let spinach cool.
- In a medium sized mixing bowl, combine the ricotta cheese, grated mozzarella, Parmesan cheese, parsley, salt, pepper, garlic powder and ground oregano. Stir well until fully combined.
- Add spinach to the cheese mixture. Stir well, to combine.
- Cook manicotti shells according to package instructions (add to boiling water-7 minutes cook time is typical). When done, remove from heat, drain gently, and let dry.
- Fill each shell using a spoon until full of filling.
- Spread some of the spaghetti sauce over the bottom of 13x9 baking pan (enough to fully cover); put the filled pasta in a single layer on top of sauce.
- Spoon the rest of the spaghetti sauce over the top of the manicotti. Sprinkle with additional grated Parmesan cheese (or mozzarella), if desired. Cover pan with aluminum foil.
- Bake at 350 degrees for 40 minutes; remove foil, then cook an additional 15 minutes. Manicotti should be hot and cheese bubbly when done. Remove pan from oven. Let sit for a minute or two, then gently remove manicotti to individual serving plates using a spatula.
- Serve with a green salad and a slice of crusty french bread, and enjoy!
Here’s one more to pin on your Pinterest boards!


 is perfect anytime, especially on a cold day! / The Grateful Girl Cooks!")


 is perfect anytime, especially on a cold day! / The Grateful Girl Cooks!")


