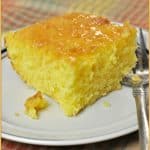
Pecan Squares

If you like pecan pie, you will enjoy these easy Pecan Squares. They’re sweet, sticky bar cookies with all the traditional flavors of pecan pie!If you like pecan pie, you will enjoy these easy Pecan Squares. They're sweet, sticky bar cookies with all the traditional flavors of pecan pie!
Here’s a really easy recipe for Pecan Squares, or as a lot of people call them, Pecan Pie Bars. I love to bake these delicious treats during the Holidays.

If you like pecan pie, you will love these Pecan Squares. It’s just that simple! These bars are perfect for taking to a party (if you’re the “designated dessert-bringer”). These pecan squares are equally good  sitting out on the kitchen counter to snack on!

Another option for these sweet dessert bars is to be devoured by hordes of ravenously hungry houseguests, OR to give to friends on a platter of holiday goodies. My fun thing to do is give plates of Christmas goodies to our neighbors, with a few of these bars included!

Scroll Down For A Printable Recipe Card At The Bottom Of The Page

How Many Pecan Squares Will This Recipe Make?

This recipe makes 4 dozen of these sweet and chewy pecan squares; and as an added bonus, they freeze well, also. Just think, if you want, you can stick some in the freezer and grab them whenever you have the urge for pecan pie. How deliciously convenient… and dangerous… (trust me, these are GOOD…)

Sure hope you will consider making these pecan squares. They are sooo good,  and I hope you get better photos of them than I did. Ha Ha.

Pecan Squares / The Grateful Girl Cooks!

Sure do hope you give these pecan squares a try. They are really delicious! Have a great day. Thank you for stopping by, and I sincerely hope you will come back again soon.

Looking For More BAR COOKIE Recipes?

You can find all of my recipes in the Recipe Index, located at the top of the page. A few of our absolute favorite bar cookie recipes include:

Interested In More Recipes?

Thank you for visiting this website. I appreciate you using some of your valuable time to do soIf you’re interested, I publish a newsletter 2 times per month (1st and 15th) with all the latest recipes, and other fun info. I would be honored to have you join our growing list of subscribers, so you never miss a great recipe!
There is a Newsletter subscription box on the top right side (or bottom) of each blog post, depending on the device you use, where you can easily submit your e-mail address (only) to be included in my mailing list.

You Can Also Find Me On Social Media:

Facebook page: The Grateful Girl Cooks!
Pinterest:
The Grateful Girl Cooks!
Instagram:
jbatthegratefulgirlcooks

Pecan Squares / The Grateful Girl Cooks!

Original Recipe Source: “Taste of Home” Magazine, author was Sylvia Ford (I cut out the recipe from my magazine years ago, but don’t know which issue…)

↓↓ PRINTABLE RECIPE BELOW ↓↓

0 from 0 votes
Pecan Squares
Prep Time
25 mins
Cook Time
25 mins
Total Time
50 mins
 

If you like pecan pie, you will enjoy these easy Pecan Squares. They're sweet, sticky bar cookies with all the traditional flavors of pecan pie!

Category: Dessert
Cuisine: American
Keyword: pecan squares
Servings: 48 squares
Calories Per Serving: 176 kcal
Author: JB @ The Grateful Girl Cooks!
Ingredients
For crust:
  • 3 cups all-purpose flour
  • 1/2 cup sugar
  • 1 cup butter , softened
  • 1/2 teaspoon salt
For pecan filling:
  • 4 eggs
  • 1 1/2 cups light or dark corn syrup
  • 1 1/2 cups granulated sugar
  • 3 Tablespoons butter , melted
  • 1 1/2 teaspoons vanilla extract
  • 2 1/2 cups chopped pecans
For chocolate drizzle (optional):
  • 1/2 cup semi-sweet chocolate chips , melted (to drizzle on top of finished bars, if desired)
Instructions
  1. Preheat oven to 350 degrees.

To make the crust:
  1. In a large bowl, mix together the flour, sugar, butter and salt until the mixture turns into coarse crumbs. Press the crumbs firmly (and evenly) into a greased 15 x 10 x 1 inch baking pan. Bake crust at 350 degrees for 20 minutes. Remove from oven when done.

  2. While crust is baking, prepare the pecan filling: In a large bowl, combine the eggs, corn syrup, sugar, melted butter, and vanilla extract, until well combined. Stir in the chopped pecans. Spread the pecan filling evenly over the top of the baked (hot) crust.

  3. Bake bars at 350 degrees for 25 minutes or until they are "set" in the middle. Remove pan from oven and cool on a wire rack. Drizzle cooled bars with melted chocolate, if desired. Once bars are completely cooled, cut into 4 dozen bars, and serve!

Recipe Notes

Caloric calculation was made without the (optional) semi-sweet chocolate chips used for drizzling over finished bars.

Nutrition Facts
Pecan Squares
Amount Per Serving (1 bar)
Calories 176 Calories from Fat 81
% Daily Value*
Fat 9g14%
Saturated Fat 3g19%
Cholesterol 26mg9%
Sodium 76mg3%
Potassium 38mg1%
Carbohydrates 23g8%
Fiber 1g4%
Sugar 17g19%
Protein 2g4%
Vitamin A 165IU3%
Vitamin C 0.1mg0%
Calcium 10mg1%
Iron 0.6mg3%
* Percent Daily Values are based on a 2000 calorie diet.

Here’s one more to pin on your Pinterest boards!If you like pecan pie, you will enjoy these easy Pecan Squares. They're sweet, sticky bar cookies with all the traditional flavors of pecan pie!


Save

Save

Cranberry-Orange Pinwheels With Citrus Sauce

An easy to prepare twist on classic baklava… these yummy cranberry-orange pinwheels drizzled with a citrus sauce will delight one and all.An easy to prepare twist on classic baklava... these cranberry-orange pinwheels drizzled with a citrus sauce will delight one and all.

I found a recipe for Cranberry-Orange Baklava Pinwheels years ago. I decided to try them, but tweaked the recipe a bit and added a citrus sauce for additional flavor. I ended up with these delicious Cranberry-Orange Pinwheels With Citrus Sauce!

I’m sure glad I did try this recipe, because these ended up tasting pretty amazing (in my humble opinion). I love the flavor combination of cranberry and orange, and also love how these cute little pinwheels turned out!

Scroll Down For A Pintable Recipe Card At The Bottom Of The Page

How Many Cranberry-Orange Pinwheels Will This Make?

The recipe makes 20 servings, so there are plenty to serve to holiday guests or a hungry family. The cranberry-orange pinwheels are perfect for a quick breakfast, or they can be served for dessert!

The recipe is a “tweaked version” of a classic Greek baklava. For this cranberry-orange pinwheels recipe you use pie crusts, rather than a traditional phyllo, to make the dough, which makes it much easier to prepare!

Cranberry-orange pinwheels with white chocolate drizzle, cooling on wire rack.
These delicious baklava style cranberry-orange pinwheels are bursting with the flavors of orange, cranberry, cinnamon, and pecans, and are absolutely scrumptious!

The citrus glaze and white chocolate drizzle on top add another layer of FLAVOR, and give little extra sweetness! Grab one, and dig in!

One of the cranberry-orange pinwheels with citrus sauce, on wire rack.

Sure hope you enjoy making AND eating these delicious cranberry-orange pinwheels! The recipe makes 20, so there are plenty to go around! They are delicious! Have a GREAT day!

Looking For More CRANBERRY-ORANGE Recipes?

You can find all of my recipes in the Recipe Index, which is located at the top of the page. I love the flavor combination of cranberry and orange, and have lots of delicious recipes using this flavor palette, including:

Interested In More Recipes?

Thank you for visiting this website. I appreciate you using some of your valuable time to do soIf you’re interested, I publish a newsletter 2 times per month (1st and 15th) with all the latest recipes, and other fun info. I would be honored to have you join our growing list of subscribers, so you never miss a great recipe!
There is a Newsletter subscription box on the top right side (or bottom) of each blog post, depending on the device you use, where you can easily submit your e-mail address (only) to be included in my mailing list.

You Can Also Find Me On Social Media:

Facebook page: The Grateful Girl Cooks!
Pinterest:
The Grateful Girl Cooks!
Instagram:
jbatthegratefulgirlcooks

Author's signature

Recipe slightly adapted from: http://www.pillsbury.com/recipes/cranberry-orange-baklava-pinwheels/a3e53b3f-493d-4048-be58-bc66d0f98717?p=1

↓↓ PRINTABLE RECIPE BELOW ↓↓

0 from 0 votes
Cranberry-Orange Pinwheels With Citrus Sauce
Prep Time
25 mins
Cook Time
12 mins
Total Time
37 mins
 
An easy to prepare twist on classic baklava... these cranberry-orange pinwheels drizzled with a citrus sauce will delight one and all.
Category: Dessert
Cuisine: American
Keyword: cranberry orange pinwheels
Servings: 20 servings
Calories Per Serving: 245 kcal
Author: JB @ The Grateful Girl Cooks!
Ingredients
For pinwheels:
  • 2 refrigerated pie crusts (2 pie crusts), softened as directed on box
  • 2 Tablespoons butter , melted
  • cups sweetened dried cranberries (6 oz)
  • 1 cup chopped pecans
  • 1/2 cup granulated sugar
  • 2 teaspoons ground cinnamon
  • 1 Tablespoon grated orange peel
  • 1 large egg
  • 2 tablespoons water
For Citrus Sauce:
  • 1 cup granulated sugar
  • 1/4 teaspoon salt
  • 2 Tablespoons cornstarch
  • 1 cup orange juice (processed or fresh)
  • 1/4 cup lemon juice
  • 3/4 cup water
  • 1/2 teaspoon grated lemon rind
  • 1/2 teaspoon grated orange rind
  • 1/2 cup white chocolate chips , melted (for additional garnish, if desired)
Instructions
To make pinwheels:
  1. Preheat oven to 400° F. Line a large baking sheet with parchment paper (you can also spray baking sheet with non-stick spray) Unroll the pie crusts; lightly press each piece of dough into a 10 1/2-inch square. Brush each of the squares with melted butter.

  2. Place cranberries, pecans, sugar, cinnamon and orange peel into a food processor (or a heavy duty blender). Cover; process only until mixture is finely chopped. Spread HALF of the ground up mixture on entire surface of pie crust square, dividing equally. Repeat with 2nd pie crust square. Roll each of the pie crusts into a log shape; pinch the edges of the dough tightly together to seal. Set aside.

  3. In a small bowl, beat egg and water until blended. Using a pastry brush, brush egg mixture over the surface of each log. Using a sharp,serrated knife, cut each log into 10 equal-sized slices. Place each slice, with cut side up, 1 inch apart on prepared baking sheet. If any filling falls out, just push it back inside the slice.

  4. Bake the pinwheels at 400° for 12 to 15 minutes (or until golden brown). While pinwheels are baking, make Citrus Sauce.

Make Citrus Sauce:
  1. In a medium saucepan, stir together sugar, salt and cornstarch. Gradually stir in orange juice, lemon juice, and water. Stir and cook over medium heat; bring to a boil. Boil for 1 minute. Remove from heat. Stir in grated lemon and orange rind. Set aside.

  2. Once pinwheels are done baking, remove from oven. Move them off of baking sheet (but still on the parchment paper!) to a wire rack to cool. Spoon 1-2 teaspoons of the Citrus Sauce onto the top of each slice. Let cool. Once citrus sauce has cooled, drizzle each slice with melted white chocolate (if desired). Enjoy!

Recipe Notes

The original recipe, as written, calls for 1/2 cup honey (1 teaspoon honey per slice) over the tops of the pinwheels (*instead of the citrus sauce and white chocolate drizzle I added). I wholeheartedly prefer the taste of the citrus sauce on these pinwheels, but wanted you to know this is another option.

Nutrition Facts
Cranberry-Orange Pinwheels With Citrus Sauce
Amount Per Serving (1 g)
Calories 245 Calories from Fat 99
% Daily Value*
Fat 11g17%
Saturated Fat 3g19%
Cholesterol 15mg5%
Sodium 118mg5%
Potassium 87mg2%
Carbohydrates 35g12%
Fiber 2g8%
Sugar 24g27%
Protein 2g4%
Vitamin A 80IU2%
Vitamin C 8mg10%
Calcium 22mg2%
Iron 0.7mg4%
* Percent Daily Values are based on a 2000 calorie diet.

Here’s one more to pin on your Pinterest boards!An easy to prepare twist on classic baklava... these cranberry-orange pinwheels drizzled with a citrus sauce will delight one and all.


Save

Save

9 Easy Recipes For Thanksgiving Day!

Here’s a delicious collection of 9 easy recipes for Thanksgiving Day that you, your family and friends will enjoy!9 Easy Recipes For Thanksgiving Day
Today I am sharing a few of my favorite recipes for Thanksgiving time. A lot of our holiday traditions center around the table, sharing good food and conversation with those we love.  I’ve put together this small collection of 9 Easy Recipes For Thanksgiving Day!

We all have family traditions that make our holiday celebrations special… here are some of our family recipes that will certainly make  the time spent around the table with those you love enjoyable and meaningful.

Some are our old family traditional dishes (served every year without fail), and some are new “traditions”. Either way, these dishes are delicious, and will certainly add to your Thanksgiving feast, whether it’s an appetizer, a side dish, bread, Thanksgiving breakfast, or that all important piece of pie you manage to eat, even after you are stuffed full to the brim. Hope you find one or two that will become a new “tradition” for your family…

Easy Recipes For Thanksgiving Day

Here’s a couple delicious ideas for your Thanksgiving Day breakfast:

Pumpkin Streusel CoffeecakePumpkin Streusel Coffeecake
(the recipe makes 2 delicious coffeecakes!)

Double-Glazed Pumpkin SconesDouble-Glazed Pumpkin Scones
(Starbucks copycat recipe)

I’ve included a couple of appetizers guaranteed to get your taste buds going and keep everyone satisfied until the main meal…

Mom’s Famous Cheese Ball
Mom's Famous Cheese Ball(cream cheese ball, with green onions, pecans, peppers). YUM!

Hummus

Hummus
Perfect, served with a veggie tray or pita chips!

For The Main Meal

Homemade Dinner Rolls

Homemade Dinner Rolls
(Is there anything better than freshly made dinner rolls?)

Rainbow Jello SaladRainbow Jello Salad
This is a wonderfully delicious and festive looking salad, which will practically feed a village!

Pecan Praline YamsPecan Praline Yams
Yams, brown sugar, coconut, butter, brown sugar… YES! Wonderful!

Rissole potatoes with fetaRissole Potatoes With Feta
A fantastic potato side dish, with bacon, feta, green onions…oh my – so delicious…

And last –  but DEFINITELY not least… When you’re ready for dessert –

Toll House PieToll House Pie
Our family tradition for years and years… chocolate chips, brown sugar, pecans…so delicious (and easy!)

Happy Thanksgiving, from our home to yours!

Happy Thanksgiving from our home to yours!
We have so much to thank God for, each and every day. We are blessed and GRATEFUL.
“Enter His gates with thanksgiving, and His courts with praise; be thankful unto Him, and bless His name. For the Lord is good, and His love endures forever; his faithfulness continues through all generations.”
Psalm 100:4,5(a)

Author's signature

Looking For More Thanksgiving Recipes?

You can find all of my recipes in the Recipe Index, located at the top of the page. I have lots of other recipes that are perfect for your Thanksgiving feast, including:

Interested In More Recipes?

Thank you for visiting this website. I appreciate you using some of your valuable time to do soIf you’re interested, I publish a newsletter 2 times per month (1st and 15th) with all the latest recipes, and other fun info. I would be honored to have you join our growing list of subscribers, so you never miss a great recipe!
There is a Newsletter subscription box on the top right side (or bottom) of each blog post, depending on the device you use, where you can easily submit your e-mail address (only) to be included in my mailing list.

You Can Also Find Me On Social Media:
Facebook page: The Grateful Girl Cooks!
Pinterest: The Grateful Girl Cooks!
Instagram: jbatthegratefulgirlcooks

Save

Save

Save

Pumpkin Streusel Coffeecake

Streusel topping and cinnamon icing enhance this delicious, moist Pumpkin Streusel Coffeecake! Recipe is easy, & makes 2 coffeecakes (perfect for company)!Streusel topping and cinnamon icing enhance this delicious, moist Pumpkin Streusel Coffeecake! Recipe is easy, & makes 2 coffeecakes (perfect for company)!

Yesterday I tried a new recipe for Pumpkin Streusel Coffeecake… wow! It was so easy to make, and begs you to cut a slice out of it when it’s done! Well… maybe it didn’t actually BEG, but it did taunt me a bit.

Pumpkin streusel coffeecake would be a perfect Thanksgiving morning treat to offer your family or holiday house guests. Warm spices like cinnamon, nutmeg, ginger and cloves help to season the pumpkin batter well. Once topped with a buttery streusel and cinnamon icing, this is one fabulous coffeecake!

Scroll Down For A Printable Recipe Card At The Bottom Of The Page

What Am I Going To Do With TWO Coffeecakes?

Since this pumpkin streusel coffeecake recipe makes TWO, perhaps you will be inspired to keep one for your family and give the other one away. Maybe a friend or neighbor might need someone to surprise or encourage them this time of year. The recipe itself is amazingly EASY, doesn’t require a lot of ingredients and will definitely be a big hit when you serve it or give it to a friend!

Making Pumpkin Streusel Coffeecake

Here’s a few pictures I took while making these delicious coffeecakes! Dust and flour two 8″ cake pans. Place a piece of parchment paper on the bottom of each pan. This will help make cake removal easier.

Two cake pans are dusted with flour, and parchment paper is placed on bottom.

Here are the ingredients for pumpkin streusel coffeecake ready to mix together…

Ingredients for pumpkin streusel coffeecake batter are mixed in large bowl.

Pour the pumpkin streusel coffeecake batter evenly into both cake pans.

Pumpkin Streusel Coffeecake batter is divided into two cake pans.

Make The Streusel Topping

Streusel ingredients ready to be mixed together. The ingredients include butter, brown sugar,  cinnamon, etc.

Pumpkin streusel coffeecake topping ingredients are mixed in small bowl.

Once combined, the crumbly topping is ready to go on top of the pumpkin streusel coffeecake batter.

Buttery streusel topping is mixed before adding to pumpkin streusel coffeecake batter.

Here is the batter, topped with the streusel.  The coffeecakes are now ready to bake in the oven!

Pumpkin Streusel Coffeecake is ready to go into oven, to bake.

Glazing The Coffeecake

While the pumpkin streusel coffeecakes are baking, mix up the cinnamon icing in a small bowl.

Icing is mixed for the coffeecakes.
Mix up the cinnamon icing while coffeecakes are baking…

Once you have removed the coffeecakes from the oven. Let them cool down for a few minutes, then carefully remove from pans to a wire rack. Place the coffeecake onto wire racks. For easier cleanup I recommend placing parchment paper underneath the racks. Drizzle each coffeecake with cinnamon icing. The parchment paper should catch any drips.

Cinnamon icing is drizzled over both of the pumpkin streusel coffeecakes once baked.

Time To EAT!

After the icing has firmed up, cut a big slice of pumpkin streusel coffeecake, and grab a fork! Serve, and enjoy every bite of this flavor-filled delicious coffeecake!

Pumpkin Streusel Coffeecake slice, served on a plate.

As I always say, “I hope you’ll give this recipe a try”. I’m sure you will really enjoy this wonderful tasting pumpkin streusel coffeecake! Have a GREAT day.

Looking For More COFFEECAKE Recipes?

You can find ALL my recipes in the Recipe Index, located at the top of the page. I have some wonderful coffeecakes you’ll enjoy, including:

Interested In More Recipes?

Thank you for visiting this website. I appreciate you using some of your valuable time to do soIf you’re interested, I publish a newsletter 2 times per month (1st and 15th) with all the latest recipes, and other fun info. I would be honored to have you join our growing list of subscribers, so you never miss a great recipe! 

There is a Newsletter subscription box on the top right side (or bottom) of each blog post, depending on the device you use, where you can easily submit your e-mail address (only) to be included in my mailing list.

You Can Also Find Me On Social Media:

Facebook page: The Grateful Girl Cooks!
Pinterest:
The Grateful Girl Cooks!
Instagram:
jbatthegratefulgirlcooks

Author's signatureRecipe Source: http://www.shugarysweets.com/2012/10/pumpkin-coffee-cake-with-cinnamon-struesel#_a5y_p=1490662

↓↓ PRINTABLE RECIPE BELOW ↓↓

0 from 0 votes
Pumpkin Streusel Coffeecake
Prep Time
30 mins
Cook Time
30 mins
Total Time
1 hr
 
Streusel topping and cinnamon icing enhance this delicious, moist Pumpkin Streusel Coffeecake! Recipe is easy, & makes 2 coffeecakes (perfect for company)!
Category: Breakfast
Cuisine: American
Keyword: pumpkin streusel coffeecake
Servings: 16 pieces (2 coffeecakes)
Calories Per Serving: 299 kcal
Author: JB @ The Grateful Girl Cooks!
Ingredients
For the Coffeecakes (2):
  • 1/2 cup unsalted butter , softened
  • 1 1/2 cup granulated sugar
  • 1 can (15oz) pure pumpkin
  • 3 eggs
  • 2 1/2 cup all purpose flour
  • 1/2 tsp baking soda
  • 2 tsp baking powder
  • 1 Tbsp ground cinnamon
  • 1 tsp ground ginger
  • 1/2 tsp ground nutmeg
  • 1/2 tsp ground cloves
  • 1/2 tsp salt
For the Streusel Topping:
  • 1/4 cup all purpose flour
  • 1/4 cup granulated sugar
  • 1/4 cup light brown sugar
  • 1 tsp ground cinnamon
  • 2 Tbsp unsalted butter , melted
For the Cinnamon Drizzle/Icing:
  • 1 1/2 cup powdered sugar
  • 1 tsp ground cinnamon
  • 3 Tbsp milk
Instructions
  1. Preheat your oven to 350 degrees.
  2. Grease and flour two 8 inch round cake pans. Line the bottoms of each pan with parchment paper, cut to fit. Set the cake pans aside.
  3. Make the batter for the coffeecakes: Beat the butter and sugar in a large mixing bowl until they are well combined (a couple of minutes). Add pumpkin and eggs to the mixture, and beat until ingredients are well blended. Add the flour, baking soda, baking powder, cinnamon, ginger, nutmeg, cloves and salt. Mix until fully combined. Distribute the batter evenly into the two prepared cake pans. Set aside.
  4. Make the streusel: In a small bowl, combine streusel ingredients using a fork. Sprinkle streusel evenly over both pans of coffeecake batter.
  5. Bake at 350 degrees for 30-35 minutes, (or until a toothpick inserted in the middle comes out clean).
  6. Once coffeecakes are done, remove them from oven and let them cool for 10 minutes in the pan.
  7. To easily remove coffeecakes from pan: Run a butter knife around the edges of pan. Place an inverted dinner sized plate over the top of coffeecake pan. Quickly flip the pan over (cake will now be upside down on dinner plate. Then place wire rack over the top of dinner plate and invert coffeecake again. Now the coffeecake should be right side up on a wire rack. Let coffeecakes cool completely.
  8. While coffeecakes are cooling, make the cinnamon drizzle/icing: Place ingredients in a small bowl, and whisk until smooth. Drizzle the icing onto completely cooled coffeecakes and set aside to let the icing firm up (about 30 minutes). Serve, and ENJOY!
Nutrition Facts
Pumpkin Streusel Coffeecake
Amount Per Serving (1 slice)
Calories 299 Calories from Fat 72
% Daily Value*
Fat 8g12%
Saturated Fat 4g25%
Cholesterol 49mg16%
Sodium 128mg6%
Potassium 104mg3%
Carbohydrates 54g18%
Fiber 1g4%
Sugar 36g40%
Protein 3g6%
Vitamin A 280IU6%
Calcium 51mg5%
Iron 1.3mg7%
* Percent Daily Values are based on a 2000 calorie diet.

Here’s one more to pin on your Pinterest boards!Streusel topping and cinnamon icing enhance this delicious, moist Pumpkin Streusel Coffeecake! Recipe is easy, & makes 2 coffeecakes (perfect for company)!

Save

Save

Save

Homemade Dinner Rolls

Homemade dinner rolls are soft, golden and buttery, and a perfect accompaniment to any meal. Recipe has directions to make by hand or bread machine.Homemade dinner rolls are soft, golden brown and buttery, and are a perfect accompaniment to any meal.
Thanksgiving is almost here… that means it’s almost time to whip up a batch of these delicious Homemade Dinner Rolls, one of our family’s holiday traditions!

I make these homemade dinner rolls often throughout the year, but they are a tradition and always a big hit at our Thanksgiving dinner. Golden brown, soft on the inside, and absolutely amazing when served warm, with a bit of butter (or honey butter). YUM! I am getting hungry just writing about these rolls!

Scroll Down For A Printable Recipe Card At The Bottom Of The Page

Homemade Dinner Rolls Can Be Made By Hand OR Bread Machine

I usually make the dough in my bread machine for the easiest way to prepare the dough, but it is also quite easy to make these by hand (with just a bit of mixing and kneading).

I’ve included instructions for making these BOTH ways in the printable recipe (below), and really hope you will consider making them, especially if you’ve never made dinner rolls before.

Most of the prep time involved is not ACTIVE prep time, it’s just waiting time, while the dough rises.  Read an epic novel or eat an entire container of chocolate bonbons while the dough rises. Whatever floats your boat.

You’ll be glad you put the time in and made these delicious homemade dinner rolls! There’s just something about freshly baked bread that is perfect for any celebration!

Homemade Dinner Rolls Dough Is Made, Shaped, And Is Ready To Bake

Here are the rolls, ready to go into the oven. This is what they look like after dough has been mixed, and has risen to double the size. The dough has been formed into individual rolls.

I’ve placed these homemade dinner rolls in a large round pan, but you can also bake them on a cookie sheet or in a cake pan (for square rolls), if desired. I’ve done all of the above, at one time or another!

Dinner roll dough in a round pan, ready to bake!

Baked In a ROUND Pan

Just out of the oven… golden brown homemade dinner rolls… ready to be brushed with additional butter. Yummy.

Hot dinner rolls, straight out of the oven!

Baked On A 13×9 Baking Sheet

Here are some I made on a baking sheet (my favorite way to bake them). The top of the homemade dinner rolls have been brushed with melted butter and they are ready to serve! Don’t they look delicious? Trust me… they ARE delicious!

Homemade dinner rolls on wire rack, ready to eat.

YUM! Hand me a homemade dinner roll please, and pass the butter… STAT!

See how fluffy the homemade dinner rolls look? Yum.

The smell in the house while fresh bread dough is baking… honestly, it’s one of my favorite smells!  If you enjoy homemade bread, I hope you will also check out my recipes for No Knead Bread (amazing!), or Miracle Bread.  They are so good, and are both VERY EASY to make!!

These (also easy to prepare) homemade dinner rolls are wonderful! I really hope you will check out the recipe below, and give them a try. I really think you will LOVE them! Have a great day.

Looking For More BREAD Recipes?

You can find ALL my recipes in the Recipe Index, located at the top of the page. I have some delicious bread recipes, including:

Interested In More Recipes?

Thank you for visiting this website. I appreciate you using some of your valuable time to do soIf you’re interested, I publish a newsletter 2 times per month (1st and 15th) with all the latest recipes, and other fun info. I would be honored to have you join our growing list of subscribers, so you never miss a great recipe!
There is a Newsletter subscription box on the top right side (or bottom) of each blog post, depending on the device you use, where you can easily submit your e-mail address (only) to be included in my mailing list.

You Can Also Find Me On Social Media:

Facebook page: The Grateful Girl Cooks!
Pinterest:
The Grateful Girl Cooks!
Instagram:
jbatthegratefulgirlcooks

Have a great day!

Author's signatureRecipe Source: Oster Deluxe Bread & Dough Maker Handbook, 1994, Sunbeam-Oster Household Products

↓↓ PRINTABLE RECIPE BELOW ↓↓

0 from 0 votes
Homemade Dinner Rolls
Prep Time
2 hrs 30 mins
Cook Time
12 mins
Total Time
2 hrs 42 mins
 

Homemade dinner rolls are soft, golden brown and buttery, and are a perfect accompaniment to any meal. 

Category: Bread
Cuisine: American
Keyword: dinner rolls
Servings: 15 rolls
Calories Per Serving: 163 kcal
Author: JB @ The Grateful Girl Cooks!
Ingredients
  • 1 cup water
  • 2 Tablespoons butter , softened
  • 1 large egg
  • 3 1/4 cups all-purpose flour
  • 1/4 cup sugar
  • 1 teaspoon salt
  • 3 teaspoons regular active dry yeast (or quick-acting active dry yeast)
  • 4 Tablespoons melted butter (for brushing onto the rolls)
Instructions
IF USING BREAD MACHINE:
  1. Place all ingredients in bread pan in the same order as they are given. Select DOUGH cycle.
IF MAKING BY HAND:
  1. Dissolve yeast in warm water in lg. bowl. Add/mix in the butter, egg, flour, sugar and salt. Mix well. Knead dough into a large ball on lightly floured surface. Spray a large mixing bowl with non-stick spray. Place dough ball into bowl. Turn dough over to coat with the spray. Cover dough with a dish towel. Let rise in warm place for about an hour until doubled in size. Proceed with rest of recipe.
TO MAKE ROLLS:
  1. Spray a baking pan with non-stick spray.
  2. Divide risen dough into 15 equal portions. shape each piece into a ball, tucking the seams under to the bottom side of the dough. Place dough balls 2 inches apart on cookie sheet or in a cake pan. Brush the tops of each roll with melted butter (reserving the rest for when the rolls are fully cooked). Cover rolls with a clean dish towel, and let the dough rise until doubled in size (about 45 minutes).
  3. Preheat oven to 375 degrees during the last 10 minutes of rising time.
  4. Bake rolls at 375 degrees for 12-15 minutes, or until golden brown. Remove rolls, brush with additional melted butter.
  5. Serve while warm. Enjoy!
Recipe Notes

Note: Most of the prep time indicated is not active prep time. It is the "hurry up and wait" time while the dough rises two times. Just sayin'.

Nutrition Facts
Homemade Dinner Rolls
Amount Per Serving (1 roll)
Calories 163 Calories from Fat 45
% Daily Value*
Fat 5g8%
Saturated Fat 3g19%
Cholesterol 22mg7%
Sodium 200mg9%
Potassium 55mg2%
Carbohydrates 25g8%
Fiber 1g4%
Sugar 3g3%
Protein 4g8%
Vitamin A 155IU3%
Calcium 7mg1%
Iron 1.4mg8%
* Percent Daily Values are based on a 2000 calorie diet.

Here’s one more to pin on your Pinterest boards!Homemade dinner rolls are soft, golden brown and buttery, and are a perfect accompaniment to any meal.


Save

Save

Fully Loaded Potato Soup

Fully Loaded Potato Soup is thick and creamy, filled with bacon, cheese, sour cream and green onions…tastes like a fully stuffed baked potato! Fully Loaded Potato Soup is thick and creamy, filled with bacon, cheese, sour cream and green onions...tastes like a fully stuffed baked potato in SOUP form.
Do you love to make soup when it is cold outside? I sure do! One of the things I love about the crisp and cool weather in Fall is making Potato Soup… Fully Loaded Potato Soup!

Fully LOADED Potato Soup is packed with all the good things you would stuff a baked potato with, given the chance. Bacon, cheese, chives, sour cream… well, you get the picture! A hot bowl of this flavor-packed potato soup on a cold day is just what you need to satisfy a growling stomach.

Scroll Down For A Printable Recipe Card At The Bottom Of The Page

Trying Out This Soup Recipe On Friends

A couple of years ago I had about 9 ladies from a Bible Study group I was in, over for lunch. I made a big pot of fully loaded potato soup. No recipe was used, I just put it all together (had made it many times from scratch!) and it was wonderful! I received several compliments on the soup. My friend, Judy asked me where I got the recipe, and told her I just made it up as I went along. I couldn’t even give her the recipe because I didn’t write anything down as I cooked. Epic FAIL.

Sooo… it’s now two years later and I finally remembered to document with PHOTOS the making of this delicious and filling, fully loaded potato soup. I made a big batch recently on a rainy, cold, dismal day (aren’t those the BEST days for making a big pot of soup?)

It’s easier than you think to make fully loaded potato soup… and IT IS YUMMY! Perfect for a cool evening’s meal (very filling) and lunch leftovers the next day! Hope you will give this recipe a try… I am confident you will LOVE it!

Making Fully Loaded Potato Soup

Chop peeled Russet potatoes into planks, then cut into small cubes. Smaller potato cubes will cook a lot faster than large chunks!

Cubing potatoes for fully loaded soup

Cook the potatoes with green onions, salt, pepper, and part of the bacon pieces until the potatoes become tender. Let me tell you, it sure smells GOOD, because of those onions and bacon!

Potatoes are cooked with green onions, bacon, etc. for soup

Add a little bit of flour to the cooked potatoes. The ingredients will continue to cook and soften. This flour will act as a thickening agent for the fully loaded potato soup, making it thick and creamy!

Flour is added to potatoes to act as a thickening agent for soup.

Time To Turn The Ingredients Into Fully Loaded Potato Soup!

Pour milk and whipping cream into the pan with the fully loaded potato soup. Once the soup has thickened, add grated cheddar cheese. Continue to cook the fully loaded potato soup, and the cheese will melt into the thickened soup. This will add another layer of flavor and creaminess.

Milk, whipping cream and cheddar cheese are added to potato soup.

Here you can see the thickened fully loaded potato soup, with the bacon and potato chunks! It looks so good, but is not quite finished!

Fully loaded potato soup is thick and creamy.

Right before serving, stir sour cream into the hot, thick fully loaded potato soup! The sour cream will add yet another layer of flavor and creaminess to the soup.

Sour cream is added to fully loaded potato soup just before serving.

Serve The Fully Loaded Potato Soup

Ladle the hot, fully loaded potato soup into individual serving bowls. It looks good just like that, but the garnishes for the soup is what helps put it over the top! Garnish each bowl of soup with crispy bacon pieces, additional cheddar cheese, and chopped chives. That REALLY pretties this soup up, and adds even more flavor! ENJOY!

Fully Loaded Potato Soup is garnished with crisp bacon, cheddar and chives.

This fully loaded potato soup is one of our family’s all time favorite soups. I hope it will become one of your favorite soups, too! Have a great day!

Looking For More SOUP Recipes?

You can find all of my soup recipes in the Recipe Index, at the top of the page. A few of our favorites include:

Interested In More Recipes?

Thank you for visiting this website. I appreciate you using some of your valuable time to do soIf you’re interested, I publish a newsletter 2 times per month (1st and 15th) with all the latest recipes, and other fun info. I would be honored to have you join our growing list of subscribers, so you never miss a great recipe!
There is a Newsletter subscription box on the top right side (or bottom) of each blog post, depending on the device you use, where you can easily submit your e-mail address (only) to be included in my mailing list.

You Can Also Find Me On Social Media:

Facebook page: The Grateful Girl Cooks!
Pinterest:
The Grateful Girl Cooks!
Instagram:
jbatthegratefulgirlcooks

Author's signature

↓↓ PRINTABLE RECIPE BELOW ↓↓

0 from 0 votes
Fully Loaded Potato Soup
Prep Time
20 mins
Cook Time
35 mins
Total Time
55 mins
 
Fully Loaded Potato Soup is thick and creamy, filled with bacon, cheese, sour cream and green onions...tastes like a fully stuffed baked potato!
Category: Soup
Cuisine: American
Keyword: fully loaded potato soup
Servings: 8 servings
Calories Per Serving: 478 kcal
Author: JB @ The Grateful Girl Cooks!
Ingredients
  • 5 large Russet potatoes , cut into 1 inch cubes
  • 3 Tablespoons butter
  • Salt and Pepper , to taste
  • 2 heaping Tablespoons flour
  • 5 pieces bacon
  • 5 green onion stalks , sliced (green stem and white bulb),
  • 1 1/2 cups grated cheddar cheese (reserve a bit for garnish)
  • 5 cups milk
  • 3/4 cup whipping cream
  • 1/2 cup sour cream
  • 2 Tablespoons chives , chopped (for garnish)
Instructions
  1. Cook bacon in skillet. When half way cooked, remove 2 slices. Chop into small pieces and place into a large soup pot. Continue cooking the 3 pieces of bacon remaining in the skillet until crispy. Drain, crumble, and set aside (2 slices will go into the soup later, one will be used for garnish),
  2. Melt 3 Tablespoons butter in the soup pot with the 2 slices of chopped, half-cooked bacon. Add cubed potatoes, and chopped green onions,, and stir to combine. Cook potatoes, stirring frequently for about 7-8 minutes, or until softened slightly.
  3. Generously salt and pepper the potatoes. Sprinkle potatoes with 2 heaping Tablespoons of flour. Stir well to combine..
  4. Add milk to soup pot and stir well. Bring to a boil, then reduce heat to a simmer.
  5. Add whipping cream (do not boil), cheddar cheese, and 2 slices crispy, (chopped) bacon. Stir to combine.
  6. Simmer on low for 30-35 minutes, stirring occasionally. Taste and add additional salt and pepper, if needed.
  7. Right before you serve the soup, add the sour cream and mix well.
  8. Ladle the soup into serving bowls, and garnish with a bit of crumbled bacon, cheddar cheese, and the chopped chives. Enjoy!
Recipe Notes

**I usually add 2 slices of halfway cooked bacon to the soup pot to cook with the potatoes for extra flavor, BUT If you prefer, you can cook ALL the bacon until crispy. Add all but one piece to the soup at one time (saving one slice to crumble for garnish!)

Nutrition Facts
Fully Loaded Potato Soup
Amount Per Serving (1 g)
Calories 478 Calories from Fat 279
% Daily Value*
Fat 31g48%
Saturated Fat 17g106%
Cholesterol 93mg31%
Sodium 352mg15%
Potassium 872mg25%
Carbohydrates 34g11%
Fiber 1g4%
Sugar 8g9%
Protein 15g30%
Vitamin A 1075IU22%
Vitamin C 9.7mg12%
Calcium 384mg38%
Iron 1.5mg8%
* Percent Daily Values are based on a 2000 calorie diet.

Here’s one more to pin on your Pinterest boards!Fully Loaded Potato Soup is thick and creamy, filled with bacon, cheese, sour cream and green onions...tastes like a fully stuffed baked potato!

Save

Save

Save

Save

Crock Pot Parmesan Honey Pork Roast

Make a delicious Parmesan Honey Pork Roast in a crock pot, and enjoy tender meat coated in a flavorful soy, honey, garlic, and Parmesan sauce.Make a delicious Parmesan Honey Pork Roast in a crock pot, and enjoy tender meat coated in a flavorful soy, honey, garlic, and Parmesan sauce.
It’s a rainy morning here in Oregon. I’m sitting here in my home office writing the Pork Roast I cooked in my crock pot recently, and I’m getting hungry! We loved this new pork roast recipe I found on Pinterest, from Six Sisters Stuff. What cracks me up about the picture I took of our meal is that, while I normally add color to our meal, with salad or veggies, this one is hysterical looking.

The night I made Parmesan honey pork roast, my husband asked for baked beans to go with the meat and mashed potatoes, so everything I served us that night was BROWN. I should have re-named this meal “The Entirely Brown Meal”. Oh well- even though the color scheme on our plates was beyond boring, at least it tasted fantastic!

The pork roast only took 10 minutes to get ready, then cooked all day in my crock pot. By dinnertime the house smelled wonderful and all I had to do was slice it, make a quick gravy with the juices, and serve it. How hard is that?

Scroll Down For A Printable Recipe Card At The Bottom Of The Page

Why We Enjoy This Crock Pot Parmesan Honey Pork Roast

The sauce is wonderful. It’s made with Parmesan cheese, honey, basil, garlic, soy sauce, etc. The meat is packed with flavor and is amazingly tender! All the juice remaining in the crock pot is made into a wonderfully delicious gravy to spoon over the pork (and mashed potatoes on the side).

Sure think you’re gonna love this easy meal as much as we did. I hope you will give it a try! But for heaven’s sake… get some color on that plate!!! Here area few pics.

Making The Pork Roast

Here is the pork roast, already in the crock pot. Now all it needs is the spice mixture to give it some flavor!

The pork roast in the crock pot, waiting to be seasoned.

This a picture of all the spices and other sauce ingredients, ready to be combined.

A seasoning sauce made up of spices, honey, garlic, etc. is mixed to put on the pork roast.

the spices are all mixed together and are ready to put onto the pork roast before cooking…

Seasoning sauce is mixed, and ready to add to crock pot with pork roast.

Ready To Cook The Parmesan Honey Pork Roast

After being coated with spice mix, the Parmesan honey pork roast is cooked in a crock pot until fully cooked and nice and tender.

The parmesan honey pork roast is coated with the spice sauce.

The crock pot parmesan honey pork roast is almost fully cooked, and is looking good. It also smells quite wonderful!

Crock pot parmesan honey pork roast is almost done cooking.

Once fully cooked, the parmesan honey pork roast rests for a couple minutes, then it’s ready to slice. Yum!

Ready to slice and serve this tender parmesan honey pork roast.

Hope you will consider making this delicious parmesan honey pork roast! It definitely tastes very good, and is really tender, because of the slow cooking in the crock pot! Thanks for stopping by today- I hope you will come back soon.

Looking For More PORK Recipes?

You can find ALL of my pork recipes in the Recipe Index, located at the top of the page. I have some absolutely delicious pork recipes for you to enjoy, including:

Interested In More Recipes?

Thank you for visiting this website. I appreciate you using some of your valuable time to do soIf you’re interested, I publish a newsletter 2 times per month (1st and 15th) with all the latest recipes, and other fun info. I would be honored to have you join our growing list of subscribers, so you never miss a great recipe!
There is a Newsletter subscription box on the top right side (or bottom) of each blog post, depending on the device you use, where you can easily submit your e-mail address (only) to be included in my mailing list.

You Can Also Find Me On Social Media:

Facebook page: The Grateful Girl Cooks!
Pinterest:
The Grateful Girl Cooks!
Instagram:
jbatthegratefulgirlcooks

Author's signatureOriginal Recipe Source: http://www.sixsistersstuff.com/2011/12/slow-cooker-parmesan-honey-pork-roast.html

↓↓ PRINTABLE RECIPE BELOW ↓↓

0 from 0 votes
Crock Pot Parmesan Honey Pork Roast
Prep Time
10 mins
Cook Time
6 hrs
Total Time
6 hrs 10 mins
 

Make a delicious Parmesan Honey Pork Roast in a crock pot, and enjoy tender meat coated in a flavorful soy, honey, garlic, and Parmesan sauce.

Category: Entree
Cuisine: American
Keyword: pork roast
Servings: 5 servings
Calories Per Serving: 595 kcal
Author: JB @ The Grateful Girl Cooks!
Ingredients
  • 1 (2-3 pound) boneless pork roast
  • 2/3 cup grated Parmesan cheese
  • 1/2 cup honey
  • 3 Tablespoons soy sauce
  • 2 Tablespoons dried basil
  • 2 Tablespoons minced garlic
  • 2 Tablespoons olive oil
  • 1/2 teaspoon salt
  • 2 Tablespoons cornstarch
  • 1/4 cup cold water
Instructions
To prepare/cook the pork roast:
  1. Lightly spray a crock pot with a non-stick cooking spray. Place the pork roast in the crock pot.
  2. In a small bowl, place the Parmesan cheese, honey, soy sauce, basil, garlic, olive oil and salt. Mix these ingredients well until fully combined. Pour this mixture over the surface of the pork roast to cover.
  3. Place the lid on the crock pot. Cook the pork roast for 6-7 hours on LOW (or until meat thermometer reaches 160 degrees).
  4. Once the meat is done cooking, CAREFULLY remove the pork roast from crock pot and place it onto a serving dish. Place aluminum foil over top of the roast to keep it warm while you make the gravy.
To make the gravy:
  1. Skim the fat off the top of the cooking juice left in crock pot. Place the juices into a medium sized saucepan. Cook the juices on medium heat until they come to a boil. In a separate small bowl, mix the cornstarch into the cold water. Mix well to remove any lumps, until mixture is smooth. Whisk the cornstarch mixture into the boiling juices. Make sure the gravy comes to a boil again, then cook and stir it for approximately 2 minutes (or until it thickens up!).
  2. Remove foil from pork roast, then cut into slices. Place slices onto individual plates and spoon some of the gravy over the meat. (I also served mashed potatoes with the gravy on top...they were a delicious side dish with the pork, and especially with the flavorful gravy!)
  3. Enjoy!
Nutrition Facts
Crock Pot Parmesan Honey Pork Roast
Amount Per Serving (1 (1/5 of total))
Calories 595 Calories from Fat 180
% Daily Value*
Fat 20g31%
Saturated Fat 6g38%
Cholesterol 183mg61%
Sodium 893mg39%
Potassium 1124mg32%
Carbohydrates 34g11%
Sugar 28g31%
Protein 67g134%
Vitamin A 125IU3%
Vitamin C 1.2mg1%
Calcium 205mg21%
Iron 3.4mg19%
* Percent Daily Values are based on a 2000 calorie diet.

Here’s one more to pin on your Pinterest boards!Make a delicious Parmesan Honey Pork Roast in a crock pot, and enjoy tender meat coated in a flavorful soy, honey, garlic, and Parmesan sauce.


Save

Save

Candied Citrus Peels

Candied citrus peels (orange and lemon), dipped in chocolate are a unique, sweet treat to make and give to friends and family during the holidays!Candied citrus peels (orange and lemon), dipped in chocolate are a unique, sweet treat to make and give to friends and family during the holidays!
Over the years, I’ve made chocolate drizzled, Candied Citrus Peels, made from oranges and lemons during the holidays, to add to the gift baskets of Christmas goodies I give to friends and family.  They are delicious and are a unique treat!

Candied citrus peels are easy to make and require only a few ingredients. I found these to be quite a unique gift idea, and they are delicious, too! I’ve made this recipe using both orange AND lemon peels. Both are wonderful, but my personal favorite is definitely the candied orange peels, because I might possibly have a genetic weakness for chocolate and orange… oh mercy!

Scroll Down For A Printable Recipe Card At The Bottom Of The Page

Making Candied Citrus Peels Is Fairly Simple But Has a Few Steps

These take a bit of prep work (nothing hard at all, though), and involves several hours of drying time, but the results are worth it, especially when you consider how inexpensive these are to make, when contrasted with how expensive they are to BUY!

The process is pretty simple. Basically you repeat the cooking process three times to rid the citrus peels of bitterness. then the peels are cooked in a simple sugar syrup. The peels are then fully dried, then decorated the next day with a chocolate coating or drizzle (to fancy them up)! That’s it! You can make as many, or as few as you like.

How Candied Citrus Peels Are Made

Boil citrus peel strips in water, then drain and boil again two more times. This process is done, because it softens the peels and removes some of the bitterness.

Boiling strips of orange peels in water in saucepan, for candied citrus peels.

After boiling the peels 3 times, cook the candied citrus peels in a sugar/water mixture for 15 minutes.

Citrus peels are cooked in a boiling sugar and water mixture for 15 minutes.

Dry Candied Citrus Peels Overnight

Dry the cooked candied citrus peels on wire racks overnight or until completely dry.

Cooked candied citrus peels dry on a wire rack overnight.

After drying completely overnight, the peels are now completely dried, and are not as shiny. The candied citrus peels can be eaten now, as is, or they can be decorated with white or dark chocolate.

Candied Citrus Peels have completely dried on a wire rack, and are ready to eat!

Decorating Citrus Peels With Chocolate Makes Them Look Fancy

Here are some  of the candied citrus peels (orange), dipped 3/4 of the way in melted semi-sweet chocolate. Chocolate and orange is a favorite flavor combination for me.

Candied Citrus Peels that have been dipped in melted chocolate.

Below are the candied citrus peels (lemon), dipped in white chocolate and drizzled with melted semi-sweet chocolate.

Candied Citrus Peels from lemons, dipped in white chocolate then drizzled with semi-sweet chocolate.

Here are more of the orange candied citrus peels, but these have been drizzled with semi-sweet chocolate.

Orange Candied Citrus Peels drizzled with semi-sweet melted chocolate.

And last but not least, here are some of the orange peel slices, dipped in white chocolate, then drizzled with semi-sweet chocolate. See how many ways you can decorate candied citrus peels?

Candied Citrus Peels (orange), with white and semi-sweet chocolate.

Hope you will give these candied citrus peels a try this holiday season (remember citrus is in season during this time of year), and enjoy! Thank you for stopping by, and I hope you will come back soon for more delicious recipes.

Looking For More Christmas Goodies?

You can find ALL of my Christmas candies and goodies in the Recipe Index, located at the top of the page. A few favorites include:

Interested In More Recipes?

Thank you for visiting this website. I appreciate you using some of your valuable time to do soIf you’re interested, I publish a newsletter 2 times per month (1st and 15th) with all the latest recipes, and other fun info. I would be honored to have you join our growing list of subscribers, so you never miss a great recipe!
There is a Newsletter subscription box on the top right side (or bottom) of each blog post, depending on the device you use, where you can easily submit your e-mail address (only) to be included in my mailing list.

You Can Also Find Me On Social Media:

Facebook page: The Grateful Girl Cooks!
Pinterest:
The Grateful Girl Cooks!
Instagram:
jbatthegratefulgirlcooks

Author's signature

The original recipe source is unknown. I copied it down onto a 3×5 card over 15 years ago, but have no record of where I got the recipe from

↓↓ PRINTABLE RECIPE BELOW ↓↓

0 from 0 votes
Candied Citrus Peels
Prep Time
1 hr 5 mins
Cook Time
15 mins
Inactive Drying time
4 hrs
Total Time
5 hrs 15 mins
 
Candied citrus peels (orange and lemon), dipped in chocolate are a unique, sweet treat to make and give to friends and family during the holidays!
Category: Candy
Cuisine: American
Keyword: candied citrus peels
Servings: 72 (Approximately 6 dozen pieces)
Calories Per Serving: 13 kcal
Author: JB @ The Grateful Girl Cooks!
Ingredients
  • Oranges or lemons (Enough to make 2 cups of sliced peels. I used 6.)
  • Water
  • 1 cup sugar (for syrup)
  • 1/4 cup sugar (for rolling cooked peels in, (IF NOT DIPPING IN CHOCOLATE)
  • Semi-sweet chocolate
  • White chocolate
Instructions
  1. Score your orange or lemons with sharp knife. Cut peel into thin strips. Remove as much of the white "pith" as possible (it's really bitter).
  2. Put the peel strips into a medium saucepan. Cover the peel with cold water. Bring to a boil over medium high heat. Once it begins boiling, reduce heat and simmer for 8 minutes. Drain water.
  3. **Repeat the above process with the peels 2 more times.**
  4. Once you have boiled the peels 3 times, wash the pan and set peels aside.
  5. In medium saucepan, bring 1/2 cup water and 1 cup granulated sugar to a boil, stirring twice. Once water is boiling and sugar is dissolved, add the peels to the pan. Simmer peels in syrup on low heat for about 15 minutes (most of the syrup will be absorbed).
  6. Remove peels with tongs to wire rack. **IF YOU ARE NOT PLANNING TO DIP FINISHED SLICES IN CHOCOLATE, THEN ROLL THEM IN SUGAR AFTER THEY HAVE DRIED FOR ABOUT AN HOUR** Place sugar coated peels back on rack to dry at least 4 hours, but preferably overnight. IF YOU ARE DIPPING OR DRIZZLING THESE IN CHOCOLATE, THIS STEP IS NOT NECESSARY!
  7. To decorate, melt semi-sweet chocolate or white chocolate (or both in separate batches) in a double boiler or in the microwave, depending on how you choose to decorate the peels. Be careful not to burn the chocolate. If melting them in microwave, cook in 30 second intervals, stirring after each 30 seconds, until smooth. Dip or drizzle melted chocolate over peels and place back on wire rack to completely dry. Keep peels stored in a cool place to prevent chocolate from melting. Enjoy
Recipe Notes

The cook time indicated INCLUDES approximately 4 hours of drying time...don't freak out and think these take that long to actually prepare. The whole cooking process takes about an hour and a half to get them to the point of being ready to dry.

Caloric calculation does NOT include optional chocolate drizzle.

Nutrition Facts
Candied Citrus Peels
Amount Per Serving (1 piece (without choc. drizzle)
Calories 13
% Daily Value*
Carbohydrates 3g1%
Sugar 3g3%
* Percent Daily Values are based on a 2000 calorie diet.

Here’s one more to pin on your Pinterest boards!Candied citrus peels (orange and lemon), dipped in chocolate are a unique, sweet treat to make and give to friends and family during the holidays!

Save

Save

Homemade Cinnamon Rolls

Looking for a yummy breakfast treat? Try glazed homemade cinnamon rolls! Nothing says “comfort food’ like a warm, made from scratch cinnamon roll!Looking for a yummy breakfast treat? Try glazed homemade cinnamon rolls! Nothing says "comfort food' like a warm, made from scratch cinnamon roll!
We had a dear friend staying with us from out of state last week. One morning for breakfast I made these Homemade Cinnamon Rolls, for an extra “sweet” start to the day. I LOVE cinnamon rolls, but don’t eat them too often! When I DO make them, they are a real treat, especially with a steaming big cup of Italian roast coffee.

I’ve made these cinnamon rolls for several years now, and am finally putting the recipe on my blog. This recipe makes 9 good sized cinnamon rolls, and they are delicious! 

I made a glaze to top this batch of homemade cinnamon rolls, but in the past I’ve also made a cream cheese frosting, which is equally delicious!

Scroll Down For A Printable Recipe Card At The Bottom Of The Page

Do I Have To Have A Bread Machine To Make Homemade Cinnamon Rolls?

You do NOT have to own a bread machine in order to make these homemade cinnamon rolls! I use my bread machine to make the dough, but recognize the fact that a lot of people don’t own a bread machine.

NOTE: I have included instructions in the note section of the recipe for those who wish to make these cinnamon rolls “by hand”.

Why Does It Take So Long?

Good things (especially dough) take time! If you’ve never made cinnamon rolls before, don’t be scared off by the “prep time” involved. Most of it is waiting for the dough to rise, so you could read an epic novel, paint your nails, or call a friend while you wait. Trust me.

Making Homemade Cinnamon Rolls

The dough is mixed (by machine or hand), and then the dough rises. After the dough has finished rising, it is rolled out into a 18×9 inch rectangle.

Homemade Cinnamon Rolls / The Grateful Girl Cooks!

Spread softened butter onto the surface of the dough, then cover with a cinnamon-sugar mixture. Tightly roll the dough up tightly into a long long shape, and tuck the ends in, to seal.

Homemade Cinnamon Rolls / The Grateful Girl Cooks!

Carefully cut the cinnamon roll dough log into 9 equal sized pieces.

Homemade Cinnamon Rolls / The Grateful Girl Cooks!

Place the slices, cut side up, in a prepared baking pan. Cover the pan, and let the dough rise again.

Homemade Cinnamon Rolls / The Grateful Girl Cooks!

Once the homemade cinnamon rolls have doubled in size, they are ready to bake!

Homemade Cinnamon Rolls / The Grateful Girl Cooks!

The homemade cinnamon rolls bake for 25-30 minutes in a preheated oven. Once done, a simple glaze is spread over the top of the rolls.

Homemade Cinnamon Rolls / The Grateful Girl Cooks!

Time To Eat!

Here’s what one of the cinnamon rolls looks like on a plate. Each layer inside is coated with cinnamon, sugar and butter. Wow… these homemade cinnamon rolls are delicious!

Homemade Cinnamon Rolls / The Grateful Girl Cooks!

Hope you will give this recipe for homemade cinnamon rolls a try. It is very economical to make these decadent treats, considering the cost of store-bought pastries these days.

Thanks for stopping by today, and invite you to come back soon for more family-friendly recipes. Take care, and have a GREAT day!

Looking For More Decadent Breakfast Treats?

You can find all of my recipes in the Recipe Index, located at the top of the page. A few decadent treats we occasionally have for breakfast include:

Want More Recipes? Get My FREE Newsletter!

I publish a newsletter 2 times per month (1st and 15th) with lots of recipes, tips, etc..
Would you like to join our growing list of subscribers?

There is a Newsletter subscription box on the top right (or bottom) of each blog post, depending on the device you use.
You can submit your e-mail address there, to be added to my mailing list.

Find Me On Social Media:

Facebook page: The Grateful Girl Cooks!
Pinterest:
The Grateful Girl Cooks!
Instagram:
jbatthegratefulgirlcooks

Homemade Cinnamon Rolls / The Grateful Girl Cooks!Original Recipe Source: Oster Deluxe Bread & Dough Maker Owner’s Manual, copyright 1994, Sunbeam-Oster Household Products

↓↓ PRINTABLE RECIPE BELOW ↓↓

0 from 0 votes
Homemade Cinnamon Rolls
Prep Time
2 hrs 30 mins
Cook Time
25 mins
Total Time
2 hrs 55 mins
 

Looking for a yummy breakfast treat? Try glazed homemade cinnamon rolls! Nothing says "comfort food' like a warm, made from scratch cinnamon roll!

Category: Breakfast
Cuisine: American
Keyword: homemade cinnamon rolls
Servings: 9 rolls
Calories Per Serving: 337 kcal
Author: JB @ The Grateful Girl Cooks!
Ingredients
For The Dough:
  • 1 cup water
  • 2 Tablespoons butter , softened
  • 1 large egg
  • 3 1/3 cups all purpose flour
  • 1/4 cup granulated sugar
  • 1 teaspoon salt
  • 3 teaspoons regular active dry yeast or bread machine yeast
For The Cinnamon Roll Filling:
  • 1/3 cup granulated sugar
  • 2 teaspoons ground cinnamon
  • 2 Tablespoons butter , softened
For The Glaze:
  • 1 cup powdered sugar
  • 1/2 teaspoon vanilla extract
  • 1-2 Tablespoons milk
Instructions
  1. Place all dough ingredients into bread machine pan in the order listed. Select Dough cycle. (if making these by hand, see NOTES section of this recipe).
  2. Spray a 9x9x2 inch square pan with non-stick spray. Set aside.
  3. In a small bowl, mix 1/3 cup sugar and the cinnamon for the filling.
  4. When dough is ready, roll the dough out on a lightly floured surface into a 18x9 inch rectangle.
  5. Spread the dough with the softened butter. Sprinkle the entire surface of the dough with the cinnamon sugar mixture.
  6. Roll the dough up tightly, BEGINNING AT THE 9" SIDE. Pinch or tuck the ends and edges into the roll to seal. Place roll seam side down.
  7. Cut the roll into nine 1 inch slices. Carefully place each slice into prepared baking dish. Cover dish with tea towel, and let the dough rise in a warm place for about an hour, until slices have doubled in size.
  8. Preheat oven to 375 degrees. Remove cover from rolls. Cook at 375 degrees for 25-30 minutes or until the rolls are golden brown. Remove pan from oven to a wire rack to cool.
  9. In a small bowl, mix the powdered sugar, vanilla and milk until the glaze is smooth and thin enough to drizzle.
  10. Drizzle the glaze over the tops of the cinnamon rolls to cover the tops completely. Let cinnamon rolls cool off slightly, so the glaze begins to firm up, then remove them from pan and serve. Enjoy!
Recipe Notes

To make by hand: Dissolve yeast in warm water in lg. bowl. Add/mix in the butter, egg, flour, sugar and salt. Mix well. Knead dough into a large ball on lightly floured surface. Spray a large mixing bowl with non-stick spray. Place dough ball into bowl. Turn dough over to coat with the spray. Cover dough with tea towel. Let rise in warm place for about an hour until doubled in size. Proceed with rest of recipe, beginning at Step 2.

Nutrition Facts
Homemade Cinnamon Rolls
Amount Per Serving (1 roll)
Calories 337 Calories from Fat 54
% Daily Value*
Fat 6g9%
Saturated Fat 3g19%
Cholesterol 31mg10%
Sodium 313mg14%
Potassium 94mg3%
Carbohydrates 63g21%
Fiber 2g8%
Sugar 26g29%
Protein 7g14%
Vitamin A 180IU4%
Calcium 17mg2%
Iron 2.4mg13%
* Percent Daily Values are based on a 2000 calorie diet.

Here’s one more to pin on your Pinterest boards!Looking for a yummy breakfast treat? Try glazed homemade cinnamon rolls! Nothing says "comfort food' like a warm, made from scratch cinnamon roll!


Save

Save

Pork Tenderloin With Apples And Apple Cider Sauce

Pork tenderloin with apples features tender pork cutlets with cooked apples, drizzled with a lovely apple cider sauce. Delicious!Pork tenderloin with apples features tender pork cutlets with cooked apples, drizzled with a lovely apple cider sauce. Delicious!
This recipe for Pork Tenderloin With Apples And Apple Cider Sauce has FALL written all over it! It’s surprising how well pork and apples go together! My husband and I had dinner recently at a friend’s home. Our friend Shari prepared a wonderful meal for us and it was FANTASTIC! It was absolutely delicious, and a wonderful recipe that was perfect for a cool, Fall evening.

This week we have a friend (a friend for 40 years) staying with us in our home. Her first night here, I decided to try making this recipe for our own dinner. I found the original recipe online at Epicurious, and prepared it for us. Miracle of miracles, it turned out GREAT (guess even little old me can’t hurt a good recipe, right?)

The original recipe from Bon Appétit, calls for Calvados, which is an apple brandy from France. I didn’t have any, and didn’t want to go buy an entire bottle for the small amount needed, so I substituted dry white wine (which I did have), and it turned out fine, as well. I followed the rest of the instructions as written, and was very pleased with the results (as was our guest).

Scroll Down For A Printable Recipe Card At The Bottom Of The Page

How To Make Pork Tenderloin With Apples

Pounding pork slices out with a meat mallet is a great stress reliever, yes? This helps to tenderize the pork.

Pounding the pork thin with a meat mallet helps tenderize the meat.

Peel and slice Golden Delicious apples, then they are ready to cook.

Golden delicious apples are peeled and sliced before cooking.

Apple slices are cooked in butter in a large skillet.

Cooking the apples in melted butter in a skillet.

When the apples are light golden brown, they are removed from the skillet.

Apples are cooked in a large skillet until golden brown on the outside.

Cooking The Pork Cutlets

Pork tenderloin cutlets are cooked in melted butter for a few minutes on each side.

The pork cutlets are cooked in melted butter in a hot skillet.

Halfway through the cooking time, they are turned to the other side to finish cooking. They are so thin, they only need to cook a few minutes on each side.

Pork cutlets are cooked on both sides in butter in a large skillet.

Preparing The Apple Cider Sauce

After removing the cooked pork cutlets, an apple cider sauce is made in the same skillet. Wine or Calvados is used to deglaze the skillet, then shallots and thyme are added to the mixture.

Shallots, thyme and wine are added to the sauce in the skillet.

Apple cider and whipping cream are then added to the sauce, and stirred to incorporate them into the sauce. By now the sauce is looking  and smelling delicious!

Apple cider and whipping cream are added to the sauce for the pork cutlets.

The finished pork tenderloin with apples is surrounded by lots of cooked, tender apples. It is then covered with the apple cider sauce, and is now ready to serve.

Apple cider sauce is poured over the cooked pork tenderloin with apples.

Pork tenderloin with apples is served. We usually give a couple of slices per person. Spoon some of the sauce on top of the pork, and serve, accompanied by apples on the side. We also like this dish with mashed potatoes on the side (with some of the sauce on top). Dig In!

The pork tenderloin with apples is served with mashed potatoes and a salad.

Sure hope you will give this wonderful meal a try. I know I will definitely make this again and again. It’s really very simple to make, and is full of flavor!

Looking For More PORK Recipes?

You can find ALL of my recipes in the Recipe Index, located at the top of the page. I have many delicious pork recipes for you to enjoy, including:

Interested In More Recipes?

Thank you for visiting this website. I appreciate you using some of your valuable time to do soIf you’re interested, I publish a newsletter 2 times per month (1st and 15th) with all the latest recipes, and other fun info. I would be honored to have you join our growing list of subscribers, so you never miss a great recipe!
There is a Newsletter subscription box on the top right side (or bottom) of each blog post, depending on the device you use, where you can easily submit your e-mail address (only) to be included in my mailing list.

You Can Also Find Me On Social Media:

Facebook page: The Grateful Girl Cooks!
Pinterest:
The Grateful Girl Cooks!
Instagram:
jbatthegratefulgirlcooks

Author's signatureRecipe Slightly Adapted From: http://www.epicurious.com/recipes/food/views/Pork-with-Apples-Calvados-and-Apple-Cider-1797

↓↓ PRINTABLE RECIPE BELOW ↓↓

0 from 0 votes
Pork Tenderloin With Apples And Apple Cider Sauce
Prep Time
15 mins
Cook Time
20 mins
Total Time
35 mins
 

Pork tenderloin with apples features tender pork cutlets with cooked apples, drizzled with a lovely apple cider sauce. Delicious!

Category: Entree
Cuisine: American
Keyword: pork tenderloin
Servings: 4 servings
Calories Per Serving: 595 kcal
Author: JB @ The Grateful Girl Cooks!
Ingredients
For the pork and apples:
  • 1 lb. pork tenderloin , cut into 1 inch thick slices
  • Salt & pepper (to season pork)
  • 5 Tablespoons butter
  • 3 medium Golden Delicious apples , (peeled, cored, sliced into 1/3 inch thick slices)
  • 1 1/2 teaspoons granulated sugar
For the Apple Cider Sauce:
  • 2 large shallots , chopped
  • 1 Tablespoon fresh thyme , chopped (or use 1 teaspoon dried)
  • 1/4 cup Calvados or other apple brandy (I substituted 1/4 cup dry white wine)
  • 1 cup heavy whipping cream
  • 1/4 cup apple cider (not apple juice)
Instructions
  1. Put the pork slices between two sheets of plastic wrap. Pound them out, one at a time, until they are about 1/4 inch thick. Set aside.
  2. In a large skillet over medium-high heat, melt 2 Tablespoons of butter. Add the apple slices, then sprinkle the slices with the sugar. Saute the apple slices until they are golden brown, on both sides (approximately 5-6 minutes). Remove apples from skillet and set aside. Cover and keep warm.
  3. Add 2 Tablespoons butter back into the large skillet. Melt butter over high heat. Season the pork with salt and pepper. Add pork slices to the hot skillet. Cook the slices until they are lightly browned and cooked through (about 3 minutes per side). Cook pork in batches, if necessary. Once pork has cooked through on both sides, remove to a platter, cover and keep warm. DO NOT CLEAN SKILLET OUT!
  4. Melt 1 Tablespoon butter over medium heat in the same skillet you cooked the pork in. Add the chopped shallots and thyme; saute these for 2 minutes.
  5. Add the Calvados (if using) or the white wine to the shallots, butter and thyme. Boil until the liquid is reduced to a glaze like consistency, scraping up the browned bits into the sauce as you go.
  6. Stir in the apple cider and whipping cream. Cook until the mixture thickens to sauce consistency (about 2-3 minutes). Lightly season with salt and pepper, to taste.
  7. Reheat the apples in another skillet or microwave, if necessary.
  8. Place pork slices on platter. Spoon the sauce over the top of the pork slices. Top with the apple slices, or place the apple slices around the pork.
  9. Serve and enjoy. This dish is perfect with mashed potatoes on the side. Use some of the apple cider sauce on top (like gravy) of the mashed potatoes for a perfect entree!
Nutrition Facts
Pork Tenderloin With Apples And Apple Cider Sauce
Amount Per Serving (1 g)
Calories 595 Calories from Fat 360
% Daily Value*
Fat 40g62%
Saturated Fat 24g150%
Cholesterol 192mg64%
Sodium 210mg9%
Potassium 703mg20%
Carbohydrates 26g9%
Fiber 3g13%
Sugar 18g20%
Protein 25g50%
Vitamin A 1470IU29%
Vitamin C 10.4mg13%
Calcium 70mg7%
Iron 1.7mg9%
* Percent Daily Values are based on a 2000 calorie diet.

Here’s one more to pin on your Pinterest boards!Pork tenderloin with apples features tender pork cutlets with cooked apples, drizzled with a lovely apple cider sauce. Delicious!


Save

Save