Gingerbread Muffins

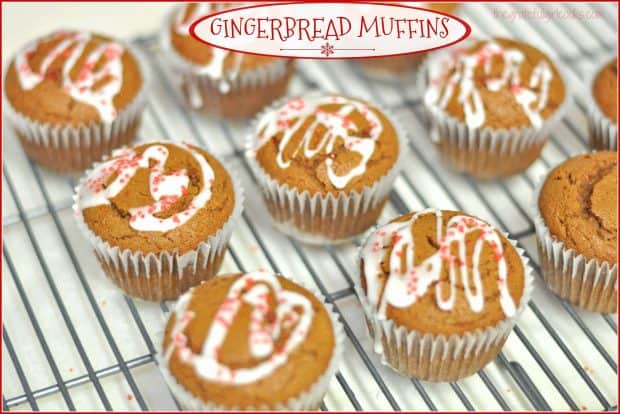
Need a little holiday inspiration? How about serving these delicious and festive looking Gingerbread Muffins for breakfast during the holidays? They are quick AND easy to make!Serve these delicious and festive Gingerbread Muffins for breakfast during the holidays! They are quick, easy to make, and taste wonderful!
I found the recipe in a cookbook that my friend Debbie gave me several years ago. I was browsing through the cookbook getting recipe ideas, but when I saw how easy these muffins were to make, I ran downstairs and whipped some up for our breakfast!  They tasted fantastic (I think my hubby ate THREE of them- they were that good!

The recipe is absolutely simple to make. If you can stir and pour batter into muffin tins, YOU can make these!!! The muffins have a wonderful gingerbread flavor and have a nice “rise” to them. Here’s how you make them:

Scroll Down For A Printable Recipe Card At The Bottom Of The Page

Prepare The Batter for The Gingerbread Muffins

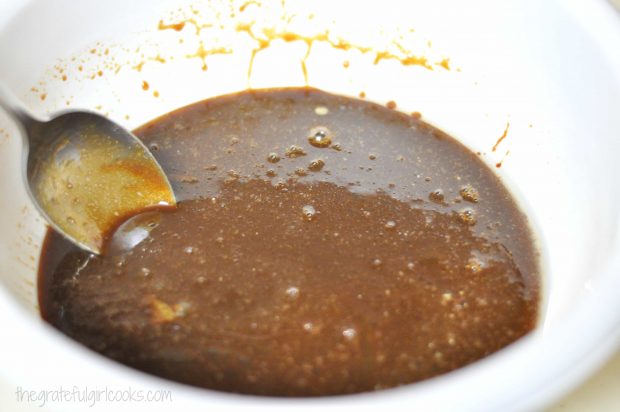
Preheat oven to 400 degrees, and prepare 12 cup standard sized muffin tin by spraying the bottom only, OR by placing paper baking cups into each muffin cup.  Beat together brown sugar, molasses, milk, oil and one egg in a large bowl. You can easily use a spoon for this.

Batter is mixed together for gingerbread muffins.

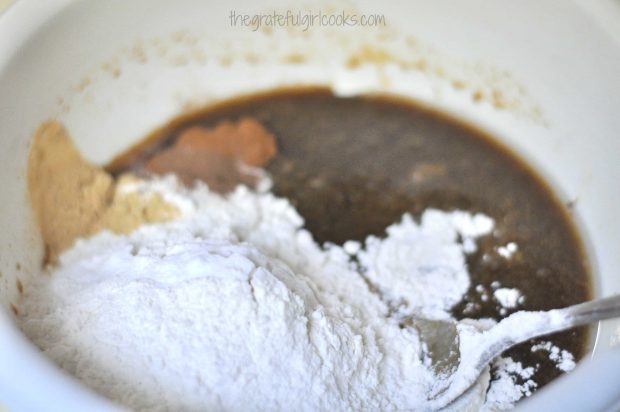
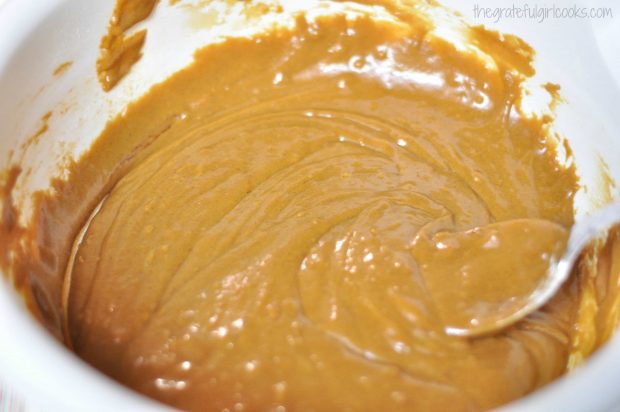
Add remaining ingredients (flour, baking powder, ginger, salt, baking soda, cinnamon and ground allspice to the batter. Stir to mix ingredients only until flour is incorporated and moistened. Do not over stir.

Dry ingredients are added to gingerbread muffin batter in bowl.

Gingerbread muffin batter is reading to put into muffin cups to bake.

Fill the Muffin Cups Then Bake

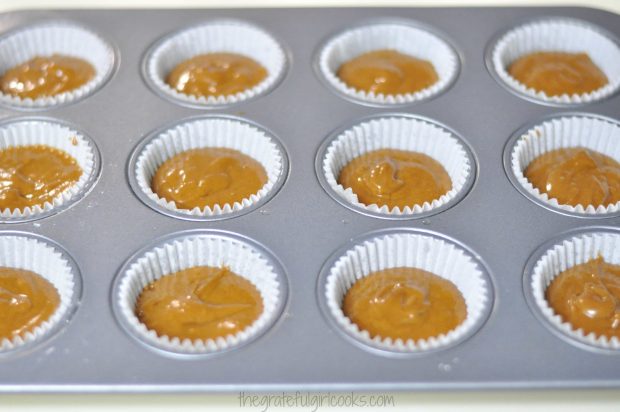
Spoon the batter evenly into prepared muffin cups. Each muffin cup should only be filled HALF full with the batter.

Batter for gingerbread muffins is divided into muffin holders.

Bake muffins at 400 degrees for 18-20 minutes, or until a toothpick inserted into the center of a muffin comes out clean. Check muffins at 18 minutes. Mine only took 18 minutes, so I was glad I checked them. This is necessary because oven temps. vary quite a bit!

Once done, immediately remove the gingerbread muffins from the baking pan, and place them on a wire rack to cool.  Once cooled, they are ready to eat… as is, OR you can fancy them up (can’t help myself!).

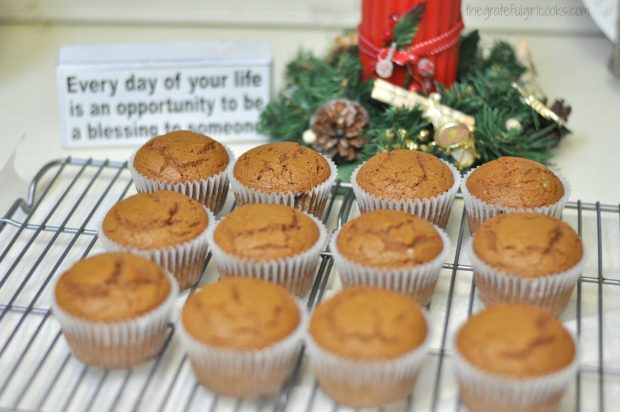
Gingerbread muffins out of oven, cooling on wire rack.

Making Icing To Decorate The Gingerbread Muffins

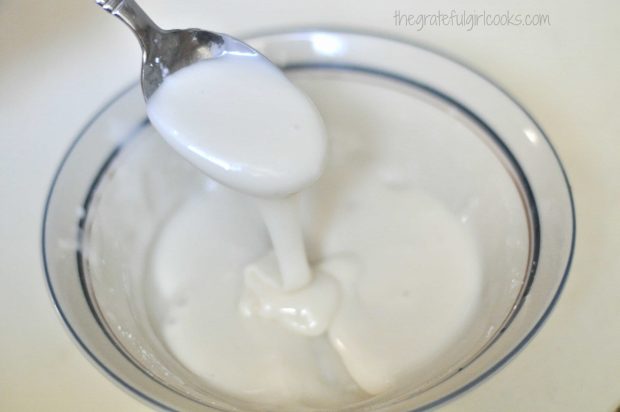
If you want to “fancy them up” a bit, while muffins are cooling off stir together a mixture of powdered sugar, vanilla, and water until the icing is thick enough to drizzle over tops of muffins. I had some red sparkly sugar in my pantry, so I also lightly sprinkled the icing with red sugar after drizzling it on. (Multi-colored sprinkles would add a fun touch, too!).

Powdered sugar icing is mixed to drizzle on gingerbread muffins.

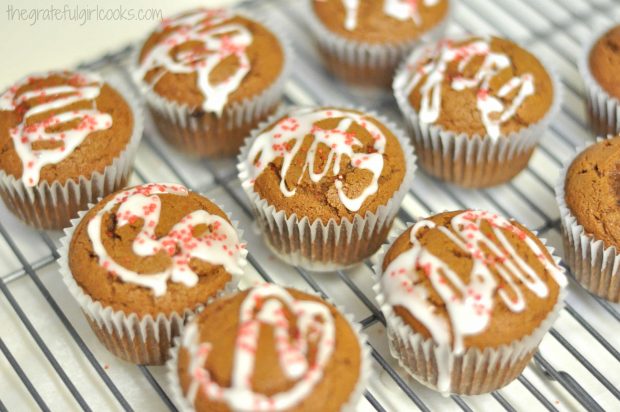
Gingerbread muffins are drizzled with powdered sugar icing and red sprinkles.

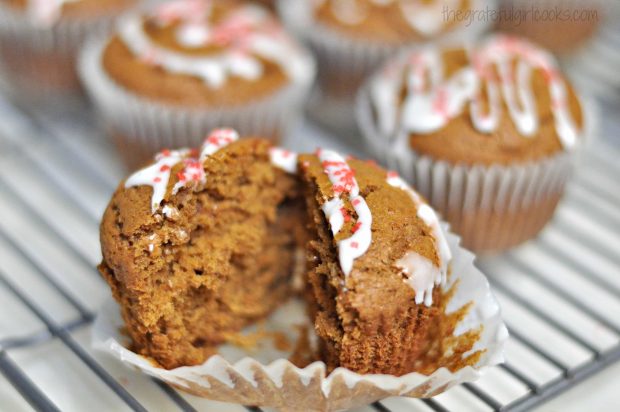
Let the icing firm up just a bit, then the gingerbread muffins are ready to eat!  Here’s a peek at the inside of one before it got gobbled up!  My husband enjoyed his warm muffins with a tiny touch of butter, which he said made them perfect!

One of the gingerbread muffins is cut in half to see inside.

It’s such an easy recipe to make and it was kind of fun to have GINGERBREAD muffins for breakfast, right in the middle of the Christmas holidays!  Hope you enjoy them.  I sincerely hope you are finding JOY in this season. Merry Christmas!

Looking For More GINGERBREAD-INSPIRED Recipes?

You can find all of my recipes in the Recipe Index, which is located at the top of the page. I have lots of delicious GINGERBREAD-INSPIRED recipes, including:

Thank you for visiting this website. I appreciate you using some of your valuable time to do soIf you’re interested, I publish a newsletter 2 times per month (1st and 15th) with all the latest recipes, and other fun info. I would be honored to have you join our growing list of subscribers, so you never miss a great recipe! There is a Newsletter subscription box on the top right side (or bottom) of each blog post, depending on the device you use, where you can easily submit your e-mail address (only) to be included in my mailing list.

You can also follow me on social media:

Facebook page: The Grateful Girl Cooks!
Pinterest:
The Grateful Girl Cooks!
Instagram:
jbatthegratefulgirlcooks

Author's signature

Recipe Adapted From:The cookbook titled : “Betty Crocker Christmas Cookbook”, Page 158, Wiley Publishing, Inc., Copyright 2010, General Mills.
0 from 0 votes
Gingerbread Muffins
Prep Time
10 mins
Cook Time
18 mins
Total Time
28 mins
 
Serve these delicious and festive Gingerbread Muffins for breakfast during the holidays! They are quick, easy to make, and taste wonderful!
Category: Breakfast
Cuisine: American
Keyword: gingerbread muffins
Servings: 12
Calories Per Serving: 255 kcal
Author: JB @ The Grateful Girl Cooks!
Ingredients
For Muffin Batter:
  • 1/4 cup brown sugar (packed)
  • 1/2 cup molasses
  • 1/3 cup milk
  • 1/3 cup vegetable oil
  • 1 egg
  • 2 cups all purpose flour
  • 1 teaspoon baking powder
  • 1 teaspoon ground ginger
  • 1/2 teaspoon salt
  • 1/2 teaspoon baking soda
  • 1/2 teaspoon ground cinnamon
  • 1/4 teaspoon ground allspice
For Decorative Icing (to drizzle on finished muffins):
  • 1 1/2 cups powdered sugar
  • 1/2 teaspoon vanilla extract
  • Few drops of water (a little at a time until desired thickness is reached)
Instructions
  1. Preheat oven to 400 degrees F. spray the bottoms (only) of a 12 standard sized muffin cups with non-stick spray OR insert paper muffin baking cups into each cup.
  2. Mix the the brown sugar, molasses, oil, milk, and egg together in a large bowl with a spoon. Mix well.
  3. Stir in the remaining ingredients (flour, baking powder, ginger, salt, baking soda, cinnamon and allspice). Stir only until all ingredients are mixed in together... do not overmix.
  4. Divide and spoon batter evenly into prepared muffin cups (only fill HALFWAY).
  5. Bake muffins at 400 degrees F for 18-20 minutes, or until a toothpick inserted into the center of muffin comes out clean. It's best to check them at the 18 minute mark, as oven temperatures vary.
  6. When done, immediately remove muffins from baking pan to a wire rack to cool. Once they have cooled down they are ready to serve warm (unless you wish to add a decorative drizzle).
  7. If you wish to drizzle icing over the top of finished muffins, place powdered sugar and vanilla in small bowl. Stir in a few drops of water, stirring as you go. Continue adding a drop or two of water and stirring, until icing is thick enough to drizzle on top of muffins. Wait until muffins are completely cool before drizzling icing on top. Lightly dust with colored sugar or sprinkles, if desired. Let icing firm up on muffins, then serve! Enjoy!
Nutrition Facts
Gingerbread Muffins
Amount Per Serving (1 muffin)
Calories 255 Calories from Fat 54
% Daily Value*
Fat 6g9%
Saturated Fat 5g31%
Cholesterol 14mg5%
Sodium 158mg7%
Potassium 281mg8%
Carbohydrates 46g15%
Sugar 30g33%
Protein 2g4%
Vitamin A 30IU1%
Calcium 60mg6%
Iron 1.8mg10%
* Percent Daily Values are based on a 2000 calorie diet.

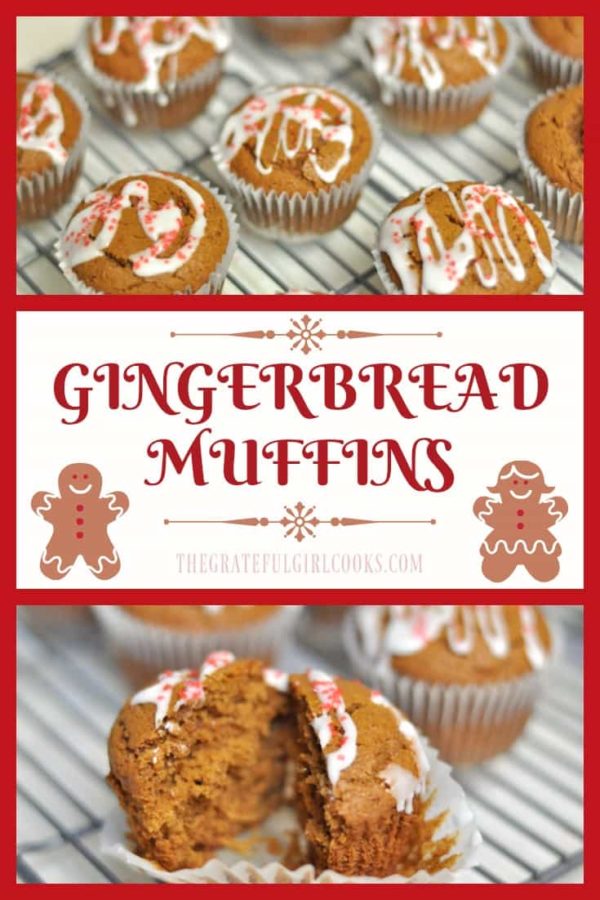
Here’s one more to pin on your Pinterest boards!Serve these delicious and festive Gingerbread Muffins for breakfast during the holidays! They are quick, easy to make, and taste wonderful!
 

Save

Save

Save

Save

Save

Save

Save

Save

Save

Save

Save

Save

Save

Tex-Mex Party Nuts

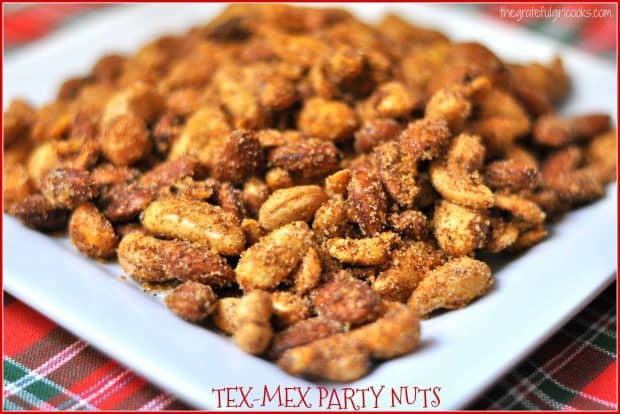
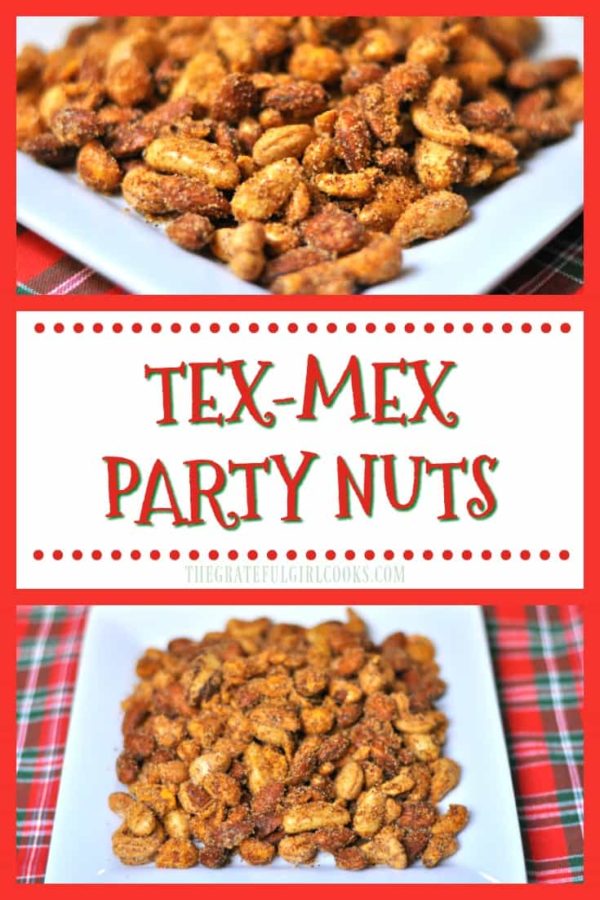
Tex-Mex party nuts are slightly sweet and slightly spicy! These Southwest flavor-inspired roasted mixed nuts will be a big hit at your next party!Tex-Mex party nuts are slightly sweet and slightly spicy! These Southwest flavor-inspired roasted mixed nuts will be a big hit at your next party!
If you are looking for a delicious appetizer for your next party (or just want a unique snack), you should give these Tex-Mex Party Nuts a try! Slightly sweet, slightly spicy and totally addicting, they will be a big hit, AND they’re EASY to prepare!

I found the recipe in a cookbook a friend of mine gave me several years ago for Christmas. After pouring over the book, I was delighted to find this recipe.

I was anxious to try it, so I patiently waited until my husband bought an “industrial strength size” jar of mixed nuts at Costco! Then I smuggled enough nuts out of the jar to make this recipe.

Wow- I am sure glad I did! These snacks are amazing, they’re easy to make with a few simple household spices, in only a few minutes!

Scroll Down For A Printable Recipe Card At The Bottom Of The Page

How To Make Tex-Mex Party Nuts

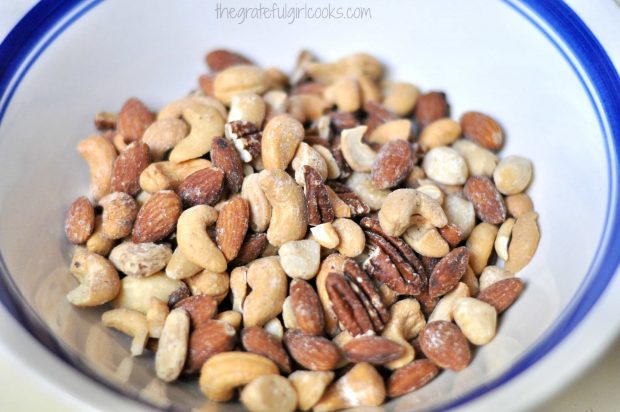
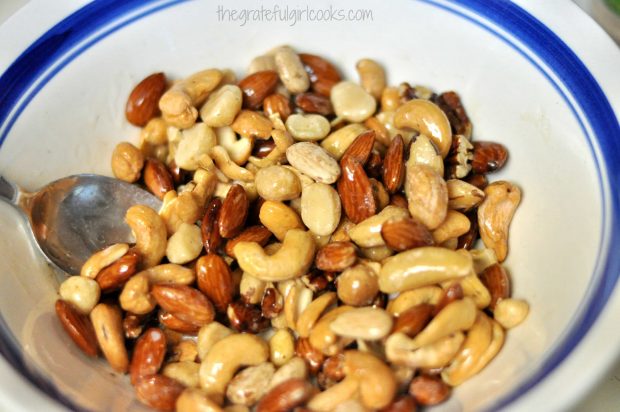
Measure the mixed nuts into a large bowl. Add melted butter, and stir the ingredients well, until the nuts are fully coated.

A large bowl of roasted mixed nuts in a bowl.

Mixed nuts are coated with melted butter before adding spices.

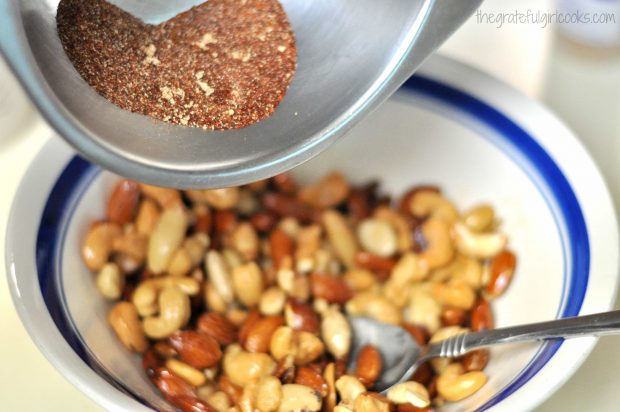
In a separate small bowl, mix together the spices EXCEPT for the granulated sugar (save that for later!). Sprinkle the spice mix over the mixed nuts, and stir to fully coat.

Spice mixture is poured into bowl of butter roasted nuts.

A mixture of spices are stirred into the mixed nuts before baking.

Time To Bake The Tex-Mex Party Nuts

Spread the spiced nuts onto a 15x10x1 inch baking pan. Place the seasoned nuts in a single layer, so the nuts can evenly cook.

Bake them uncovered, in a 300°F. oven for 10 minutes. When they’re done baking, immediately pour the hot spiced nuts into a medium bowl.

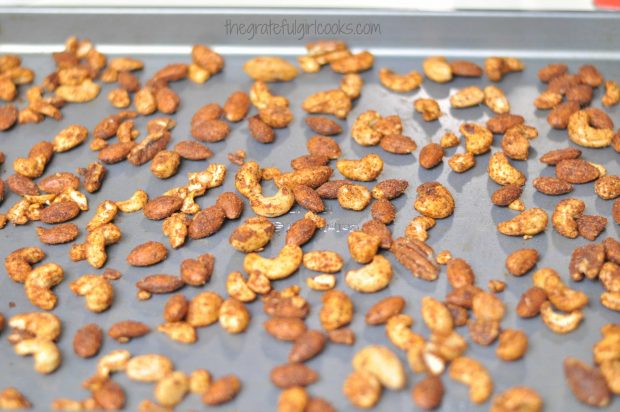
All the mixed nuts are baked in single layer on a large pan.

Sprinkle the nuts with granulated sugar while they are still HOT from the oven. Stir the sugar in well, to make sure the nuts are fully coated.

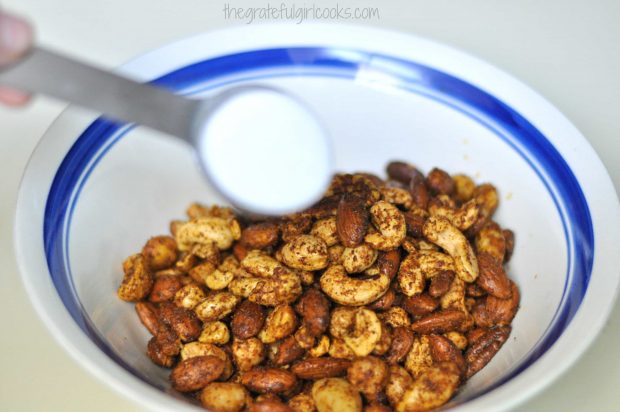
Roasted nuts are sprinkled with sugar just as soon as they are out of oven.

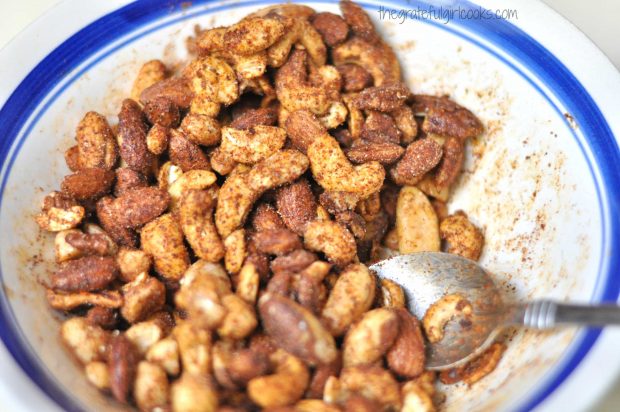
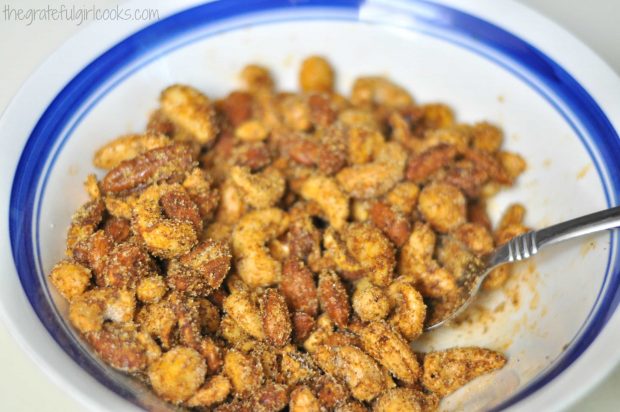
Mixed seasoned and roasted nuts are coated with spices and sugar, and are ready to serve.

Time to Eat!

Let the nuts cool completely, then serve these absolutely DELICIOUS Tex-Mex party nuts on a pretty plate or in a serving bowl.

This simple appetizer will be gone in a flash, because they are so GOOD! Make sure to leave a spoon on the plate so your guests can scoop them up!

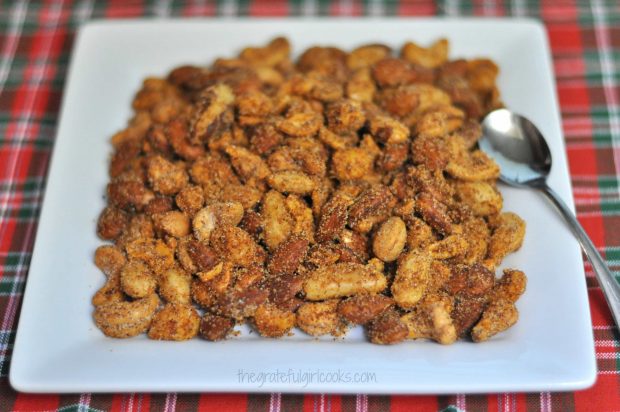
Tex-Mex Party Nuts served as an appetizer snack, on a white plate.

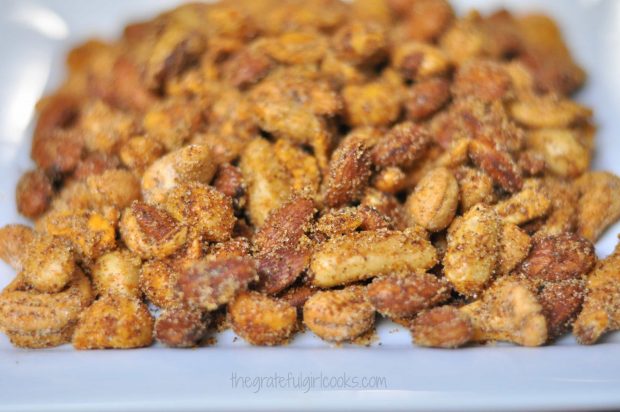
Close up photo of Tex-Mex party nuts on white plate.

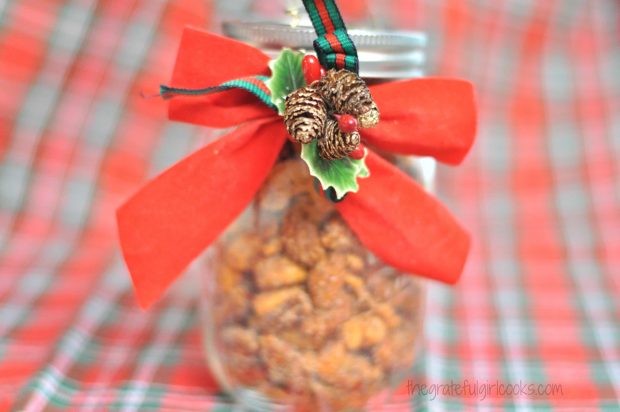
The Tex-Mex Party Nuts also make a lovely food gift during the holidays. Simply place the Tex-Mex Party Nuts in a canning jar or container, then decorate, and enjoy giving them as a gift to a friend!

Other delicious items for gift-giving are Ranch Pretzel Bites, Maple Cinnamon Spiced Nuts, or Spiced Tea Mix. Each of them will be appreciated and enjoyed.

You might also consider giving candied citrus peels or candied orange, cinnamon & clove spiced pecans! They also make great food gifts for holidays or other special occasions.

Tex-Mex Party Nuts can be placed in a decorated jar and given as a holiday gift.

The first time I made these Tex-Mex party nuts I was afraid (before trying them) that they might be TOO spicy, but was pleasantly surprised to find out they were NOT!  They have a perfect combo of slightly sweet and slightly spicy ingredients!

Tex-Mex Party Nuts will keep for up to 3 weeks, if they’re stored in an airtight covered container at room temperature.  This recipe can be EASILY doubled or tripled. 

I hope you will give them a try, because they are quite tasty! If you enjoy these roasted nuts, you will probably also like my yummy Coconut Candied Cashews! They are DELICIOUS!

Thanks for stopping by, and I hope you will come back soon for more delicious recipes. Don’t forget- you can find ALL of my recipes in the Recipe Index, located at the top of the page. Have a GREAT day!

Want More Recipes? Get My FREE Newsletter!

I publish a newsletter 2 times per month (1st and 15th) with lots of recipes, tips, etc..
Would you like to join our growing list of subscribers?

There is a Newsletter subscription box on the top right (or bottom) of each blog post, depending on the device you use.
You can submit your e-mail address there, to be added to my mailing list.

Find Me On Social Media:

Facebook page: The Grateful Girl Cooks!
Pinterest:
The Grateful Girl Cooks!
Instagram:
jbatthegratefulgirlcooks

Author's signature

Recipe Adapted From:  “Betty Crocker Christmas Cookbook”, Page 272, Wiley Publishing, Inc., Copyright 2010, General Mills.

↓↓ PRINTABLE RECIPE BELOW ↓↓

0 from 0 votes
Tex-Mex Party Nuts
Prep Time
5 mins
Cook Time
10 mins
Total Time
15 mins
 

Tex-Mex party nuts are slightly sweet and slightly spicy! These Southwest flavor-inspired roasted mixed nuts will be a big hit at your next party!

Category: Appetizer
Cuisine: Southwest
Keyword: Tex Mex party nuts
Servings: 8 servings (1/4 cup each)
Calories Per Serving: 247 kcal
Author: JB @ The Grateful Girl Cooks!
Ingredients
  • 2 cups salted mixed nuts
  • Tablespoons butter , melted
  • 2 teaspoons chili powder
  • ½ teaspoon garlic powder
  • ½ teaspoon onion powder
  • ¼ teaspoon ground cinnamon
  • ¼ teaspoon ground red cayenne pepper
  • --------------------------------------------------------
  • 2 Tablespoons granulated sugar (set aside)
Instructions
  1. Preheat oven to 300 degrees F.
  2. Place mixed nuts in a medium sized bowl. Add melted butter and stir until the nuts are fully coated.
  3. In a small bowl, place all spices EXCEPT for the granulated sugar. Mix together. Sprinkle spice mix over the buttered mixed nuts, and stir until coated.
  4. Place nuts onto a 10 x15 x 1 inch baking pan in a single layer. Bake the nuts uncovered for 10 minutes. The nuts should be fully roasted. Remove nuts from oven and immediately place them into a bowl.
  5. Sprinkle the nuts with the granulated sugar while the nuts are still HOT. Stir to coat. Let the nuts cool completely, then serve. (If storing, the nuts will keep for about 3 weeks in a covered airtight container at room temperature).

Nutrition Facts
Tex-Mex Party Nuts
Amount Per Serving (0.25 cup)
Calories 247 Calories from Fat 180
% Daily Value*
Fat 20g31%
Saturated Fat 3g19%
Cholesterol 5mg2%
Sodium 31mg1%
Potassium 224mg6%
Carbohydrates 12g4%
Fiber 3g13%
Sugar 3g3%
Protein 6g12%
Vitamin A 240IU5%
Vitamin C 0.2mg0%
Calcium 27mg3%
Iron 1.4mg8%
* Percent Daily Values are based on a 2000 calorie diet.

Here’s one more to pin on your Pinterest boards!Tex-Mex party nuts are slightly sweet and slightly spicy! These Southwest flavor-inspired roasted mixed nuts will be a big hit at your next party!


Save

Save

Save

Save

Save

Save

Save

Save

Save

Save

Save

Save

Save

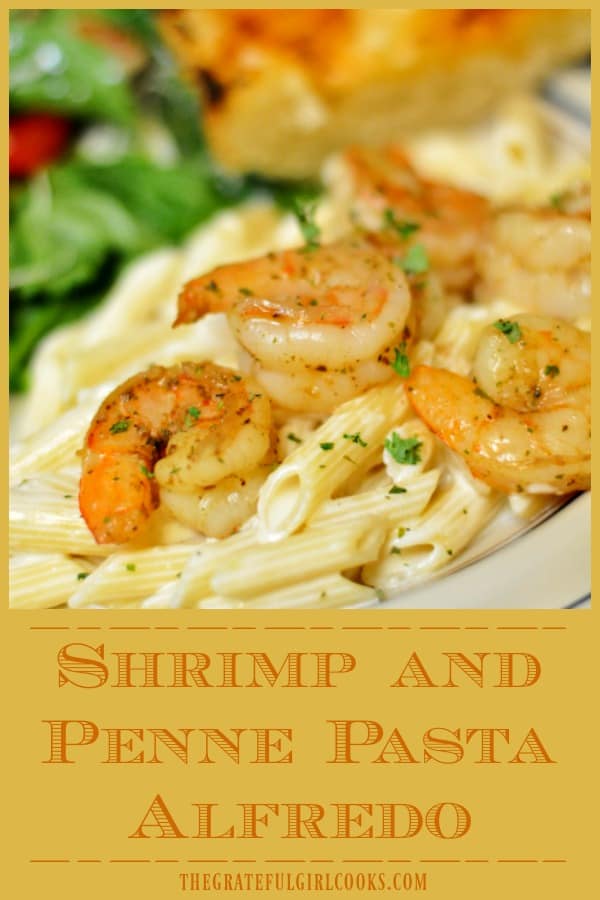
Shrimp And Penne Pasta Alfredo

Shrimp Penne Pasta Alfredo features lightly seasoned, pan-seared shrimp served on a bed of pasta in a creamy Parmesan alfredo sauce. This dish is easy and delicious!Shrimp Penne Pasta Alfredo features lightly seasoned, pan-seared shrimp served on a bed of pasta in a creamy Parmesan alfredo sauce. Easy and delicious!
We really love this shrimp pasta meal!  It tastes WONDERFUL! Guess what? Shrimp and Penne Pasta Alfredo is not only delicious to eat, it’s EASY to prepare in UNDER 30 minutes!! Over 30 years ago a friend in Southern California named Lona told me how to make a quick alfredo sauce. I’ve made alfredo sauce that exact same way ever since.

This recipe for shrimp penne pasta alfredo, (w/ penne pasta AND pan-seared shrimp) is just one of the variations I have made through the years.  The shrimp in this dish is lightly sprinkled with Cajun spices, but you can easily substitute your own Italian spices, if desired.

The alfredo sauce takes only minutes to prepare while the pasta is cooking, so the entire dish can be ready to go in under 30 minutes! Trust me- shrimp penne pasta alfredo is EASY to prepare, and is quite yummy.

Scroll Down For A Printable Recipe Card At The Bottom Of The Page

How To Make Shrimp Penne Pasta Alfredo

Bring large pot of water to boil. Cook the penne pasta according to the package directions. While the pasta is cooking, lightly sprinkle Cajun seasoning onto peeled, deveined large shrimp (21-25 per pound). NOTE: You can substitute seasoning of your choice, such as garlic powder, Italian seasoning, etc., if you want.

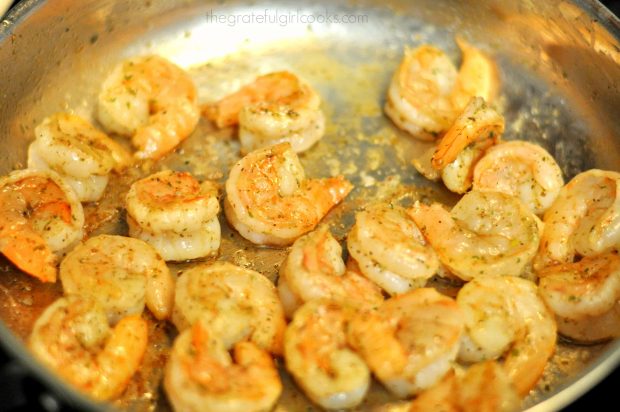
In a large skillet, heat the olive oil on medium heat.  Once oil is hot (but not smoking), add shrimp. Cook the shrimp about 2 minutes per side, until pink and fully cooked. When done, remove shrimp from skillet and keep it warm.

Shrimp is pan-seared in skillet for Shrimp Penne Pasta Alfredo.

Making The Alfredo Sauce

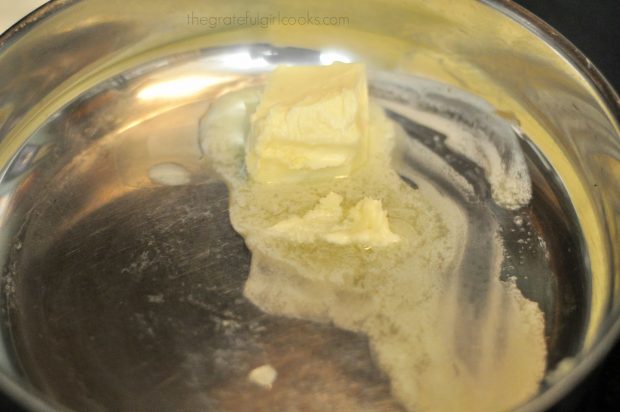
To save time, make the alfredo sauce while the pasta is cooking. Start the sauce by melting a stick of butter (1/2 cup) in a large skillet.

Butter is melted to make sauce for Shrimp Penne Pasta Alfredo.

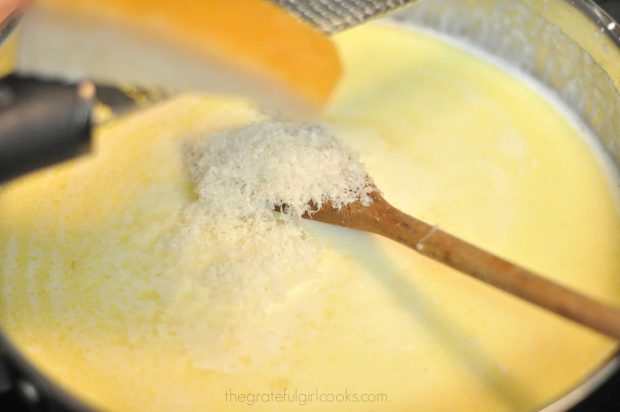
Add 1½ cups heavy whipping cream to the melted butter. Stir to combine the butter and whipping cream. Grate 1½ cups of fresh Parmesan cheese directly into the sauce (you can add more Parmesan, if desired).

Whisk the sauce well to combine ingredients.  Cook the alfredo sauce on medium-low heat (stirring constantly) until the Parmesan cheese has melted, sauce has thickened, and is hot. Do not let sauce come to a boil. Taste test the sauce; season with a tiny bit of garlic powder, salt and pepper, if desired. 

Grated, fresh Parmesan cheese is added to sauce for Shrimp Penne Pasta Alfredo.

Add Cooked Pasta To The Alfredo Sauce

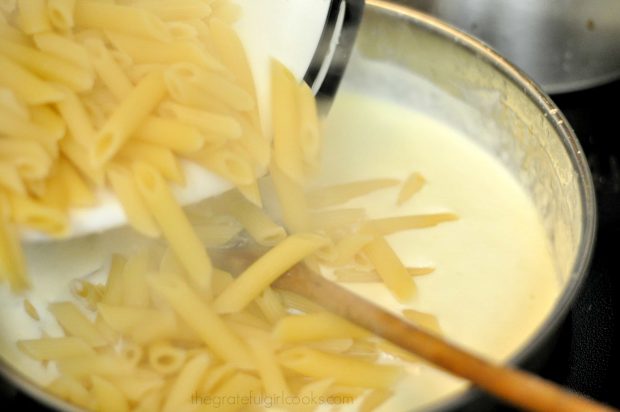
When the penne pasta is finished cooking, drain it well, and then add it to the skillet with the thickened, hot Alfredo sauce.

Hot, cooked pasta is added to sauce for Shrimp Penne Pasta Alfredo.

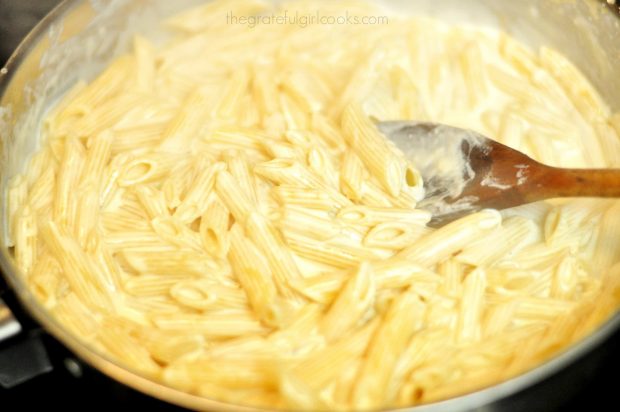
Stir again, to fully mix pasta and sauce. Heat on low until the sauce and pasta are hot and fully mixed together.

Penne pasta is coated with Alfredo sauce before adding shrimp.

Serve Shrimp Penne Pasta Alfredo

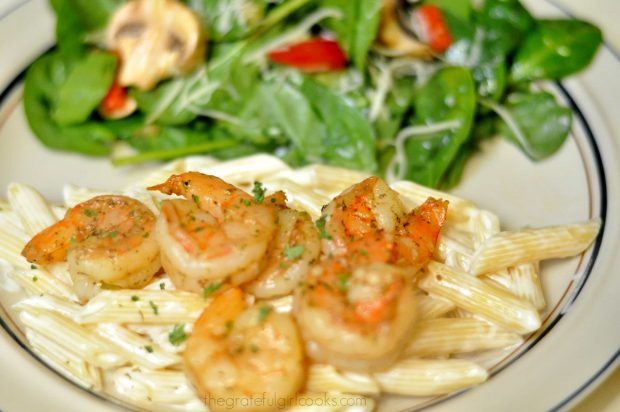
Place a portion of the hot penne pasta alfredo onto each individual serving plate. Top each portion with several of the pan-seared shrimp. Garnish the dish with dried parsley and additional grated Parmesan cheese (if desired). Serve the shrimp penne pasta alfredo immediately, while hot.

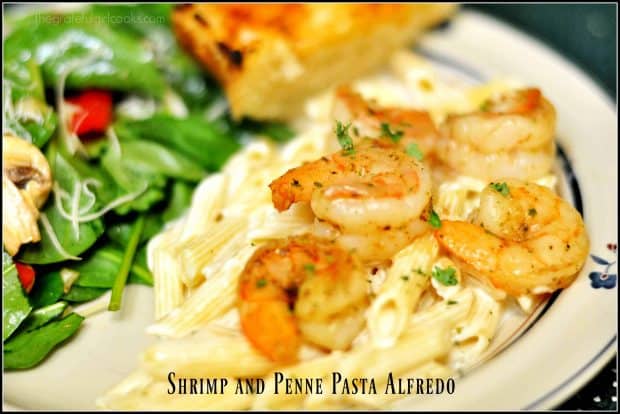
Shrimp Penne Pasta Alfredo is served on plate, with green salad.

See how easy it is to make this meal? In hardly any time at all, you’ve made a delicious shrimp penne pasta alfredo dinner! Hope you will consider making this delicious meal for yourself and those you love!  Blessings~

Looking For More Shrimp Recipes?

You can find all my shrimp recipes in the Recipe Index, located at the top of the page. A few favorites include:

Interested In More Recipes?

Thank you for visiting this website. I appreciate you using some of your valuable time to do soIf you’re interested, I publish a newsletter 2 times per month (1st and 15th) with all the latest recipes, and other fun info. I would be honored to have you join our growing list of subscribers, so you never miss a great recipe!
There is a Newsletter subscription box on the top right side (or bottom) of each blog post, depending on the device you use, where you can easily submit your e-mail address (only) to be included in my mailing list.

You Can Also Find Me On Social Media:

Facebook page: The Grateful Girl Cooks!
Pinterest:
The Grateful Girl Cooks!
Instagram:
jbatthegratefulgirlcooks

Author's signature

5 from 1 vote
Shrimp And Penne Pasta Alfredo
Prep Time
10 mins
Cook Time
15 mins
Total Time
25 mins
 
Shrimp Penne Pasta Alfredo features lightly seasoned, pan-seared shrimp served on a bed of pasta in a creamy Parmesan alfredo sauce. Easy and delicious!
Category: Entree
Cuisine: Italian
Keyword: shrimp penne pasta alfredo
Servings: 4 servings
Calories Per Serving: 664 kcal
Author: JB @ The Grateful Girl Cooks!
Ingredients
  • 1 pound shrimp (21-25 count per pound), shelled/deveined
  • Cajun seasoning (or seasoning of your choice: garlic powder, Italian seasoning, etc.)
  • 1 Tablespoon olive oil
  • 1 stick butter (1/2 cup)
  • cups heavy whipping cream
  • Approximately 1½ cups grated Parmesan cheese (add more to taste, if desired)
  • Season lightly with garlic powder , salt & black pepper, to taste
  • 1/2 pound penne pasta , cooked per package instructions
  • Dried parsley and/or additional grated Parmesan cheese for garnish (if desired)
Instructions
  1. Prepare penne pasta according to package instructions. While pasta is cooking, prepare the sauce and the shrimp.
To Make Alfredo Sauce:
  1. Melt butter in medium skillet. Once melted, pour in heavy whipping cream. Stir to combine. Cook on medium-low until heated through (but not boiling). Add grated Parmesan cheese to saucepan. Stir well, to combine. Continue cooking until cheese melts, and mixture thickens (but is NOT boiling). Taste and add additional Parmesan cheese (you can't get too much!) for thicker sauce and additional flavor. Season very lightly with garlic powder, salt and pepper. Keep sauce warm while you prepare the shrimp (or can cook both at the same time if multi-tasking).
To cook shrimp:
  1. Heat olive oil on medium-high heat in large skillet.
  2. Lightly sprinkle shelled/deveined shrimp with Cajun seasoning. Stir to combine. When oil in skillet is hot, add shrimp. Cook shrimp for about 2 minutes per side, until pink and cooked through. Set aside and keep warm.
To Serve:
  1. When pasta is done, drain. Add drained penne to skillet with hot Alfredo sauce , and mix well to fully coat pasta with sauce. Place a serving of hot pasta on individual plates. Top with 4-5 cooked shrimp.
  2. Garnish with dried parsley and additional Parmesan cheese, if desired. Serve and enjoy!
Recipe Notes

Fresh grated Parmesan is the best choice, but if all you have available is the "Green Container" shaker can of Parmesan cheese, by all means use it!

Nutrition Facts
Shrimp And Penne Pasta Alfredo
Amount Per Serving (1 serving)
Calories 664 Calories from Fat 351
% Daily Value*
Fat 39g60%
Saturated Fat 21g131%
Cholesterol 408mg136%
Sodium 920mg40%
Potassium 284mg8%
Carbohydrates 44g15%
Fiber 1g4%
Sugar 1g1%
Protein 32g64%
Vitamin A 1310IU26%
Vitamin C 5.2mg6%
Calcium 234mg23%
Iron 3.2mg18%
* Percent Daily Values are based on a 2000 calorie diet.

Here’s one more to pin on your Pinterest boards!Shrimp Penne Pasta Alfredo features lightly seasoned, pan-seared shrimp served on a bed of pasta in a creamy Parmesan alfredo sauce. Easy and delicious!


Save

Save

Save

Save

Save

Save

Save

Save

Save

Save

Save

Save

Save

Save

Save

Save

Save

Save

Save

Save

Save

Save

Save

Save

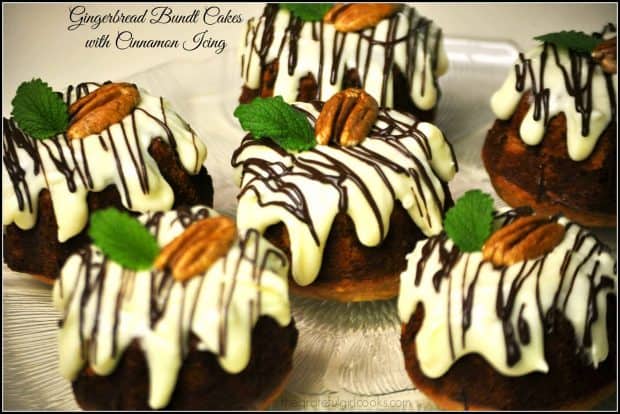
Gingerbread Bundt Cakes With Cinnamon Icing

Miniature gingerbread bundt cakes with cinnamon icing are delicious, and make a wonderful gift to give friends and family during the holidays!Miniature gingerbread bundt cakes with cinnamon icing are delicious, and make a wonderful gift to give friends and family during the holidays!
Do you enjoy gingerbread?  I sure do. The warm flavors of the spices has always been a favorite of mine. There is quite a bit of history behind this beloved cake. You can read all about gingerbread here.

A few years ago I enjoyed making miniature Gingerbread Cakes With Cinnamon Icing to give to our neighbors and friends. Using a miniature bundt pan (preferably a 12 cup pan), I was able to make two dozen of these delicious food gifts to give away!

Scroll Down For A Printable Recipe Card At The Bottom Of The Page

How Many Gingerbread Bundt Cakes Will This Recipe Make?

The recipe is simple to prepare, and as written, makes approximately 24 cute, mini bundt cakes.  Each individual sized gingerbread-flavored cake is covered with a delicious creamy Cinnamon icing (or glaze), then drizzled with chocolate to “fancy” them up.

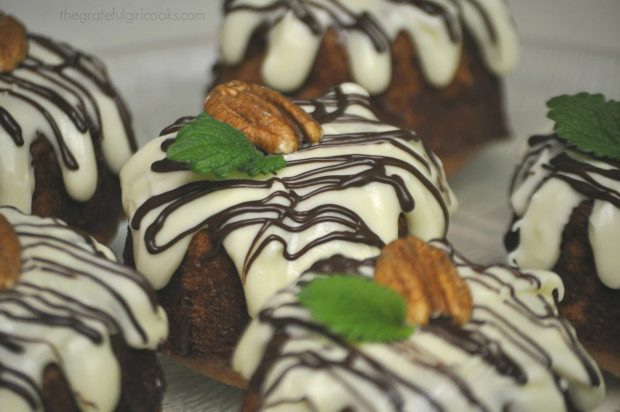
The gingerbread bundt cakes are then garnished with a pecan and a mint sprig. When I made these, I doubled the amount of cinnamon icing. With double the amount of cinnamon icing, it covered more of the top of each cake.

Gingerbread bundt cakes are frosted, then garnished with a pecan and a fresh mint sprig.

Another Way To Serve These Gingerbread Bundt Cakes

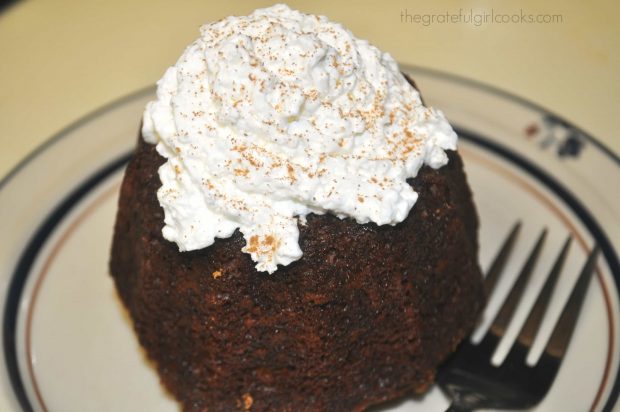
Another option for serving these yummy treats is to leave the cinnamon icing off of the finished cakes. When ready to serve, cover the tops of each cake with whipped cream and a light dusting of cinnamon. The gingerbread bundt cakes are delicious served this way, as well.

Gingerbread bundt cakes can also be topped with whipped cream, sprinkled with cinnamon.

Great For Gift-Giving!

It was fun to wrap up each individual mini cake (the ones with the cinnamon icing) and decorate them with pretty seasonal Fall leaves and ribbons. Gingerbread bundt cakes are also a wonderful Christmas gift for friends who enjoy food! They are a nice homemade gift to share (from our kitchen) with our friends and neighbors.

If you enjoy giving food gifts like gingerbread bundt cakes to family and friends, be sure to check out my recipes for Spiced Tea Mix, Old-Fashioned Fudge, and Chocolate Dipped Shortbread Cookies.  These, along with other recipes for holiday goodies are available in my Recipe Index, at the top of each blog post.

The little gingerbread bundt cakes taste wonderful… they are LOADED with flavor!  Sure hope you will consider making these little edible gifts for those you love!  They would be a perfect food gift for the holidays!

Looking for More GINGERBREAD-INSPIRED Recipes?

You can find all of my recipes in the Recipe Index, located at the top of the page. I have several delicious, gingerbread-inspired recipes you might enjoy, including:

Interested In More Recipes?

Thank you for visiting this website. I appreciate you using some of your valuable time to do soIf you’re interested, I publish a newsletter 2 times per month (1st and 15th) with all the latest recipes, and other fun info. I would be honored to have you join our growing list of subscribers, so you never miss a great recipe!
There is a Newsletter subscription box on the top right side (or bottom) of each blog post, depending on the device you use, where you can easily submit your e-mail address (only) to be included in my mailing list.

You Can Also Find Me On Social Media:

Facebook page: The Grateful Girl Cooks!
Pinterest:
The Grateful Girl Cooks!
Instagram:
jbatthegratefulgirlcooks

Gingerbread Bundt Cakes With Cinnamon Icing / The Grateful Girl Cooks!

Recipe Adapted From:  http://thesepeasarehollow.blogspot.com/2010/10/gingerbread-bundts.html

0 from 0 votes
Gingerbread Bundt Cakes With Cinnamon Icing
Prep Time
15 mins
Cook Time
30 mins
Total Time
45 mins
 

Miniature gingerbread bundt cakes with cinnamon icing are delicious, and make a wonderful gift to give friends and family during the holidays!

Category: Dessert
Cuisine: American
Keyword: gingerbread bundt cakes
Servings: 24 mini cakes
Calories Per Serving: 216 kcal
Author: JB @ The Grateful Girl Cooks!
Ingredients
For Gingerbread Cakes:
  • 2 ¼ cups all purpose flour
  • ½ teaspoon baking soda
  • ½ salt
  • ½ teaspoon allspice
  • ½ teaspoon ground cloves
  • ½ teaspoon nutmeg
  • 1 teaspoon cocoa powder
  • 1 teaspoon ground cinnamon
  • 2 teaspoons ground ginger
  • 1 cube unsalted butter (melted, then brought to room temp.)
  • ¾ cup dark molasses
  • ¾ cup granulated sugar
  • 1 egg (large)
  • ½ cup buttermilk
  • ½ cup milk
For Cinnamon Glaze:
  • 2 cups powdered sugar
  • 6-8 Tablespoons milk (depends on how thick or thin you want icing!)
  • ½ teaspoon ground cinnamon
  • (OPTIONAL) Melted chocolate for drizzle, whole pecans and/or mint sprigs for garnish
Instructions
  1. Preheat oven to 350 degrees F. Grease and flour the miniature bundt pan cups.
  2. Place flour, baking soda, salt, allspice, cloves, nutmeg, cocoa powder, cinnamon and ginger in a medium sized bowl. Whisk together until combined.
  3. Using an electric mixer or a stand mixer, combine molasses, granulated sugar and melted (but at room temperature) butter until blended well. Add the egg to this mixture, and continue beating until ingredients are completely combined.
  4. Slowly pour in the buttermilk, followed by the milk, beating slowly as you add, until ingredients are combined. Add the dry ingredients from the medium bowl (flour, spices, etc.) in small increments to the wet ingredients in mixing bowl, beating well after each addition. Be sure to scrape down the sides of bowl as you go. Stop mixing when ingredients have all been added and are just incorporated into batter.
  5. Pour or spoon batter into each prepared bundt pan cup, filling each to 3/4 of the way full. Smooth the top of the batter. Bake at 350 degrees, with the pan on the middle rack of oven, for approx. 30 minutes, OR until a toothpick that is inserted into the middle of the cake comes out clean. Remove pan to a wire rack. Let cakes cool for 15-20 minutes, then remove cakes from pan to wire rack.
  6. To prepare icing: Place the powdered sugar, cinnamon and milk in medium sized bowl. Mix well with a fork until smooth. Too thin? Add powdered sugar. Too thick? Add milk. Pour or spread icing over tops of each cooled cake. Let icing firm up before serving.
  7. If desired, drizzle melted chocolate over each cake. Garnish with a whole pecan or walnut, then add a sprig of mint for a festive garnish. Let chocolate firm up before serving or wrapping. Enjoy!
Nutrition Facts
Gingerbread Bundt Cakes With Cinnamon Icing
Amount Per Serving (1 g)
Calories 216 Calories from Fat 72
% Daily Value*
Fat 8g12%
Saturated Fat 5g31%
Cholesterol 28mg9%
Sodium 40mg2%
Potassium 192mg5%
Carbohydrates 34g11%
Sugar 24g27%
Protein 1g2%
Vitamin A 270IU5%
Calcium 43mg4%
Iron 1.1mg6%
* Percent Daily Values are based on a 2000 calorie diet.

Here’s one more to pin on your Pinterest boards!Miniature gingerbread bundt cakes with cinnamon icing are delicious, and make a wonderful gift to give friends and family during the holidays!


Save

Save

Save

Save

Save

Save

Save

Save

Save

Save

Save

Save

Save

Save

Save

Save

Happy Thanksgiving!

Happy Thanksgiving!  We really do have so much to be thankful for, if you think about it.  Enjoy this holiday; hopefully you will be able to carve out some quiet time of reflection, and give thanks for God’s many blessings, large or small in your life.Happy Thanksgiving / The Grateful Girl Cooks!

One of the quotes I LOVE is this “There is ALWAY something to be thankful for”.  My sincere hope is that your day is filled with laughter, love, fantastic food, and the gift of family and friends. May your celebration be sweet!

From our home in Oregon to yours… Happy Thanksgiving!

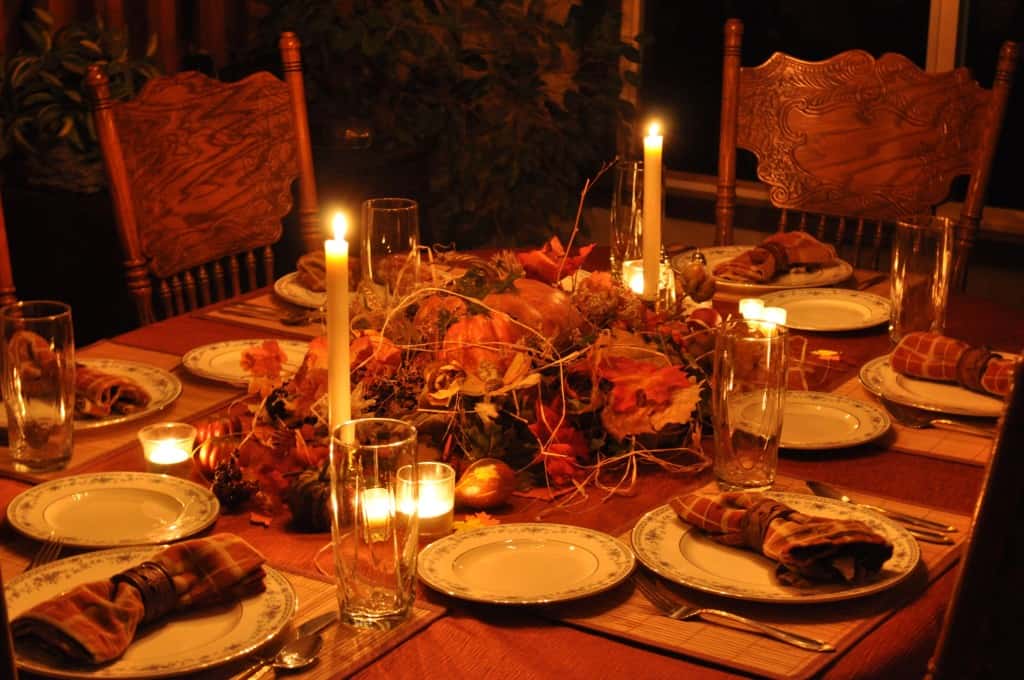
Our dining room table is set and ready for a happy Thanksgiving.

May your Thanksgiving celebration be made even more special by sharing it with your loved ones. God Bless You, and truly hope you have a very happy Thanksgiving.

Interested In More Recipes?

Thank you for visiting this website. I appreciate you using some of your valuable time to do soIf you’re interested, I publish a newsletter 2 times per month (1st and 15th) with all the latest recipes, and other fun info. I would be honored to have you join our growing list of subscribers, so you never miss a great recipe!

There is a Newsletter subscription box on the top right side (or bottom) of each blog post, depending on the device you use, where you can easily submit your e-mail address (only) to be included in my mailing list.

You Can Also Find Me On Social Media:
Facebook page: The Grateful Girl Cooks!
Pinterest: The Grateful Girl Cooks!
Instagram: jbatthegratefulgirlcooks

Author's signature

Save

Save

Save

Save

Old-Fashioned Cake Doughnuts

You’ll be surprised how easy it is to prepare old-fashioned cake doughnuts, with hints of cinnamon and nutmeg. The recipe makes 12 doughnuts + holes!
You'll be surprised how easy it is to prepare old-fashioned cake doughnuts, with hints of cinnamon and nutmeg. The recipe makes 12 doughnuts + holes!
In spite of all the fancy gourmet doughnuts available at specialty shops nowadays, sometimes a simple Old-Fashioned Cake Doughnut, maybe sprinkled with powdered sugar or cinnamon-sugar hits the spot!

If and when we have doughnuts, it’s because my doughnut-crazy husband picks them up at a local doughnut shop. BUT… I wanted to try my hand at making this simple cake doughnut out of simple curiosity on the “how-to’s” of making them. I located a recipe that sounded good on Pinterest and gave it a go… with very good results!

These old-fashioned cake doughnuts do not contain yeast, so there is no time waiting for dough to rise, which is a real timesaver! They are made with simple ingredients that are typically found in most kitchens. These yummy doughnuts are very easy to prepare. Here’s how to make them:

Scroll Down For A Printable Recipe Card At The Bottom Of The Page

How To Make Cake Doughnuts

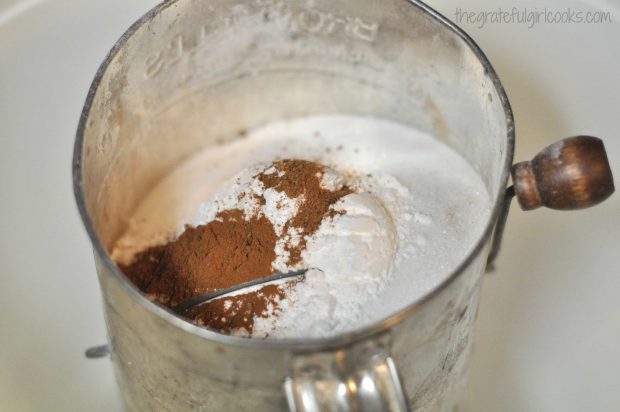
Sift flour, sugar, salt, baking powder, cinnamon and nutmeg into a medium-sized bowl.

Dry ingredients for doughnuts are sifted together.

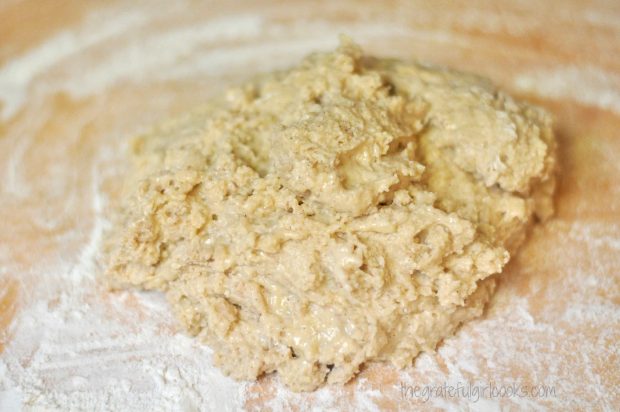
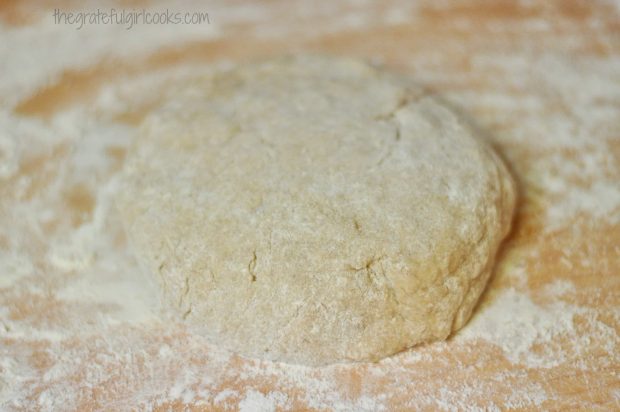
Mix in melted butter and stir until dough is crumbly. Stir in milk and beaten egg. Turn out the dough (it is sticky) onto a lightly floured work surface. Flour your hands a little bit,  and then knead the dough lightly, adding a sprinkle or two of flour if the dough remains sticky.

The dough is kneaded together on a floured surface.

Doughnut dough is shaped into a circle before cutting out shapes.

Cut Out The Cake Doughnuts

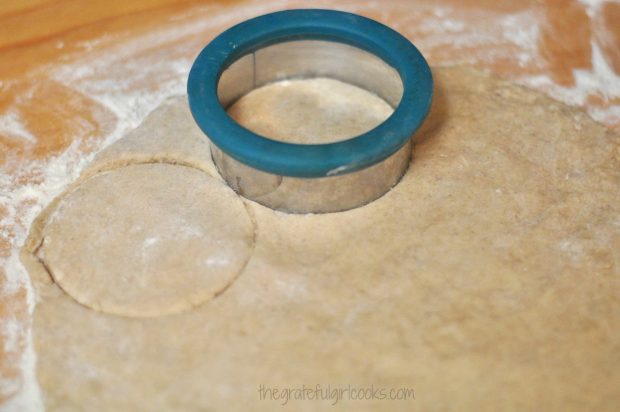
Pat the dough out so that it is 1/4 inch thick. Dip a doughnut cutter or a biscuit cutter into flour, then cut out doughnuts. Be sure to dip the cutter into flour before cutting out each doughnut..

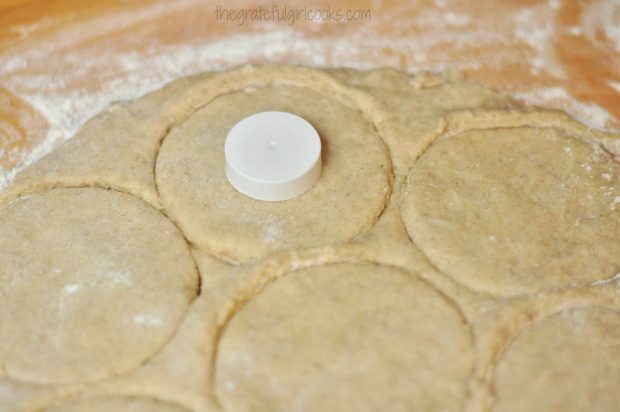
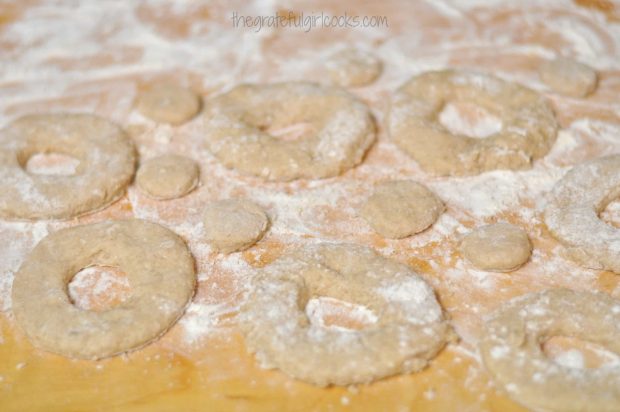
Because I used a biscuit cutter, I then used a very small cap from a bottle to cut out the center of the doughnuts. Gather scraps of leftover dough, and cut additional doughnuts out.

Circles are cut out of the dough with a biscuit or doughnut cutter.

A bottle cap can be used to cut out the doughnut holes.

Old-Fashioned Cake Doughnuts and holes ready to fry.

Cooking Old-Fashioned Cake Doughnuts

Heat oil to 375 degrees (make sure oil is at correct temperature before adding doughnuts).  I used my electric skillet with a temperature gauge on it, but a meat or candy thermometer would also work!

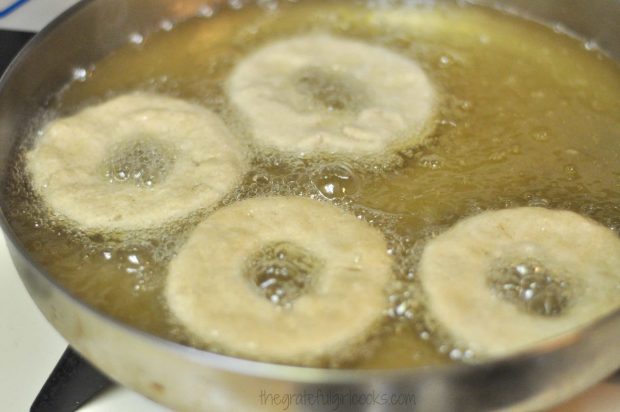
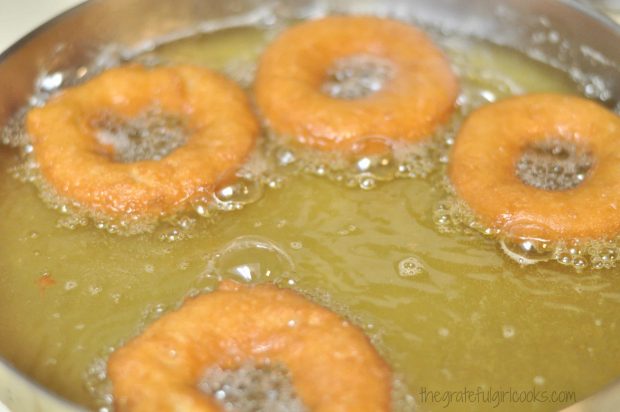
Carefully add the doughnuts, 3-4 at a time to the hot oil. Cook them for 3 minutes, turning them over at mid-point in the cooking time. I use two chopsticks (one in center of doughnut, one on outside) to carefully flip the doughnuts over.  Doughnuts should be golden brown on both sides.

The doughnuts are cooked in very hot oil to brown.

Old-Fashioned Cake Doughnuts are turning golden brown in the hot oil.

Old-Fashioned Cake Doughnuts Are Done Cooking – Now What?

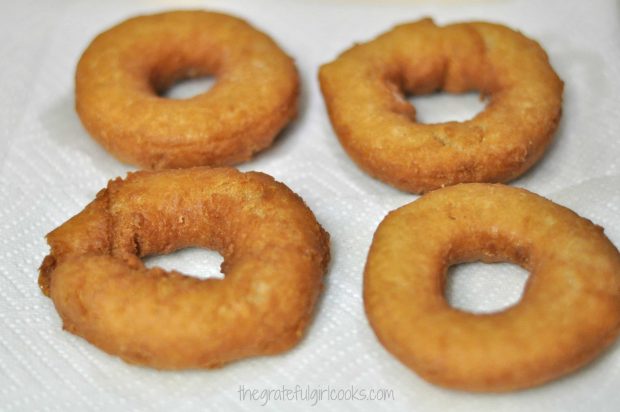
Place the cooked doughnuts onto several layers of paper towels to drain. Make sure oil comes back to temperature and continue cooking doughnuts until all have been prepared.

Paper towels absorb the oil after frying the doughnuts.

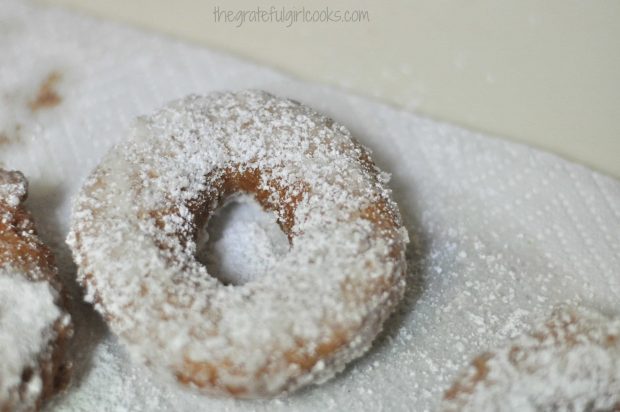
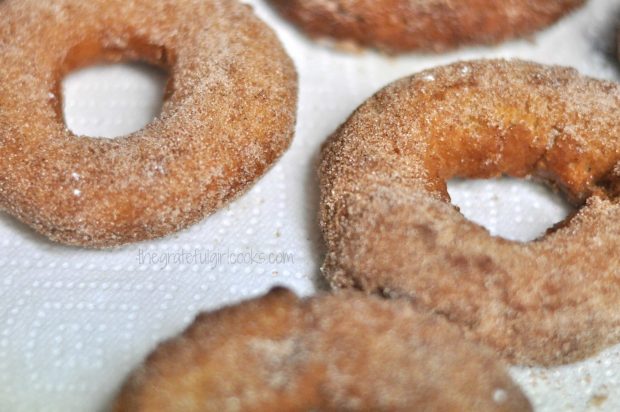
Once the doughnuts have cooled off, they are ready to serve, as is (plain and simple).  If you want you can sprinkle some or all of the doughnuts with sifted powdered sugar OR sprinkle with a cinnamon-sugar mixture.

TIP: When using powdered sugar, make sure the doughnuts are totally cooled off before adding. If using cinnamon-sugar mixture, sprinkle it on while doughnuts are still hot.

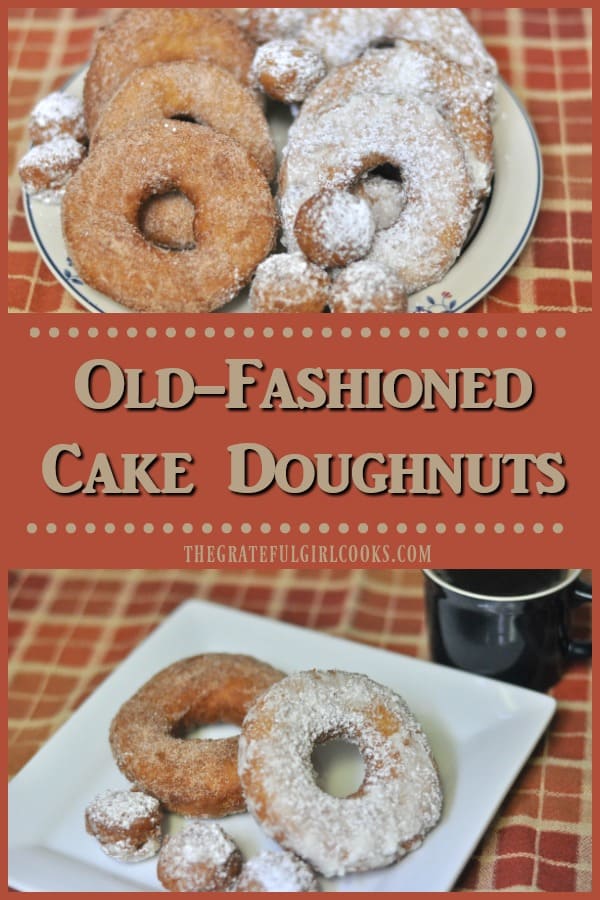
Old-Fashioned Cake Doughnuts can be dusted with sifted powdered sugar before serving.

A cinnamon-sugar mixture coats these old-fashioned cake doughnuts.

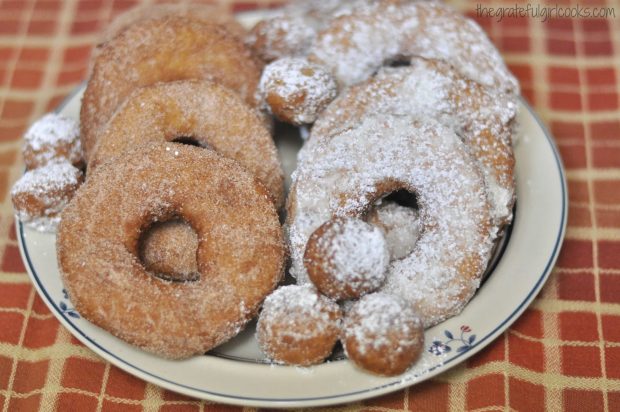
However you enjoy eating cake doughnuts, I hope you consider making these. It’s nice to know that occasionally you can make your own, instead of having to go to a shop to buy them.

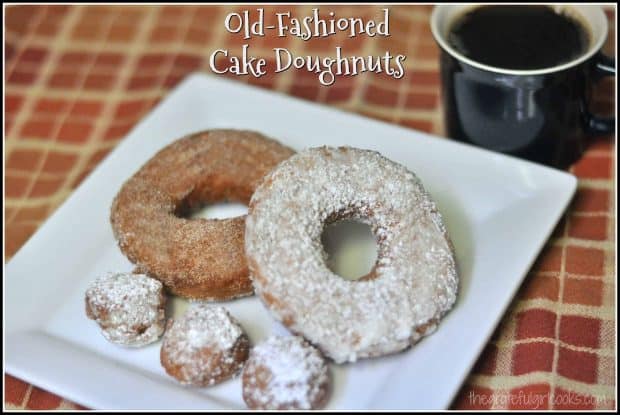
A plate of old-fashioned cake doughnuts and doughnut holes, ready to eat.

Have a blessed week, as you gather with family and/or friends, to give thanks to God for our many blessings, big or small. There is ALWAYS something to be grateful for!

Looking For More DOUGHNUT Recipes?

You can find all of my recipes in the Recipe Index, located at the top of the page. I have several doughnut recipes, including:

Interested In More Recipes?

Thank you for visiting this website. I appreciate you using some of your valuable time to do soIf you’re interested, I publish a newsletter 2 times per month (1st and 15th) with all the latest recipes, and other fun info. I would be honored to have you join our growing list of subscribers, so you never miss a great recipe!
There is a Newsletter subscription box on the top right side (or bottom) of each blog post, depending on the device you use, where you can easily submit your e-mail address (only) to be included in my mailing list.

You Can Also Find Me On Social Media:
Facebook page: The Grateful Girl Cooks!
Pinterest: The Grateful Girl Cooks!
Instagram: jbatthegratefulgirlcooks

Author's signature

Recipe Source:  http://baking.about.com/od/doughnutsanddonuts/r/plaincake.htm

0 from 0 votes
Old-Fashioned Cake Doughnuts
Prep Time
20 mins
Cook Time
3 mins
Total Time
23 mins
 

You'll be surprised how easy it is to prepare old-fashioned cake doughnuts, with hints of cinnamon and nutmeg. The recipe makes 12 doughnuts + holes!

Category: Breakfast
Cuisine: American
Keyword: cake doughnuts
Servings: 12
Calories Per Serving: 140 kcal
Author: JB @ The Grateful Girl Cooks!
Ingredients
  • 2 cups flour
  • 1/2 cup granulated sugar
  • 1 teaspoon salt
  • 1 Tablespoon baking powder
  • 1/4 teaspoon cinnamon
  • 1/8 teaspoon nutmeg
  • 2 Tablespoons butter , melted
  • 1/2 cup milk
  • 1 egg , beaten
  • approx. 1 quart oil , for frying
  • Optional: powdered sugar or cinnamon-sugar mixture for cooked doughnuts
Instructions
  1. Sift flour, sugar, salt, baking powder, cinnamon and nutmeg into a medium-sized bowl.
  2. Mix in melted butter-stir until dough is crumbly. Stir in milk and beaten egg. Turn out dough (it is sticky) onto a lightly floured work surface. Flour your hands and knead dough lightly, (adding a sprinkle or two of flour if dough remains sticky) until it comes together in a ball.
  3. Pat the dough out until it is 1/4 inch thick. Dip a doughnut cutter or a biscuit cutter into flour, then cut out doughnuts (dipping cutter into flour before cutting each one). Cut out center of the doughnuts if using biscuit cutter. Gather scraps of leftover dough, and cut additional doughnuts.
  4. Heat oil to 375 degrees (make sure oil is at correct temperature before adding dough). I used an electric skillet with temperature gauge, but a meat or candy thermometer would work! Carefully add doughnuts, 3-4 at a time to hot oil. Cook for 3 minutes, turning them over at mid-point in the cooking time. I use two chopsticks (one in center of doughnut, one on outside) to carefully flip the doughnuts over. Doughnuts should be golden brown on both sides. Place cooked doughnuts onto several layers of paper towels to drain. Bring oil back to temperature and continue cooking doughnuts and doughnut holes until all have been prepared.
  5. Once doughnuts have cooled, they are ready to serve. If desired, sprinkle doughnuts with sifted powdered sugar OR with a cinnamon-sugar mixture. If using powdered sugar, make sure doughnuts are totally cooled off before sprinkling. If using cinnamon-sugar mixture, sprinkle it on while doughnuts are still hot.
Recipe Notes

The quantity of doughnuts made will vary, depending on the size of the doughnut or biscuit cutter used. Caloric calculation does not include optional toppings such as powdered sugar or cinnamon-sugar.

Nutrition Facts
Old-Fashioned Cake Doughnuts
Amount Per Serving (1 doughnut)
Calories 140 Calories from Fat 27
% Daily Value*
Fat 3g5%
Saturated Fat 1g6%
Cholesterol 19mg6%
Sodium 221mg10%
Potassium 141mg4%
Carbohydrates 25g8%
Sugar 8g9%
Protein 2g4%
Vitamin A 95IU2%
Calcium 60mg6%
Iron 1.1mg6%
* Percent Daily Values are based on a 2000 calorie diet.

Here’s one more to pin on your Pinterest boards!You'll be surprised how easy it is to prepare old-fashioned cake doughnuts, with hints of cinnamon and nutmeg. The recipe makes 12 doughnuts + holes!


Save

Save

Save

Save

Save

Save

Save

Save

Save

Save

Save

Save

Save

Save

Save

Save

Save

Save

Save

Chicken Divan

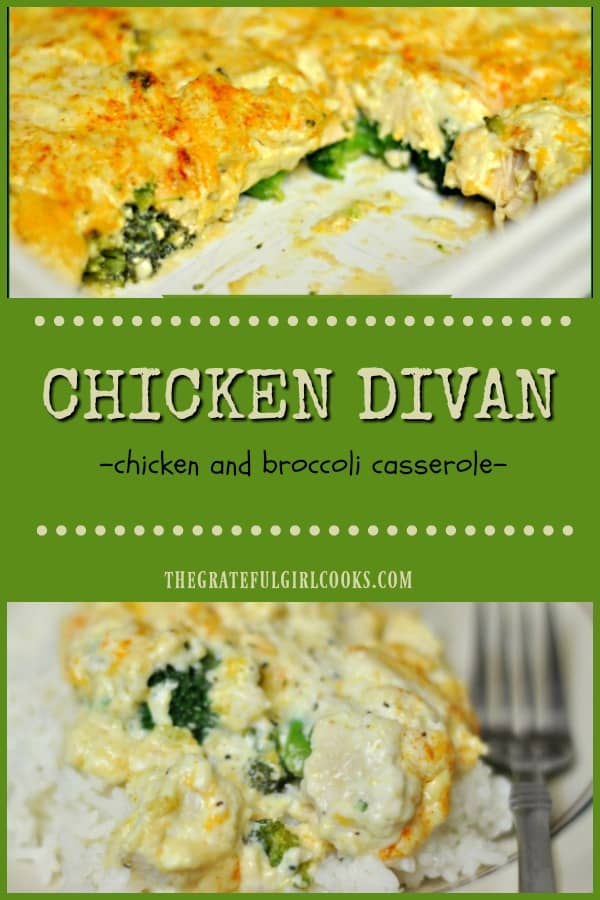
Chicken Divan is a delicious, easy to make casserole, with chicken breasts and broccoli, baked in a creamy cheese sauce, and served on a bed of fluffy rice.Chicken Divan is a delicious, easy to make casserole, with chicken breasts and broccoli, baked in a creamy cheese sauce, and served on a bed of fluffy rice.
Over 39 years ago, just before getting married, a friend gave me this recipe for Chicken Divan. At this point in my life it would be difficult to count how many times I have made this fantastic casserole recipe over the years. It has been a family favorite!

According to Wikipedia, Chicken Divan was named after the Divan Parisienne Restaurant in New York City where it was created for a contest their Chef entered. His recipe for a chicken casserole, with broccoli, in a creamy Mornay sauce won the contest and became the restaurant’s signature dish!

Scroll Down For A Printable Recipe Card At The Bottom Of The Page

How I Received This Recipe For Chicken Divan

Many years ago I was given the recipe by my friend Elnora when I was getting married. I worked for Elnora’s husband in the Music Department at the church I attended, and that is how we met. Now, over 40 years later, I am so grateful she gifted me with her recipe, because we truly LOVE this chicken divan.

The recipe makes a phenomenal tasting casserole that serves 8-10 people, and is VERY easy to prepare! Here’s how you make this: (by the way… when I took these photos I only made HALF the recipe, which is reflected in the photos).

Making Chicken Divan

Before assembling the casserole, cook boneless chicken breasts in boiling water until done. You can add onion, celery, and carrots to water for additional flavoring if desired. Remove  the chicken pieces when done, and let them cool. Once chicken is cool, cut it into bite-size pieces, and set aside.

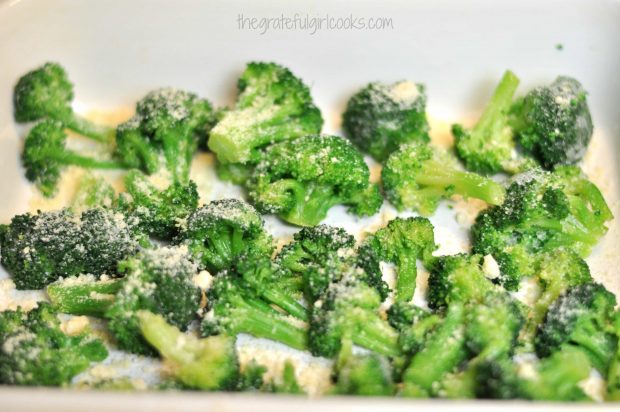
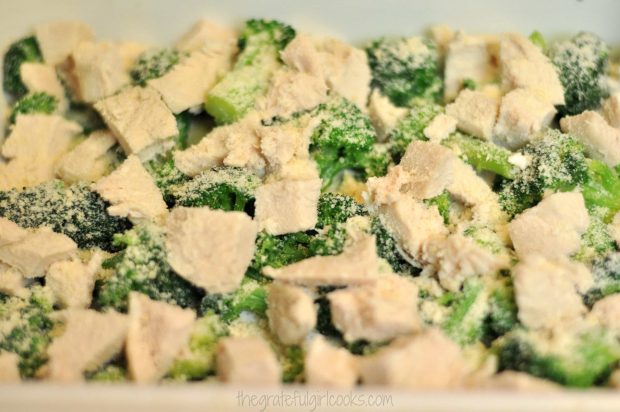
Spray a 9×13 baking pan with non-stick spray. Arrange thawed broccoli across bottom of baking pan. Sprinkle generously with grated Parmesan cheese.

Broccoli and Parmesan in casserole dish

Arrange the chicken cubes on top of the broccoli.  Sprinkle the top of the casserole again with Parmesan cheese.

Chicken breast cubes placed on top of broccoli

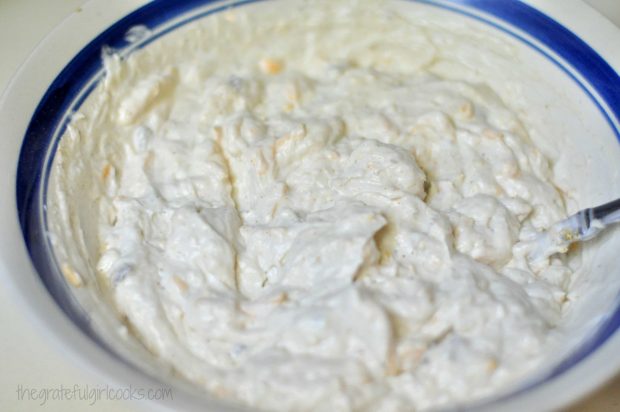
In a medium bowl, combine cream of mushroom soup, sour cream, mayonnaise, grated Cheddar, lemon juice, curry powder, salt and pepper. Mix these ingredients until they are fully combined. The sauce will be fairly thick.

Sauce is mixed together for chicken divan.

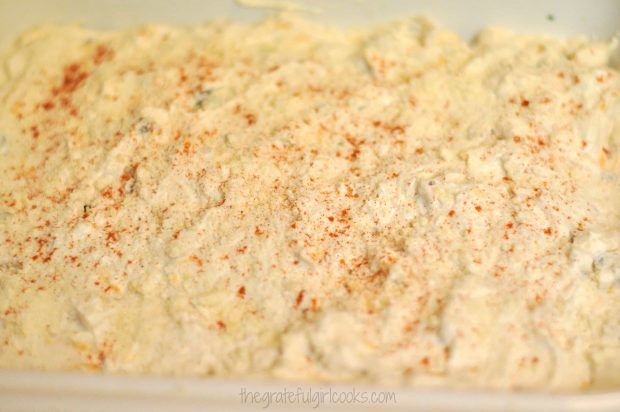
Spoon or pour the sauce evenly over the top of the casserole, spreading it out, to cover.  Generously sprinkle the top with additional Parmesan cheese, then lightly sprinkle with paprika.

Chicken casserole is sprinkled with Parmesan cheese and paprika.

Time To Bake The Chicken Divan!

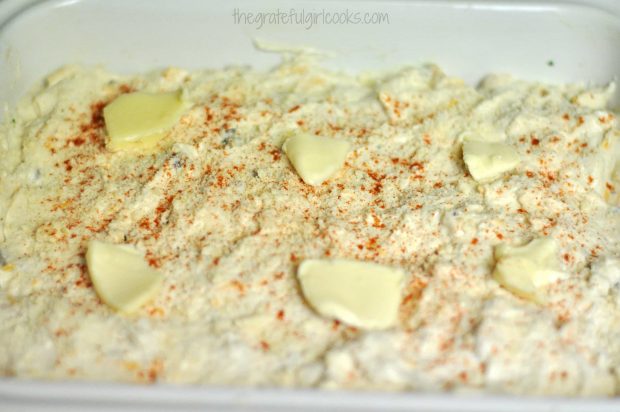
Place several small pads of butter on the top of the chicken divan casserole. Bake, uncovered, in a 350 degree oven for 35-40 minutes, until golden in color. The cheese sauce should be bubbly around the edges of the pan.

Pads of butter placed on top of casserole before baking

When the chicken divan is done, remove the pan to a hot pad, and let it sit for 5-6 minutes. This will allow the casserole time to firm up a bit (the sauce is VERY hot!).

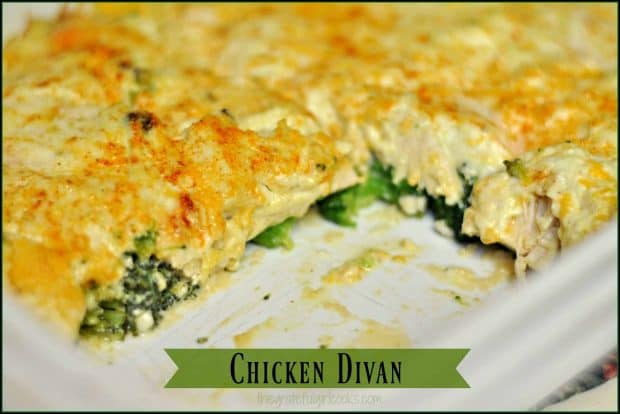
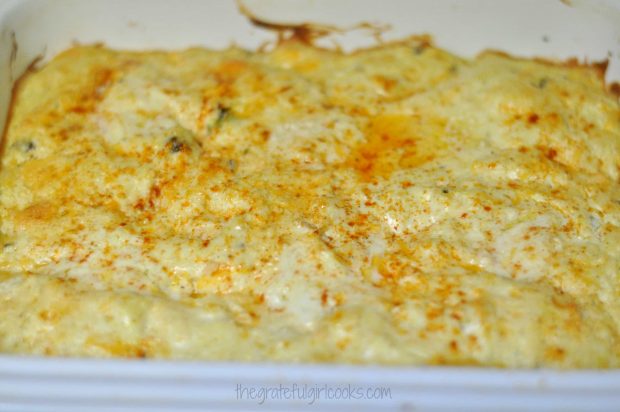
Casserole will be golden brown and bubbly when done baking.

Time To Serve It And Eat!

When ready, serve hot over fluffy rice, and ENJOY this delicious chicken divan casserole! It’s wonderful, because you’ve got chicken, rice AND broccoli all in one dish. The leftovers are fabulous, as well.

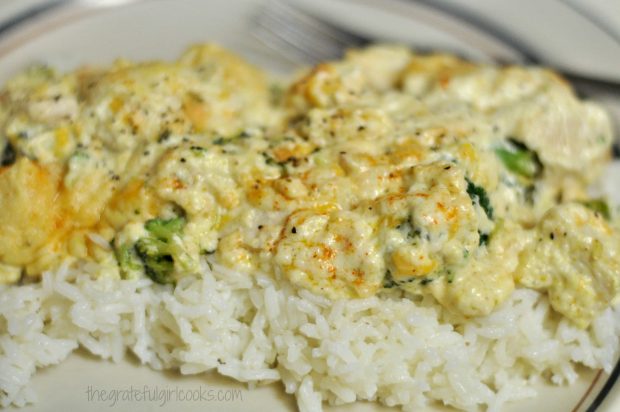
We enjoy this chicken and broccoli casserole served over white rice

Chunks of chicken breast taste magnificent with the sauce and broccoli. Placing it on a bed of rice provides a great medium to soak up some of the delicious sauce! It’s SOOOO delicious!

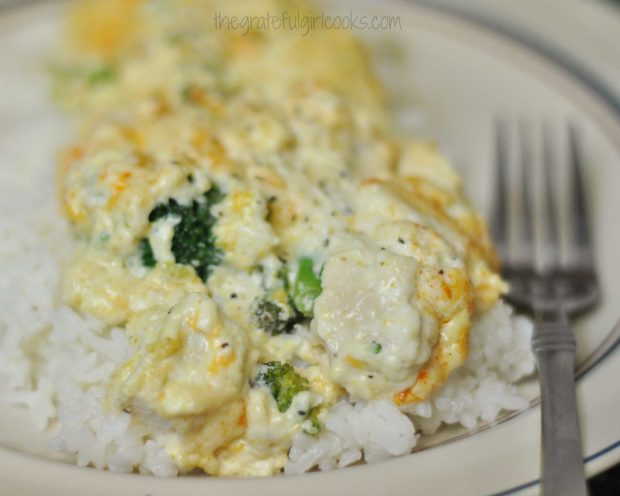
Chicken divan over rice, on plate with fork

While I know this is not the most “health-conscious” or calorie-conscious meal, sometimes ya just gotta go for it and enjoy a great meal! Everything in moderation, right? Sure hope you will try this recipe… it’s a definite KEEPER!

Looking For Other CASSEROLE Recipes?

You can find all of my recipes in the Recipe Index, located at the top of the page. You might also enjoy my casserole recipes for:

Thank you for visiting this website. I appreciate you using some of your valuable time to do soIf you’re interested, I publish a newsletter 2 times per month with all the latest recipes, and other fun info. I would be honored to have you join our growing list of subscribers, so you never miss a great recipe! There is a Newsletter subscription box on the top right side (or bottom) of each blog post, depending on the device you use, where you can easily submit your e-mail address (only) to be included in my mailing list.

You can also follow me on social media:

Facebook page: The Grateful Girl Cooks!
Pinterest:
The Grateful Girl Cooks!
Instagram:
jbatthegratefulgirlcooks

Have a wonderful day, friends.

Author's signatureRecipe Source: Elnora Hall

0 from 0 votes
Chicken Divan
Prep Time
30 mins
Cook Time
40 mins
Total Time
1 hr 10 mins
 
Chicken Divan is a delicious, easy to make casserole, with chicken breasts and broccoli, baked in a creamy cheese sauce, and served on a bed of fluffy rice.
Category: Entree - Casserole
Cuisine: American
Keyword: chicken divan
Servings: 10 servings
Calories Per Serving: 482 kcal
Author: JB @ The Grateful Girl Cooks!
Ingredients
  • 3 boneless , skinless chicken breasts
  • 2 small packages frozen broccoli spears
  • 2 cans cream of mushroom soup
  • 1 cup mayonnaise
  • 1 carton (8 ounces) sour cream
  • 1 cup grated sharp cheddar cheese
  • 1 Tablespoon fresh squeezed lemon juice
  • 1 teaspoon curry powder
  • Salt and pepper , to taste
  • Parmesan cheese (fresh grated OR can use "green shaker can")
  • Paprika (to sprinkle on top of casserole prior to baking)
  • Butter (enough for small pads of butter on top of casserole)
  • Rice , prepared according to instructions on package
Instructions
  1. Cook chicken breasts in water (enough to cover); bring to a low boil, cook until chicken is done (about 25-30 mins.). See *NOTES. When done, remove chicken from water. Let cool, then cut into bite-sized cubes.
  2. Spray a 9x13 baking pan with non-stick spray. Place thawed broccoli evenly on bottom of baking pan. Sprinkle generously with Parmesan cheese. Evenly arrange the chicken pieces over the broccoli. Sprinkle again with Parmesan cheese.
  3. In a medium bowl, fully combine (with a spoon) cream of mushroom soup, sour cream, mayonnaise, grated cheddar cheese, lemon juice, curry powder, and salt and pepper (to taste). Pour or spoon sauce evenly over top of casserole. Spread out, to cover entire casserole. Generously sprinkle with Parmesan cheese, then lightly sprinkle with paprika. Dot the top of casserole with small pads of butter.
  4. Bake casserole, uncovered, at 350 degrees for 35-40 minutes, until casserole is bubbling all around the edges and is golden brown in color. Remove casserole. Let it sit for 5-6 minutes to allow time to firm up just a bit.
  5. Serve casserole hot over a bed of fluffy rice... and ENJOY!
Recipe Notes

Original recipe says to cook chicken with onion, celery & carrots for flavor. I have never done this, but include it in case you wish to do so. The original recipe also said to cook the frozen broccoli, but I find that if I thaw it out completely, then pat it dry, there is no need to cook it.

Nutrition Facts
Chicken Divan
Amount Per Serving (1 serving)
Calories 482 Calories from Fat 261
% Daily Value*
Fat 29g45%
Saturated Fat 9g56%
Cholesterol 61mg20%
Sodium 734mg32%
Potassium 433mg12%
Carbohydrates 36g12%
Fiber 1g4%
Sugar 1g1%
Protein 17g34%
Vitamin A 605IU12%
Vitamin C 41.7mg51%
Calcium 156mg16%
Iron 1.4mg8%
* Percent Daily Values are based on a 2000 calorie diet.

Here’s one more to pin on your Pinterest boards!Chicken Divan is a delicious, easy to make casserole, with chicken breasts and broccoli, baked in a creamy cheese sauce, and served on a bed of fluffy rice.


Save

Save

Save

Save

Save

Save

Save

Save

Save

Save

Save

Save

Save

Save

Lime, Cranberry & Raspberry Refresher

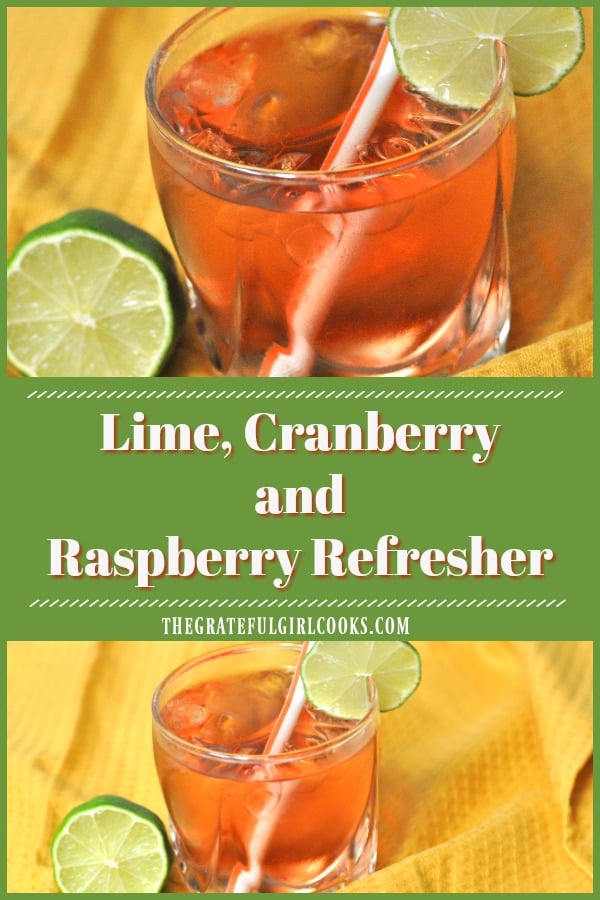
Lime Cranberry Raspberry Refresher is a family-friendly, delicious, sparkling, non-alcoholic beverage everyone can enjoy, especially on warm days!

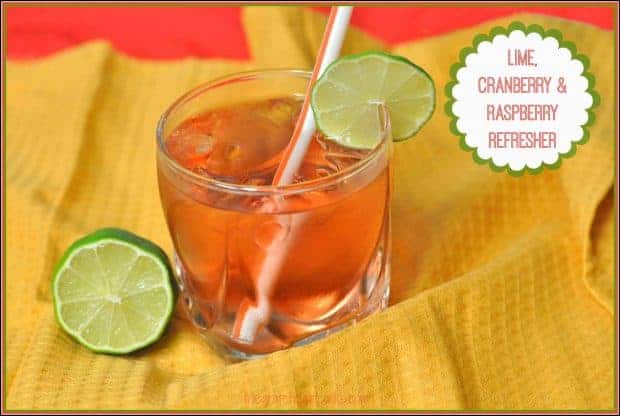
Looking for a great tasting, bubbly beverage everyone can enjoy during the upcoming holidays?  How about a Lime Cranberry Raspberry Refresher? This non-alcoholic beverage also contains apple juice and sparkling water, and I think you will really like it!

The lime cranberry raspberry refresher recipe is absolutely simple to prepare (ready in 3 minutes!), and makes eight, 1 cup servings.  It is full of cranberry-raspberry juice, apple juice, and lime infused sparkling water, so this drink has plenty of flavor!

I found the recipe in a cookbook I own called “Cooking Light – Fresh Food Superfast”, changed the recipe up just a bit, and REALLY enjoyed it!  The cookbook got it right – a pitcher of this delicious drink certainly IS super fast to prepare!

Scroll Down For A Printable Recipe Card At the Bottom Of The Page

Lime Cranberry Raspberry Refresher Is Also Perfect For The Holidays!

If you want to make a festive non-alcoholic beverage that everyone can enjoy (including the kids), consider making this refreshing drink during the holidays.  You can add fresh or frozen raspberries and/or frozen cranberries to each drink, and garnish each glass with a lime wedge, to make it even more festive looking!

Looking For Other Refreshing, Family-Friendly Drinks?

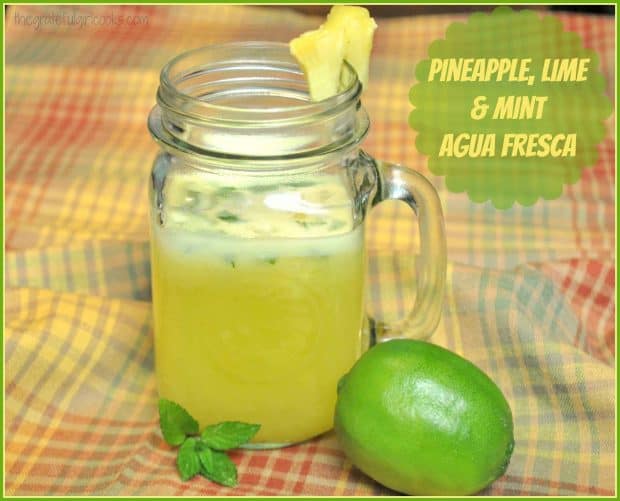
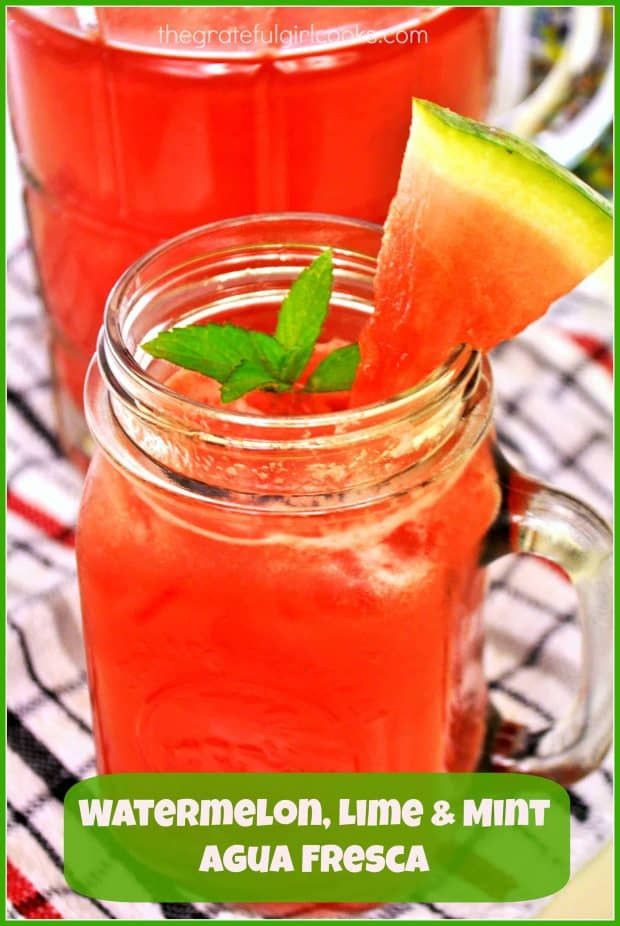
If you enjoy or are searching for other sparkling beverages like this that are non-alcoholic, you might also really enjoy my recipes for Pineapple, Lime and Mint Agua Fresca , Watermelon, Lime and Mint Agua Fresca, or homemade Blackberry Soda.  All are equally delicious!

Showing another agua fresca refreshing drink with pineapple

Any of these cold, refreshing beverages would taste GREAT on a hot day… don’t ya think?

Showing another refreshing beverage with watermelon

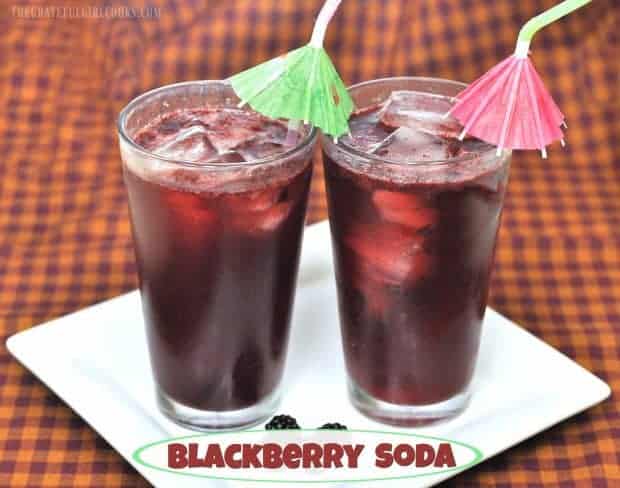
Another refreshing beverage using fresh blackberries

Sure hope you enjoy this colorful, bubbly and flavorful lime cranberry raspberry refresher! We sure do. Have a wonderful day, and be sure to check out ALL of my recipes in the Recipe Index, located at the top of the page.

Interested In More Recipes?

Thank you for visiting this website. I appreciate you using some of your valuable time to do soIf you’re interested, I publish a newsletter 2 times per month (1st and 15th) with all the latest recipes, and other fun info. I would be honored to have you join our growing list of subscribers, so you never miss a great recipe!
There is a Newsletter subscription box on the top right side (or bottom) of each blog post, depending on the device you use, where you can easily submit your e-mail address (only) to be included in my mailing list.

You Can Also Find Me On Social Media:

Facebook page: The Grateful Girl Cooks!
Pinterest:
The Grateful Girl Cooks!
Instagram:
jbatthegratefulgirlcooks

Author's signature

Recipe Adapted from: The cookbook called “Cooking Light – Fresh Food Superfast”, page 150, published 2011, Time Home Entertainment, Inc.

0 from 0 votes
Lime, Cranberry & Raspberry Refresher
Prep Time
3 mins
Cook Time
0 mins
Total Time
3 mins
 
Lime Cranberry Raspberry Refresher is a family-friendly, delicious, sparkling, non-alcoholic beverage everyone can enjoy, especially on warm days!
Category: Beverage
Cuisine: American
Keyword: lime cranberry raspberry refresher
Servings: 8 servings
Calories Per Serving: 86 kcal
Author: JB @ The Grateful Girl Cooks!
Ingredients
  • 4 cups cranberry-raspberry juice
  • 2 cups apple juice
  • 2 cups lime flavored sparkling water
  • Ice cubes (optional, but recommended)
  • Fresh raspberries or frozen cranberries (optional)
  • Thin lime wedges (as garnish for glass-optional)
Instructions
  1. Pour the cranberry-raspberry juice and apple juice into a large pitcher. Stir in 2 cups sparkling LIME water, until combined.
  2. Serve drink over ice cubes.

  3. (Optional) Add frozen cranberries OR fresh or frozen raspberries to each glass (for decoration).

  4. Garnish glass with a thin lime wedge, if desired.
  5. Serve, and enjoy!
Recipe Notes

If you wish to make this up ahead of serving time, mix cranberry/raspberry juice and apple juice in pitcher. Cover and refrigerate. Just before serving, add cold lime sparkling water to pitcher. Serve over ice, and other garnishes.

Nutrition Facts
Lime, Cranberry & Raspberry Refresher
Amount Per Serving (1 serving (8 oz.))
Calories 86
% Daily Value*
Sodium 29mg1%
Potassium 160mg5%
Carbohydrates 22g7%
Sugar 21g23%
Vitamin A 55IU1%
Vitamin C 12.3mg15%
Calcium 21mg2%
Iron 0.4mg2%
* Percent Daily Values are based on a 2000 calorie diet.

Here’s one more to pin on your Pinterest boards!Lime Cranberry Raspberry Refresher is a family-friendly, delicious, sparkling, non-alcoholic beverage everyone can enjoy, especially on warm days!!


Save

Save

Save

Save

Save

Save

Save

Save

Save

Save

Save

Save

Save

Save

Save

Save

Save

Save

Save

Save

Save

Chocolate Cream Cheese Danish

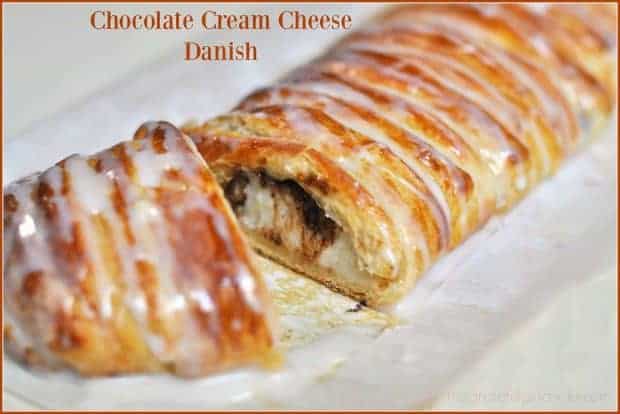
You’re gonna LOVE this decadent chocolate cream cheese danish! This chocolate filled pastry is EASY to make, using store bought crescent roll dough!You're gonna LOVE this decadent chocolate cream cheese danish! This chocolate filled pastry is EASY to make, using store bought crescent roll dough!

If you enjoy a good pastry AND enjoy chocolate, I’m pretty sure you will love this recipe for a Chocolate Cream Cheese Danish I found online recently. Added bonus? It’s EASY to make! This pastry is super easy to prepare, because it starts with a can of store-bought crescent rolls, and only takes about 30 minutes total to prepare! Let me show you just how easy it is to make this treat!

Scroll Down For A Printable Recipe Card At The Bottom Of The Page

How To Make A Chocolate Cream Cheese Danish

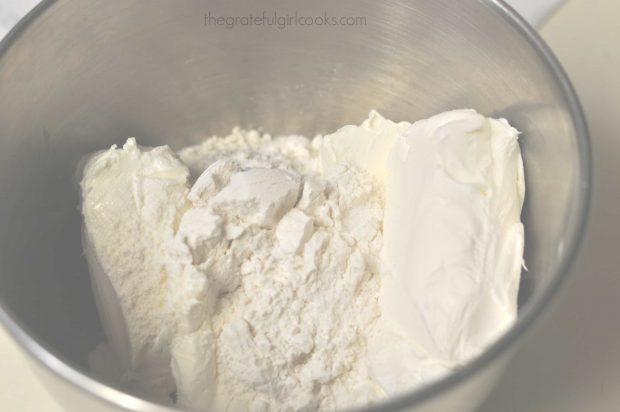
Before beginning, preheat your oven to 375 degrees F. (See? I told you this would be EASY!). Mix together room temperature cream cheese, sugar, flour and vanilla extract in a small bowl. I used an electric mixer to do this and it was mixed in a flash! Once it is creamy and thoroughly combined, set aside.

Cream cheese and flour in metal mixing bowl (filling for danish)

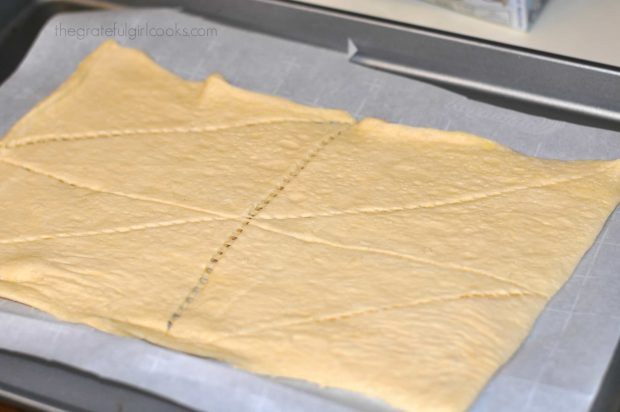
Open the can of crescent dough; without separating the triangles, unroll the dough and place it onto a parchment paper-lined baking sheet. Using your fingers, press the dough together to close all the holes (perforations) up, so you have one complete piece of dough.

Crescent dough rolled out on parchment paper to make chocolate cream cheese danish.

Filling The Pastry

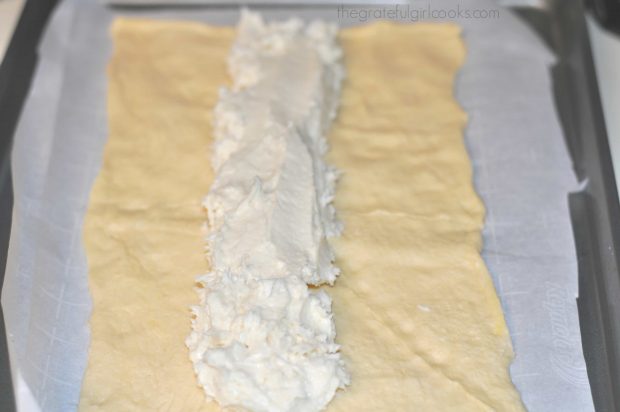
Once you have pressed all the holes in the dough together, drop the cream cheese filling (by spoonfuls) in the center, down the length of the dough. Make sure to evenly spread the filling out, so that the filling for the chocolate cream cheese danish is between 2-3 inches wide.

Cream cheese filling for chocolate cream cheese danish, is placed on crescent dough.

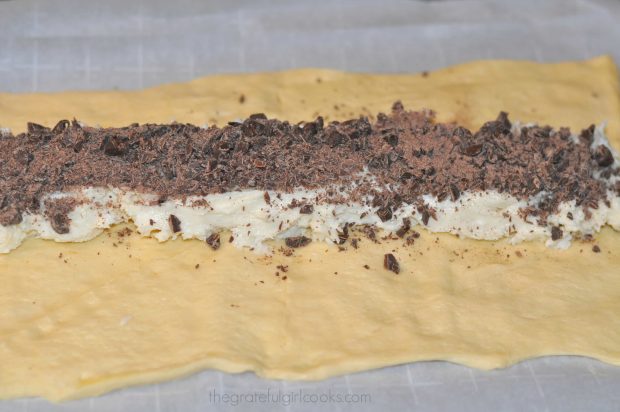
Evenly sprinkle the chopped chocolate over the top of the cream cheese filling.

Chopped chocolate sprinkled onto cream cheese filling on dough

Cutting The Pastry Strips For “Braiding”

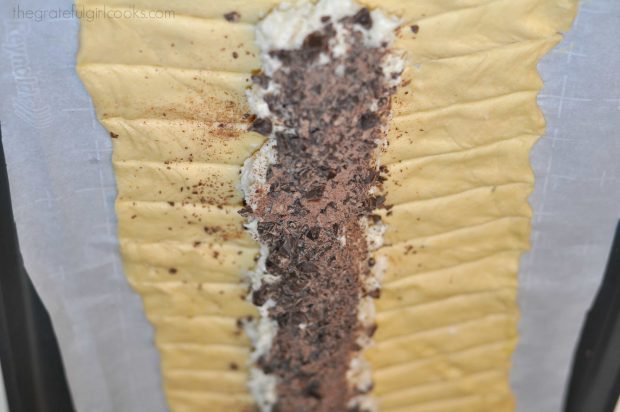
Starting at one end of the pastry, cut 1 inch strips (at a slight angle toward the top) into both sides of the dough. Cut in until it reaches the filling.

Pull the strips up and over the filling making sure to alternate sides (L,R,L,R, etc) until entire chocolate cream cheese danish has been “braided. Tuck in any extra bits of dough that you may end up with, on each end of the roll.

Dough with strips cut on sides, with chocolate and cream cheese in middle

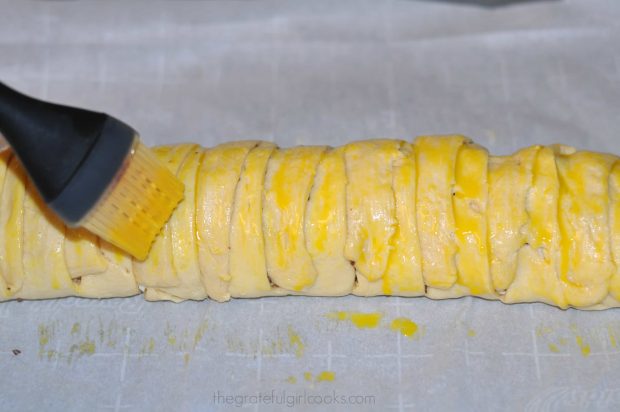
Once the chocolate cream cheese danish has been braided and rolled, it’s time to bake it, after it gets one more special touch. Give the chocolate cream cheese danish an “egg bath” BEFORE baking. To do this, whisk an egg YOLK in a small bowl, then brush the surface of the pastry roll with the beaten yolk.

Brushing egg yolk onto the chocolate cream cheese danish.

Ready To Bake!

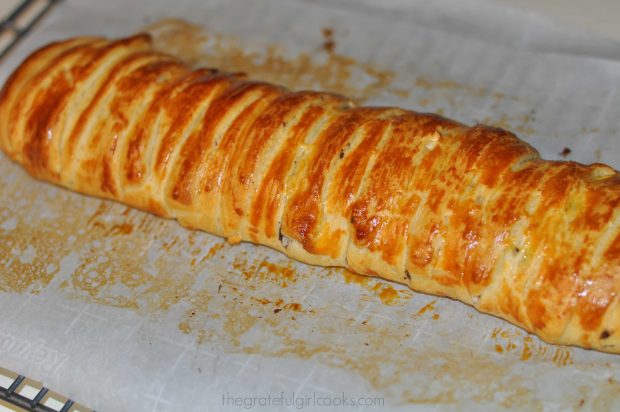
Bake the chocolate cream cheese danish at 375 degrees for 20 minutes, until the pastry is golden brown in color. Remove the pastry from the oven and place it (still on the parchment paper) onto a wire rack to cool.  Let it cool COMPLETELY.

Browned chocolate cream cheese danish, right out of the oven.

Make The Glaze For The Chocolate Cream Cheese Danish

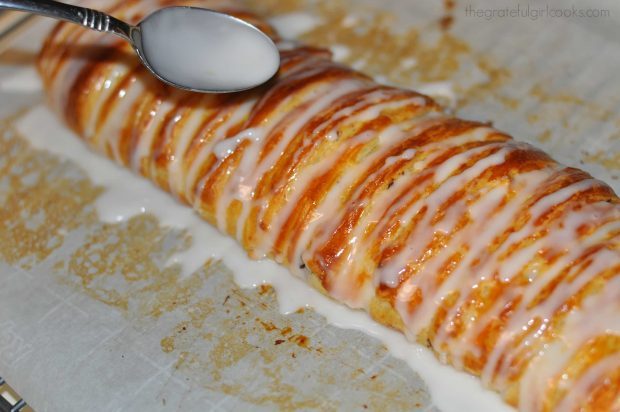
While the chocolate cream cheese danish is cooling, make the glaze to top the pastry.  Mix together a simple glaze of powdered sugar, milk, and vanilla in a small bowl, until smooth. Once the pastry has cooled completely, decoratively drizzle the glaze back and forth across the pastry until all the glaze is gone.

The parchment paper will help to collect any run-off glaze, and will help to make it an easy cleanup.  Let the chocolate cream cheese danish rest, while the glaze firms up.

Glaze being spooned over top of baked chocolate cream cheese danish.

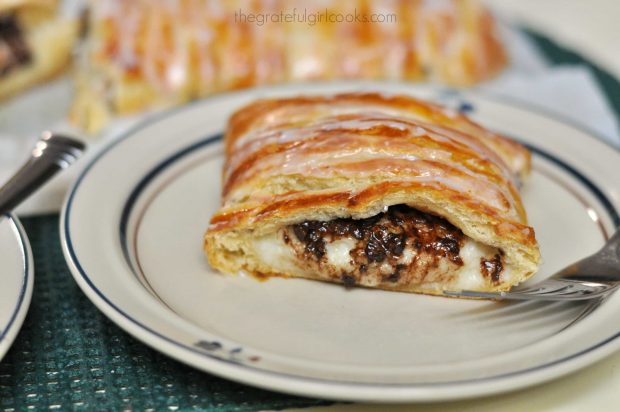
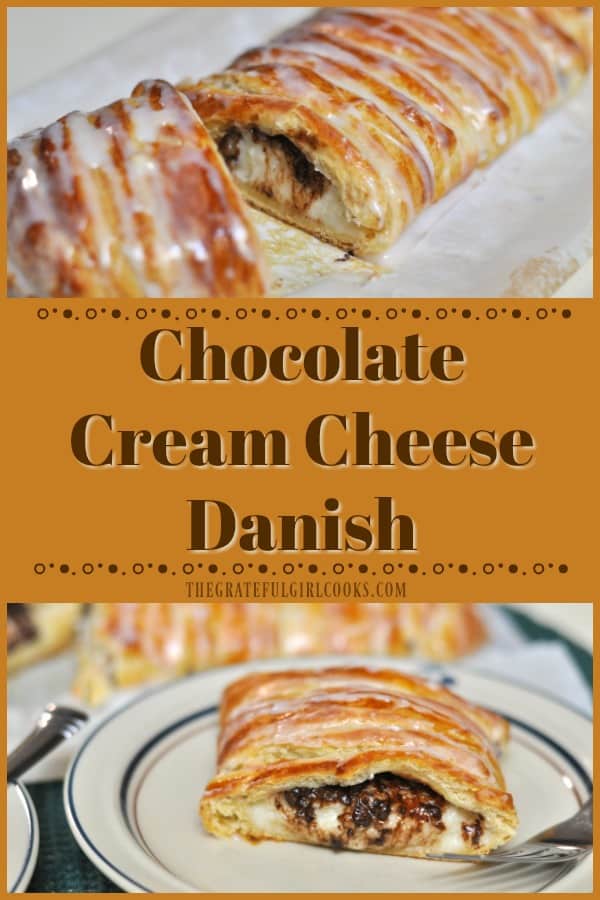
The pastry is ready to serve, once the glaze on top has become firm.  When ready to serve, cut the pastry into slices, grab a cup of coffee or tea… and dig in!

Slice of chocolate cream cheese danish on a plate with fork

This chocolate pastry is decadently rich, creamy, and filled with chocolate, so obviously it’s not something you want to eat every day, but for an occasional treat! It really is delicious!  A small piece goes a long way! Sure hope you enjoy this chocolate cream cheese danish. We sure do. Thanks for stopping by, and have a great day.

Looking For More Delicious Breakfast Treats Like This?

You can find all of my recipes in the Recipe Index, located at the top of the page. I have lots of yummy breakfast treats, including:

Interested In More Recipes?

Thank you for visiting this website. I appreciate you using some of your valuable time to do soIf you’re interested, I publish a newsletter 2 times per month (1st and 15th) with all the latest recipes, and other fun info. I would be honored to have you join our growing list of subscribers, so you never miss a great recipe!
There is a Newsletter subscription box on the top right side (or bottom) of each blog post, depending on the device you use, where you can easily submit your e-mail address (only) to be included in my mailing list.

You Can Also Find Me On Social Media:

Facebook page: The Grateful Girl Cooks!
Pinterest:
The Grateful Girl Cooks!
Instagram:
jbatthegratefulgirlcooks

Author's signatureRecipe Source:  http://www.laurenslatest.com/chocolate-cream-cheese-danish/

0 from 0 votes
Chocolate Cream Cheese Danish
Prep Time
10 mins
Cook Time
20 mins
Total Time
30 mins
 
You're gonna LOVE this decadent chocolate cream cheese danish! This chocolate filled pastry is EASY to make, using store bought crescent roll dough!
Category: Breakfast
Cuisine: American
Keyword: chocolate cream cheese danish
Servings: 8 servings
Calories Per Serving: 330 kcal
Author: JB @ The Grateful Girl Cooks!
Ingredients
For Pastry:
  • 1 can crescent rolls
  • 8 ounces cream cheese , softened (at room temp)
  • 1/2 cup granulated sugar
  • 2 Tablespoons all purpose flour
  • 1 teaspoon vanilla extract
  • 2 ounces chopped semi-sweet chocolate
  • 1 egg yolk , beaten (for brushing onto rolled pastry before baking)
For Glaze:
  • 1/2 cup powdered sugar
  • 1 teaspoon milk
  • 1/4 teaspoon vanilla extract
Instructions
  1. Before beginning, preheat your oven to 375 degrees F.
  2. Cream together softened cream cheese, granulated sugar, flour and vanilla until smooth. Set aside.
  3. Unroll the crescent dough without separating any of the triangles. Keep the dough all in one piece! Place dough onto a parchment paper-lined baking sheet, then press together all the perforations in the dough with your fingers.
  4. Spoon the cream cheese filling down the center of the dough lengthwise. Spread the dough out so it is 2-3 inches wide in center of roll.
  5. Evenly sprinkle chopped chocolate on top of the cream cheese filling.
  6. Cut 1 inch strips of dough evenly on each side of the filling (at a slight angle toward the top).
  7. Starting at top, lift pieces of dough and pull up and over filling, alternating sides as you go, so that you end up with a somewhat "braided" pastry. (Left side strip, Right side strip, etc.). Tuck any leftover pieces of dough into the ends.
  8. Beat an egg yolk in a small dish. Using a pastry brush, gently "paint" the yolk over the surface of the pastry until covered. Place pastry in a preheated 375 degree oven; bake for 20 minutes, until golden brown in color. Remove pastry (keeping the parchment paper underneath) to a wire rack. Let cool completely.
  9. Mix together glaze ingredients until smooth. Once pastry is completely cool, decoratively drizzle glaze over surface of pastry. Let glaze firm up, then cut into slices, serve and enjoy!
Nutrition Facts
Chocolate Cream Cheese Danish
Amount Per Serving (1 slice)
Calories 330 Calories from Fat 171
% Daily Value*
Fat 19g29%
Saturated Fat 9g56%
Cholesterol 56mg19%
Sodium 315mg14%
Potassium 79mg2%
Carbohydrates 37g12%
Sugar 26g29%
Protein 3g6%
Vitamin A 415IU8%
Calcium 35mg4%
Iron 1.1mg6%
* Percent Daily Values are based on a 2000 calorie diet.

Here’s one more to pin on your Pinterest boards!You're gonna LOVE this decadent chocolate cream cheese danish! This chocolate filled pastry is EASY to make, using store bought crescent roll dough!


Save

Save

Save

Save

Save

Save

Save

Save

Save

Save

Save

Honey BBQ Chicken Strips

Fantastic tasting honey BBQ chicken strips are marinated, seasoned & browned chicken breast tenders, covered with a sweet/sticky honey BBQ sauce and baked.Fantastic tasting honey BBQ chicken strips are marinated, seasoned & browned chicken breast tenders, covered with a sweet/sticky honey BBQ sauce and baked.
My husband and I really enjoyed a new (to us) recipe for Honey BBQ Chicken Strips that I made recently. Sweet and slightly sticky from a Honey/BBQ sauce, these nicely seasoned, browned, then baked chicken strips were fantastic!

Best part? The honey bbq chicken strips were full of flavor… and didn’t take too much time to make! NOTE: I only made a HALF recipe since only two of us were eating, so that is reflected in my photos.

Scroll Down For A Printable Recipe Card At The Bottom Of the Page

How To Make Honey BBQ Chicken Strips

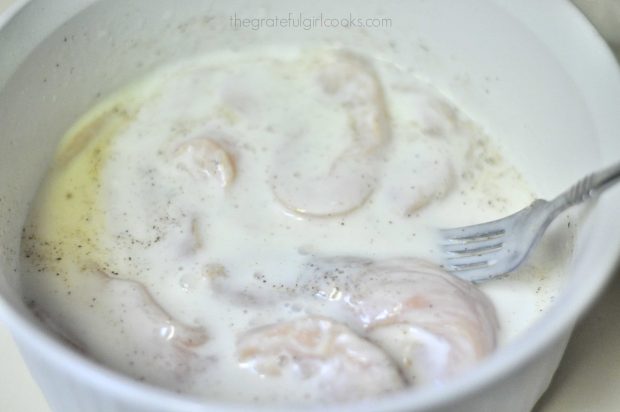
Cut boneless skinless chicken breasts into strips. Season the chicken strips with salt and pepper. Place the chicken in a medium sized bowl, cover with 2 cups of buttermilk, and stir to fully coat the chicken pieces.

Cover the bowl with plastic wrap, and refrigerate/marinate chicken for at least 2 hours. When chicken is nearly done marinating, preheat oven to 350 degrees and prep the remaining ingredients.

Chicken strips dipped in buttermilk in white bowl

Make The Coating For Chicken and Mix The BBQ Sauce

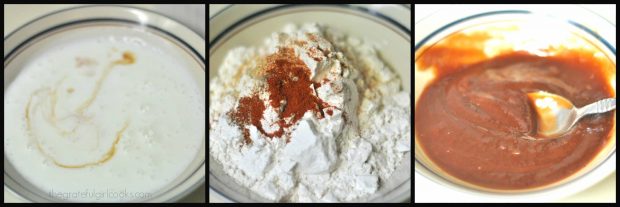
  1. Mix together 2 cups buttermilk and hot sauce in a small bowl. Set the bowl aside.
  2. Stir together flour, salt, pepper, garlic powder and paprika in a second bowl. Set the bowl aside.
  3. Mix together the BBQ sauce, honey and apple cider vinegar in a third bowl. Set the bowl aside.

Buttermilk, spices, and honey BBQ sauce for chicken strips in 3 bowls

Prepare The Chicken Strips For Cooking

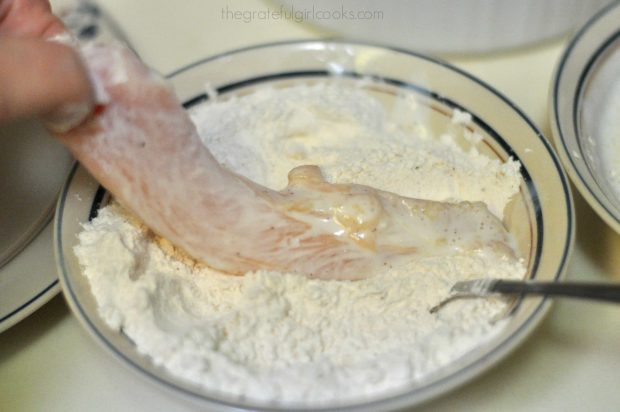
Once the chicken is done marinating, remove the chicken strips from the buttermilk and let excess buttermilk drip back into bowl. Dip and fully cover the chicken strips (one at a time) in:

  1. FLOUR MIXTURE (shake off excess), then
  2. BUTTERMILK MIXTURE (letting excess drip off), then
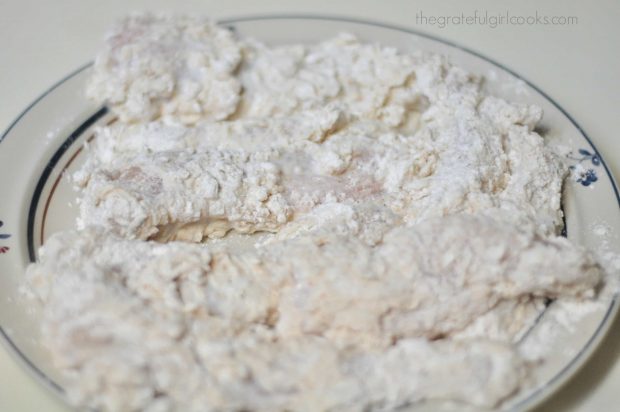
  3. Back in to the FLOUR MIXTURE. Set all the coated pieces of chicken on a large plate or platter until all pieces are finished being coated. It’s a tad messy, but keep going… it will be worth it!

Chicken breast strip dredged in flour for honey bbq chicken strips.

Floured chicken strips resting on plate

Cook The Chicken Strips

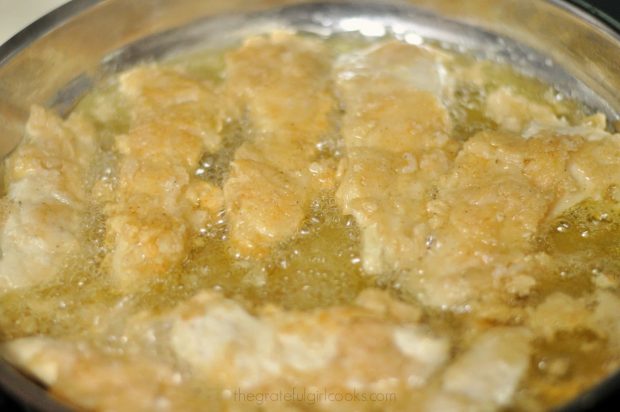
Heat vegetable oil in large skillet. Heat oil to 350-360 degrees (use a thermometer if you have one). Once the oil is at the correct temperature and is really hot, gently place the chicken strips in the oil. Cook in batches, if necessary.

Fry the chicken strips until they are golden brown, and then flip them over and cook the other side. Once both sides are golden brown, remove to wire rack or paper towels. The chicken will be baked after this step, so strips don’t have to be fully cooked through.

Chicken breast pieces for honey bbq chicken strips are cooking in hot oil in skillet.

Bake The Honey BBQ Chicken Strips

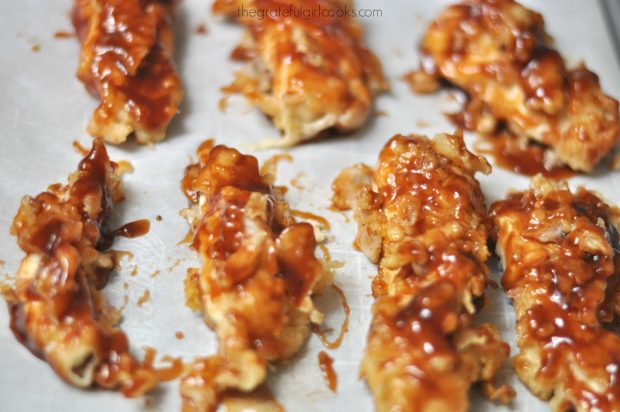
Using a pastry brush, cover the chicken strips with the BBQ/Honey mixture on both sides.  Place the coated strips onto parchment paper lined baking sheet. Bake the honey bbq chicken strips at 350 degrees for 20 minutes, until fully cooked.

Browned honey bbq chicken strips ready to bake in the oven.

Time To Serve Honey BBQ Chicken Strips

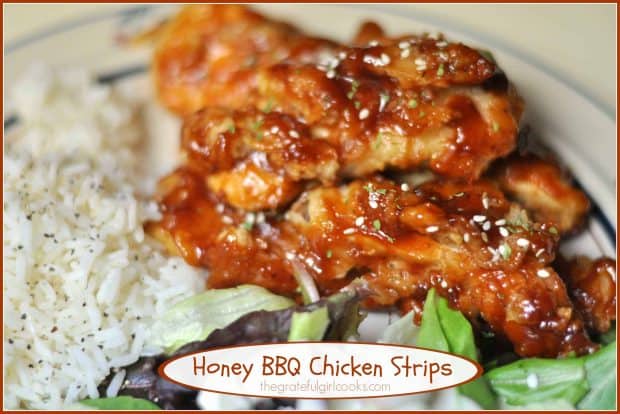
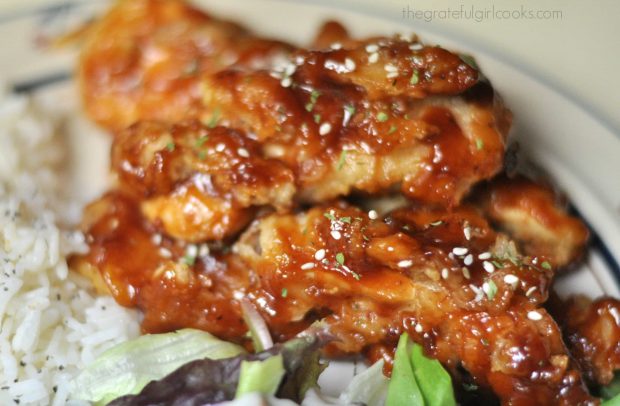
When done, remove the chicken strips from the oven. Sprinkle each of the pieces with sesame seeds and/or parsley (fresh or dried) for a garnish (optional). Serve the honey bbq chicken strips while hot… and enjoy!

Honey BBQ Chicken Strips on plate, with rice and salad

I served the honey bbq chicken strips for our dinner, with a small salad and rice on the side. The strips would also be a great “snack/appetizer” treat for munching on while watching football or a great game on TV with a friends or family! These delicious pieces of chicken have great flavor, and the sticky sweet BBQ sauce makes them “lip-smacking delicious”!

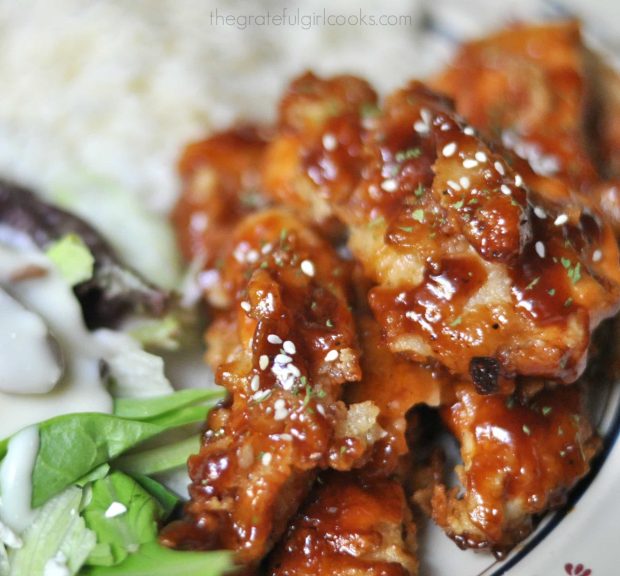
Close up photo of honey BBQ chicken strips.

I sure hope you will consider making these delicious honey bbq chicken strips. I am thankful to have found the recipe from Trish, at “Mom On Time Out”. It’s a “keeper”.  Have a blessed day!

Looking For More CHICKEN Recipes?

You can find all my recipes in the Recipe Index, located at the top of the page. I have LOTS of chicken recipes, including:

Interested In More Recipes?

Thank you for visiting this website. I appreciate you using some of your valuable time to do soIf you’re interested, I publish a newsletter 2 times per month (1st and 15th) with all the latest recipes, and other fun info. I would be honored to have you join our growing list of subscribers, so you never miss a great recipe!
There is a Newsletter subscription box on the top right side (or bottom) of each blog post, depending on the device you use, where you can easily submit your e-mail address (only) to be included in my mailing list.

You Can Also Find Me On Social Media:

Facebook page: The Grateful Girl Cooks!
Pinterest:
The Grateful Girl Cooks!
Instagram:
jbatthegratefulgirlcooks

Author's signature

Recipe Source: http://www.momontimeout.com/2015/08/honey-bbq-chicken-strips-recipe/

0 from 0 votes
Honey BBQ Chicken Strips
Prep Time
10 mins
Cook Time
35 mins
Total Time
45 mins
 
Fantastic tasting honey BBQ chicken strips are marinated, seasoned & browned chicken breast tenders, covered with a sweet/sticky honey BBQ sauce and baked.
Category: Entree
Cuisine: American
Keyword: honey BBQ chicken strips
Servings: 6 -8 servings
Calories Per Serving: 553 kcal
Author: JB @ The Grateful Girl Cooks!
Ingredients
  • 2 pounds chicken tenders or boneless chicken breasts , cut into long strips)
  • 1 teaspoon salt
  • 1 teaspoon black pepper
  • Vegetable oil (for frying... at least 1 inch deep)
  • 4 cups buttermilk (divided)
  • 1 Tablespoon hot sauce
  • 2 cups flour
  • 1 teaspoon salt
  • 1 teaspoon black pepper
  • 1 teaspoon garlic powder
  • 1 teaspoon paprika
  • 1 cup barbecue sauce
  • 1/4 cup honey
  • 1 Tablespoon apple cider vinegar
  • Sesame seeds/parsley (Optional, for garnish)
Instructions
  1. Season chicken strips with salt and pepper. Place in a medium sized bowl, cover with 2 cups of buttermilk, and stir to fully coat chicken pieces. Cover bowl, and refrigerate/marinate chicken for at least 2 hours. When chicken is nearly done marinating, preheat oven to 350 degrees and prep the remaining ingredients.
  2. In medium bowl, mix together 2 cups buttermilk and hot sauce. Set aside.
  3. In small bowl, stir together flour, salt, pepper, garlic powder and paprika. Set aside.
  4. In shallow bowl, mix together BBQ sauce, honey and apple cider vinegar. Set aside.
  5. When chicken is done marinating, remove strips from buttermilk and let excess drip off. Place chicken strips (coating one at a time) in FLOUR MIXTURE, then BUTTERMILK MIXTURE, then put back in FLOUR MIXTURE to coat. I set all the coated pieces on a large platter until all were coated.
  6. Heat vegetable oil in large skillet. Heat oil to 350-360 degrees (use a thermometer if you have one). Once the oil is at the correct temperature and is really hot, gently place the chicken strips in the oil. Fry until golden brown; flip over and cook other side. Cook in batches, if necessary.  Once both sides are golden brown, remove to wire rack or paper towels (chicken will be baked, so strips don't have to be fully cooked through).

  7. Using a pastry brush, cover the chicken strips with the BBQ/Honey mixture on both sides. Place the coated strips onto parchment paper lined baking sheet. Bake at 350 degrees for 20 minutes, until fully cooked. When done, remove from oven, sprinkle with sesame seeds and/or dried parsley for a garnish (optional). Serve and enjoy!
Nutrition Facts
Honey BBQ Chicken Strips
Amount Per Serving (1 serving (1.5 pieces))
Calories 553 Calories from Fat 90
% Daily Value*
Fat 10g15%
Saturated Fat 4g25%
Cholesterol 114mg38%
Sodium 1667mg72%
Potassium 951mg27%
Carbohydrates 71g24%
Fiber 1g4%
Sugar 35g39%
Protein 42g84%
Vitamin A 580IU12%
Vitamin C 3.7mg4%
Calcium 214mg21%
Iron 3mg17%
* Percent Daily Values are based on a 2000 calorie diet.

Here’s one more to pin on your Pinterest boards!Fantastic tasting honey BBQ chicken strips are marinated, seasoned & browned chicken breast tenders, covered with a sweet/sticky honey BBQ sauce and baked.

Save

Save

Save

Save

Save

Save

Save

Save

Save

Save

Save

Save

Save

Save

Save