Strawberry Cheesecake Ice Cream

It’s easy to make delicious, fresh homemade strawberry cheesecake ice cream, with an ice cream maker and only a few common ingredients!It's easy to make delicious, fresh homemade strawberry cheesecake ice cream, with an ice cream maker and only a few common ingredients!
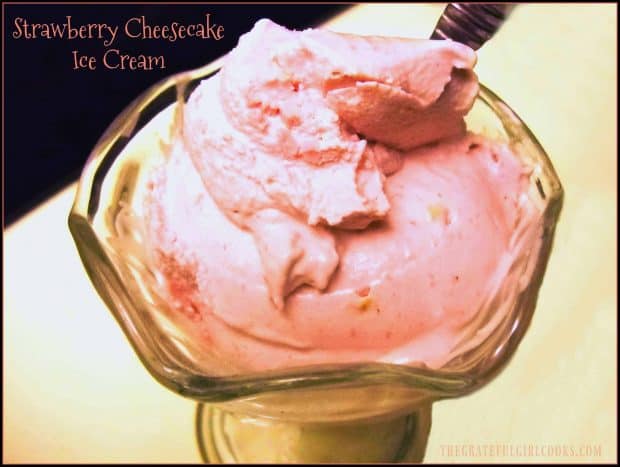
I love cheesecake, and I love strawberries. Believe it or not, I also love cheesecake with strawberry topping! So it stands to reason that I would also love homemade Strawberry Cheesecake Ice Cream!

It’s fun making homemade ice cream in my little electric ice cream maker that I received several years ago for my birthday. The kind I have is perfect for a quick batch… no ice cubes and no salt to freeze it.

It just sits on my kitchen counter waiting patiently for me.  I pour in the ice cream mixture and a little over 20 minutes later… boom… ice cream! It’s fun (and dangerous) to be able to make homemade ice cream, even when it’s snowing or pouring down rain outside.

Scroll Down For A Printable Recipe Card At The Bottom Of The Page

How I Came Up With Recipe

This recipe for strawberry cheesecake ice cream is an easy recipe I tried one summer while experimenting with a LOT of ice cream recipes. For this recipe I added in a few ingredients that I thought would make a great ice cream to my standard vanilla base.

Did I mention that I ate all the different kinds of ice cream I made that summer? Well… SOMEONE had to do it.  Heh heh heh. This recipe for Strawberry Cheesecake ice cream tasted great, and is very simple to make. Here’s how:

How To Make Strawberry Cheesecake Ice Cream

Place cleaned, stemmed, cored and sliced fresh strawberries, sugar and lemon juice into a blender. Blend on high until mixture is pureed.  Add 8 ounces of room temperature cream cheese (cut into chunks) to the liquid. Blend again until mixture is well pureed.

Transfer the strawberry/cream cheese mixture to a large bowl.  Stir in whipping cream, milk, and vanilla extract, to fully combine. This is you strawberry cheesecake ice cream base.

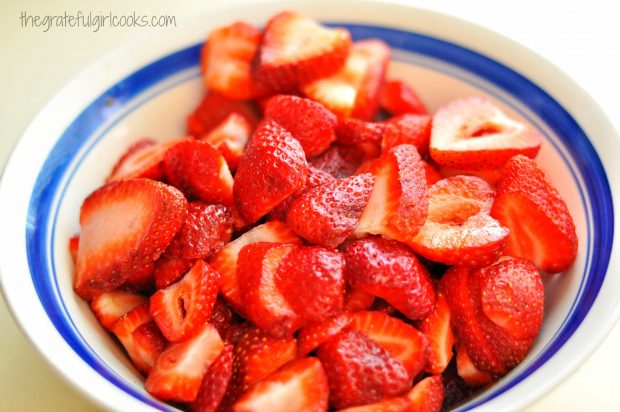
Fresh strawberries will be used to make strawberry cheesecake ice cream.

Pour the ice cream mixture into the cannister of an ice cream machine. Freeze, per manufacturer instructions until done. My beloved ice cream machine takes just over 20 minutes to freeze to soft-serve consistency.

The strawberry cheesecake ice cream is ready to eat right then and there, but I suggest transferring ice cream to a freezable container with a lid, and freeze for 2-3 additional hours to firm ice cream up to a more “scoopable” consistency.
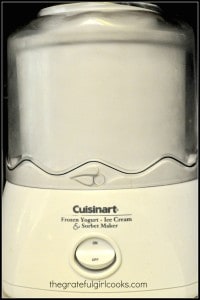
My Cuisinart ice cream machine.That’s it!  When the ice cream is done, grab a big ol’ scoop, plop down into the nearest chair and enjoy this delicious strawberry cheesecake ice cream.  Sure hope you enjoy it… we sure do!

Looking For More HOMEMADE ICE CREAM Recipes?

You can find all of my recipes in the Recipe Index, located at the top of the page. I have many ice cream recipes, including:

Interested In More Recipes?

Thank you for visiting this website. I appreciate you using some of your valuable time to do soIf you’re interested, I publish a newsletter 2 times per month (1st and 15th) with all the latest recipes, and other fun info. I would be honored to have you join our growing list of subscribers, so you never miss a great recipe!
There is a Newsletter subscription box on the top right side (or bottom) of each blog post, depending on the device you use, where you can easily submit your e-mail address (only) to be included in my mailing list.

You Can Also Find Me On Social Media:
Facebook page: The Grateful Girl Cooks!
Pinterest: The Grateful Girl Cooks!
Instagram: jbatthegratefulgirlcooks

Author's signature

0 from 0 votes
Strawberry Cheesecake Ice Cream
Prep Time
30 mins
Cook Time
0 mins
Total Time
30 mins
 
It's easy to make delicious, fresh homemade strawberry cheesecake ice cream, with an ice cream maker and only a few common ingredients!
Category: Dessert
Cuisine: American
Keyword: strawberry cheesecake ice cream
Servings: 10 (1/2 cup servings)
Calories Per Serving: 203 kcal
Author: JB @ The Grateful Girl Cooks!
Ingredients
  • 2 cups fresh strawberries , de-stemmed, cored, sliced
  • 3/4 cup granulated sugar
  • 2 teaspoons fresh lemon juice
  • 8 ounces cream cheese (room temp)
  • 1 cup whipping cream
  • 1/2 cup whole milk
  • 1 teaspoon vanilla extract
Instructions
  1. Combine strawberries, sugar and lemon juice in blender. Blend until mixture is smooth and pureed.
  2. Cut softened cream cheese into chunks and add to blender. Blend until smooth. Transfer fruit puree into a large mixing bowl.
  3. Stir in whipping cream, milk and vanilla until blended.
  4. Pour ingredients into freezer cannister of ice cream machine and freeze according to manufacturer instructions (usually between 20 and 25 minutes).
  5. When done, transfer ice cream to a covered freezer container and place in freezer for 2-3 hours to firm up to a scoopable consistency.
  6. Serve, and enjoy!
Nutrition Facts
Strawberry Cheesecake Ice Cream
Amount Per Serving (1 (1/2 cup serving))
Calories 203 Calories from Fat 108
% Daily Value*
Fat 12g18%
Saturated Fat 7g44%
Cholesterol 46mg15%
Sodium 121mg5%
Potassium 134mg4%
Carbohydrates 20g7%
Sugar 18g20%
Protein 2g4%
Vitamin A 495IU10%
Vitamin C 17.5mg21%
Calcium 67mg7%
Iron 0.2mg1%
* Percent Daily Values are based on a 2000 calorie diet.

Here’s one more to pin on your Pinterest boards!It's easy to make delicious, fresh homemade strawberry cheesecake ice cream, with an ice cream maker and only a few common ingredients!

Save

Save

Save

Save

Save

Save

Save

Save

Save

Save

Save

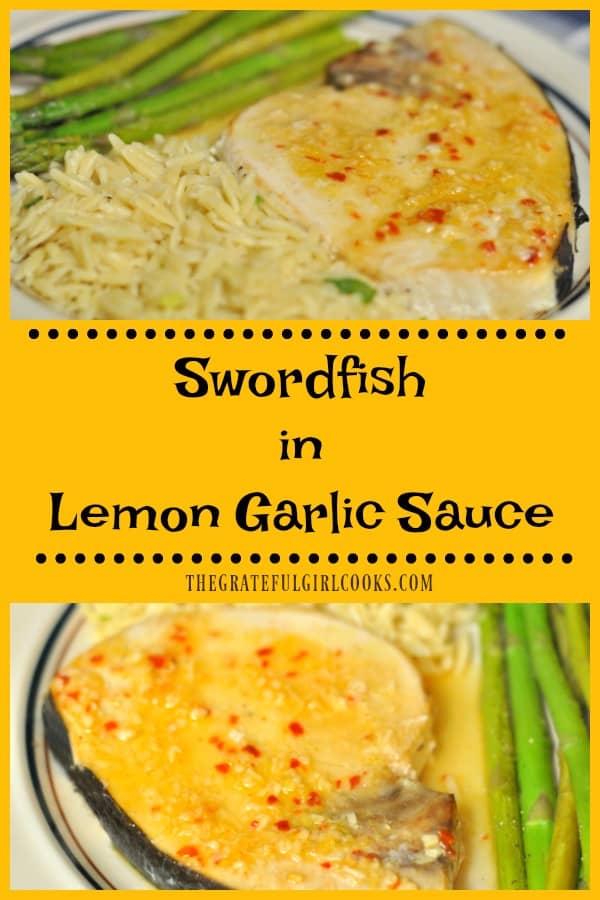
Swordfish In Lemon Garlic Sauce

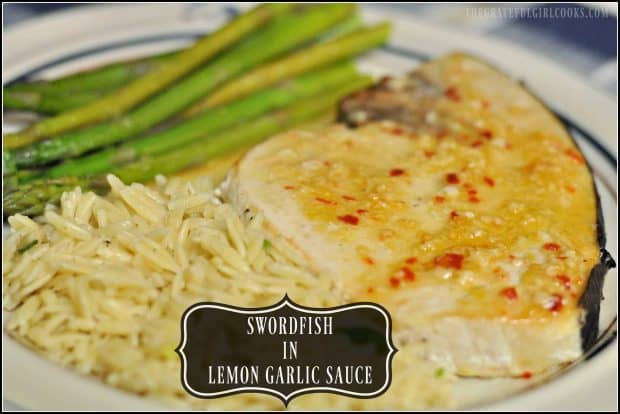
Swordfish fillets in lemon garlic sauce are pan-seared, then baked fish fillets. They’re served, glazed with an easy lemon garlic sauce!
Swordfish fillets in lemon garlic sauce are pan-seared, then baked fish fillets. They're served, glazed with an easy lemon garlic sauce!
Looking for an easy and flavorful way to cook swordfish that doesn’t involve an outdoor BBQ grill?  Here’s a very simple way to make Swordfish In Lemon Garlic Sauce! This seafood dish is really quite simple to prepare, and tastes wonderful with the addition of the yummy butter, wine, garlic and lemon sauce on top! Here’s how to make this simple dish:

Scroll Down For A Printable Recipe Card At The Bottom Of The Page

Pan-Sear Swordfish Fillets

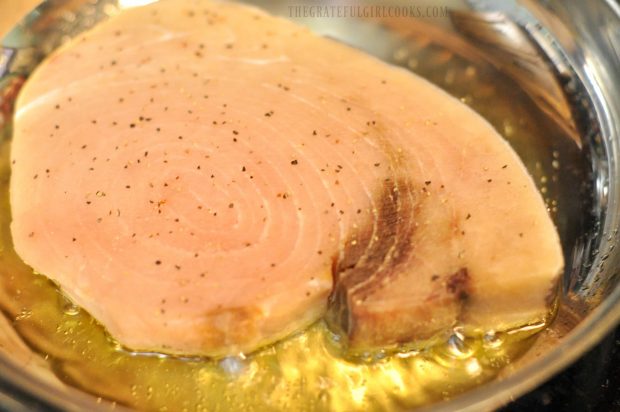
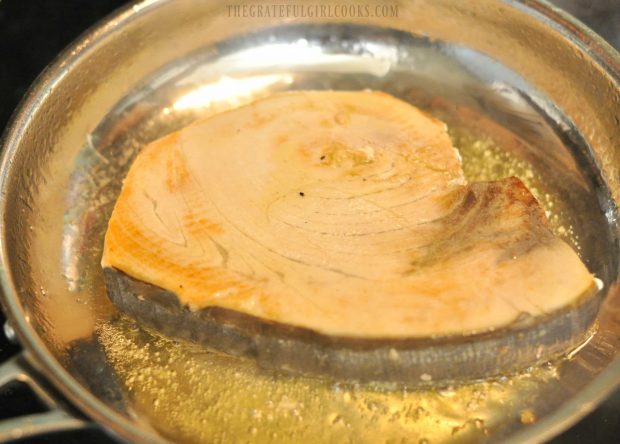
Preheat your oven to 400 degrees.  Heat olive oil in a large, OVEN-PROOF skillet until very hot (but not smoking). Add lightly seasoned swordfish fillets (at room temperature) to the hot oil. Cook the fish for 2-3 minutes, until golden brown on bottom. Turn the swordfish fillets over and cook the other side for 2-3 minutes.

A swordfish fillet is being pan-seared in oil in a large skillet.

Swordfish fillets are turned after pan-searing in olive oil.

Bake The Pan-Seared Swordfish

Place the ovenproof skillet and swordfish into a preheated oven. Continue to bake the fish for 7-12 minutes (time will vary based on thickness of swordfish). Begin checking on the fish after 6 minutes have passed. Once the fish flakes easily with a fork,  it is ready.  TIP: While the fish is baking, prepare the easy lemon garlic sauce.

Make The Lemon Garlic Sauce

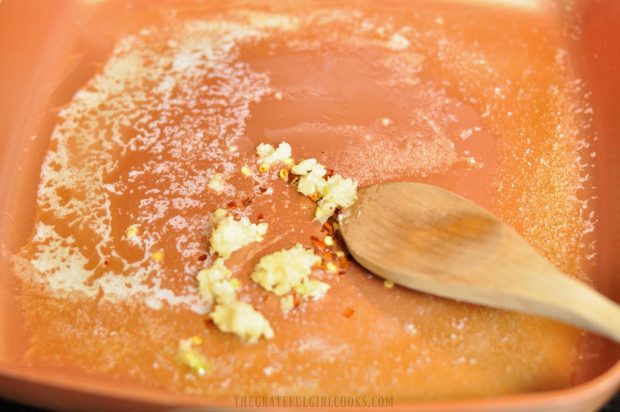
While the swordfish is in oven, make the lemon garlic sauce. Place butter and olive oil in a small skillet. Heat over low heat until the butter is melted. Add the minced garlic and red pepper flakes. Stir and cook this on very low heat for about 1 minute (being careful NOT to burn the garlic).

Minced garlic and red pepper flakes are cooked in melted butter.

Add the white wine to the skillet, and using medium heat, bring the liquid to a simmer.  Cook the lemon garlic sauce for 3 minutes, stirring often.  The liquid will reduce a bit in volume, and the alcohol will cook off during this time.

White wine is added to lemon garlic sauce in pan.

Remove the skillet from the heat.  Add lemon juice and finely grated fresh lemon zest, and stir to combine.  The lemon garlic sauce will smell really good at this point.

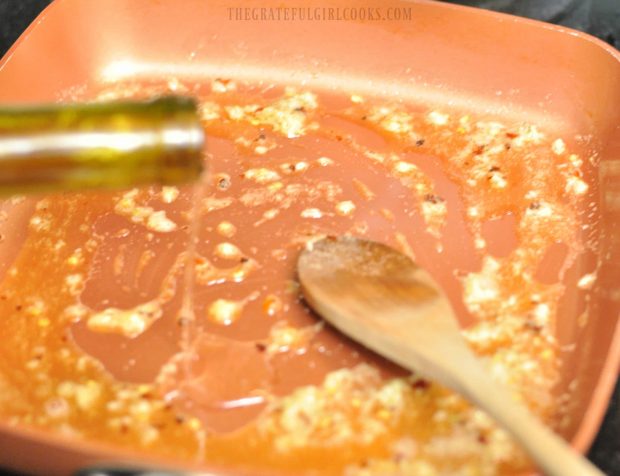
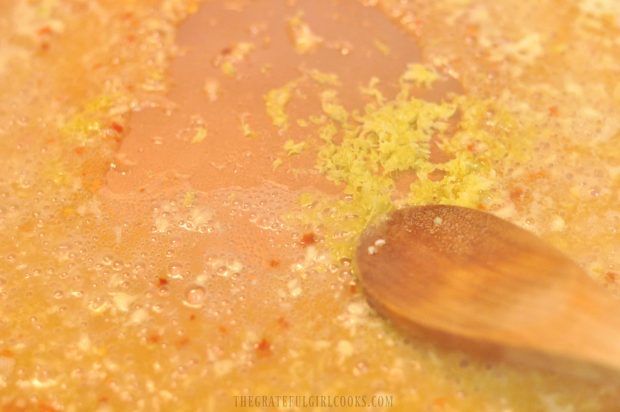
Lemon zest and juice are added to the sauce for the swordfish.

Time To Serve The Swordfish In Lemon Garlic Sauce!

Transfer the baked swordfish out of the skillet and onto serving plates. Spoon the lemon garlic sauce over the top of the fish, and serve it, garnished with parsley, (if desired).  Grab a fork and dive into this delicious swordfish in lemon garlic sauce!

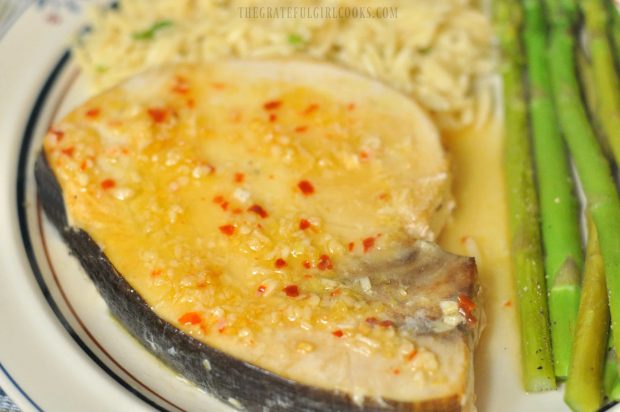
Swordfish with lemon garlic sauce, on plate with orzo and asparagus.

I love seafood grilled outdoors on our BBQ, but as is the case often here in Oregon, the rain prevents that many times. It’s nice to have this simple alternative cooking method for enjoying a wonderful piece of swordfish cooked right in the ol’ kitchen!  Have a great day.

Looking For More SEAFOOD Recipes?

You can find all of my seafood recipes in the Recipe Index, located at the top of the page. I have quite a few, including:

Interested In More Recipes?

Thank you for visiting this website. I appreciate you using some of your valuable time to do soIf you’re interested, I publish a newsletter 2 times per month (1st and 15th) with all the latest recipes, and other fun info. I would be honored to have you join our growing list of subscribers, so you never miss a great recipe!
There is a Newsletter subscription box on the top right side (or bottom) of each blog post, depending on the device you use, where you can easily submit your e-mail address (only) to be included in my mailing list.

You Can Also Find Me On Social Media:
Facebook page: The Grateful Girl Cooks!
Pinterest: The Grateful Girl Cooks!
Instagram: jbatthegratefulgirlcooks

Author's signature

Recipe Source: www.superseafoodrecipes.com/swordfish-recipe-with-lemon-garlic-sauce.html

↓↓ PRINTABLE RECIPE BELOW ↓↓

0 from 0 votes
Swordfish In Lemon Garlic Sauce
Prep Time
5 mins
Cook Time
15 mins
Total Time
20 mins
 

Swordfish fillets are pan-seared, then finish cooking in an oven. They're served, glazed with an easy to make, delicious lemon garlic sauce!

Category: Entree
Cuisine: American
Keyword: swordfish
Servings: 2 servings (5 ounces each)
Calories Per Serving: 537 kcal
Author: JB @ The Grateful Girl Cooks!
Ingredients
  • 10 ounces swordfish steaks (2- 5 ounce pieces at least 1 inch thick)
  • 3 Tablespoons olive oil
  • Salt and black pepper
For Lemon Garlic Sauce:
  • 2 Tablespoons butter
  • 2 Tablespoons olive oil
  • 8 cloves garlic , minced
  • 1/4 teaspoon red pepper flakes
  • 1/2 cup dry white wine
  • Grated zest from 1 large lemon
  • 2 Tablespoons fresh squeezed lemon juice
  • 2 Tablespoons chopped parsley (for garnish-optional)
Instructions
  1. Preheat oven to 400 degrees. Let swordfish come to room temperature for 30 minutes before cooking. Pat fish really dry with a paper towel, then lightly season with salt and pepper.
  2. Heat olive oil in a large, OVEN-PROOF skillet until very hot (but not smoking). Carefully add swordfish fillets to skillet. Cook for 2-3 minutes, until golden brown on bottom. Turn fish over and cook the other side 2-3 minutes, as well. Place skillet (and swordfish) into hot oven. Bake swordfish for between 7 and 12 minutes (time will vary based on thickness of swordfish). Begin checking fish after 6 minutes have passed. Once the fish flakes easily with a fork, it will be ready.

  3. While swordfish is baking, make the lemon garlic sauce. Place butter and olive oil in a small skillet. Cook on low heat until butter is melted. Add minced garlic and red pepper flakes. Stir and cook mixture on very low heat for about a minute (being careful NOT to burn the garlic).
  4. Add white wine to the skillet, and using medium heat, bring the liquid to a simmer. Cook the sauce for 3 minutes, stirring often. The liquid will reduce a bit in volume as it cooks.
  5. Remove sauce from heat. Add lemon juice and finely grated fresh lemon zest. Stir to combine.
  6. Transfer cooked swordfish to serving plate. Spoon the lemon garlic sauce over the top of the fish, and garnish with parsley, if desired.
Nutrition Facts
Swordfish In Lemon Garlic Sauce
Amount Per Serving (1 5 ounce piece)
Calories 537 Calories from Fat 342
% Daily Value*
Fat 38g58%
Saturated Fat 11g69%
Cholesterol 123mg41%
Sodium 246mg11%
Potassium 705mg20%
Carbohydrates 7g2%
Sugar 1g1%
Protein 29g58%
Vitamin A 930IU19%
Vitamin C 18.7mg23%
Calcium 40mg4%
Iron 1.2mg7%
* Percent Daily Values are based on a 2000 calorie diet.

Here’s one more to pin on your Pinterest boards!Swordfish fillets in lemon garlic sauce are pan-seared, then baked fish fillets. They're served, glazed with an easy lemon garlic sauce!

Save

Save

Save

Save

Save

Save

Save

Save

Save

Save

Save

Save

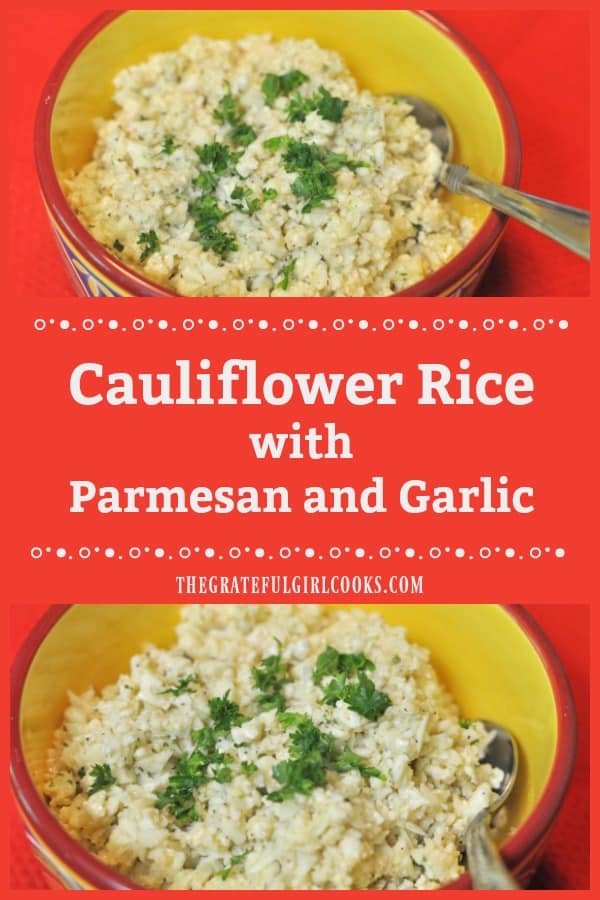
Cauliflower Rice with Parmesan and Garlic

Cauliflower rice, (seasoned with Parmesan and garlic) is a trending, healthy substitute for people wanting to avoid the carbs/starches in white or brown rice! Cauliflower rice, (seasoned with Parmesan and garlic) is a healthy substitute for people wanting to avoid the carbs/starches in white or brown rice!
I recently found a recipe for Cauliflower Rice with Parmesan and Garlic, and decided to check it out. What a great way to get more veggies on the ol’ dinner plate!

How Cauliflower Rice Got It’s Name

The dish is called “rice” because a head of cauliflower is processed in a food processor (or by using a box grater) so that the florets become small enough that they LOOK like rice.  The cauliflower is then cooked and served.

This recipe for cauliflower rice adds a bit of flavor to the cooked “rice” by adding a bit of fresh grated Parmesan cheese, minced garlic and butter. The result? A tasty side dish, that still comes in under 100 calories! It’s very easy to make cauliflower rice. If you’ve been curious like I was as to HOW to make it, give this simple recipe a try, and see for yourself!

How To Make Cauliflower Rice

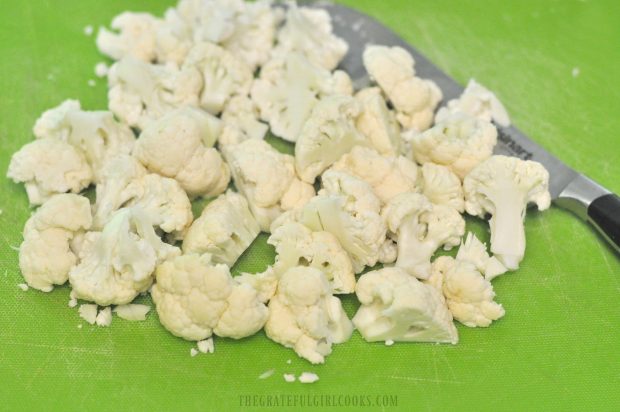
To “rice” the cauliflower, remove the outer leaves and core from a medium sized head of cauliflower. Cut the cauliflower into small florets.

Cauliflower Rice is made using fresh cauliflower, cut into florets.

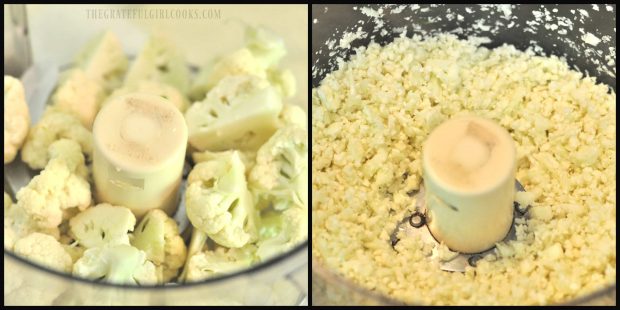
Place the florets into a food processor (with blade attachment).  Pulse several times until the cauliflower florets are small like grains of rice.

Can I Still Make Cauliflower Rice If I Don’t Own A Food Processor?

The good news is… YES!!!  If you do not own a food processor, no problem… simply use a box cheese grater and grate into small rice sized pieces!

Cauliflower florets are processed in food processor until it resembles rice.

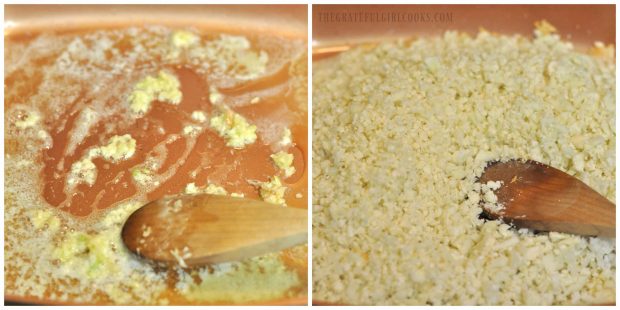
Melt butter in a large skillet or saucepan on medium-low heat. Add minced garlic and continue to cook, stirring constantly, for 2-3 minutes, so that the garlic flavor is infused into the melted butter.

It is important NOT to burn the garlic, so keep an eye on it!  Add the cauliflower rice to the skillet and stir. Turn the heat up to medium-high to finish cooking.

Garlic is cooked in butter, then cauliflower rice is added to pan.

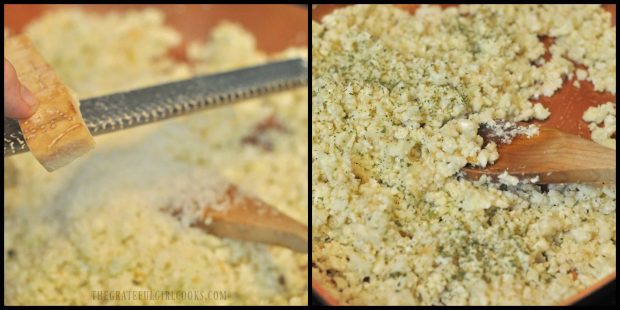
Sprinkle grated Parmesan cheese on top and stir well, to combine. Cook for about 5 minutes, or until cauliflower is tender, stirring often.

Season the cauliflower rice with salt and pepper, to taste. I added some dried parsley at this point, as well. Stir to completely mix all ingredients, and reheat, if necessary to serving temperature.

Cauliflower Rice with Parmesan and Garlic is seasoned with Parmesan cheese, garlic and spices.

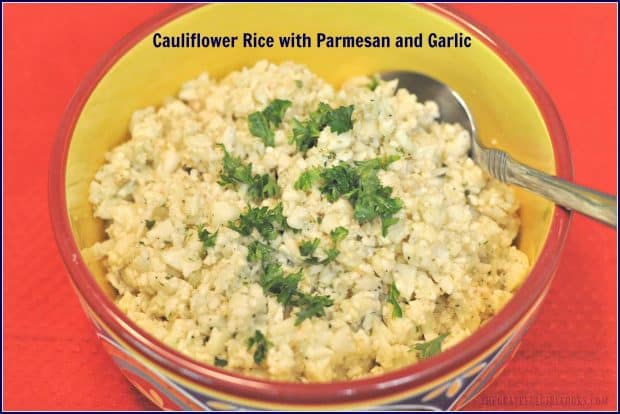
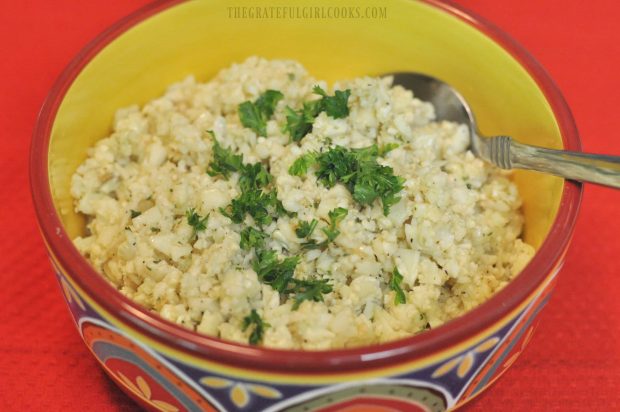
Pour the rice into a serving dish, and garnish with chopped fresh parsley and additional Parmesan cheese, if desired.  Serve this side dish hot.

Cauliflower Rice with Parmesan and Garlic in bowl, on a red placemat.

Hope you will consider trying this recipe for cauliflower rice.  It fools the eye because it LOOKS like rice on the plate, but has fewer calories, and tastes like cauliflower (with some seasonings)! What a great way to get more veggies onto the ol’ dinner plate, right?  You might also want to try my recipe for Lemon Garlic Cauliflower Rice. Have a great day!

Looking For Other RICE Recipes?

You can find ALL of my recipes in the Recipe Index, which is located at the top of the page. You might also enjoy a few other recipes for RICE that I have on this blog, including:

Interested In More Recipes?

Thank you for visiting this website. I appreciate you using some of your valuable time to do soIf you’re interested, I publish a newsletter 2 times per month (1st and 15th) with all the latest recipes, and other fun info. I would be honored to have you join our growing list of subscribers, so you never miss a great recipe!
There is a Newsletter subscription box on the top right side (or bottom) of each blog post, depending on the device you use, where you can easily submit your e-mail address (only) to be included in my mailing list.

You Can Also Find Me On Social Media:

Facebook page: The Grateful Girl Cooks!
Pinterest:
The Grateful Girl Cooks!
Instagram:
jbatthegratefulgirlcooks

Author's signature

Recipe Adapted From: http://kirbiecravings.com/2016/05/garlic-parmesan-cauliflower-rice.html

0 from 0 votes
Cauliflower Rice with Parmesan and Garlic
Prep Time
5 mins
Cook Time
7 mins
Total Time
12 mins
 

Cauliflower rice, (seasoned with Parmesan and garlic) is a trending, healthy substitute for people wanting to avoid the carbs/starches in white or brown rice!

Category: Side Dish, Vegetable Dish
Cuisine: American
Keyword: cauliflower rice
Servings: 8 (1/2 cup) servings
Calories Per Serving: 95 kcal
Author: JB @ The Grateful Girl Cooks!
Ingredients
  • 1 medium head of cauliflower (will yield approx. 4 cups of cauliflower "rice")
  • 4 Tablespoons butter
  • 4 garlic cloves , minced
  • 1/2 cup shredded Parmesan cheese
  • Dried parsley (just a shake or two)
  • Salt and pepper , to taste
  • Fresh chopped parsley for garnish (optional)
  • Parmesan cheese for garnish (optional)
Instructions
  1. To "rice" the cauliflower, remove outer leaves and core from a medium sized head of cauliflower. Cut the cauliflower into small florets. Place florets into a food processor (with blade attachment). Pulse several times until florets are small, like grains of rice. No food processor? Use a box cheese grater and grate into small rice sized pieces!
  2. Melt butter in a large skillet or saucepan on medium-low heat. Add minced garlic and continue to cook, stirring constantly, for 2-3 minutes, so the garlic flavor is infused into butter. It is important NOT to burn the garlic, so keep a good eye on it! Add "riced" cauliflower to skillet, stir, and turn heat to medium-high.
  3. Sprinkle grated Parmesan cheese on top and stir well, to combine. Cook cauliflower for about 5 minutes, stirring often, until cauliflower is tender. Season with salt and pepper (to taste) and dried parsley. Stir to combine all ingredients, and reheat if necessary, to serving temp.
  4. Transfer the rice to a serving dish, garnish with chopped fresh parsley and additional Parmesan cheese, if desired. Serve hot.
Nutrition Facts
Cauliflower Rice with Parmesan and Garlic
Amount Per Serving (1 serving)
Calories 95 Calories from Fat 63
% Daily Value*
Fat 7g11%
Saturated Fat 4g25%
Cholesterol 20mg7%
Sodium 171mg7%
Potassium 173mg5%
Carbohydrates 3g1%
Fiber 1g4%
Sugar 1g1%
Protein 3g6%
Vitamin A 230IU5%
Vitamin C 26.2mg32%
Calcium 93mg9%
Iron 0.3mg2%
* Percent Daily Values are based on a 2000 calorie diet.

Here’s one more to pin on your Pinterest boards!Cauliflower rice, (seasoned with Parmesan and garlic) is a trending, healthy substitute for people wanting to avoid the carbs/starches in white or brown rice!


Save

Save

Save

Save

Save

Save

Save

Save

Save

Save

Save

Save

Save

Save

Garlic & Herb Baked Salmon

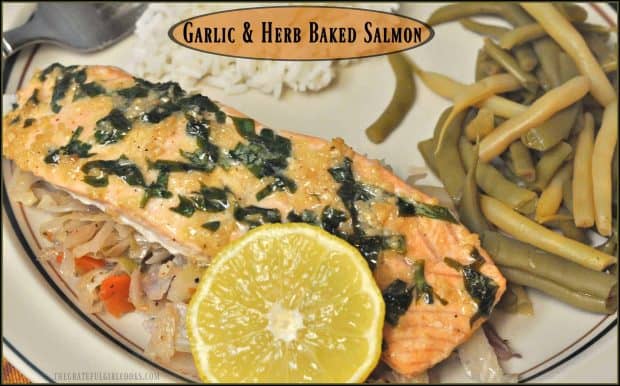
Garlic Herb Baked Salmon is a delicious, quick and easy recipe featuring boneless, skinless salmon fillets topped with a seasoned lemon butter sauce.Garlic Herb Baked Salmon is a delicious, quick and easy recipe featuring boneless, skinless salmon fillets topped with a seasoned lemon butter sauce.
My husband and I really love salmon! In my never ending quest to find new recipes, I stumbled upon this simple one for garlic herb baked salmon, and it did not disappoint!

Scroll Down For A Printable Recipe Card At The Bottom Of The Page

This Is One EASY Recipe!

The process for making this salmon dish is extremely SIMPLE. A garlic, butter, lemon juice and herb mixture is prepared, and then salmon fillets are topped with it. Salmon goes into the oven where it is baked, and then it is DONE!  How’s THAT for EASY??? It’s quick and it tastes GOOD. From start to finish, it took under 20 minutes, which is perfect for crazy busy days!

How To Make Garlic Herb Baked Salmon

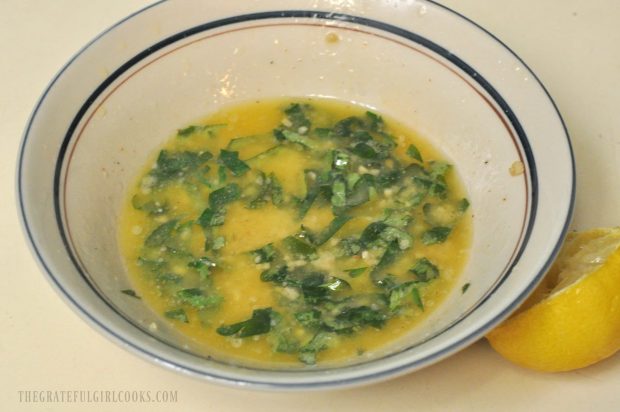
Preheat your oven to 400 degrees F.  Place the melted butter, garlic, parsley, salt, cayenne pepper, lemon juice and black pepper in a small bowl. Give it a good stir to fully combine ingredients. Now the sauce is READY! Hope you didn’t break a sweat doing all that hard work- wink, wink!

Butter, lemon juice, herbs and spices make up a sauce for the seafood.

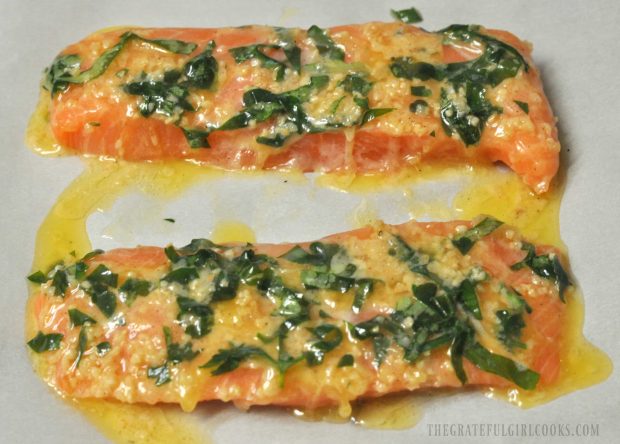
Place the salmon fillets onto a parchment paper-lined baking sheet, leaving a bit of space between each fillet. The parchment paper helps cut down on the cleanup once the salmon is done. Use a spoon and divide the garlic herb sauce evenly between salmon fillets, covering the top and sides of the fish.

Salmon fillets are covered with the lemon butter herb sauce before baking.

 Time To Finish The Garlic Herb Baked Salmon

Bake the salmon in a preheated 400 degree oven for 12 minutes. Remove the baking sheet from oven, once done, and transfer fillets to individual plates.

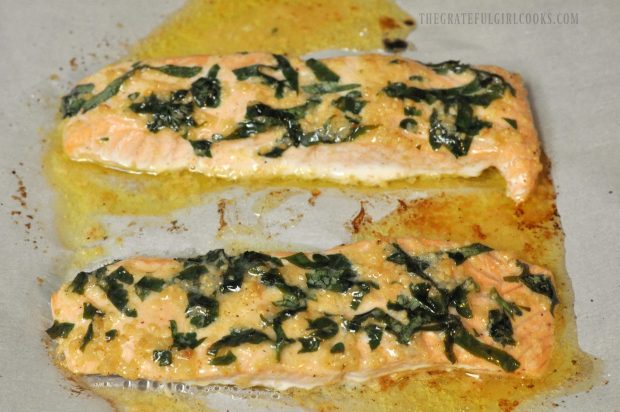
Garlic Herb Baked Salmon only takes 12 minutes to cook in the oven!

Garnish And Serve The Garlic Herb Baked Salmon

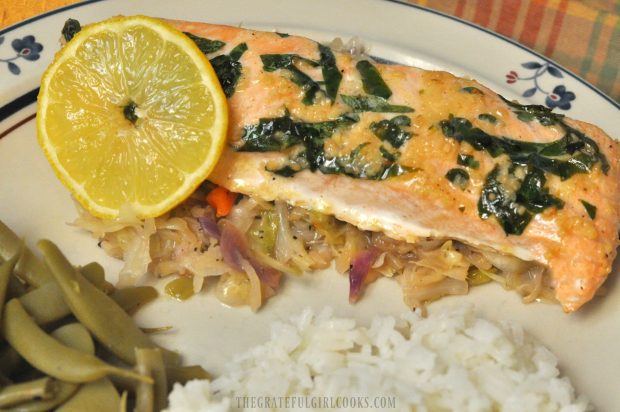
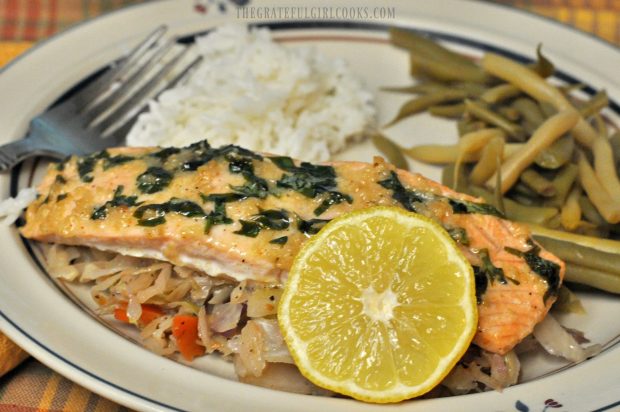
Garnish each piece of salmon with a lemon wedge and serve immediately with your favorite side dish.  I served my garlic herb baked salmon on a bed of cooked sesame ginger slaw,  with green beans (from our garden) and steamed rice.

If you want, you can also drizzle the salmon with any leftover garlic herb mixture that remains on the baking sheet. Just spoon it up, and drizzle it on the fish.

The salmon on a bed of ginger slaw, with green beans and rice on side.

A lemon wedge garnishes a serving of the baked salmon.

This salmon recipe is really SO EASY!!! It really has a great flavor, as well. As always, I sure hope you will consider making this for yourself, your family or others you love!

Looking For More SALMON Recipes?

You can find all of my recipes in the Recipe Index, located at the top of the page. I have quite a few salmon recipes, including:

Interested In More Recipes?

Thank you for visiting this website. I appreciate you using some of your valuable time to do soIf you’re interested, I publish a newsletter 2 times per month (1st and 15th) with all the latest recipes, and other fun info. I would be honored to have you join our growing list of subscribers, so you never miss a great recipe!
There is a Newsletter subscription box on the top right side (or bottom) of each blog post, depending on the device you use, where you can easily submit your e-mail address (only) to be included in my mailing list.

You Can Also Find Me On Social Media:
Facebook page: The Grateful Girl Cooks!
Pinterest: The Grateful Girl Cooks!
Instagram: jbatthegratefulgirlcooks

Author's signatureRecipe Source:  http://rasamalaysia.com/garlic-herb-roasted-salmon/

0 from 0 votes
Garlic Herb Baked Salmon
Prep Time
5 mins
Cook Time
12 mins
Total Time
17 mins
 

Garlic Herb Baked Salmon is a delicious, quick and easy recipe featuring boneless, skinless salmon fillets topped with a seasoned lemon butter sauce.

Category: Entree
Cuisine: American
Keyword: garlic herb baked salmon
Servings: 2 servings
Calories Per Serving: 364 kcal
Author: JB @ The Grateful Girl Cooks!
Ingredients
  • 2 6 ounce each salmon fillets
  • 2 Tablespoons melted butter
  • 3 cloves garlic , minced
  • 1 Tablespoon fresh Italian parsley , chopped
  • 1/8 teaspoon salt
  • 1 Pinch cayenne pepper
  • 1 teaspoon lemon juice
  • 3 dashes ground black pepper
  • 4 Lemon wedges (for garnish-optional)
Instructions
  1. Before beginning, preheat oven to 400 degrees F. Line a baking sheet with parchment paper.
  2. In a small bowl, stir together the melted butter, minced garlic, parsley, salt, cayenne pepper, lemon juice and black pepper until fully combined.
  3. Place salmon fillets onto parchment paper lined baking sheet, leaving space in between each fillet. Spoon the garlic and herb sauce evenly over the top and sides of the salmon (to cover).

  4. Bake salmon at 400 degrees F. for 12 minutes. Remove from oven. Serve immediately with lemon wedges for garnish, if desired. Enjoy!

Nutrition Facts
Garlic Herb Baked Salmon
Amount Per Serving (1 g)
Calories 364 Calories from Fat 198
% Daily Value*
Fat 22g34%
Saturated Fat 8g50%
Cholesterol 123mg41%
Sodium 323mg14%
Potassium 921mg26%
Carbohydrates 6g2%
Fiber 1g4%
Sugar 1g1%
Protein 34g68%
Vitamin A 585IU12%
Vitamin C 24.1mg29%
Calcium 45mg5%
Iron 1.9mg11%
* Percent Daily Values are based on a 2000 calorie diet.

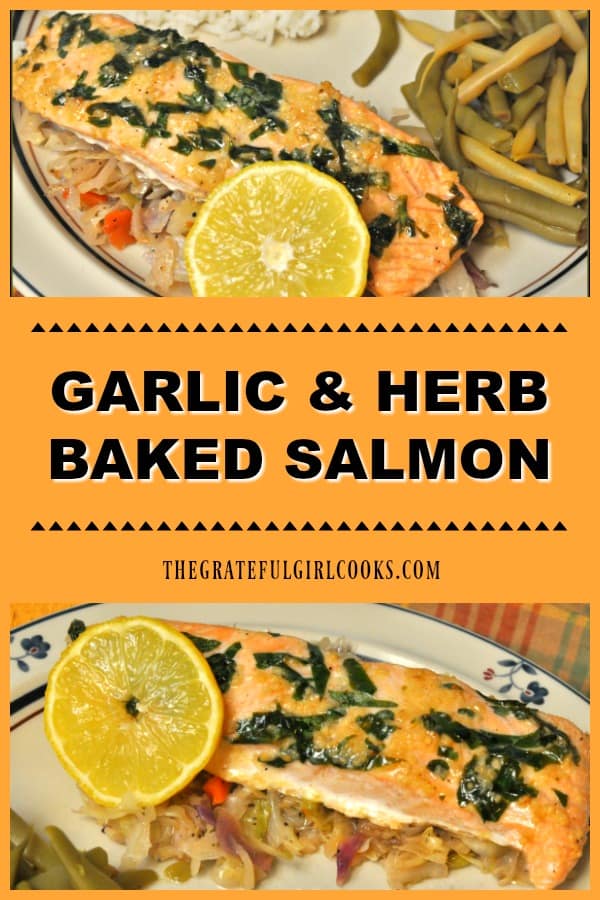
Here’s one more to pin on your Pinterest boards!Garlic Herb Baked Salmon is a delicious, quick and easy recipe featuring boneless, skinless salmon fillets topped with a seasoned lemon butter sauce.

Save

Save

Save

Save

Save

Save

Save

Save

Save

Save

Save

Cranberry Orange Loaf With Orange Icing

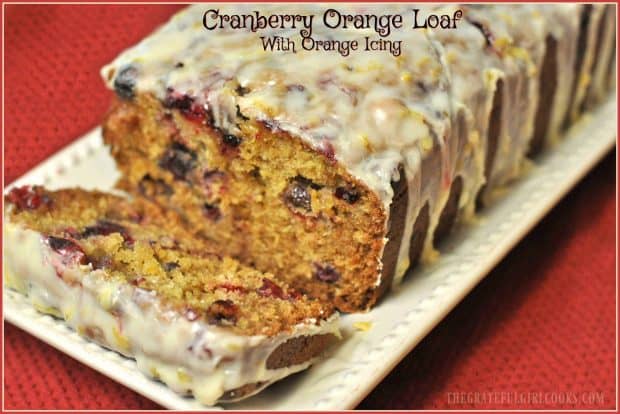
Cranberry Orange Loaf with Orange Icing is a deliciously flavored sweet bread, topped with a creamy citrus icing! Enjoy a taste of the holidays with a slice!Cranberry Orange Loaf with Orange Icing is a deliciously flavored sweet bread, topped with a creamy citrus icing! Enjoy a taste of the holidays with a slice!Looking for a little taste of the holidays to help start your day? You will absolutely LOVE this delicious recipe for cranberry orange loaf with orange icing! Grab a big ol’ slice of this moist, flavorful bread, and sit down in a comfy chair with a mug of coffee or tea!

Recently I discovered a bag of fresh cranberries lurking in the refrigerator in our garage. They had been hiding out in a refrigerator drawer since Thanksgiving… oops! What an unexpected surprise! Thankfully they were still GOOD, so I used them to make this delicious treat! Waste not, want not, right?

It sure was a wonderful start to the day to enjoy a slice of this flavor packed bread in the morning with a cup of coffee!  The tang from the cranberries paired well with the sweet orange icing… YUM!  The best part of all was just how easy this loaf of sweet bread was to prepare!  Here’s how:

Scroll Down For A Printable Recipe Card At The Bottom Of The Page

Making The Cranberry Orange Loaf Batter

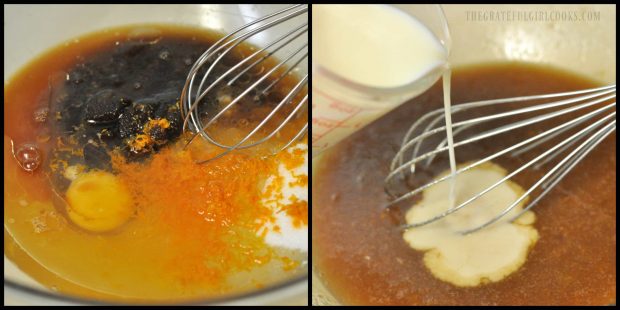
Combine egg, oil granulated and brown sugars, orange zest, fresh squeezed orange juice, and vanilla extract in a medium bowl. Whisk well, to fully combine ingredients.  Add buttermilk and whisk to combine.

Whisking ingredients to make batter for cranberry orange loaf.

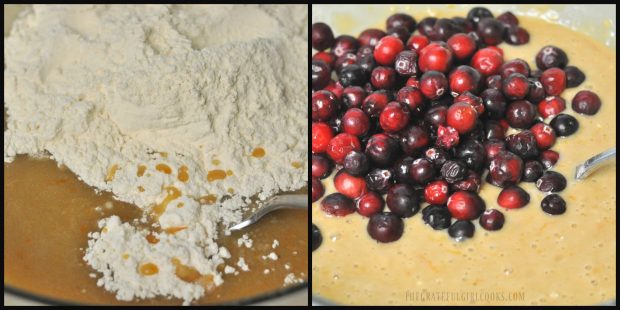
Add flour, baking soda, baking powder and salt, and stir until the ingredients are combined, but do not over mix!  Add the cranberries, and stir gently to incorporate them into batter.

Dry ingredients, then cranberries are added to loaf batter.

Baking The Cranberry Orange Loaf

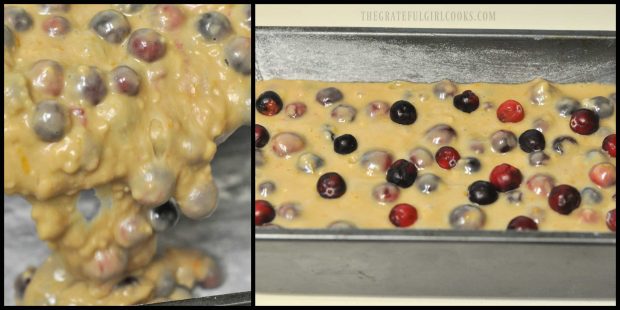
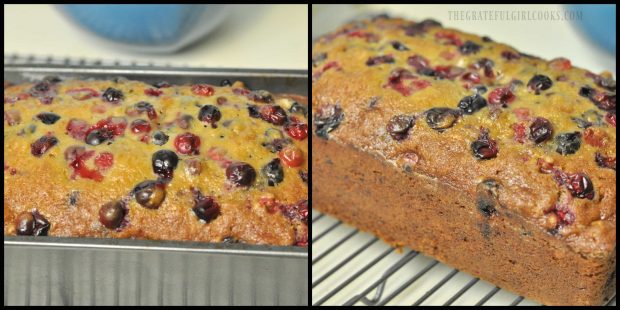
Pour the batter for the cranberry orange loaf into a greased and floured 9×5 loaf pan.  Sprinkle the top of loaf with a few additional cranberries.  Bake in preheated 350 degree oven for approximately 65-70 minutes (mine took 65). **After bread has been in oven for 30 minutes, loosely tent the pan with aluminum foil to prevent excess browning of outside of loaf before it is done all the way through.

The cranberry orange loaf will be done when a toothpick inserted into the center of loaf comes out clean.  Keep an eye on the bread towards the end of the baking time, as oven temps can vary quite a bit!

Batter for cranberry orange loaf poured into pan, then baked.

Once the cranberry orange loaf is done baking, remove the aluminum foil “tent”, and let the bread cool IN THE PAN for about 15-20 minutes. After it has cooled, carefully remove the bread to a wire rack to finish cooling.

Cranberry orange loaf is baked and removed from pan.

Make The Orange Icing

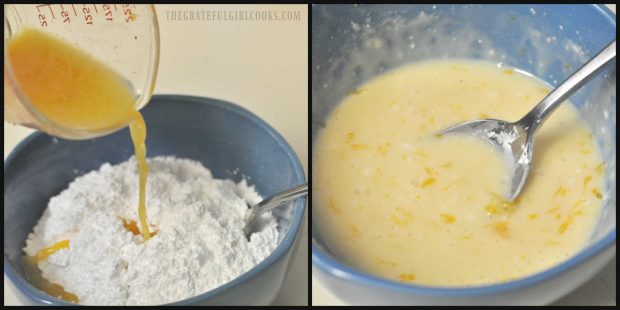
While the bread is cooling, prepare the orange icing. Place confectioner’s sugar (powdered), fresh squeezed orange juice and orange zest into a small bowl. Stir well, to fully combine these ingredients.  If you want the icing to be thicker, add more powdered sugar. If you want it thinner, add a tiny bit more orange juice, until it reaches desired icing consistency.

Making orange icing for cranberry orange loaf.

Time To Ice The Cranberry Orange Loaf!

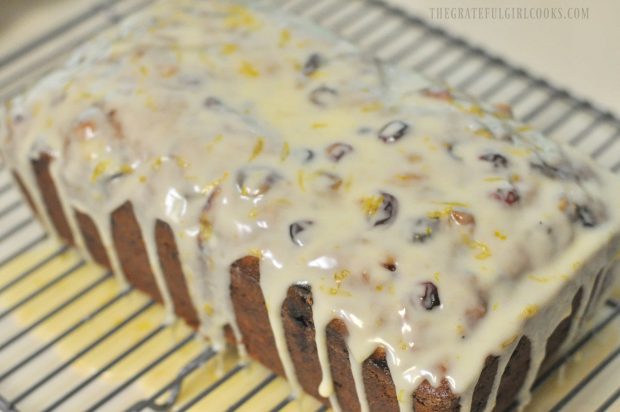
Place a piece of wax paper, parchment paper or aluminum foil UNDER the wire rack. When the bread has completely cooled, evenly spread the icing over the loaf. I like to take it all the way to the edges so it can run down the sides, as well. Having the wax paper, etc. under the rack allows for this and helps to make it an EASY cleanup!

Cranberry orange loaf with orange icing on wire rack.

Who Wants A Piece Of Cranberry Orange Loaf With Orange Icing?

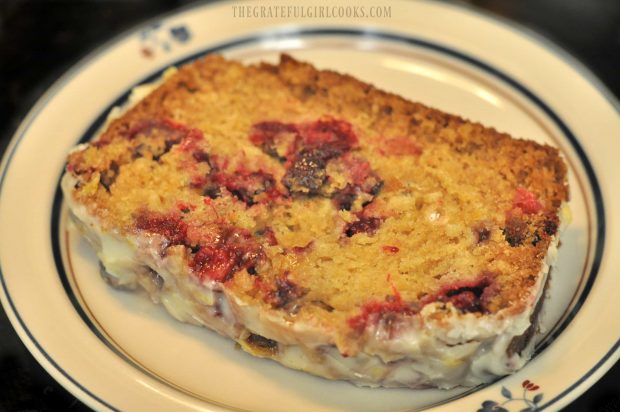
Once the icing has firmed up and the bread is at room temperature, it is ready to serve!  Slice a piece, pour a cup of coffee or tea, and enjoy the amazing flavors in this delicious cranberry orange loaf!

A slice of cranberry orange loaf with orange icing, on a plate.

Cranberry orange loaf slice on a plate, ready to eat!

Hope you enjoy this delicious cranberry orange loaf! The flavor combination is classic, and I trust you will enjoy it, too.  Have a wonderful day!

Looking for More SWEET BREAD Recipes?

You can find all of my recipes in the Recipe Index, which is located at the top of the page. I have a variety of delicious sweetened bread recipes, including:

Interested In More Recipes?

Thank you for visiting this website. I appreciate you using some of your valuable time to do soIf you’re interested, I publish a newsletter 2 times per month (1st and 15th) with all the latest recipes, and other fun info. I would be honored to have you join our growing list of subscribers, so you never miss a great recipe!
There is a Newsletter subscription box on the top right side (or bottom) of each blog post, depending on the device you use, where you can easily submit your e-mail address (only) to be included in my mailing list.

You Can Also Find Me On Social Media:
Facebook page: The Grateful Girl Cooks!
Pinterest: The Grateful Girl Cooks!
Instagram: jbatthegratefulgirlcooks

Author's signature

Recipe Adapted From:  https://www.averiecooks.com/2015/11/cranberry-orange-bread-with-sweet-orange-glaze.html

0 from 0 votes
Cranberry Orange Loaf With Orange Icing
Prep Time
15 mins
Cook Time
1 hr 5 mins
Total Time
1 hr 20 mins
 
Cranberry Orange Loaf with Orange Icing is a deliciously flavored sweet bread, topped with a creamy citrus icing! Enjoy a taste of the holidays with a slice!
Category: Bread
Cuisine: American
Keyword: cranberry orange loaf
Servings: 12 1 loaf (9x5)
Calories Per Serving: 335 kcal
Author: JB @ The Grateful Girl Cooks!
Ingredients
  • 1/2 cup buttermilk
  • 1 large egg
  • 1/2 cup vegetable oil (or canola)
  • 1/2 cup granulated sugar
  • 1/2 cup light brown sugar , packed
  • 1 Tablespoon orange zest (from a LARGE orange)
  • 1/3 cup fresh squeezed orange juice
  • 2 teaspoons vanilla extract
  • cups all purpose flour
  • 1 teaspoon baking soda
  • 1/2 teaspoon baking powder
  • 1/2 teaspoon salt
  • 2 cups fresh cranberries (plus several more for garnishing loaf)
For Orange Icing:
  • 2 cups confectioner's sugar
  • 1/4 cup freshly squeezed orange juice
  • 1/2 teaspoon orange zest
Instructions
  1. Preheat oven to 350 degrees F. Generously grease and flour 9x5 loaf pan. Set aside.
  2. In a medium bowl, combine egg, oil granulated and brown sugars, orange zest, fresh squeezed orange juice, and vanilla extract. Whisk to combine ingredients. Add buttermilk; whisk to combine.
  3. Add flour, baking soda, baking powder and salt; stir until ingredients are combined, but do not over mix! Add cranberries; stir gently to incorporate them into batter.
  4. Pour batter into greased/ floured loaf pan. Sprinkle top of loaf with a few additional cranberries. Bake at 350 degrees for approx. 65-70 minutes (mine took 65). NOTE**After bread has been in oven for 30 minutes, loosely tent the pan with aluminum foil to prevent excess browning of outside of loaf before it is done all the way through. Bread will be done when a toothpick inserted into the center of loaf comes out clean. Keep an eye on the bread, as oven temps vary considerably!
  5. When bread is done, remove foil "tent", let bread cool IN THE PAN for about 15-20 minutes, then carefully remove to a wire rack to finish cooling.
  6. While bread is cooling, prepare orange icing by placing confectioner's sugar (powdered), fresh squeezed orange juice and orange zest in a small bowl. Stir well to fully combine until smooth. (If you want thicker icing, add more powdered sugar. Thinner? Add a tiny bit of orange juice, until it reaches desired icing consistency). Place a piece of wax paper, parchment paper or aluminum foil UNDER the wire rack (for easy cleanup). When bread has completely cooled, evenly spoon icing over the top to cover. Take it all the way to the edges so it can run down the sides. Once the icing has firmed up and the bread is completely at room temperature, it's ready to slice and serve!
Nutrition Facts
Cranberry Orange Loaf With Orange Icing
Amount Per Serving (1 slice)
Calories 335 Calories from Fat 90
% Daily Value*
Fat 10g15%
Saturated Fat 7g44%
Cholesterol 14mg5%
Sodium 208mg9%
Potassium 110mg3%
Carbohydrates 59g20%
Fiber 1g4%
Sugar 39g43%
Protein 3g6%
Vitamin A 70IU1%
Vitamin C 9.1mg11%
Calcium 33mg3%
Iron 1.3mg7%
* Percent Daily Values are based on a 2000 calorie diet.

Here’s one more to pin on your Pinterest boards!
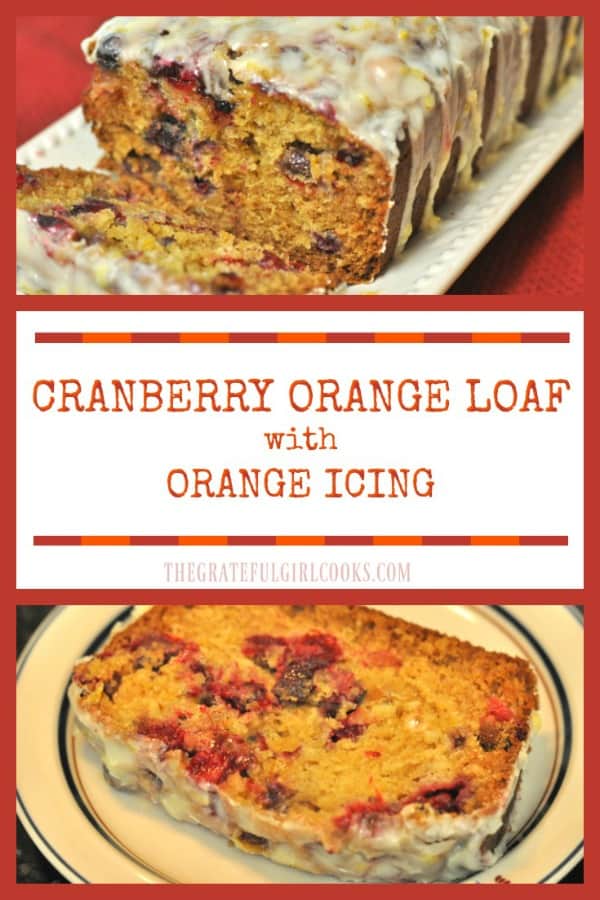
Cranberry Orange Loaf with Orange Icing is a deliciously flavored sweet bread, topped with a creamy citrus icing! Enjoy a taste of the holidays with a slice!

Save

Save

Save

Save

Save

Save

Save

Save

Save

Save

Save

Save

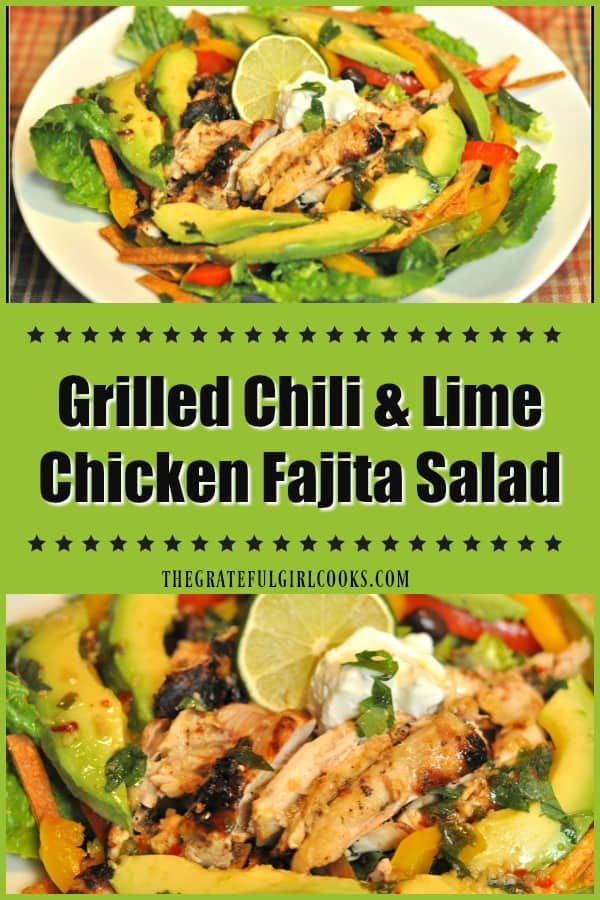
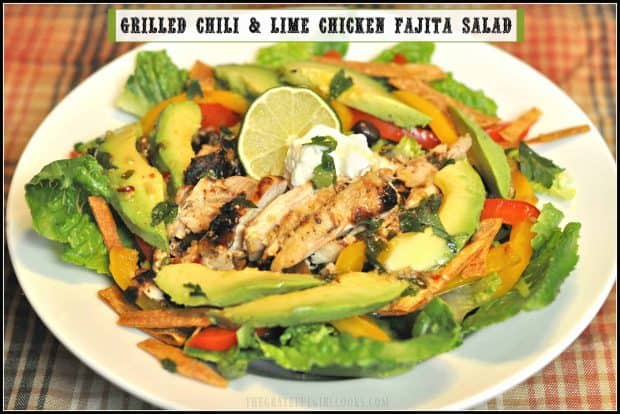
Grilled Chili & Lime Chicken Fajita Salad

Grilled Chili Lime Chicken Fajita Salad is delicious, with marinated chicken, peppers, onions, black beans, avocado and lettuce, and a chili lime dressing!Grilled Chili Lime Chicken Fajita Salad is delicious, with marinated chicken, peppers, onions, black beans, avocado and lettuce, and a chili lime dressing!
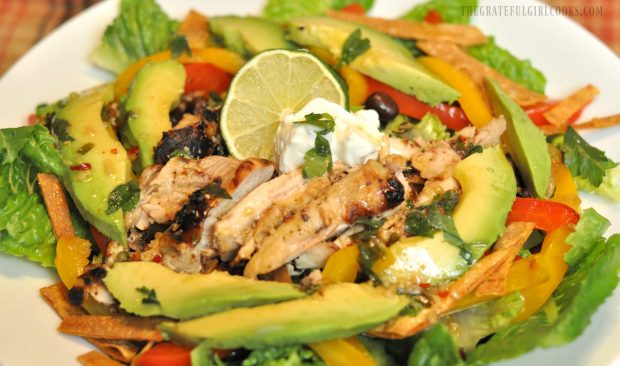
Do you like fajitas? Well, I sure do, so I was excited to try a new recipe for Grilled Chili & Lime Chicken Fajita Salad! Wow… it tasted fantastic, and I can’t wait to share it with you today. This main dish salad is filled with marinated grilled chicken, romaine lettuce, black beans, grilled bell peppers and onion, and is topped with tortilla strips, cilantro, avocado and sour cream.

If that’s not enough, it is drizzled with an amazing chili and lime salad dressing (part of it serves as the marinade!).  If you like Southwestern food, chances are you will LOVE this filling salad.  We sure did!  It is one of my new favorites… will DEFINITELY make this chicken fajita salad again and again.

Scroll Down For A Printable Recipe Card At The Bottom Of The Page

Plan Ahead

The chicken will need to marinate for a couple hours (at least), so plan ahead. This marinating time is not included in the prep time in the printable recipe. I like to get things ready ahead of time, so early in the afternoon I marinated the chicken, then grilled the chicken and at the same time, (in a separate skillet) I grilled the onion and peppers.

When it was dinner time, all I had to do was slice the pre-cooked chicken, arrange the salad ingredients in 2 serving bowls, drizzle with the dressing and serve! EASY!

How To Cook This Chicken Fajita Salad

The day I made this salad it was pouring rain, so I cooked the chicken on my indoor George Foreman grill. You can cook the marinated chicken on the BBQ, an indoor grill. You can also cook it in a skillet on your stovetop! The recipe calls for boneless chicken thighs, but boneless chicken breasts are a great substitution, too!

Marinating The Chicken

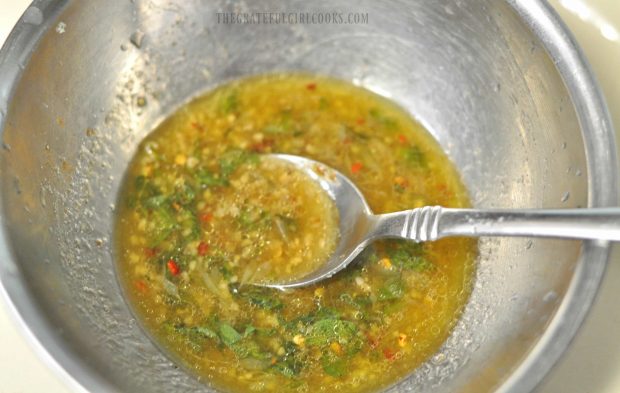
In a small bowl, whisk the ingredients for the marinade together until fully blended.  Pour HALF (approx. 1/4 cup) of the marinade into a shallow dish.

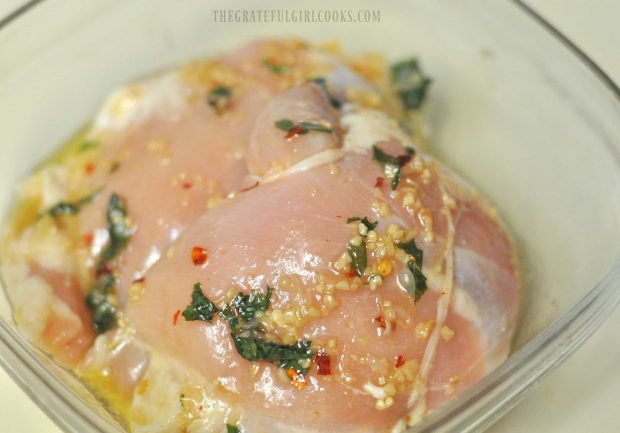
Add the chicken, cover, and refrigerate/marinate chicken for at least 2 hours (turning occasionally to coat), for best taste results! Cover and set the remaining marinade (approx. 1/4 cup) aside until ready to serve (this is the salad dressing). There is no need to refrigerate.
Marinade for chicken fajita salad, in small metal bowl

Chicken thighs marinating in glass dish

Cooking the Chicken

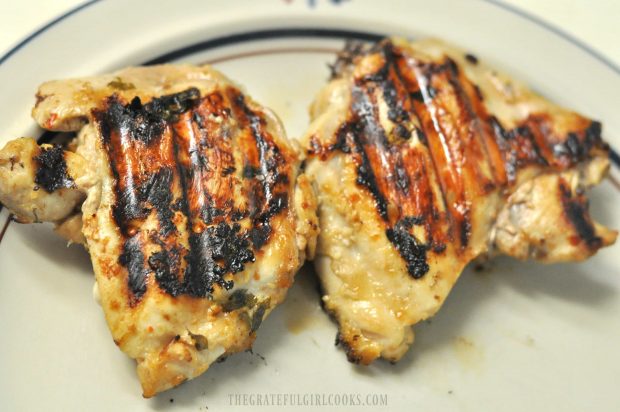
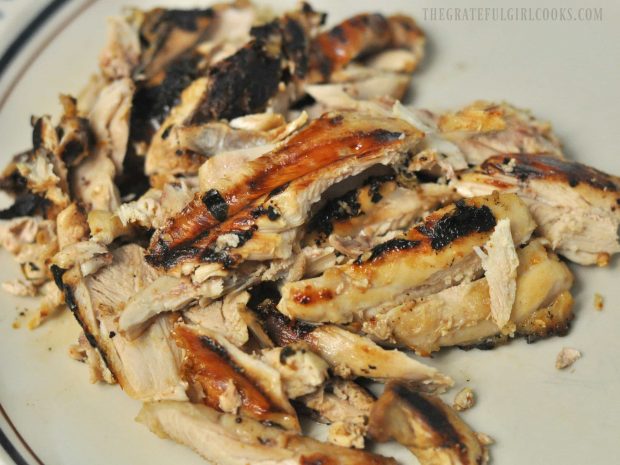
After chicken has been marinated, grill the chicken until done and crispy on a BBQ or indoor grill. If using a skillet, heat a teaspoon of oil on medium-high heat until hot before adding meat. Once very hot (but not smoking), add chicken and cook until done. When cooked fully, remove chicken. Let rest for a few minutes, then cut chicken into thin slices.

TIP: When you cook the marinated chicken, discard and do NOT use the marinade that has been in contact with the chicken, to avoid cross contamination!
Grilled chicken thighs for salad

Grilled marinated chicken, cut into thin slices for salad

Cooking the Veggies

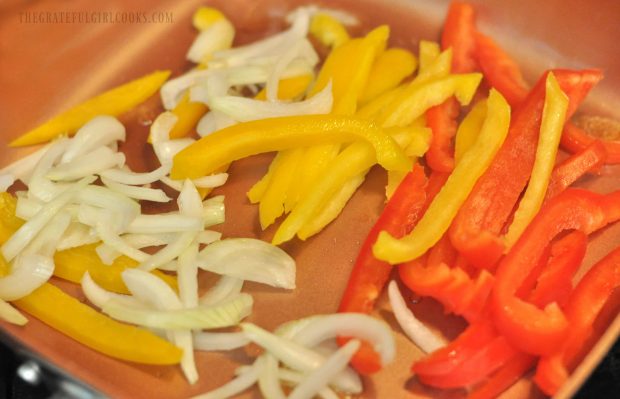
In a separate skillet, heat a teaspoon of oil on medium-high heat until hot. Add the sliced red and yellow bell peppers and onions to the skillet once it is hot (but not smoking).. Cook until tender (4-5 minutes), stirring occasionally. Remove the skillet from the heat and set it aside, to let the veggies cool.

Yellow and red bell pepper slices with onions grilled in skilletTime To Assemble The Salad

To assemble the salad, fill each serving dish with torn romaine leaves. Evenly distribute the black beans, peppers and onions over lettuce. Add some sliced avocado and crisp tortilla strips. TIP: I made my own tortilla strips. To see how to make them, check the notes section of printable recipe.

Sprinkle the salad with extra cilantro leaves.  Place a dollop of sour cream on top, and add a lime wedge (for garnish).  Finish it by drizzling reserved marinade over the top.

Enjoy This Delicious Chicken Fajita Salad

Serve… and ENJOY this amazing, flavor-filled chicken fajita salad! The recipe as written (below) makes two very generous sized main course salads.

Grilled Chili and Lime Chicken Fajita Salad on white serving plate.

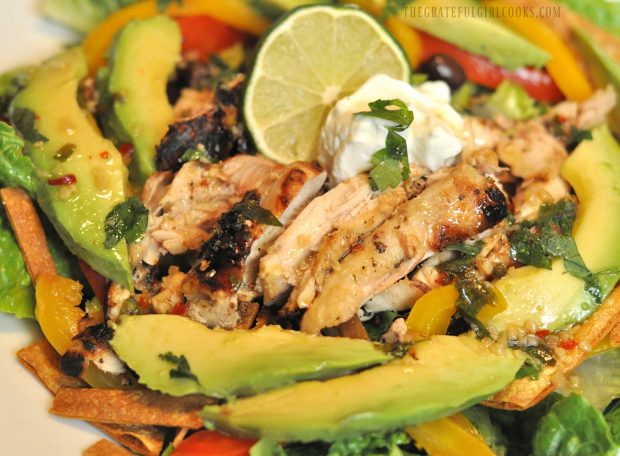
I’m not kidding… this chili lime chicken fajita salad really is one delicious dinner!  I hope you will give it a try. My husband loved it, too.  One of his first comments after tasting it was, “wow, this has to be one of the best looking salads I’ve ever eaten”. Yes, it LOOKS good, but just wait until you TASTE it! Grab a fork and have a taste of this juicy chicken fajita salad!  YUM!

Close up photo of chicken fajita salad

Have a wonderful day! Thanks for stopping by. I hope you find some delicious recipes, (including this one for chicken fajita salad) to fix for those you love and cherish!

Looking For More ENTREE SALAD Recipes?

You can find ALL of my recipes in the Recipe Index, located at the top of the page. I have some delicious main course salad recipes you might enjoy, including:

Interested In More Recipes?

Thank you for visiting this website. I appreciate you using some of your valuable time to do soIf you’re interested, I publish a newsletter 2 times per month (1st and 15th) with all the latest recipes, and other fun info. I would be honored to have you join our growing list of subscribers, so you never miss a great recipe!
There is a Newsletter subscription box on the top right side (or bottom) of each blog post, depending on the device you use, where you can easily submit your e-mail address (only) to be included in my mailing list.

You Can Also Find Me On Social Media:

Facebook page: The Grateful Girl Cooks!
Pinterest:
The Grateful Girl Cooks!
Instagram:
jbatthegratefulgirlcooks

Author's signature

Recipe Adapted From:  https://cafedelites.com/2015/08/09/grilled-chilli-lime-chicken-fajita-salad/

0 from 0 votes
Grilled Chili & Lime Chicken Fajita Salad
Prep Time
15 mins
Cook Time
15 mins
Total Time
30 mins
 
Grilled Chili Lime Chicken Fajita Salad is delicious, with marinated chicken, peppers, onions, black beans, avocado and lettuce, and a chili lime dressing!
Category: Main Course Salad
Cuisine: Southwestern
Keyword: chicken fajita salad
Servings: 2 Main Course Servings
Calories Per Serving: 544 kcal
Author: JB @ The Grateful Girl Cooks!
Ingredients
For Marinade:
  • 4 Tablespoons olive oil
  • 1/3 cup (+ 1 Tablespoon more) fresh squeezed lime juice
  • 2 Tablespoons fresh chopped cilantro
  • 2 cloves minced garlic
  • 1 teaspoon brown sugar
  • 3/4 teaspoon red chili flakes
  • 1/2 teaspoon ground Cumin
  • 1 teaspoon salt
For Salad:
  • 2 boneless , skinless chicken thighs (can substitute chicken breasts)
  • 1/2 yellow bell pepper , sliced thin (seeds removed)
  • 1/2 red bell pepper , sliced thin (seeds removed)
  • 1/2 medium onion , thinly sliced
  • 5 cups Romaine lettuce , roughly chopped
  • 1 avocado , sliced (divided)
  • 1/2 cup black beans (rinsed, drained)
For Garnish (Optional):
  • Sour cream and extra cilantro leaves
  • Crisp tortilla strips (see Notes section for "how to make" these).
Instructions
  1. In a small bowl, whisk ingredients for marinade together until fully blended. Pour HALF (approx. 1/4 cup) of the marinade into a shallow dish. Add chicken and let marinate in fridge for at least 2 hours, turning occasionally to coat. Cover remaining marinade and set aside until ready to serve (this is the salad dressing-you do not need to refrigerate).
  2. Heat a teaspoon of oil on medium-high heat in a skillet. Once oil is hot, add marinated chicken pieces; cook until done and crispy on outside (can also use indoor grill or outside BBQ). When fully cooked, remove chicken. Let rest for a few minutes, then cut into thin slices. Set aside. Discard and do NOT use the marinade that has been in contact with the chicken, to avoid cross contamination.
  3. In a separate skillet, heat a teaspoon of oil on medium-high heat. Add sliced onions and bell peppers. Cook until tender (4-5 minutes), stirring occasionally. Remove from heat; set aside.
To Assemble Salad: Fill serving dish with torn romaine leaves. Evenly distribute black beans, peppers and onions over lettuce. Add sliced avocado and crisp tortilla strips. Sprinkle with cilantro leaves. Place a dollop of sour cream on top and add a lime wedge (for garnish). Drizzle reserved marinade over salad. Serve... and ENJOY!
    Recipe Notes

    Caloric calculation does not include sour cream or tortilla strip garnish. Prep Time does not include marinating time for chicken.

    TO MAKE TORTILLA STRIPS: Cut 2 corn tortillas in half, then cut into thin strips. Coat strips with 1 Tablespoon of vegetable oil, then bake at 375 degrees for 5-6 minutes on each side (flipping midway through baking), until light brown and crispy.

    Nutrition Facts
    Grilled Chili & Lime Chicken Fajita Salad
    Amount Per Serving (1 serving)
    Calories 544 Calories from Fat 288
    % Daily Value*
    Fat 32g49%
    Saturated Fat 4g25%
    Cholesterol 72mg24%
    Sodium 1329mg58%
    Potassium 1561mg45%
    Carbohydrates 35g12%
    Fiber 14g58%
    Sugar 7g8%
    Protein 32g64%
    Vitamin A 11655IU233%
    Vitamin C 123.8mg150%
    Calcium 85mg9%
    Iron 3.7mg21%
    * Percent Daily Values are based on a 2000 calorie diet.

    Here’s one more to pin on your Pinterest boards!Grilled Chili Lime Chicken Fajita Salad is delicious, with marinated chicken, peppers, onions, black beans, avocado and lettuce, and a chili lime dressing!

    Save

    Save

    Save

    Save

    Save

    Save

    Save

    Save

    Save

    Save

    Save

    Save

    Save

    Save

    Save

    Save

    Piña Colada Ice Cream

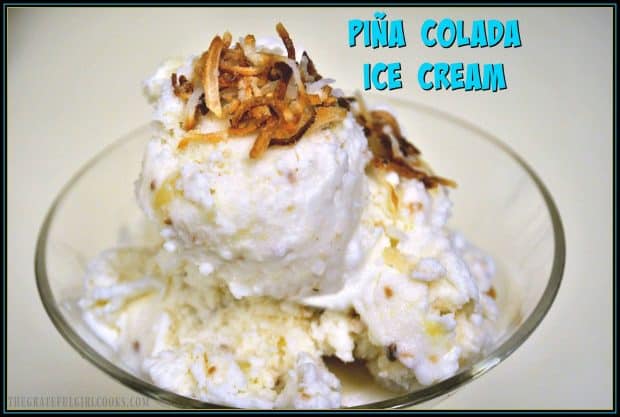
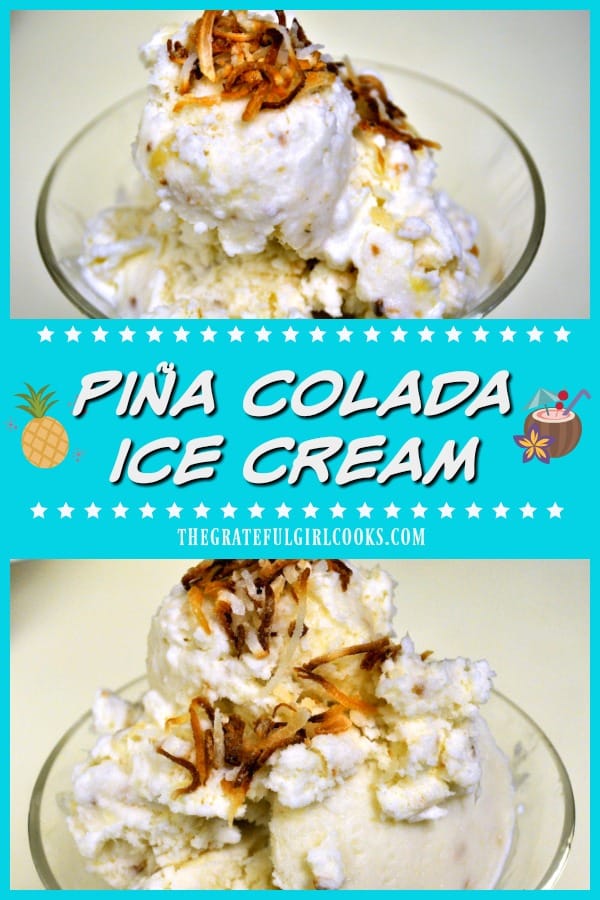
    Enjoy a taste of the tropics with yummy Piña Colada Ice Cream, with pineapple, cream of coconut, rum extract, coconut milk, & grated toasted coconut.Enjoy a taste of the tropics with yummy Piña Colada Ice Cream, with pineapple, cream of coconut, rum extract, coconut milk, & grated toasted coconut.
    Summertime is coming… blue skies, warm weather, evenings spent out on the back deck by the fire pit… enjoying a dish of homemade Piña Colada Ice Cream! Oh boy – I can hardly wait! We have had the wettest winter I can remember in a LONG time here in Oregon, and we are LONGING for sunshine and hot weather to finally make it’s appearance!

    One of the traditions we have is to make homemade ice cream throughout the year… at least this Piña Colada Ice Cream makes it FEEL like summer, thanks to it’s coconut/pineapple tropical flavor!

    Scroll Down For A Printable Recipe Card At The Bottom Of The Page

    How To Make Piña Colada Ice Cream

    In a large mixing bowl, combine whipping cream, cream of coconut, coconut milk, and pineapple juice. (If desired, you can add 1/4 teaspoon of Rum extract, but it is not necessary).  Stir until combined.  Add coconut flakes and stir.

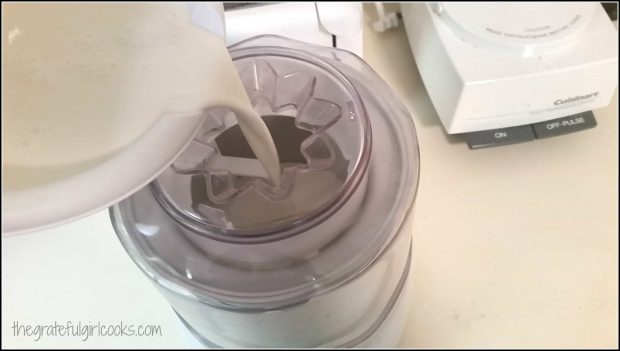
    Pour this mixture into the canister of an ice cream maker and freeze according to manufacturer instructions. I use an electric indoor machine and it takes 20-25 minutes for soft serve consistency.  About 5 minutes BEFORE the piña colada ice cream is done, add the drained, crushed pineapple.

    Ice cream base is poured into machine for freezing.

    Let Ice Cream Firm Up In Freezer, Then Serve!

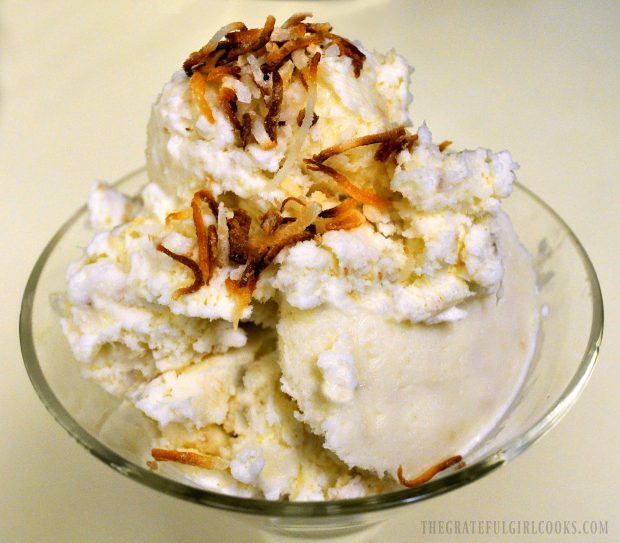
    When ice cream is done, transfer it to a freezer safe container with a lid. Freeze an additional 3-4 hours until firm.  When it is ready to serve, garnish each scoop of piña colada ice cream with toasted coconut flakes. NOTE: See the notes section of the printable recipe (below) for instructions on how to toast the coconut.

    The pina colada ice cream is garnished with toasted shredded coconut to serve.

    That’s it! Enjoy a “taste of the tropics” any time of the year with this simple and delicious piña colada ice cream! Sure hope you enjoy it.

    Looking For More ICE CREAM Recipes?

    You can find all of my recipes in the Recipe Index, located at the top of the page. I have quite a few recipes for ice cream. they include:

    Interested In More Recipes?

    Thank you for visiting this website. I appreciate you using some of your valuable time to do soIf you’re interested, I publish a newsletter 2 times per month (1st and 15th) with all the latest recipes, and other fun info. I would be honored to have you join our growing list of subscribers, so you never miss a great recipe!
    There is a Newsletter subscription box on the top right side (or bottom) of each blog post, depending on the device you use, where you can easily submit your e-mail address (only) to be included in my mailing list.

    You Can Also Find Me On Social Media:
    Facebook page: The Grateful Girl Cooks!
    Pinterest: The Grateful Girl Cooks!
    Instagram: jbatthegratefulgirlcooks

    Author's signatureRecipe Source:  Unknown. Copied recipe onto notebook paper many, many years ago, but did not write down the source. Oops.

    0 from 0 votes
    Piña Colada Ice Cream
    Prep Time
    30 mins
    Cook Time
    0 mins
    Total Time
    30 mins
     

    Enjoy a taste of the tropics with yummy Piña Colada Ice Cream, with pineapple, cream of coconut, rum extract, coconut milk, & grated toasted coconut.

    Category: Dessert
    Cuisine: American
    Keyword: piña colada ice cream
    Servings: 10 ½ cup servings
    Calories Per Serving: 387 kcal
    Author: JB @ The Grateful Girl Cooks!
    Ingredients
    • 3/4 cup whipping cream
    • 1 can cream of coconut use 15 oz. or 13.5 oz (brands vary in weight)
    • 1 cup coconut milk unsweetened (canned=13.66 oz.)
    • 2 Tablespoons pineapple juice (reserved from can of crushed pineapple)
    • 1/4 teaspoon Rum extract (optional-not necessary)
    • 1 cup coconut flakes
    • 3/4 cup canned crushed pineapple , drained (juice reserved)
    • 1/4 cup TOASTED coconut flakes , for garnish (see Notes section for instructions)
    Instructions
    1. In a large mixing bowl, combine whipping cream, cream of coconut, coconut milk, and pineapple juice. (you can also add 1/4 teaspoon of Rum extract, if desired). Stir until combined. Add coconut flakes and stir to incorporate. Pour this mixture into canister of ice cream maker and freeze according to manufacturer instructions. About 5 minutes BEFORE the ice cream is done, add drained crushed pineapple.
    2. When ice cream is done, transfer it to a freezer safe container with a lid. Freeze for an additional 3-4 hours until firm. When it is ready to serve, garnish each scoop with toasted coconut flakes (see notes section of printable recipe for instructions on how to toast the coconut).
    Recipe Notes

    To toast coconut flakes for garnish: Preheat oven to 325 degrees. Spread coconut evenly on cookie sheet lined with parchment paper. Bake for about 15-20 minutes. Check it every 5 minutes. Remove from oven when coconut is golden brown. Remove coconut from cookie sheet; let cool completely before garnishing ice cream.

    Nutrition Facts
    Piña Colada Ice Cream
    Amount Per Serving (0.5 cup)
    Calories 387 Calories from Fat 225
    % Daily Value*
    Fat 25g38%
    Saturated Fat 20g125%
    Cholesterol 24mg8%
    Sodium 35mg2%
    Potassium 177mg5%
    Carbohydrates 40g13%
    Fiber 3g13%
    Sugar 35g39%
    Protein 1g2%
    Vitamin A 285IU6%
    Vitamin C 4.8mg6%
    Calcium 25mg3%
    Iron 1.2mg7%
    * Percent Daily Values are based on a 2000 calorie diet.

    Here’s one more to pin on your Pinterest boards!Enjoy a taste of the tropics with yummy Piña Colada Ice Cream, with pineapple, cream of coconut, rum extract, coconut milk, & grated toasted coconut.

    Save

    Save

    Save

    Save

    Save

    Save

    Save

    Save

    Save

    Save

    Save

    Save

    Save

    Healthy Chocolate Oatmeal

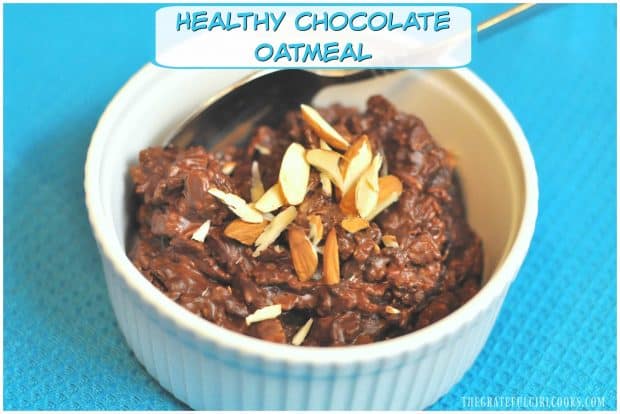
    Make healthy chocolate oatmeal in the microwave! It’s delicious and will fill you up! This QUICK breakfast is a yummy “morning bowl of goodness”.Make healthy chocolate oatmeal in the microwave! It's delicious and will fill you up! This QUICK breakfast is a yummy "morning bowl of goodness".I recently found a simple, quick recipe for Healthy Chocolate Oatmeal made in the microwave and thought I’d try it. After all, how bad could a healthy breakfast with oatmeal AND chocolate be for you, right?  The recipe makes one serving, but can be easily doubled.

    Scroll Down For A Printable Recipe Card At The Bottom Of The Page

    Why Is It Called HEALTHY Chocolate Oatmeal?

    The reason this chocolate oatmeal can be considered “healthy” is that it is made with non-fat milk, unsweetened cocoa powder and artificial sweetener (no sugar!).  And guess what?  It is yummy!

    This is a perfect for those of you, who like me, have a deep love of all things chocolate, and find it appealing, even in a bowl of healthy OATMEAL! Chocolate for the win! The best part is that making healthy chocolate oatmeal is as simple as stirring up the ingredients and cooking it in the microwave until done. Here’s how to make this yummy breakfast treat:

    How To Make Healthy Chocolate Oatmeal

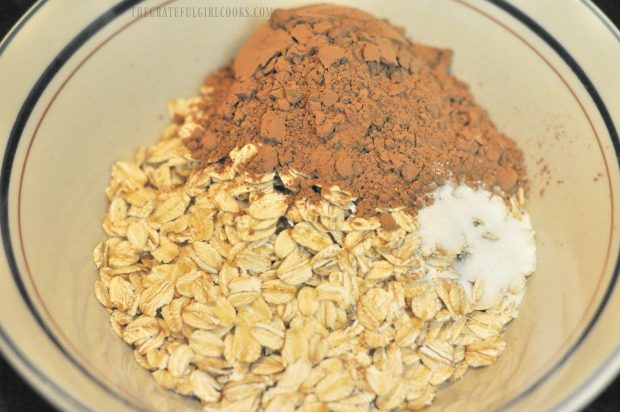
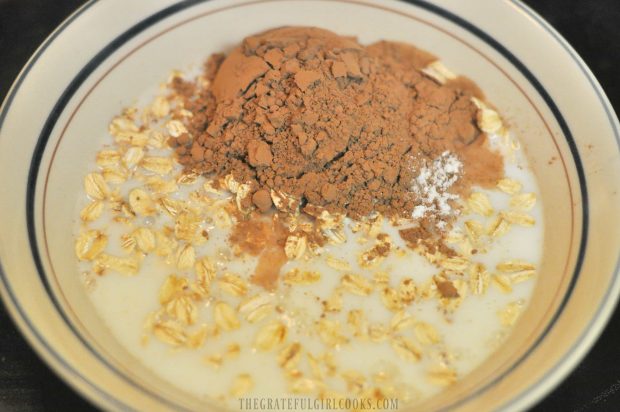
    Mix the oats, milk, cocoa powder and sweetener together in a microwave safe bowl. Continue to stir (it takes a minute or two to get the cocoa stirred in, but it WILL get there, so keep stirring- trust me!).

    Oats, cocoa powder and sweetener are placed into microwave safe bowl.

    Milk is added to oats, and cocoa powder before mixing.

    Microwave The Healthy Chocolate Oatmeal

    Place the bowl in microwave. Microwave on HIGH power for 2 minutes and 15 seconds. Stir oats every 45 seconds (total of 3 times), until the oatmeal has significantly thickened.

    Remove the oatmeal from the microwave, being careful, because it is HOT. Let the oatmeal rest for just a minute before serving. If desired, top with a few sliced raw almonds. Note: Here is where I transferred the cooked oatmeal to a pretty dish for photographing it, but that is not necessary!

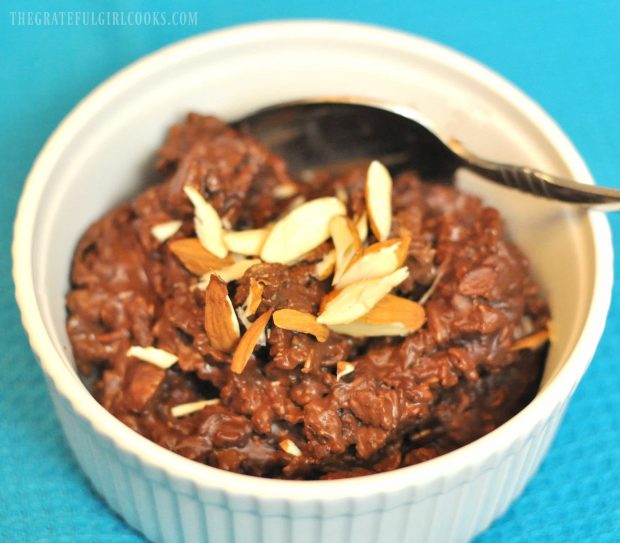
    Healthy chocolate oatmeal is topped with almonds after being microwaved.
    Add an additional splash of milk (if oatmeal is a bit too thick for your liking). Stir, serve and enjoy! If you enjoy this delicious healthy chocolate oatmeal, you might want to try my yummy recipe for Maple Nut Oatmeal, too! It’s so good!

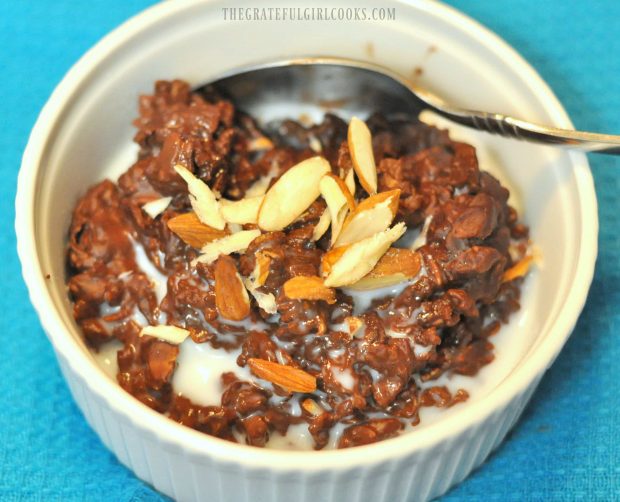
    A little milk added to chocolate oatmeal to blend.

    It couldn’t be simpler to enjoy a hot, filling bowl of CHOCOLATE oatmeal for breakfast, without adding a lot of additional calories or sugar to your morning! Hope you will consider trying this easy recipe. Have a wonderful day, friends.

    Looking For More Breakfasts Using OATS?

    You can find all of my recipes in the Recipe Index, located at the top of the page. A few recipes that use oats include:

    Interested In More Recipes?

    Thank you for visiting this website. I appreciate you using some of your valuable time to do soIf you’re interested, I publish a newsletter 2 times per month (1st and 15th) with all the latest recipes, and other fun info. I would be honored to have you join our growing list of subscribers, so you never miss a great recipe!
    There is a Newsletter subscription box on the top right side (or bottom) of each blog post, depending on the device you use, where you can easily submit your e-mail address (only) to be included in my mailing list.

    You Can Also Find Me On Social Media:
    Facebook page: The Grateful Girl Cooks!
    Pinterest: The Grateful Girl Cooks!
    Instagram: jbatthegratefulgirlcooks

    Author's signatureRecipe Source: http://dineanddish.net/2016/07/healthier-chocolate-oatmeal-recipe/

    0 from 0 votes
    Healthy Chocolate Oatmeal
    Prep Time
    3 mins
    Cook Time
    2 mins
    Total Time
    5 mins
     
    Make healthy chocolate oatmeal in the microwave! It's delicious and will fill you up! This QUICK breakfast is a yummy "morning bowl of goodness".
    Category: Breakfast
    Cuisine: American
    Keyword: healthy chocolate oatmeal
    Servings: 1 serving
    Calories Per Serving: 197 kcal
    Author: JB @ The Grateful Girl Cooks!
    Ingredients
    • 1/3 cup old-fashioned oats (not instant)
    • 2/3 cup non-fat milk
    • 2 Tablespoons unsweetened cocoa powder
    • 1 teaspoon Truvia (or Stevia packet)
    For serving (optional):
    • A few sliced raw almonds
    • A splash of milk (to thin out oatmeal, if desired)
    Instructions
    1. Mix the oats, milk, cocoa powder and sweetener together in a microwave safe bowl. Continue to stir (it takes a minute or two to get the cocoa stirred in, but it WILL get there-trust me!).
    2. Place the bowl in microwave. Microwave on HIGH power for 2 minutes and 15 seconds. Stir oats every 45 seconds (total of 3 times), until the oatmeal has significantly thickened.
    3. Remove oatmeal. Let stand for a minute or so before serving. If desired, top with a few sliced raw almonds, and additional splash of milk (if oatmeal is too thick). Stir, serve and enjoy!
    Nutrition Facts
    Healthy Chocolate Oatmeal
    Amount Per Serving (1 g)
    Calories 197 Calories from Fat 36
    % Daily Value*
    Fat 4g6%
    Saturated Fat 1g6%
    Cholesterol 3mg1%
    Sodium 72mg3%
    Potassium 504mg14%
    Carbohydrates 32g11%
    Fiber 6g25%
    Sugar 8g9%
    Protein 11g22%
    Vitamin A 335IU7%
    Calcium 226mg23%
    Iron 2.5mg14%
    * Percent Daily Values are based on a 2000 calorie diet.

    Here’s one more to pin on your Pinterest boards!Make healthy chocolate oatmeal in the microwave! It's delicious and will fill you up! This QUICK breakfast is a yummy "morning bowl of goodness".

    Save

    Save

    Save

    Save

    Save

    Save

    Save

    Save

    Save

    Save

    Save

    Save

    How To Can Chili

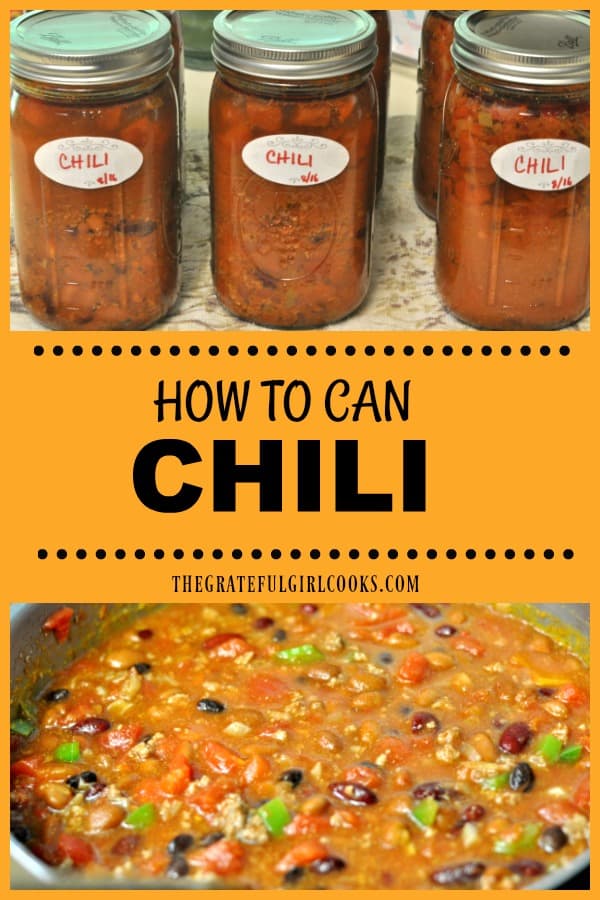
    Learn how to can chili (meat and beans) using safe pressure canning guidelines. Recipe yields 8 qts. of old-fashioned chili, for long term storage.Learn how to can chili (meat and beans) using safe pressure canning guidelines. Recipe yields 8 qts. of old-fashioned chili, for long term storage.
    Last summer I canned a variety of foods to stock our pantry with, in order to have plenty for Fall and Winter.  I canned vegetables from our garden, fruit picked at local farms, as well as homemade soups and stews.  One project I tackled was learning how to can chili (using my recipe) for long term storage.

    I’m glad I did, because we were able to have jars of Mom’s Old-Fashioned Chili in our pantry to eat whenever we wanted through the long Winter!  Homemade chili must be canned using a pressure canner, so I slightly adapted my recipe so it conformed to safe canning guidelines and the results were wonderful! Currently I only have ONE jar left from all the quarts of chili I canned last summer, so I feel the need to “can” some more coming on!

    Some people feel like you should add cooked beans AFTER you open the jars so the beans don’t get soggy, but I have not found this to be the case. I add the beans and can them at the same time, with no problem.

    Scroll down For a Printable Recipe Card At The Bottom Of the Page

    Making Canned Chili

    This recipe as written makes about 8 quarts of chili. The process is fairly simple.  At the same time I was cooking the chili, I was preparing the pressure canner, with 3″ of simmering water. I did this according to the pressure canner’s manufacturer instructions. The jars and lids were also prepped following USDA canning guidelines.

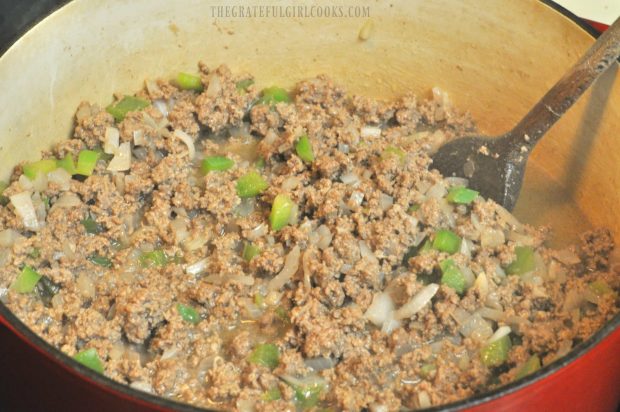
    Ground beef, diced onions and a large diced green pepper were cooked in a large pan until done. Grease was drained from pan and discarded.  Meat mixture was then transferred to a very large stockpot.

    Ground beef, onions, and bell pepper are cooked in pan.

    Adding LOTS Of Flavor!

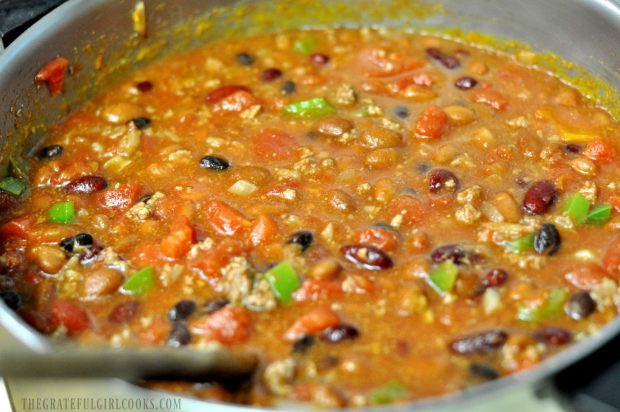
    To the meat mixture, add canned diced tomatoes, kidney beans, chili beans, pinto beans, and black beans.  I also added water and the spices (oregano, cumin, salt, chili powder, cayenne powder, paprika, salt, and Worcestershire sauce).

    The chili was cooked on medium-high until it was boiling. At this point, give it a taste, and adjust salt, if necessary, to suit your preference.

    Lots of spices, beans, and tomatoes are added to the chili.

    How To Can Chili

    Prepared (clean and hot) canning jars were filled with the hot chili, leaving a 1″ headspace in each jar.  Air bubbles were removed, and the jar rims were wiped completely clean with a wet dishcloth to ensure a good seal.

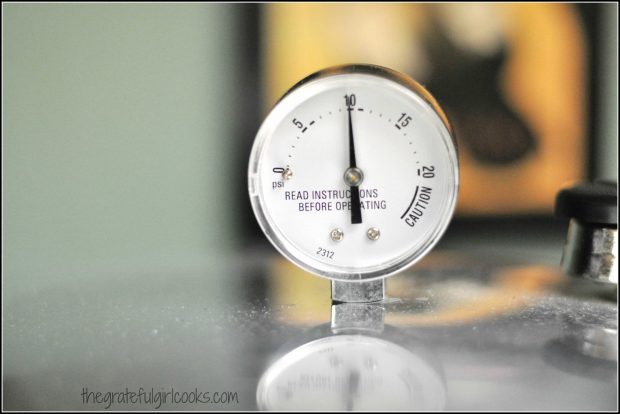
    I centered flat lids on top and screwed down the rings until they were fingertip tight.  Quart jars were processed at 10# pressure for 90 minutes. If using pint sized jars, process at 10# pressure for 75 minutes.

    Quart jars are processed at 10 pounds of pressure.

    Once cooking time was completed, I followed manufacturer instructions for letting the pressure drop to zero naturally, then followed instructions for safely removing the vent and lid. PLEASE follow your own pressure canners manufacturer instructions!

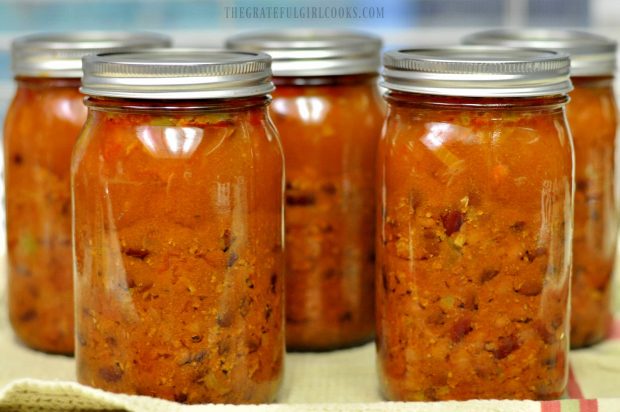
    Once I removed the HOT jars of chili, I placed them onto a dish towel on the counter (don’t place them directly on countertop because temperature variations could lead to cracking the jars), and let them sit undisturbed overnight.

    Once they had completely cooled, I checked to make sure each jar was properly sealed, wiped down the jars, put a label on each one, and into our pantry they went!

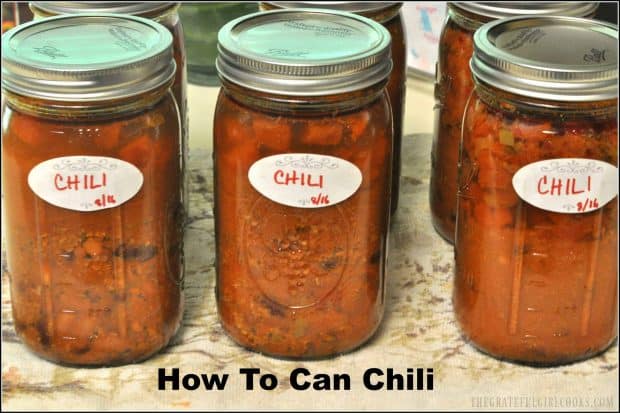
    Jars cool down after processing. Now you know how to can chili!

    I’ve canned chili several times since then, and have had great results. It has been wonderful to have my homemade chili waiting to be opened and used in our pantry, for a good hot bowl of soup or a chili cheese dog with the hubby!

    Hope you will consider trying this recipe. PLEASE be sure to follow all recommended safe canning methods to ensure your success!

    Looking For More PRESSURE CANNING Recipes?

    You can find all of my canning recipes in the Recipe Index, located at the top of the page. A few pressure canning recipes you might be interested in include:

    Interested In More Recipes?

    Thank you for visiting this website. I appreciate you using some of your valuable time to do soIf you’re interested, I publish a newsletter 2 times per month (1st and 15th) with all the latest recipes, and other fun info. I would be honored to have you join our growing list of subscribers, so you never miss a great recipe!
    There is a Newsletter subscription box on the top right side (or bottom) of each blog post, depending on the device you use, where you can easily submit your e-mail address (only) to be included in my mailing list.

    You Can Also Find Me On Social Media:
    Facebook page: The Grateful Girl Cooks!
    Pinterest: The Grateful Girl Cooks!
    Instagram: jbatthegratefulgirlcooks

    Author's signature

    Recipe adapted from: http://www.thegratefulgirlcooks.com/moms-old-fashioned-chili/

    4.34 from 3 votes
    How To Can Chili
    Prep Time
    20 mins
    Cook Time
    1 hr 30 mins
    Total Time
    1 hr 50 mins
     

    Learn how to can chili (meat and beans) using safe pressure canning guidelines. Recipe yields 8 qts. of old-fashioned chili, for long term storage.

    Category: Entree
    Cuisine: Mexican
    Keyword: how to can chili
    Servings: 8 quarts
    Calories Per Serving: 1014 kcal
    Author: JB @ The Grateful Girl Cooks!
    Ingredients
    • 3 pounds ground beef
    • 2 medium onions , diced
    • 1 large green bell pepper , diced
    • 56 ounces canned diced tomatoes (including juice)
    • 31 ounces canned kidney beans, drained
    • 31 ounces canned chili beans (including liquid)
    • 31 ounces canned black beans, drained
    • 15.5 ounces canned pinto beans, drained
    • Water (use 3½ large 28 ounce cans of water - use empty diced tomato cans)
    • 3 teaspoons dried oregano
    • 2 Tablespoons cumin
    • 4-5 teaspoons salt
    • 3 teaspoons paprika
    • Tablespoons garlic powder
    • teaspoons cayenne pepper
    • 8 Tablespoons chili powder
    • 5 Tablespoons Worcestershire sauce
    • Additional salt to taste (if necessary)
    Instructions
    1. While cooking chili, prepare your pressure canner, with 3" of simmering water. Prep jars and lids according to safe USDA canning guidelines.
    2. Brown ground beef, diced onions and diced green pepper in a large pan until fully cooked. Drain grease and discard. Transfer meat mixture to a very large stockpot.
    3. Add canned diced tomatoes, kidney beans, chili beans, pinto beans, and black beans to meat mixture. Stir. Add water,spices and Worcestershire sauce. Stir all ingredients well to combine. Cook chili on medium-high until it begins boiling. Give it a taste, and adjust salt, if necessary.
    4. Fill prepared (clean & hot) canning jars with hot chili, leaving a 1" headspace in each jar. Remove air bubbles with utensil, and adjust headspace, if necessary. Wipe jar rims clean with a wet dishcloth, to ensure a good seal. Center flat lids on top and screw down rings until fingertip tight. Process quart jars at 10# pressure for 90 minutes. If using pint jars, process at 10# pressure for 75 minutes.
    5. Once processing time is completed, let pressure drop to zero naturally, then follow instructions for safely removing vent and lid. PLEASE follow your pressure canners manufacturer instructions!
    6. Remove HOT jars of chili, place onto a dish towel on counter (don't place jars directly on counter as temperature variations could lead to cracking the jars). Let jars sit and cool undisturbed overnight. Once completely cooled, check to ensure each jar is properly sealed, wipe down jars, label each one, and store in pantry!
    Recipe Notes

    The chili thickens a little as it is processed. Once you open a jar, you may want to add just a little bit of water to the chili before heating, to thin it out. Caloric calculation is for 1 quart jar of chili.

    Nutrition Facts
    How To Can Chili
    Amount Per Serving (1 quart jar of chili)
    Calories 1014 Calories from Fat 342
    % Daily Value*
    Fat 38g58%
    Saturated Fat 13g81%
    Cholesterol 120mg40%
    Sodium 2743mg119%
    Potassium 2981mg85%
    Carbohydrates 108g36%
    Fiber 34g142%
    Sugar 16g18%
    Protein 63g126%
    Vitamin A 3380IU68%
    Vitamin C 51.6mg63%
    Calcium 316mg32%
    Iron 18.5mg103%
    * Percent Daily Values are based on a 2000 calorie diet.

    Here’s one more to pin on your Pinterest boards!Learn how to can chili (meat and beans) using safe pressure canning guidelines. Recipe yields 8 qts. of old-fashioned chili, for long term storage.


    Save

    Save

    Save

    Save

    Save

    Save

    Save

    Save

    Save

    Save

    Save

    Save

    Save

    Save

    Save

    Save

    Save

    Save

    Save

    Save

    Save

    Chicken And Veggie Stir-Fry

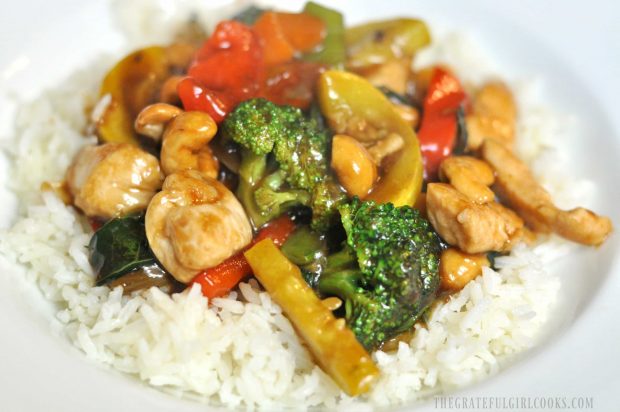
    Chicken Veggie Stir Fry, with broccoli, carrots, bok choy, zucchini, onions,etc. in an Asian-inspired sauce, is served on rice in this delicious, 20 minute dish.Chicken Veggie Stir Fry, with broccoli, carrots, bok choy, zucchini, onions,etc. in an Asian-inspired sauce, is served on rice.
    Do you enjoy stir-fry meals?  We sure do… in fact, I’ve been making this delicious, Asian-inspired Chicken Veggie Stir Fry using the same process and “recipe” for over 20 years.

    This dish couldn’t be simpler to make! I came up with a simple Asian sauce after experimenting years ago, then simply added chicken and fresh veggies, cooked it together, and have been making chicken veggie stir fry like this ever since!

    The process is simple: stir-fry lightly seasoned, cubed chicken breasts and lots of fresh veggies.  Add a homemade Asian flavored sauce (so quick & easy to make), then serve on a bed of rice! The recipe is easy, packed with veggies, and is wonderfully delicious!

    Scroll Down For A Printable Recipe Card At The Bottom Of The Page

    How To Make Chicken Veggie Stir Fry

    TIMESAVING TIP: To save time, I cooked all three parts of this recipe at the same time (it’s easy to do).

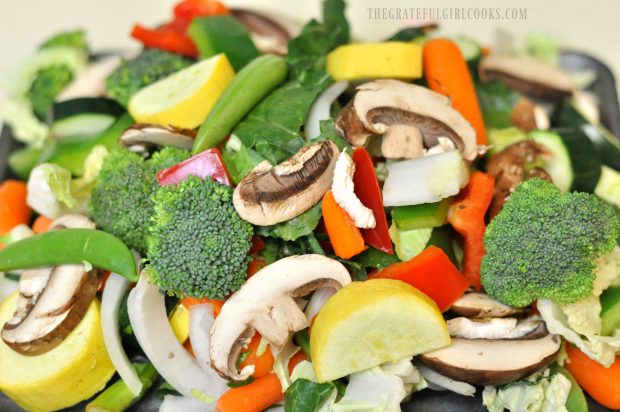
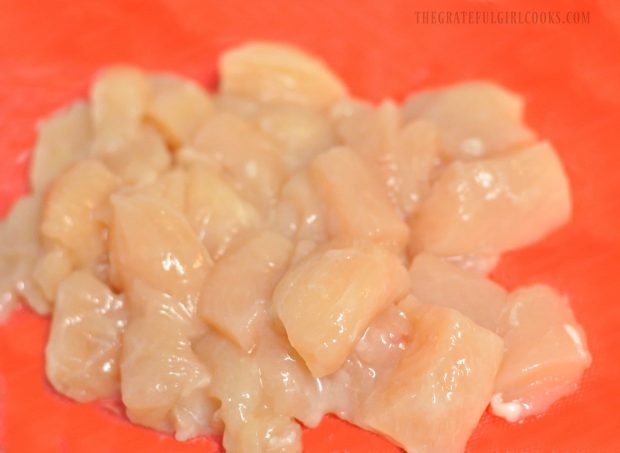
    The first thing you will need to do is cook rice according to package directions, and prep the veggies and chicken while the rice is cooking. Make sure the veggies are cut into bite sized pieces. Cut boneless, skinless chicken breasts into 2 inch cubes.

    Fresh veggies are cut and prepped to add to chicken veggie stir fry.

    Chicken breasts are cut into cubes to cook for the chicken veggie stir fry.

    Make The Sauce For Chicken Veggie Stir Fry

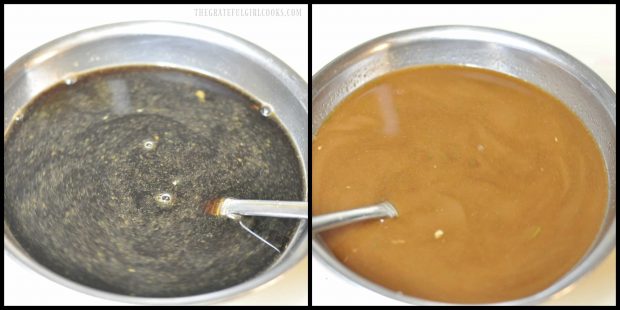
    Prepare the stir-fry sauce by combining chicken broth, soy sauce, and ground ginger in a small bowl. Stir in the corn starch and mix well to dissolve any lumps, and set it aside when done.

    Asian sauce is made to coat the finished chicken veggie stir fry.

    Cook the Vegetables

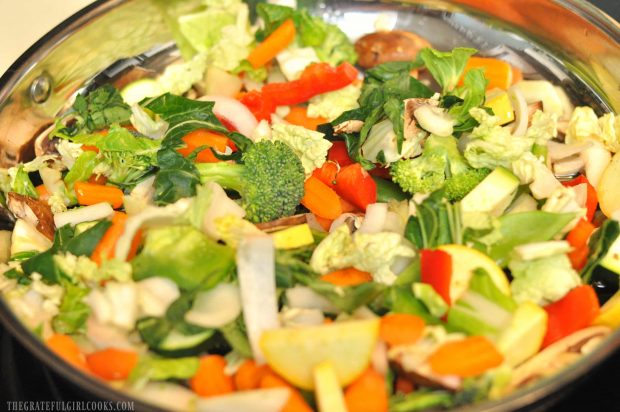
    In a large skillet, heat HALF of the oil on medium-high heat until very hot, but not smoking.  Add all the veggies and cook for 6-7 minutes, stirring often until the veggies are crisp-tender.

    The veggies are cooked in a large skillet for the chicken veggie stir fry.

    Cook The Chicken

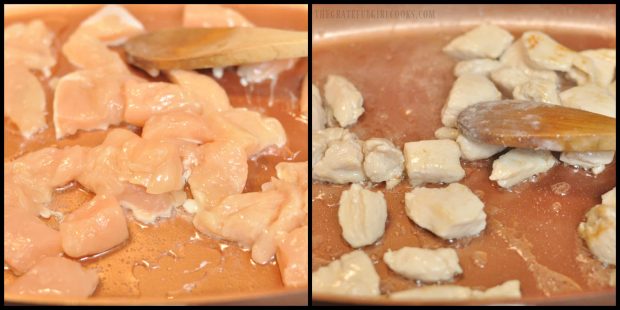
    In a separate medium skillet, heat the remaining half of the oil on medium-high until very hot, but not smoking.  Add the chicken pieces and cook, turning pieces over to cook through on all sides (about 3-4 minutes). To save time, cook the chicken while the veggies are cooking. Multi-tasking at it’s finest!

    Chicken breast is cooked before adding to the chicken veggie stir fry.

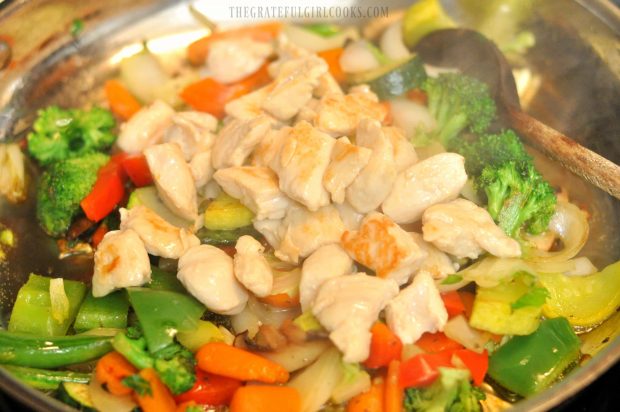
    When the chicken is finished cooking, add the pieces to the cooked veggies in the large skillet.

    The cooked chicken is added to the vegetables in large skillet.

    Add Sauce To Chicken Veggie Stir Fry

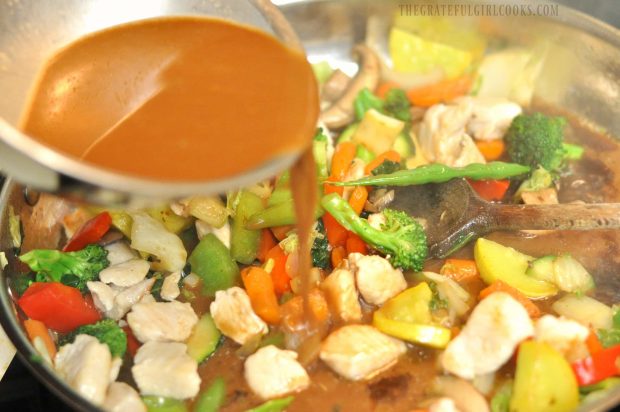
    Give the reserved sauce a good stir, then pour it over the chicken and veggies. Cook on medium-high heat, stirring often for about 2 minutes. The sauce will thicken as it cooks and will coat the chicken and veggies.

    An Asian-inspired sauce is added to the skillet full of chicken veggie stir fry.

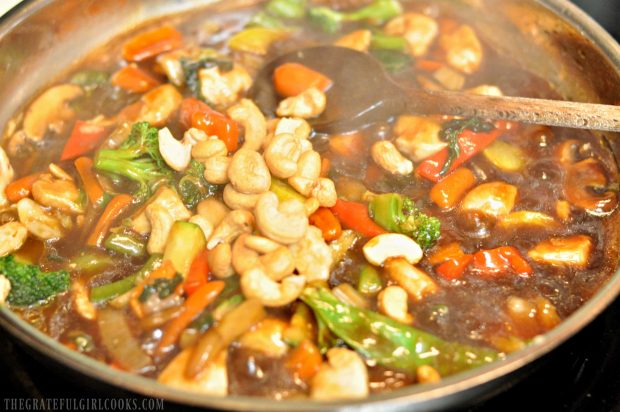
    Once the sauce has thickened and coated everything, add the cashews, and stir to combine. Cook just for a minute, until the chicken veggie stir fry is heated through.

    Cashews are added to the chicken veggie stir fry, after sauce thickens.

    Serve The Chicken Veggie Stir Fry

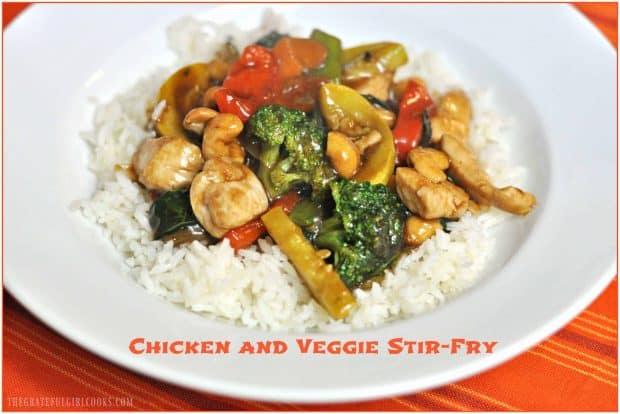
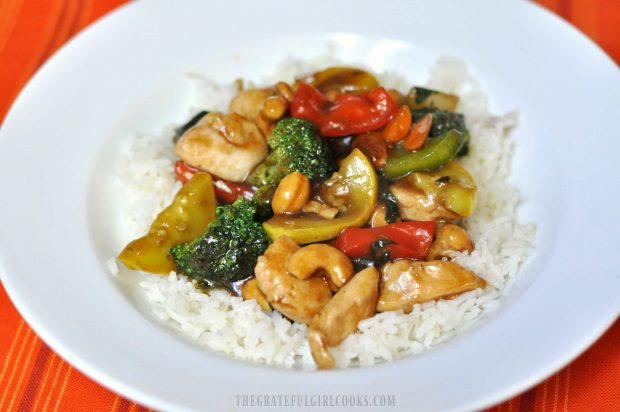
    Serve the chicken veggie stir fry hot, on top of a bed of rice (brown or white).  Grab a fork (or chopsticks) and dig right in! It’s GOOD!

    Chicken veggie stir fry is served on a bed of white rice.White rice serves as the bed for the chicken veggie stir fry.

    Can I Change The Veggies OR Make This Dish Vegetarian?

    While you can adjust the veggies according to your taste and what you have available (I’ve done this many times), the basics you should have in this dish are onion, carrots, broccoli, and red peppers, because they add so much color (and flavor) to the dish. Any other veggies you choose to add will enhance the dish with additional flavor and color!!!

    If you are a Vegetarian, no problem! Simply omit the chicken from the dish!  Be creative… make it your own… and enjoy every bite! Have a wonderful day!

    Looking For More CHICKEN Recipes?

    You can find all of my recipes in the Recipe Index, which is located at the top of the page. I have LOTS of chicken recipes, including:

    Interested In More Recipes?

    Thank you for visiting this website. I appreciate you using some of your valuable time to do soIf you’re interested, I publish a newsletter 2 times per month (1st and 15th) with all the latest recipes, and other fun info. I would be honored to have you join our growing list of subscribers, so you never miss a great recipe! 

    There is a Newsletter subscription box on the top right side (or bottom) of each blog post, depending on the device you use, where you can easily submit your e-mail address (only) to be included in my mailing list.

    You Can Also Find Me On Social Media:

    Facebook page: The Grateful Girl Cooks!
    Pinterest:
    The Grateful Girl Cooks!
    Instagram:
    jbatthegratefulgirlcooks

    Author's signature

    0 from 0 votes
    Chicken And Veggie Stir Fry
    Prep Time
    10 mins
    Cook Time
    10 mins
    Total Time
    20 mins
     
    Chicken Veggie Stir Fry, with broccoli, carrots, bok choy, zucchini, onions,etc. in an Asian-inspired sauce, is served on rice in this delicious dish.
    Category: Entree
    Cuisine: Asian
    Keyword: chicken veggie stir fry
    Servings: 4 servings
    Calories Per Serving: 483 kcal
    Author: JB @ The Grateful Girl Cooks!
    Ingredients
    For Stir-Fry
    • 3 boneless skinless chicken breasts , cut into 2 inch cubes
    • Ground ginger (to lightly season chicken with before cooking)
    • 6 cups fresh vegetables (total) *See NOTES section below.
    • 1/4 cup vegetable oil , divided
    • 1/3 cup roasted cashews
    For Stir-Fry sauce:
    • 1 cup chicken broth
    • 1/4 cup soy sauce
    • 2 Tablespoons corn starch
    • 1 teaspoon ground ginger
    For Serving: Cooked rice (prepared according to package directions)
      Instructions
      1. Cook rice according to pkg. directions.Cut veggies/chicken in bite size pieces while rice is cooking.
      2. Make stir-fry sauce by mixing chicken broth, soy sauce, and ground ginger in small bowl. Stir in corn starch and mix well. Set aside.
      3. In large skillet, heat HALF of the oil on medium-high heat until very hot, but not smoking. Add all veggies; continue cooking for about 6-7 minutes, stirring often until veggies are crisp-tender.
      4. In separate medium skillet, heat remaining half of the oil on medium-high until very hot, but not smoking. Add chicken; cook all sides until it turns white and is cooked through (about 3-4 minutes).
      5. Add cooked chicken to the veggies in large skillet.
      6. Give the sauce a stir, then pour it over chicken and veggies. Cook on medium-high heat, stirring often for about 2 minutes. The sauce will thicken as it cooks and will coat the chicken and veggies.
      7. When done, add the cashews, and stir to combine. Serve over hot cooked rice... and enjoy!
      Recipe Notes

      I used broccoli, onion, carrots, red & green bell peppers, bok choy, mushrooms, sugar snap peas, zucchini and yellow squash. Additional veggie add-ins might also include: fresh chopped asparagus, green onions, fresh green beans, celery, water chestnuts, canned/drained bean sprouts, etc.

      Nutrition Facts
      Chicken And Veggie Stir Fry
      Amount Per Serving (1 serving)
      Calories 483 Calories from Fat 198
      % Daily Value*
      Fat 22g34%
      Saturated Fat 12g75%
      Cholesterol 54mg18%
      Sodium 1253mg54%
      Potassium 1034mg30%
      Carbohydrates 45g15%
      Fiber 11g46%
      Protein 30g60%
      Vitamin A 13890IU278%
      Vitamin C 33.5mg41%
      Calcium 84mg8%
      Iron 4.2mg23%
      * Percent Daily Values are based on a 2000 calorie diet.

      Here’s one more to pin on your Pinterest boards!Chicken Veggie Stir Fry, with broccoli, carrots, bok choy, zucchini, onions, etc. in an Asian-inspired sauce, is served on rice.


      Save

      Save

      Save

      Save

      Save

      Save

      Save

      Save

      Save

      Save

      Save

      Save

      Save

      Save

      Save

      Save

      Save