Deep Dish Boysenberry Pie

Deep dish boysenberry pie is easy to prepare with fresh or frozen berries. The perfect summer dessert, especially with a scoop of vanilla ice cream!Deep dish boysenberry pie is easy to prepare with fresh or frozen berries, and is the perfect summer dessert, especially with a scoop of vanilla ice cream!One of my favorite fruit pies is Boysenberry Pie…so it stands to reason that one of my absolute favorite DEEP DISH pies is Deep Dish Boysenberry Pie! I figure it’s just MORE of a good thing, so how can that be anything but DELICIOUS? It just SCREAMS Summer to me!

Scroll Down For A Printable Recipe Card At The Bottom Of The Page

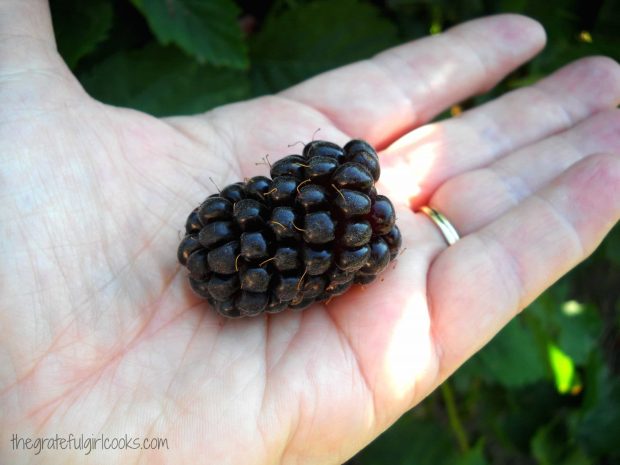
Deep dish boysenberry pie is easy to prepare with fresh or frozen berries, and is the perfect summer dessert, especially with a scoop of vanilla ice cream! I love to go berry picking each summer here in the fertile farmlands surrounding Portland. It’s fun to get out and pick boysenberries during their short growing season. YUM!!! See how big they are?

I have great memories of my Great Aunt Juanita in Southern California growing boysenberries and making us cobblers when we came to visit her in the summer.

Look at the size of that fresh picked boysenberry!

I usually end up making cobblers, jams, and “regular sized” pies when I pick my berries, but I also wanted to try my hand at making a DEEP DISH boysenberry pie…bursting with fresh sun-ripened boysenberries, and crowned with a large scoop of homemade vanilla ice cream. I made my deep dish pie in a Corningware baking dish, and not in a pie pan. It was easy. Here’s what you do:

Make The Filling For The Deep Dish Boysenberry Pie

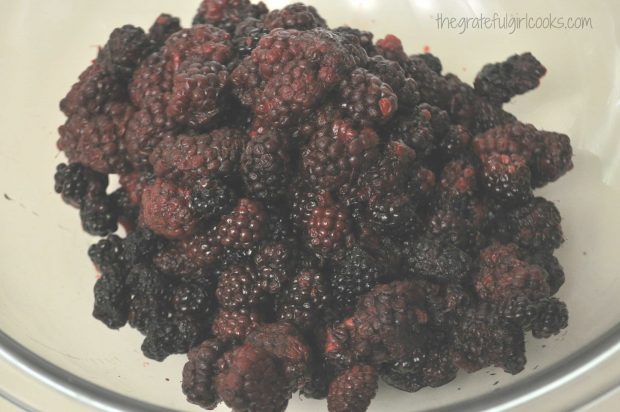
Preheat your oven to 425 degrees.  Rinse and completely drain the boysenberries.

Fresh boysenberries are rinsed then drained.

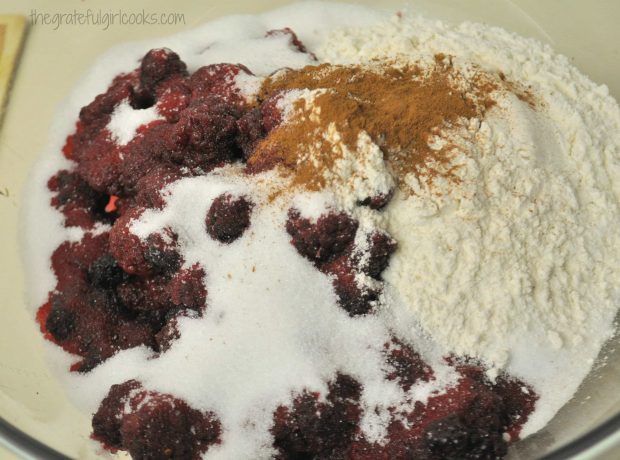
Gently mix the boysenberries with sugar, flour (or cornstarch), and cinnamon.

Boysenberries are tossed with flour, sugar and cinnamon.

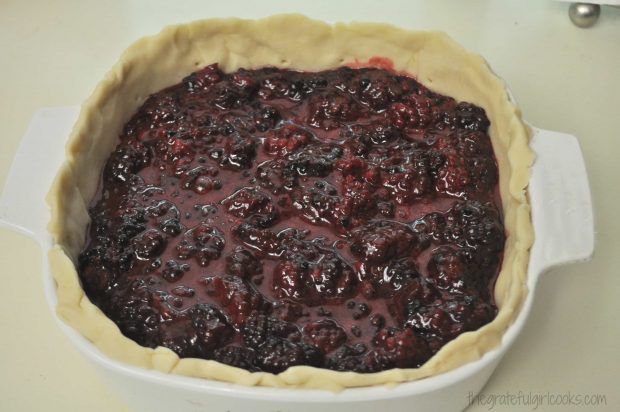
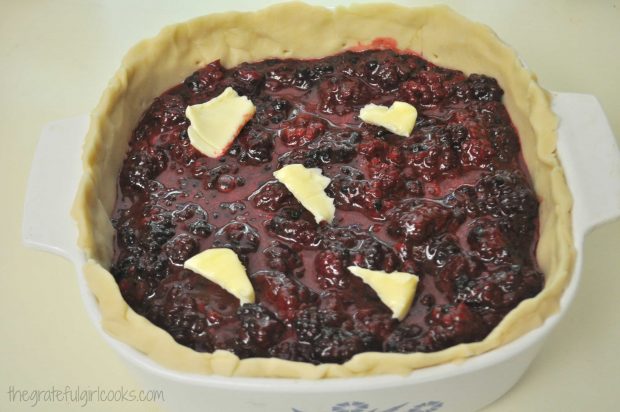
Roll out and place one of the pie crusts into the baking dish. Make sure it comes up to the rim of the dish. Prick the dough with the tines of a fork all over the sides and bottom of crust. Gently pour in the berry mixture.

Boysenberry pie filling is placed into pastry lined deep dish

Dot the top of the pie with chunks of butter.

Butter chunks are placed on top of boysenberry pie filling.

Making the Lattice Crust

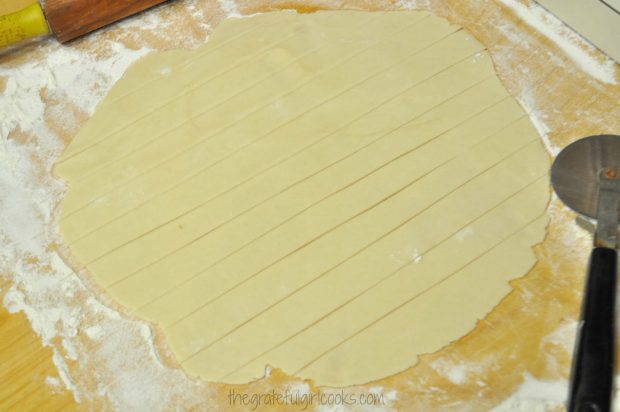
Roll out the remaining pie crust (I always use my Mom’s recipe for all my pie crusts). Cut strips for a lattice crust (I like using a pizza cutter for easy cutting- a sharp knife will also work well).

Pie dough is cut into strips for lattice top for deep dish pie.

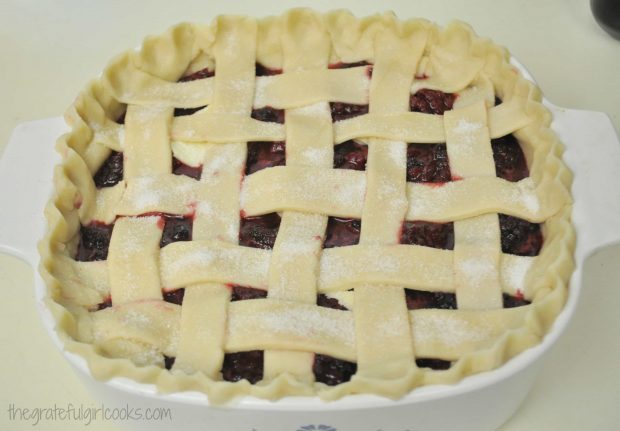
Weave the top crust onto top of pie, and pinch edges together with the bottom crust to seal crust.  Flute the edges to form crust. Lightly brush the top weaved crust with a little milk (or water), then sprinkle with sugar (lightly). This will give the top crust a little shine and a sugary top.

Top lattice crust is arranged on deep dish boysenberry pie.

Bake The Deep Dish Boysenberry Pie

Bake in preheated 425 degree oven for 45-50 minutes (or longer), until crust is light golden brown and juices are bubbling up in the center and around the sides of the pie.  Let pie cool down a bit on a wire rack before attempting to serve. This will give the juices time to coagulate a bit.

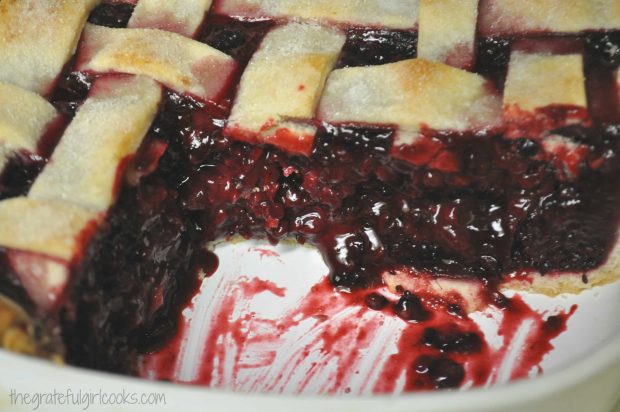
Here’s a peek at the inside of the pie, once that first piece was dished up!

Inside look at the boysenberry pie after a piece was removed.

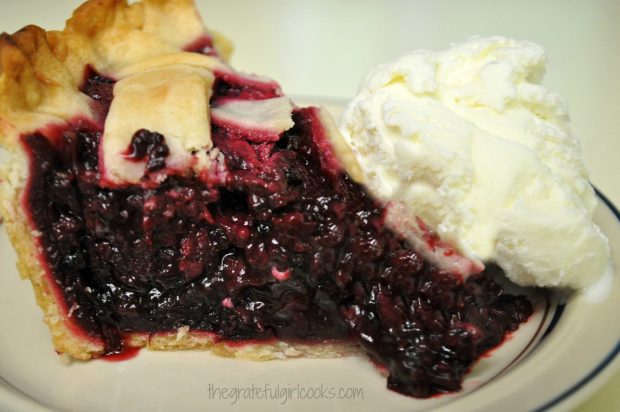
Here it is on the plate with a large scoop of homemade vanilla ice cream. You can’t really tell in this picture, but the heighth of the pie was about 2 ½ inches high. Well… at least it was BEFORE I dumped a large scoop of ice cream on it.. ha ha! Smashed that pie right down…

Deep dish boysenberry pie with a scoop of vanilla ice cream

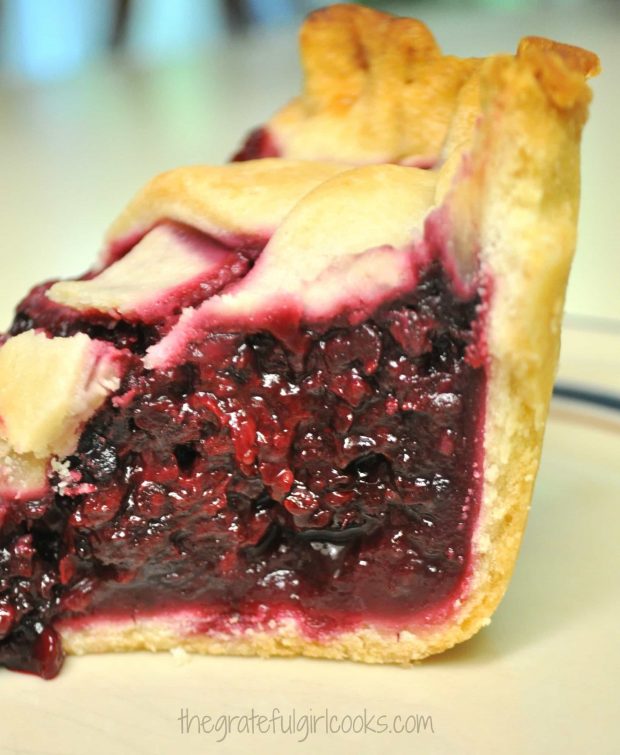
Here’s another shot from the other side of this yummy pie!

A side view of the deep dish boysenberry pie.

I hope you will consider making this delicious deep dish boysenberry pie! If you are interested in my recipe for a “regular sized” boysenberry pie (not deep dish) , you can find it here.

Looking For More PIE Recipes?

You can find all of my recipes in the Recipe Index, located at the top of the page. I have quite a few delicious pie recipes, including:

Interested In More Recipes?

Thank you for visiting this website. I appreciate you using some of your valuable time to do soIf you’re interested, I publish a newsletter 2 times per month (1st and 15th) with all the latest recipes, and other fun info. I would be honored to have you join our growing list of subscribers, so you never miss a great recipe!
There is a Newsletter subscription box on the top right side (or bottom) of each blog post, depending on the device you use, where you can easily submit your e-mail address (only) to be included in my mailing list.

You Can Also Find Me On Social Media:
Facebook page: The Grateful Girl Cooks!
Pinterest: The Grateful Girl Cooks!
Instagram: jbatthegratefulgirlcooks

Have a blessed day!

Author's signatureRecipe Adapted From:  The New Pillsbury Family Cookbook, Published by the Pillsbury Company, 1973, page 149
0 from 0 votes
Deep Dish Boysenberry Pie
Prep Time
15 mins
Cook Time
45 mins
Total Time
1 hr
 
Deep dish boysenberry pie is easy to prepare with fresh or frozen berries, and is the perfect summer dessert, especially with a scoop of vanilla ice cream!
Category: Desserts
Cuisine: American
Keyword: deep dish boysenberry pie
Servings: 8 servings
Calories Per Serving: 420 kcal
Author: JB @ The Grateful Girl Cooks!
Ingredients
  • 6 cups fresh boysenberries (rinsed and drained)
  • 1 1/4 cup granulated sugar
  • 1/2 cup flour OR 1/4 cup plus 2 Tablespoons corn starch
  • 1/2 teaspoon cinnamon
  • 2 Tablespoons cold butter (cut into chunks)
  • 2 Pastry Pie Dough Crusts (homemade or store bought)
  • A little bit of granulated sugar to sprinkle on top of crust
Instructions
  1. Preheat oven to 425 degrees F.
  2. Place boysenberries, sugar, flour (or cornstarch), and cinnamon in a large mixing bowl. Gently toss to combine fully.
  3. Roll out pie dough so you have 2 .Place 1 crust into 2 quart baking dish. Press it into dish so that it covers bottom and comes all the way up to rim of dish. Prick bottom and sides of crust with tines of fork.
  4. Gently pour the berry mixture into prepared pie crust. Dot the top of pie with chunks of butter. Cover the pie filling with the other pie crust. Seal edges. Flute edges. Cut vents to let out steam. IF MAKING LATTICE TOP CRUST: Roll out dough. Cut into approx. 1/2 inch wide strips. Lay half of strips in parallel rows on top of pie filling (about 1 inch apart). To weave, place another row of strips parallel to first rows, but lift every other strip as new strips are added. (up, under, up, under). Seal edges of crusts together. Form standing edge/rim. Flute edges.
  5. Brush top crust lightly with milk or water. Immediately sprinkle wet crust lightly with granulated sugar.
  6. Bake at 425 degrees for 45-50 minutes, or until crust is golden brown, and juices are bubbling. Remove to a wire rack and let cool down slightly, before serving. Serve with ice cream...enjoy!
Recipe Notes

NOTE: Unsweetened frozen boysenberries may be used if fresh berries are unavailable. Mix frozen fruit in with the sugar and flour, etc. Do not use sweetened frozen fruit, as that would mess up the recipe (and be WAY TOO SWEET and the syrup consistency would change!)

Nutrition Facts
Deep Dish Boysenberry Pie
Amount Per Serving (1 slice)
Calories 420 Calories from Fat 126
% Daily Value*
Fat 14g22%
Saturated Fat 5g31%
Cholesterol 7mg2%
Sodium 200mg9%
Potassium 187mg5%
Carbohydrates 70g23%
Fiber 6g25%
Sugar 38g42%
Protein 4g8%
Vitamin A 155IU3%
Vitamin C 3.1mg4%
Calcium 35mg4%
Iron 2.3mg13%
* Percent Daily Values are based on a 2000 calorie diet.

Here’s one more to pin on your Pinterest boards!Deep dish boysenberry pie is easy to prepare with fresh or frozen berries, and is the perfect summer dessert, especially with a scoop of vanilla ice cream!


Save

Save

Memorial Day – A Day To Remember…

Today is Memorial Day, and we remember… the brave men and women who have served our country in the armed forces, and lost their lives in the process. Throughout the history of our country, these everyday heroes have fallen in the line of duty. They have protected and served our country, largely been under-appreciated, yet have helped keep our nation strong and secure.Memorial Day - A Day To Remember(photo credit: studentnewsdaily.com)

Today we pause… and remember. Thank You to those who have served and paid the ultimate sacrifice for our freedom throughout the years.  We DO remember and honor you today, and remain humbly grateful for your sacrifice on behalf of our nation.  We will not forget.

Home of the free...Photo credit: unknown (Pinterest)

“The willingness of America’s veterans to sacrifice for our country earned them our lasting gratitude”. (J. Miller)

Author's signature

Interested In More Recipes?

Thank you for visiting this website. I appreciate you using some of your valuable time to do soIf you’re interested, I publish a newsletter 2 times per month (1st and 15th) with all the latest recipes, and other fun info. I would be honored to have you join our growing list of subscribers, so you never miss a great recipe!
There is a Newsletter subscription box on the top right side (or bottom) of each blog post, depending on the device you use, where you can easily submit your e-mail address (only) to be included in my mailing list.

You Can Also Find Me On Social Media:
Facebook page: The Grateful Girl Cooks!
Pinterest: The Grateful Girl Cooks!
Instagram: jbatthegratefulgirlcooks

Santa Fe Chicken

You’ll love Santa Fe Chicken, with Tex-Mex seasoned baked chicken breasts and a crushed tortilla chip crust, salsa, avocados and Pepper Jack cheese!You'll love Santa Fe Chicken, with Tex-Mex seasoned baked chicken breasts and a crushed tortilla chip crust, salsa, avocados and Pepper Jack cheese!Anyone out there love a good Tex-Mex kick to their chicken? We sure do, which is why this Santa Fe Chicken tastes fantastic!

This easy to prepare dinner dish features baked, seasoned chicken breasts with a crushed tortilla chip coating. the chicken is covered with salsa, melted Pepper Jack cheese, and avocados! Can you say “YUM”???!

The recipe is very simple to prepare. I used two large chicken breasts and cut them horizontally in half, which gave me 4 thin chicken breasts, for 4 servings! My husband and I loved the flavor of the finished Santa Fe Chicken, and I hope you will, too!

Scroll Down for A Printable Recipe Card At The Bottom Of The Page

How To Make Santa Fe Chicken

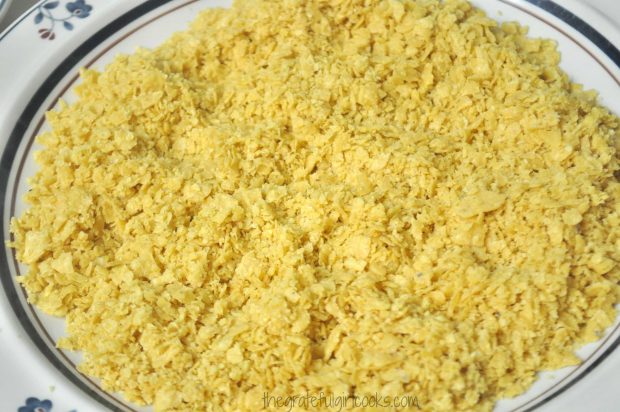
First, preheat your oven to 400 degrees F.  Finely crush tortilla chips in your food processor (or crush in a sealable plastic storage bag, using a rolling pin or mallet to crumble). These crumbs will be the coating for the chicken, so you want them to be in small pieces.  Place the crumbs onto a dinner plate, and set it aside.

Crushed tortilla chips ready to coat Santa Fe chicken.


Prepare The Chicken

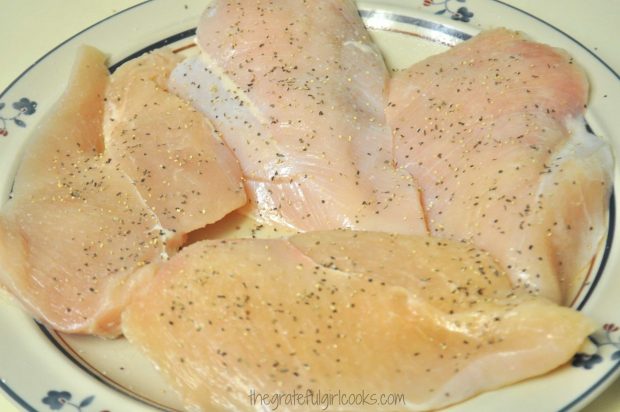
Season the boneless chicken breasts with salt, pepper, and a light sprinkling of cumin and garlic powder.

NOTE: If using whole chicken breasts, be sure to pound out the chicken with a mallet until it is about 1/4-1/2 inch thick. You can place the chicken breasts (one at a time) between two pieces of plastic wrap to do this, which will help minimize splatters. If you are using very large chicken breasts like I did, slice them horizontally in half (then no need to pound them).

Chicken breasts, lightly seasoned with salt, pepper and spices are used to make Santa Fe Chicken.
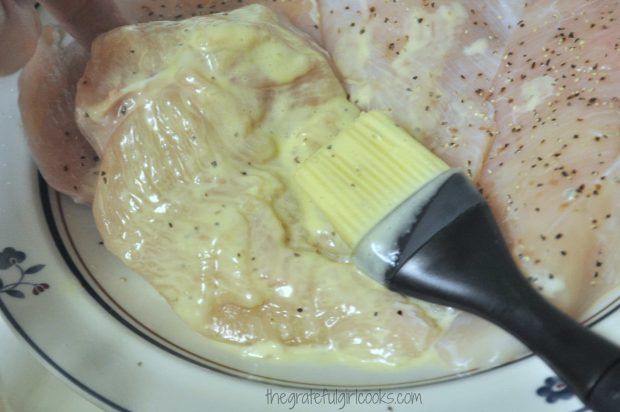
Coat each piece of chicken on both sides with mayonnaise – I know… weird, right? The mayonnaise helps keep the chicken very moist as it bakes. It also holds the tortilla chip crumbs onto the chicken! I was able to use my homemade mayonnaise to do this, which is why it has a slight yellow hue in the photo below.

Mayonnaise is brushed onto seasoned chicken breasts, to coat

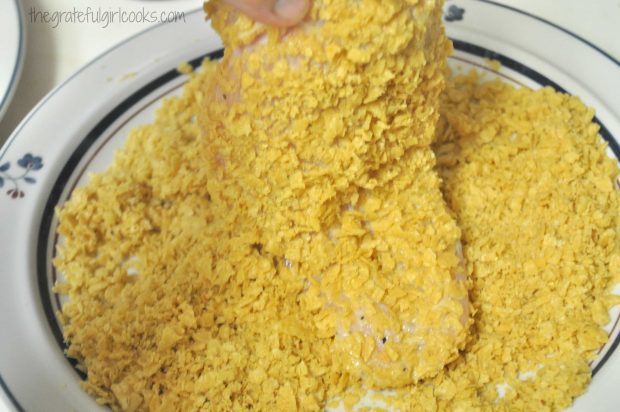
Dredge each chicken breast in the tortilla chip crumbs on BOTH sides. You can use your fingers to help pack down the crumbs, if necessary.

Santa Fe chicken breasts are dredged in crushed tortilla chips, to coat.

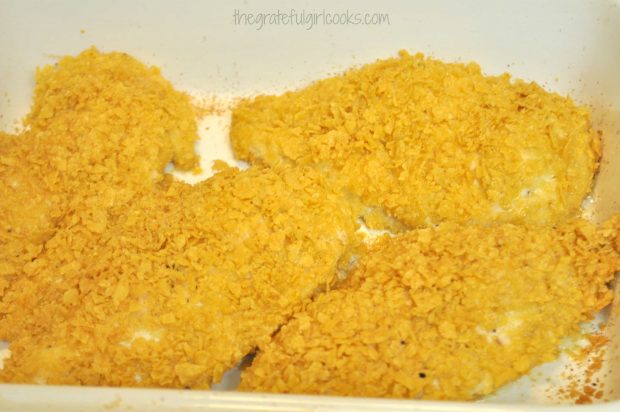
Spray a casserole dish with non stick spray, then place the coated chicken breasts in the pan.

Chicken breasts with tortilla chip topping in white baking pan

Bake The Santa Fe Chicken

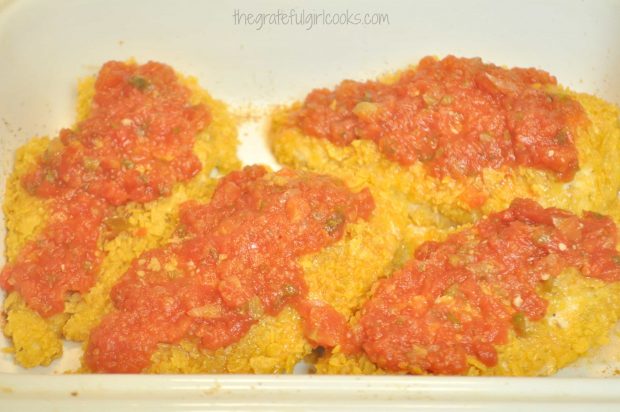
Bake Santa Fe chicken, uncovered, at 400 degrees for 20-25 minutes (or until chicken reaches internal temperature of 165 degrees). I baked mine for a total of 25 minutes. When done, remove the pan from the oven. Top each piece of chicken with salsa. I used the homemade salsa I canned last summer!

Baked Santa Fe chicken breasts are topped with salsa after baking.

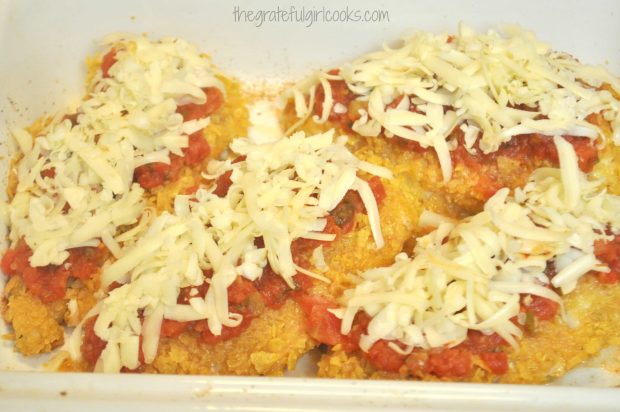
Sprinkle the grated Pepper Jack cheese on top of the salsa. Place the Santa Fe chicken back into the oven and continue cooking for 5 more minutes (until the cheese has melted).

Grated Jack cheese is added to the salsa on top of Santa Fe chicken.

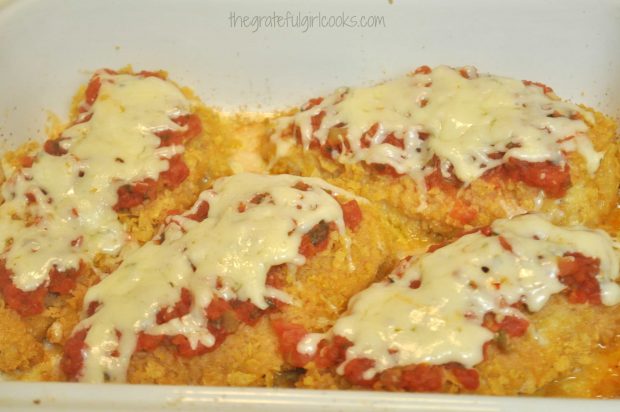
This is how it looked, right when it came out of the oven. Not sure if you’ll agree with me or not, but I think Santa Fe Chicken looks like a Tex-Mex version of Chicken Parmigiana!

Santa Fe Chicken with melted jack cheese out of oven.

Serving Santa Fe Chicken

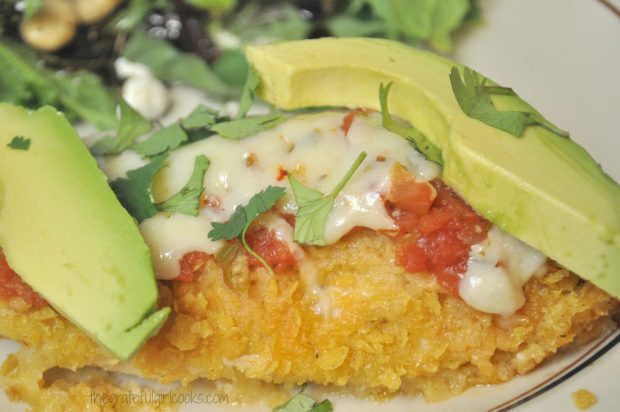
To serve, garnish each piece of Santa Fe chicken with a couple slices of fresh avocado and some chopped cilantro. Garnishing the dish is optional, but it really adds additional flavor AND beautiful color to each serving! Flavor and color is a winning combo!

That’s it! See how easy it is to whip up this delicious Santa Fe Chicken dinner for 4? I really believe you will love the Tex-Mex flavor (and the tortilla chip crust) on these baked chicken breasts! Sure hope you will give them a try… I KNOW I will be making these again!

Santa Fe Chicken, garnished with avocado slices and cilantro and ready to eat!

Have a wonderful day, and may you KNOW today just how much you are loved by the One who created you! May God bless you in all you do today.

If you’re looking for additional chicken recipes with a Southwestern taste, you might want to check out my recipes for Chicken Enchilada Mole Casserole, Chili’s Chicken Enchilada Soup (a copycat recipe), or a delicious Layered Chicken Enchilada Casserole. I have LOTS of chicken recipes (of all kinds) on this blog. You can find them all, listed in the Recipe Index at the top of the page.

Interested In More Recipes?

Thank you for visiting this website. I appreciate you using some of your valuable time to do soIf you’re interested, I publish a newsletter 2 times per month (1st and 15th) with all the latest recipes, and other fun info. I would be honored to have you join our growing list of subscribers, so you never miss a great recipe!
There is a Newsletter subscription box on the top right side (or bottom) of each blog post, depending on the device you use, where you can easily submit your e-mail address (only) to be included in my mailing list.

You Can Also Find Me On Social Media:
Facebook page: The Grateful Girl Cooks!
Pinterest: The Grateful Girl Cooks!
Instagram: jbatthegratefulgirlcooks

Author's signature

Recipe Adapted From:  http://www.cinnamonspiceandeverythingnice.com/santa-fe-baked-chicken/

0 from 0 votes
Santa Fe Chicken
Prep Time
10 mins
Cook Time
25 mins
Total Time
35 mins
 

You'll love Santa Fe Chicken, with Tex-Mex seasoned baked chicken breasts and a crushed tortilla chip crust, salsa, avocados and Pepper Jack cheese!

Category: Entree
Cuisine: Southwest
Keyword: Santa Fe chicken
Servings: 4 servings
Calories Per Serving: 691 kcal
Author: JB @ The Grateful Girl Cooks!
Ingredients
  • 4 boneless skinless chicken breasts (or 2 large breasts, cut in half horizontally!)
  • Salt and black pepper
  • Cumin (to sprinkle on chicken breasts)
  • Garlic powder (to sprinkle on chicken breasts)
  • 1/2 cup mayonnaise (can substitute olive oil, if necessary)
  • 1 + 1/2 cups tortilla chip crumbs (chips processed in food processor or pounded in plastic sealable bag)
  • 1 + 1/3 cups salsa
  • 1 + 1/3 cups grated Pepper Jack Cheese (may substitute sharp cheddar)
  • 1/3 cup chopped fresh cilantro
  • 1 ripe avocado , peeled and thinly sliced
Instructions
  1. Preheat oven to 400 degrees F. Spray a casserole dish with non stick spray (or use parchment paper on bottom of pan).
  2. Finely crush tortilla chips by processing them in a food processor (or in large plastic sealable bag using a meat mallet or rolling pin) until they are small crumbs. Place crumbs onto a dinner plate. Set aside.

  3. If using 4 chicken breasts, pound them down to about 1/4-1/2 inch thickness by placing them between sheets of plastic wrap. Use a meat mallet to pound them out. If using 2 large breasts, cut them in half horizontally (no need to pound them down thinner). Lightly season each piece of chicken with salt, pepper, cumin, and garlic powder.

  4. Spread mayonnaise onto both sides of each piece of chicken (one at a time), then dredge mayonnaise coated chicken in tortilla chip crumbs, turning to coat both sides. Use your fingers to press on additional crumbs, if necessary.

  5. Bake chicken (uncovered) in 400 degree oven for 20-25 minutes. When done, chicken should have reached an internal temperature of 165 degrees.

  6. Remove pan from oven. Spoon salsa over top of each chicken breast, followed by grated Pepper Jack cheese. Place chicken back in oven for an additional 5 minutes, until cheese has melted. Remove from oven. Serve chicken with a garnish of avocado slices and chopped cilantro. Enjoy!

Recipe Notes

To thinly slice avocado... cut in half, remove seed. Run a large spoon under and around avocado half and remove entire half of avocado in one piece. Thinly slice. Caloric calculation does NOT include avocado garnish.

Nutrition Facts
Santa Fe Chicken
Amount Per Serving (1 piece)
Calories 691 Calories from Fat 405
% Daily Value*
Fat 45g69%
Saturated Fat 12g75%
Cholesterol 116mg39%
Sodium 1283mg56%
Potassium 781mg22%
Carbohydrates 34g11%
Fiber 3g13%
Sugar 4g4%
Protein 37g74%
Vitamin A 830IU17%
Vitamin C 3.3mg4%
Calcium 380mg38%
Iron 2.1mg12%
* Percent Daily Values are based on a 2000 calorie diet.

Here’s one more to pin on your Pinterest boards!You'll love Santa Fe Chicken, with Tex-Mex seasoned baked chicken breasts and a crushed tortilla chip crust, salsa, avocados and Pepper Jack cheese!

Save

Save

Mint Chocolate Chip Ice Cream

Nothing quite beats the taste of homemade Mint Chocolate Chip Ice Cream! Enjoy this cool, creamy treat any time of the year!Nothing quite beats the taste of homemade Mint Chocolate Chip Ice Cream! Enjoy this cool, creamy treat any time of the year!
“I Scream, You Scream… We ALL Scream For Ice Cream!” It seems like just about everyone loves a good scoop of ice cream. I know I sure do!  Here’s a quick and easy recipe for one of my favorites… Mint Chocolate Chip Ice Cream, just in time for good ol’ Summertime!

Scroll Down For A Printable Recipe Card At The Bottom Of The Page

Memories Of Homemade Ice Cream

Growing up in sunny Southern California, I have such fond memories of my Mom and Dad making many varieties of homemade ice cream for our family and friends, as an extra special cold and creamy treat in the HEAT of summertime. Back in those days, my Dad would be the one to hand crank the old wooden ice cream maker, then carefully wrap the finished ice cream and canister in lots of towels, etc. to keep it frozen while it firmed up a bit.

We would stand around, giddy with excitement, licking our lips in eager anticipation of the frozen treat we would soon be served. It was (and still is) one of my favorite summertime treats! Lucky for me, my husband has the same memories with his family, so we can enjoy this together! Nowadays, there are all kinds of electric homemade ice cream makers, which have taken some of the hard work out of it (all that hand-cranking!), but with the same delicious results.

I don’t know about you, but I find the prospect of having some freshly frozen ice cream hard to resist… especially Mint Chocolate Chip… I love it!  And it’s so easy to make (with or without an electric ice cream maker).  I’ve included directions for both in the printable recipe.

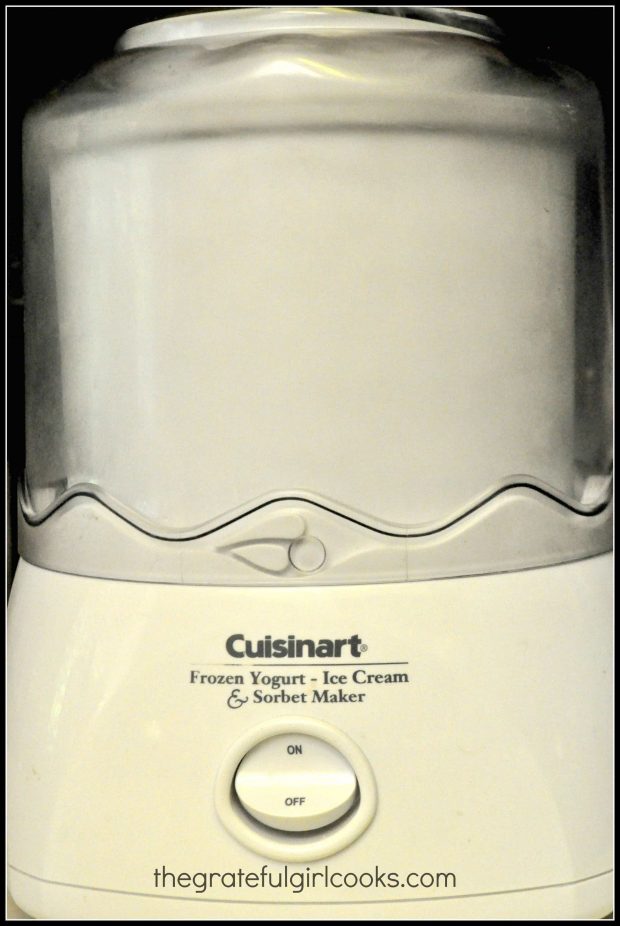
The Cuisinart ice cream maker I used to make mint chocolate chip ice cream.

Perhaps you will consider trying this easy recipe… the mint flavor shines, and the flecks and pieces of chocolate…well, you know… it’s so delicious!

Homemade mint chocolate chip ice cream is a treat year round!

I sincerely hope you enjoy this ice cream.  I’ve posted at least 14 flavors, including this Mint Chocolate Chip Ice Cream (so far), from the summer I had my “Great Ice Cream Experiment” to try many different recipes! Have a great day, treat yourself and enjoy a big old scoop (or two) of ice cream!

Looking For More ICE CREAM Recipes?

You can find ALL my recipes in the Recipe Index, located at the top of the page. I have lots of homemade ice cream recipes, including:

Interested In More Recipes?

Thank you for visiting this website. I appreciate you using some of your valuable time to do soIf you’re interested, I publish a newsletter 2 times per month (1st and 15th) with all the latest recipes, and other fun info. I would be honored to have you join our growing list of subscribers, so you never miss a great recipe!
There is a Newsletter subscription box on the top right side (or bottom) of each blog post, depending on the device you use, where you can easily submit your e-mail address (only) to be included in my mailing list.

You Can Also Find Me On Social Media:

Facebook page: The Grateful Girl Cooks!
Pinterest:
The Grateful Girl Cooks!
Instagram:
jbatthegratefulgirlcooks

Author's signatureRecipe Source:  Cuisinart Instruction and Recipe Booklet for Automatic Frozen Yogurt-Ice Cream & Sorbet Maker, copyright 2002, Cuisinart, page 4.

0 from 0 votes
Mint Chocolate Chip Ice Cream
Prep Time
25 mins
Cook Time
0 mins
Total Time
25 mins
 
Nothing quite beats the taste of homemade Mint Chocolate Chip Ice Cream! Enjoy this cool, creamy treat any time of the year!
Category: Desserts- Ice Cream
Cuisine: American
Keyword: mint chocolate chip ice cream
Servings: 10 (1/2 cup servings)
Calories Per Serving: 303 kcal
Author: JB @ The Grateful Girl Cooks!
Ingredients
  • 1 cup whole milk (well chilled)
  • 3/4 cup granulated sugar
  • 2 cups heavy whipping cream (well chilled)
  • 1 to 1½ teaspoons pure peppermint extract (to taste)
  • 3 drops green food coloring
  • 4 ounces semi-sweet chocolate (chopped into tiny, uneven pieces)
Instructions
  1. Mix milk and sugar in a medium bowl until sugar has dissolved (about 1-2 minutes on low speed).
  2. STIR in the heavy whipping cream, peppermint extract, and 3 drops green food coloring, until fully combined.
  3. Turn ice cream machine on, and pour the mixture through the spout into the machine. Freeze ice cream, according to manufacturer's instructions, until thick and creamy (approx. 20-25 minutes). During the last 5 minutes of mixing, add the chopped chocolate pieces and all the leftover chocolate flakes to the ice cream.
  4. Store ice cream in a covered container in the freezer for a couple hours to let it firm up more. Scoop, serve... and enjoy!

Recipe Notes

No ice cream maker? In a large bowl, whip the heavy cream on high for about 10 minutes until stiff peaks begin to form. In separate bowl, stir together milk, peppermint extract, food coloring and chocolate bits and flakes. Fold the whipping cream gently into milk mixture until combined. Pour mixture into a 2-3 quart container; cover. Put the covered container into the freezer; let it freeze for a minimum of 6 -7 hours. Serve, and enjoy!

Nutrition Facts
Mint Chocolate Chip Ice Cream
Amount Per Serving (1 (1/2 cup serving))
Calories 303 Calories from Fat 198
% Daily Value*
Fat 22g34%
Saturated Fat 13g81%
Cholesterol 68mg23%
Sodium 29mg1%
Potassium 132mg4%
Carbohydrates 23g8%
Sugar 20g22%
Protein 2g4%
Vitamin A 745IU15%
Vitamin C 0.2mg0%
Calcium 66mg7%
Iron 0.7mg4%
* Percent Daily Values are based on a 2000 calorie diet.

Here’s one more to pin on your Pinterest boards!Nothing quite beats the taste of homemade Mint Chocolate Chip Ice Cream! Enjoy this cool, creamy treat any time of the year!


Save

Save

Spicy Fish Sandwich w/Chili Mayo

Spicy Fish Sandwich with Chili Mayo is a delicious meal, w/ pan-seared cod, peppery arugula and marinated cucumber strips, on a toasted roll!Spicy Fish Sandwich with Chili Mayo is an incredible meal, featuring pan-seared cod, peppery arugula and marinated cucumber strips, served on a toasted roll!
I made my hubby an amazing fish sandwich for dinner recently. It’s a Spicy Fish Sandwich with Chili Mayo recipe that I found on Pinterest. It was quite delicious, and I know this because I begged him for a couple bites! WOW- this fish sandwich tastes GREAT!

I found a piece of cod in our freezer that I wanted to use, so I fed the hubby AND tried a new recipe at the same time! It really DID taste good, and I will make it again (except this time I will make one for me, too!).  Here’s how you make this yummy fish sandwich (recipe is for 2 sandwiches):

Scroll Down For A Printable Recipe Card At The Bottom Of The Page

Prepare The Cucumber Topping

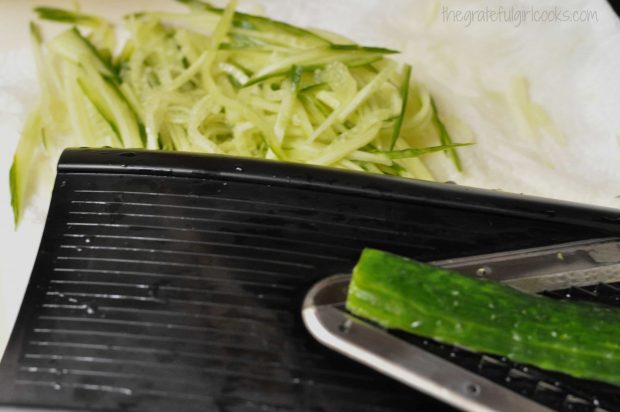
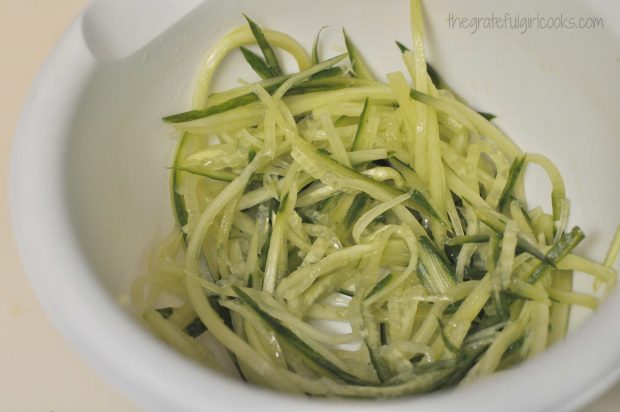
Thinly slice 1/2 of a cucumber lengthwise and add it to a bowl with some white wine vinegar and a small touch of sugar. I used a mandoline and julienned the cucumber into long thin strips, but you could also use a vegetable peeler and thinly slice the cucumber lengthwise to make wide “ribbons”. Once mixed, cover until ready to use on sandwich.

Cucumber is julienne sliced on a mandoline.

Thinly sliced cucumber for fish sandwich.

Make The Chili Mayo

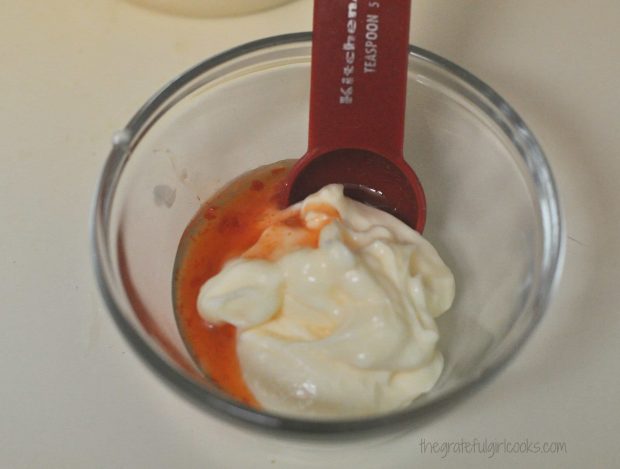
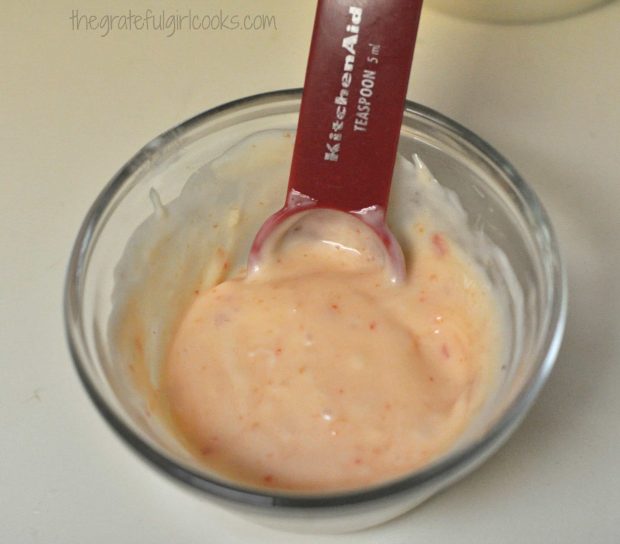
Make the chili mayo by combining mayo and sweet chili sauce (I use Mae Ploy). Mix together and keep refrigerated until ready to use. Try to mix it up early in the day so flavors have time to mingle.

The chili mayo sauce does not have too much heat but just enough that I called this a spicy fish sandwich! If you like it hot, then by all means, simple add more chili sauce.

Making the chili mayo for the fish sandwich.

Chili mayo is ready for spicy fish sandwich!

Toast the Bread In A Skillet

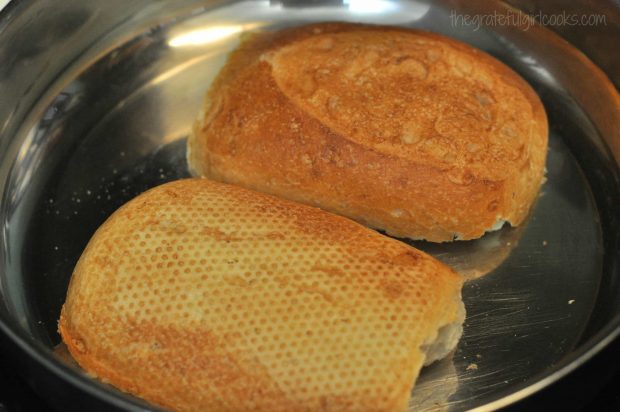
Lightly toast a French bread roll in a skillet. (You can also broil it a bit, to toast the surface of the roll before adding the rest of the ingredients to it). A ciabatta roll would also be wonderful for the sandwich (per the original author). They have enough sturdiness to hold the ingredients without getting soggy.

Toasting french roll in skillet before making sandwich.

How To Cook The Fish

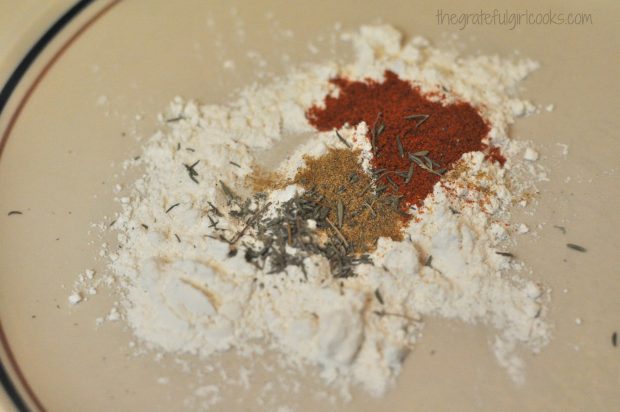
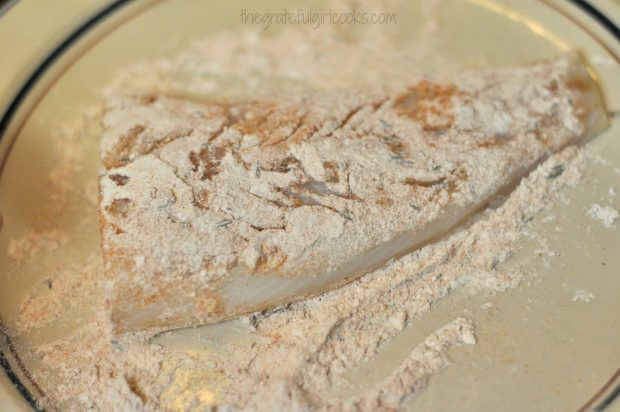
Mix up flour, smoked paprika, cumin, and dried thyme on a plate. Spread it out so you can dredge the piece of fish in it. This is enough spices for TWO pieces of fish. Dredge the fish in the spice/flour mixture, turning to coat it on both sides.

Flour and spices are mixed together for fish coating

Cod fillets are dredged in flour/spice mixture before cooking

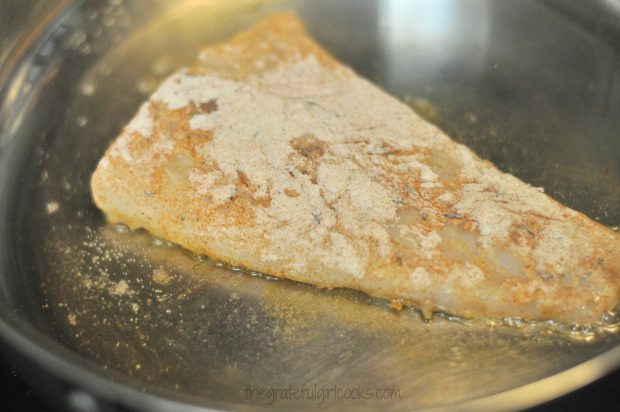
Heat oil on medium high in non-stick skillet. Let it get hot, then place the piece (or pieces) of fish into the hot oil. DO NOT MOVE THE FISH after placing in the skillet initially (or it may stick). As it cooks for 2-3 minutes it will develop a “crust” on the bottom side and will be fine.

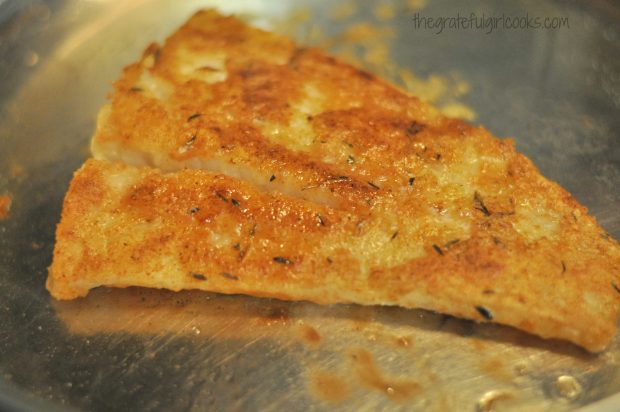
After 2-3 minutes, carefully turn the fish over and continue cooking for another 2-3 minutes, until done and golden brown.

Dredged fish is pan-seared in skillet for sandwich.

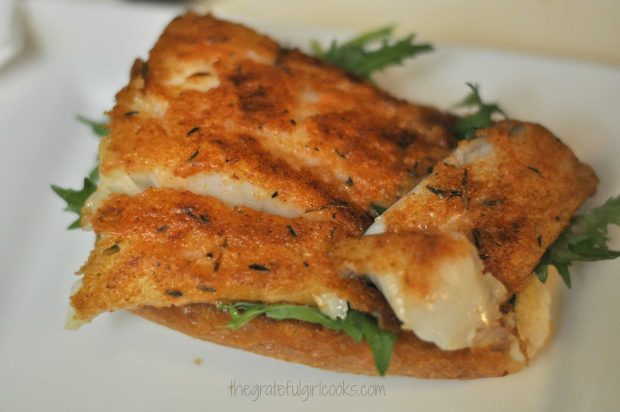
Pan-seared fish is cooked and ready to put on sandwich!

Putting The Spicy Fish Sandwich Together For Serving

To serve, slice the toasted rolls in half horizontally.  Spread a generous amount of the chili mayo sauce onto both sides of the toasted roll.

Chili mayo is spread on toasted french rolls for sandwich

Place some arugula leaves on top of the sauce on the bottom half of the roll, then place the cooked fish on top of the arugula.

Arugula and pan-seared fish are placed onto sandwich roll.

Add a generous helping of the sliced cucumbers (letting any juices drain off before adding). Top with the other half of the toasted roll, and serve!

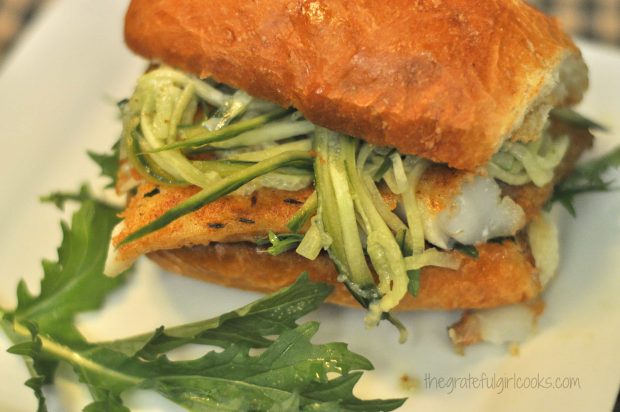
Thinly sliced marinated cucumbers are added to spicy fish sandwich

Time To EAT!

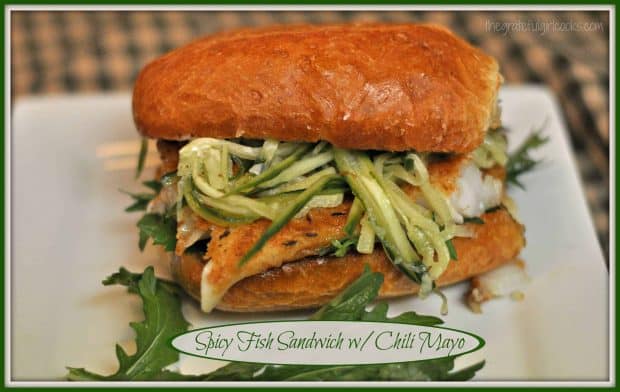
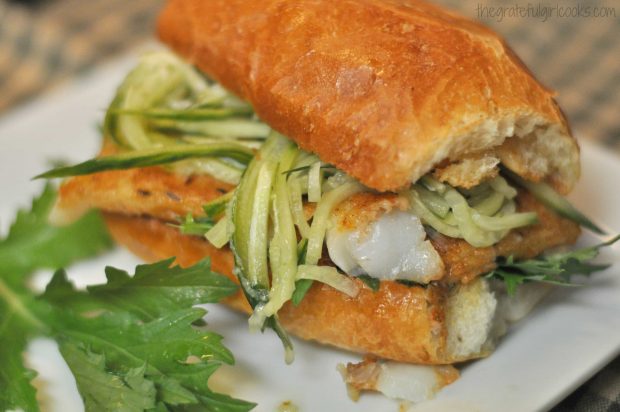
Take a BIG bite! The seasoned, semi-crunchy fish, paired with peppery arugula, the crunch of marinated cucumbers, toasty roll, and the chili mayo combine to make this a WONDERFUL spicy fish sandwich!

Spicy Fish Sandwich w/Chili Mayo is served!

Sure hope you will give this spicy fish sandwich recipe a try! I know we will have this again in our home!  Have a wonderful day, friends. May you find moments of refreshment and encouragement throughout your day.

Looking for More SANDWICH Recipes?

You can find ALL my recipes in the Recipe Index, located at the top of the page. I have some delicious sandwich recipes, including:

Interested In More Recipes?

Thank you for visiting this website. I appreciate you using some of your valuable time to do soIf you’re interested, I publish a newsletter 2 times per month (1st and 15th) with all the latest recipes, and other fun info. I would be honored to have you join our growing list of subscribers, so you never miss a great recipe!
There is a Newsletter subscription box on the top right side (or bottom) of each blog post, depending on the device you use, where you can easily submit your e-mail address (only) to be included in my mailing list.

You Can Also Find Me On Social Media:
Facebook page: The Grateful Girl Cooks!
Pinterest: The Grateful Girl Cooks!
Instagram: jbatthegratefulgirlcooks

Author's signature

Recipe Source: http://www.olivemagazine.com/recipes/spicy-fish-burger-with-chilli-mayo/10084.html

0 from 0 votes
Spicy Fish Sandwich w/ Chili Mayo
Prep Time
10 mins
Cook Time
6 mins
Total Time
16 mins
 

Spicy Fish Sandwich with Chili Mayo is an incredible meal, featuring pan-seared cod, peppery arugula and marinated cucumber strips, served on a toasted roll!

Category: Sandwich
Cuisine: American
Keyword: spicy fish sandwich
Servings: 2 sandwiches
Calories Per Serving: 401 kcal
Author: JB @ The Grateful Girl Cooks!
Ingredients
For cucumbers and marinade:
  • 1/2 cucumber , sliced thinly lengthwise (using mandoline to julienne or veg. peeler to slice ribbons)
  • 1 teaspoon white wine vinegar
  • 1/3 teaspoon granulated sugar
For chili-mayo sauce:
  • 2 Tablespoons mayonnaise
  • 1 teaspoon sweet chili sauce (I used Mae Ploy), add more sauce to taste, if desired.
For fish:
  • 1 Tablespoon flour
  • 1/4 teaspoon smoky paprika
  • 1/4 teaspoon cumin
  • 1/4 teaspoon dried thyme
  • 2 Tablespoons oil
  • 2 pieces cod (bun sized)
  • 2 crusty French rolls or ciabatta rolls
  • Arugula (a small handful)
Instructions
  1. Prepare cucumbers, by thinly slicing or julienning into very thin strips lengthwise. Place in bowl with white wine vinegar and granulated sugar. Mix. Cover and set aside.
  2. Mix the mayonnaise and chili sauce together in a small container. Refrigerate until needed.
  3. Slice rolls in half. Lightly "toast" the cut sides of rolls in a dry skillet or under the broiler until slightly crispy. Set aside.
  4. Combine flour, paprika, cumin and thyme on a plate. Mix, then spread out on plate. Dredge the pieces of fish through the flour mixture, turning to coat both sides.
  5. Heat oil on medium-high in a non-stick skillet until hot. Carefully place the fish into the hot oil. Do not move the fish once in skillet or it might stick. It will form a crust as it cooks. Let fish cook for 2-3 minutes, then carefully turn fish over and continue cooking other side for 2-3 minutes, until done and golden brown.
  6. To assemble sandwich, slice rolls in half horizontally. Generously spread chili-mayo sauce on both sides of each sandwich roll. Place arugula on top of sauce on bottom of roll. Place fish on top of arugula. Place marinated cucumber slices (drain liquid first) on top of fish, then place top of roll on. Serve... and enjoy!
Nutrition Facts
Spicy Fish Sandwich w/ Chili Mayo
Amount Per Serving (1 sandwich)
Calories 401 Calories from Fat 180
% Daily Value*
Fat 20g31%
Saturated Fat 12g75%
Cholesterol 51mg17%
Sodium 442mg19%
Potassium 656mg19%
Carbohydrates 29g10%
Fiber 2g8%
Sugar 3g3%
Protein 25g50%
Vitamin A 460IU9%
Vitamin C 5mg6%
Calcium 84mg8%
Iron 2.4mg13%
* Percent Daily Values are based on a 2000 calorie diet.

Here’s one more to pin on your Pinterest boards!Spicy Fish Sandwich with Chili Mayo is an incredible meal, featuring pan-seared cod, peppery arugula and marinated cucumber strips, served on a toasted roll!


Save

Save

Save

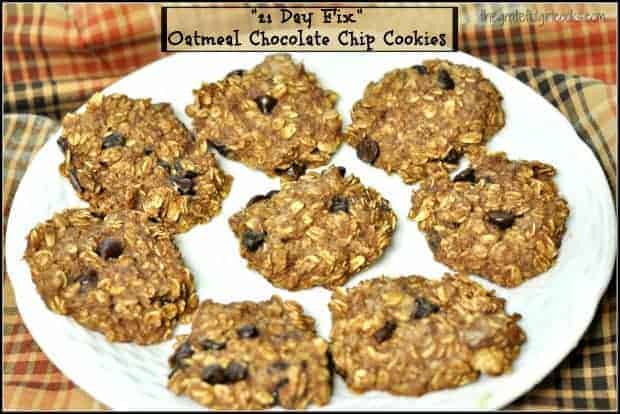
“21 Day Fix” Oatmeal Chocolate Chip Cookies

Yummy “21 Day Fix” Oatmeal Chocolate Chip Cookies will satisfy that sweet tooth, with only 5 ingredients, and they’re ready in under 20 minutes!"21 Day Fix" Oatmeal Chocolate Chip Cookies will satisfy that sweet tooth, with only 5 ingredients, and they're ready in under 20 minutes!

Who says you can’t have a couple of cookies while eating healthy foods and controlling portion size on “The 21 Day Fix Plan”?  Here’s a fun little recipe for HEALTHY “21 Day Fix” Oatmeal Chocolate Chip Cookies to satisfy that ever present sweet tooth!

I made these cookies recently while giving the 21 Day Fix program a test run. The cookies get their sweetness from bananas, and are filled with rolled oats, cinnamon, salt, and chocolate chips! Two cookies equal one serving, and come in under 100 calories per serving.

This recipe, as written, makes 8 cookies, but would be totally easy to double. The cookies helped curb my sweet tooth… and kept me rolling along on the plan. It was nice to have cookies as a treat!

Scroll Down For A Printable Recipe Card At The Bottom Of The Page

How to Make 21 Day Fix Oatmeal Chocolate Chip Cookies

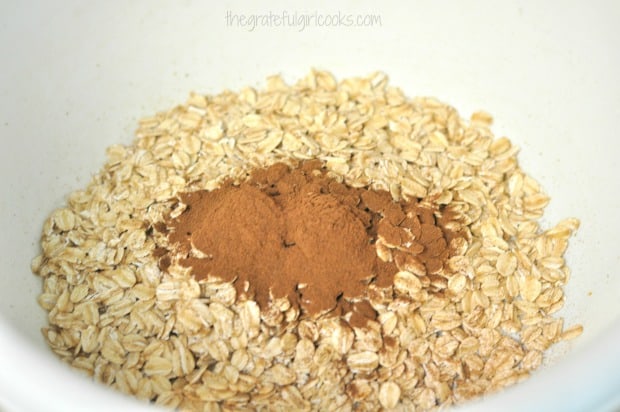
Here’s how simple they are to make:  Preheat your oven to 350 degrees.  Mix the old-fashioned rolled oats (not quick cooking) with cinnamon and sea salt in a medium sized bowl.

Rolled oats, cinnamon, and salt in bowl, for 21 day fix oatmeal chocolate chip cookies.

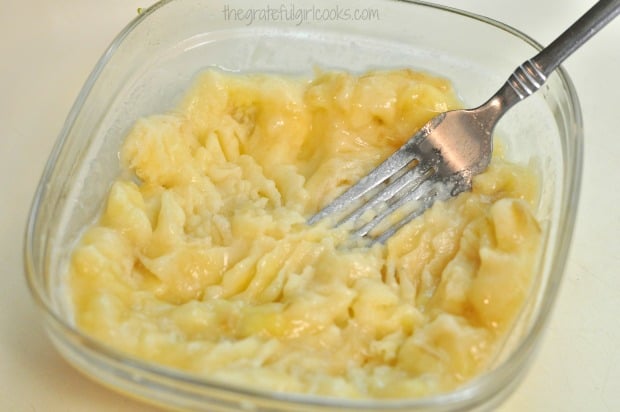
Mash up two bananas with a fork, in a small bowl.

Mashed bananas in dish, ready to add to batter for oatmeal chocolate chip cookies.

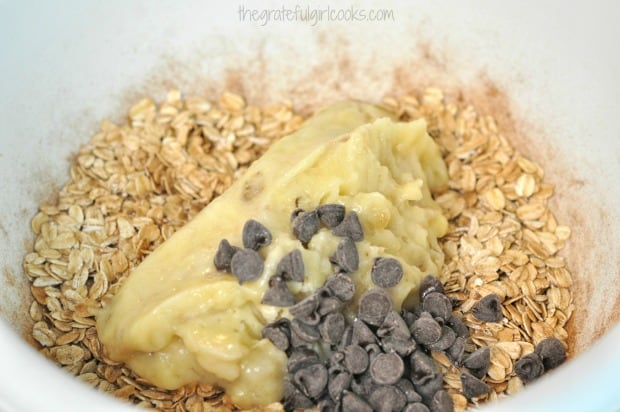
Add the mashed bananas and chocolate chips to the rolled oats, in a medium sized mixing bowl.

Oats, banana and chocolate chips in dish, ready to make batter for oatmeal chocolate chip cookies!

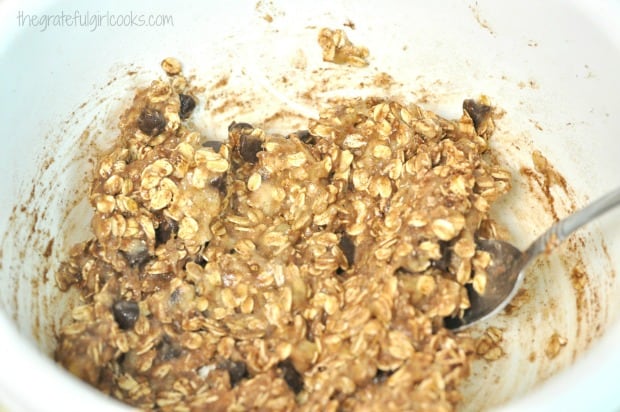
Stir all the ingredients very well, so they are totally combined.

Batter for 21 Day Fix oatmeal chocolate chip cookies.

Shaping The 21 Day Fix Oatmeal Chocolate Chip Cookies

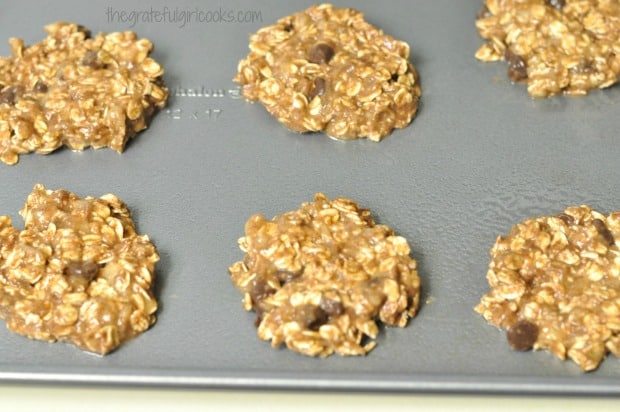
Drop the “dough” by heaping Tablespoons onto an ungreased cookie sheet, being careful to leave a bit of space between each cookie. Lightly wet your hands so the batter won’t stick, then shape the “dough” into circles and flatten the tops down a bit.

Baking The Oatmeal Chocolate Chip Cookies

Place the cookies into a preheated 350°F oven, and let them bake for approximately 15 minutes (or until firm).

Dough for oatmeal chocolate chip cookies, on baking sheet.

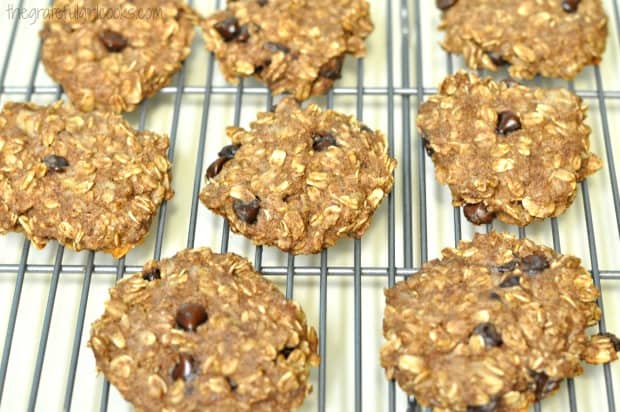
Once the oatmeal chocolate chip cookies are finished baking, let them cool slightly on the pan. Transfer the cookies to a wire rack to finish cooling.

Baked 21 day fix oatmeal chocolate chip oatmeal cookies, cooling on wire rack.

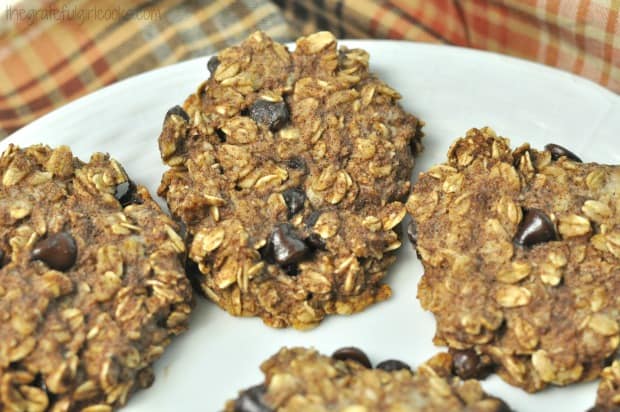
Once completely cooled off, these yummy diet-friendly cookies are ready to eat! The oatmeal chocolate chip cookies hold together very well, and are slightly soft to the bite. They have a good taste, too!

Three baked 21 day fix oatmeal chocolate chip cookies on white plate.

Hope you will consider making these cookies if you are looking for a healthy, but not sugar packed oatmeal chocolate chip cookie. If you are following the “21 Day Fix” plan, the container counts are 1 yellow, and 1 purple for a serving of 2 cookies.

Don’t get me wrong… I can normally stuff my face with REAL oatmeal chocolate chip cookies till the cows come home, but while “eating clean” on this 21 day program, these were a tasty substitute!  Have a great day.

Looking For More COOKIE Recipes?

You can find all of my cookie recipes in the Recipe Index, which is located at the top of the page. I have quite a few delicious recipes, including:

Interested In More Recipes?

Thank you for visiting this website. I appreciate you using some of your valuable time to do soIf you’re interested, I publish a newsletter 2 times per month (1st and 15th) with all the latest recipes, and other fun info. I would be honored to have you join our growing list of subscribers, so you never miss a great recipe!
There is a Newsletter subscription box on the top right side (or bottom) of each blog post, depending on the device you use, where you can easily submit your e-mail address (only) to be included in my mailing list.

You Can Also Find Me On Social Media:

Facebook page: The Grateful Girl Cooks!
Pinterest:
The Grateful Girl Cooks!
Instagram:
jbatthegratefulgirlcooks

Author's signature

Recipe Source:  http://www.adventuresofashrinkingprincess.com/recipes/21-day-fix-oatmeal-chocolate-chip-cookies/

0 from 0 votes
"21 Day Fix" Oatmeal Chocolate Chip Cookies
Prep Time
5 mins
Cook Time
15 mins
Total Time
20 mins
 

Yummy "21 Day Fix" Oatmeal Chocolate Chip Cookies will satisfy a sweet tooth, with only 5 ingredients, and they're ready in under 20 minutes!

Category: Dessert
Cuisine: American
Keyword: oatmeal chocolate chip cookies
Servings: 8 cookies (2 per serving)
Calories Per Serving: 98 kcal
Author: JB @ The Grateful Girl Cooks!
Ingredients
  • 1 cup old-fashioned oats
  • 2 teaspoons cinnamon
  • 1/4 teaspoon sea salt
  • 2 medium ripe bananas , mashed
  • 1/4 cup semi-sweet chocolate chips
Instructions
  1. Preheat oven to 350 degrees. Lightly spray a baking sheet with non-stick spray.
  2. In a medium sized bowl, add the rolled oats, cinnamon and sea salt.
  3. In a separate bowl, mash the bananas together, using a fork. Add the mashed bananas and chocolate chips into the rolled oats mixture. Mix these ingredients very well.

  4. Drop the cookie "dough" by heaping Tablespoons (8 total) onto your baking sheet. Lightly wet your fingers with water and gently press down on the tops of each cooking to flatten a bit.
  5. Bake cookies at 350 degrees for 14-15 minutes, or until the cookies are firm to the touch. Remove cookies from oven. Let them cool down, then transfer to a wire rack, to finish cooling. Serve at room temp, and enjoy!

Recipe Notes

On 21 Day Fix plan? One serving = 2 cookies.
Container count is 1 yellow, 1 purple.

Nutrition Facts
"21 Day Fix" Oatmeal Chocolate Chip Cookies
Amount Per Serving (2 cookies)
Calories 98 Calories from Fat 18
% Daily Value*
Fat 2g3%
Saturated Fat 1g6%
Sodium 74mg3%
Potassium 174mg5%
Carbohydrates 16g5%
Fiber 2g8%
Sugar 5g6%
Protein 2g4%
Vitamin A 20IU0%
Vitamin C 2.6mg3%
Calcium 15mg2%
Iron 0.9mg5%
* Percent Daily Values are based on a 2000 calorie diet.

Here’s one more to pin on your Pinterest boards!Yummy "21 Day Fix" Oatmeal Chocolate Chip Cookies will satisfy a sweet tooth, with only 5 ingredients, and they're ready in under 20 minutes!


Save

Save

Save

Save

Strawberry-Rhubarb Dream Bars

Strawberry-Rhubarb Dream Bars are creamy dessert bars with fresh strawberries and rhubarb filling on a rich, buttery crust. Recipe makes 16 treats.Strawberry-Rhubarb Dream Bars are creamy dessert bars with fresh strawberries and rhubarb filling on a rich, buttery crust. Recipe makes 16 treats.
I love Spring, when it seems like everything is blooming and growing! From flowers to garden vegetables AND our lawns (which constantly seem to need mowing)…I love it all! Spring is also time for delicious fresh strawberries, rhubarb… and Strawberry-Rhubarb Dream Bars!

I grow rhubarb and strawberries in our garden, so I’m always on the prowl for new recipes to use them in. I found the recipe for these sweet/tangy dessert bars on Pinterest and decided to make them. YUM! They are really quite good. The bars have a creamy strawberry-rhubarb filling on a shortbread-style crust, and are absolutely delicious!

Scroll Down For A Printable Recipe Card At the Bottom Of The Page

How To Make Strawberry-Rhubarb Dream Bars

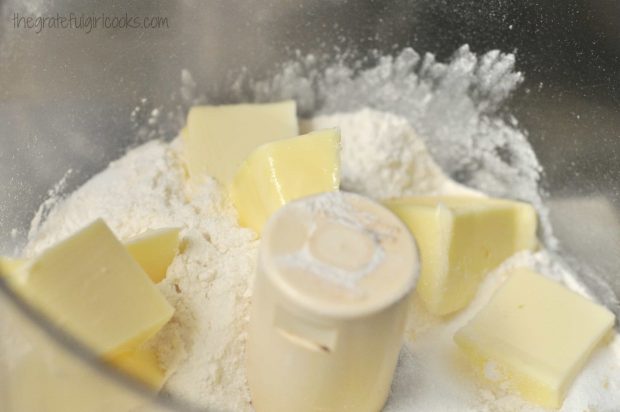
Preheat your oven to 350 degrees. The crust ingredients are placed in a food processor (or can be mixed with a pastry blender) and mixed until the butter has become fine crumbs.

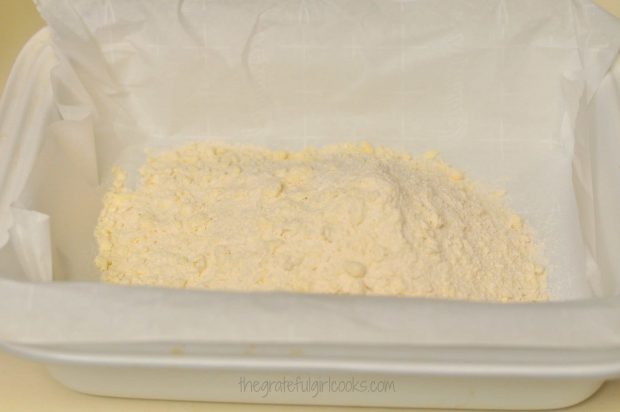
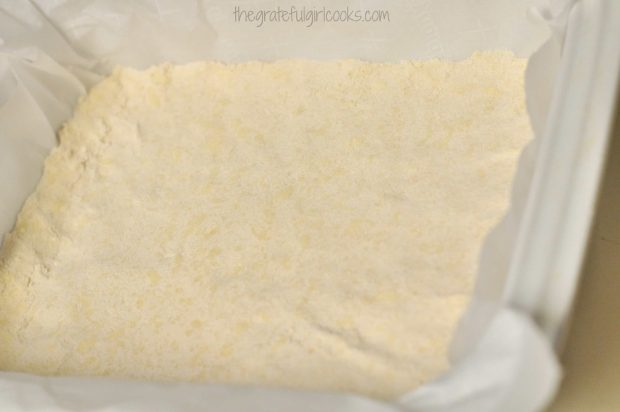
The crumbs are then placed into an 8×8 (or an 8×10) baking pan that is lined with parchment paper. Let the parchment paper extend over the edges of pan, so you can easily lift out the bars when cool. Press the crumbs into the bottom of the pan, forming a packed down crust. Bake the crust at 350 degrees for 15 minutes, then remove the pan from the oven.

Crust ingredients, including butter, are mixed in a food processor.The processed crust mixture is placed in a parchment paper-lined baking dish.The crumbles are patted down into the baking dish, to form a bottom crust.

Time To Make The Filling!

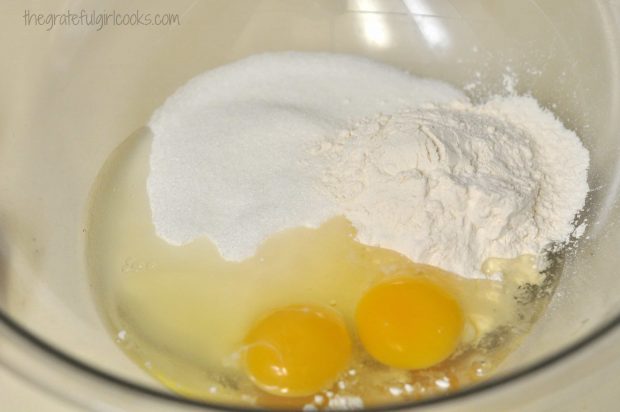
While the crust is baking, make the filling. Make the filling by mixing together the eggs, granulated sugar, flour and salt. There is no mixer required… just whisk or stir this mixture with a spoon until blended.

Eggs, flour, sugar and salt are combined to start making the filling.
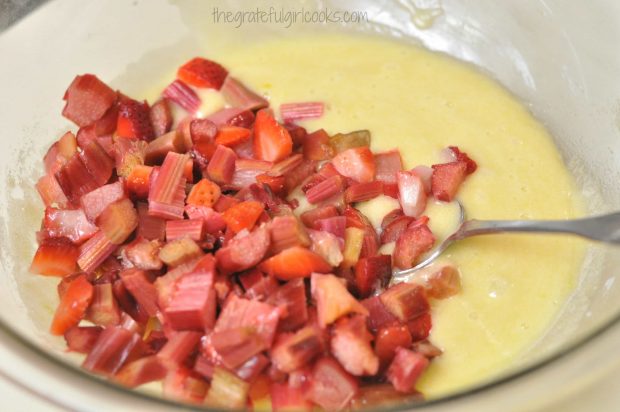
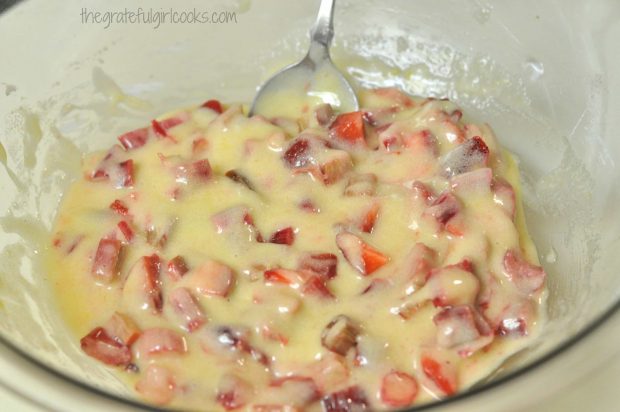
Gently stir the diced strawberries and rhubarb into the filling, until well combined.

Chopped rhubarb and strawberries are added to the filling ingredients.Filling for the Strawberry-Rhubarb Dream Bars is now fully blended together.

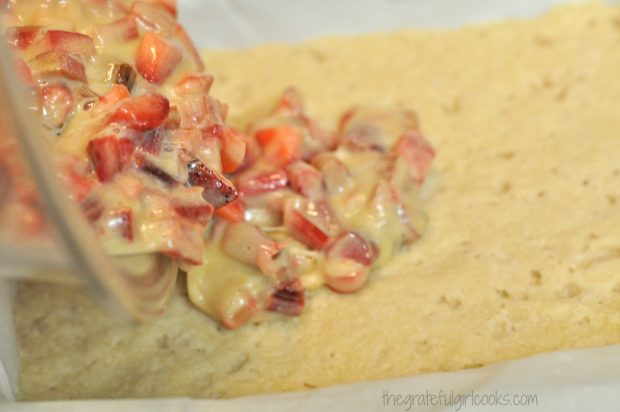
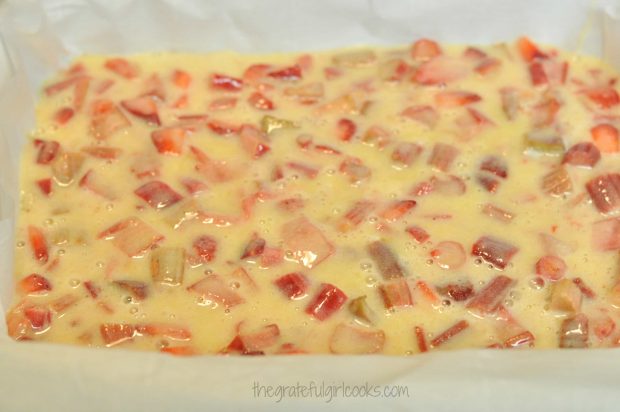
Once you remove the crust from oven, pour the strawberry-rhubarb mixture on top of the hot crust. Spread the filling evenly across the baked crust.

The filling is poured onto the top of the hot, baked crust.The strawberry and rhubarb filling is spread over the crust before baking.

Bake The Strawberry-Rhubarb Dream Bars

Put the pan back into the oven and continue to bake the dream bars for an additional 40-45 minutes. When the strawberry-rhubarb dream bars are done, remove pan from oven, and let them cool completely.

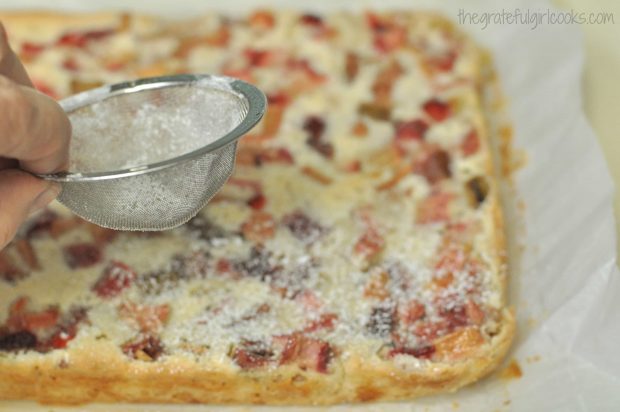
Once cool, transfer the bars out of the pan by lifting up the parchment paper.  Top the dessert bars with sifted powdered sugar.

Powdered sugar is sifted over the baked dream bars.

Slice And SERVE!

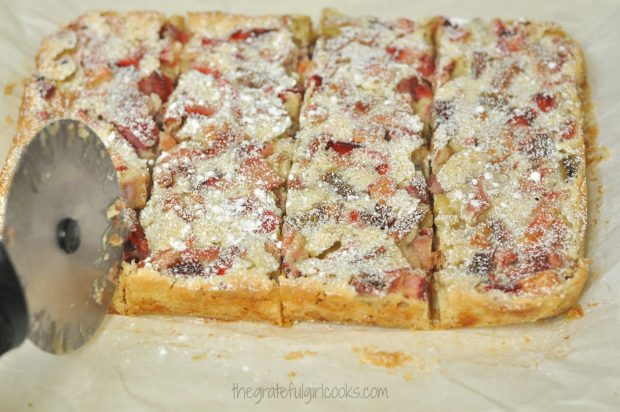
Once you’ve covered the bars with sifted powdered sugar, slice into 16 individual portions. I like using a pizza cutter to do this, but a really sharp knife will work just as well!

Strawberry-Rhubarb Dream Bars are sliced into 16 portions for serving.

That’s it! Now you’ve just made 16 creamy and delicious, Strawberry-Rhubarb Dream Bars. I love the flavor combo of strawberries and rhubarb (have you tried Strawberry-Rhubarb Pie?). The combo of strawberries and rhubarb pair very well in this easy dessert! Now all that’s left is to grab one, take a big bite, and ENJOY!

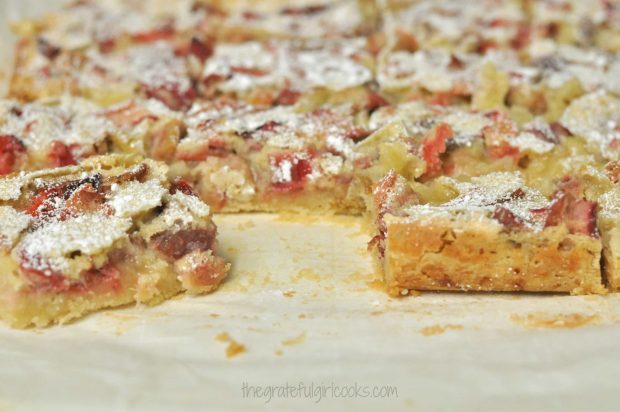
An inside look at the dream bars, once cut. YUM!

I sincerely hope you have a wonderful day, and enjoy each moment you are gifted with. I am so very thankful for this season of Spring, and new life springing up from what once was dormant… in nature, and in my own heart (through faith in Jesus). Be blessed!

Looking For More BAR COOKIE Recipes?

You can find all of my recipes in the Recipe Index, located at the top of the page. I have some great bar cookie recipes there, including:

Interested In More Recipes?

Thank you for visiting this website. I appreciate you using some of your valuable time to do soIf you’re interested, I publish a newsletter 2 times per month (1st and 15th) with all the latest recipes, and other fun info. I would be honored to have you join our growing list of subscribers, so you never miss a great recipe!
There is a Newsletter subscription box on the top right side (or bottom) of each blog post, depending on the device you use, where you can easily submit your e-mail address (only) to be included in my mailing list.

You Can Also Find Me On Social Media:
Facebook page: The Grateful Girl Cooks!
Pinterest: The Grateful Girl Cooks!
Instagram: jbatthegratefulgirlcooks

Author's signature

Recipe Adapted From: http://noshingwiththenolands.com/rhubarb-dream-bars/

0 from 0 votes
Strawberry-Rhubarb Dream Bars
Prep Time
15 mins
Cook Time
45 mins
Total Time
1 hr
 

Strawberry-Rhubarb Dream Bars are creamy dessert bars with fresh strawberries and rhubarb filling on a rich, buttery crust. Recipe makes 16 treats.

Category: Bar Cookies, Dessert
Cuisine: American
Keyword: strawberry-rhubarb dream bars
Servings: 16 bars
Calories Per Serving: 178 kcal
Author: JB @ The Grateful Girl Cooks!
Ingredients
For The Crust:
  • 1 cup flour
  • 1/2 cup granulated sugar
  • 1/2 cup butter (chilled)
For The Filling:
  • 2 large eggs
  • 1 cup granulated sugar
  • 1/4 cup flour
  • 1/4 teaspoon salt
  • 1 1/4 cups diced fresh rhubarb
  • 3/4 cup diced fresh strawberries
For garnish:
  • Powdered sugar (sifted)
Instructions
  1. Preheat your oven to 350 degrees. Using parchment paper, line the bottom of an 8x8 or a 8x10 inch baking pan. Let the parchment paper overlap (extend over) the sides of pan, so you will be able to lift out the entire dessert later.
Make the crust:
  1. Place the flour, granulated sugar and butter into a food processor. Pulse until butter has been reduced to small crumbs throughout. (If you want to do this by hand, use a pastry blender and cut in the butter until small crumbs). Pour the crumbs into prepared baking sheet. Press the crumbs down firmly and evenly to form a crust. Bake at 350 degrees for 15 minutes. Remove from oven.
Make filling:
  1. While crust is baking, prepare the filling by mixing the eggs, granulated sugar, flour and salt together in a medium bowl. Once creamy, gently stir in diced strawberries and rhubarb until blended. Once crust comes out of the oven, pour filling on top of hot crust. Distribute filling evenly. Place back into the oven and cook for another 40-45 minutes (mine took entire 45 minutes). When done, remove pan from oven. Let cool completely (in pan). Once cool, lift the entire dessert out of baking pan using the parchment paper overhangs. Remove parchment paper from sides.
  2. Sift powdered sugar over the top of the dessert. Slice into 16 bars; Serve and enjoy!
Nutrition Facts
Strawberry-Rhubarb Dream Bars
Amount Per Serving (1 bar)
Calories 178 Calories from Fat 54
% Daily Value*
Fat 6g9%
Saturated Fat 3g19%
Cholesterol 35mg12%
Sodium 95mg4%
Potassium 53mg2%
Carbohydrates 29g10%
Sugar 21g23%
Protein 1g2%
Vitamin A 215IU4%
Vitamin C 4.7mg6%
Calcium 15mg2%
Iron 0.6mg3%
* Percent Daily Values are based on a 2000 calorie diet.

Here’s one more to pin on your Pinterest boards!Strawberry-Rhubarb Dream Bars are creamy dessert bars with fresh strawberries and rhubarb filling on a rich, buttery crust. Recipe makes 16 treats.


Save

Save

Marinated Grilled Pork Chops

Marinated grilled pork chops feature thick boneless chops, seasoned in a light lemon juice, olive oil and herb marinade, then grilled to delicious perfection!Marinated grilled pork chops feature thick boneless chops, seasoned in a light lemon juice, olive oil and herb marinade, then grilled to delicious perfection!

I recently tried a new recipe for Marinated Grilled Pork Chops that I found online. Talk about EASY and tasty!!! Boneless pork chops are marinated in a simple sauce of lemon juice, olive oil and a few basic herbs, then are grilled and served to the “hungering mob”.  Easy!

I really think you will enjoy these easy to prepare pork chops. Here’s how to make them:

Scroll Down For A Printable Recipe Card At The Bottom Of The Page

Make The Marinade

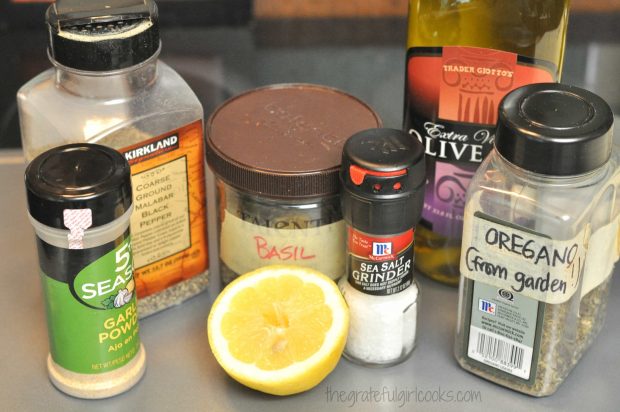
The process couldn’t have been simpler! Here’s the ingredients for the simple marinade: Lemon juice, olive oil, garlic powder, basil, oregano, salt and pepper. (I was happy to be able to use dried basil and oregano from our garden as part of this marinade – note my “classy” labels on the jars! Ha Ha).

Spices are assembled to make marinade for pork chops

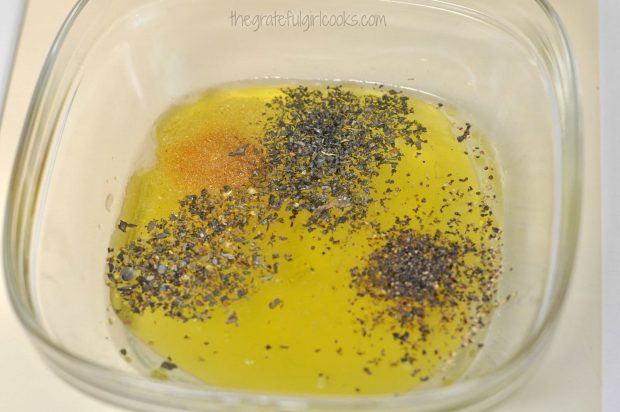
In a small bowl, add the ingredients for the marinade. (*Note: This recipe makes enough marinade for 6 servings. I only made 3 pork chops, since I was cooking only for my husband and myself, but still used the original amount of marinade as called for in the recipe).

Olive oil and herbs are used to make pork chop marinade.

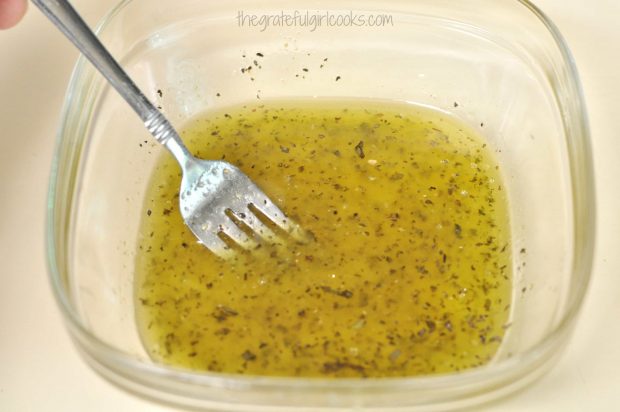
Use a fork or whisk to completely blend these ingredients together. It will look like this.

Marinade is blended with a fork for pork chops.

Marinate The Pork Chops

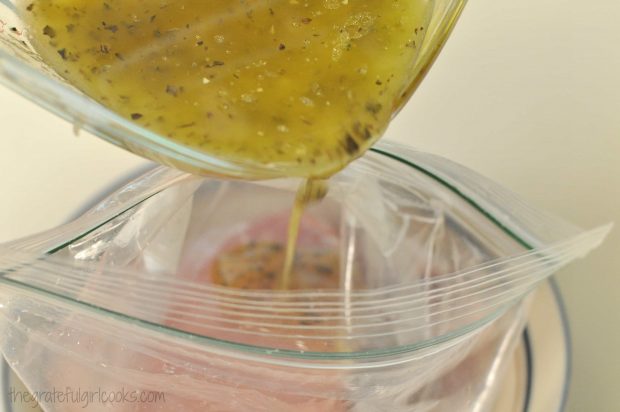
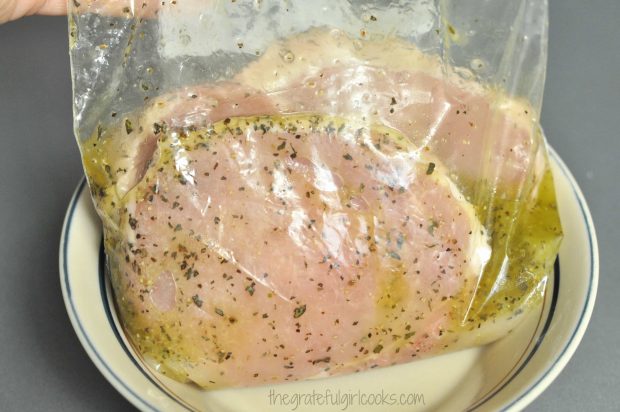
Place the pork chops in a container (with a lid) or a large sealable freezer bag. I used a bag, then placed it in a bowl (to stabilize bag and to catch any leakage). Pour the marinade over the pork chops, squishing the bag around to coat all pieces with marinade.

Lemon marinade is poured over pork chops in resealable bag.

Let the chops marinade for several hours in the refrigerator. (I made mine up early in the morning and let them soak in the marinade all day). The olive oil will congeal after several hours refrigeration, but take the chops out of fridge about 30 minutes before grilling, and it will return to a liquid stage, as it warms up.

Pork chops marinade in sauce in refrigerator for a couple hours.

Cooking Marinated Grilled Pork Chops

When ready to cook, preheat your BBQ grill (or indoor grill) on medium-high heat.  Discard the extra marinade from the bag. Grill the pork chops for 5-7 minutes per side. Don’t overcook the chops (or they will be DRY).

Once done, the marinated grilled pork chops should have reached an internal temperature of 145 degrees (you can check with a meat thermometer if you have one). My husband grilled these outside on our Weber BBQ, and they were full of smoky flavor!

Remove the pork chops from the grill and let them sit for about 5 minutes to let the juices redistribute. After that, serve them to the ones you love, and enjoy this simple to prepare main dish. It’s a perfect recipe for summertime, when you don’t want to heat up the kitchen!

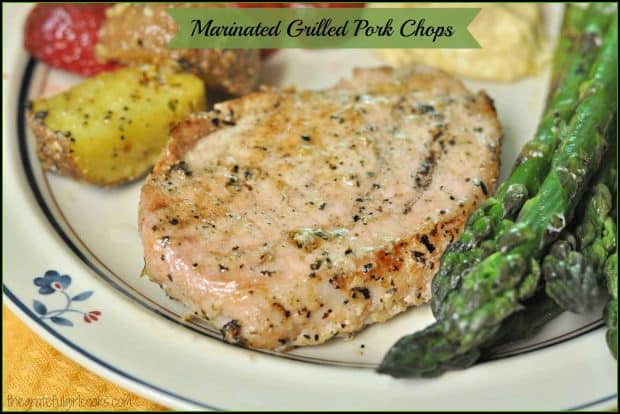
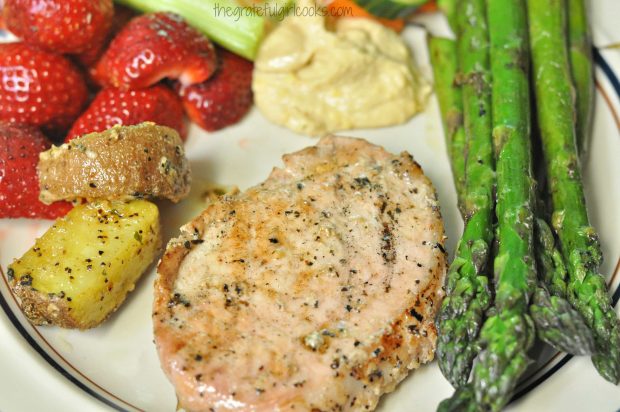
Marinated grilled pork chops are served with fruit, asparagus, and potatoes.

Have a wonderful day! Think of someone you might encourage with a kind word or deed today… they may need that boost of encouragement more than you thought!

Looking For More PORK CHOP Recipes?

You can find ALL my recipes in the Recipe Index, located at the top of the page. I have some really delicious pork chop recipes, including:

Interested In More Recipes?

Thank you for visiting this website. I appreciate you using some of your valuable time to do soIf you’re interested, I publish a newsletter 2 times per month (1st and 15th) with all the latest recipes, and other fun info. I would be honored to have you join our growing list of subscribers, so you never miss a great recipe!
There is a Newsletter subscription box on the top right side (or bottom) of each blog post, depending on the device you use, where you can easily submit your e-mail address (only) to be included in my mailing list.

You Can Also Find Me On Social Media:
Facebook page: The Grateful Girl Cooks!
Pinterest: The Grateful Girl Cooks!
Instagram: jbatthegratefulgirlcooks

Author's signature

Recipe Source: http://www.spendwithpennies.com/lemon-herb-grilled-pork-chops/

0 from 0 votes
Marinated Grilled Pork Chops
Prep Time
5 mins
Cook Time
15 mins
Total Time
20 mins
 
Marinated grilled pork chops feature thick boneless chops, seasoned in a light lemon juice, olive oil and herb marinade, then grilled to delicious perfection!
Category: Entree
Cuisine: American
Keyword: marinated grilled pork chops
Servings: 6 servings
Calories Per Serving: 256 kcal
Author: JB @ The Grateful Girl Cooks!
Ingredients
  • 1/2 lemon , juiced
  • 4 Tablespoons olive oil
  • 2 Tablespoons water
  • 1/2 teaspoon garlic powder
  • 1/4 teaspoon dried basil
  • 1/4 teaspoon dried oregano
  • Salt and pepper , to taste
  • 6 boneless pork chops (about 1 " thick)
Instructions
  1. Mix marinade ingredients in a small bowl until fully blended.
  2. Place pork chops in a large sealable freezer bag (or a large container with lid). Pour marinade over the chops. Squish bag around to fully cover the chops, then marinade in refrigerator for at least 2-3 hours.
  3. Remove bag with pork chops from fridge about 30 minutes prior to grilling. Preheat grill on medium-high heat. 

  4. Remove chops from bag (discard marinade) and place on pre-heated grill. Grill pork chops for 5-7 minutes per side, or until the pork reaches an internal temperature of 145 degrees. Do not overcook the chops or they will be DRY.
  5. When chops are done, remove them from heat, and let them sit for 5-6 minutes, to allow the juices time to redistribute inside the meat. Serve, and enjoy!

Recipe Notes

Please note that prep time does not include the minimum of 2-3 hours marinating time.

Nutrition Facts
Marinated Grilled Pork Chops
Amount Per Serving (1 pork chop)
Calories 256 Calories from Fat 117
% Daily Value*
Fat 13g20%
Saturated Fat 2g13%
Cholesterol 88mg29%
Sodium 66mg3%
Potassium 531mg15%
Carbohydrates 1g0%
Protein 30g60%
Vitamin C 4.8mg6%
Calcium 9mg1%
Iron 0.9mg5%
* Percent Daily Values are based on a 2000 calorie diet.

Here’s one more to pin on your Pinterest boards!Marinated grilled pork chops feature thick boneless chops, seasoned in a light lemon juice, olive oil and herb marinade, then grilled to delicious perfection!


Save

Save

Grilled Chicken & Spring Greens w/ Raspberry Balsamic Dressing

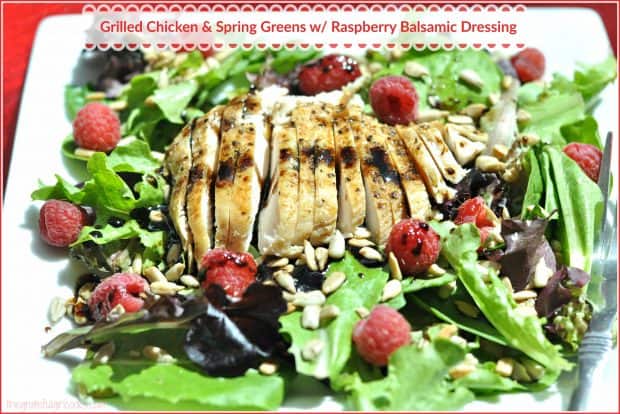
I had the best salad the other day for lunch! I was intent on making a healthy lunch, and I came up with this Grilled Chicken & Spring Greens with Raspberry Balsamic Dressing! And let me tell you… I loved every single bite (and crunch, thanks to the sunflower seeds)!Grilled Chicken & Spring Greens w Raspberry Balsamic Dressing / The Grateful Girl Cooks!

This was such an easy salad to put together! I pre-grilled the chicken early in the morning (on my handy-dandy indoor grill… Thanks, George Foreman!), so all that was involved at lunch time was to assemble the salad and whip up some dressing (under a minute).

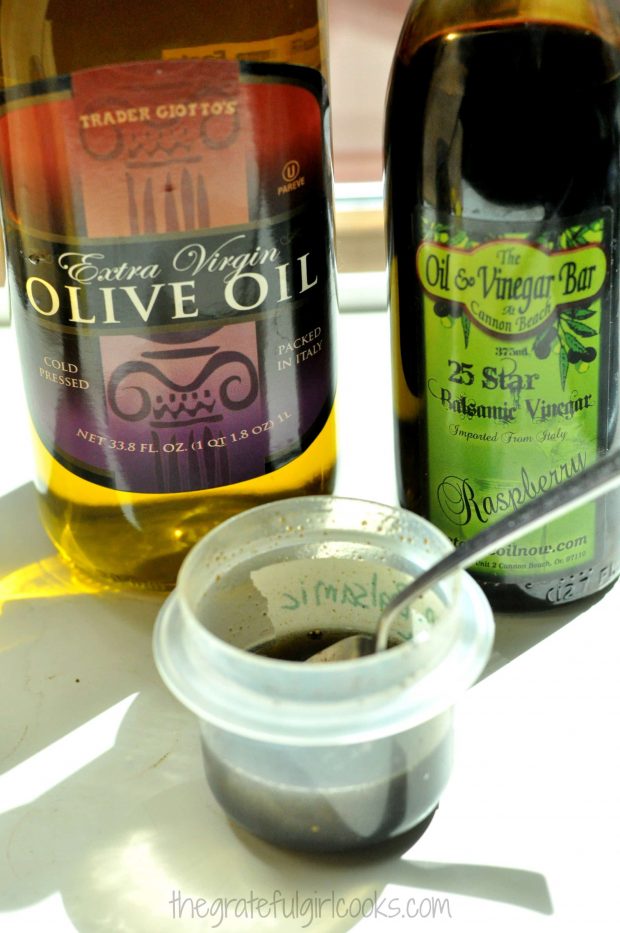
I used some Raspberry Balsamic Vinegar that I had previously purchased at a specialty shop on the Oregon coast, but in case you don’t happen to have any just laying around waiting to be used, I have seen numerous “flavored” balsamic vinegars at local grocery stores.

Here’s a picture I took at a Flavored Olive Oil and Balsamic Vinegar tasting shop I visited with a friend, in downtown Seattle last summer (so fun to sample different flavors!). I left there with bottles of dark chocolate balsamic vinegar and blood orange olive oil- put the two together…oh my crazy goodness!

Grilled Chicken & Spring Greens w Raspberry Balsamic Dressing / The Grateful Girl Cooks!

It’s fun to experiment with different flavored balsamic vinegars…they are slightly thick and sweet! I have several flavors, including peach & cinnamon, dark chocolate, and my beloved raspberry! YUM.  If you don’t have access to “flavored” balsamic vinegar, rest assured…you can easily substitute regular aged balsamic vinegar in the dressing, and it will still taste great!

I like to make extra and keep grilled chicken on hand for last minute salads, quesadillas, tacos, etc., but if you don’t, here’s what you do. Slice a large chicken breast in half horizontally, then sprinkle it lightly on one side with garlic powder, coarse black pepper, celery salt, and seasoning salt.  Then grill it, bake it or broil it… whatever technique you prefer, and let the chicken cool down a bit (so it’s warm) before slicing it into thin strips and adding it to your salad.

Make The Salad Dressing

To make the salad dressing, mix equal parts balsamic vinegar and olive oil until completely blended, then add a tiny bit of salt and pepper, to taste. For one salad, I mixed 2 teaspoons olive oil and 2 teaspoons balsamic vinegar (& had some leftover!)

Grilled Chicken & Spring Greens w Raspberry Balsamic Dressing / The Grateful Girl Cooks!

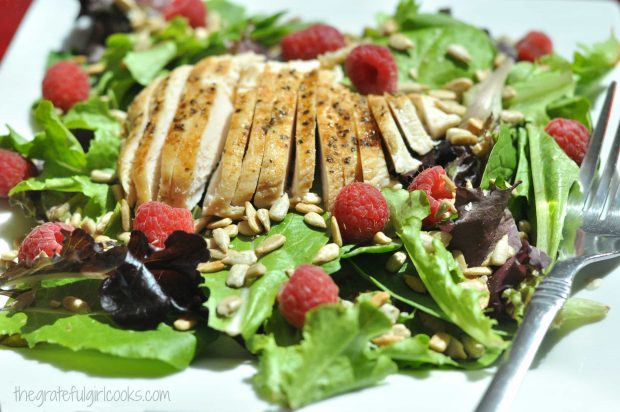
I assembled chilled Spring Greens on a plate, added fresh raspberries, then sprinkled it with roasted sunflower seeds. I thinly sliced the warm grilled chicken breast, placed it on the top of the salad, then lightly drizzled the Raspberry Balsamic dressing over the top.

I am not posting an official “printable recipe”, because it’s really a simple salad to prepare, especially if you want to add other ingredients to make it “your own”.   I have highlighted the directions in blue (see above), for your convenience, however.

Be creative!  I’ve even used a Peach/Cinnamon balsamic to make this salad, as well. Just substitute fresh peach slices for the raspberries! Just arrange the salad, then drizzle with the dressing!

Grilled Chicken & Spring Greens w Raspberry Balsamic Dressing / The Grateful Girl Cooks!

I truly LOVE this salad (contemplating just how many times I can eat this before I ever get tired of it…), and hope you will consider making it. It’s a very healthy salad (protein, veggies, healthy oil, and fruit!)… and I trust you will LOVE it, too!

Have a fantastic day… may God bless you, and the work of your hands.

Here’s one more to pin on your Pinterest boards!Grilled Chicken & Spring Greens w Raspberry Balsamic Dressing / The Grateful Girl Cooks!

Interested In More Recipes?

Thank you for visiting this website. I appreciate you using some of your valuable time to do soIf you’re interested, I publish a newsletter 2 times per month (1st and 15th) with all the latest recipes, and other fun info. I would be honored to have you join our growing list of subscribers, so you never miss a great recipe!

There is a Newsletter subscription box on the top right side (or bottom) of each blog post, depending on the device you use, where you can easily submit your e-mail address (only) to be included in my mailing list.

You Can Also Find Me On Social Media:
Facebook page: The Grateful Girl Cooks!
Pinterest: The Grateful Girl Cooks!
Instagram: jbatthegratefulgirlcooks

Grilled Chicken & Spring Greens w/ Raspberry Balsamic Dressing

Save

Save

Chicken Marsala – “21 Day Fix” Recipe

I recently found this recipe for Chicken Marsala that is compliant with the “21 Day Fix” clean eating program. I found it to be full of flavor, easy to prepare, and a dish I would make again.Chicken Marsala - "21 Day Fix" Recipe / The Grateful Girl Cooks!
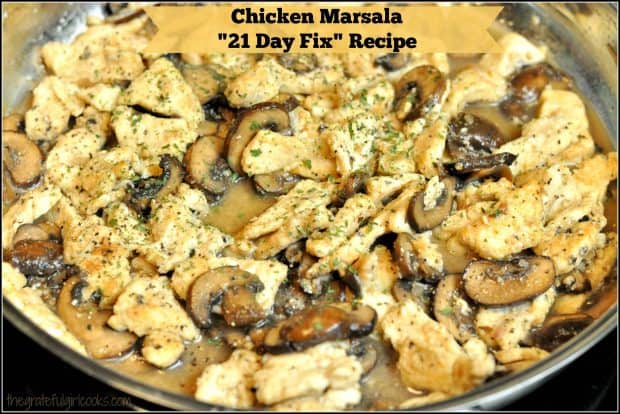
This recipe features sautéed baby portabella mushrooms, with shallots and garlic, served alongside pan browned chicken breast slices, in a light, slightly creamy sauce. Here’s how you make it:

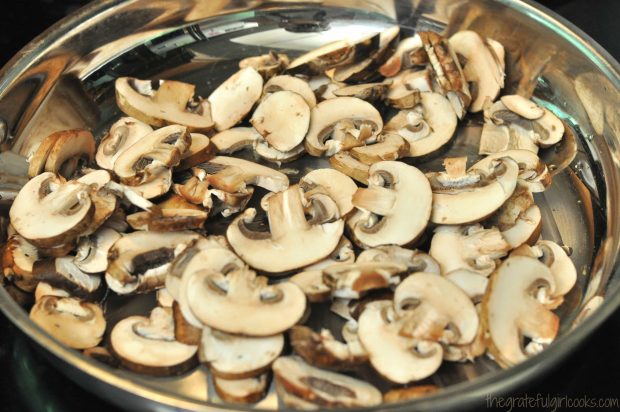
Melt a small amount of coconut oil in a medium skillet on low to medium heat. Add sliced baby portabella mushrooms and sauté them for about 8 minutes, stirring occasionally.

Chicken Marsala - "21 Day Fix" Recipe / The Grateful Girl Cooks!

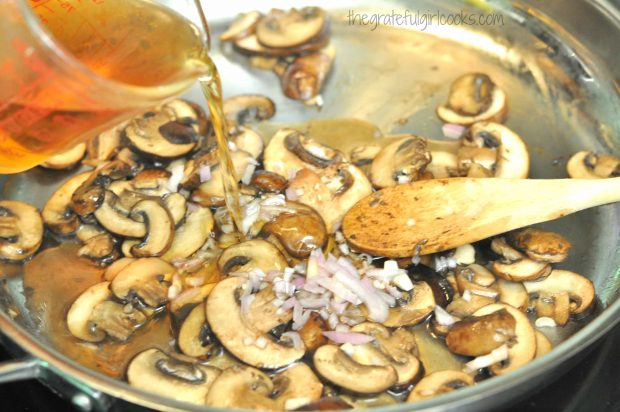
Once mushrooms are cooked, add Marsala wine, chopped shallots and minced garlic. Let this mixture simmer for about 15 minutes, until the wine reduces quite a bit. Stir the mixture occasionally.

Chicken Marsala - "21 Day Fix" Recipe / The Grateful Girl Cooks!

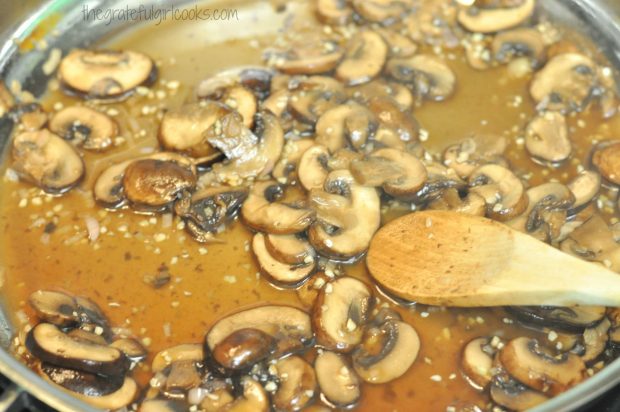
It will look like this when it’s just about done.

Chicken Marsala - "21 Day Fix" Recipe / The Grateful Girl Cooks!

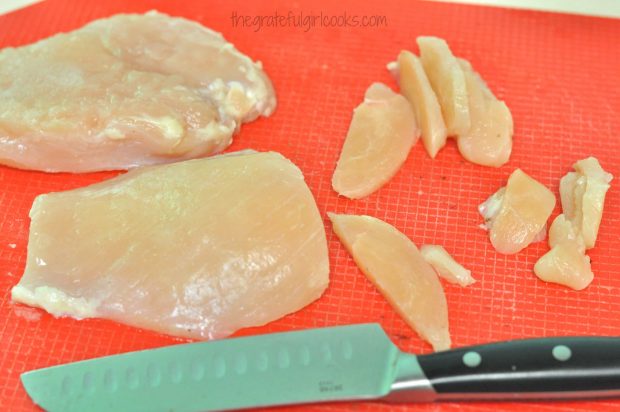
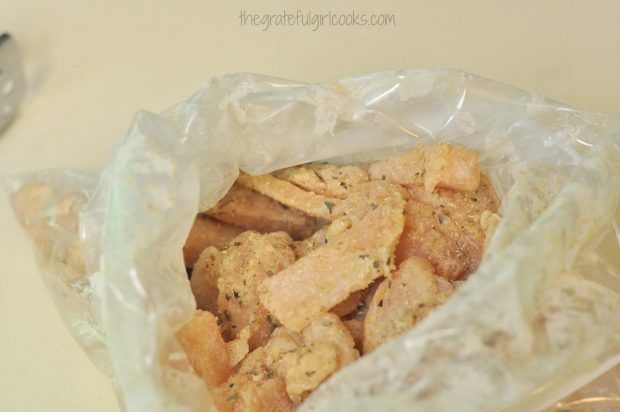
While the mushrooms are cooking, prepare the chicken. Slice chicken breasts thinly, then place chicken strips in a large bowl or ziploc bag, along with wheat flour and spices. Mix well, to fully coat the pieces of chicken.

Chicken Marsala - "21 Day Fix" Recipe / The Grateful Girl Cooks!

This is what the chicken pieces will look like, once coated.

Chicken Marsala - "21 Day Fix" Recipe / The Grateful Girl Cooks!

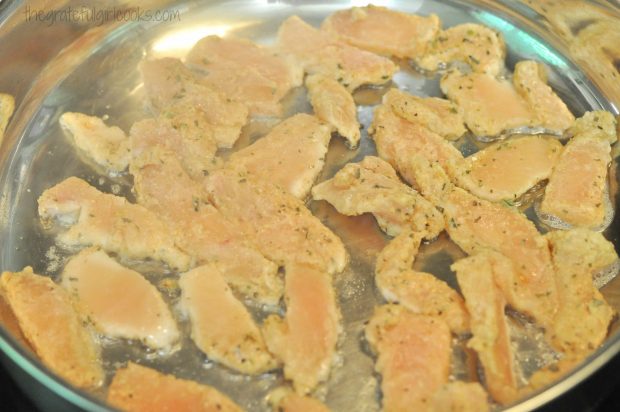
Shake off excess flour. In a large skillet, melt coconut oil and heat on medium. Once skillet is hot, add chicken pieces, and cook for 2-3 minutes per side, until the chicken is lightly browned on both sides.

Chicken Marsala - "21 Day Fix" Recipe / The Grateful Girl Cooks!

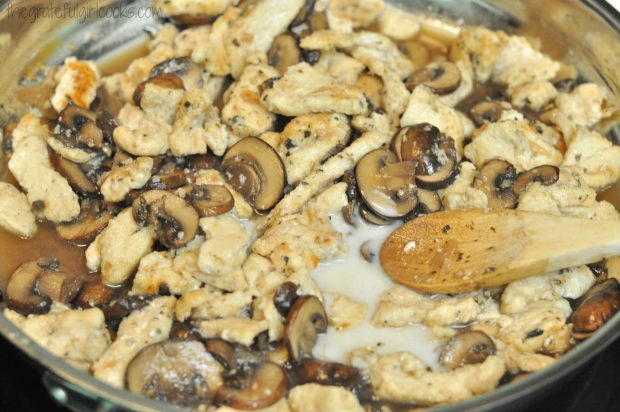
Once the chicken is cooked through and lightly browned, add the mushrooms and sauce.  Sprinkle with 1 teaspoon wheat flour and stir (nominal amount added to thicken sauce).

Add chicken broth and almond milk. Stir again, to fully combine. Let this simmer until fully heated through.

Chicken Marsala - "21 Day Fix" Recipe / The Grateful Girl Cooks!

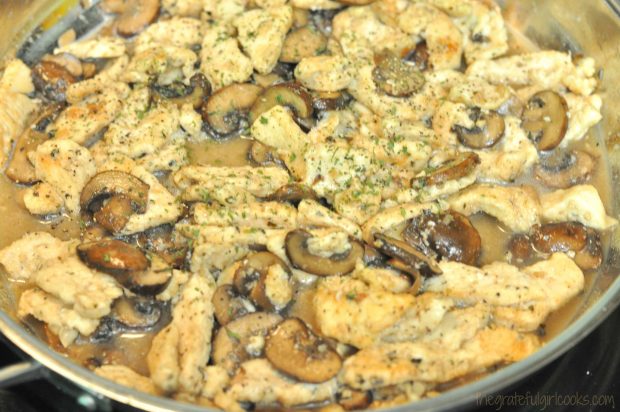
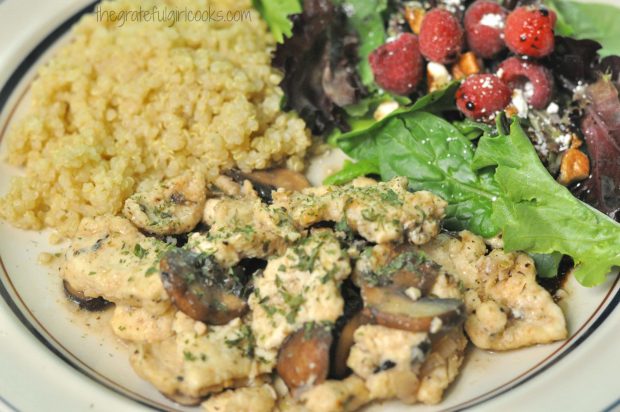
Once heated through, sprinkle with chopped fresh parsley or dried parsley flakes, and serve!

Chicken Marsala - "21 Day Fix" Recipe / The Grateful Girl Cooks!

If following the 21 Day Fix Plan, the counts for this chicken dish is 1 Red, 1 Green, and 1 tsp. (The count for the wheat flour divided between 4 servings is so nominal it is not included).

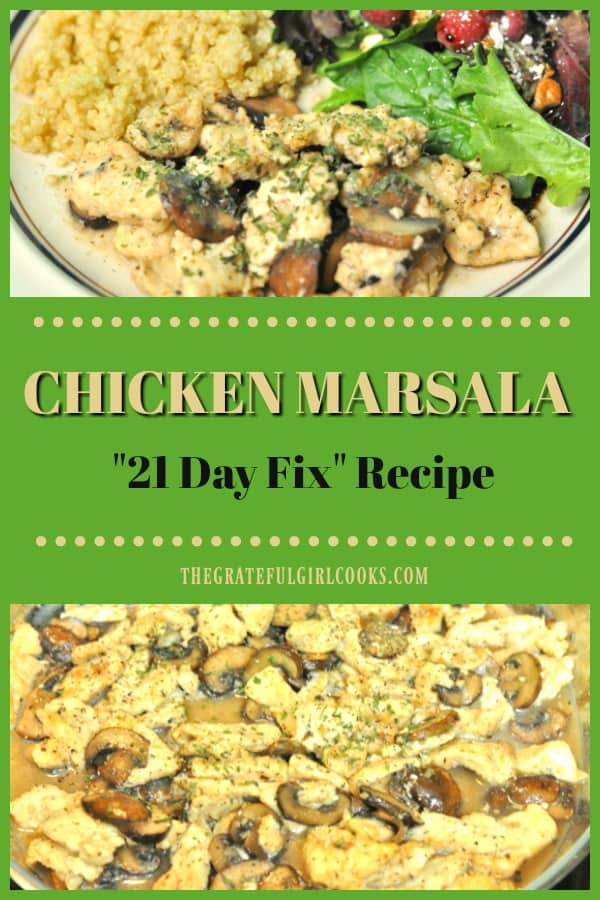
I served the chicken with sides of green salad and quinoa. If NOT following this eating plan, just go right ahead and enjoy this dish! It really is quite tasty.

Chicken Marsala - "21 Day Fix" Recipe / The Grateful Girl Cooks!

Enjoy this delicious chicken dish. I know my husband and I sure did!  Don’t ya just love it when a “lighter” version of a classic dish also tastes just as great? Have a great day… look around… “there is ALWAYS something to be thankful for”!

Interested In More Recipes?

Thank you for visiting this website. I appreciate you using some of your valuable time to do soIf you’re interested, I publish a newsletter 2 times per month (1st and 15th) with all the latest recipes, and other fun info. I would be honored to have you join our growing list of subscribers, so you never miss a great recipe!
There is a Newsletter subscription box on the top right side (or bottom) of each blog post, depending on the device you use, where you can easily submit your e-mail address (only) to be included in my mailing list.

You Can Also Find Me On Social Media:
Facebook page: The Grateful Girl Cooks!
Pinterest: The Grateful Girl Cooks!
Instagram: jbatthegratefulgirlcooks

Chicken Marsala - "21 Day Fix" Recipe / The Grateful Girl Cooks!Recipe Source:  http://www.fitmomangelad.com/21-day-fix-chicken-marsala/

0 from 0 votes
Chicken Marsala - "21 Day Fix" Recipe
Prep Time
15 mins
Cook Time
30 mins
Total Time
45 mins
 
Enjoy this "lighter" version of Chicken Marsala, featuring baby portabella mushrooms, chicken, shallots, garlic and Marsala wine.
Category: Entree
Cuisine: French
Keyword: chicken marsala 21 day fix
Servings: 4 servings
Calories Per Serving: 316 kcal
Author: JB @ The Grateful Girl Cooks!
Ingredients
Cook mushroom sauce:
  • 1 Tablespoon coconut oil
  • 8 ounces baby portabella mushrooms (Baby Bella), sliced
  • 1/4 cup shallots , diced
  • 3 cloves garlic , minced
  • 3/4 cup Marsala wine
For chicken:
  • 1 pound boneless , skinless chicken breast, thinly sliced
  • 1/4 cup wheat flour
  • 1 teaspoon onion powder
  • 1 teaspoon garlic powder
  • 1 teaspoon oregano
  • 1 Tablespoon coconut oil
  • 1 teaspoon wheat flour
  • 2 Tablespoons almond milk
  • 1/2 cup chicken broth
  • Salt and pepper , to taste
  • Fresh parsley , chopped OR dried parsley flakes
Instructions
  1. Melt coconut oil in a medium skillet. Add chopped mushrooms and sauté for about 8 minutes. Add minced garlic, chopped shallots and Marsala wine. Let this mixture simmer for about 15 minutes, or until the wine has reduced quite a bit, stirring occasionally.
  2. While the mushrooms are cooking, place the chicken slices, along with 1/4 cup wheat flour, onion powder, garlic powder, and oregano into a large bowl or ziploc bag. Stir or shake to fully coat the chicken pieces with spices.
  3. Heat 1 Tablespoons coconut oil in separate large skillet on medium heat. Shaking off excess flour, place chicken pieces into skillet. Cook for 2-3 minutes per side, until lightly browned and cooked through.
  4. Once chicken is cooked through, add the mushrooms and sauce. Sprinkle mixture with 1 teaspoon wheat flour. Stir to combine. Add almond milk and chicken broth; let this simmer for a few minutes until fully heated through.
  5. Garnish with fresh chopped parsley, or dried parsley flakes. Serve and enjoy!
Recipe Notes

21 Day Fix counts: 1 Red, 1 Green, 1 teaspoon (wheat flour is so nominal once divided into 4 servings, that is is not added to count).

Nutrition Facts
Chicken Marsala - "21 Day Fix" Recipe
Amount Per Serving (1 serving)
Calories 316 Calories from Fat 90
% Daily Value*
Fat 10g15%
Saturated Fat 6g38%
Cholesterol 72mg24%
Sodium 269mg12%
Potassium 708mg20%
Carbohydrates 16g5%
Fiber 1g4%
Sugar 5g6%
Protein 26g52%
Vitamin A 35IU1%
Vitamin C 4.1mg5%
Calcium 30mg3%
Iron 1.3mg7%
* Percent Daily Values are based on a 2000 calorie diet.

Here’s one more to pin on your Pinterest boards!Chicken Marsala - "21 Day Fix" Recipe / The Grateful Girl Cooks!


Save