Pasta With Italian Sausage, Sun-Dried Tomatoes And Summer Squash

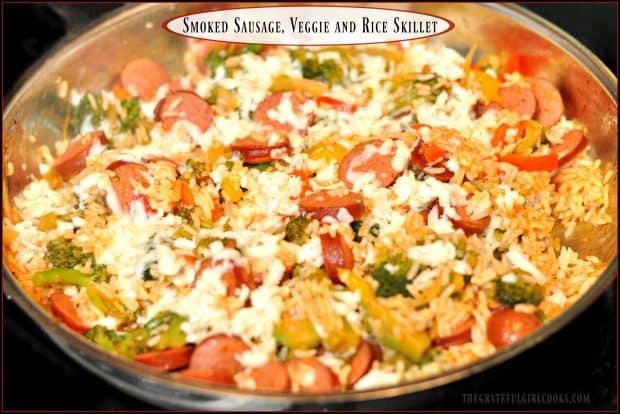
Pasta with Italian Sausage is a delicious meal, with seasoned spaghetti noodles topped with sun-dried tomatoes, onion, basil and summer squash.Pasta with Italian Sausage is a delicious meal, with seasoned spaghetti noodles topped with sun-dried tomatoes, onion, basil and summer squash.

Recently I created a recipe for pasta with Italian sausage. I used 2 Italian sausages that I scavenged out of our freezer, added summer squash from our garden, and some sun-dried tomatoes (packed in oil) from our garden, as well, so it certainly wasn’t a budget buster!

This dish WAS packed with great flavor! I made the sausage topping while the pasta was cooking, so the entire meal was quick to put together!

Scroll Down For A Printable Recipe Card At The Bottom Of The Page

How To Make Pasta with Italian Sausage

Begin by cooking the pasta according to the package directions. While the pasta was cooking, I cooked the ingredients for the “sauce” in my trusty old, large skillet.

The ingredients for the pasta "sauce" are cooked in a skillet.

These ingredients include Italian sausage, onion, green peppers, yellow squash, sun-dried tomatoes, basil, minced garlic, and spices.

The Italian sausage and veggies are cooked until done.

When done cooking, drain off the little bit of grease from the Italian sausage from the skillet. Good riddance!

The grease from the skillet is drained off once the Italian sauce is cooked.


Season the Cooked Pasta

For this recipe for pasta with Italian sausage I use spaghetti, but any pasta would work just fine! When done cooking, drain the pasta (don’t rinse), then put it back in the pan. Toss the hot pasta with butter, olive oil, Parmesan cheese, oregano, and garlic powder. Season the pasta with salt and pepper, to taste.

Pasta With Italian Sausage features buttered, seasoned spaghetti noodles.

Serve The Pasta with Italian Sausage

Divide the hot, seasoned pasta with Italian sausage into serving dishes. Top each portion with the Italian sausage mixture. Generously sprinkle the pasta with additional Parmesan cheese, to finish.

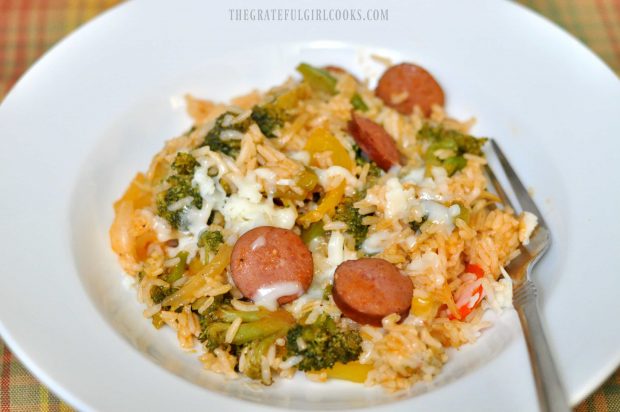
The finished pasta with Italian sausage is sprinkled with Parmesan and served in a white bowl.

Grab a fork, and enjoy this tasty pasta with Italian sausage dish! Looks pretty good, and tastes very good! The best part? Pasta with Italian sausage can be prepared and on the table in about 20 minutes!

A slice of buttered sourdough bread is served along with the pasta with Italian sausage.

Hope you enjoy this delicious pasta with Italian sausage! I made it up as I went along (which is ALWAYS an adventure!), but was pleasantly surprised at how delicious it was. the pasta is full of flavor!  My husband and I LOVED this simple meal.  Have a great day, friends, and please come back again soon.

Looking For More PASTA Recipes?

You can find all of my recipes in the Recipe Index, located at the top of the page. A few favorite pasta recipes include:

Interested In More Recipes?

Thank you for visiting this website. I appreciate you using some of your valuable time to do soIf you’re interested, I publish a newsletter 2 times per month (1st and 15th) with all the latest recipes, and other fun info. I would be honored to have you join our growing list of subscribers, so you never miss a great recipe!
There is a Newsletter subscription box on the top right side (or bottom) of each blog post, depending on the device you use, where you can easily submit your e-mail address (only) to be included in my mailing list.

You Can Also Find Me On Social Media:
Facebook page: The Grateful Girl Cooks!
Pinterest: The Grateful Girl Cooks!
Instagram: jbatthegratefulgirlcooks

Author's signature

Recipe Source: My hungry brain.

0 from 0 votes
Pasta With Italian Sausage, Sun-Dried Tomatoes And Summer Squash
Prep Time
10 mins
Cook Time
10 mins
Total Time
20 mins
 
Pasta with Italian Sausage is a delicious meal, with seasoned spaghetti noodles topped with sun-dried tomatoes, onion, basil and summer squash.
Category: Entree
Cuisine: Italian
Keyword: pasta with Italian sausage
Servings: 2 servings
Calories Per Serving: 1187 kcal
Author: JB @ The Grateful Girl Cooks!
Ingredients
For Pasta "Sauce":
  • 1 Tablespoon olive oil
  • 2 Italian sausages , casing removed
  • 1/4 cup chopped brown onion
  • 1/3 cup chopped green peppers
  • 1/2 cup chopped yellow squash
  • 1/3 cup chopped sun-dried tomatoes (packed in oil)
  • 2 Tablespoons fresh basil leaves , chopped
  • 1 Tablespoon minced garlic
  • 1/4 teaspoon dried oregano
For Pasta:
  • 8 ounces pasta (½ pound)- I used spaghetti noodles, cooked and drained
  • 2 Tablespoons butter
  • 2 Tablespoons olive oil
  • 2 Tablespoons shredded Parmesan cheese
  • 1/4 teaspoon dried oregano
  • 1/2 teaspoon garlic powder
  • Salt and Pepper , to taste
  • Additional shredded Parmesan cheese (for garnish)
Instructions
  1. Bring large pot of salted water to a boil (for pasta). When fully boiling, add pasta and cook per package instructions.
  2. While pasta is cooking, prepare the "sauce", by heating olive oil on medium high in large skillet. Add crumbled Italian sausage, chopped onion, green peppers, yellow squash, sun-dried tomatoes, basil, oregano and minced garlic. Cook for approx. 7-8 minutes, until done. Drain any grease from pan. Keep warm.
  3. When pasta is done cooking, drain, then return to pan. While pasta is hot, add butter, olive oil, Parmesan cheese, oregano, garlic powder, and salt and pepper, to taste. Toss well, to combine.
  4. Place seasoned pasta in serving bowls. Top with hot sausage mixture.
  5. Garnish (liberally) with additional shredded Parmesan cheese. Serve and enjoy!
Nutrition Facts
Pasta With Italian Sausage, Sun-Dried Tomatoes And Summer Squash
Amount Per Serving (1 g)
Calories 1187 Calories from Fat 657
% Daily Value*
Fat 73g112%
Saturated Fat 24g150%
Cholesterol 119mg40%
Sodium 1055mg46%
Potassium 999mg29%
Carbohydrates 97g32%
Fiber 5g21%
Sugar 5g6%
Protein 35g70%
Vitamin A 885IU18%
Vitamin C 49.5mg60%
Calcium 122mg12%
Iron 3.7mg21%
* Percent Daily Values are based on a 2000 calorie diet.

Here’s one more to pin on your Pinterest boards!Pasta with Italian Sausage is a delicious meal, with seasoned spaghetti noodles topped with sun-dried tomatoes, onion, basil and summer squash.


Save

Save

Pineapple Lime Mint Agua Fresca

Make this cold, refreshing Pineapple Lime Mint Agua Fresca in 5 minutes! It’s a family friendly, fresh fruit beverage with only 75 calories per serving!Make cold, refreshing Pineapple, Lime and Mint Agua Fresca in 5 minutes! It's a family friendly, fresh fruit beverage with only 75 calories per serving!
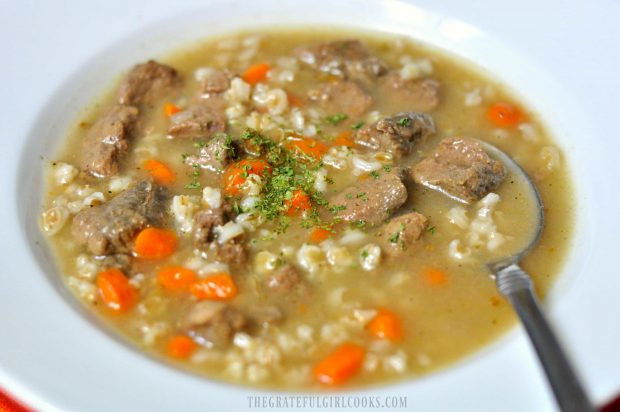
I recently tried a recipe for Pineapple Lime Mint Agua Fresca that I found in a Cooking Light cookbook I bought a few months back. Guess what? It tasted GREAT!

The recipe took less than 5 minutes to whip up, and before I knew it, was chilling in my refrigerator!  The end result was a cold and delicious, family-friendly pineapple infused agua fresca, with a touch of lime and fresh mint, for added flavor! Here’s how to make it:

Scroll Down For A Printable Recipe Card At The Bottom Of The Page

How To Make Pineapple Lime Mint Agua Fresca

Here’s how you make it (enough for 4 one cup servings):  Place fresh chunks of pineapple, cold water, a tiny bit of sugar, and fresh lime juice into a blender.

Fresh pineapple, water, lime juice and sugar are blended until smooth for agua fresca

Blend the ingredients on high for about a minute until fully mixed and smooth.

Pineapple chunks and fresh lime juice are fully blended.

Hold a sieve over the serving pitcher. Strain the liquid through the sieve, directly into the pitcher. I used a spoon to help push the liquid through. Once all liquid has been strained through, discard any solids remaining in the sieve.

Blended pineapple juice is drained through a sieve to remove pulp.

Add chopped fresh mint leaves to the mixture.  Give the mixture a good stir, then cover the pitcher, and refrigerate until you are ready to serve! Serve when it is good and cold!

Fresh chopped mint leaves added to pineapple lime agua fresca.

Ready To Serve!

Pour the cold pineapple lime mint agua fresca over ice into serving glasses.  The recipe makes enough for 4, one cup servings. If desired, garnish each drink with a pineapple wedge and/or a sprig of fresh mint! It’s not necessary to garnish the glasses, of course, but it IS fun and looks cute!

Serve, and enjoy this delicious, fresh, low calorie (75 calories per serving) agua fresca! It’s delicious, and I’m confident you’re gonna really like it!

Pineapple lime mint agua fresca is served cold over ice!

This refreshing pineapple lime mint agua fresca is super easy to make! My husband and I enjoyed it very much, especially since the day I made it our temps hit 90 degrees!  Hope you’ll give it a try!
Have a great day – seek to bring out the very best in everyone you meet. You could be THE ONE who makes someone else’s day a little bit better!

Looking For More BEVERAGE Recipes?

You can find all of my recipes in the Recipe Index, located at the top of the page. I have lots of yummy drink recipes, including:

Interested In More Recipes?

Thank you for visiting this website. I appreciate you using some of your valuable time to do soIf you’re interested, I publish a newsletter 2 times per month (1st and 15th) with all the latest recipes, and other fun info. I would be honored to have you join our growing list of subscribers, so you never miss a great recipe!
There is a Newsletter subscription box on the top right side (or bottom) of each blog post, depending on the device you use, where you can easily submit your e-mail address (only) to be included in my mailing list.

You Can Also Find Me On Social Media:

Facebook page: The Grateful Girl Cooks!
Pinterest:
The Grateful Girl Cooks!
Instagram:
jbatthegratefulgirlcooks

Have a GREAT day!

Author's signature

Recipe Source: The cookbook “Cooking Light Fresh Food Superfast”, Published by Time Home Entertainment, Inc., 2011, page 144

0 from 0 votes
Pineapple, Lime & Mint Agua Fresca
Prep Time
5 mins
Cook Time
0 mins
Total Time
5 mins
 
Make cold, refreshing Pineapple, Lime and Mint Agua Fresca in 5 minutes! It's a family friendly, fresh fruit beverage with only 75 calories per serving!
Category: Beverage
Cuisine: American
Keyword: agua fresca
Servings: 4 servings
Calories Per Serving: 75 kcal
Author: JB @ The Grateful Girl Cooks!
Ingredients
  • 3 cups fresh pineapple , cut into cubes
  • 2 cups COLD water
  • 1 Tablespoon granulated sugar
  • 1 Tablespoon fresh squeezed lime juice
  • 1 Tablespoon fresh mint , chopped
Instructions
  1. Place the pineapple cubes, cold water, sugar, and fresh lime juice into a blender. Blend on high for about a minute, until mixture is fully combined and smooth.
  2. Pour liquid through a sieve (to strain) directly into a pitcher. When done, discard any solids remaining in sieve.
  3. Stir chopped mint into liquid. Cover the pitcher with plastic wrap or a lid. Refrigerate the liquid until it is really cold and you are ready to serve!
  4. To serve, pour beverage over ice cubes, and place a garnish (if desired) of a pineapple wedge and/or a mint sprig on rim of glass.
Nutrition Facts
Pineapple, Lime & Mint Agua Fresca
Amount Per Serving (1 g)
Calories 75
% Daily Value*
Sodium 7mg0%
Potassium 134mg4%
Carbohydrates 19g6%
Fiber 1g4%
Sugar 15g17%
Vitamin A 125IU3%
Vitamin C 60.6mg73%
Calcium 23mg2%
Iron 0.4mg2%
* Percent Daily Values are based on a 2000 calorie diet.

Here’s one more to pin on your Pinterest boards!Make cold, refreshing Pineapple, Lime and Mint Agua Fresca in 5 minutes! It's a family friendly, fresh fruit beverage with only 75 calories per serving!


Save

Save

Summer Vegetable Tian

There are a lot of fantastic Summer veggies coming into season right now. This Summer Vegetable Tian is a GREAT way to simply & creatively serve fresh veggies to those you love!Summer Vegetable Tian is a delicious and colorful baked vegetable side dish, layered with zucchini, yellow squash, potato, tomato, herbs and Italian cheese.
The recipe serves 6, and is very inexpensive to make (especially if you have a backyard garden like me, and are bursting with harvested zucchini, onions, yellow squash and tomatoes about this time of year)!

If you have ONE onion, ONE zucchini, ONE yellow squash, ONE potato, and ONE tomato, then you have almost everything you will need to make this great side dish!

Scroll Down For A Printable Recipe Card At The Bottom Of The Page

How To Make A Summer Vegetable Tian

Here’s how you make this beautiful, delicious summer vegetable tian:  Start by sautéing the diced onions and minced garlic in olive oil for a few minutes. Note: I added garlic during the last minute of cooking, so it wouldn’t burn or become bitter.

Cooking onions and garlic for vegetable tian

Spread softened butter on the bottom and sides of a baking dish (again… playing with your food).

Baking dish for vegetable tian is coated with softened butter

Spread the cooked onions and garlic on the bottom of the dish.

Cooked onions and garlic are added to baking dish

Now It’s Time To Arrange The Veggies!

Alternating veggies, stack the sliced vegetables in the dish vertically until it is filled. (You will notice there won’t be as many tomato slices as everything else- no worries, just add them in.  Have fun playing with your food!  Season the veggies generously with salt and pepper, then add dried thyme.

Layered summer vegetables for tian are placed into baking dish.

Cover the baking dish with aluminum foil, and place the pan in a preheated 400 degree oven. Bake veggies for 30 minutes, then take the foil off the dish, cover the top of the veggies with the shredded Parmesan cheese, then continue baking for another 15-20 minutes.

This is what they looked like when I removed the foil. (oops-forgot to take a picture after adding shredded cheese to the top after this!)

Partially baked summer vegetable tian with Italian seasoning.

Time To Eat The Summer Vegetable Tian!

When done, the Parmesan cheese will be melted and light brown in color, and the veggies will be cooked through.  Remove baking dish from oven, and serve while hot!  I found it easiest to remove a “serving sized section” of veggies using a spatula to keep them together in a compact, colorful line.

Summer vegetable tian with melted cheese is fully baked.

On the plate, and ready to eat! I served this summer vegetable tian dish with Baked Dover Sole Rollatini, but it would be a great side dish for a variety of main courses!

Summer vegetable tian is served as a delicious side dish

I don’t think you can EVER go wrong with fresh vegetables on the table! The alternating colors displayed so beautifully made it a very appetizing looking dish. The vegetables tasted wonderful, too, so I will definitely be making this again! Have a blessed day!

Looking For More VEGGIE Recipes?

You can find all of my veggie dishes in the Recipe Index, located at the top of the page. I have lots of vegetable dishes I think you will enjoy, including:

Interested In More Recipes?

Thank you for visiting this website. I appreciate you using some of your valuable time to do soIf you’re interested, I publish a newsletter 2 times per month (1st and 15th) with all the latest recipes, and other fun info. I would be honored to have you join our growing list of subscribers, so you never miss a great recipe!
There is a Newsletter subscription box on the top right side (or bottom) of each blog post, depending on the device you use, where you can easily submit your e-mail address (only) to be included in my mailing list.

You Can Also Find Me On Social Media:
Facebook page: The Grateful Girl Cooks!
Pinterest: The Grateful Girl Cooks!
Instagram: jbatthegratefulgirlcooks

Author's signature

Recipe Source:  http://www.budgetbytes.com/2011/08/summer-vegetable-tian/

↓↓ PRINTABLE RECIPE BELOW ↓↓

0 from 0 votes
Summer Vegetable Tian
Prep Time
15 mins
Cook Time
45 mins
Total Time
1 hr
 
Summer Vegetable Tian is a delicious and colorful baked vegetable side dish, layered with zucchini, yellow squash, potato, tomato, herbs and Italian cheese.
Category: Side Dishes, Vegetable Dish
Cuisine: American
Keyword: summer vegetable tian
Servings: 6 servings
Calories Per Serving: 144 kcal
Author: JB @ The Grateful Girl Cooks!
Ingredients
  • 1 medium sized brown onion , diced
  • 2 cloves garlic , minced
  • 1 Tablespoon olive oil
  • 1 medium sized zucchini , thinly sliced
  • 1 medium sized yellow squash , thinly sliced
  • 1 medium potato , thinly sliced
  • 1 medium tomato , thinly sliced
  • 1 teaspoon dried thyme
  • Salt and Pepper (to taste)
  • 1 cup shredded Italian Cheese (I used shredded Parmesan)
  • Non-stick spray (or softened butter), for pan. I used butter!
Instructions
  1. Preheat your oven to 400º F. While oven is preheating, dice the onion (finely) and mince the 2 cloves of garlic. Heat olive oil in skillet on medium heat. Add onions; sauté them for 4-5 minutes, or until soft and translucent. Add garlic the last minute of cooking, so as not to burn it. Set aside.
  2. THINLY slice zucchini, yellow squash, potato and tomato. It is best if these vegetables are all about the same circumference around, for uniformity.
  3. Spray an 8x8 baking dish with non-stick spray or coat bottom and sides of pan with softened butter (I used butter!). Place the cooked onions and garlic on the bottom of pan, spreading evenly.
  4. Evenly stack the thinly sliced vegetables vertically in dish (alternating veggies) to form a long line of colorful veggies in the pan. When one row is done, start another row, until all veggies have been distributed. (Think of this as playing with your food!)
  5. Once vegetables are arranged in dish, season them liberally with salt and pepper, then add thyme.
  6. Cover baking dish with aluminum foil; Bake at 400 degrees for 30 minutes. Take the foil off the dish, cover the tops of the veggies with shredded Parmesan cheese, then continue cooking (uncovered) for an additional 15-20 minutes (until the cheese turns light brown).
  7. Remove pan from oven, and serve! Enjoy!
Recipe Notes

I found it is easiest to serve the veggies by lifting a "section" out of the baking dish with a long spatula. That keeps the veggies together in a compact, colorful line.

Nutrition Facts
Summer Vegetable Tian
Amount Per Serving (1 serving)
Calories 144 Calories from Fat 63
% Daily Value*
Fat 7g11%
Saturated Fat 3g19%
Cholesterol 14mg5%
Sodium 268mg12%
Potassium 415mg12%
Carbohydrates 12g4%
Fiber 1g4%
Sugar 3g3%
Protein 8g16%
Vitamin A 445IU9%
Vitamin C 17.9mg22%
Calcium 211mg21%
Iron 1mg6%
* Percent Daily Values are based on a 2000 calorie diet.

Here’s one more to pin on your Pinterest boards!Summer Vegetable Tian is a delicious and colorful baked vegetable side dish, layered with zucchini, yellow squash, potato, tomato, herbs and Italian cheese.


Save

Save

Baked Dover Sole Rollatini

Baked Dover Sole Rollatini are fish fillets, filled with Italian seasoned breadcrumbs and Parmigiano cheese, rolled & baked in a lemon-wine sauce!

I recently made Baked Dover Sole Rollatini for my husband and I for dinner.  It was absolutely fantastic! Dover sole fillets are filled with Italian herb-seasoned breadcrumbs, lemon zest, and Parmigiano cheese, then rolled and baked on top of a lemon-wine sauce. DELICIOUS!

The fish doesn’t taste “fishy”, light in texture, and is seasoned very well. I got the Dover Sole fillets at Trader Joe’s, and was thrilled that I got a package of 5 small thin fillets (frozen) for only $4.54. That is much cheaper than a burger at some fast food joints!

The recipe (which I found on Pinterest), is from famed Italian chef and author Lidia Bastianich, and I found it to be EASY and DELICIOUS! Here’s how to make it:

Scroll Down For A Printable Recipe Card At the Bottom Of The Page

How To Make Dover Sole Rollatini

Make the filling by mixing breadcrumbs, shredded Parmesan cheese, lemon zest, fresh Italian parsley, and oregano together in a small bowl. Add 4 Tablespoons of olive oil and stir to mix until all the ingredients are coated.

Bread crumbs, lemon zest, and spices in mixing bowl

Rub softened butter over the bottom of a 9″ x 13″ baking dish.  Place thin slices from HALF of a large lemon on the bottom of the dish in a single layer.

Juice the OTHER HALF of the lemon, and add the lemon juice and white wine to the baking dish.

Lemon slices on bottom of white baking dish

Time To Roll the Fish With “Filling”

Spread out the sole fillets on a work surface. Blot them dry using paper towels to remove any excess moisture.

Raw dover sole fish fillets on red work surface

Evenly divide and spread the seasoned bread crumb mixture on top of the fillets, covering the surface.  Press the crumbs down into the fish a bit, so they adhere better.

NOTE: Reserve a bit of the crumbs to garnish the top of the fish before baking.

Fish fillets covered with bread crumb mixture on red cutting board

Time To Roll

Roll each fillet up, starting with the short end. Once rolled, secure the rolls with a toothpick inserted from top to bottom at an angle, because this holds it together while baking!

After securing the rolls with a toothpick in each one (top to bottom), gently place the rolls into the baking dish on top of the lemon wedges.  Sprinkle the remaining breadcrumbs you have left on top of the fish.

Dover sole fillet rolled up with filling

Bake The Dover Sole Rollatini

Add capers to the baking dish in the “open” spaces between the pieces of fish.  Drizzle the tops of the dover sole rollatini with olive oil. 

Bake the dover sole rollatini (uncovered) in a preheated 350°F. oven for about 20 minutes, or until the fish is cooked through.

Fish rolled up on top of lemon slices in white baking dish

Time To Serve This Dish

Once the fish is cooked through, remove the pan from the oven, and remove the toothpicks before serving, because no one want to bite down on a sharp toothpick!!  

Carefully lift each piece of dover sole out of the baking dish and transfer them onto plates using a spatula. The fillets are small once rolled, so we each had two pieces.

Baked fish in baking dish out of oven

There you have it!  I served the Baked Dover Sole Rollatini with some fresh fruit from our garden, and a Summer Vegetable Tian, The meal was light, fresh, and absolutely wonderful!

We will DEFINITELY be having this easy seafood dish again. My husband and I also loved that we had a healthy delicious meal, for less money than eating take-out!

Close up of dover sole rollatini with vegetables on plate.

I hope you have the opportunity to try this dish, because it is really yummy, light and full of flavor. You’ll enjoy this seafood meal.

May you find and take great delight in the smallest of things today.  Look around! There’s beauty everywhere, if you choose to see it. The beauty I experience through the 5 senses God gave me to enjoy life, continues to make me smile and give Him my heartfelt thanks.

Thanks for stopping by, and please come back again soon for more family-friendly recipes. Take care, may God bless you, and have a GREAT day!

Looking For More DOVER SOLE Recipes?

You can find ALL of my recipes in the Recipe Index, which is located at the top of the page. I have other dover sole recipes you might enjoy, including:

Want More Recipes? Get My FREE Newsletter!

I publish a newsletter 2 times per month (1st and 15th) with lots of recipes, tips, etc..
Would you like to join our growing list of subscribers?

There is a Newsletter subscription box on the top right (or bottom) of each blog post, depending on the device you use.
You can submit your e-mail address there, to be added to my mailing list.

Find Me On Social Media:

Facebook page: The Grateful Girl Cooks!
Pinterest:
The Grateful Girl Cooks!
Instagram:
jbatthegratefulgirlcooks

Author's signature

Recipe Source: http://www.thedailymeal.com/recipes/baked-rollatini-sole-recipe

↓↓ PRINTABLE RECIPE BELOW ↓↓

0 from 0 votes
Baked Dover Sole Rollatini
Prep Time
10 mins
Cook Time
20 mins
Total Time
30 mins
 

Baked Dover Sole Rollatini are Dover sole fillets, filled with Italian seasoned breadcrumbs and Parmigiano cheese, then rolled & baked in a lemon-wine sauce!

Category: Entree
Cuisine: American
Keyword: dover sole rollatini
Servings: 6 servings
Calories Per Serving: 410 kcal
Author: JB @ The Grateful Girl Cooks!
Ingredients
For The Breadcrumb Filling:
  • 1/2 cup dry breadcrumbs
  • 1/2 cup shredded Parmesan cheese
  • 1/4 cup fresh Italian parsley , chopped
  • 1 large lemon (zest the outside, then juice HALF, thinly slice other HALF for fish prep)
  • 2 teaspoons dried oregano
  • 4 Tablespoons olive oil , extra virgin
For Preparing Fish:
  • 2 Tablespoons butter , softened
  • 6 Dover Sole fillets (boneless, skinless)
  • Reserved lemon juice and lemon slices (see above)
  • Reserved thin lemon slices
  • 1 cup dry white wine
  • 2 Tablespoons olive oil
  • 2 Tablespoons drained capers
Instructions
  1. Preheat your oven to 350 degrees F.
  2. Mix together the breadcrumb ingredients (breadcrumbs, Parmesan, Italian parsley, lemon zest, oregano). Sprinkle with 4 T. olive oil. Mix to fully combine.
  3. Rub softened butter over the bottom of 9x13 baking dish, to coat. Place the thin lemon slices onto bottom of pan in a single layer. Add the lemon juice and white wine to pan.
  4. Lay out the fish on a work surface. Spread the bread crumb mixture over the length of each fillet (reserving a bit of breadcrumb mixture to sprinkle on top of fish before baking).
  5. Roll each fillet up (with the bread crumb mixture inside), beginning with the short side of the fillet. As you finish rolling each one, insert a toothpick from top to bottom at an angle to hold it securely closed. Place each piece of fish in the baking dish on top of the lemon slices. Sprinkle top of fish with reserved bread crumb mixture (as a garnish). Lightly drizzle tops of fish with 2 T. olive oil. Spread capers in the pan in the open spaces between pieces of fish.
  6. Place pan in lower part of oven and bake for approximately 20 minutes, or until the fish is cooked through. Remove pan from oven. REMEMBER TO REMOVE TOOTHPICKS, then place fish onto individual serving plates using a spatula. Serve, and enjoy!
Recipe Notes

If using small thin fillets, plan on 2 per serving for adults. Calorie count is based on large fillet (1 large piece per serving).

Nutrition Facts
Baked Dover Sole Rollatini
Amount Per Serving (1 serving)
Calories 410 Calories from Fat 180
% Daily Value*
Fat 20g31%
Saturated Fat 5g31%
Cholesterol 17mg6%
Sodium 304mg13%
Potassium 78mg2%
Carbohydrates 8g3%
Sugar 1g1%
Protein 4g8%
Vitamin A 410IU8%
Vitamin C 3.3mg4%
Calcium 127mg13%
Iron 1.1mg6%
* Percent Daily Values are based on a 2000 calorie diet.

Here’s one more to pin on your Pinterest boards!Baked Dover Sole Rollatini are Dover sole fillets, filled with Italian seasoned breadcrumbs and Parmigiano cheese, then rolled & baked in a lemon-wine sauce!

Save

Save

Save

Beef Jerky DIY!

Make your own delicious beef jerky in a food dehydrator or oven at home, for a fraction of the cost of purchasing it!Make your own delicious beef jerky in a food dehydrator or oven at home, for a fraction of the cost of purchasing it!
Have you ever wondered HOW to make really great tasting beef jerky for a fraction of the price of store bought?  Well, if you like to snack on this chewy treat and want to know how to make your own in a food dehydrator OR in your oven, read on!

Over 20 years ago I bought a food dehydrator (see photo below) for about $25. I have used that thing a LOT ever since. It is a real “workhorse”, and I have used it for making my own beef jerky (as well as many varieties of dried fruits, spices, veggies, etc.) ever since!

That original $25 I spent was a great investment. (The photo below is to show you my little 5 rack machine – drying mint leaves and cherry tomatoes from our garden). I’ve also dehydrated lots of fruits and veggies, too!

Food dehydrator with herbs inside

Scroll Down For A Printable Recipe Card At the Bottom Of the Page

How To Make Beef Jerky

Making beef jerky is very easy, actually. Very thin strips of beef are marinated overnight (or a minimum of 4 hours), then placed in the dehydrator or oven and “dried” until the strips of meat are moisture free and pliable.

Here’s how you make beef jerky (with only 4 ingredients!)  The basic mix is 3 parts soy sauce, 1 part brown sugar, and 1 part Liquid Smoke (the picture shows what kind I use – found at grocery store).  Mix it up in a medium bowl.

Photo of bottle of concentrated Liquid Smoke flavoring

The meat (I like to use London broil or flank steak) is sliced into very thin 1/8″ strips (it is easiest to cut if meat is partially thawed after being frozen).  If you are using London Broil, cut slices WITH THE GRAIN.

If you will be using Flank Steak, cut slices AGAINST THE GRAIN. Beef jerky meat is then marinated in sauce for a MINIMUM of 4 hours in refrigerator. Refrigerate the meat (overnight is BEST), in a covered container.

Raw beef strips for beef jerky, marinating in bowl.

When the meat for the beef jerky is done marinating, lay the beef strips on paper towels to absorb excess sauce. Pat lightly dry.

Marinated beef jerky strips draining on paper towel.

Dehydrating The Beef Jerky

Place strips of beef onto dehydrator racks leaving space for air to flow between each piece. If you are using an oven, place the strips onto aluminum foil covered baking sheets.

Strips of marinated beef in dehydrator

If you are using a food dehydrator, dry the beef jerky strips for between 3-4 hours, turning strips over about halfway through drying process. When done the beef jerky should be fully dry, but still pliable.

If Using An Oven To Make Beef Jerky

If using oven, dry the jerky on the lowest setting your oven will go (usually between 150 and 170 degrees). The beef jerky will need to dry in oven for 8-10 hours, so it’s easy to put it in oven at night and have it done the next morning.

Storing Beef Jerky

The finished beef jerky will have a very nice smoky, slightly teriyaki taste, and boy, is it GOOD! Remove the strips from the dehydrator or oven, and let them completely cool.  Keep any leftover beef jerky stored in an airtight container or sealable bag.

I’ve made my own beef jerky for over 20 years now, and it is always a big hit with my husband and our sons… and given the price of a bag of jerky at the store (whoa!), making it at home is a real money saver!

Pieces of beef jerky on paper towel

Hope you will consider trying this easy recipe for beef jerky… it’s never failed me yet!  Have a fantastic day! Please come back again soon, for more yummy recipes.

Looking For More SNACK Recipes?

You can find all of my recipes in the Recipe Index, located at the top of the page. I have quite a few recipes for some yummy snacks, including:

Interested In More Recipes?

Thank you for visiting this website. I appreciate you using some of your valuable time to do soIf you’re interested, I publish a newsletter 2 times per month (1st and 15th) with all the latest recipes, and other fun info. I would be honored to have you join our growing list of subscribers, so you never miss a great recipe!
There is a Newsletter subscription box on the top right side (or bottom) of each blog post, depending on the device you use, where you can easily submit your e-mail address (only) to be included in my mailing list.

You Can Also Find Me On Social Media:
Facebook page: The Grateful Girl Cooks!
Pinterest: The Grateful Girl Cooks!
Instagram: jbatthegratefulgirlcooks

Author's signature

Recipe Source: My Mr. Coffee Food Dehydrator Owner’s Manual (really, really old)

0 from 0 votes
Beef Jerky DIY!
Prep Time
4 hrs
Cook Time
4 hrs
Total Time
8 hrs
 

Make your own delicious beef jerky in a food dehydrator or oven at home, for a fraction of the cost of purchasing it!

Category: Appetizer/Snack
Cuisine: American
Keyword: beef jerky
Servings: 25 slices (approx.)
Calories Per Serving: 35 kcal
Author: JB @ The Grateful Girl Cooks!
Ingredients
For marinade:
  • 3/4 cup soy sauce
  • 1/4 cup brown sugar
  • 1/4 cup Liquid Smoke
For meat:
  • 1 pound London Broil or flank steak
Instructions
  1. Slice meat into 1/8 inch wide strips (TIP: meat will cut BEST if you use slightly thawed, but still partially frozen meat).
  2. Combine marinade ingredients in medium sized bowl. Add meat strips to marinade. Coat all meat with marinade. Cover bowl and let marinate in refrigerator at LEAST 4 hours (or overnight-BEST!).

  3. When ready, lightly pat dry meat strips (place strips on paper towels). Lay strips on food dehydrator racks OR place strips on baking sheets lined with aluminum foil. Leave space between each piece so air can circulate.

  4. If using dehydrator, dehydrate at 145 degrees for approximately 3-4 hours, until dry but pliable. If using oven, turn oven to lowest setting (150-170 degrees). Let jerky bake for 8-10 hours until dry, but pliable.

  5. Remove beef jerky when done. Let cool completely. Store in airtight container. Enjoy!
Recipe Notes

Try to use meat with a limited amount of fat present, for best results. *The amount of marinade used will vary depending on how much meat you are using to make jerky. You will need to have enough of the sauce to marinade all strips of beef. 

Nutrition Facts
Beef Jerky DIY!
Amount Per Serving (1 piece)
Calories 35
% Daily Value*
Cholesterol 11mg4%
Sodium 406mg18%
Potassium 85mg2%
Carbohydrates 2g1%
Sugar 2g2%
Protein 4g8%
Calcium 7mg1%
Iron 0.5mg3%
* Percent Daily Values are based on a 2000 calorie diet.

Here’s one more to pin on your Pinterest boards!Make your own delicious beef jerky in a food dehydrator or oven at home, for a fraction of the cost of purchasing it!


Save

Blackberry Pie Bars

You’ll LOVE these delicious dessert Blackberry Pie Bars, made with fresh juicy blackberries baked on a shortbread crust, with a buttery streusel crumb topping.You'll LOVE these delicious dessert Blackberry Pie Bars, made with fresh juicy blackberries baked on a shortbread crust, with a buttery streusel crumb topping.
It’s THAT time of the summer when fresh berries are making their annual appearance all around the Pacific Northwest. The other day I picked 4 quarts of fresh blackberries that were growing wild in our neighborhood, and made these fantastic tasting Blackberry Pie Bars! It’s nice to pick wild blackberries (for FREE), and then use them to create a special “something” that my husband and I can enjoy AND I can give to others.

This recipe makes 24 bars, so I kept a few for us, then gave away 2 big plates of them to our sons and another friend. The Blackberry Pie Bars are delicious; they do taste like you’re eating a piece of pie!

Scroll Down For A Printable Recipe Card At The Bottom Of The Page

How To Make Blackberry Pie Bars

Place flour, 1 cup sugar, baking powder, cinnamon, salt and lemon zest into a food processor. Pulse these together a couple times to mix. *Don’t have a food processor? No problem… just use a hand held pastry blender.

Flour, lemon zest, cinnamon, etc. mixed in food processor for blackberry bar base

Add egg, butter, and vanilla extract to the mixture. Pulse again until the mixture is crumbly (and the butter is in small pieces).

Butter, egg, vanilla added to ingredients in food processor

Put half of the crumbly dough into a prepared 13×9 inch pan. (either sprayed with non-stick spray, OR in a 13×9 pan that is covered with parchment paper with paper hanging over the edges.

This is what I do, and it makes lifting the entire pan of bars out very easy, once cooled!)  Pack down the crumbs with your hands, until it forms a solid crust.

Crumbled ingredients (before baking) form base for bar cookies
In a large bowl, combine 1/2 cup sugar, cornstarch and lemon juice. Add the fresh blackberries, and stir gently until the berries are coated.

Blackberries, sugar and lemon juice in large bowl

Evenly spoon out the blackberry mixture over the crust.

Blackberry filling spread out over bar cookie base in baking pan

Sprinkle the remaining half of the crumb mixture over the top of the berries, to cover the surface of the bars.  

Crumb mixture spread over blackberry pie filling before baking

Bake The Blackberry Pie Bars

Bake in a preheated 375 degree oven for 45 minutes, or until the crumb topping is lightly browned. When done, remove the pan from the oven. Let the blackberry pie bars cool completely, while still in the pan.

Once cool, if using parchment paper, lift out the entire pan of bars. Pull paper away from the sides of the dessert. If not using parchment paper, let blackberry pie bars cool completely, then cut.

Blackberry pie bars are removed from pan after baking

The best way I have found to make even cuts is by using my pizza cutter! Make 4 cuts lengthwise, then make 6 cuts the other direction, for a total of 24 bars.

Blackberry bar cookies are cut into squares with pizza cutter

Piece of a blackberry pie bar cookie

Here… I saved one of the blackberry pie bars for YOU! Go ahead… you KNOW you want a bite, right?  You’re welcome! Sure hope you enjoy every bite of it!

Blackberry pie bar close up photo, resting on a serving spatula

Have a great day!  Think of ways you could bring joy or encouragement into someone’s life today… and be intentional about considering just how much you and I have to be grateful for.

Looking For Other Bar Cookie Recipes?

You can find all of my recipes in the Recipe Index, located at the top of the page. I have quite a few scrumptious bar cookie recipes on my blog, including:

Interested In More Recipes?

Thank you for visiting this website. I appreciate you using some of your valuable time to do soIf you’re interested, I publish a newsletter 2 times per month (1st and 15th) with all the latest recipes, and other fun info. I would be honored to have you join our growing list of subscribers, so you never miss a great recipe!
There is a Newsletter subscription box on the top right side (or bottom) of each blog post, depending on the device you use, where you can easily submit your e-mail address (only) to be included in my mailing list.

You Can Also Find Me On Social Media:

Facebook page: The Grateful Girl Cooks!
Pinterest:
The Grateful Girl Cooks!
Instagram:
jbatthegratefulgirlcooks

Author's signature

Recipe Source: http://www.thenovicechefblog.com/2013/07/blackberry-pie-bars/

0 from 0 votes
Blackberry Pie Bars
Prep Time
10 mins
Cook Time
45 mins
Total Time
55 mins
 

You'll LOVE these delicious dessert Blackberry Pie Bars, made with fresh juicy blackberries baked on a shortbread crust, with a buttery streusel crumb topping.

Category: Bar Cookies
Cuisine: American
Keyword: blackberry pie bars
Servings: 24 bars
Calories Per Serving: 188 kcal
Author: JB @ The Grateful Girl Cooks!
Ingredients
  • 3 cups all purpose flour
  • 1 1/2 cups granulated sugar (divided)
  • 1 teaspoon baking powder
  • 1 teaspoon cinnamon
  • 1/4 teaspoon salt
  • Zest and juice from 1 lemon (divided)
  • 1 cup (2 cubes) cold butter (cut into 1 inch slices)
  • 1 large egg
  • 2 teaspoons vanilla extract
  • 4 cups fresh blackberries
  • 4 teaspoons cornstarch
Instructions
  1. Before beginning, preheat your oven to 375 degrees. Line a 9x13 pan with parchment paper and spray the bottom. Make sure to leave parchment paper extended over the edges, so you can lift out the entire pan of bars once cooled. (If not using parchment paper, simply spray baking pan with non-stick spray).
  2. Place flour, 1 CUP of the sugar, baking powder, cinnamon, salt and lemon zest into a food processor. Pulse a couple times to mix. Add egg, butter, and vanilla extract. Pulse the mixture until dough gets crumbly (and butter is size of small peas).
  3. Put HALF of the dough mixture into the baking pan. Pat down with fingers to form a solid crust. Set aside the rest of the mixture to use for the crumb topping.
  4. In a large mixing bowl, combine the rest of the sugar, cornstarch and lemon juice. Add the blackberries, and stir gently to fully coat berries. Spoon the blackberries over the crust in the pan. Sprinkle the remaining crumb mixture over the top of the berries.
  5. Bake at 375 degrees for 45 minutes (or until the topping is golden brown). Remove to a wire rack. COOL COMPLETELY before lifting the bar cookies out of the pan (using the parchment paper).
  6. Cut into serving sizes. (It is easy to cut into bars if you use a pizza cutter!) Enjoy!
Recipe Notes

I cut the bars lengthwise into 4 sections, then cut 6 pieces in each section, for a total of 24 bars (each about 2 inches)

Nutrition Facts
Blackberry Pie Bars
Amount Per Serving (1 bar)
Calories 188 Calories from Fat 72
% Daily Value*
Fat 8g12%
Saturated Fat 4g25%
Cholesterol 27mg9%
Sodium 95mg4%
Potassium 77mg2%
Carbohydrates 27g9%
Fiber 1g4%
Sugar 13g14%
Protein 2g4%
Vitamin A 300IU6%
Vitamin C 5mg6%
Calcium 21mg2%
Iron 0.9mg5%
* Percent Daily Values are based on a 2000 calorie diet.

Here’s one more to pin on your Pinterest boards!You'll LOVE these delicious dessert Blackberry Pie Bars, made with fresh juicy blackberries baked on a shortbread crust, with a buttery streusel crumb topping.


Save

Save

Sun Dried Tomato, Spinach & Cheese Stuffed Chicken Breasts

Stuffed chicken breasts, filled with spinach, mozzarella cheese and sun-dried tomatoes are lightly seared, then baked, in this easy dish!Stuffed chicken breasts, filled with spinach, mozzarella cheese and sun-dried tomatoes are lightly seared, then baked, in this easy dish!
Today I am happy to share and recommend a unique and delicious recipe I found on Pinterest for stuffed chicken breasts. YUM.

How can you go wrong with Italian seasoned, pan-seared (then baked) chicken breasts, stuffed full of fresh baby spinach, sun-dried tomatoes, AND ooey, gooey mozzarella cheese? I mean, really… how could this NOT taste good? Here’s how to make them.

Scroll Down For A Printable Recipe Card At The Bottom Of The Page

How To Make Stuffed Chicken Breasts

The first thing you will need to do is mix up the Italian “dressing” in a small bowl. This will only take a minute or less.

An Italian seasoned "dressing" is mixed together before applying to chicken.
This is what it will look like once combined… it’s a bit thicker than a normal dressing or sauce.

The seasoning sauce is fairly thick before it is brushed onto chicken.

Prepare The Chicken Breasts For Stuffing

Carefully cut a “pocket” into each of the chicken breasts. Slice deep into each chicken breast (horizontally), but DO NOT cut all the way through the chicken breast! After cutting, they should be able to open almost all the way (like this, shown below).

Boneless chicken breasts are cut almost all the way through, forming a pocket.
Cover the chicken breasts inside and out with the Italian “dressing”. A pastry brush works well for this.

Sauce is brushed onto all sides of the chicken breasts.

Creating The Stuffed Chicken Breasts

Stuff one half of each chicken breast with thinly sliced sun-dried tomatoes (oil-packed). I was lucky to be able to use the sun-dried tomatoes packed in olive oil that I grew in our garden, dehydrated, then packed in oil last Fall! You can find jars of sun-dried tomatoes (oil-packed) in most grocery stores nowadays.

Sun dried tomatoes are placed on one side of the chicken breast.
Place the slices of mozzarella cheese on top of the tomatoes.

Mozzarella cheese slices are placed on top of sun dried tomatoes.
Top the mozzarella slices with a handful of fresh baby spinach leaves. Whoo Hoo… they’re almost done now!

Baby spinach leaves are added to the stuffed chicken breasts.

Seal Up Then Brown The Chicken

Now close the chicken breasts up, stuffing as much as you can into each piece. Secure the chicken breast, top to bottom, with several toothpicks to hold it all together. I used 3 toothpicks for each one, putting them in at a diagonal.

Heat olive oil in an OVENPROOF skillet until really hot. Carefully add the stuffed chicken breasts and cook for 2-3 minutes per side, until each side is seared golden brown in color.

Secured with toothpicks, the stuffed chicken breasts are pan seared in hot oil.

Oven Time!

After browning both sides of the stuffed chicken breasts, place the skillet (and chicken) into a preheated 350 degree oven. Cook the chicken for 15-18 minutes for small and medium breasts.

Larger chicken breasts will need to cook a few minutes longer). This is what they will look like when you remove the skillet from the oven.  Lots of gooey cheese and juices!

After baking the stuffed chicken breasts are browned, and oozing with melted cheese.

Serve The Stuffed Chicken Breasts

Place the chicken onto individual serving plates, and for goodness sake… REMOVE THE TOOTHPICKS!!! (Just sayin’ – no one wants to bite into a toothpick now, do they?) Spoon a bit of the sauce and/or melted cheese over the top of each chicken breast, and SERVE!  Doesn’t that look GOOD?

A serving of the stuffed chicken breast, on a plate.

I cut this one in half so you can see what the inside looks like! Pretty sure that you’re gonna like this chicken dish. It is really good!

Once cut, you can see the layers of stuffing in each piece of chicken.

I hope you will consider trying this wonderful chicken recipe… we really enjoyed it!  Have a blessed day, and thank you for stopping by. I hope you will come back again soon.

Looking For More CHICKEN Recipes?

You can find all of my chicken recipes in the Recipe Index, located at the top of the page. I have LOTS of them you will enjoy, including:

Interested In More Recipes?

Thank you for visiting this website. I appreciate you using some of your valuable time to do soIf you’re interested, I publish a newsletter 2 times per month (1st and 15th) with all the latest recipes, and other fun info. I would be honored to have you join our growing list of subscribers, so you never miss a great recipe!
There is a Newsletter subscription box on the top right side (or bottom) of each blog post, depending on the device you use, where you can easily submit your e-mail address (only) to be included in my mailing list.

You Can Also Find Me On Social Media:
Facebook page: The Grateful Girl Cooks!
Pinterest: The Grateful Girl Cooks!
Instagram: jbatthegratefulgirlcooks

Author's signature

Recipe Source: http://www.recipetineats.com/sun-dried-tomato-spinach-cheese-stuffed-chicken-breast/

↓↓ PRINTABLE RECIPE BELOW ↓↓

0 from 0 votes
Sun Dried Tomato, Spinach & Cheese Stuffed Chicken Breasts
Prep Time
15 mins
Cook Time
18 mins
Total Time
33 mins
 

Stuffed chicken breasts, filled with spinach, mozzarella cheese and sun-dried tomatoes are lightly seared, then baked, in this easy dish!

Category: Dinner, Entree
Cuisine: American
Keyword: stuffed chicken breasts
Servings: 2 servings
Calories Per Serving: 439 kcal
Author: JB @ The Grateful Girl Cooks!
Ingredients
For The Italian "Dressing":
  • 1 Tablespoon Dijon mustard
  • 1 Tablespoon white wine vinegar (may substitute lemon juice, if desired)
  • 1/2 teaspoon sugar
  • 2 teaspoons olive oil
  • 1/2 teaspoon Italian seasoning
  • 1/2 teaspoon red pepper flakes
For Chicken:
  • 2 small or medium boneless , skinless chicken breasts
  • 1/2 cup sun-dried tomatoes (oil packed), drained and cut into thin strips
  • 4 slices mozzarella cheese (2 per chicken breast to cover)
  • Handful of fresh baby spinach leaves
  • 2 teaspoons olive oil (for pan-searing)
Instructions
  1. Preheat oven to 350 degrees F (180C).

  2. Mix Italian "dressing" ingredients in a small bowl until combined.
  3. Slice a pocket in each chicken breast. Cut far into each breast (horizontally), but do not slice all the way through. Cover the chicken breasts inside and out with the Italian "dressing". I used a pastry brush.

  4. Stuff one half of each piece of chicken with a layer of sun-dried (and drained) tomatoes. Cover tomatoes with mozzarella cheese slices, then cover cheese with baby spinach leaves. Try to get as much of the filling stuffed inside of the chicken as you can. Use toothpicks to hold each piece together. I used 3 toothpicks for each breast, and inserted them through at an angle.
  5. Heat oil on medium-high in an ovenproof skillet until very hot. Carefully place the chicken breasts into hot skillet. Sear them (without moving them) for 2-3 minutes, then carefully turn over and repeat with other side, until golden brown on both sides.
  6. Place skillet with chicken into preheated oven. Continue cooking for 15-18 minutes. Larger breasts may take a couple minutes longer (it may also take a bit longer if you are cooking more than 4 breasts at a time).
  7. Remove from oven. Place chicken onto individual serving plates. REMOVE TOOTHPICKS. Spoon up some of the juices, and melted mozzarella cheese; place on top of chicken. Serve & enjoy!
Recipe Notes

If you are using really large chicken breasts, you can cut them in half once done, and you will end up with 4 decent sized portions (budget stretcher 101)

Nutrition Facts
Sun Dried Tomato, Spinach & Cheese Stuffed Chicken Breasts
Amount Per Serving (1 piece)
Calories 439 Calories from Fat 198
% Daily Value*
Fat 22g34%
Saturated Fat 9g56%
Cholesterol 117mg39%
Sodium 660mg29%
Potassium 1487mg42%
Carbohydrates 19g6%
Fiber 4g17%
Sugar 12g13%
Protein 41g82%
Vitamin A 2210IU44%
Vitamin C 16.3mg20%
Calcium 345mg35%
Iron 3.9mg22%
* Percent Daily Values are based on a 2000 calorie diet.

Here’s one more to pin on your Pinterest boards!Stuffed chicken breasts, filled with spinach, mozzarella cheese and sun-dried tomatoes are lightly seared, then baked, in this easy dish!


Save

Save

Giant Sugar Cookies

Giant Sugar Cookies are fun to eat when you just NEED a cookie as big as your head! Six inches in diameter, these are delicious, classic, BIG yummy treats!

Some days are like that, right? You just need a cookie as big as your head to make it all right again. Something like a Giant Sugar Cookie, perhaps?  I made these jumbo cookies recently as my husband and I were still reeling from the loss of our furry family member, Bailey (our beloved dog), who we lost to cancer two weeks ago. Getting in the kitchen and baking is therapy for me, to be honest! My heart was sad, and I really just wanted to bake something yummy! So I did.

This recipe for giant sugar cookies only makes 6 cookies, but they each come out about 6 inches wide, so trust me when I say, you will only need one.  My husband and I each ate one, then I gave the others away to our 2 sons, one of their girlfriends and one of our friends.

I like to bake, but I LOVE to give goodies to my friends and family even more (I hope you LOVE the giant size… every now and then someone you know might just need a GIANT cookie to help make it all better)!

Scroll Down For A Printable Recipe Card At The Bottom Of The Page

Giant Sugar Cookies Are Easy To Make:

While your oven is preheating, cream together butter and sugar until smooth. Once smooth, add egg and mix well, then add other dry ingredients until a soft dough is formed.

Making batter for giant sugar cookies is EASY.

Measure out 1/3 cup of the dough for each cookie (6 total), then roll each one in between your clean hands to form a ball.

Each giant sugar cookie uses 1/3 cup of dough, rolled into ball.

Place the dough balls on two separate cookie sheets (on parchment paper), leaving plenty of space between each one (remember these will end up about 6 inches in diameter, so trust me… leave lots of room in between the cookie dough balls).

Giant Sugar Cookie dough is placed onto parchment paper before baking.

Lightly press down each cookie to flatten them out a bit. Lightly sprinkle tops of cookies with coarse sugar.

Giant sugar cookies are pressed down, then sprinkled with sugar before baking.

Time To Bake!

Bake cookies at 350 degrees for about 14-15 minutes. They should be just lightly brown around the edges when done. The cookies will firm up more as they cool.

Sugar cookies are baked into giant sized treats.

See? Each cookie is about 6 inches in diameter. THAT is one GIANT sugar cookie!

Each giant sugar cookie measures about 6 inches across!

Sure hope you enjoy these jumbo-sized cookies! They are fun to give to others when they least expect a surprise gift from your kitchen! Enjoy these big ol’ bites of deliciousness!

Looking For More COOKIE Recipes?

You can find all of my recipes in the Recipe Index, located at the top of the page. I have lots of yummy cookie recipes you might enjoy, including:

Interested In More Recipes?

Thank you for visiting this website. I appreciate you using some of your valuable time to do soIf you’re interested, I publish a newsletter 2 times per month (1st and 15th) with all the latest recipes, and other fun info. I would be honored to have you join our growing list of subscribers, so you never miss a great recipe!
There is a Newsletter subscription box on the top right side (or bottom) of each blog post, depending on the device you use, where you can easily submit your e-mail address (only) to be included in my mailing list.

You Can Also Find Me On Social Media:
Facebook page: The Grateful Girl Cooks!
Pinterest: The Grateful Girl Cooks!
Instagram: jbatthegratefulgirlcooks

Author's signature

Recipe Source:  http://www.centercutcook.com/jumbo-sugar-cookies/

0 from 0 votes
Giant Sugar Cookies
Prep Time
10 mins
Cook Time
15 mins
Total Time
25 mins
 
Giant Sugar Cookies are fun to eat when you just NEED a cookie as big as your head! Six inches in diameter, these are delicious, classic, BIG yummy treats!
Category: Dessert
Cuisine: American
Keyword: giant sugar cookies, sugar cookies
Servings: 6 huge cookies
Calories Per Serving: 399 kcal
Author: JB @ The Grateful Girl Cooks!
Ingredients
  • 1/2 cup butter
  • 1 cup granulated sugar
  • 1 egg
  • 1 ½ cups all purpose flour
  • 1 ½ teaspoons baking soda
  • 2 Tablespoons cornstarch
  • 1/2 teaspoon salt
  • Coarse sugar , for sprinkling on top of cookies (optional, but recommended)
Instructions
  1. Before beginning, line two large baking sheets with parchment paper. Heat oven to 350 degrees.
  2. Place the butter and sugar into a large mixing bowl. Mix until smooth; add egg and mix well.
  3. Add flour, baking soda, salt and cornstarch to the batter. Mix dough until it is thoroughly combined.
  4. Measure out 1/3 cup dough for each of the 6 cookies. Roll dough between your clean hands to form a ball. Place on cookie sheet (3 per sheet). Repeat with remaining dough. Remember to leave enough space between each dough ball as they will be approximately 6 inches in diameter when done. Lightly press down on each dough ball with your hands, to slightly flatten. Sprinkle tops of cookies with coarse sugar.
  5. Bake cookies at 350 degrees for 14-15 minutes or until cookies are light golden brown around the edges. Remove from oven. Let cookies cool on the parchment paper. They will firm up slightly as they cool. Enjoy!
Nutrition Facts
Giant Sugar Cookies
Amount Per Serving (1 huge cookie)
Calories 399 Calories from Fat 144
% Daily Value*
Fat 16g25%
Saturated Fat 9g56%
Cholesterol 67mg22%
Sodium 614mg27%
Potassium 43mg1%
Carbohydrates 59g20%
Sugar 33g37%
Protein 4g8%
Vitamin A 510IU10%
Calcium 13mg1%
Iron 1.6mg9%
* Percent Daily Values are based on a 2000 calorie diet.

Here’s one more to pin on your Pinterest boards!Giant Sugar Cookies are fun to eat when you just NEED a cookie as big as your head! Six inches in diameter, these are delicious, classic, BIG yummy treats!


Save

Save

Grilled “Elvis Special” Sandwich

A Grilled “Elvis Special” Sandwich is a hunk, a hunk of burnin’ love! Peanut butter, banana, and chocolate cooked on buttered bread would even make Elvis proud!A Grilled "Elvis Special" Sandwich is a hunk, a hunk of burnin' love! Peanut butter, banana, and chocolate cooked on buttered bread would even make Elvis proud!
Fact:  Elvis Presley loved peanut butter and banana sandwiches. I decided to morph that combo and make a Grilled Elvis Special Sandwich – a grilled banana, peanut butter AND chocolate sandwich.

If Elvis were still around he would probably say “Thank You…Thank You Very Much“.  Then he’d take a big bite, and swivel his hips (to work off the calories, no doubt).

Scroll Down For A Printable Recipe Card At The Bottom Of The Page

Experimenting With This Sandwich!

I wasn’t sure just HOW this sandwich would taste, but I was in an experimenting mood one day. Creamy peanut butter and “smashed” banana is something my grandma used to eat all the time. Trust me, she ate this all the time (especially when she took out her false teeth, ha ha).

I was thinking about that when it hit me (an idea, NOT the sandwich). My thought was “what if I GRILLED the sandwich AND added a few chocolate chips to really take it to the next level”?  I mean… chocolate goes good with bananas and chocolate goes good with peanut butter, so how could this NOT work?

Well, thankfully… it DID WORK. It actually was VERY GOOD! Who knew?  In the words of Elvis… “I’m All Shook Up”!  So that’s how this goofy good, Grilled Elvis Special Sandwich came to be. Truth. Amen. And now… you can make this sandwich, too!

How To Make A Grilled Elvis Special Sandwich

Start with a large ripe banana (this recipe makes TWO sandwiches). Cut the banana into chunks and put it into a bowl with the peanut butter. Use a fork to smash the banana and mix the two ingredients together.  The banana should be smashed until it is almost creamy, with little pieces.

Ripe banana and peanut butter are mashed together for this "Elvis Special" Sandwich.

Butter the slices of bread just like you’re going to make a grilled cheese sandwich. Butter one side of each piece of bread.

Bread is buttered on one side before grilling the "Elvis Special" sandwich.

Spread half of the peanut butter/banana mixture onto the UNBUTTERED side of a piece of bread.  Sprinkle with a small amount of chocolate chips (15-20).

Peanut butter banana mixture with chocolate chips on this "Elvis Special" sandwich before grilling.

Time For The Grill

Place the sandwich buttered side down into a hot skillet on medium low heat. Cover the sandwich with the other piece of bread (buttered side facing UP).

Grilled "Elvis Special" Sandwich is cooked in a small skillet.

Grill until the bottom side of the sandwich is golden brown. Carefully turn the sandwich over with a spatula. Cook the other side until it is golden brown, also.

Grilled "Elvis Special" Sandwich is cooked until golden brown on both sides.

Time to Eat The Grilled “Elvis Special” Sandwich!

Remove the grilled sandwich from skillet. Cut it in half diagonally… and serve! Grab a cup of milk to drink, and a paper napkin! This Elvis Special Sandwich might get messy – but it’s a GOOD messy! Enjoy!

Grilled "Elvis Special" Sandwich is sliced in half, and topped with sliced bananas to serve.

Looking For More SANDWICH Recipes?

I sincerely hope you enjoy this Grilled Elvis Special Sandwich! If you are interested in other sandwich recipes, I hope you will check out Grilled Patty Melts, BBQ Shredded Pork, and Mediterranean Chicken Sandwiches. You might also enjoy my Grilled Thai PB & J Sandwich, or a Fried Chicken Spicy Mayo & Slaw Sandwich.

You can find ALL of my recipes in the Recipe Index, which is located at the top of the page. Hope you have a wonderful day. I sincerely hope you find moments of peace and encouragement in your day. May you also seek to be a peacemaker, and encourager of others, as well.

Interested In More Recipes?

Thank you for visiting this website. I appreciate you using some of your valuable time to do soIf you’re interested, I publish a newsletter 2 times per month (1st and 15th) with all the latest recipes, and other fun info. I would be honored to have you join our growing list of subscribers, so you never miss a great recipe!
There is a Newsletter subscription box on the top right side (or bottom) of each blog post, depending on the device you use, where you can easily submit your e-mail address (only) to be included in my mailing list.

You Can Also Find Me On Social Media:

Facebook page: The Grateful Girl Cooks!
Pinterest:
The Grateful Girl Cooks!
Instagram:
jbatthegratefulgirlcooks

Grilled "Elvis Special" Sandwich / The Grateful Girl Cooks!

0 from 0 votes
Grilled "Elvis Special" Sandwich
Prep Time
5 mins
Cook Time
5 mins
Total Time
10 mins
 
A Grilled "Elvis Special" Sandwich is a hunk, a hunk of burnin' love! Peanut butter, banana, and chocolate cooked on buttered bread would even make Elvis proud!
Category: Sandwich
Cuisine: American
Keyword: Elvis special sandwich
Servings: 2 sandwiches
Calories Per Serving: 511 kcal
Author: JB @ The Grateful Girl Cooks!
Ingredients
  • 1 large banana (or two small)
  • 2 Tablespoons creamy peanut butter (generous Tablespoons)
  • 1/4 cup Chocolate chips ( approx 15-20 per sandwich)
  • 4 slices good quality bread
  • 2 Tablespoons Butter , softened (to spread on one side of each piece of bread)
Instructions
  1. In a small bowl, mash banana and peanut butter together, using a fork, until mixture is creamy with small pieces of banana.

  2. Spread one side of each of piece of bread with soft (room temp) butter. Place two pieces of bread, butter side down in a skillet (on medium heat).

  3. Spread the peanut butter/banana mixture onto bread in skillet. Sprinkle chocolate chips on top of peanut butter/banana mixture. Place remaining piece of bread on top of each sandwich, butter side UP.
  4. Grill sandwich on medium heat until bottom of sandwich is golden brown. Carefully turn each sandwich over using a spatula, and continue cooking until other side is golden brown.
  5. Remove sandwich to serving plate. Cut diagonally, and serve! Can garnish sandwich with sliced bananas, if desired.

Nutrition Facts
Grilled "Elvis Special" Sandwich
Amount Per Serving (1 sandwich)
Calories 511 Calories from Fat 234
% Daily Value*
Fat 26g40%
Saturated Fat 12g75%
Cholesterol 33mg11%
Sodium 479mg21%
Potassium 416mg12%
Carbohydrates 59g20%
Fiber 5g21%
Sugar 26g29%
Protein 11g22%
Vitamin A 440IU9%
Vitamin C 5.1mg6%
Calcium 110mg11%
Iron 2.7mg15%
* Percent Daily Values are based on a 2000 calorie diet.

Here’s one more to pin on your Pinterest boards!A Grilled "Elvis Special" Sandwich is a hunk, a hunk of burnin' love! Peanut butter, banana, and chocolate cooked on buttered bread would even make Elvis proud!


Save

Save

Save

JB’s Best Brownies

JB’s Best Brownies are amazing! These classic bar cookies are easy to make, chewy, moist, and fudgey, and taste fantastic – with or without frosting!JB's Best Brownies are amazing! These classic bar cookies are easy to make, chewy, moist, and fudgey, and taste fantastic - with or without frosting!

About 25 years ago, I started making this recipe for brownies. I truthfully have no recollection of how or where I stumbled upon this recipe. But two things I DO know… my nickname is JB… and these are my very best brownies!  There you have it… JB’s Best Brownies!

Truly these are amazingly good brownies! I’ve published the recipe before in a couple of school cookbooks and have received several notes from people telling me that JB’s Best Brownies are their favorite brownies! They are so very easy to make. **NOTE: I WAS MAKING A DOUBLE BATCH WHEN I TOOK THESE PHOTOS). Recipe as written below, is for single batch.

Scroll Down For A Printable Recipe Card At The Bottom Of The Page

How To Make JB’s Best Brownies

Blend the butter, sugar and vanilla in a large bowl (no need for a mixer, just use a wooden spoon). Add eggs. Mix well by hand until all ingredients are fully combined.

Eggs, sugar, vanilla in bowl to begin making batter for brownies.

In a separate bowl, whisk together flour, cocoa, baking powder and salt. Stir dry ingredients into the batter.

Flour, cocoa, and other dry ingredients are added to the batter.

Add the chopped nuts (pecans or walnuts), if using. Stir the batter well, to combine.

Chopped pecans (or walnuts) are added, and stirred into the batter.


A Helpful Tip For Making JB’s Best Brownies

Spread the batter for JB’s best brownies into a greased 9″ square pan (or if doubling recipe – use a 9×13 pan). It’s very helpful to line the baking pan with parchment paper. Make sure the parchment paper is extended over the edges of pan, and sprayed with non-stick spray. You can see this in the photo below.

Once brownies have cooled, you can lift out the entire tray of JB’s best brownies by using the parchment paper and lifting them out. They will be much easier to frost, cut and serve this way, but is not necessary. If you are NOT using parchment paper, you only need to spray your baking pan with non-stick spray, fill with batter, and bake.

The batter for JB's best brownies is added to a parchment paper lined baking pan.Time To Bake!

Bake the brownies at 350 degrees for 20-25 minutes. Start checking them around the 20 minute mark (times will vary depending on size of pan you are using). A toothpick inserted into middle of pan should come out clean when done. Once brownies are done, remove the pan from oven, to a wire rack, to cool.

Brownies are removed from oven after baking, to cool.

Make The Frosting

While JB’s best brownies are baking, you can make the creamy chocolate frosting. Cream together softened butter, cocoa, corn syrup and vanilla. You can mix this easily with a spoon, because no mixer is needed.

Frosting ingredients for JB's best brownies in a small blue bowl.

A thick chocolate frosting for the brownies is mixed together easily.
Add the powdered sugar to the frosting mixture. Mix the frosting very well, to combine. Add 1-2 Tablespoons milk (and a little more, if needed), to make a thick, spreadable frosting for the brownies.

Powdered sugar is added to frosting for JB's best brownies, until smooth and creamy.

Frost The Brownies

Once JB’s best brownies have completely cooled, they are ready to frost. If you used parchment paper in the baking pan, gently and carefully lift the entire pan of brownies out of the pan by holding the edges of parchment paper and lifting.

Evenly spread the frosting over the cooled brownies, then let them rest for 10-15 minutes (if you can wait!). Cut JB’s best brownies into desired serving sizes, and serve!

JB's best brownies are frosted, sliced, and ready to eat!

Make Them Frosted Or Unfrosted!

I love frosted brownies, but my husband doesn’t like frosting on his. Soooo… I make a double batch, then only frost HALF the brownies, so we are BOTH happy! Here’s an “up close and personal” view of an un-frosted brownie. This is my husband’s preferred way of eating them.

JB's Best Brownies can also be made and eaten, WITHOUT frosting.

Shown below is an “up close and personal” view of one of the brownies with frosting.  YAY! I’m being serious about the frosted kind, because they are my absolute favorite! These delicious bar cookies are chewy, very chocolatey, and have bits of nuts in them.. Oh my goodness. They are so good!

Enjoy JB’s best brownies with a good cold glass of milk. Yum.  Good thing I don’t make them too often, because I could eat the whole pan! No… really!

JB's Best Brownies, with frosting, on a clear platter.

I am thankful you chose to visit my website today.  Hope you enjoy JB’s Best Brownies, and have a great day! If you enjoy brownies, you might also want to try Irish Cream Layered Brownies-they’re yummy, too! Thanks for stopping by, and please come back again soon.

Looking For Additional Bar Cookie Recipes?

You can find ALL of my bar cookie recipes in the Recipe Index at the top of the page. A few of my favorites include:

Interested In More Recipes?

Thank you for visiting this website. I appreciate you using some of your valuable time to do soIf you’re interested, I publish a newsletter 2 times per month (1st and 15th) with all the latest recipes, and other fun info. I would be honored to have you join our growing list of subscribers, so you never miss a great recipe!
There is a Newsletter subscription box on the top right side (or bottom) of each blog post, depending on the device you use, where you can easily submit your e-mail address (only) to be included in my mailing list.

You Can Also Find Me On Social Media:

Facebook page: The Grateful Girl Cooks!
Pinterest:
The Grateful Girl Cooks!
Instagram:
jbatthegratefulgirlcooks

Author's signature

0 from 0 votes
JB's Best Brownies
Prep Time
10 mins
Cook Time
25 mins
Total Time
35 mins
 
JB's Best Brownies are amazing! These classic bar cookies are easy to make, chewy, moist, and fudgey, and taste fantastic - with or without frosting!
Category: Dessert
Cuisine: American
Keyword: JB's best brownies
Servings: 12 small brownies
Calories Per Serving: 273 kcal
Author: JB @ The Grateful Girl Cooks!
Ingredients
For brownies:
  • 1/2 cup butter , melted
  • 1 cup granulated sugar
  • 1 teaspoon vanilla extract
  • 2 eggs
  • 1/2 cup all purpose flour
  • 1/3 cup cocoa powder
  • 1/4 teaspoon baking powder
  • 1/4 teaspoon salt
  • 1/2 cup chopped pecans or walnuts (optional)
For Frosting:
  • 3 Tablespoons room temperature butter (do not melt)
  • 3 Tablespoons cocoa powder
  • 1 Tablespoons light corn syrup (or honey)
  • 1/2 teaspoon vanilla extract
  • 1 cup powdered sugar
  • 1-2 Tablespoons milk
Instructions
To prepare brownies:
  1. Blend butter, sugar and vanilla in a large bowl (no need for a mixer, just use a wooden spoon). Add eggs. Mix well by hand until all ingredients are fully combined.
  2. In separate bowl, whisk together flour, cocoa, baking powder and salt. Stir dry ingredients into the batter. Add chopped nuts, if using. Stir well, to combine.
  3. It's EASY to lift pan of brownies out of pan to frost and cut if you line the baking pan with parchment paper, leaving edges of paper hanging over the side of pan. Spray the parchment paper with non-stick spray. If not using parchment paper, just spray baking pan. Spread batter into prepared 9" square pan (or if doubling recipe - use a 9x13 pan). Bake at 350 degrees for 20-25 minutes. A toothpick inserted into middle of pan should come out clean when done.
Make frosting while brownies are cooking:
  1. Cream together softened butter, cocoa, corn syrup and vanilla (Just use a spoon-no mixer needed).
  2. Add powdered sugar. Mix well to combine. Add 1-2 Tablespoons milk (and a little more, if needed), to make a thick, spreadable frosting.
To frost brownies:
  1. When finished baking, remove cooked brownies from oven to a wire rack. Once brownies have cooled completely, you can lift out the entire tray of brownies by holding the parchment paper and carefully lifting them out. They will be much easier to frost, cut and serve this way, but is not necessary.
  2. Once brownies have COMPLETELY cooled, you can frost them, let them sit for a bit, then slice and serve!
Recipe Notes

9x9 pan yields 12 small brownies or 9 medium sized brownies.
If recipe is doubled, a 13x9 pan yields 24 small or 12 large brownies (large ones are in my photos). I double the recipe a lot (we love brownies!). If you double recipe, it will fill a 9x13 pan with no trouble. Continue to check for "done-ness" beginning around the 20 minute mark.

Nutrition Facts
JB's Best Brownies
Amount Per Serving (1 brownie w/ frosting)
Calories 273 Calories from Fat 126
% Daily Value*
Fat 14g22%
Saturated Fat 7g44%
Cholesterol 55mg18%
Sodium 154mg7%
Potassium 101mg3%
Carbohydrates 35g12%
Fiber 1g4%
Sugar 28g31%
Protein 3g6%
Vitamin A 365IU7%
Calcium 22mg2%
Iron 1mg6%
* Percent Daily Values are based on a 2000 calorie diet.

Here’s one more to pin on your Pinterest boards!JB's Best Brownies are amazing! These classic bar cookies are easy to make, chewy, moist, and fudgey, and taste fantastic - with or without frosting!

Save

Save

Save

Save