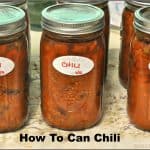
Dark Chocolate Almond Chia Muffins

You will LOVE these easy and absolutely delicious dark chocolate almond chia muffins, loaded with dark chocolate, almonds, chia seeds, and sea salt!You will LOVE these easy and absolutely delicious dark chocolate almond chia muffins, loaded with dark chocolate, almonds, chia seeds, and sea salt!

It’s always fun when a friend gives me a recipe to try, one they really enjoy. What a great way to find NEW recipes, and get an “insider tip” from someone saying “you’ve got to try this!”. Such is the case with this AMAZING recipe for Dark Chocolate Almond Chia Muffins! I was at a Bible Study last week, and our teaching leader (my friend Fran) gave me a sticky note with the name of this recipe written on it, plus the name of the source.

The dark chocolate almond chia muffins sounded good, so less than 24 hours later, I was making these delicious muffins in my little ol’ kitchen. Let me tell you, folks… they are FABULOUS! How can you go wrong with dark chocolate, almonds, chia seeds, etc.? I’d never used chia seeds (an ancient grain) in a recipe prior to this, but did a bit of research and found out how nutritious/filling they are when added to food.

I am thrilled my friend Fran was kind enough to share this recipe with me, and I’m impressed by how ridiculously tasty these muffins are! From start to finish, it only took about 30 minutes to make a dozen. Here’s what you do:

Scroll Down For A Printable Recipe Card At The Bottom Of The Page

How To Make Dark Chocolate Almond Chia Muffins

First, preheat your oven to 400° F. While the oven is preheating, put paper liners into a standard sized 12 cup muffin tin. Whisk the flour, sugar, cocoa powder, baking soda and salt together in a large mixing bowl.

Flour and cocoa for chocolate muffins in mixing bowl with whisk

Add chia seeds to the dry ingredients (see those little bitty black seeds? So many nutritional benefits to adding these to foods). Also add 1/2 cup of the chopped almonds (reserving the rest for later), and dark chocolate chips to the flour mixture. Stir to combine.

Chocolate chips and almonds added to dry ingredients for chocolate almond chia muffins.

Make The “Wet Ingredients”

In a separate bowl, mix together buttermilk, melted butter (important – make sure melted butter has cooled to room temp. before adding, or you will get scrambled eggs!), egg, and almond extract. Add these wet ingredients to the dry ingredients in the large mixing bowl. Mix them together, only until just combined. Do not over-mix the batter.

Butter, egg and buttermilk added to chocolate almond chia muffins mix in bowl.

Evenly distribute the chocolate almond chia muffins batter between the 12 muffin cups. Top each of the muffins with 1½ – 2 teaspoons of the reserved chopped almonds.

Chocolate almond chia muffins batter in muffin cups, are ready to bake!

Sprinkle With Sea Salt And Then Bake

Sprinkle the top of each muffin with a pinch of coarse sea salt (trust me, this is GOOD). Bake the dark chocolate almond chia muffins at 400° F. for 18 minutes, or until the muffins spring back slightly when lightly pressed in the center.

Sea salt is sprinkled on top of chocolate almond chia muffins before baking.

Let the baked chocolate almond chia muffins cool down (still in the pan), after removing them from oven.

A dozen chocolate almond chia muffins cooling down in pan, after baking.

Time To Enjoy A Muffin!

The dark chocolate almond chia muffins taste wonderful, served warm or at room temperature. Be sure to store them in an airtight container. They can also be frozen, if wrapped well and stored in a plastic freezer bag.

Close up of dark chocolate almond chia muffins, with almonds on top

Here’s an inside peek at one of the chocolate almond chia muffins. You can see the dark chocolate chips and hints of chopped almonds inside. When warmed slightly, the chocolate chips get nice and “gooey”, which is a code word for “oh my goodness!”.

Inside look at one of the dark chocolate almond chia muffins, cut in half.

So, just as my friend passed this recipe to me, I now pass it on to you, friends. May you receive as much enjoyment out of these muffins as we did. Then… pass it on! Have a great day.

Looking For More MUFFIN Recipes?

You can find all of my recipes in the Recipe Index, located at the top of the page. I have LOTS of delicious muffin recipes, including:

Interested In More Recipes?

Thank you for visiting this website. I appreciate you using some of your valuable time to do soIf you’re interested, I publish a newsletter 2 times per month (1st and 15th) with all the latest recipes, and other fun info. I would be honored to have you join our growing list of subscribers, so you never miss a great recipe!
There is a Newsletter subscription box on the top right side (or bottom) of each blog post, depending on the device you use, where you can easily submit your e-mail address (only) to be included in my mailing list.

You Can Also Find Me On Social Media:

Facebook page: The Grateful Girl Cooks!
Pinterest:
The Grateful Girl Cooks!
Instagram:
jbatthegratefulgirlcooks

Author's signature

Recipe Source: Heather Meldrom at  http://www.realsimple.com/food-recipes/browse-all-recipes/dark-chocolate-almond-chia-muffins

0 from 0 votes
Dark Chocolate Almond Chia Muffins
Prep Time
15 mins
Cook Time
18 mins
Total Time
33 mins
 

You will LOVE these easy and absolutely delicious dark chocolate almond chia muffins, loaded with dark chocolate, almonds, chia seeds, and sea salt!

Category: Breakfast
Cuisine: American
Keyword: chocolate almond chia muffins
Servings: 12 muffins
Calories Per Serving: 383 kcal
Author: JB @ The Grateful Girl Cooks!
Ingredients
  • 2 cups all purpose flour
  • 1 cup granulated sugar
  • 1/2 cup unsweetened cocoa powder
  • 1 teaspoon baking soda
  • 1/4 teaspoon salt (table salt)
  • 5 teaspoons chia seeds (found with grains (ie. rice, quinoa) in most grocery stores)
  • 2/3 cup chopped almonds (divided)
  • 3/4 cup dark chocolate chips
  • 1 cup buttermilk
  • 3/4 cup (one and a half cubes) unsalted butter, melted and cooled to room temp.
  • 1 large egg
  • 1 teaspoon almond extract
  • Coarse sea salt , for sprinkling onto muffins before baking
Instructions
  1. Preheat oven to 400 degrees (F). Insert paper liners into a 12 cup standard sized muffin tin.
  2. Whisk the flour, sugar, cocoa powder, baking soda and table salt together in a large bowl. Add chia seeds, 1/2 cup of almonds (reserve the rest for garnish), and chocolate chips. Stir to combine.
  3. In a separate bowl, mix together the buttermilk, melted butter (at room temp!!!), egg, and almond extract. Once combined, add the wet ingredients to the bowl with the dry ingredients. Stir only until ingredients are fully combined (do not over-mix).
  4. Distribute batter equally between the 12 muffin cups. Sprinkle each muffin with 1 1/2 to 2 teaspoons of the reserved chopped almonds. Sprinkle each muffin with a pinch of coarse sea salt.
  5. Bake muffins at 400 degrees for 18 minutes, or until the muffins spring back when lightly pressed in the center. Remove pan from oven, but let muffins cool in the pan. Store in an airtight container.
Nutrition Facts
Dark Chocolate Almond Chia Muffins
Amount Per Serving (1 muffin)
Calories 383 Calories from Fat 189
% Daily Value*
Fat 21g32%
Saturated Fat 11g69%
Cholesterol 46mg15%
Sodium 374mg16%
Potassium 246mg7%
Carbohydrates 44g15%
Fiber 3g13%
Sugar 21g23%
Protein 6g12%
Vitamin A 405IU8%
Calcium 102mg10%
Iron 2.1mg12%
* Percent Daily Values are based on a 2000 calorie diet.

Here’s one more to pin on your Pinterest boards!

You will LOVE these easy and absolutely delicious dark chocolate almond chia muffins, loaded with dark chocolate, almonds, chia seeds, and sea salt!


Save

Save

Save

Chicken Cutlets With Pecan Sauce

This EASY dinner of pan-seared chicken cutlets, topped with a delicious butter pecan sauce, can be prepared and on the table in 20 minutes!This EASY week-night dinner of pan-seared chicken cutlets, topped with a delicious butter pecan sauce, can be prepared and on the table in 20 minutes!
I received a gift card to use at a favorite bookstore. Since I collect cookbooks, one book I got was a Southern Living cookbook, for time saving meals. Chicken Cutlets With Pecan Sauce is the first recipe I tried, and wow… it WAS quick, inexpensive, and absolutely delicious!

This dish only took about 20 minutes, from start to finish, and my husband and I loved it! The original recipe calls for chicken cutlets, but I typically don’t buy cutlets. I ended up using 2 large chicken breasts and sliced them horizontally for this recipe, for a total of 4 servings.

Scroll Down For A Printable Recipe Card At the Bottom Of The Page

How to Make Chicken Cutlets with Pecan Sauce

Melt butter in a large skillet, and then add and chopped pecans. Cook the pecans for 2-3 minutes. When the pecans are lightly toasted, remove them from the skillet.

Cooking chopped pecans in butter for chicken cutlets with pecan sauce.

Season each of the chicken cutlets with salt and pepper, then dredge the pieces in flour to coat all sides.

Dredging chicken cutlets in flour and seasonings before cooking.

Cook the chicken breasts in hot olive oil in same skillet you used to toast the pecans. Pan-sear the chicken cutlets on medium heat, for about 4 minutes per side.

Cooking four floured chicken cutlets in hot oil in large skillet.

They should be light golden brown when done and fully cooked through. Once done, put the chicken cutlets onto a serving plate or platter, and top with the toasted pecans. Keep the chicken warm while you make the sauce, which takes about 5 minutes.

Chicken cutlets are cooked on both sides in skillet until lightly browned.

Make The Sauce For The Chicken Cutlets

Using the same skillet (do not clean it out), add the chicken broth. Cook the broth for a couple minutes, stirring to get the little browned bits of goodness off the bottom of skillet. Add the brown sugar, apple cider vinegar, and thyme to the broth.

Cook for 3-4 minutes, until sauce has reduced a bit, and sauce has slightly thickened. Add 2 Tablespoons of butter to the pan sauce. Whisk to combine until butter has melted and is incorporated fully into the sauce. Remove the skillet from the heat, and now the sauce is ready for the chicken cutlets and toasted pecans.

Sauce is whisked and cooked in skillet for the chicken cutlets with pecan sauce.

To Serve Chicken Cutlets With Pecan Sauce

Spoon the sauce from the skillet over the chicken cutlets and toasted pecans. Serve the chicken cutlets with pecan sauce while hot! Each chicken cutlet is topped with the toasted pecans, the lovely sauce, and is garnished with a sprig of fresh thyme! Don’t they look nice? Who’s ready to eat?

Chicken cutlets with pecan sauce are served on a white platter.

To round out the meal, I serve the chicken cutlets with oven-roasted veggies on the side. It is absolutely delicious, and the butter toasted pecans with the sauce on the chicken taste so good!

Chicken Cutlets With Pecan Sauce are served with roasted vegetables on the side.

We truly enjoyed these chicken cutlets with pecan sauce. I will definitely make this recipe again, and hope you will give it a try. It is such a quick, delicious meal to prepare… and the leftovers are good, too! Have a fantastic day! May you find someone to encourage and bless as you go through your day!

Looking For More CHICKEN Recipes?

You can find ALL of my chicken recipes in the Recipe Index at the top of the page. There are a LOT of them! Some of our favorites include:

Interested In More Recipes?

Thank you for visiting this website. I appreciate you using some of your valuable time to do soIf you’re interested, I publish a newsletter 2 times per month (1st and 15th) with all the latest recipes, and other fun info. I would be honored to have you join our growing list of subscribers, so you never miss a great recipe! 

There is a Newsletter subscription box on the top right side (or bottom) of each blog post, depending on the device you use, where you can easily submit your e-mail address (only) to be included in my mailing list.

You Can Also Find Me On Social Media:

Facebook page: The Grateful Girl Cooks!
Pinterest:
The Grateful Girl Cooks!
Instagram:
jbatthegratefulgirlcooks

Author's signatureRecipe Source: The cookbook “Southern Living Quick Start Homemade”, Published by Time Home Entertainment, 2013, page 162.

0 from 0 votes
Chicken Cutlets With Pecan Sauce
Prep Time
10 mins
Cook Time
10 mins
Total Time
20 mins
 
This EASY dinner of pan-seared chicken cutlets, topped with a delicious butter pecan sauce, can be prepared and on the table in 20 minutes!
Category: Entree
Cuisine: American
Keyword: chicken cutlets
Servings: 4 servings
Calories Per Serving: 496 kcal
Author: JB @ The Grateful Girl Cooks!
Ingredients
  • 4 Tablespoons butter , divided (1/2 cube)
  • 1/2 cup chopped pecans
  • 4 chicken cutlets (I sliced two large breasts horizontally in half to make 4 cutlets)
  • 1 teaspoon salt
  • 1/2 teaspoon black pepper
  • 3 Tablespoons olive oil
  • 1/2 cup chicken broth
  • 1 Tablespoon brown sugar
  • 2 Tablespoons apple cider vinegar
  • 1/2 teaspoon dried thyme (if using fresh thyme, use 1 1/2 teaspoons)
Instructions
  1. Melt 2 Tablespoon butter in a large skillet (nonstick works the best). Add chopped pecans and cook over medium-low heat for 2-3 minutes until pecans are lightly toasted and fragrant, stirring occasionally. Remove pecans from skillet.
  2. Sprinkle the chicken cutlets with salt and pepper. Place flour on a dinner plate, and dredge the chicken cutlets in the flour, making sure both sides are covered with flour.
  3. Cook the chicken in hot olive oil in the skillet. Cook on medium heat for about 4 minutes per side until done. When chicken is fully cooked through, and light golden brown, remove them to a serving platter. Top the chicken with the toasted pecans. Keep chicken warm while making the sauce.
  4. Using same skillet, add chicken broth. Cook for 2 minutes, scraping up the browned bits of goodness from the bottom of skillet. Add the brown sugar, vinegar and thyme. Stir to combine and cook for 3-4 minutes until sauce has reduced a bit and slightly thickened. Add remaining 2 Tablespoons of butter and whisk to combine until butter is melted and is fully combined.
  5. Spoon sauce over the chicken and pecans, and serve!
Nutrition Facts
Chicken Cutlets With Pecan Sauce
Amount Per Serving (1 cutlet + sauce)
Calories 496 Calories from Fat 324
% Daily Value*
Fat 36g55%
Saturated Fat 10g63%
Cholesterol 138mg46%
Sodium 987mg43%
Potassium 708mg20%
Carbohydrates 5g2%
Fiber 1g4%
Sugar 3g3%
Protein 37g74%
Vitamin A 400IU8%
Vitamin C 4.1mg5%
Calcium 21mg2%
Iron 1.2mg7%
* Percent Daily Values are based on a 2000 calorie diet.

Here’s one more to pin on your Pinterest boards!This EASY dinner of pan-seared chicken cutlets, topped with a delicious butter pecan sauce, can be prepared and on the table in 20 minutes!

Save

Save

Save

Save

Mom’s Lemon Jello Cake

Mom’s Lemon Jello Cake with lemon glaze icing is so easy to make, is bursting with LEMON flavor, and will be a big hit with all who try this delicious dessert!Mom's Lemon Jello Cake with lemon glaze icing is so easy to make, is bursting with LEMON flavor, and will be a big hit with all who try this delicious dessert!

My mother has been making Mom’s Lemon Jello Cake for at least 45 years. It’s SO EASY to make, is incredibly moist, and overflows with lemon flavor! It was always a treat when my Mom would make this simple, delicious cake for our family when we were young!

The cake takes only a few minutes to mix up and get into the oven… and 35 minutes later… you’ve made a fantastic, moist lemon jello cake, that is covered with a sweet lemon glaze that seeps into the body of the cake. This is really so simple to make. Here’s what you do:

Scroll Down for A Printable Recipe Card At The Bottom Of The Page

How To Make This Lemon Jello Cake

Mix the ingredients for the lemon jello cake in large bowl. It is important to note the recipe calls for lemon gelatin mix (not lemon pudding). I’ve been asked that question before and it is an important distinction!

Lemon gelatin is used rather than lemon pudding mix... and important difference!

Beat the ingredients with a mixer until they are fully blended. Pour the cake batter into a greased and floured 13 x 9 inch baking pan.

Ingredients for lemon jello cake in large bowl.

Batter for Mom's lemon jello cake is mixed together in bowl.

The addition of lemon jello powder really adds an extra level of lemony citrus flavor to this cake! Once the batter for the cake is in the pan, you’re ready to bake!

Lemon cake batter is poured into 13x9 inch baking dish.

Baking And Glazing The Lemon Jello Cake

Bake the lemon jello cake 350 degrees for 35 minutes, or until a toothpick inserted into middle of cake comes out dry. The cake will be light golden brown on top.

Let the cake sit (still in the pan) for just a minute on a wire rack, then poke holes into the entire top of the cake. I use a chop stick for doing this, but a straw also works well. Make holes every inch or so.

After lemon jello cake is baked, holes are poked into cake

Here’s a close up to show you the holes that were made in the top of the cake.

The lemon cake has holes poked in it all over.

Prepare The Lemon Glaze

Mix up the lemon glaze in a small bowl, then pour it over the hot cake. Use the back of a spoon to spread the lemon icing over the entire surface of cake.

Lemon glaze for cake is mixed up in bowl.

Glaze is poured over top of lemon jello cake.

Here’s what the lemon jello cake will look like after completely distributing the glaze over it. The glaze melts from the hot cake, and sinks down into the tiny holes you created all over the top of the cake. The lemon icing seeping into the holes INTO the cake is what helps the cake to stay so moist, and full of flavor! YUM!

Lemon glaze is absorbed through the holes poked into cake.

Ready To EAT!

Once the cake and icing have cooled off to room temperature, cut a piece of this tasty lemon jello cake, and enjoy every bite! It is DELICIOUS, and dare I say it again… so EASY!!!!!!

Slice of lemon cake on plate with a fork... ready to eat.

Sure hope you give this recipe for lemon jello cake a try. It’s always a big hit with everyone who tries it. If you like lemon flavored treats, you will love this cake (it also freezes well)! Have a fantastic day… and in the words of Cinderella in the newest movie version… “HAVE COURAGE. BE KIND.”

Looking For More CAKE Recipes?

All of my cake recipes can be found in the Recipe Index at the top of the page. A few of our favorites include:

Interested In More Recipes?

Thank you for visiting this website. I appreciate you using some of your valuable time to do soIf you’re interested, I publish a newsletter 2 times per month (1st and 15th) with all the latest recipes, and other fun info. I would be honored to have you join our growing list of subscribers, so you never miss a great recipe!
There is a Newsletter subscription box on the top right side (or bottom) of each blog post, depending on the device you use, where you can easily submit your e-mail address (only) to be included in my mailing list.

You Can Also Find Me On Social Media:

Facebook page: The Grateful Girl Cooks!
Pinterest:
The Grateful Girl Cooks!
Instagram:
jbatthegratefulgirlcooks

Have a wonderful day, friends!

Author's signature

Recipe Source: My Mom (who has been making this cake for at least 45 years!)

5 from 6 votes
Mom's Lemon Jello Cake
Prep Time
5 mins
Cook Time
35 mins
Total Time
40 mins
 
Mom's Lemon Jello Cake with lemon glaze icing is so easy to make, is bursting with LEMON flavor, and will be a big hit with all who try this delicious dessert!
Category: Dessert
Cuisine: American
Keyword: lemon jello cake
Servings: 16 servings
Calories Per Serving: 281 kcal
Author: JB @ The Grateful Girl Cooks!
Ingredients
For cake:
  • 1 box Lemon Cake Mix
  • 3 ounces Lemon Jello powder (small size gelatin, not pudding))
  • 3 large eggs
  • 3/4 cup vegetable oil
  • 3/4 cup water
For Lemon Glaze:
  • 2 cups powdered sugar
  • 2 lemons (all the juice AND the zest from the peel)
Instructions
  1. Preheat oven to 350 degrees F.
  2. In a large bowl, combine cake mix, jello powder, eggs, oil and water. Beat until well blended. Pour batter into a GREASED and FLOURED 13 x 9 inch cake pan. Bake at 350 degrees for 35 minutes (or until a toothpick inserted into center of cake comes out clean).

  3. While cake is baking, make the icing, by mixing the powdered sugar with the fresh lemon juice and lemon zest (rind), until fully combined.
  4. When cake is done, remove pan to a wire rack. While cake is still hot, poke holes over the entire surface of the cake, using a chop stick, a straw, or the handle end of a spoon. Make holes every inch or so across the top of cake. Pour on the lemon glaze, and spread it evenly across top of cake, to cover. Let cake cool down to room temperature (so glaze will firm up), then cut into pieces and serve. Enjoy!

Nutrition Facts
Mom's Lemon Jello Cake
Amount Per Serving (1 piece (1/16th of total))
Calories 281 Calories from Fat 99
% Daily Value*
Fat 11g17%
Saturated Fat 9g56%
Cholesterol 30mg10%
Sodium 247mg11%
Potassium 45mg1%
Carbohydrates 42g14%
Sugar 29g32%
Protein 2g4%
Vitamin A 45IU1%
Vitamin C 7.2mg9%
Calcium 76mg8%
Iron 0.9mg5%
* Percent Daily Values are based on a 2000 calorie diet.

Here’s one more to pin on your Pinterest boards!Mom's Lemon Jello Cake with lemon glaze icing is so easy to make, is bursting with LEMON flavor, and will be a big hit with all who try this delicious dessert!


Save

Save

Beef Stroganoff

Beef Stroganoff is a delicious classic dish, featuring tender strips of beef in seasoned beef/mushroom/onion/sour cream sauce, and served over egg noodles.Beef Stroganoff is a delicious classic dish, featuring tender strips of beef in seasoned beef/mushroom/onion/sour cream sauce, and served over egg noodles.

Do you enjoy Beef Stroganoff? We sure do. This classic dish, which originated over a hundred years ago, features tender strips of beef in a delicious beef/mushroom/onion/sour cream sauce, and is served over egg noodles. It really hits the spot on a cold winter’s day!

It’s really not too difficult to make beef stroganoff.  This classic meal is sure to please even the pickiest eater! IF you are looking for another way to cook this dish (easier), be sure to check out my recipe for Easy Ground Beef Stroganoff. Both of thee recipes will give you the delicious flavor of a traditional stroganoff.

Scroll Down For A Printable Recipe Card At The bottom Of The Page

How To Make Classic Beef Stroganoff

Slice the beef into 1/2 inch thick strips. Coat the beef with flour, salt and pepper. You can use a large resealable bag and shake it up or mix it all up in a large bowl. I used a large bowl and stirred it to combine. Make sure all sides of the meat are coated with flour mixture.

Beef cubes coated with flour and spices

Melt a Tablespoon of butter in a large skillet on medium-high heat. Add the meat (will need to do this in batches, adding butter for each batch). Cook and stir until the beef stroganoff meat is browned on all sides, BUT DO NOT OVERCOOK THE MEAT.

Remove browned meat to bowl. Repeat process until all meat strips are browned on the outside. Set meat aside.

Browning stew meat in skillet

Use the same skillet (without cleaning it out). Melt 2 Tablespoons butter in skillet over medium-high heat. Add the chopped onions and mushrooms. Cook for 4-5 minutes, stirring occasionally, until onions and mushrooms are tender.

Mushrooms and onions cooking in skillet

Now stir in the beef broth, tomato paste, and Worcestershire sauce. Bring this liquid to a boil. Be sure to scrape up browned bits from the bottom of pan as you go. They add flavor!

Mushrooms and onions cooking in beef broth in skillet

Add the meat (and any juices) back into the skillet. Cook for about 5 minutes until the sauce thickens a bit, and the dish is fully heated through.

Beef stroganoff cubes added to skillet with sauce.

Here’s An Important Note About The Cooking Process

If using beef tenderloin tips or tenderloin, you can go straight to the next step (adding the sour cream). Sometimes I like to use beef stew meat (it’s less expensive, but a little “tougher”) for this recipe. It helps to tenderize the meat if I put it into a crock pot at this point.

I prepare the recipe up to this point, then transfer it all to a crock pot and let it cook on low for 5-6 hours. This way you can do the prep work early in the day, then let it cook in your crock pot until about ready to serve.  It really helps to tenderize the meat, and smells incredible. 

**For purposes of the photos (below), I returned all meat and sauce from my crock pot back into the original skillet to finish.

Finishing The Beef Stroganoff For Serving

Once the meat has cooked and heated through (either on stove top or in crock pot), add a cup of sour cream to the dish.  Continue heating, but do not let the mixture come to a boil once sour cream has been added.

Sour cream added to beef and sauce in metal skillet

Stir well, to fully combine the sour cream. Heat through (but don’t let it boil), and serve.

Heating sauce and meat for beef stroganoff in large skillet

Beef Stroganoff is at it’s very best when served over cooked egg noodles or rice. Here, it is shown over cooked egg noodles.

Garnish the beef stroganoff with a bit of parsley. We enjoyed this dish, served with some of the green beans from our garden that I canned last summer. YUM!

Beef stroganoff served on noodles, with green beans on plate

Beef Stroganoff (with noodles or rice) is a delicious, filling meal. Yes, it takes a little bit of prep time (browning the meat pieces), but I think you will find it worth every minute when you taste how delicious this meal is!

Sure hope you will consider making this recipe for beef stroganoff. I’ve made it countless times over the past 10 years. It tastes wonderful!

Looking For More BEEF Recipes?

You can find all of my recipes in the Recipe Index, which is located at the top of the page. I have some great beef recipes you might enjoy, including:

Interested In More Recipes?

Thank you for visiting this website. I appreciate you using some of your valuable time to do soIf you’re interested, I publish a newsletter 2 times per month (1st and 15th) with all the latest recipes, and other fun info. I would be honored to have you join our growing list of subscribers, so you never miss a great recipe!
There is a Newsletter subscription box on the top right side (or bottom) of each blog post, depending on the device you use, where you can easily submit your e-mail address (only) to be included in my mailing list.

You Can Also Find Me On Social Media:

Facebook page: The Grateful Girl Cooks!
Pinterest:
The Grateful Girl Cooks!
Instagram:
jbatthegratefulgirlcooks

Author's signature

Recipe Source:  Cookbook titled “Favorite Brand Name Old-Fashioned Holiday Recipes”, published in 2003 by Publications International, Ltd., page 168.

0 from 0 votes
Beef Stroganoff
Prep Time
30 mins
Cook Time
5 mins
Total Time
35 mins
 

Beef Stroganoff is a delicious classic dish, featuring tender strips of beef in seasoned beef/mushroom/onion/sour cream sauce, and served over egg noodles.

Category: Entree
Cuisine: American
Keyword: beef stroganoff
Servings: 4 servings
Calories Per Serving: 762 kcal
Author: JB @ The Grateful Girl Cooks!
Ingredients
  • 8 ounces egg noodles , uncooked
  • 1/4 cup all purpose flour
  • 1/2 teaspoon salt
  • 1/4 teaspoon black pepper
  • 1 1/4 pounds beef tenderloin tips or tenderloin (I used 1 1/2 pounds beef stew meat)
  • 1/4 cup butter (4 Tablespoons), divided
  • 3/4 cup chopped brown onion
  • 12 ounces fresh button mushrooms , sliced
  • 1 10.5 ounce condensed beef broth , can
  • 2 Tablespoons tomato paste
  • 1 Tablespoon Worcestershire sauce
  • 1 cup sour cream , at room temperature
  • Dried parsley or chopped fresh chives , for garnish (optional)
Instructions
  1. Cook egg noodles (or rice) while preparing the stroganoff. Drain noodles, cover and keep warm until ready to serve.
To Prepare Stroganoff:
  1. Mix together flour, salt and pepper in large bowl or resealable bag. Slice the beef into thin 1/2 inch wide strips (this works best if meat is partially frozen-easier to slice). Combine meat and flour mixture. Toss, to coat all sides of beef.
  2. In a large nonstick skillet, melt a Tablespoon of the butter on medium-high heat. Add 1/2 of the beef strips and cook, stirring occasionally, until beef is browned on all sides. Do not overcook the beef! Remove beef to bowl. Add another Tablespoon of butter to skillet, and repeat process with rest of beef. Remove beef to bowl; do NOT clean skillet.
  3. Melt 2 Tablespoons butter in skillet. Add chopped onions and mushrooms. Cook for about 5 minutes over medium-high heat, until onions and mushrooms have softened. Stir occasionally.
  4. Add beef broth, tomato paste and Worcestershire sauce to onions and mushrooms. Stir well to combine. Bring mixture to a boil, scraping up the browned bits from the bottom of the skillet as it heats.
  5. Return the beef strips to skillet. Cook for 5 minutes, until sauce has thickened a bit, and it is heated through. (**If you are using a crock pot, at this point, transfer all the meat and sauce to crock pot, and cook on low for 5-6 hours, then proceed with the rest of the recipe).
  6. Once meat has finished cooking, add one cup of sour cream to skillet. Stir well, to combine. Heat through, BUT DO NOT LET SAUCE BOIL AFTER ADDING SOUR CREAM.
  7. Serve beef stroganoff over cooked, drained egg noodles, or cooked rice. Garnish with parsley or chopped chives, if desired. Enjoy!
Recipe Notes

The "Cook Time" indicated does NOT include the time necessary if a crock pot is used to tenderize the beef. I like to do the prep work early in the morning, throw it all (minus the sour cream) into the crock pot later in the day, then at dinner time, all I have to do is cook noodles and add sour cream to the dish! Easy peasy, but it does mean more "Cook Time".

Nutrition Facts
Beef Stroganoff
Amount Per Serving (1 serving)
Calories 762 Calories from Fat 324
% Daily Value*
Fat 36g55%
Saturated Fat 18g113%
Cholesterol 218mg73%
Sodium 612mg27%
Potassium 963mg28%
Carbohydrates 56g19%
Fiber 3g13%
Sugar 7g8%
Protein 52g104%
Vitamin A 870IU17%
Vitamin C 6.8mg8%
Calcium 112mg11%
Iron 5.9mg33%
* Percent Daily Values are based on a 2000 calorie diet.

Here’s one more to pin on your Pinterest boards!Beef Stroganoff is a delicious classic dish, featuring tender strips of beef in seasoned beef/mushroom/onion/sour cream sauce, and served over egg noodles.


Save

Save

Orange Julius (copycat)

You’ll enjoy this Orange Julius copycat recipe for the famous cold, creamy, frothy orange drink! EASY and quick to make smoothie, with only a few ingredients!You'll enjoy this Orange Julius copycat recipe for the famous cold, creamy, frothy orange drink! EASY and quick to make smoothie, with only a few ingredients!

When I was growing up, a treat my parents would buy for us occasionally was an Orange Julius, at the local mall. Did you ever have these cold drinks while growing up?

I loved this ice cold, thick, frothy orange drink… it was a great “smoothie” way back before smoothies became the rage! This Orange Julius (copycat) version I found online comes pretty close in taste to the original, and makes 4 generous servings!

Scroll Down For A Printable Recipe Card At The Bottom Of The Page

The History Behind Orange Julius

I discovered from searching it’s history that the original Orange Julius drink was created by a small business owner named Julius Freed in 1926. He opened an orange juice stand in Los Angeles, California.

A friend of his (who happened to be a chemist) suggested a way to make the orange juice more frothy and thick, and once Mr. Freed began making drinks that way, sales at his little “juice bar” skyrocketed. The rest is history!

What Exactly IS An Orange Julius Made With?

This recipe uses orange juice and low-fat milk as the base for this creamy beverage, so it is low in calories.  The orange juice and milk are easily mixed with a few other simple ingredients (including ice) in a blender for an easy and quick, frothy and refreshing cold beverage.

Oranges are used to make this copycat orange julius smoothie.

There are many copycat versions online for Orange Julius drinks. Apparently the original recipe for the powdered thickening compound is still a secret to this day. Many published recipes use egg products (raw, pasteurized or egg substitute) to make this drink. This particular recipe for an orange julius uses no egg products at all, but is delicious, just the same!

Other Smoothie Recipes

If you enjoy cold smoothies like this orange julius, you might also want to check out my other smoothie recipes! All of my recipes can be found in the Recipe Index, located at the top of the page.

A few favorites (all pictured below) are:

I love smoothies ANY TIME of the year, but especially during the long HOT summer months!  I hope you will give this Orange Julius recipe (or any of the others mentioned) a try! I think you will LOVE it!

Collage of 6 fruit smoothies for Orange Julius (copycat) recipe post

The recipe (as written) makes approximately 4, eight ounce Orange Julius servings. This drink is perfect for a breakfast or anytime “treat” for you and your family or friends! Hope you enjoy this cold, citrus flavored smoothie. It’s so easy to make, and tastes so delicious!

Thanks for stopping by, and I hope you will come back again soon for more yummy recipes. Don’t forget, you can find ALL of my recipes in the Recipe Index, which is located at the top of the page.

Interested In More Recipes?

Thank you for visiting this website. I appreciate you using some of your valuable time to do soIf you’re interested, I publish a newsletter 2 times per month (1st and 15th) with all the latest recipes, and other fun info. I would be honored to have you join our growing list of subscribers, so you never miss a great recipe!
There is a Newsletter subscription box on the top right side (or bottom) of each blog post, depending on the device you use, where you can easily submit your e-mail address (only) to be included in my mailing list.

You Can Also Find Me On Social Media:

Facebook page: The Grateful Girl Cooks!
Pinterest:
The Grateful Girl Cooks!
Instagram:
jbatthegratefulgirlcooks

Have a GREAT day!

Author's signature

Recipe Source: http://www.lynnskitchenadventures.com/2010/06/copycat-orange-julius.html

0 from 0 votes
Orange Julius (copycat)
Prep Time
5 mins
Cook Time
0 mins
Total Time
5 mins
 
You'll enjoy this Orange Julius copycat recipe for the famous cold, creamy, frothy orange drink! EASY and quick to make smoothie, with only a few simple ingredients!
Category: Beverage
Cuisine: American
Keyword: orange julius
Servings: 4 servings (8 ounces each)
Calories Per Serving: 161 kcal
Author: JB @ The Grateful Girl Cooks!
Ingredients
  • 2 cups orange juice fresh squeezed (or commercial)
  • 1 cup milk
  • 1 teaspoon vanilla extract
  • 1/4 cup granulated sugar
  • 1/4 cup powdered sugar
  • 1 1/2 cups ice cubes
Instructions
  1. Place all ingredients in blender and blend on high until all ingredients are fully incorporated and mixture is smooth, thick and frothy!
  2. Pour yourself a glass, garnish with a thin orange slice, if desired... and enjoy!

Nutrition Facts
Orange Julius (copycat)
Amount Per Serving (1 serving)
Calories 161
% Daily Value*
Cholesterol 2mg1%
Sodium 27mg1%
Potassium 336mg10%
Carbohydrates 35g12%
Sugar 33g37%
Protein 2g4%
Vitamin A 365IU7%
Vitamin C 62mg75%
Calcium 87mg9%
Iron 0.3mg2%
* Percent Daily Values are based on a 2000 calorie diet.

Here’s one more to pin on your Pinterest boards!You'll enjoy this Orange Julius copycat recipe for the famous cold, creamy, frothy orange drink! EASY and quick to make smoothie, with only a few ingredients!


Save

Save

Pound Cake With Lemon Cream and Blueberry Sauce

Make Pound Cake With Lemon Cream And Blueberry Sauce, for a wonderfully decadent dessert your family or guests will really enjoy! Make Pound Cake With Lemon Cream And Blueberry Sauce, for a wonderfully decadent dessert your family or guests will really enjoy!
A few years ago my husband and I were invited to some dear friends’ home for dinner. Our hostess asked me to bring dessert. I decided to “make something on the fly”, without a recipe, and this Pound Cake With Lemon Cream and Blueberry Sauce is the result!

Layers of pound cake, covered in lemon cream cheese filling, then topped with blueberry pie filling is a wonderful, easy to prepare dessert.

I assembled this dessert at our friends home, so I didn’t take many photos. The picture you see above is the one I DO have of the finished dessert. We brought the components separately (bowl of lemon cream, blueberry pie filling and pound cake).

If you use purchased pound cake and canned blueberry pie filling, then all you do is make the easy lemon topping, and the rest is SIMPLE! Here’s how to make 4 servings of this delicious dessert.

Make Or Purchase The Pound Cake 

The recipe is made easier (and quicker) by using store bought pound cake in loaf form and canned blueberry pie filling, which can be a real time-saver!

The picture below shows a homemade pound cake loaf. You will need 8 thin slices of pound cake for this recipe.

Slices of pound cake are used for the layers of this dessert.

Want To Make Your Own Blueberry Pie Filling?

If you do not have a can of blueberry filling on hand, it’s easy and fairly quick make your own!  You can use my recipe here, if desired. You will need a total of 2 cups of blueberry pie filling for this recipe.

A simple blueberry sauce is cooked to add to the pound cake.Once thickened, blueberry sauce is cooled then added to slices of pound cake.

Time To Create This Layered Dessert!

Cut the loaf of pound cake into 8 equal sized thin slices. Put one slice of pound cake on each dessert plate. Spoon lemon cream cheese topping over each slice, followed by a generous spoonful of blueberry pie filling.

Place another slice of pound cake on top of the blueberry pie filling (but turn this slice a quarter turn).

Top the second slice with another spoonful of lemon cream cheese topping, followed by more blueberry pie filling.

Make sure the filling runs over the sides of the pound cake (to make it look nice!). Garnish the pound cake with lemon cream and blueberry sauce with a couple of mint leaves and candied lemon peel. The garnish is optional, but adds a nice decorative touch!

Hope you will give this easy dessert a try! It’s a piece of CAKE!

Looking for More DESSERT Recipes?

You can find ALL of my recipes in the Recipe Index, which is located at the top of the page. I have LOTS of delicious dessert recipes to check out, including:

Want More Recipes? Get My FREE Newsletter!

I publish a newsletter 2 times per month (1st and 15th) with lots of recipes, tips, etc..
Would you like to join our growing list of subscribers?

There is a Newsletter subscription box on the top right (or bottom) of each blog post, depending on the device you use.
You can submit your e-mail address there, to be added to my mailing list.

Find Me On Social Media:

Facebook page: The Grateful Girl Cooks!
Pinterest:
The Grateful Girl Cooks!
Instagram:
jbatthegratefulgirlcooks

Author's signature

↓↓ PRINTABLE RECIPE BELOW ↓↓

0 from 0 votes
Pound Cake With Lemon Cream and Blueberry Sauce
Prep Time
15 mins
Cook Time
0 mins
Total Time
15 mins
 

Make Pound Cake With Lemon Cream And Blueberry Sauce, for a wonderfully decadent dessert your family or guests will really enjoy!

Category: Dessert
Cuisine: American
Keyword: pound cake
Servings: 4 servings
Calories Per Serving: 917 kcal
Author: JB @ The Grateful Girl Cooks!
Ingredients
  • 16 ounces cream cheese (room temp)
  • 1 ¼ cups powdered sugar
  • 1/4 teaspoon vanilla extract
  • 1/4 teaspoon lemon extract
  • 8 ounces Cool Whip , thawed
  • 1 Tablespoon lemon zest
  • 10,75 ounces Pound Cake (in loaf form)
  • 2 cups blueberry pie filling
  • 8 leaves Mint leaves for garnish (optional)
  • 8 pieces Candied Lemon Peel for garnish (optional)
Instructions
  1. In a large mixing bowl, beat the cream cheese, powdered sugar, vanilla and lemon extracts until smooth. Gently fold in Cool Whip until mixture is creamy and well combined.
  2. Slice pound cake loaf into 8 equal sized slices. Place 1 slice of pound cake onto 4 dessert plates. Spoon a generous amount of lemon cream cheese filling over each slice, letting some run over the edges. Spoon blueberry pie filling generously over cream cheese topping.

  3. Place a second slice of pound cake on top of the blueberry sauce, at a 90 degree quarter turn. Repeat layer of lemon cream cheese topping, then blueberry pie filling. Make sure some of the topping runs over the side.

  4. Garnish the dessert with mint leaves and candied lemon peels, if desired. (Totally optional!) Serve and enjoy!

Nutrition Facts
Pound Cake With Lemon Cream and Blueberry Sauce
Amount Per Serving (1 g)
Calories 917 Calories from Fat 198
% Daily Value*
Fat 22g34%
Saturated Fat 12g75%
Cholesterol 148mg49%
Sodium 998mg43%
Potassium 567mg16%
Carbohydrates 165g55%
Fiber 4g17%
Sugar 129g143%
Protein 15g30%
Vitamin A 870IU17%
Vitamin C 2.9mg4%
Calcium 318mg32%
Iron 3.3mg18%
* Percent Daily Values are based on a 2000 calorie diet.

Here’s one more to pin on your Pinterest boards!Make Pound Cake With Lemon Cream And Blueberry Sauce, for a wonderfully decadent dessert your family or guests will really enjoy!


Save

Save

Save

Chicken Thigh Osso Bucco

Chicken Thigh Osso Bucco is a delicious twist on an Italian classic. Braised in white wine, chicken stock & veggies, it’s served on mashed potatoes or polenta!Chicken Thigh Osso Bucco is a delicious twist on an Italian classic. Braised in white wine, chicken stock & veggies, it's served on mashed potatoes or polenta!

I enjoy searching for and finding new recipes to make for our family and friends. It’s especially fun when I stumble onto a recipe, make it, and enjoy it so much that I KNOW it will be made over and over again. Such is the case with this recipe for Chicken Thigh Osso Bucco!

Before making this dish, I had to find an answer to one truly important question. Exactly WHAT IS OSSO BUCCO in the first place? Well, here’s the answer! In Italian “osso bucco” means “bone with a hole”, and refers to the typical way this recipe is prepared – with veal shanks. Veal shanks have a bone filled with bone marrow in the center of the meat, therefore that is how it got the name. Makes sense, right?

Scroll Down For A Pintable Recipe Card At The Bottom Of The Page

Chicken Thigh Osso Bucco

THIS recipe uses chicken thighs (bone in, skin on) instead of veal shanks, but the method of cooking is virtually the same. The meat braises for almost an hour in liquid, which results in a very tender piece of chicken.

This recipe for chicken thigh osso bucco originally was featured on the television show “The Chew”, and was prepared by host Clinton Kelly. I stumbled upon a slight adaptation of that recipe on another website, and that is the version I used to make this delicious dinner! Chicken thigh osso bucco is served on top of creamy mashed potatoes (or polenta, if that’s your preference). The dish smells fabulous, and tastes fabulous!

Prepare The Chicken

Here’s how you prepare this dish: *Note: original recipe calls for 8 chicken thighs. I used 4 since I was only cooking for two people, but kept everything else in recipe the same.

Dredge chicken thighs in flour to coat, then season them with salt and pepper.

Chicken thighs coated in flour for chicken thigh osso bucco.

Heat olive oil in a large stock pot. Add the floured chicken thighs to the hot oil, then sear the meat on both sides, until golden brown.

Thighs are seared in pan for chicken thigh osso bucco.

Once chicken is browned on both sides (but not cooked all the way through), transfer it to a plate or wire rack. Let it rest.

4 pan-seared chicken thighs, for chcken thigh osso bucco, on wire rack.

Cook The Veggies

Place the diced carrots and onions into the same pan you cooked the chicken thighs in (do not clean pan). Cook for several minutes, stirring occasionally until the veggies have softened.

Diced carrots and onions cooked in large saucepan, for chicken thigh osso bucco.

Add garlic, tomato paste, white wine, chicken stock, rosemary and thyme to the veggies in the pan. Stir, to mix these ingredients together. Continue to cook until the liquid has reduced by about half.

Sauce is cooking for chicken thigh osso bucco dish.

Simmer The Chicken

Once the liquid is reduced by about half, add the chicken thighs back into the pan. Put a lid on the pan. Continue to simmer the chicken on low for about 45-50 minutes, until the chicken thigh osso bucco is cooked all the way through. Once that is completed, you are ready to serve this delicious dish.

Chicken pieces for chicken thigh osso bucco, are added to sauce, to bake.

Time To Serve Chicken Thigh Osso Bucco

To serve, place the chicken thigh osso bucco on top of creamy mashed potatoes (or polenta). Spoon some of the leftover sauce and veggies over the top of each piece of the chicken. Grab your fork, and get ready to dig in.

Chicken Thigh Osso Bucco served on top of potatoes, with broccoli on the side.

That’s it!  Chicken Thigh Osso Bucco is easy to make, fabulous tasting, and very filling! It also looks good on the plate, right? YUM! The chicken and veggies are very tender, and easy to cut. I think you will LOVE it!

Chicken thigh osso bucco served on top of mashed potatoes.

I really hope you will consider making this chicken thigh osso bucco. It is absolutely delicious, and will definitely be making it again! Have a wonderful day… praying we will all seek to be an encourager to someone who might need it today.

Looking For More Chicken Recipes?

There are LOTS of chicken recipes on my website. You can check them out using the Recipe Index at the top of the page. Some of our favorites include:

Interested In More Recipes?

Thank you for visiting this website. I appreciate you using some of your valuable time to do soIf you’re interested, I publish a newsletter 2 times per month (1st and 15th) with all the latest recipes, and other fun info. I would be honored to have you join our growing list of subscribers, so you never miss a great recipe! 

There is a Newsletter subscription box on the top right side (or bottom) of each blog post, depending on the device you use, where you can easily submit your e-mail address (only) to be included in my mailing list.

You Can Also Find Me On Social Media:

Facebook page: The Grateful Girl Cooks!
Pinterest:
The Grateful Girl Cooks!
Instagram:
jbatthegratefulgirlcooks

Author's signature

Recipe Source: http://dinnerthendessert.com/clinton-kelleys-chicken-thigh-osso-bucco/

4.8 from 10 votes
Chicken Thigh Osso Bucco
Prep Time
15 mins
Cook Time
1 hr
Total Time
1 hr 15 mins
 

Chicken Thigh Osso Bucco is a delicious twist on an Italian classic. Braised in white wine, chicken stock & veggies, it's served on mashed potatoes or polenta!

Category: Entree
Cuisine: Italian
Keyword: chicken thigh osso bucco
Servings: 8 servings
Calories Per Serving: 327 kcal
Author: JB @ The Grateful Girl Cooks!
Ingredients
  • 8 chicken thighs bone in, skin on
  • 1/2 cup all purpose flour
  • 1/2 teaspoon salt
  • 1/4 teaspoon ground black pepper
  • olive oil (enough to cover bottom of pan)
  • 1 brown onion (diced)
  • 1 large carrot (peeled, sliced, cut into quarters)
  • 2 cloves garlic (minced)
  • 1 Tablespoon tomato paste
  • 1 cup dry white wine
  • 1 cup chicken stock
  • 1/2 teaspoon dried rosemary
  • 1/2 teaspoon dried thyme
  • parsley for garnish (if desired)
Instructions
  1. Place flour, salt and pepper on plate. Mix. Dredge chicken in flour mixture until all sides are covered.
  2. Add olive oil (enough to cover bottom of pan) to large heavy-bottomed saucepan. Heat on medium.
  3. When oil is hot, add chicken. Sear chicken until it is browned on both sides (you might need to brown chicken in batches). Remove chicken from pan.
  4. Add a bit more olive oil if necessary. Add onions and carrots; cook until softened (4-5 minutes).
  5. Add minced garlic. Cook for one more minute, stirring to prevent burning.
  6. Add tomato paste, wine, chicken stock, rosemary and thyme. Stir to combine all ingredients. Cook until the liquid in the pan has reduced by about half.
  7. Add the chicken thighs back to the pan; turn heat to low. Cover pan, and cook on low for 45-50 minutes (or until is cooked all the way through.
  8. Serve cooked chicken on top of creamy mashed potatoes or polenta. Spoon some of the veggies and sauce over the top of chicken. Garnish with parsley, if desired.
Nutrition Facts
Chicken Thigh Osso Bucco
Amount Per Serving (1 piece)
Calories 327 Calories from Fat 171
% Daily Value*
Fat 19g29%
Saturated Fat 5g31%
Cholesterol 111mg37%
Sodium 298mg13%
Potassium 357mg10%
Carbohydrates 10g3%
Sugar 1g1%
Protein 20g40%
Vitamin A 1390IU28%
Vitamin C 2.1mg3%
Calcium 19mg2%
Iron 1.5mg8%
* Percent Daily Values are based on a 2000 calorie diet.

Here’s one more to pin on your Pinterest boards!Chicken Thigh Osso Bucco is a delicious twist on an Italian classic. Braised in white wine, chicken stock & veggies, it's served on mashed potatoes or polenta!

Save

Save

Save

Roast Turkey Breast with Herbs and Garlic

It’s easy to cook a healthy, lean, delicious roast turkey breast with a coating of olive oil and a spice mix of herbs and garlic in under an hour!It's easy to cook a healthy, lean, delicious roast turkey breast with a coating of olive oil and a spice mix of herbs and garlic in under an hour!

I usually roast a whole turkey at Thanksgiving, but at other times of the year… I don’t want to mess with it!  However, I will occasionally cook a roast turkey breast, since it takes far less time to prepare than an entire 20 pound bird. This recipe for Roast Turkey Breast with Herbs and Garlic is quite simple to make (in under an hour), and is very delicious!

Now that our sons are grown and living on their own, I only cook for my husband and myself. We have discovered that a small roast turkey breast is the perfect size for the two of us!  This roasted turkey was perfect – low calorie, but full of flavor!

I normally prepare this recipe with a whole, bone-in turkey breast. This time, after I had coated the meat with my herb and garlic seasoning, I decided to split it right down the middle. That way I could cook the roast turkey breast in TWO portions (so I could freeze one after roasting, to save for another meal). That’s the method I’m sharing today.

Scroll Down For A Printable Recipe Card At The Bottom Of The Page

How To Make Roast Turkey Breast

The recipe is so easy. You mix up a spice “rub”, coat the turkey with it, then roast it. That’s it… easy, right? First, put the minced garlic, thyme, rosemary, sage, salt, pepper, and olive oil into a small bowl. Stir these ingredients well, so they are fully mixed together.

Spice rub for roast turkey breast is mixed in small bowl

Rinse the turkey, then pat it dry with paper towels. Place the “rub” mixture onto the turkey, and spread it all over the surface of the turkey breast (for this recipe, leave the skin “on”). Try to separate the skin a little bit from the meat. Place some of the “rub” mixture under the skin.

Notice that this is a WHOLE turkey breast. I started to make this roast turkey breast the “normal way”, then changed my mind, at the last minute!

Spices with garlic and herbs are rubbed onto turkey breast before roasting

Roast turkey breast with herbs and garlic is ready for the oven.

Once the turkey breast is covered with the herb and garlic rub, you roast the turkey breast until it is done  (**unless you are like me, and change your mind**).

Last Minute Changes To Roast Turkey Breast Aren’t ALL Bad, Right?

Because I decided in a moment of whimsy to NOT cook an entire turkey breast in one piece,  I took a humongous sharp knife and carefully split that whole turkey breast right through the breast bone, splitting it into 2 half turkey breasts .  NOTE TO SELF:  – do this BEFORE applying rub next time. It’s MUCH easier to cut the turkey breast in half BEFORE adding the slippery oil and herbs… just sayin’. That will teach me to NOT make a mid-recipe change next time! Ha Ha.

However you prefer your roast turkey breast (either WHOLE or CUT IN HALF), roast the turkey breast, and all will be right in the universe!!! Place the turkey breasts in a roasting pan, or onto a baking sheet with rimmed edges. You do not need to put the turkey onto a rack for this recipe

IMPORTANT NOTE: The time cooking  in the detailed recipe below is for cooking 2 half breasts. If you leave the turkey breast whole, then your roasting time will differ slightly, as it will need more time to cook it all the way through.

Roast turkey breast is split in half before putting into oven.

How Long Do I Roast Turkey Breast?

Roast the split turkey breasts at 350 degrees for 45-60 minutes (oven temperatures vary). Remember a whole turkey breast will need to cook longer!

Use a digital thermometer to test for “done-ness”, and to ensure internal temperature is 165 degrees, for safety. When the internal temperature of the roast turkey breast reaches 165 degrees, remove it from the oven. Cover the turkey with aluminum foil for 10 minutes, and let it rest, to let the juices redistribute through the meat.

Roast turkey breast is golden brown after baking.

Time To EAT!

Once the roast turkey breast has “rested”, slice the roast turkey breast up, and serve! I mixed up a little gravy using the turkey juices and a bit of flour, salt and pepper. The gravy was then used to drizzle on the roast turkey breast slices. That tastes fantastic, but is optional.

Sliced roast turkey breast is served with gravy, and vegetables on the side.

Hope you will consider trying this easy recipe for roast turkey breast, with herbs and garlic. The only time it takes “hands on” is to mix the spice rub, split the breast into two pieces and apply the spices to the turkey. The rest of the “cooking” time was simply that… “cooking” time.

Have a great day. May you find MUCH to be thankful for as you go about your day! Thank you for stopping by, and I hope you will come back soon.

Looking For More TURKEY Recipes?

You can find ALL my recipes in the Recipe Index, located at the top of the page. I have some wonderful turkey recipes, including:

Interested In More Recipes?

Thank you for visiting this website. I appreciate you using some of your valuable time to do soIf you’re interested, I publish a newsletter 2 times per month (1st and 15th) with all the latest recipes, and other fun info. I would be honored to have you join our growing list of subscribers, so you never miss a great recipe!
There is a Newsletter subscription box on the top right side (or bottom) of each blog post, depending on the device you use, where you can easily submit your e-mail address (only) to be included in my mailing list.

You Can Also Find Me On Social Media:

Facebook page: The Grateful Girl Cooks!
Pinterest:
The Grateful Girl Cooks!
Instagram:
jbatthegratefulgirlcooks

Author's signatureRecipe Source: http://flavorthemoments.com/simple-herb-garlic-roasted-turkey-breast/

0 from 0 votes
Roast Turkey Breast with Herbs and Garlic
Prep Time
5 mins
Cook Time
45 mins
Total Time
50 mins
 

It's easy to cook a healthy, lean, delicious roast turkey breast with a coating of olive oil and a spice mix of herbs and garlic in under an hour!

Category: Entree
Cuisine: American
Keyword: roast turkey breast
Servings: 6 servings
Calories Per Serving: 272 kcal
Author: JB @ The Grateful Girl Cooks!
Ingredients
  • 3 pound turkey breast (with the bone in, and the skin on)
  • 2 cloves garlic , minced
  • 1 teaspoon dried thyme
  • 1 teaspoon dried sage leaves
  • 1 teaspoon dried rosemary
  • 1 teaspoon salt
  • 1/2 teaspoon ground black pepper
  • 2 Tablespoons olive oil
Instructions
  1. Preheat your oven to 350 degrees. Before beginning, rinse turkey breast. Pat it dry with paper towels.  Carefully (using a very sharp knife), cut the turkey breast in half, right through the top side middle cartillage. Set aside both sections.

  2. Make the herb and garlic rub, by mixing garlic, thyme, sage, rosemary, salt, pepper and olive oil together in a small bowl.

  3. Rub the herb and garlic mixture over the entire surface of the turkey (bottom and top). Separate skin a bit from the meat, and rub some of the mixture under the skin, as well. Place the turkey breast(s) in a roasting pan (or baking sheet with edges).

  4. Bake the turkey breast(s) at 350 degrees for 45-60 minutes. Since oven temps vary, be sure and test for "done-ness", using a digital thermometer in thick part of breast. When properly/safely cooked, the thermometer should show an internal temperature of 165 degrees. If it is not to temp, continue cooking and checking temperature every few minutes. NOTE: If cooking whole turkey breast, longer roasting time will be necessary. Cook to 165 degrees internally.

  5. Once turkey is "done", remove it from oven. Cover with foil, and let the meat rest for about 10 minutes. This will help keep the turkey juicy! After turkey has rested, slice, serve, and enjoy!

Recipe Notes

Note: Turkey breast will freeze well, if wrapped very well in plastic wrap AND aluminum foil.

Nutrition Facts
Roast Turkey Breast with Herbs and Garlic
Amount Per Serving (1 serving)
Calories 272 Calories from Fat 72
% Daily Value*
Fat 8g12%
Saturated Fat 1g6%
Cholesterol 122mg41%
Sodium 855mg37%
Potassium 548mg16%
Protein 48g96%
Vitamin A 45IU1%
Vitamin C 0.3mg0%
Calcium 37mg4%
Iron 1.4mg8%
* Percent Daily Values are based on a 2000 calorie diet.

Here’s one more to pin on your Pinterest boards!It's easy to cook a healthy, lean, delicious roast turkey breast with a coating of olive oil and a spice mix of herbs and garlic in under an hour!

Save

Save

Waffles With Homemade Peach Topping

Waffles with Peach Topping are a delicious breakfast treat! Use fresh or frozen peaches to make a quick and EASY topping for your favorite waffle!
Every now and then, I enjoy waffles as a breakfast treat. By every now and then, I mean every couple of months. I WISH I could eat waffles more often, but that would not help me keep my “girlish figure” (**snort, snort, cough, cough) BUT… when I do have one, I sure enjoy Belgian waffles with homemade peach topping and a giant dollop of whipped cream.

If you enjoy waffles, be sure to try my recipes for Banana Nut Waffles or Pumpkin Spice Waffles. They’re equally yummy, easy to prepare, and I am confident you will enjoy them, as well!

Scroll Down For A Printable Recipe Card At The Bottom Of The Page

Is It Difficult To Make The Peach Topping?

The quick answer to this question is No! It’s really easy to make a delicious peach topping for waffles! It’s as simple as peeling and slicing peaches, and gently cooking them with the other ingredients for about 5 minutes.

Once heated and sauce is thickened, pile it (or delicately spoon it) onto a cooked waffle! If you’re feeling rather adventurous, dollop it with some whipped cream. YUMMO! There’s nothing better than breakfast waffles with peach topping!

What Kind Of Waffles?

The type of waffle you use truly doesn’t matter. Use a favorite prepared mix to make your own, or use frozen waffles, if that’s easiest for you on a busy morning. I like to use my Belgian waffle maker and almost always use a prepared mix. In the time it takes to mix the batter, and cook a couple waffles, the peach topping is basically cooked and ready to go!

Cooking a waffle in a waffle maker.

Can You Use FROZEN Peaches To Make This Topping?

I prefer to use fresh, ripe summer peaches to make the topping, but if they are out of season, YES, you can substitute frozen peaches. If you’re going to use FROZEN peaches, be sure to slightly decrease the water amount called for in the recipe.

Fresh peach slices and seasonings ready to make waffles with peach topping.

PLEASE NOTE: The caloric calculation in the printable recipe below is for the peach topping only (per serving), since there is no way to know what kinds of waffles people will be using (frozen/homemade, etc.)

Try This Peach Topping On Cake – YUM!

By the way… this peach topping is also WONDERFUL over slices of pound cake or angel food cake.  I’ve been making this topping for years and years, and think you will LOVE it! Hope you will consider trying this recipe for waffles with peach topping.

Looking For Other BREAKFAST Recipes?

You can find all of my breakfast recipes in the Recipe Index, located at the top of the page. A few favorites include:

Interested In More Recipes?

Thank you for visiting this website. I appreciate you using some of your valuable time to do soIf you’re interested, I publish a newsletter 2 times per month (1st and 15th) with all the latest recipes, and other fun info. I would be honored to have you join our growing list of subscribers, so you never miss a great recipe!
There is a Newsletter subscription box on the top right side (or bottom) of each blog post, depending on the device you use, where you can easily submit your e-mail address (only) to be included in my mailing list.

You Can Also Find Me On Social Media:

Facebook page: The Grateful Girl Cooks!
Pinterest:
The Grateful Girl Cooks!
Instagram:
jbatthegratefulgirlcooks

Author's signature

Recipe Source: my brain AFTER my morning coffee

↓↓ PRINTABLE RECIPE BELOW ↓↓

5 from 1 vote
Waffles With Homemade Peach Topping
Prep Time
5 mins
Cook Time
10 mins
Total Time
15 mins
 

Waffles with Peach Topping are a delicious breakfast treat! Use fresh or frozen peaches to make a quick and EASY topping for your favorite waffle!

Category: Breakfast
Cuisine: American
Keyword: waffles with peach topping
Servings: 4 servings
Calories Per Serving: 212 kcal
Author: JB @ The Grateful Girl Cooks!
Ingredients
  • 1/2 cup water
  • 3/4 cup granulated sugar
  • 1 Tablespoon fresh lemon juice
  • 1 Tablespoon cornstarch
  • 4-5 large peaches (peeled, pitted and thinly sliced - a total of about 4 cups of sliced fruit)
  • 3/4 teaspoon ground cinnamon
Instructions
  1. Whisk the water, granulated sugar, lemon juice and cornstarch together in a large saucepan (or large skillet). Bring these ingredients to a full boil on medium heat, stirring often. (If using frozen peaches, do not thaw, but remember to slightly decrease the amount of water used). Mixture should thicken slightly.
  2. Add the peach slices and cinnamon. Stir to combine; cook on low for approximately 4-5 minutes, until heated through, and peaches have softened up slightly. Remove from heat.
  3. Prepare waffles (using mix or your own recipe). Sprinkle cooked waffle with sifted powdered sugar, if desired.
  4. Spoon peach topping over the top of waffle. Garnish with whipped cream, if desired.
Recipe Notes

PLEASE NOTE: The caloric calculation is for the peach topping only. This is because there are so many kinds of waffles (homemade/frozen) that may be used, that it would be impossible to accurately report. This topping is also delicious over slices of pound cake or angel food cake.

Nutrition Facts
Waffles With Homemade Peach Topping
Amount Per Serving (1 serving peach topping)
Calories 212
% Daily Value*
Sodium 2mg0%
Potassium 285mg8%
Carbohydrates 54g18%
Fiber 2g8%
Sugar 50g56%
Protein 1g2%
Vitamin A 490IU10%
Vitamin C 11.4mg14%
Calcium 13mg1%
Iron 0.4mg2%
* Percent Daily Values are based on a 2000 calorie diet.

Here’s one more to pin on your Pinterest boards!Waffles with Peach Topping are a delicious breakfast treat! Use fresh or frozen peaches to make a quick and EASY topping for your favorite waffle!


Save

Save

Creamy Potato Leek Soup

Delicious, creamy potato leek soup, made with Yukon gold potatoes, fresh leeks, seasoned broth and cream, is delicious, thick and filling!Delicious, creamy potato leek soup, made with Yukon gold potatoes, fresh leeks, seasoned broth and cream, is delicious, thick and filling!

Creamy Potato Leek Soup. Hmmm… never having made it before, I pondered it for awhile before deciding to give this recipe a try (with a slight tweak to the original). I was growing leeks in my garden, but they were not as large as store-bought ones. I used them in the recipe anyway, and was surprised by how delicious this soup was!

This soup was very easy to make, and my husband and I really enjoyed the taste and creaminess of Yukon Gold potatoes and leeks, cooked in seasoned chicken broth. I played with the original recipe a bit, and added cream to the finished soup for a delicious finish!

Scroll Down For A Printable Recipe Card At the Bottom Of The Page

How To Make Creamy Potato Leek Soup

First, rinse and clean the leeks really well. Trim off the dark green parts of the stem, and the root end. Split the leeks in half, and rinse well, to ensure any grit gets washed out. Do not skip this step… you don’t want any sand, dirt, etc. from the leeks in your soup, do you?

Dice the leeks. Heat butter (or oil, if substituting) in large saucepan or Dutch oven. Add the diced leeks; cook them for several minutes (5-6) until they soften.

Leeks are cooked in butter to begin making creamy potato leek soup.

Add the potatoes, chicken broth and water to the pot. Bring this mixture to a boil. Sprinkle with a little salt and pepper, to season.

Potatoes, chicken broth and spices are added to the creamy potato leek soup in pot.

Once the potato leek soup comes to a boil, reduce the heat; let it cook on a low simmer until the potatoes are “fork-tender”. Times for this step can vary depending on the size potato chunks you used, so keep this in mind.

The pot of creamy potato leek soup cooks and the potatoes soften.

When the potatoes have softened up and are fork-tender, puree the soup. You can use an immersion blender, or can transfer soup in batches to a blender or food processor, to blend until creamy.

An immersion blender is used to puree the potatoes in the creamy potato leek soup.

After blending or pureeing, the potato leek soup should be thick. Take a quick taste. Adjust the salt and pepper seasoning, if necessary, to suit your taste. This is what the potato leek soup looked like after I pureed it. Nice and thick!

Creamy potato leek soup becomes thickened, after pureeing potatoes.

Pour in the whipping cream. Heat on medium heat only until hot. Be careful after adding the whipping cream to NOT let the soup come to a boil. Just heat the soup through, and then it is ready to serve.

Whipping cream is added to creamy potato leek soup right before serving.

To Serve Creamy Potato Leek Soup

Ladle the hot creamy potato leek soup into serving bowls. Garnish with chopped chives or fresh parsley, if desired,  and serve. You can also drizzle additional whipping cream on top of the potato leek soup, if desired. Serve this comforting soup with a green salad on the side, and enjoy!

A bowl of creamy potato leek soup, with green salad on the side.

This creamy potato leek soup was a tasty experiment for me, using leeks from our garden for the first time in a recipe. The soup was filling, and absolutely delicious! I will definitely make it again.

Looking For More SOUP Recipes?

You can find all my recipes in the Recipe Index, located at the top of the page. I have lots of soup recipes for you to enjoy, including:

Interested In More Recipes?

Thank you for visiting this website. I appreciate you using some of your valuable time to do soIf you’re interested, I publish a newsletter 2 times per month (1st and 15th) with all the latest recipes, and other fun info. I would be honored to have you join our growing list of subscribers, so you never miss a great recipe! 

There is a Newsletter subscription box on the top right side (or bottom) of each blog post, depending on the device you use, where you can easily submit your e-mail address (only) to be included in my mailing list.

You Can Also Find Me On Social Media:

Facebook page: The Grateful Girl Cooks!
Pinterest:
The Grateful Girl Cooks!
Instagram:
jbatthegratefulgirlcooks

Author's signatureRecipe Adapted From:  http://userealbutter.com/2011/01/06/potato-leek-soup-recipe/

0 from 0 votes
Creamy Potato Leek Soup
Prep Time
15 mins
Cook Time
30 mins
Total Time
45 mins
 
Delicious, creamy potato leek soup, made with Yukon gold potatoes, fresh leeks, seasoned broth and cream, is delicious, thick and filling!
Category: Soup
Cuisine: American
Keyword: creamy potato leek soup
Servings: 6 servings
Calories Per Serving: 267 kcal
Author: JB @ The Grateful Girl Cooks!
Ingredients
  • 2 Tablespoons butter (may substitute vegetable oil)
  • 4 leeks (cut off roots, and dark green stems), split, washed well, diced.
  • 2 pounds Yukon Gold Potatoes
  • 4 cups chicken broth
  • 2 cups water
  • Salt and Pepper , to taste
  • 3/4 cup whipping cream
  • chopped chives or parsley for garnish
  • additional whipping cream to drizzle on soup with garnish , if desired
Instructions
  1. In a large soup pan, heat the butter (or oil) on medium. Add chopped leeks. Cook, stirring occasionally, until they soften (about 5-7 minutes).
  2. Add potatoes, chicken broth and water. Season with salt and pepper, to taste. Bring this mixture to a boil. Once boiling, reduce heat to a low simmer. Continue cooking until the potatoes are easily pierced with a fork ("fork-tender").
  3. Blend the mixture until smooth, using an immersion blender. You may also blend the soup in a kitchen blender or food processor (but may have to do this in batches). Taste again, and add additional salt and pepper to taste, if desired.
  4. Pour in whipping cream. Mix until well combined. If necessary, reheat soup until hot, but NOT boiling! Ladle hot soup into serving bowls. Garnish with chopped chives OR parsley; drizzle with additional whipping cream, if desired. Enjoy!
Nutrition Facts
Creamy Potato Leek Soup
Amount Per Serving (1 (1/6th of total))
Calories 267 Calories from Fat 135
% Daily Value*
Fat 15g23%
Saturated Fat 9g56%
Cholesterol 50mg17%
Sodium 649mg28%
Potassium 878mg25%
Carbohydrates 28g9%
Fiber 4g17%
Sugar 2g2%
Protein 6g12%
Vitamin A 1545IU31%
Vitamin C 35.5mg43%
Calcium 112mg11%
Iron 6.5mg36%
* Percent Daily Values are based on a 2000 calorie diet.

Here’s one more to pin on your Pinterest boards!Delicious, creamy potato leek soup, made with Yukon gold potatoes, fresh leeks, seasoned broth and cream, is delicious, thick and filling!


Save

Save