These delicious Glazed Lemon Poppy Seed Doughnuts are tart AND sweet, simple to make, and baked (not fried)! They are a wonderful breakfast treat!! They are a wonderful breakfast treat! / The Grateful Girl Cooks!")
Who wants doughnuts? How about these Glazed Lemon Poppy Seed Doughnuts? They are baked (not fried), a little sweet, a little tangy, glazed with a lemon icing… and very good! Yes, please!
I found this recipe on Pinterest and decided to give it a try. I love all things lemon… and lemon poppy seed doughnuts with lemon glaze on top? C’mon!!! I knew I had to make them. The doughnuts are baked and are crazy easy to make.
Scroll Down For A Printable Recipe Card At The Bottom Of The Page
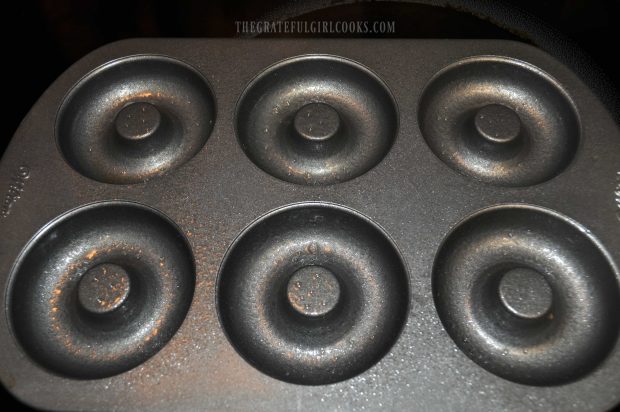
Prepare The Doughnut Pan
Spray a doughnut pan with non-stick spray; set aside. Preheat your oven to 350 degrees F. Speaking of doughnut pans… I bought a Wilton 6 cavity doughnut pan a couple years ago with a gift card I received for my birthday.
I think the doughnut pan was only $9 or $10 dollars on Amazon, and I’ve used it a lot. It’s wonderful to be able to BAKE doughnuts, instead of FRYING them! This is what the pan looks like.
How To Make Lemon Poppy Seed Doughnuts
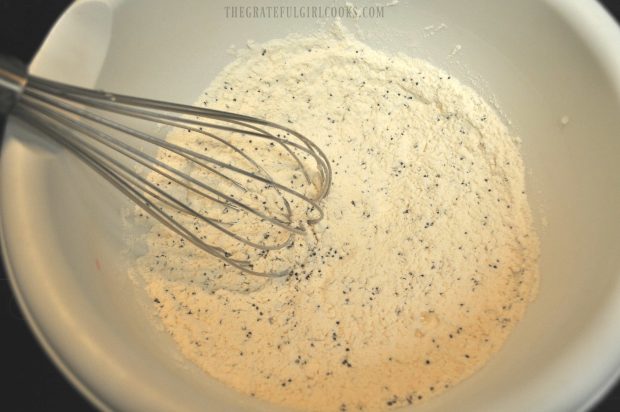
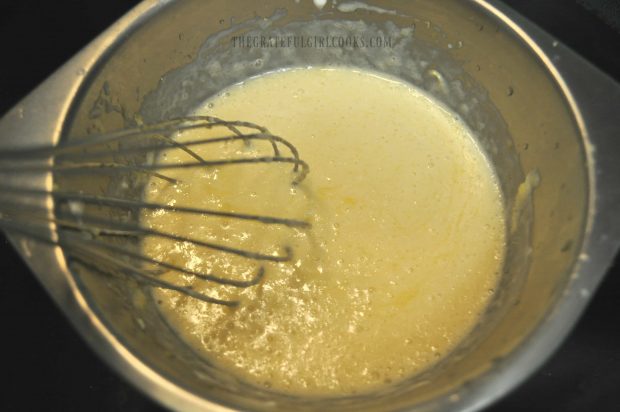
In a medium sized bowl, place flour, poppy seeds, baking powder, salt and baking soda. Whisk these together, then set bowl aside. In a separate bowl, combine butter, egg, granulated sugar, sour cream, milk, vanilla, lemon zest and juice. Whisk these together until batter is smooth.
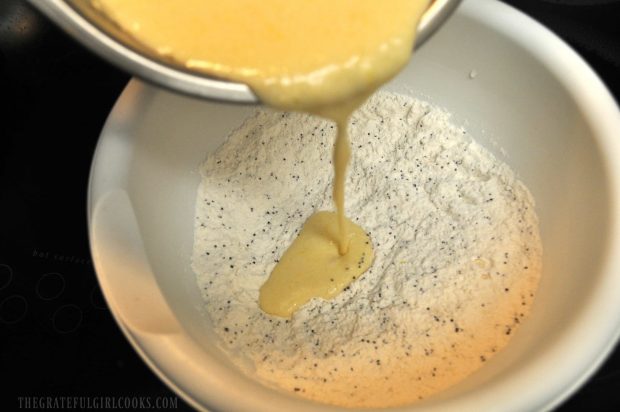
Pour this wet mixture into the bowl with the dry ingredients. Stir until all ingredients are combined into a thick batter, but make sure not to over mix! You now have the batter made for the lemon poppy seed doughnuts! Easy, right?
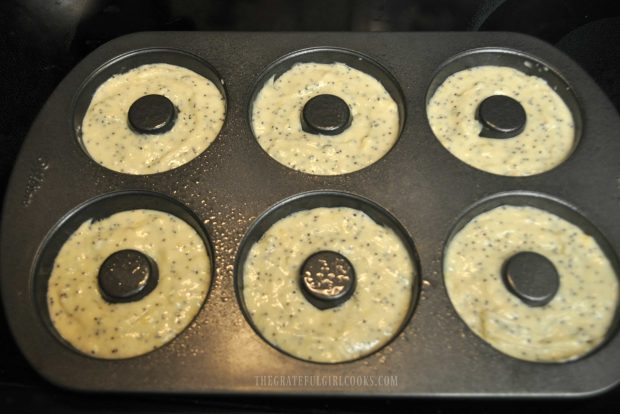
Fill Pan Then Bake The Doughnuts
Carefully spoon (or pipe) the batter into doughnut pan, filling each cup 2/3 to 3/4 of the way full. If you have a 6 cup pan, you may have to bake these in batches. Bake the lemon poppy seed doughnuts at 350°F for approximately 10 minutes. Check them at 9 minutes. The edges should be slightly brown when done.
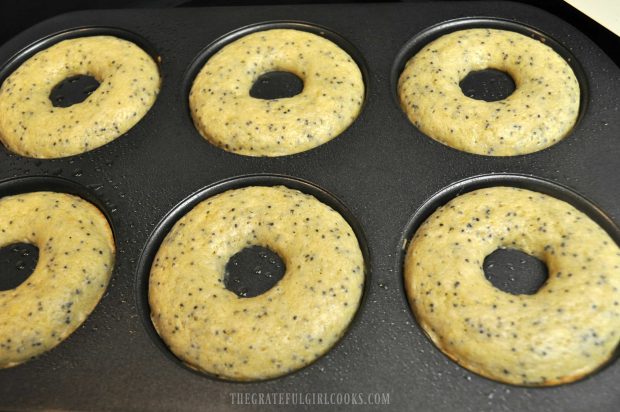
When done, remove pan from oven, and let it sit for a couple of minutes, then transfer the doughnuts from pan to a wire rack that is positioned on top of a piece of parchment paper.
When you glaze the doughnuts later, any glaze that drips will land on parchment paper, which is better for easy clean up!). Repeat process with any leftover batter. Once done, let the doughnuts cool a bit before putting the glaze on them.
Make Glaze For The Lemon Poppy Seed Doughnuts
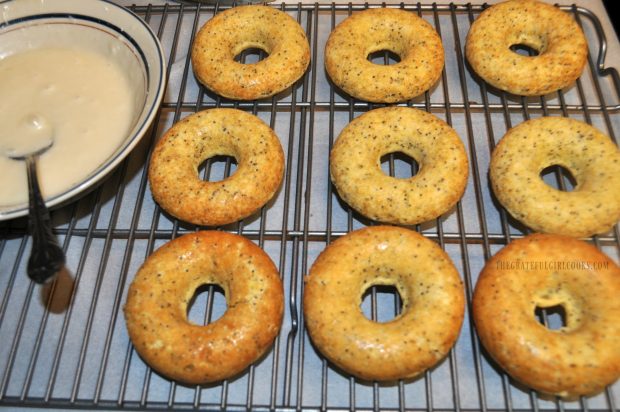
To make the lemon glaze, place powdered sugar, melted butter, lemon juice, milk and vanilla extract in a medium sized bowl. Mix together well, until you have a creamy glaze. NOTE: I used 1½ Tablespoons of milk to get it to the consistency I wanted, but if you want the glaze to be thicker, only use 1 Tablespoon milk.
Icing The Doughnuts
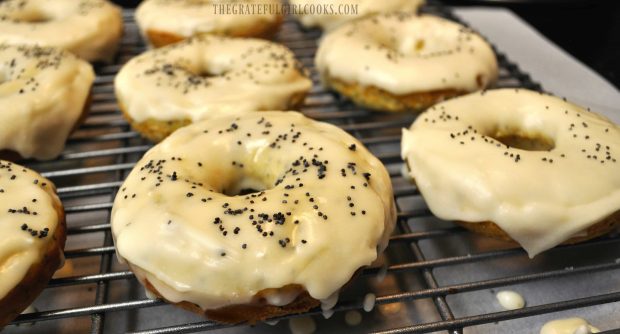
Once the doughnuts have cooled down, frost them with the lemon glaze by picking up a doughnut and dipping the top side into the glaze to coat. Flip it over and put the iced lemon poppy seed doughnuts back onto the wire rack.
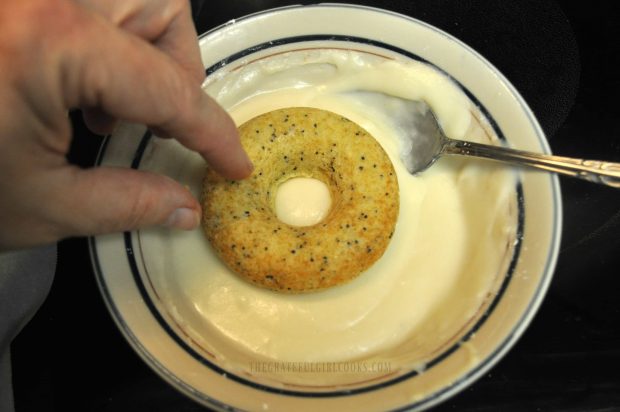
Once all the doughnuts have been iced, sprinkle with a few poppy seeds, if desired. Repeat until all doughnuts have been glazed. Once the “icing” has firmed up, the lemon poppy seed doughnuts are ready to serve.
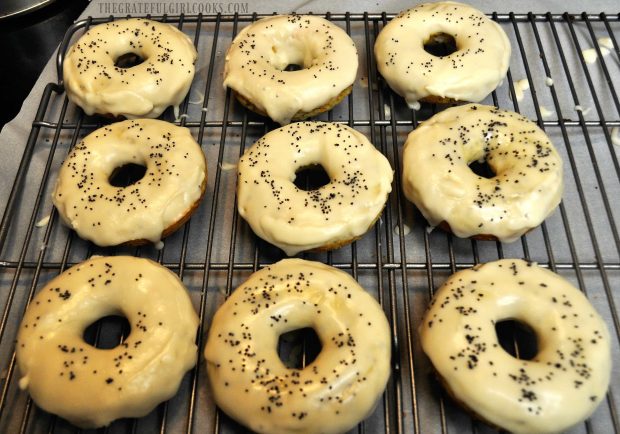
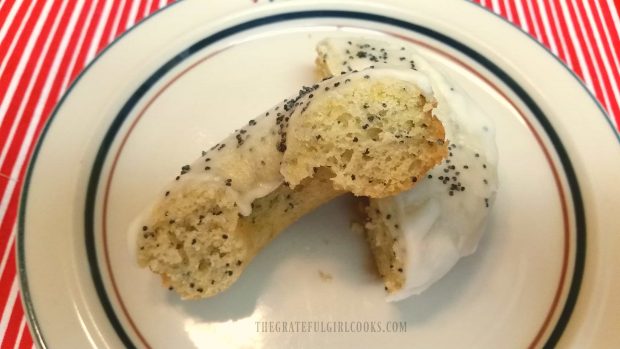
Lemon poppy seed doughnuts are best eaten on the same day they are made, BUT you can store them for a couple days at room temp, if covered well.
Can You FREEZE Lemon Poppy Seed Doughnuts?
YES. The doughnuts can be frozen for a month or two, if wrapped and sealed well. I made these doughnuts a couple weeks ago before our complete kitchen remodel begins. We won’t have an oven for 6-8 weeks, so I froze several doughnuts for later. I’m looking forward to having them conveniently stashed in our freezer to pull out for a quick breakfast treat!
There you have it… Baked Lemon Poppy Seed Doughnuts! A big thank you goes out to Sally at Sally’s Baking Addiction for her lovely recipe! Sure hope you will give these yummy lemon infused doughnuts a try.
Looking For More DOUGHNUT Recipes?
You can find all my recipes in the Recipe Index, located at the top of the page. A few doughnut recipes you might enjoy include:
Interested In More Recipes?
Thank you for visiting this website. I appreciate you using some of your valuable time to do so. If you’re interested, I publish a newsletter 2 times per month (1st and 15th) with all the latest recipes, and other fun info. I would be honored to have you join our growing list of subscribers, so you never miss a great recipe!
There is a Newsletter subscription box on the top right side (or bottom) of each blog post, depending on the device you use, where you can easily submit your e-mail address (only) to be included in my mailing list.
You Can Also Find Me On Social Media:
Facebook page: The Grateful Girl Cooks!
Pinterest: The Grateful Girl Cooks!
Instagram: jbatthegratefulgirlcooks

Recipe Source: https://sallysbakingaddiction.com/2016/09/02/glazed-lemon-poppy-seed-donuts/

- 1 cup all purpose flour
- 1 Tablespoon poppy seeds
- 1 teaspoon baking powder
- 1/2 teaspoon salt
- 1/4 teaspoon baking soda
- 2 Tablespoons butter , melted (and cooled a bit)
- 1 large egg
- 1/3 cup granulated sugar
- 1/4 cup sour cream
- 1/4 cup milk
- 1 teaspoon vanilla extract
- 1 Tablespoon lemon zest
- 1 Tablespoon fresh lemon juice
- 1 cup powdered sugar
- 2 Tablespoon butter , melted
- 1 Tablespoon fresh lemon juice
- 1-2 Tablespoons milk (depends on thickness of glaze you desire)
- 1/2 teaspoon vanilla extract
- Poppy seeds for garnish (completely optional)
Spray a doughnut pan with non-stick spray and set aside. Preheat oven to 350° F.
In a medium bowl, place flour, poppy seeds, baking powder, salt and baking soda. Whisk together, then set bowl aside. In separate bowl, combine butter, egg, granulated sugar, sour cream, milk, vanilla, lemon zest and juice. Whisk together until batter is smooth, Pour this wet mixture into bowl with dry ingredients. Stir until combined into a thick batter, but make sure not to over mix!
Carefully spoon (or pipe) batter into doughnut pan, filling each cup 2/3 to 3/4 of the way full. If you have a 6 cup pan, you may have to bake these in batches.
Bake doughnuts for approx. 10 minutes. Check them at 9 minutes. The edges should be slightly brown when done. When done, remove pan from oven, and let it sit for 2-3 minutes, then transfer doughnuts from pan to a wire rack that is on top of a piece of parchment paper (when you glaze the doughnuts later, any glaze that drips will land on parchment paper, which is better for easy clean up!). Repeat process with any leftover batter. Once done, let doughnuts cool before putting the glaze on them.
To make the lemon glaze, place powdered sugar, melted butter, lemon juice, milk and vanilla extract in a medium sized bowl. Mix together until you have a creamy glaze. I used 1½ Tablespoons of milk to get it to the consistency I wanted, but if you want the glaze to be thicker, only use 1 Tablespoon milk.
Once doughnuts have cooled, frost with lemon glaze by picking up a doughnut and dipping the top side into the glaze to coat. Flip it over and put the doughnut back on wire rack. Sprinkle with a few poppy seeds, if desired. Repeat until all doughnuts are glazed. Once the "icing" has firmed, doughnuts are ready to serve.
Here’s one more to pin on your Pinterest boards!! They are a wonderful breakfast treat! / The Grateful Girl Cooks!")