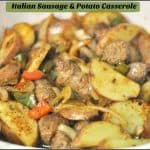
Category: Main Dishes

Florentine Manicotti

Florentine manicotti, filled with ricotta, Parmesan and mozzarella cheeses, and covered with marinara sauce is a meatless, easy to make Italian dish.Florentine manicotti, filled with ricotta, Parmesan and mozzarella cheeses, and covered with marinara sauce is a meatless, easy to make Italian dish.

My husband and I love Italian food! One of the dishes we enjoy occasionally is this “meatless” recipe for Florentine Manicotti. Pasta shells filled with three cheeses (creamy ricotta, mozzarella and Parmesan), spinach, and covered in spaghetti sauce. Yum. I like to think of manicotti as the Italian version of Mexican enchiladas!

For anyone unfamiliar with manicotti, it is a large, tube shaped type of pasta that is typically filled with meat or cheese and is baked in spaghetti sauce. This particular recipe is meatless; it’s delicious, and is a fairly easy dish to prepare. I use a recipe I found years ago on a box of pasta, and tweaked it a bit by adding cooked spinach and a couple additional spices to the cheesy filling, to give it a true “Florentine” touch!

Scroll Down For A Printable Recipe Card At The bottom Of The Page

Make The Filling For Florentine Manicotti

Cook a small box of frozen spinach, according to the package directions. Drain it very well, and let the spinach cool. When it has cooled off, mix up the cheese filling, and then add the spinach.

Preparing the filling for the florentine manicotti.

Prepare The Manicotti For Filling

Here’s what manicotti pasta shells look like BEFORE they are cooked. They’re each about 5 inches long. The tubes of pasta are fragile, so be very careful not to break them.

Manicotti pasta shells BEFORE cooking. Carefully add the pasta to a large pot of boiling, salted water, and cook it for 7 minutes.

The pasta shells are cooked for 7 minutes in boiling, salted water.Once done cooking, carefully remove the manicotti shells to a colander and drain them well.

After cooking, the manicotti pasta shells are drained in a colander.

Before you begin filling the Florentine manicotti put a layer of spaghetti sauce on the bottom of a baking pan.

Marinara sauce is spread on the bottom of casserole dish before adding stuffed manicotti.

Make The Florentine Manicotti

Gently fill each of the pasta tubes with the cheese and spinach filling. I hold the shell in my hand and fill one side with the cheese/spinach filling (using a spoon and sometimes a butter knife) clear to the middle. Switch to the other end of the shell and fill the other side. Try to get as much filling into the shell as possible without splitting it.

Stuffing the florentine manicotti shells before baking.Once the Florentine manicotti shells are filled, lay them on top of the spaghetti sauce.

Stuffed florentine manicotti are laid on top of sauce in baking dish.Cover the manicotti with the rest of the spaghetti sauce. I cover the entire pasta shell with sauce, then sprinkle the top with Parmesan cheese (or grated mozzarella cheese).

The manicotti are covered with sauce and Parmesan cheese, to bake.

Time To Bake!

Cover the baking pan with aluminum foil. Bake at 350 degrees for 40 minutes, then remove the foil and bake an additional 15 minutes longer. when done, the Florentine manicotti is heated through, and the cheese filling is bubbly.

Let cool for a minute or two (easier to serve up) , then remove the manicotti to serving plates using a spatula. The only thing left to do is grab a fork, dig in, and enjoy this tasty dish!

Florentine manicotti are done baking and ready to eat!Hope you will give this recipe a try!  I may not have the most mouthwatering “professional” photos to share, but trust me. Florentine manicotti are delicious, and I really think you will enjoy them! Have a great day, and please come back soon.

Looking for More ITALIAN Recipes?

You can find all of my recipes in the Recipe Index, located at the top of the page. I have lots of delicious Italian dishes you might want to check out, including:

Interested In More Recipes?

Thank you for visiting this website. I appreciate you using some of your valuable time to do soIf you’re interested, I publish a newsletter 2 times per month (1st and 15th) with all the latest recipes, and other fun info. I would be honored to have you join our growing list of subscribers, so you never miss a great recipe!
There is a Newsletter subscription box on the top right side (or bottom) of each blog post, depending on the device you use, where you can easily submit your e-mail address (only) to be included in my mailing list.

You Can Also Find Me On Social Media:

Facebook page: The Grateful Girl Cooks!
Pinterest:
The Grateful Girl Cooks!
Instagram:
jbatthegratefulgirlcooks

Author's signatureRecipe adapted from: Box of American Beauty Manicotti Pasta Shells.

0 from 0 votes
Florentine Manicotti
Prep Time
25 mins
Cook Time
1 hr
Total Time
1 hr 25 mins
 
Florentine manicotti, filled with ricotta, Parmesan and mozzarella cheeses, and covered with marinara sauce is a meatless, easy to make Italian dish.
Category: Entree
Cuisine: Italian
Keyword: florentine manicotti
Servings: 6 servings
Calories Per Serving: 332 kcal
Author: JB @ The Grateful Girl Cooks!
Ingredients
  • 6-8 uncooked manicotti pasta shells
  • 15 ounces part-skim ricotta cheese (1 3/4 cups)
  • 2 cups (8 ounces) grated mozzarella cheese
  • 10 ounces frozen chopped spinach (cooked per package directions, and drained well)
  • 1/4 cup grated Parmesan cheese
  • 2 Tablespoons fresh parsley , chopped
  • 1/2 teaspoon salt
  • 1/4 teaspoon ground black pepper
  • 1/8 teaspoon garlic powder
  • 1/8 teaspoon ground oregano
  • 3 cups (or one 28 ounce jar) prepared spaghetti sauce
  • Additional Parmesan or mozzarella cheese (for garnish, optional)
Instructions
  1. Preheat oven to 350 degrees F.
  2. Cook frozen chopped spinach per package instructions. Remove from heat; drain WELL. Let spinach cool.
  3. In a medium sized mixing bowl, combine the ricotta cheese, grated mozzarella, Parmesan cheese, parsley, salt, pepper, garlic powder and ground oregano. Stir well until fully combined.
  4. Add spinach to the cheese mixture. Stir well, to combine.
  5. Cook manicotti shells according to package instructions (add to boiling water-7 minutes cook time is typical). When done, remove from heat, drain gently, and let dry.
  6. Fill each shell using a spoon until full of filling.
  7. Spread some of the spaghetti sauce over the bottom of 13x9 baking pan (enough to fully cover); put the filled pasta in a single layer on top of sauce.
  8. Spoon the rest of the spaghetti sauce over the top of the manicotti. Sprinkle with additional grated Parmesan cheese (or mozzarella), if desired. Cover pan with aluminum foil.
  9. Bake at 350 degrees for 40 minutes; remove foil, then cook an additional 15 minutes. Manicotti should be hot and cheese bubbly when done. Remove pan from oven. Let sit for a minute or two, then gently remove manicotti to individual serving plates using a spatula.
  10. Serve with a green salad and a slice of crusty french bread, and enjoy!
Nutrition Facts
Florentine Manicotti
Amount Per Serving (1 manicotti)
Calories 332 Calories from Fat 135
% Daily Value*
Fat 15g23%
Saturated Fat 8g50%
Cholesterol 45mg15%
Sodium 1270mg55%
Potassium 736mg21%
Carbohydrates 25g8%
Fiber 3g13%
Sugar 6g7%
Protein 24g48%
Vitamin A 6720IU134%
Vitamin C 13mg16%
Calcium 596mg60%
Iron 2.9mg16%
* Percent Daily Values are based on a 2000 calorie diet.

Here’s one more to pin on your Pinterest boards!Florentine manicotti, filled with ricotta, Parmesan and mozzarella cheeses, and covered with marinara sauce is a meatless, easy to make Italian dish.

Save

Save

Save

Make Grilled Pizzas On Your BBQ!

Learn how easy it is to make grilled pizzas on your BBQ grill, which helps keep your kitchen cool in the Summer!Learn how easy it is to make grilled pizzas on your BBQ grill, which helps keep your kitchen cool this Summer!
Want to beat the heat in the kitchen this summer? Why not make grilled pizzas on your BBQ grill? That way you can kill two birds with one stone… keep the ol’ kitchen cool, AND enjoy a great homemade pizza!

I heard someone say they loved grilled pizzas right off the BBQ grill. Wait… What? It sounded like a great cooking experiment so I decided to give it a try. Result? Completely awesome!  It’s really much easier than I thought it would be! Get your hands on some pizza dough. Purchase it at the grocery store or make your own.

Scroll Down For A Printable Recipe Card At The Bottom Of The Page

Make Or Purchase Pizza Dough

I like to make my own grilled pizza dough. If you want to see the recipe for the dough I use, you can find it on my blog post for “Make It Yourself! Pepperoni Pizza”. The most important tip about this way of making pizza is to have all the pizza toppings ready to go (chopped, diced, etc.) before you put the dough on the grill!

Make the pizza dough (or open the package of pre-made dough – whatever). When done, divide dough into 6-8 little balls (if wanting small individual sized pizzas) OR (as in my pictures), divide dough into 2 medium sized dough balls. Roll or stretch dough out into a round shape (don’t worry if they’re not perfectly round shaped… no biggie).

Pizza dough rising for grilled pizzas

Time To Make Grilled Pizzas On Your BBQ!

Heat your BBQ grill on medium high heat. Brush olive oil (important-don’t forget this step – this will keep dough from sticking to grill, and will crisp the dough up a bit!!!) on both sides of the circle-shaped pizza dough. Carefully slide the pizza dough onto the grill rack.

Cook dough for 3-4 minutes on the first side. The bottom should be lightly browned and have grill marks. The top of the dough will look done. Carefully remove dough and turn it upside down (*GRILLED SIDE UP) onto a cutting board.

Quickly add the sauce and toppings to your pizza. If you’re feeling brave, just flip the pizza over and add the sauce and toppings while it is on the grill. (that was too hot for me…I just had a wood cutting board outside and transferred it back and forth. Worked like a charm.

Pizza dough is removed from BBQ and toppings are added, then back onto BBQ grill
Carefully slide pizzas back onto grill and continue to cook for 3-4 minutes. We put the lid on the BBQ, which helped the cheese melt. The bottom of the dough should be lightly browned.

Grilled pizzas made on the BBQ are ready to slice and eat!

Remove pizzas from grill, slice and serve, with any last minute garnishes. Serve immediately… enjoy!

Grilled pizza sliced and served... straight off the BBQ grill!
We loved the taste of the grilled pizzas… and I personally loved the fact that our kitchen stayed cool! We loved our grilled BBQ chicken pizza, and our veggie delight pizza, and look forward to making this easy dinner again this summer. It sure helps to keep our kitchen cool!

I am not posting a printable recipe because everyone likes different kinds of pizza, toppings, sauces, AND pizza dough. I simply wanted to describe the “how-to’s” of grilling fresh pizzas on a BBQ so anyone could do it themselves! Hope you will give it a try!

Looking for More PIZZA Recipes?

You can find ALL my recipes in the Recipe Index, located at the top of the page. I have a variety of pizza recipes, which include:

Interested In More Recipes?

Thank you for visiting this website. I appreciate you using some of your valuable time to do soIf you’re interested, I publish a newsletter 2 times per month (1st and 15th) with all the latest recipes, and other fun info. I would be honored to have you join our growing list of subscribers, so you never miss a great recipe! 

There is a Newsletter subscription box on the top right side (or bottom) of each blog post, depending on the device you use, where you can easily submit your e-mail address (only) to be included in my mailing list.

You Can Also Find Me On Social Media:

Facebook page: The Grateful Girl Cooks!
Pinterest:
The Grateful Girl Cooks!
Instagram:
jbatthegratefulgirlcooks

Have a great day.

Author's signature

Here’s one more to pin on your Pinterest boards!Learn how easy it is to make grilled pizzas on your BBQ grill, which helps keep your kitchen cool this Summer!

Save

Save

Quick and Easy Open Faced Tuna Melts

It’s been unusually HOT in the Pacific Northwest for the past several weeks. Temps are supposed to hover near 100 degrees this coming weekend, which is “not the norm” for late June in Oregon. We want quick  and easy meals (don’t want to heat up the kitchen cooking). Enter our “go-to” standby… Quick and Easy Open Faced Tuna Melts!!!!Quick and Easy Open Faced Tuna Melts / The Grateful Girl Cooks!
These open faced tuna melts are ridiculously easy… so easy in fact, that I’m not even gonna post the “recipe”. They actually are delicious, and are very quick to prepare!

First you toast some English muffins. I used sourdough (delicious!). Allow for one half or two halves per serving. Once toasted, place some cheese (gruyere, smoky gouda, or cheddar) on top of the muffin. (I have used all of these cheeses in the past. Pictures are with Smoky Gouda.

Quick and Easy Open Faced Tuna Melts / The Grateful Girl Cooks!
Put some tuna on top to cover the muffin. (Use the tuna you prefer, mixed up with whatever you like in your tuna salad). All I used for mine was one can (one can is enough for 4 half muffins) of albacore tuna, mixed with mayonnaise. That’s it!  But for goodness sake, make your tuna the way you like it!

Quick and Easy Open Faced Tuna Melts / The Grateful Girl Cooks!
Slice some really good ripe tomatoes and put a slice on top of each muffin. Sprinkle with a pinch of salt, pepper, dried parsley and dried basil. Just a touch.

Quick and Easy Open Faced Tuna Melts / The Grateful Girl Cooks!
Put the english muffins on a wire rack and place under a broiler. DO NOT put them directly under the broiler. Put them on the middle rack of your oven.

It will take a few minutes to broil them, but by putting them on the middle rack, instead of directly under the broiler, all the ingredients will have a chance to get hot, and that cheese on the bottom will melt.

Remove from broiler when cheese is bubbly and the tuna has just started to lightly turn golden.

Quick and Easy Open Faced Tuna Melts / The Grateful Girl Cooks!
Remove tuna melts from wire rack with a spatula. Place on serving plates. I like to put some red leaf lettuce leaves under the tuna melts just for some added color, to make it look good, but that is totally optional.

You can either pick them up and eat them or cut them with knife and fork… whatever suits you! They’re really delicious! Sure hope you’ll give ’em a try. Good for a quick, filling lunch, or dinner on a really HOT evening! Been making these for years and years, and have never been disappointed!

Quick and Easy Open Faced Tuna Melts / The Grateful Girl Cooks!Have a wonderful week… may you feel gratitude for all you experience this week, and above all else…may you deeply know just how much God loves you!

Interested In More Recipes?

Thank you for visiting this website. I appreciate you using some of your valuable time to do so.  If you’re interested, I publish a newsletter 2 times per month (1st and 15th) with all the latest recipes, and other fun info. I would be honored to have you join our growing list of subscribers, so you never miss a great recipe!

There is a Newsletter subscription box on the top right side (or bottom) of each blog post, depending on the device you use, where you can easily submit your e-mail address (only) to be included in my mailing list.

You Can Also Find Me On Social Media:
Facebook page: The Grateful Girl Cooks!
Pinterest: The Grateful Girl Cooks!
Instagram: jbatthegratefulgirlcooks

Quick and Easy Open Faced Tuna Melts / The Grateful Girl Cooks!


Here’s one more to pin on your Pinterest boards!Quick and Easy Open Faced Tuna Melts / The Grateful Girl Cooks!

Save

Save

Chicken Salad

This easy to prepare, delicious chicken salad, with cranberries, celery and pecans can be eaten as is, or served in pita bread or rolls for a great sandwich.This easy to prepare, delicious chicken salad, with cranberries, celery and pecans can be eaten as is, or served in pita bread or rolls for a great sandwich.
We’ve had lots of sunshine and hot weather the past several weeks in the Pacific Northwest. A few nights ago I decided to make my old standby recipe for Chicken Salad, serve it with some fresh pineapple, strawberries, and cantaloupe, and have dinner out on our back deck.

This was a perfect entree salad on a hot night! I was even able to use some of the red leaf lettuce from our garden to serve the salad on- whoo-hoo!  I’ve been making chicken salad this way for over 25 years. I’ve never had a recipe that I’ve used, so I had to be deliberate about writing it down this time, so I could post the right quantities for this blog post.

We really enjoy the salad, with chunks of chicken breast, crisp celery, the sweet chewy raisins, dried cranberries, red onion and crunchy pecans! This salad is really easy to make, too! Quick and easy, it’s my idea of a perfect meal! Here’s how to make it:

Scroll Down For A Printable Recipe Card At The Bottom Of The Page

Cook The Chicken Breasts

The first thing you need to do is cook the chicken. Put frozen chicken breasts (yep-right out of the freezer) into a large pan. Cover them with water, bring water to a boil, then cook on high heat for about 45-50 minutes (until fully cooked). *Note: I use 4 chicken breasts, but this picture shows 5 because I was cooking an extra one for another recipe.

Cooking chicken breasts to make chicken salad
When the chicken has finished cooking, remove the chicken breasts from the water and let the pieces cool a little. Once the chicken has cooled enough to handle, cut the pieces into 1 inch cubes and set aside.

Preparing The Chicken Salad

While the chicken is cooking, chop the pecans, celery and red onion, and place them into a medium sized bowl, along with the raisins and dried cranberries.

Pecans, raisins, red onion and celery ready to add to chicken salad.
Place the chunks of cooked chicken breast into the bowl with the other ingredients.

Cooked chicken breast chunks added to salad ingredients in bowl.
Add the mayonnaise to the bowl, and then season the chicken salad with salt and pepper. Give it a good stir to mix it all together (making sure it is all coated). Give it a taste, then add more salt and pepper, if necessary to suit your taste preference.

Ingredients are mixed with condiments and seasoning to make chicken salad.

Serving The Chicken Salad

Cover the chicken salad with plastic wrap and refrigerate it for about 2-3 hours. We feel this salad is at it’s best served nice and cold, plus the flavors have had time to develop.  Once the salad has fully chilled, it’s ready to serve! By the way… it tastes GREAT on sandwiches, too. I love to stuff a pita full of this chicken salad!  Yum.

Chicken salad can be served in pita bread for sandwiches.
Delicious, stuffed with chicken salad!

My absolute favorite way to serve this is… just as it is!!!!! When ready to serve, I place red lettuce leaves onto a serving plate, then arrange the chicken salad on top, for a nice presentation.

Chicken salad, served on top of red leaf lettuce.
This chicken salad is a great quick bite for lunch OR for a light dinner! I sure hope you will try making this for yourself… it’s really delicious! Hope you have a wonderful day and enjoy each minute of life you are blessed with!

Looking For More Chicken Salad Recipes?

You can find all of my recipes in the Recipe Index, located at the top of the page. I have a few chicken salad recipes, including:

Interested In More Recipes?

Thank you for visiting this website. I appreciate you using some of your valuable time to do soIf you’re interested, I publish a newsletter 2 times per month (1st and 15th) with all the latest recipes, and other fun info. I would be honored to have you join our growing list of subscribers, so you never miss a great recipe!
There is a Newsletter subscription box on the top right side (or bottom) of each blog post, depending on the device you use, where you can easily submit your e-mail address (only) to be included in my mailing list.

You Can Also Find Me On Social Media:

Facebook page: The Grateful Girl Cooks!
Pinterest:
The Grateful Girl Cooks!
Instagram:
jbatthegratefulgirlcooks

Author's signature

0 from 0 votes
Chicken Salad
Prep Time
45 mins
Cook Time
0 mins
Total Time
45 mins
 
This easy to prepare, delicious chicken salad, with cranberries, celery and pecans can be eaten as is, or served in pita bread or rolls for a great sandwich.
Category: Entree Salad
Cuisine: American
Keyword: chicken salad
Servings: 8 small servings
Calories Per Serving: 467 kcal
Author: JB @ The Grateful Girl Cooks!
Ingredients
  • 4 boneless , skinless chicken breasts (frozen)
  • 1 1/2 cups diced celery (I use 3 stalks-slice each stalk in thirds lengthwise, then chop)
  • 1 cup chopped pecans (can also use walnuts)
  • 3/4 cup raisins
  • 1/4 cup dried cranberries
  • 1/2 cup diced red onion
  • 1 1/3 cups mayonnaise
  • salt and pepper , to taste (approx. 1/2 teaspoon salt, 1/4 teaspoon pepper-more, as needed)
  • Red leaf lettuce leaves (to serve salad on top of-this is optional, but it looks pretty!)
Instructions
  1. Place frozen chicken breasts into a large saucepan. Cover completely with water. Cook on HIGH for 45-50 minutes (until chicken is done). Remove from heat. Remove chicken to a cutting board and let cool.
  2. In a large salad bowl, place the celery, pecans, raisins, dried cranberries, and red onion.
  3. Once the chicken has cooled off (to the touch), cut it into 1 inch cubes. Add the chicken to the salad bowl.
  4. Add the mayonnaise, salt and pepper. Mix well to combine all ingredients.
  5. Taste salad. Add additional salt and pepper, to suit your taste. I usually have to add a bit more. When ready, cover salad with plastic wrap, and place in refrigerator to chill for 2-3 hours or more (the longer the flavors have time to come together, the better!)
  6. When ready to serve, place a few red leaf lettuce leaves onto serving plate. Arrange salad into a mound in the center of the lettuce. Serve, and enjoy!
  7. Keep leftovers covered and refrigerated. Will keep for several days!
Recipe Notes

Prep time includes time for cooking the chicken, but does not include refrigeration time.

Nutrition Facts
Chicken Salad
Amount Per Serving (1 serving)
Calories 467 Calories from Fat 351
% Daily Value*
Fat 39g60%
Saturated Fat 5g31%
Cholesterol 51mg17%
Sodium 321mg14%
Potassium 433mg12%
Carbohydrates 16g5%
Fiber 2g8%
Sugar 4g4%
Protein 14g28%
Vitamin A 210IU4%
Vitamin C 2.1mg3%
Calcium 27mg3%
Iron 1mg6%
* Percent Daily Values are based on a 2000 calorie diet.

Here’s one more to pin on your Pinterest boards!This easy to prepare, delicious chicken salad, with cranberries, celery and pecans can be eaten as is, or served in pita bread or rolls for a great sandwich.

Save

Save

Save

Save

Lentil Stew

Hearty, healthy and delicious, you will love this low calorie, thick homemade lentil stew for an easy and inexpensive lunch or dinner!Hearty, healthy and delicious, you will love this low calorie, thick homemade lentil stew for an easy and inexpensive lunch or dinner!
Well, this was a happy experiment. It was my first time cooking lentils! I guess I’m behind the times, but I kept hearing about how inexpensive, nutritious, and filling lentils were, so I started looking to see what goes into a good, thick Lentil Stew. Then I made my own version!

I must have looked at 25 different ways to make lentil soup or stew. I finally decided to just make my own version and add a variety of ingredients (like carrots, celery, thyme, dill, garlic, etc) I found on various recipes that sounded like they would be good additions.

The only HARD part about making this stew was I had to remember to write all the ingredients down as I made it, so I could actually remember what I did. Do you ever do that? Let’s just say that one hand was stirring the pot, one hand was writing it all down, and I suppose I might have used my FEET to take the pictures… somehow I got it done, and guess what? This hearty lentil stew is GOOD!

Scroll Down For a Printable Recipe Card At the Bottom Of The Page

Lentils Are A Healthy Protein-Filled Legume

On a side note… did you know that lentils (a legume) contain the 3rd highest protein of any legume? True. Lentils are inexpensive AND highly nutritious. That can be considered a win-win kind of main ingredient.

How To Make Delicious Lentil Stew

The first thing to do is cook the chopped onions for a few minutes in a bit of olive oil. The onions are cooked until they have softened.

Cooking onions in red pot for lentil stew
Once onions have softened, add the lentils. It’s important to rinse and drain the lentils in a colander BEFORE adding! Brown rice is then added to the soup pot, along with 5 cups water. Give the ingredients a good stir after adding the rice.

Lentils, water and brown rice added to stew
Add a large cube of chicken bouillon to the stew, crumbling it up, as you add. TIP FOR VEGETARIANS: If you want to make this a completely vegetarian stew, leave the chicken bouillon out or add vegetable bouillon.

I personally enjoy the flavor the chicken bouillon adds, but it certainly won’t hurt the lentil stew if you omit it.

Chicken bouillon used to flavor lentil stewTime To Cook the Lentil Stew

Add the chopped celery, carrots, flat leaf parsley, thyme, dill, salt, oregano, seasoning salt, and minced garlic to the pot. Bring the lentil stew to a boil, then reduce the heat. Cook the stew on a low simmer for about 45-50 minutes, stirring occasionally.

Chopped celery, carrots, and spices added to soup pot
After the stew has cooked for about 45 minutes, the rice and lentils will be softened. A lot of the broth will have absorbed. Now the mixture will look more like a thickened soup or stew. TIP: I served the lentil stew in it’s thickened form. If you want it to be more “soup-like” (more broth liquid), simply add a cup of water during the last 10 minutes of cook time.

Lentil Stew ready to serve!Ready to EAT!

To serve, divide the hot lentil stew into serving bowls. Garnish each bowl of soup with chopped parsley, if desired. Serve the soup with some crusty slices of bread, and you’ve got yourself a hearty meal!

Even without meat, the combination of lentils and brown rice combine to make sure all essential amino acids are provided to make a complete protein dish. The lentil stew leftovers are pretty amazing, also (just sayin’).

Lentil Stew in bowl, with garlic bread on side
This was an easy meal to make, and my husband and I enjoyed the leftovers for lunch over the course of several days. Sure hope you will give this delicious lentil stew a try… I think you will be surprised at just how good it is! Have a great day!

Looking For More SOUP OR STEW Recipes?

Interested In More Recipes?

Thank you for visiting this website. I appreciate you using some of your valuable time to do soIf you’re interested, I publish a newsletter 2 times per month (1st and 15th) with all the latest recipes, and other fun info. I would be honored to have you join our growing list of subscribers, so you never miss a great recipe! 

There is a Newsletter subscription box on the top right side (or bottom) of each blog post, depending on the device you use, where you can easily submit your e-mail address (only) to be included in my mailing list.

You Can Also Find Me On Social Media:

Facebook page: The Grateful Girl Cooks!
Pinterest:
The Grateful Girl Cooks!
Instagram:
jbatthegratefulgirlcooks

Author's signature

0 from 0 votes
Lentil Stew
Prep Time
10 mins
Cook Time
45 mins
Total Time
55 mins
 

Hearty, healthy and delicious, you will love this low calorie, thick homemade lentil stew for an easy and inexpensive lunch or dinner!

Category: Dinner, Main Dish, Soup
Cuisine: American
Keyword: lentil stew
Servings: 8 servings
Calories Per Serving: 151 kcal
Author: JB @ The Grateful Girl Cooks!
Ingredients
  • 1 Tablespoon olive oil
  • 1 medium brown onion , chopped
  • 5 cups water
  • 1 cup brown lentils (rinsed)
  • 1/3 cup brown rice (uncooked)
  • 1 large chicken bouillon cube (can omit if making this vegetarian)
  • 2 cups chopped carrots
  • 2 celery stalks , chopped small
  • 1/4 teaspoon dried thyme
  • 1 1/4 teaspoons salt
  • 1/4 teaspoon dried oregano
  • 1 Tablespoon chopped flat leaf parsley
  • 1/4 teaspoon dried dill
  • 1/4 teaspoon seasoning salt
  • 1 teaspoon minced garlic
  • Dried parsley (OPTIONAL-to sprinkle on stew as a garnish before serving)
Instructions
  1. In a large soup pot, cook the chopped onion in olive oil until onions have softened (3-4 minutes).
  2. Add 5 cups water, rinsed lentils, brown rice, and crumbled chicken bouillon cube.
  3. Add the rest of the ingredients.
  4. Bring soup mixture to a full boil, then reduce the heat to a low simmer.
  5. Continue to cook the stew for 45-50 minutes (covered) on low, stirring occasionally. Uncover the stew the last 10 minutes of cooking time.(*If you want the stew to have more broth, simply add in another cup of water during the last 10 minutes of cooking time).
  6. Taste. Season with additional salt/pepper, if desired.
  7. Ladle the hot stew into serving bowls. Sprinkle with dried parsley (optional).
  8. Serve with some good crusty bread, and ENJOY!
Nutrition Facts
Lentil Stew
Amount Per Serving (1 serving)
Calories 151 Calories from Fat 18
% Daily Value*
Fat 2g3%
Sodium 588mg26%
Potassium 398mg11%
Carbohydrates 25g8%
Fiber 8g33%
Sugar 2g2%
Protein 7g14%
Vitamin A 5440IU109%
Vitamin C 5mg6%
Calcium 34mg3%
Iron 2.2mg12%
* Percent Daily Values are based on a 2000 calorie diet.

Here’s one more to pin on your Pinterest boards!Hearty, healthy and delicious, you will love this low calorie, thick homemade lentil stew for an easy and inexpensive lunch or dinner!


Save

Save

Pork Paprikash

Pork Paprikash is a classic Hungarian pork dish in a flavorful sauce, served over bow-tie pasta or egg noodles, and on the dinner table in under half an hour!Pork Paprikash is a classic Hungarian pork dish in a flavorful sauce, served over bow-tie pasta or egg noodles, and on the dinner table in under half an hour!

I recently tried a recipe for Pork Paprikash that I found on Pinterest. I’d never made the dish before, but was looking for a traditional dish that uses Hungarian sweet paprika (which I received as a gift from a friend).

My husband and I LOVED this meal of pork paprikash with it’s amazing flavors. I just gotta say, I was practically GIDDY with excitement over how quick and easy it was to prepare!

Scroll Down For A Printable Recipe Card At The Bottom Of The Page

Where Does Pork Paprikash Get Its Name?

The dish gets its name from the generous use of paprika (in Hungarian it is “paprikás”). It can be prepared with either chicken or pork. I prepared it using boneless pork, cut into bite-sized cubes.

It is typically served with egg noodles, but I used bow-tie pasta this time, because it is what I had in the pantry. This is such a quick meal to prepare… it only took about 25 minutes, from start to finish! The Hungarian paprika can be found in most spice sections at the grocery store (FYI).

How To Make Pork Paprikash

Tip: Bring a pot of salted water to a boil, so that you can cook the pasta noodles while you are preparing the pork paprikash. Once the pork is done, serve it on top of the cooked noodles.

Cut the boneless pork into bite sized pieces. Season it lightly with salt and pepper.

Boneless pork seasoned with salt and pepper is used to make pork paprikash.
Heat olive oil in a large skillet. Add the pieces of pork, and cook for about 4 minutes, turning to brown all sides.

Pork cubes for pork paprikash, cooking in oil in silver skilletPork cubes browning in skillet, to be used in pork paprikash.
Once the pork is browned on all sides, remove pork from the skillet. Set aside. Add more olive oil to skillet, and reduce heat to medium. Sauté the chopped onions, garlic, salt and pepper until onions are softened (about 3-4 minutes).

Onions and garlic used in pork paprikash sauce, cooking in skillet.
Make The Sauce

Measure out the flour, tomato paste, thyme, and paprika to the skillet. Stir the ingredients together, and cook for one more minute.

Spices and tomato paste added to cooked onions in skillet to make pork paprikash sauce.
Add the chicken stock into the skillet. Whisk to combine it fully with the other sauce ingredients. Add the vinegar, and bring the sauce to a boil.

Chicken stock added to pork paprikash sauce in skillet
Return the Pork To the Skillet

Transfer the cooked pork back into the skillet, and stir to combine. Reduce the heat under the skillet, and simmer the pork paprikash for 5 minutes.

The pork paprikash, simmering in skillet.
By now the pork paprikash is looking and smelling really good. After cooking the pork and sauce for 5 minutes, remove the pan from the heat. Stir in the sour cream. Mix well, to combine. This yummy pork paprikash is just about ready to serve!

Sour cream is added to pork paprikash in skillet.
Time To Serve the Pork Paprikash

By now your pasta noodles should be done cooking. Drain them and place onto serving platter or individual plates. Spoon the pork paprikash over the pasta. You can garnish the dish with some chopped fresh or dried parsley, if desired. Serve this dish nice and hot, and enjoy!

Pork paprikash and noodles on a plate with peas.
Sure hope you will give this delicious pork paprikash dinner a try! We had it with a side of peas, fresh from our garden on the side (the first picking of the Spring!). This easy, flavor-filled pork paprikash was a delicious meal, and we’ll be having it again!

Looking For More PORK Recipes?

If you’re looking for other pork recipes, be sure to check out all of mine in the Recipe Index at the top of the page. These recipes include:

Interested In More Recipes?

Thank you for visiting this website. I appreciate you using some of your valuable time to do soIf you’re interested, I publish a newsletter 2 times per month (1st and 15th) with all the latest recipes, and other fun info. I would be honored to have you join our growing list of subscribers, so you never miss a great recipe! 

There is a Newsletter subscription box on the top right side (or bottom) of each blog post, depending on the device you use, where you can easily submit your e-mail address (only) to be included in my mailing list.

You Can Also Find Me On Social Media:

Facebook page: The Grateful Girl Cooks!
Pinterest:
The Grateful Girl Cooks!
Instagram:
jbatthegratefulgirlcooks

Author's signatureRecipe Source: http://dinnersdishesanddesserts.com/pork-tenderloin-paprikash/

0 from 0 votes
Pork Paprikash
Prep Time
10 mins
Cook Time
15 mins
Total Time
25 mins
 
Pork Paprikash is a classic Hungarian pork dish in a flavorful sauce, served over bow-tie pasta or egg noodles, and on the dinner table in under half an hour!
Category: Entree
Cuisine: Hungarian
Keyword: pork paprikash
Servings: 4 servings
Calories Per Serving: 357 kcal
Author: JB @ The Grateful Girl Cooks!
Ingredients
  • 1 lb. pork tenderloin (or boneless pork chops), cut into 1 inch cubes
  • 1/2 teaspoon salt
  • 1/2 teaspoon finely ground black pepper
  • 2 teaspoons olive oil (for cooking meat)
  • 1 Tablespoon olive oil (for cooking onions, etc.)
  • 1 1/2 cups chopped brown onions
  • 2 teaspoons minced garlic
  • 2 Tablespoons all purpose flour
  • 2 Tablespoons tomato paste
  • 1/2 teaspoon dried thyme
  • 1 teaspoon Hungarian sweet paprika (found in most spice sections at grocery store)
  • 1 1/2 cups chicken stock
  • 1 Tablespoon apple cider vinegar
  • 3 Tablespoons sour cream
  • Egg noodles (or bow tie pasta) -prepare per pkg. instructions while pork is cooking!
Instructions
  1. Cut the pork into cubes. Season with salt and pepper.
  2. Heat 2 teaspoons olive oil in large skillet. When skillet and oil are hot, add the pork pieces; cook the pork for about 4 minutes, turning to brown the meat on all sides. When browned, remove the pork from skillet. Set aside.
  3. Turn the heat down to medium. Add 1 Tablespoon olive oil back into the skillet. Add the chopped onions, garlic, salt and pepper. Stir and cook for 3 minutes, or until onions have softened up, then add minced garlic and cook for one more minute, stirring constantly.
  4. Add flour, tomato paste, dried thyme, and paprika to onion mixture. Stir together; cook for one minute.
  5. Pour in the chicken stock; use a whisk to mix the ingredients into a sauce. Add the apple cider vinegar; bring the mixture to a boil.
  6. Once sauce begins to boil, reduce the heat to low, and add the pork cubes back into the sauce. Stir to coat the pork with sauce. Simmer for 5 minutes.
  7. Remove skillet from heat. Stir in sour cream. Mix sauce well to fully incorporate sour cream.
  8. Place cooked and drained egg noodles (or bow tie pasta) onto serving platter or individual plates. Spoon the pork and sauce over the pasta. Serve while hot... and enjoy!
Nutrition Facts
Pork Paprikash
Amount Per Serving (1 g)
Calories 357 Calories from Fat 117
% Daily Value*
Fat 13g20%
Saturated Fat 3g19%
Cholesterol 97mg32%
Sodium 556mg24%
Potassium 779mg22%
Carbohydrates 28g9%
Fiber 2g8%
Sugar 5g6%
Protein 30g60%
Vitamin A 425IU9%
Vitamin C 6.7mg8%
Calcium 45mg5%
Iron 2.4mg13%
* Percent Daily Values are based on a 2000 calorie diet.

Here’s one more to pin on your Pinterest boards!

Pork Paprikash is a classic Hungarian pork dish in a flavorful sauce, served over bow-tie pasta or egg noodles, and on the dinner table in under half an hour!


Save

Save

Bacon-Wrapped Grilled Hot Dogs

Make your BBQ dinner go from ordinary to special with these yummy, easy bacon-wrapped grilled hot dogs! Remember, everything’s better with bacon!Make your BBQ dinner go from ordinary to special with these yummy, easy bacon-wrapped grilled hot dogs! Remember, everything's better with bacon!
Last night we grilled hamburgers for dinner. Right before we put the burgers on the grill, I decided to also throw on a few hot dogs, but hot dogs with a slight twist!

Oh my goodness… I took one taste of a bacon-wrapped grilled hot dog and knew it was a good decision to cook them this way! Bacon makes everything better… it even “classed up” an ordinary hot dog!

The smoky bacon flavor really adds to the grilled hot dog flavor. My husband raved about them! They were so very simple to make… here’s what I did, using 4 hot dogs and 4 pieces of bacon. Adjust the quantity to however many hot dogs you will be making.

How To Make Bacon-Wrapped Grilled Hot Dogs

Fasten one end of the bacon into the end of a hot dog with a toothpick like this (shown below).

Wrapping a hot dog weiner with raw bacon
Tightly roll bacon around hot dog, covering the hot dog as much as possible.

Wrapping hot dog weiner with tightly wound raw bacon strip
Attach the bacon to the hot dog using another toothpick. Repeat for each hot dog.

Four all beef weiners wrapped with bacon strip and secured with toothpicks
Cook the hot dogs on a really HOT side of the grill.

Four hot dogs wrapped in bacon cooking over hot coals.
How Long Do They Take To Cook?

Turn the hot dogs every couple of minutes (and spread ’em out a bit), to ensure that ALL the bacon has cooked. It will take about 25 minutes to cook the bacon completely through.

Four hot dogs grilled with bacon wrap.
When done, remove from heat, and serve. Put them in a hot dog bun, or just eat them as they are, fresh off the grill. They taste wonderful!

Four bacon-wrapped grilled hot dogs on plate, ready to eat.
That’s it! See how easy that was? My only tip is… REMEMBER TO REMOVE THE TOOTHPICKS FROM THE HOT DOGS BEFORE SERVING!  Nobody wants to eat a big ol’ toothpick, right?

Hope you enjoy these. They would be good on toasted hot dog buns, but my husband just cut one up with a knife and fork and ate it that way, and said it was DELICIOUS, without the bun. I guess bacon really does make everything tastes better… even hot dogs!

If you enjoy hot dogs, be sure to check out my recipe for yummy coney dogs! They’re absolutely delicious and are another simple meal to prepare! Thanks so much for stopping by, and I invite you to come back soon for more family-friendly recipes. Take care, and have a great day!

Interested In More Recipes?

Thank you for visiting this website. I appreciate you using some of your valuable time to do soIf you’re interested, I publish a newsletter 2 times per month (1st and 15th) with all the latest recipes, and other fun info. I would be honored to have you join our growing list of subscribers, so you never miss a great recipe!
There is a Newsletter subscription box on the top right side (or bottom) of each blog post, depending on the device you use, where you can easily submit your e-mail address (only) to be included in my mailing list.

You Can Also Find Me On Social Media:

Facebook page: The Grateful Girl Cooks!
Pinterest:
The Grateful Girl Cooks!
Instagram:
jbatthegratefulgirlcooks

Author's signature

Here’s one more to pin on your Pinterest boards!Make your BBQ dinner go from ordinary to special with these yummy, easy bacon-wrapped grilled hot dogs! Remember, everything's better with bacon!

Save

Save

Hawaiian “Huli Huli” Chicken

Hawaiian Huli Huli Chicken is absolutely delicious and SO EASY to make! Chicken is marinated in a simple Polynesian inspired sauce, then grilled on a BBQ. Hawaiian Huli Huli Chicken is absolutely delicious and SO EASY to make! Chicken is marinated in a simple Polynesian inspired sauce, then grilled on a BBQ.

The last thing I wanted to do, or had time for this week, was blogging, OR cooking anything that required using my brain and a lot of energy!  BUT… I tried this EASY recipe for Hawaiian “Huli Huli” Chicken (a Pinterest find) for dinner, and I’m sure glad I did! It was FANTASTIC!

Man oh man, it’s been crazy! My husband is working LONG hours and is also recovering from a back injury, so I spent a good part of the week tackling BIG home projects. My first project was pressure washing our brick patio and wood deck. UGH. Then I worked my tail off rolling 2 coats of paint onto our back (big) deck! DOUBLE UGH.

I needed something EASY to make at night for our dinner that didn’t require a lot of WORK. That’s where this delicious Hawaiian Huli Huli Chicken came in to the picture.

Scroll Down For A Printable Recipe Card At The Bottom Of The Page

What Does “Huli Huli” Mean?

Huli Huli is a very popular marinade or sauce in Hawaii. It is both slightly sweet and slightly savory! The words “huli huli” mean “to turn” in Hawaiian, referring to the turning of pork or chicken on the BBQ grill as it cooks.

It’s SO EASY To Make Hawaiian Huli Huli Chicken

The marinade for the Hawaiian Huli Huli chicken only takes 5-10 minutes to make!  Whisk the ingredients together, and it’s DONE! The only other prep step needed is to pour half of the marinade over some boneless, skinless chicken breasts and thighs. Once the chicken is covered with the marinade, it sits and bathes in it overnight (minimum of 4 hours for best flavor) in the fridge.

The other half of the marinade is refrigerated to baste the chicken with, as it grills. If you marinade the chicken ahead of time, this Hawaiian Huli Huli Chicken really is one quick dinner to make on a crazy, busy day!

Ingredients for Hawaiian Huli Huli Chicken marinade are placed in small bowl.Hawaiian Huli Huli Chicken marinade is whisked to blend ingredients in bowl.
Time To Cook The Hawaiian Huli Huli Chicken

When you’re ready to cook the chicken, remove the chicken from the refrigerator.  I try to take it out of the fridge about half an hour before we cook it, to take the chill off. The marinade that the raw chicken has soaked in can be discarded so there is no cross contamination (nobody wants that bacteria in their meal).

My husband grilled the Hawaiian Huli Huli Chicken on our trusty Weber grill. He made sure to occasionally baste the chicken with the reserved “fresh” marinade and turn it, while it cooked. When the chicken was finished cooking, he brought it into the house so we could gobble it up!

Hawaiian Huli Huli Chicken is grilled on our BBQ

That’s it! See how incredibly EASY Hawaiian Huli Huli Chicken is to make?  When the chicken is done, garnish the pieces with sliced green onions before serving. I served the chicken with a side of steamed white rice, and a crisp green salad, and it was delicious!!!

My husband and I both think it tastes fantastic!  The Hawaiian Huli Huli chicken has a great Polynesian/teriyaki flavor going on, with just a teensy bit of heat from the cayenne pepper!

Hawaiian Huli Huli Chicken, garnished with green onions, ready to eat!

Next time I make this dish, I will also grill some pineapple  to serve alongside it. Don’t you think think grilled pineapple would be a perfect side dish for the chicken? YUM.

Hawaiian Huli Huli Chicken on white platter, ready to eat!
We absolutely loved this easy to prepare dish! Hawaiian Huli Huli Chicken was a perfect main course to serve on a very hot night. All you have to do is plan a little bit ahead to marinate the chicken. Make the marinade for the chicken at the beginning of the day (or before you leave for work). Then when you’re ready for dinner, throw the marinated chicken on the ol’ BBQ grill and keep your kitchen cool!

Sure hope you will try this recipe for Hawaiian Huli Huli Chicken. The original recipe calls for using all boneless chicken thighs, but I preferred the combo of chicken thighs and breasts! Have a great day!

Looking For More GRILLED CHICKEN Recipes?

You can find all my recipes in the Recipe Index, located at the top of the page. I have quite a few delicious grilled chicken recipes, including:

Interested In More Recipes?

Thank you for visiting this website. I appreciate you using some of your valuable time to do soIf you’re interested, I publish a newsletter 2 times per month (1st and 15th) with all the latest recipes, and other fun info. I would be honored to have you join our growing list of subscribers, so you never miss a great recipe!
There is a Newsletter subscription box on the top right side (or bottom) of each blog post, depending on the device you use, where you can easily submit your e-mail address (only) to be included in my mailing list.

You Can Also Find Me On Social Media:

Facebook page: The Grateful Girl Cooks!
Pinterest:
The Grateful Girl Cooks!
Instagram:
jbatthegratefulgirlcooks

Author's signatureRecipe Adapted From: http://cookinginstilettos.com/huli-huli-chicken/

0 from 0 votes
Hawaiian "Huli Huli" Chicken
Prep Time
5 mins
Cook Time
20 mins
Total Time
25 mins
 
Hawaiian Huli Huli Chicken is absolutely delicious and SO EASY to make! Chicken is marinated in a simple Polynesian inspired sauce, then grilled on a BBQ.
Category: Entree
Cuisine: Hawaiian
Keyword: Hawaiian huli huli chicken
Servings: 4 servings
Calories Per Serving: 287 kcal
Author: JB @ The Grateful Girl Cooks!
Ingredients
For tThe Marinade:
  • 1/2 cup soy sauce
  • 1/2 cup ketchup
  • 1/2 cup brown sugar
  • 1/4 cup chicken broth
  • 1 1/4 teaspoons fresh minced ginger
  • 1 1/4 teaspoons minced garlic
  • 1/8 teaspoon cayenne pepper
For The Chicken:
  • 4-5 boneless skinless chicken thighs and/or breasts
  • Olive oil (use to oil the grill before adding chicken)
  • 1 stalk green onion , chopped (use the green part), for garnish
Instructions
  1. Whisk the marinade ingredients together in a large covered container, until fully combined. Set aside about half of the marinade in a separate container (cover and refrigerate the reserved marinade until ready to grill).

  2. Add the thawed chicken pieces to the large container; turn to coat in the sauce. Make sure container is covered. Refrigerate chicken overnight, or at least 4-6 hours.
  3. Prepare BBQ. Lightly oil the grill with the olive oil. When coals are hot and ready to go, add the chicken pieces. Discard the marinade that the raw chicken was in. 

  4. Grill the chicken until done (larger pieces of chicken will require longer cooking time). Use the reserved marinade (from step #1) to baste the chicken continually while it cooks. When chicken is fully cooked (approx. 20-25 minutes or so, depending on size), remove chicken from grill to a serving platter. Garnish chicken with sliced green onions. Serve and enjoy!

Recipe Notes

REMEMBER!!!! The PREP time as indicated, does NOT include the time to marinade the chicken! Prepare ahead, and this will go quick!

Caloric calculation was determined using boneless, skinless chicken breasts.

Nutrition Facts
Hawaiian "Huli Huli" Chicken
Amount Per Serving (1 breast)
Calories 287 Calories from Fat 27
% Daily Value*
Fat 3g5%
Cholesterol 72mg24%
Sodium 1527mg66%
Potassium 618mg18%
Carbohydrates 38g13%
Sugar 33g37%
Protein 26g52%
Vitamin A 245IU5%
Vitamin C 4.5mg5%
Calcium 39mg4%
Iron 1.4mg8%
* Percent Daily Values are based on a 2000 calorie diet.

Here’s one more to pin on your Pinterest boards!Hawaiian Huli Huli Chicken is absolutely delicious and SO EASY to make! Chicken is marinated in a simple Polynesian inspired sauce, then grilled on a BBQ. YUM!


Save

Save

Save

Sticky Orange Chicken

Sticky orange chicken is pan-seared chicken breasts, cooked in an orange marmalade, chicken stock, and rosemary herb based sweet and sticky sauce!Sticky orange chicken is pan-seared chicken breasts, cooked in an orange marmalade, chicken stock, and rosemary herb based sweet and sticky sauce!
Good morning!  It’s going to be a great day in the Pacific Northwest. We’re headed into several days in a row of warm, sunny weather for Memorial Day weekend. With temps in the mid 70’s and higher, it could even get to be warm and “sticky” outside. Yes- that is my horrible line to transition over to this wonderful dinner I made last night called “Sticky Orange Chicken”.

Scroll Down For A Printable Recipe Card At The Bottom Of The Page

About This Dish

I found this recipe from Rachael Ray (celebrity cook) on Pinterest a while back, but finally took the opportunity to make it last evening. This sticky orange chicken was so easy to make, and it really has a great fresh flavor!

Lots of flavor is there, thanks in part to the orange marmalade sauce, which is infused with extra flavor from chicken stock, fresh rosemary and thyme. YUM! The whole dish took under 30 minutes to prepare, from start to finish, and was absolutely delicious! This would be a great meal to fix, at the end of a long and busy day!

Note: The recipe as written serves 4.  My pictures only show 2 pieces of chicken. I only prepared 2 chicken breasts for my husband and myself, but kept the original quantity of sauce (just a little Public Service Announcement).

How To Make Sticky Orange Chicken

Here’s what you do to make this simple dish… first, gather the ingredients together.  I’m fortunate enough to make my own orange marmalade, so that was easy!

I also grow rosemary and thyme in my garden, so gathering this part of the recipe was a cinch! Some apple cider vinegar, salt, and chicken stock from our pantry finished out the pile of ingredients.

Sticky Orange Chicken / The Grateful Girl Cooks!
Cook The Chicken Breasts

Heat olive oil in a skillet until very hot, but not smoking. Lightly salt the chicken, then add the chicken breasts to the hot skillet. The chicken breasts should sizzle as you put them into the hot skillet. Let them sear, untouched, for 5 minutes, then turn them to the other side and cook for another 5 minutes.  The chicken breasts are cooked for 10 minutes total.

Raw chicken breasts are pan-seared in oil, to brown them.
Once the chicken is seared and browned on BOTH sides, transfer the chicken to a plate, and keep them warm.

Browned chicken breasts are transferred to a plate, while sauce for sticky orange chicken is made.

Make The Sauce For The Sticky Orange Chicken

Pour the apple cider vinegar into the hot skillet to de-glaze the pan. Add the orange marmalade, chicken stock, fresh chopped rosemary and thyme, and stir to combine.

Chicken stiock, apple cider vinegar, orange marmalade and other ingredients are added to skillet.
Whisk the sticky orange chicken sauce together and continue cooking it for 2-3 minutes. The sauce will begin to thicken up just a bit as it cooks.

Sticky orange sauce is mixed, and begins to thicken as it cooks.
Add The Chicken Back Into The Sticky Orange Sauce

Once the sauce has thickened, add the chicken breasts back into the sauce. Continue to cook the chicken in the sauce for 5-6 additional minutes. While it cooks, spoon the sauce over the top of the chicken often.

The chicken is added to the sauce, and is covered with the sticky orange sauce.
Serve The Sticky Orange Chicken

Once the chicken is done cooking, remove it from the skillet and transfer the breasts to individual serving plates. Spoon a little of the sauce over the top of each chicken breast for even more great flavor. I served the sticky orange chicken with a side of rice, and some easy, steamed broccoli. 

A piece of sticky orange chicken is served with rice and broccoli on the side,.
I sure hope you will give this recipe for sticky orange chicken a try. The recipe is really EASY, QUICK, and YUMMY! Have a great day!

Looking For More CHICKEN Recipes?

You can find all of my chicken recipes in the Recipe Index, located at the top of the page. I have a LOT of chicken recipes you will enjoy, including:

Interested In More Recipes?

Thank you for visiting this website. I appreciate you using some of your valuable time to do soIf you’re interested, I publish a newsletter 2 times per month (1st and 15th) with all the latest recipes, and other fun info. I would be honored to have you join our growing list of subscribers, so you never miss a great recipe! 

There is a Newsletter subscription box on the top right side (or bottom) of each blog post, depending on the device you use, where you can easily submit your e-mail address (only) to be included in my mailing list.

You Can Also Find Me On Social Media:

Facebook page: The Grateful Girl Cooks!
Pinterest:
The Grateful Girl Cooks!
Instagram:
jbatthegratefulgirlcooks

Author's signatureRecipe Source: http://www.rachaelrayshow.com/recipe/14441_Sticky_Orange_Chicken_with_Herbs_and_Sweet_Potatoes_with_Cider/

↓↓ PRINTABLE RECIPE BELOW ↓↓

0 from 0 votes
Sticky Orange Chicken
Prep Time
10 mins
Cook Time
15 mins
Total Time
25 mins
 
Sticky orange chicken is pan-seared chicken breasts, cooked in an orange marmalade, chicken stock, and rosemary herb based sweet and sticky sauce!
Category: Entree
Cuisine: American
Keyword: sticky orange chicken
Servings: 4
Calories Per Serving: 283 kcal
Author: JB @ The Grateful Girl Cooks!
Ingredients
  • 2 Tablespoons Extra Virgin Olive Oil
  • 4 boneless , skinless chicken breasts
  • Salt (just a pinch, to season each chicken breast lightly)
  • 2 Tablespoons apple cider vinegar
  • 1/3 cup (heaping) orange marmalade
  • 1 cup chicken stock
  • 1 Tablespoon fresh rosemary leaves , finely chopped
  • 2 Tablespoons fresh thyme leaves , finely chopped
Instructions
  1. Coat a stainless steel skillet with the olive oil. Heat until very hot.
  2. Lightly sprinkle each chicken breast with a tiny bit of salt. Add the chicken breasts to hot skillet. You should hear the oil sizzle when you add the chicken. Sear the chicken breasts, without moving them, for 5 minutes. Turn chicken over and continue to cook for 5 more minutes. Chicken should be golden brown on BOTH sides. When cooking time (total of 10 minutes) is done, remove chicken to a plate. Set aside.
  3. Add the apple cider vinegar back into the skillet and de-glaze the pan.
  4. Add the orange marmalade, chicken stock, chopped rosemary and thyme. Whisk these together to combine. Continue cooking on medium heat for 2-3 minutes. The sauce will slightly thicken just a bit.
  5. Add the chicken breasts back into the sauce in the skillet. Continue to cook for 5-6 more minutes, spooning the sauce over the tops of each chicken breasts continuously, as they cook. Once chicken is done, remove chicken breasts to serving platter or individual plates. Spoon some of the sauce over each chicken breast.
  6. Serve with a side of rice or potatoes, and a veggie... and ENJOY!
Nutrition Facts
Sticky Orange Chicken
Amount Per Serving (1 g)
Calories 283 Calories from Fat 90
% Daily Value*
Fat 10g15%
Saturated Fat 1g6%
Cholesterol 74mg25%
Sodium 232mg10%
Potassium 512mg15%
Carbohydrates 20g7%
Sugar 16g18%
Protein 25g50%
Vitamin A 230IU5%
Vitamin C 8.3mg10%
Calcium 30mg3%
Iron 1.2mg7%
* Percent Daily Values are based on a 2000 calorie diet.

Here’s one more to pin on your Pinterest boards!Sticky orange chicken is pan-seared chicken breasts, cooked in an orange marmalade, chicken stock, and rosemary herb based sweet and sticky sauce!

Save

Save

Save

Save

Fettucine Senese

Fettucine Senese is a wonderful Italian pasta dish, featuring a cream sauce with proscuitto, Italian sausage, mushrooms, and Pecorino Romano cheese.Fettucine Senese is a wonderful Italian pasta dish, featuring a cream sauce with proscuitto, Italian sausage, mushrooms, and Pecorino Romano cheese.
I made Fettucine Senese  for a pasta-themed dinner party we attended two years ago. Our menu featured several pasta entrees (a variety of fresh pastas were made during the dinner party), and this is the delicious entree I made. The sauce is an Olive Garden copycat recipe, which I found in one of my cookbooks, and it is DELICIOUS!

Scroll Down For A Printable Recipe Card At The Bottom Of The Page

Where “Senese” Originated

“Senese” is the term used to refer to people from the town of Siena, Italy.  This senese sauce is one of the sauces served on penne pasta at Olive Garden restaurants. Senese sauce  is a cream sauce, with proscuitto, Italian sausage, mushrooms, herbs, and Pecorino Romano cheese. It is fabulous, served on fettucine noodles.

We Made Our Own Pasta At A Dinner Party

All of us at the dinner party pitched in to make several kinds of fresh pasta.  My husband and a friend made the fettucine noodles from scratch used in this recipe, that evening.

Making fresh fettucine for this dish.
How I Found The Recipe For Fettucine Senese

I found th recipe for the sauce in one of my cookbooks, while searching for pasta recipes. The sauce sounded interesting, so I gave it a try. Good move!  The flavors were delicious, because proscuitto and Italian sausage really packed a LOT of flavor into the sauce.

This recipe for fettucine senese is a winner! The sauce is the star, and it is really easy to prepare all in one pan.  Add the cooked pasta of your choice (I used fettucine), and you’ve got a fantastic, and easy Italian fettucine senese that serves 4!

A few of the ingredients used to make the senese sauce for the pasta.
Is Fettucine Senese Difficult To Make?

The sauce and pasta is quite easy to prepare.   It’s EASY, EASY, EASY! If you can stir and cook pasta while making the sauce, you can make this delicious fettucine senese in about 30 minutes!

It was all I could do to stay out of the cooking pan while the sauce was cooking. It smelled and tastes so good!  The recipe is easily doubled, if you have more mouths to feed. Serve it with fettucine, or the pasta of your choice! You’re gonna LOVE Fettucine Senese!

The sauce for fettucine senese cooking in a large pot.
I really hope you will give this one a try. It’s absolutely delicious! Have a fantastic day, friends! Thanks for stopping by, and I truly hope you will come back again soon.

Looking For More PASTA Recipes?

You can find all of my recipes in the Recipe Index, located at the top of the page. A few pasta recipes you might enjoy include:

Interested In More Recipes?

Thank you for visiting this website. I appreciate you using some of your valuable time to do soIf you’re interested, I publish a newsletter 2 times per month (1st and 15th) with all the latest recipes, and other fun info. I would be honored to have you join our growing list of subscribers, so you never miss a great recipe!
There is a Newsletter subscription box on the top right side (or bottom) of each blog post, depending on the device you use, where you can easily submit your e-mail address (only) to be included in my mailing list.

You Can Also Find Me On Social Media:

Facebook page: The Grateful Girl Cooks!
Pinterest:
The Grateful Girl Cooks!
Instagram:
jbatthegratefulgirlcooks

Author's signatureOriginal Recipe Source for Sauce: The book “More of America’s Most Wanted Recipes”, by Ron Douglas, copyright 2010, by Verity Associates, LLC, page 183.

0 from 0 votes
Fettucine Senese
Prep Time
15 mins
Cook Time
10 mins
Total Time
25 mins
 

Fettucine Senese is a wonderful Italian pasta dish, featuring a cream sauce with proscuitto, Italian sausage, mushrooms, and Pecorino Romano cheese.

Category: Entree
Cuisine: Italian
Keyword: fettucine senese
Servings: 8 servings
Calories Per Serving: 1259 kcal
Author: JB @ The Grateful Girl Cooks!
Ingredients
  • 1/2 cup chopped onion
  • 3 cloves garlic , chopped
  • 2 Tablespoons butter
  • 1/2 cup extra virgin olive oil
  • 8 ounces (1/2 pound) sliced portobello (or button) mushrooms, sliced thinly
  • 6 Italian sausage links , casings removed
  • 1/4 cup plus 2 Tablespoons white wine (can substitute chicken broth, if desired)
  • 2 Tablespoons all purpose flour
  • 4 cups heavy whipping cream (or half-and-half)
  • 4 ounces proscuitto , chopped
  • 1 Tablespoon fresh sage (minced) OR 1 teaspoon dried sage (plus extra for garnish)
  • 1 Tablespoon minced fresh parsley OR 1 teaspoon dried parsley flakes
  • 8 ounces Pecorino Romano cheese , grated (plus extra for garnish)
  • 1 teaspoon garlic powder
  • Salt and pepper (to taste)
  • 1 pound fettucine pasta , cooked per package instructions)
Instructions
  1. Bring a large pot of salted water to a boil (for pasta) while you are making sauce in another pan.

To make the sauce:
  1. In a large soup pot or large saucepan, heat olive oil and butter until melted. Add and sauté chopped onion and garlic. Cook onions and garlic for a few minutes until softened.

  2. Add Italian sausage (out of the casings); continue to break up sausage as it cooks. Once sausage is cooked and no longer pink, add wine. Bring mixture to a boil, then add in the flour a little at a time, stirring constantly.

  3. Stir in whipping cream, chopped proscuitto, sage, parsley, Pecorino Romano cheese, garlic powder, and salt and pepper (to taste). Stir and cook until sauce has thickened up a bit and is smooth. Continue to cook sauce on a low simmer for 10 minutes. Stir frequently.

  4. While sauce is cooking, prepare pasta according to package instructions. Drain. Toss cooked, drained pasta with the sauce. Mix well, to combine. Transfer pasta to a warm serving plate or individual plates. Garnish with dried herbs and additional grated cheese, if desired, and serve.

Recipe Notes

The recipe makes a lot of sauce! You will probably have some left over.

Nutrition Facts
Fettucine Senese
Amount Per Serving (1 g)
Calories 1259 Calories from Fat 927
% Daily Value*
Fat 103g158%
Saturated Fat 48g300%
Cholesterol 321mg107%
Sodium 1135mg49%
Potassium 625mg18%
Carbohydrates 50g17%
Fiber 3g13%
Sugar 3g3%
Protein 34g68%
Vitamin A 2045IU41%
Vitamin C 4.1mg5%
Calcium 422mg42%
Iron 2.7mg15%
* Percent Daily Values are based on a 2000 calorie diet.

Here’s one more to pin on your Pinterest boards!Fettucine Senese is a wonderful Italian pasta dish, featuring a cream sauce with proscuitto, Italian sausage, mushrooms, and Pecorino Romano cheese.


Save

Save

Save

Save

Save