Cumin dusted pork cutlets are lightly seasoned with Southwestern spices, pan-seared, then served covered in a delicious, fresh citrus sauce.

I recently made some delicious Cumin-Dusted Pork Cutlets with Citrus Sauce for our dinner and wanted to share this very simple recipe with you today. The recipe originated on the Epicurious website and sounded interesting, so I decided to try it, only making a couple tweaks to the original recipe. The pork cutlets are seasoned, then pan-seared.
As soon as they are done, a quick and easy citrus sauce (with orange juice, lemon juice, and garlic) is made and then spooned over the cooked pork cutlets. The cutlets are then served. It really couldn’t be any easier!
Scroll Down For A Printable Recipe Card At The Bottom Of The Page
How To Make Cumin Dusted Pork Cutlets With Citrus Sauce
If you are using thin, small cutlets, a serving size would be 2 cutlets per adult (and you will NOT need to pound them down). You want to use fairly thin pork cutlets, so they will cook quickly. Lightly season the pork with salt and pepper, and set aside.

**NOTE: I ended up using slightly larger and thicker boneless chops that I already had in my freezer for this meal, so I pounded each piece with a meat mallet between plastic wrap to flatten them out more (to about 1/2 inch). Since they were large pork chops to begin with, we had 1 cutlet per serving.

Prepare Seasoning Mix For The Pork Chops
Mix the flour, ground cumin, chili powder, garlic powder, salt and pepper on a large dinner plate until the ingredients are fully combined.

Once mixed, coat both sides of each of the pork cutlets with seasoning. Make sure to shake off any excess flour from the pork cutlets.

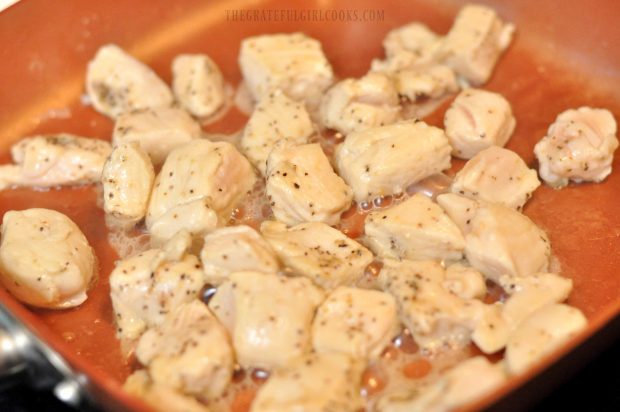
Heat 1 Tablespoon of olive oil on medium-high heat in a large non-stick skillet. Once oil is very hot (but not smoking), add cutlets. They should sizzle when they hit the hot oil.

Cooking the Cumin Dusted Pork Cutlets
Cook 3-4 minutes on first side, then turn over and cook other side for same amount of time (until fully cooked through and golden brown). Transfer the pork cutlets to a serving plate; keep them warm. If your pork cutlets are thicker, be sure to cook them longer. Chops should reach a safe, internal temperature of 145°F.

Making The Citrus Sauce For The Pork Cutlets
Do not clean out the skillet (the brown bits on bottom of skillet help to flavor citrus sauce!). Add 2 Tablespoons olive oil to skillet; heat on medium. Add minced garlic to skillet; cook for about 15-30 seconds, stirring constantly (don’t burn it!).
Add fresh orange and lemon juices, and a few orange slices. Bring this mixture to a boil, stirring occasionally. Cook the sauce until the liquid has reduced in volume and has thickened a bit. This will take about a minute or so. Taste the citrus sauce; add additional salt and pepper, if needed. Remove the sauce from the heat.

Spoon the citrus sauce over the pork cutlets. Garnish each serving with thin orange slices and parsley (fresh or dried) if desired. Serve and enjoy!

The pork cutlets have a nice, slightly Southwestern flavor (the cumin does not overpower it). There is enough sauce for 4 servings (single cutlet). If serving 2 cutlets per person, the recipe as written makes enough sauce for 2 servings.
Hope you will consider making this easy, tasty pork cutlets meal. Have a great day, friends. Thanks for stopping by. I hope you will come back again soon.
Looking For More PORK CHOP Recipes?
You can find all of my recipes in the Recipe Index, located at the top of the page. I have quite a few delicious recipes featuring pork chops, including:
Interested In More Recipes?
Thank you for visiting this website. I appreciate you using some of your valuable time to do so. If you’re interested, I publish a newsletter 2 times per month (1st and 15th) with all the latest recipes, and other fun info. I would be honored to have you join our growing list of subscribers, so you never miss a great recipe!
There is a Newsletter subscription box on the top right side (or bottom) of each blog post, depending on the device you use, where you can easily submit your e-mail address (only) to be included in my mailing list.
You Can Also Find Me On Social Media:
Facebook page: The Grateful Girl Cooks!
Pinterest: The Grateful Girl Cooks!
Instagram: jbatthegratefulgirlcooks

Recipe Adapted From: http://www.epicurious.com/recipes/food/views/cumin-dusted-pork-cutlets-with-citrus-pan-sauce-105363

Cumin dusted pork cutlets are lightly seasoned with Southwestern spices, pan-seared, then served covered in a delicious, fresh citrus sauce.
- 4 boneless pork cutlets
- 2 Tablespoons all purpose flour
- 2 teaspoons ground cumin
- 1/4 teaspoon garlic powder
- 1/2 teaspoon chili powder
- 1/2 teaspoon salt
- 1/2 teaspoon ground black pepper
- 1 Tablespoon olive oil
- 2 Tablespoons olive oil
- 2 garlic cloves , minced
- 1/3 cup fresh orange juice
- 3 Tablespoons fresh lemon juice
- A few orange slices (see below)
- 1 orange , sliced into thin slices, then cut in half (divided)
- Chopped fresh parsley or dried parsley
- Lightly season pork with salt and pepper, and set aside.
- On a plate, mix together flour, ground cumin, chili powder, garlic powder, salt and pepper. Once mixed, coat each pork cutlet (on both sides) with seasoning. Shake off excess flour.
- Heat 1 Tablespoon of olive oil on medium-high heat in a large non-stick skillet. Once oil is very hot (but not smoking), add cutlets. Cook 3-4 minutes on first side, then flip and cook other side for same amount of time (until cooked through and golden brown). Remove pork to serving plate; keep warm.
- Do not clean out the skillet. Add 2 Tablespoons olive oil to skillet; heat oil on medium. Add minced garlic to skillet; cook for about 15-30 seconds, stirring constantly (don't burn it!). Add fresh orange and lemon juices, and a few orange slices. Bring mixture to a boil, stirring occasionally, until liquid has reduced and thickened a bit (this will take about a minute or so). Taste sauce; add additional salt and pepper, if desired. Remove sauce from heat.
- Spoon sauce over the pork cutlets. Garnish with thin orange slices and parsley (fresh or dried) if desired. Serve and enjoy!
If a slightly sweeter citrus sauce is desired, add 1 teaspoon honey.
Here’s one more to pin on your Pinterest boards!


