Skinny Chunky Monkey Cookies are easy to make, low calorie baked treats with oats, applesauce, peanut butter, bananas and cocoa powder.
I found an interesting recipe online for Skinny Chunky Monkey Cookies. The recipe contains no butter, no sugar, no flour, and no oil. Hmmm… it sounded interesting, so I decided to check it out. I figured it was about time for me to make something that was low on sugar intake, and relatively “healthy”.
These little skinny chunky monkey cookies fit the bill for a nice, “not too sweet”, flavorful bites of goodness! Ripe bananas provide all the sweetness for these low calorie treats!
These “completely easy to make” cookies can also be eaten as a tasty breakfast cookie. This is because they are made from oats, bananas, unsweetened applesauce, cocoa powder and a bit of peanut butter. The recipe made 18 small cookies, and they were pretty tasty!
Scroll Down For A Printable Recipe Card At The Bottom Of The Page
How To Make Skinny Chunky Monkey Cookies
First you mash up some really ripe bananas in a large bowl. Once that’s done, it’s time to add the rest of the ingredients. Stir all of this together until the ingredients are fully blended. See how EASY this is?

This is what the cookie batter will look like after mixing it up. Once it’s fully mixed, let the batter “rest” for for about 15 minutes. Preheat your oven to 350°F while the cookie batter is “resting”.

Time To Bake These Cookies!
By now your oven should be preheated to 350°F . Drop the batter by Tablespoonfuls onto an ungreased baking sheet, leaving space between each dollop. Bake the skinny chunky monkey cookies for about 10-12 minutes.

Ready To Serve/Eat The Cookies
Once the cookies are finished baking, remove the cookie sheet from the oven. Let the cookies sit for a minute, and then transfer them with a spatula to a wire rack to finish cooling. Grab a cookie after it has completely cooled (they taste best at room temp!), and enjoy!

I hope you will give this recipe a try. They would be a great addition to a child’s lunchbox (especially since they are not packed full of sugar)! Sure hope you enjoy these simple skinny chunky monkey cookies. Have a great day!
Looking For More COOKIE Recipes?
You can find ALL of my cookie recipes in the Recipe Index, located at the top of the page. A few favorites of ours include:
Interested In More Recipes?
Thank you for visiting this website. I appreciate you using some of your valuable time to do so. If you’re interested, I publish a newsletter 2 times per month (1st and 15th) with all the latest recipes, and other fun info. I would be honored to have you join our growing list of subscribers, so you never miss a great recipe!
There is a Newsletter subscription box on the top right side (or bottom) of each blog post, depending on the device you use, where you can easily submit your e-mail address (only) to be included in my mailing list.
You Can Also Find Me On Social Media:
Facebook page: The Grateful Girl Cooks!
Pinterest: The Grateful Girl Cooks!
Instagram: jbatthegratefulgirlcooks
 Original recipe source: http://www.sixsistersstuff.com/2012/05/skinny-chunky-monkey-cookies-recipe.html
↓↓ PRINTABLE RECIPE BELOW ↓↓
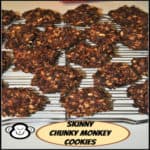
Skinny Chunky Monkey Cookies are easy to make, low calorie baked treats with oats, applesauce, peanut butter, bananas and cocoa powder.
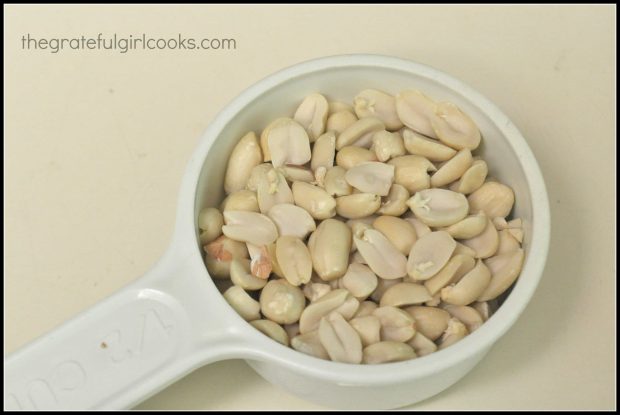
- 3 ripe bananas , mashed
- 2 cups old fashioned oats
- 1/4 cup peanut butter (I used crunchy, but either will work just fine)
- 1/4 cup cocoa powder
- 1/3 cup unsweetened applesauce
- 1 teaspoon vanilla
- Preheat oven to 350 degrees F.
Mash bananas in medium sized bowl. Add the rest of the ingredients to the mashed bananas. Mix well to combine. Let batter rest for 15 minutes.
Drop by Tablespoonfuls onto a ungreased baking sheet. Bake for 10-12 minutes. Remove cookies to a wire rack when done. Let cool to room temp before serving (they taste better that way!) Enjoy!
Here’s one more to pin on your Pinterest boards!