Month: July 2021

Dutch Crumb Peach Pie

Make a Dutch Crumb Peach Pie to enjoy the taste of summer! A delicious, classic peach pie, covered with crumbly, buttery streusel topping!Make a Dutch Crumb Peach Pie to enjoy the taste of summer! A delicious, classic peach pie, covered with crumbly, buttery streusel topping!
What’s a girl to do when she picks a BUNCH of fresh peaches in the summer? Well THIS girl likes to make delicious things with the “fruits of her labor”. I’ve canned them, and have used fresh peaches to make jam, cobblers, galettes, ice cream, turnovers, peach pies, smoothies, and crisps. It’s amazing how many delicious items you can make with this seasonal fruit.

Today I want to share with you a scrumptious recipe for Dutch Crumb Peach Pie. We love apple pies made this way, so I thought it would also be yummy using peach filling. I combined two different recipes from an OLD cookbook I received when I got married (43 years ago), and this delicious pie is the result.

Scroll Down for A Printable Recipe Card At the Bottom Of the Page

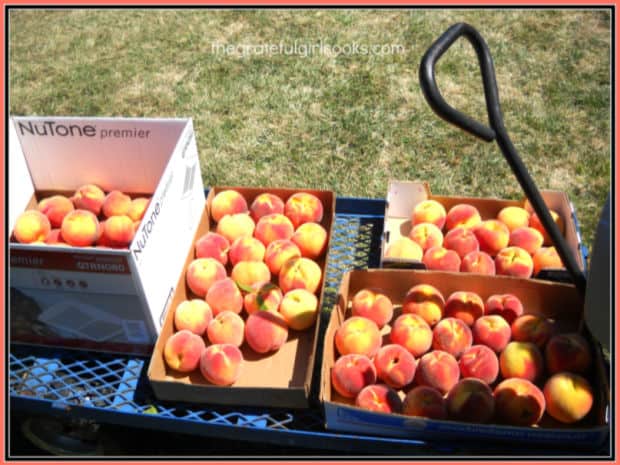
Lots of fresh summer peaches to make delicious desserts and jam with!

Prepare The Peach Pie Filling

Making the filling for this Dutch Crumb Peach Pie is really quite easy! First, peel the peaches, and then carefully slice them in half, and remove the pit. Cut the peaches into slices, about ½” wide. Place the peach slices into a large mixing bowl.

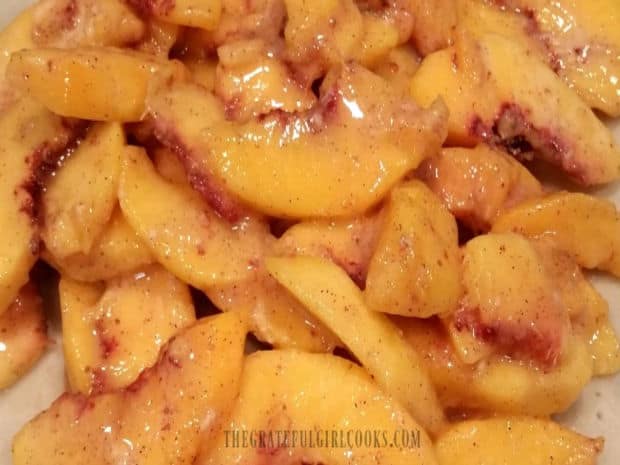
Add granulated sugar, flour, cinnamon and freshly squeezed lemon juice to the peach slices in the bowl. Stir gently, to fully combine these ingredients. When done, set the bowl aside until later. This is your pie filling.


Sliced peaches are combined with sugar, flour, cinnamon and lemon juice to make the pie filling.

Make The Streusel Topping

Now it’s time to make the simple, buttery streusel topping. The streusel is what turns this pie from a plain peach pie into a Dutch crumb peach pie! Here’s how to make the crumbly pie topping.

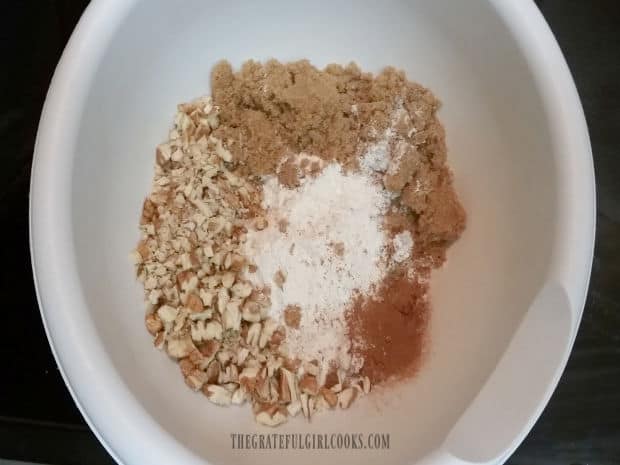
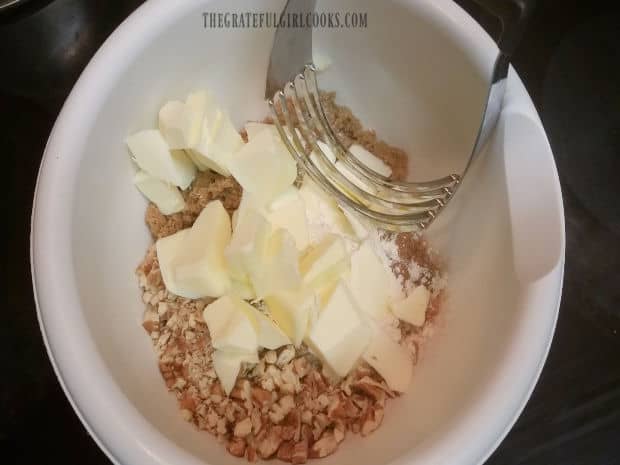
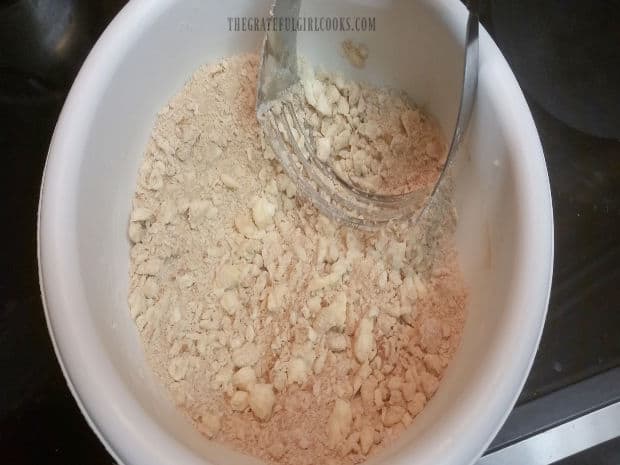
Place flour, brown sugar, cinnamon, and chopped pecans into a medium-sized mixing bowl. Cut VERY COLD butter into chunks and add them to the bowl. Use a pastry blender (or two forks) to cut the butter into the topping ingredients. Once done, the butter should be reduced to about the size of peas. Set the streusel topping aside.

Flour, brown sugar, cinnamon, and pecans in a bowl to make streusel topping for pie.Cold butter is cut into streusel ingredients until crumbly, using a pastry blender.Streusel topping is ready to add to the top of the Dutch Crumb Peach Pie before baking.

Ready To Assemble The Dutch Crumb Peach Pie

Okay… now get that pie crust prepared! You can use whatever deep dish 9″ pie crust is convenient for you. That would include a homemade pie crust (that’s what I use), or a store-bought frozen (but thawed) pie crust, or refrigerated pie crust dough.

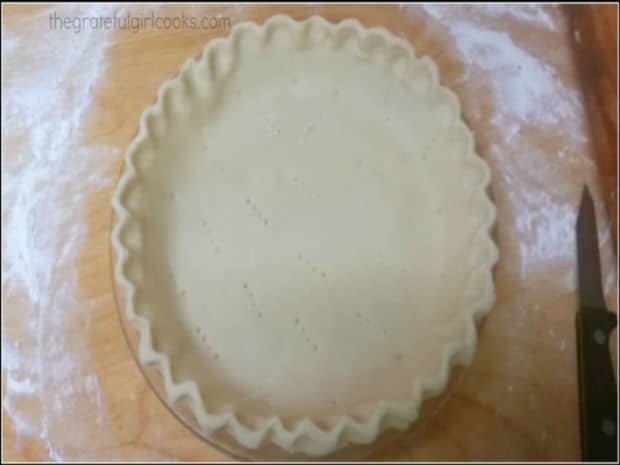
Crimp the edges of your pie crust, then gently prick the bottom and sides of the dough with the tines (the tips) of a fork (as shown below). The pie dough is pricked so it doesn’t puff up with large air pockets while baking.

The pie crust has been prepared for the pie filling.

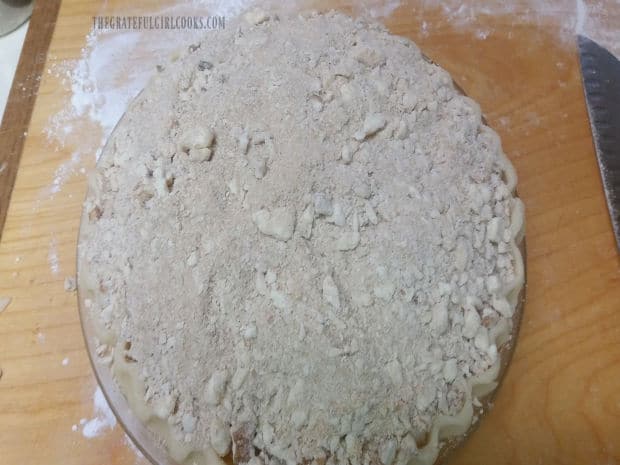
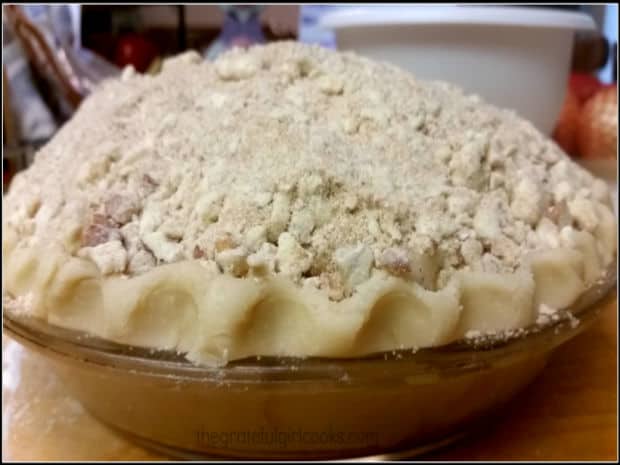
Pour the peach pie filling into the prepared pie crust, making sure it is spread evenly. Add the streusel topping, a little at a time until the entire surface of the peach filling is covered. I like to mound it up in the middle of the pie (like a dome). Use all the topping.

TIP: I usually cup my hand around the edge of the crust so the topping doesn’t go all over the place as I add it! That helps to hold it onto the surface of the pie.

Peach filling is added to pie crust, then topped with streusel topping, to cover.The streusel crumb topping is mounded from the crust into the middle of the pie.

Bake The Dutch Crumb Peach Pie

Bake the Dutch Crumb Peach Pie on the middle rack of a preheated 425°F. oven. I typically place a sheet of aluminum foil underneath the pie, in case the filling bubbles over. This ensures you won’t have a messy oven when done!

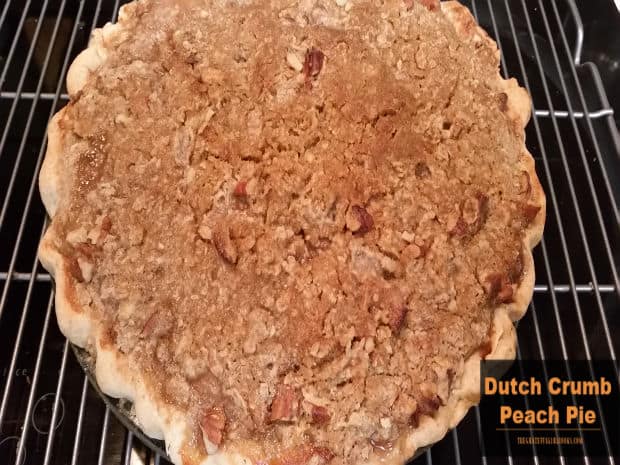
Bake the Dutch Crumb Peach Pie for approximately 40 minutes, or a few minutes more, depending on your oven. The pie is done when the streusel topping and crust are golden brown, and the filling is bubbly around the edges. Transfer the pie to a wire rack to cool for about 10-15 minutes before slicing. When ready to serve, slice the pie into 8 wedges, serve and enjoy!

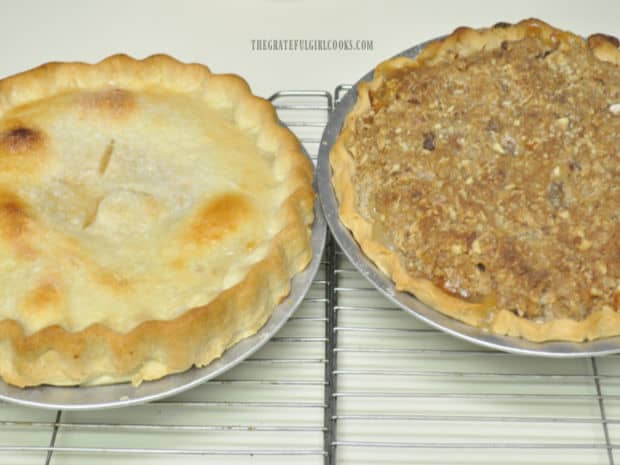
This pie is wonderful served warm with a scoop of vanilla ice cream, but is also yummy served at room temperature! In the 2nd photo below you can see my regular peach pie, and a Dutch Crumb Peach pie, side by side. YUMMO!

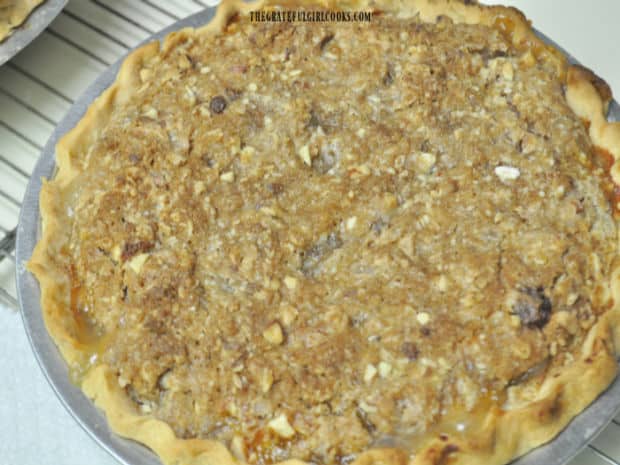
A Dutch Crumb Peach Pie, cooling on a wire rack after baking.Classic peach pie on the left, and Dutch Crumb Peach Pie on the right.

I hope you have the chance to make this delicious pie, and I believe you will NOT be disappointed! Thank you for stopping by today, and I truly hope you will come back again soon, for more family friendly recipes. Have a GREAT day!

Looking For More PIE Recipes?

You can find AL of my recipes in the Recipe Index, located at the top of the page. I have some wonderfully delicious pie recipes for you to enjoy, including:

Interested In More Recipes?

Thank you for visiting this website. I appreciate you using some of your valuable time to do soIf you’re interested, I publish a newsletter 2 times per month (1st and 15th) with all the latest recipes, and other fun info. I would be honored to have you join our growing list of subscribers, so you never miss a great recipe!
There is a Newsletter subscription box on the top right side (or bottom) of each blog post, depending on the device you use, where you can easily submit your e-mail address (only) to be included in my mailing list.

You Can Also Find Me On Social Media:

Facebook page: The Grateful Girl Cooks!
Pinterest:
The Grateful Girl Cooks!
Instagram:
jbatthegratefulgirlcooks

Author's signature

Recipe adapted from: Pie Filling: The New Pillsbury Family Cookbook, page 149, published 1973 by The Pillsbury Co. Streusel Topping: From the same cookbook, on page 147
0 from 0 votes
Dutch Crumb Peach Pie
Prep Time
15 mins
Cook Time
40 mins
Total Time
55 mins
 

Make a Dutch Crumb Peach Pie to enjoy the taste of summer! A delicious, classic peach pie, covered with crumbly, buttery streusel topping!

Category: Desserts
Cuisine: American
Keyword: Dutch crumb peach pie
Servings: 8 slices
Calories Per Serving: 365 kcal
Author: JB @ The Grateful Girl Cooks!
Ingredients
  • 1 9" deep dish pie crust
For Peach Pie Filling:
  • 5 cups sliced fresh peaches (peeled)
  • ¾ cup granulated sugar
  • cup all purpose flour
  • ½ teaspoon ground cinnamon
  • 1 Tablespoon fresh lemon juice
For Streusel Topping:
  • 1 cup all purpose flour
  • ½ cup firmly packed brown sugar
  • ½ teaspoon ground cinnamon
  • ¼ cup chopped pecans may substitute walnuts
  • ½ cup COLD butter equals 1 stick of butter (8 Tablespoons)
Instructions
  1. Preheat oven to 425°F.

  2. MAKE PIE FILLING: Peel peaches. Slice in half, completely removing the pit. Cut peaches into slices, about ½" wide. Place sliced peaches in large mixing bowl. Add sugar, flour, cinnamon and lemon juice. Stir gently, to fully combine. Set bowl aside.

  3. MAKE STREUSEL TOPPING: Place flour, brown sugar, cinnamon, and chopped pecans in a medium-sized bowl. Cut VERY COLD butter into chunks and add to bowl. Use a pastry blender (or two forks) to cut in butter. Once done, butter should be reduced to the size of peas. Set streusel topping aside.

  4. PREPARE PIE CRUST: Crimp edges of a deep dish 9" pie crust; gently prick bottom and sides of dough with the tines (tips) of a fork, so dough doesn't puff up with air pockets while baking.

  5. MAKE PIE: Pour peach pie filling evenly into prepared pie crust,. Add streusel to the top, a little at a time, until all peach filling is covered. Mound streusel up in the middle (like a dome). TIP: Cup your hand around edge of crust so topping doesn't spill all over while adding!

  6. TIP:** Bake pie on middle rack in oven. Put a sheet of aluminum foil underneath the pie, in case filling bubbles over, so you won't have a messy oven when done! Bake pie for approx. 40 minutes, or more, depending on your oven. It's done when streusel topping and crust are golden brown, and filling is bubbly around the edges.

  7. Transfer pie from oven to a wire rack to cool for 10-15 minutes before slicing. When ready to serve, slice the pie into 8 wedges, serve each piece with a scoop of vanilla ice cream, and enjoy!

Recipe Notes

NOTE: If using frozen pie crust, be sure to thaw it before using.

Nutrition Facts
Dutch Crumb Peach Pie
Amount Per Serving (1 slice (1/8 of total))
Calories 365 Calories from Fat 126
% Daily Value*
Fat 14g22%
Saturated Fat 8g50%
Trans Fat 1g
Polyunsaturated Fat 1g
Monounsaturated Fat 4g
Cholesterol 31mg10%
Sodium 106mg5%
Potassium 244mg7%
Carbohydrates 58g19%
Fiber 2g8%
Sugar 40g44%
Protein 3g6%
Vitamin A 671IU13%
Vitamin C 7mg8%
Calcium 29mg3%
Iron 1mg6%
* Percent Daily Values are based on a 2000 calorie diet.

Here’s one more to pin on your Pinterest boards!Make a Dutch Crumb Peach Pie to enjoy the taste of summer! A delicious, classic peach pie, covered with crumbly, buttery streusel topping!



Smoked Smothered Pork Chops

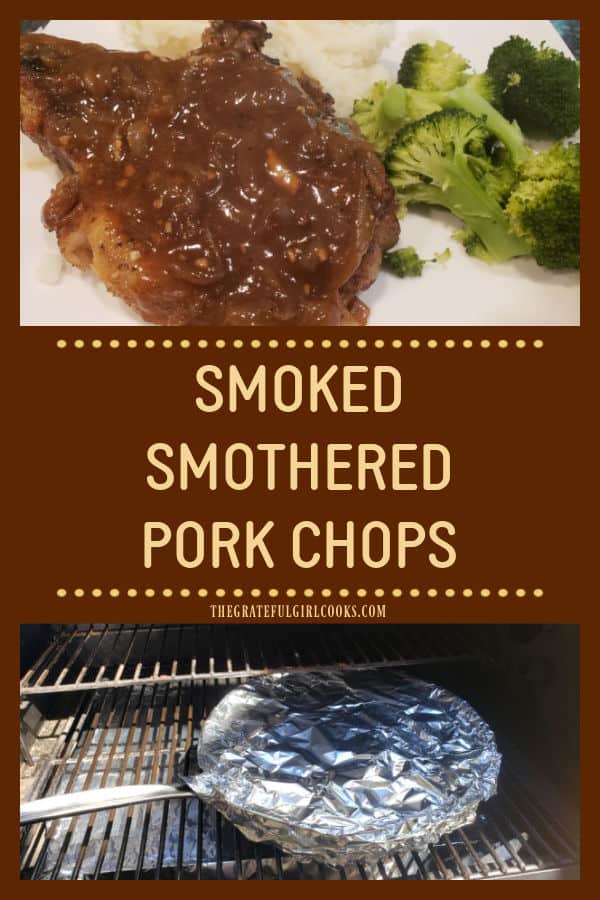
Smoked Smothered Pork Chops are tender, delicious and covered in onion gravy. They’re prepped on a stove, then cooked until tender on a smoker grill.
Smoked Smothered Pork Chops are tender, delicious and covered in onion gravy. Prepped on a stove, then cooked until tender on a smoker grill.

We love smothered pork chops, and typically we bake them. However, when it is summer and it’s really hot, I don’t want to heat up our kitchen by using our oven. That’s where our smoker comes in handy! We do the prep work for these smoked smothered pork chops on the stovetop for several minutes, then transfer them to our Traeger grill to cook low and slow!

I made a couple tweaks to a recipe I posted on this blog a few years ago, by doubling the ingredients (to serve 4) and adapting it to be cooked on a smoker grill. They turned out wonderful! Delicious and tender, this is an easy way to slow cook pork chops on a HOT summer day, without using the oven!

The long cooking time (1 hour, 45 minutes) on the smoker gives bone-in pork chops a chance to be infused with flavor and they always turn out really tender! The pork chops are “smothered” in a simple onion gravy while they cook away! YUM! Here’s how to make smoked smothered pork chops.

Scroll Down For A Printable Recipe Card At The Bottom Of The Page

Season The Pork Chops

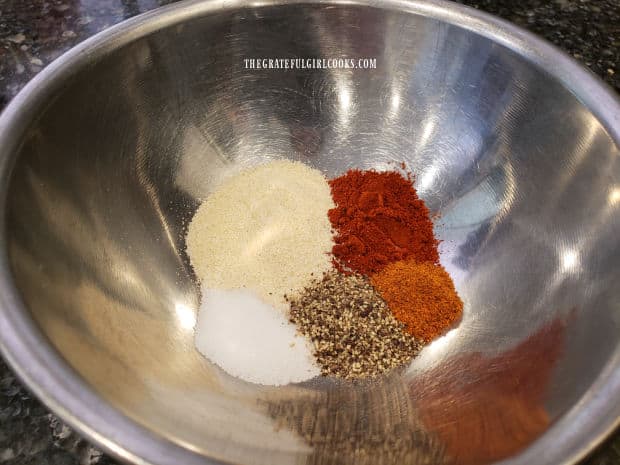
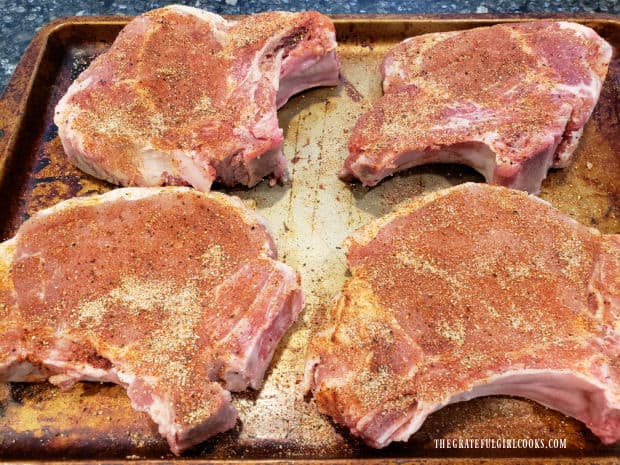
Place paprika, onion powder, salt, black pepper, and cayenne pepper in a small bowl. Stir to combine these dry spices. Pat the pork chops dry using a paper towel, then sprinkle both sides of the pork chops evenly with the spice mix. Press the spices into the meat, so it adheres.

A simple spice mix is combined to use on the smoked pork chops.Four bone-in pork chops are coated with spices on both sides before cooking.

Prepare The Smoked Smothered Pork Chops

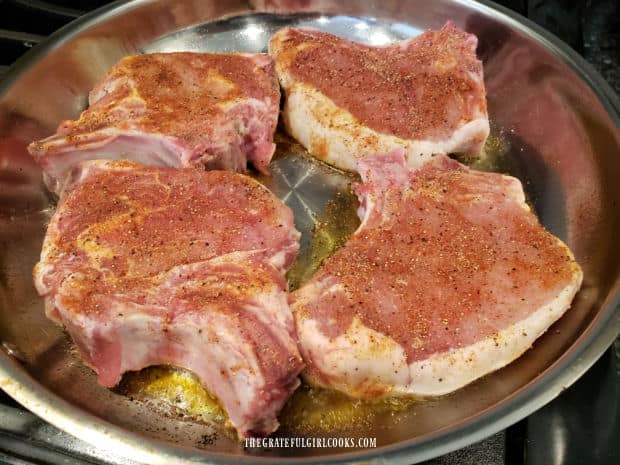
Before cooking the pork chops on your smoker, you will need to quickly pan-sear and brown them. Heat vegetable oil in a large oven-proof skillet on medium-high heat, until very hot, but just barely smoking.

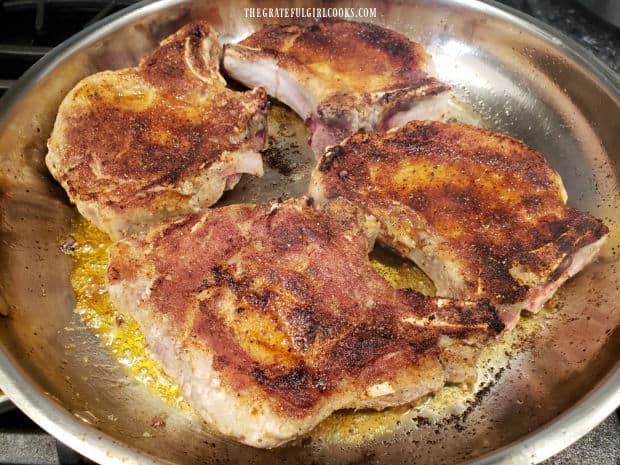
Add the seasoned pork chops to the skillet in a single layer, and cook each side 3-4 minutes, until well browned. Transfer the pork chops from the skillet to a plate (once browned), and keep them warm. Do NOT clean out the skillet!

Seasoned pork chops are browned in a skillet before putting them on the smoker.Both sides of the pork chops are browned well in a large skillet.

Caramelize Onions To Smother The Pork Chops

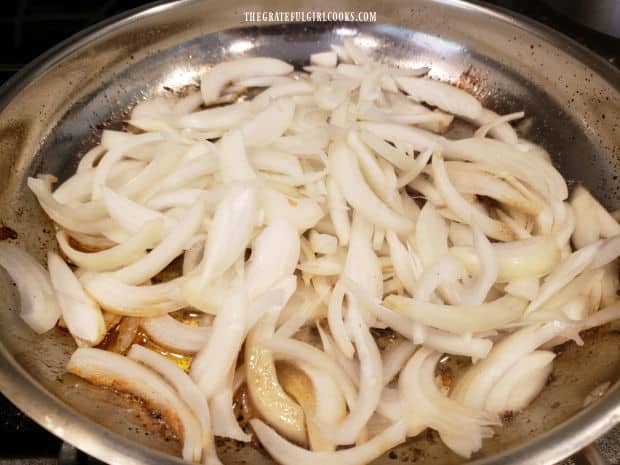
Add butter to the same skillet, and let it melt on medium heat. Add the onion slices, and cook for 8-10 minutes, stirring occasionally, until well browned. Stir in thyme and minced garlic, and cook for about 30 additional seconds.

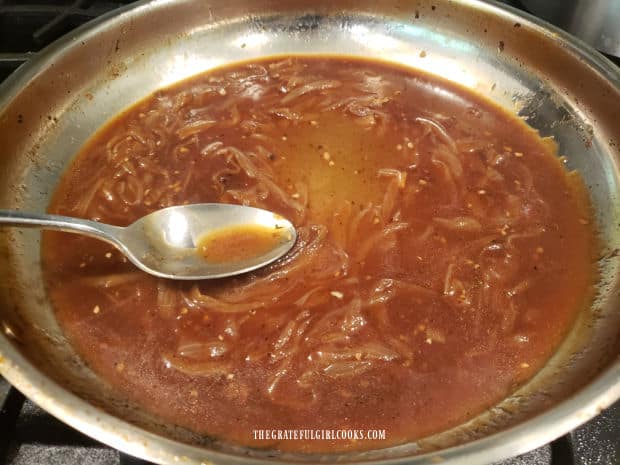
Add 1 cup beef broth to the skillet (reserving remaining 2 Tablespoons broth for later use). Toss in the bay leaf, and stir well, scraping up the browned bits (lots of flavor) from the bottom of the skillet while it cooks.

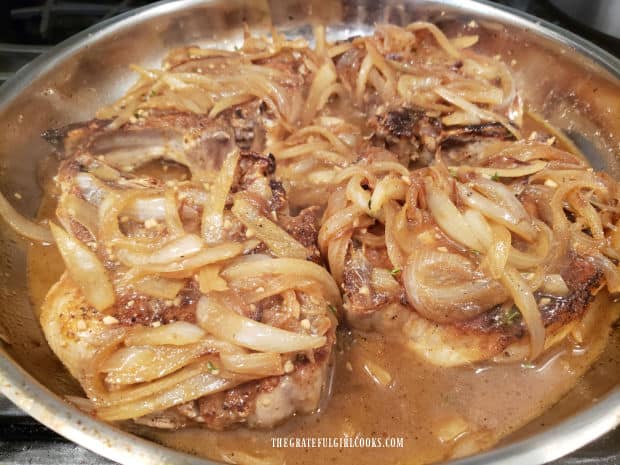
Bring this mixture to a simmer, then transfer the pork chops back into the skillet. Spoon some of the sauce and onions over the top of each piece, then remove skillet from the stove and cover it with aluminum foil.

Sliced onions are cooked in butter until well browned.Smoked smothered pork chops are covered with gravy and cooked onions.

Ready For The Smoker Grill

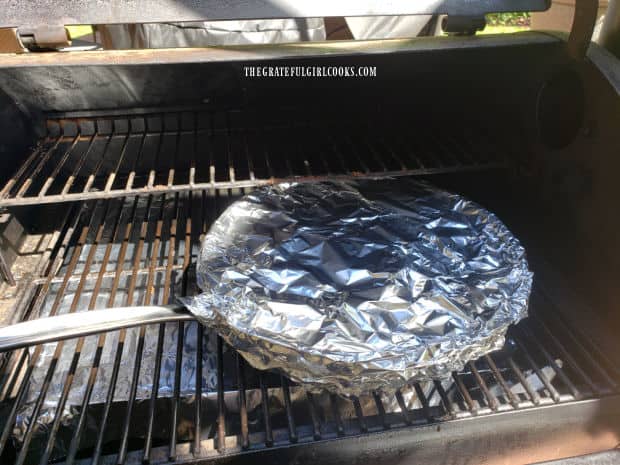
Preheat your smoker to 300°F according to manufacturer’s instructions. Once it is ready and at temperature, carefully place the foil-covered skillet onto the grill grate. Close the lid, and let the smoked smothered pork chops cook, (undisturbed) for 1 hour and 45 minutes, until the pork chops are tender.

Smoked smothered pork chops are cooked on a Traeger grill in a foil-covered skillet.

Last Step Before Serving The Smoked Smothered Pork Chops

When done, remove the skillet from the smoker, and carefully transfer the smoked smothered pork chops (meat only) to a plate. Cover them with foil to keep them hot. Place a large strainer on top of a medium-sized bowl.

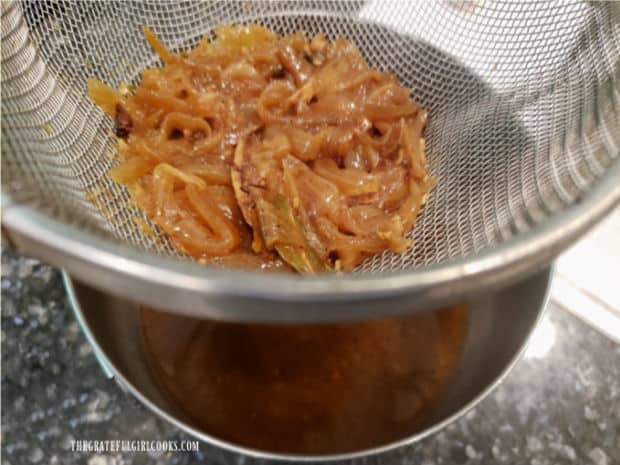
Pour the sauce and onions from the skillet through the strainer. The sauce will run through strainer into the bowl below. The onions will remain in the strainer. Discard the bay leaves, and place the onions in a small bowl. If desired, remove any accumulated fat from the surface of the sauce.

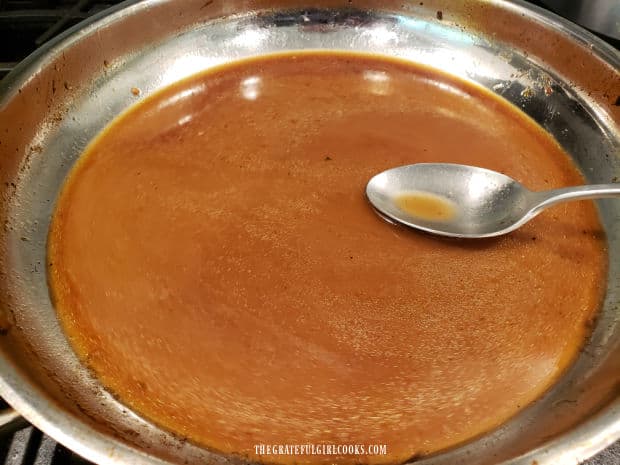
Measure out 2/3 cup of the sauce, and place it back into the skillet. Bring the sauce to a low simmer. In a separate small bowl, whisk together the reserved 2 Tablespoons beef broth and the cornstarch until smooth. Add this to the sauce in the skillet, and whisk to combine. The sauce will slightly thicken as it cooks for about a minute. Once thickened, add the onions back into the sauce, and stir to combine. **If desired, season gravy with additional salt and pepper, to suit your taste.

Onions and juices are separated by straining juice over a bowl.Some of the onion sauce is used to make a gravy.The onions are added back into the gravy and cooked until gravy thickens.

Time To Eat!

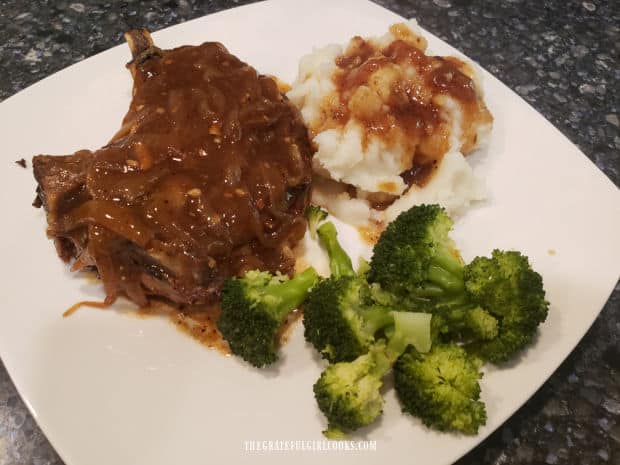
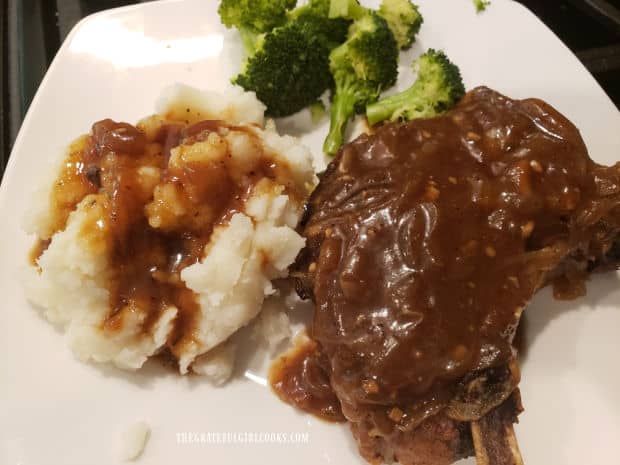
Now it’s time to serve the smoked smothered pork chops! By this time you should be more than ready to enjoy this dish. Place a pork chop onto each plate, and then generously spoon some of the onion gravy over the top of each piece.
We always enjoy having mashed potatoes with the pork chops, and like to add a bit of the “gravy” to them! Serve, and enjoy these tender and delicious smoked smothered pork chops. I think you will really enjoy them!
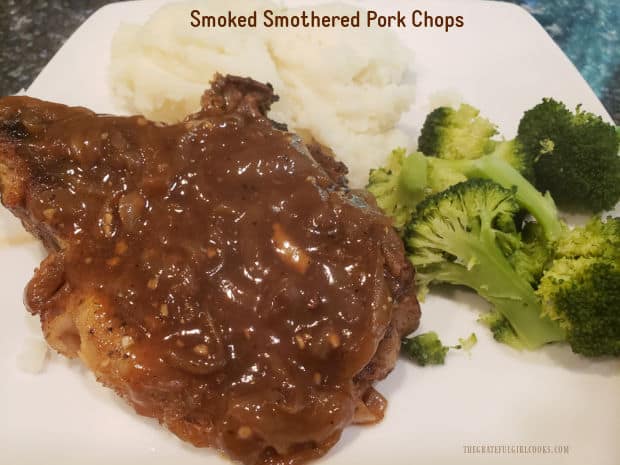
A serving of smoked smothered pork chops, with mashed potatoes and broccoli on the side.A thick onion gravy tops the smoked smothered pork chops.

I hope you’ll have the opportunity to try these pork chops, because they are really yummy. You can also check out my original recipe for BAKED smothered pork chops (for two) here. Thank you for stopping by, and I hope you will come back again soon for more family-friendly recipes.

Looking for More PORK CHOP Recipes?

You can find ALL of my recipes in the Recipe Index, located at the top of the page. I have quite a few, delicious pork chop recipes you’ll enjoy, including:

Interested In More Recipes?

Thank you for visiting this website. I appreciate you using some of your valuable time to do soIf you’re interested, I publish a newsletter 2 times per month (1st and 15th) with all the latest recipes, and other fun info. I would be honored to have you join our growing list of subscribers, so you never miss a great recipe!
There is a Newsletter subscription box on the top right side (or bottom) of each blog post, depending on the device you use, where you can easily submit your e-mail address (only) to be included in my mailing list.

You Can Also Find Me On Social Media:

Facebook page: The Grateful Girl Cooks!
Pinterest:
The Grateful Girl Cooks!
Instagram:
jbatthegratefulgirlcooks

Author's signature


0 from 0 votes
Smoked Smothered Pork Chops
Prep Time
20 mins
Cook Time
1 hr 45 mins
Total Time
2 hrs 5 mins
 

Smoked Smothered Pork Chops are tender, delicious and covered in onion gravy. They're prepped on a stove, then cooked until tender on a smoker grill.

Category: Dinner
Cuisine: American
Keyword: smoked smothered pork chops
Servings: 4
Calories Per Serving: 441 kcal
Author: JB @ The Grateful Girl Cooks!
Ingredients
  • 1 teaspoon onion powder
  • ½ teaspoon paprika
  • ½ teaspoon (each) salt and pepper
  • ¼ teaspoon cayenne pepper
  • 4 bone-in pork chops , approx. 8 ounces each, (¾-1" thick)
  • 2 Tablespoons vegetable oil
  • 2 Tablespoons butter
  • 2 large yellow onions halved, sliced thin top to bottom
  • 2 cloves garlic , minced
  • 1 teaspoon fresh thyme, minced , OR ¼ tsp. dried thyme
  • 1 cup PLUS 2 Tablespoons low sodium beef broth , divided use
  • 2 bay leaves
  • teaspoons cornstarch
Instructions
  1. Place paprika, onion powder, salt, pepper, and cayenne pepper in small bowl. Stir to combine. Pat pork chops dry using paper towel; sprinkle both sides of meat with spice mix, pressing spices into meat to adhere.

  2. Heat oil in large oven-proof skillet on medium-high heat, until very hot. Add pork chops in single layer; cook each side 3-4 minutes, until well browned. Transfer pork chops from skillet to a plate & keep warm. Do NOT clean out skillet!

  3. Add butter to same skillet; melt on medium heat. Add sliced onions; cook for 8-10 minutes, stirring occasionally, until well browned. Stir in thyme and minced garlic; cook for 30 additional seconds. Add 1 cup beef broth to skillet (reserving remaining 2 Tablespoons for later). Add bay leaves and stir well, scraping up the browned bits from bottom of skillet while it cooks. Bring to a simmer; transfer pork chops back into skillet. Spoon sauce and onions over pork chops. Remove skillet from stove; cover it with aluminum foil.

  4. Preheat smoker to 300°F according to manufacturer instructions. Once at temp., place foil-covered skillet onto grill grate. Close smoker lid; let cook, (undisturbed) for 1 hour and 45 minutes, until pork chops are tender.

  5. When done, remove skillet from smoker; transfer pork chops (meat only) to a plate. Cover with foil to keep them hot. Place a large strainer on top of a medium-sized bowl. Pour sauce and onions from skillet through strainer. Sauce will run through strainer into bowl below. Onions will remain in strainer. Discard bay leaf. Place onions in small bowl. Remove any accumulated fat from surface of sauce. Place ⅔ cup of the sauce back into the skillet. Bring to a low simmer. In separate bowl, whisk reserved 2 Tablespoons beef broth and cornstarch until smooth. Add to sauce in skillet; whisk to combine. Sauce will slightly thicken as it cooks for about a minute. Once sauce thickens, add onions; stir to combine. **If desired, season gravy with additional salt and pepper, to taste.

  6. Place a pork chop onto each plate, and generously top each one with onion gravy. Serve, and enjoy!

Nutrition Facts
Smoked Smothered Pork Chops
Amount Per Serving (1 pork chop and gravy)
Calories 441 Calories from Fat 252
% Daily Value*
Fat 28g43%
Saturated Fat 14g88%
Trans Fat 1g
Polyunsaturated Fat 2g
Monounsaturated Fat 8g
Cholesterol 132mg44%
Sodium 548mg24%
Potassium 835mg24%
Carbohydrates 9g3%
Fiber 2g8%
Sugar 3g3%
Protein 37g74%
Vitamin A 389IU8%
Vitamin C 7mg8%
Calcium 59mg6%
Iron 1mg6%
* Percent Daily Values are based on a 2000 calorie diet.

Here’s one more to pin on your Pinterest boards!Smoked Smothered Pork Chops are tender, delicious and covered in onion gravy. Prepped on a stove, then cooked until tender on a smoker grill.

Sun-Dried Tomato Parmesan Bread

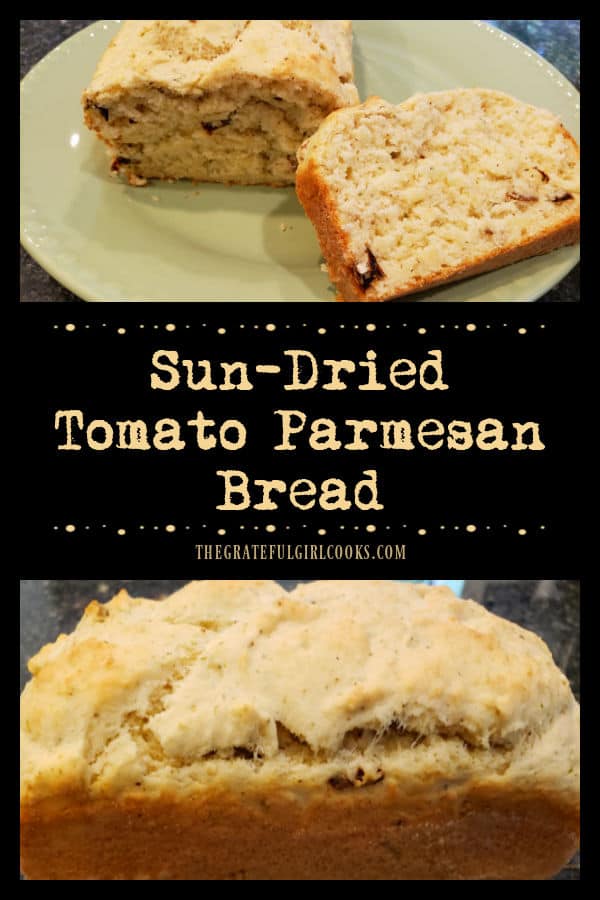
Make a loaf of Italian-inspired Sun-Dried Tomato Parmesan Bread. Easy to make, only 10 minutes prep, and into the oven it goes for 25-30 minutes!
Make a loaf of Italian-inspired Sun-Dried Tomato Parmesan Bread. Easy to make, 10 minutes prep and into the oven it goes for 30 minutes!

If you’re looking for a new recipe for bread that can be served with soups, salads, or meat, may I suggest this delicious loaf of sun-dried tomato Parmesan bread? It is super simple to make, and tastes absolutely wonderful! 

Dried oregano and freshly grated Parmesan cheese add Italian flavor to the chopped sun-dried tomatoes that are featured in this bread. The prep work is minimal (10 minutes), and then the bread is baked for 25-30 minutes. That’s it! Let me show you how EASY it is to make a delicious, large loaf of this flavorful bread.

Scroll Down For A Printable Recipe Card At The Bottom Of The Page

Make The Bread Batter

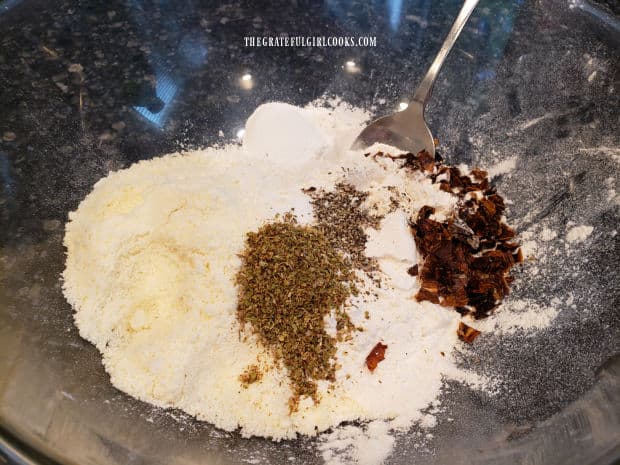
Before mixing the bread batter, be sure to preheat your oven, because it doesn’t take long at all to prepare the batter! To make the batter, place flour, baking powder, salt, pepper, grated Parmesan cheese, oregano and finely chopped sun-dried tomatoes in a large mixing bowl. Stir well, to combine.

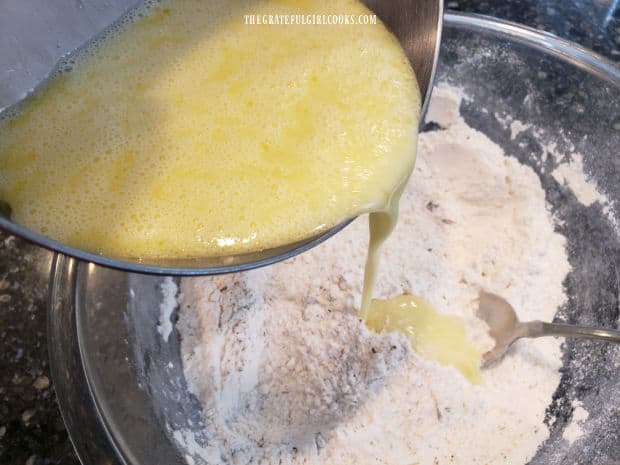
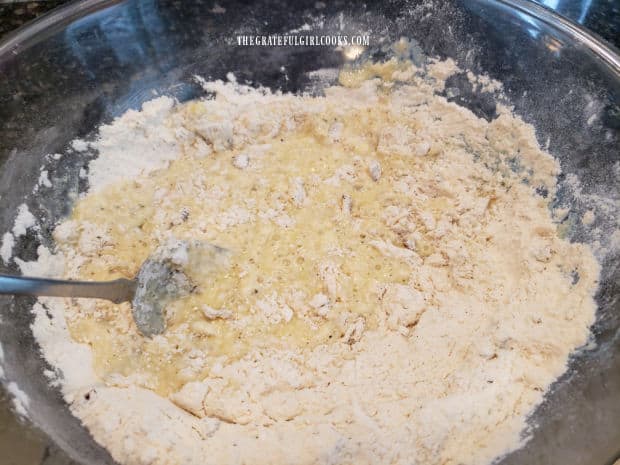
In a separate bowl, whisk the milk, egg, and olive oil together until fully combined. Pour the egg mixture into the bowl with the flour mixture. 

Flour, Parmesan cheese, spices and sun-dried tomatoes are combined in bowl.Egg, oil and milk mixture is added to the dry ingredients to make the bread batter.

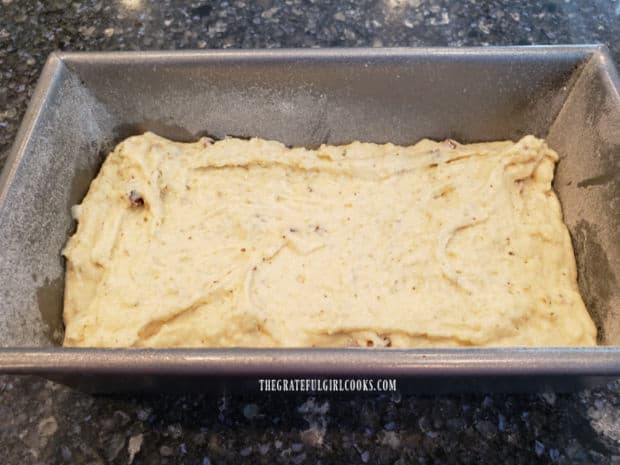
Stir, but only until all of the dry ingredients are incorporated into the batter. Be careful NOT to overmix. Pour or spoon the bread batter into a well greased and floured 8″ x 4″ loaf pan. Level the batter evenly in the pan. Now you’re ready to bake the sun-dried tomato Parmesan bread!

Batter is stirred only until ingredients are moistened and fully incorporated.The batter for sun-dried tomato Parmesan bread is spooned into a greased/floured loaf pan

Bake The Sun-Dried Tomato Parmesan Bread

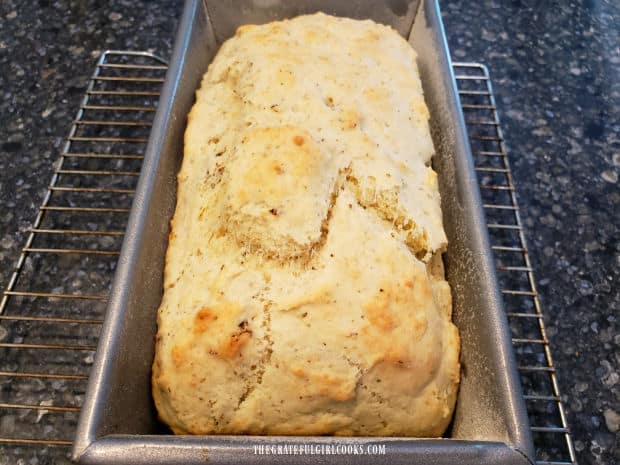
Place the sun-dried tomato Parmesan bread into a preheated 375°F. oven, and bake for 25-30 minutes. When done, it will be golden brown on top of the loaf. You can check to see if it’s done by inserting a toothpick into the top/center of the loaf. If it comes out clean, you know the sun-dried tomato Parmesan bread is fully baked.

Let the bread cool (still in the pan) for several minutes before removing it from the loaf pan and transferring it to a wire rack to cool.

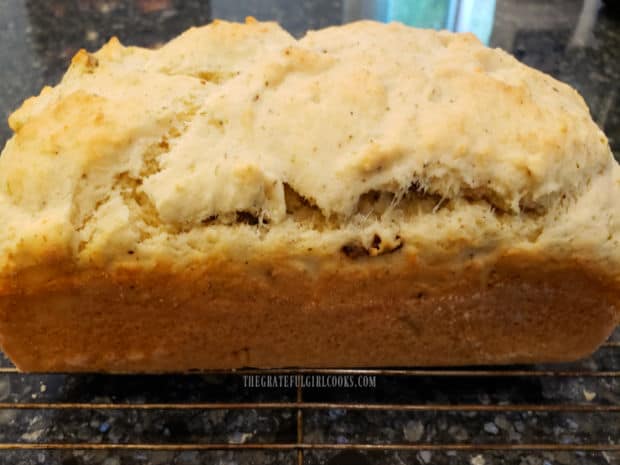
A loaf of golden brown sun-dried tomato Parmesan bread cools in pan after baking.A side view of a loaf of baked sun-dried tomato Parmesan bread.

Who Wants A Slice?

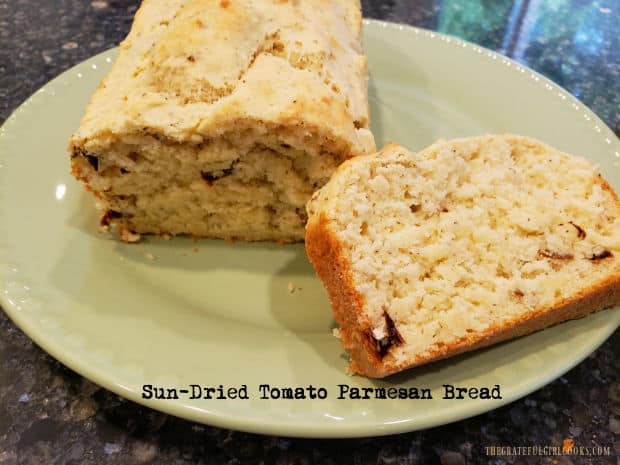
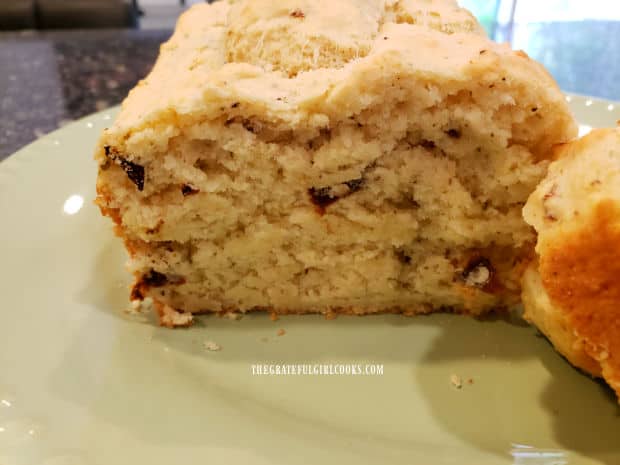
We enjoy eating this bread warm, with softened butter spread on top! It is easier to slice once it has cooled down a bit. Once sliced, you can see the specks of oregano, and pieces of sun-dried tomatoes in the bread.

The sun-dried tomato Parmesan bread is mild in flavor, but absolutely delicious. We really enjoy it served as a side dish for a salad or chicken, but you can’t go wrong with eating a piece all by itself (dripping with butter, ha ha). YUM!

A peek at the inside of the sun-dried tomato Parmesan bread, after slicing.

I hope you will take the opportunity to make this delicious sun-dried tomato Parmesan bread soon, and trust you will enjoy it, like we do! Thanks for stopping by, and I invite you to come back again soon for more family-friendly recipes. Take care!

Looking For More BREAD Recipes?

You can find ALL of my recipes in the Recipe Index, located at the top of the page. I have some delicious sweet AND savory bread recipes you may enjoy, including:

Interested In More Recipes?

Thank you for visiting this website. I appreciate you using some of your valuable time to do soIf you’re interested, I publish a newsletter 2 times per month (1st and 15th) with all the latest recipes, and other fun info. I would be honored to have you join our growing list of subscribers, so you never miss a great recipe!
There is a Newsletter subscription box on the top right side (or bottom) of each blog post, depending on the device you use, where you can easily submit your e-mail address (only) to be included in my mailing list.

You Can Also Find Me On Social Media:

Facebook page: The Grateful Girl Cooks!
Pinterest:
The Grateful Girl Cooks!
Instagram:
jbatthegratefulgirlcooks

Author's signature

Original recipe source: Kate Stewart Rovner, in Southern Living Magazine, November 2005 issue, page 208, published by Southern Living, Inc.

↓↓ PRINTABLE RECIPE BELOW ↓↓

0 from 0 votes
Sun-Dried Tomato Parmesan Bread
Prep Time
10 mins
Cook Time
30 mins
Total Time
40 mins
 

Make a loaf of Italian-inspired Sun-Dried Tomato Parmesan Bread. Easy to make, 10 minutes prep and into the oven it goes for 30 minutes!

Category: Bread, Side Dish
Cuisine: Italian
Keyword: sun-dried tomato Parmesan bread
Servings: 8 (an 8" loaf)
Calories Per Serving: 233 kcal
Author: JB @ The Grateful Girl Cooks!
Ingredients
  • 2 cups all purpose flour
  • 1 Tablespoon baking powder
  • 1 teaspoon dried oregano
  • ½ teaspoon salt
  • ¼ teaspoon black pepper
  • ½ cup grated Parmesan cheese
  • ¼ cup finely chopped sun-dried tomatoes
  • 1 cup milk
  • ¼ cup extra virgin olive oil
  • 1 large egg
Instructions
  1. Preheat oven to 375° F. Generously grease and flour an 8" x 4" loaf pan.

  2. Place flour, baking powder, salt, pepper, grated Parmesan cheese, oregano and chopped sun-dried tomatoes in large mixing bowl. Stir well, to combine.

  3. In separate bowl, whisk milk, olive oil and egg until fully combined. Pour into bowl with flour mixture. Stir, only until dry ingredients are incorporated into batter. Be careful NOT to overmix. Pour or spoon batter into prepared loaf pan. Level batter evenly in pan.

  4. Bake at 375°F. for 25-30 minutes. When done, it will be golden brown on top. Check for done-ness by inserting toothpick into top/center of loaf. If it comes out clean, bread is done. Let bread cool (still in pan) several minutes before removing it from pan. Transfer bread to a wire rack to cool. Slice and serve warm. Enjoy!

Recipe Notes

NOTE: Caloric calculation made using 1% milk, and sun-dried tomatoes, not packed in oil.

Nutrition Facts
Sun-Dried Tomato Parmesan Bread
Amount Per Serving (1 slice (1/8 of total))
Calories 233 Calories from Fat 90
% Daily Value*
Fat 10g15%
Saturated Fat 2g13%
Trans Fat 1g
Polyunsaturated Fat 1g
Monounsaturated Fat 6g
Cholesterol 30mg10%
Sodium 273mg12%
Potassium 368mg11%
Carbohydrates 28g9%
Fiber 1g4%
Sugar 3g3%
Protein 8g16%
Vitamin A 180IU4%
Vitamin C 1mg1%
Calcium 188mg19%
Iron 2mg11%
* Percent Daily Values are based on a 2000 calorie diet.

Here’s one more to pin on your Pinterest boards!Make a loaf of Italian-inspired Sun-Dried Tomato Parmesan Bread. Easy to make, 10 minutes prep and into the oven it goes for 30 minutes!

Lemon Dutch Baby

Make a Lemon Dutch Baby (serves 4) in only a few minutes! Ingredients for this fluffy German pancake are blended, then baked in a skillet!
Make a Lemon Dutch Baby (serves 4) in only a few minutes! Ingredients for this fluffy German pancake are blended, then baked in a skillet!Have you ever had a Lemon Dutch Baby? Dutch Babies are also called German Pancakes, and this one is absolutely delicious! This fluffy baked pancake is flavored with vanilla extract and fresh grated lemon zest. It can be served with  powdered sugar and lemon wedges, if desired (YES, DO IT!). We love the sweetness a bit of sifted powdered sugar brings, and always squeeze a bit of lemon juice over each portion. It is so yummy!

Guess what? This lemon Dutch baby recipe is super easy, too, which means it’s a keeper! I was inspired to make this after making some absolutely yummy miniature Dutch babies, so I modified the recipe a bit, and landed on this one!

Lemon Dutch Babies are incredibly easy and delicious, and you can’t go wrong with that combo! The ingredients are blended, poured into a hot cast iron skillet, and then baked until golden brown and puffy! Let me show you how easy it is to make a delicious Lemon Dutch Baby that will serve 4!

Scroll Down For a Printable Recipe Card At the Bottom Of The Page

Make The Batter For The Lemon Dutch Baby

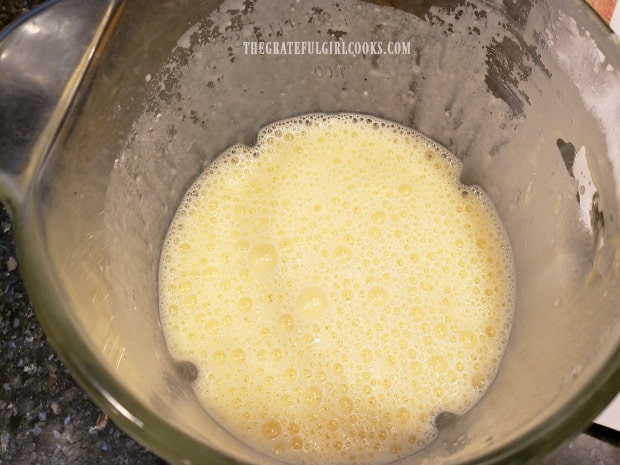
Put the milk, eggs, flour, salt, vanilla extract, and freshly grated lemon zest into a blender. Put the lid on (kind of important, right?), and blend these ingredients, until they have been combined well. Make sure there are no lumps in the batter.

The ingredients for the German pancake are blended until smooth.

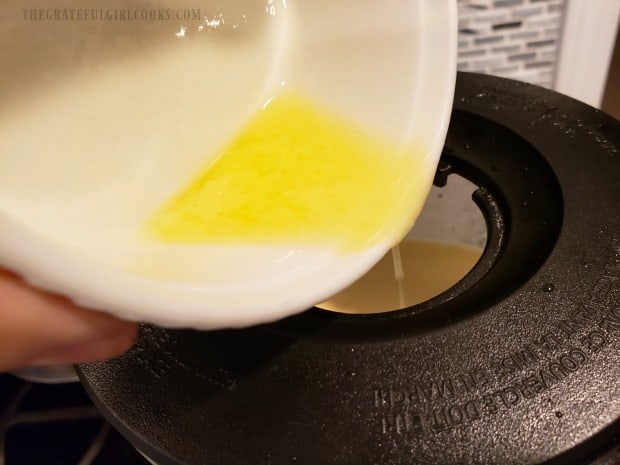
Blend in 2 Tablespoons of butter, that has been melted and cooled to room temperature, and set remaining ONE Tablespoon aside for later. Drizzle the melted butter (using the removable top as shown below) into the blender, while running the blender on low speed. Okay- now you’ve made the batter for your lemon Dutch baby. See how easy that is?

Melted and cooled butter is added to the batter for the Dutch baby.

Baking The Lemon Dutch Baby

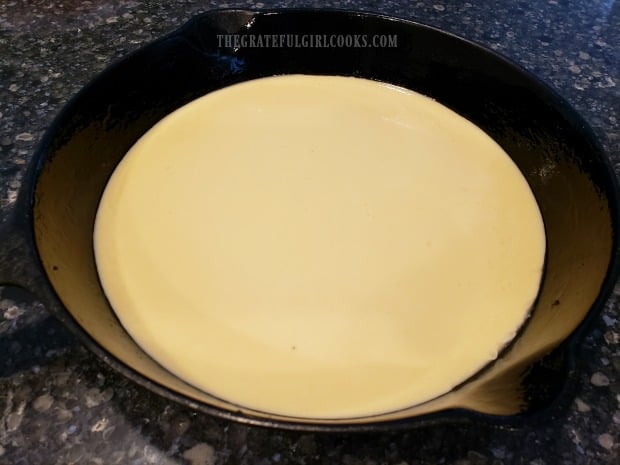
Heat a 9″ or 10″ cast iron skillet on medium heat. Once the skillet is hot, pour in the reserved Tablespoon of melted butter. Use a pastry brush to coat the bottom and sides of the skillet with butter. Pour the batter into the hot skillet, and immediately place the skillet into a preheated 425°F. oven.

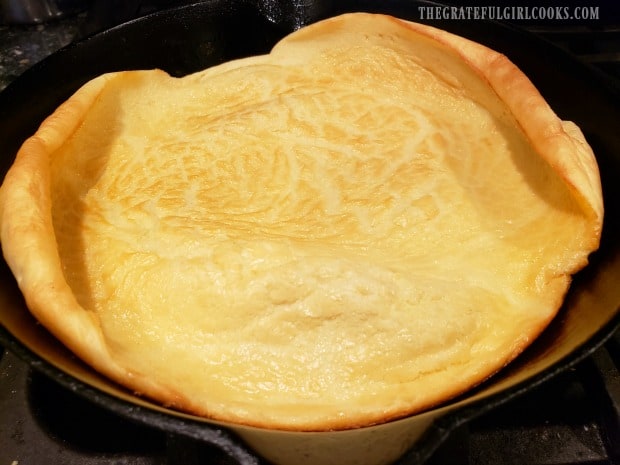
Bake the lemon Dutch baby at 425°F. for 13-15 minutes. When done, the Dutch baby should be puffy, and a light golden brown color, and cooked through. Remove the skillet from the oven.

Batter is poured into a hot, buttered skillet before baking.The Lemon Dutch Baby is puffy and golden, once it has been removed from the oven.

Serving The Lemon Dutch Baby

Even though it is optional, I recommend generously dusting the surface with sifted powdered sugar, and lemon wedges. Each person can squeeze fresh lemon juice over their serving (one or two wedges per serving). You won’t need any syrup, because the lemon juice and powdered sugar combo is all you will need to sweeten it. Slice the lemon Dutch baby into 4 wedges, and serve immediately!

A lemon Dutch baby, garnished with powdered sugar, lemon wedges and a strawberry.Lemon wedges and a strawberry garnish the powdered sugar covered Lemon Dutch Baby.

I really hope you enjoy this Lemon Dutch Baby! We really think they are a wonderful breakfast treat. My favorite way to enjoy it is to squeeze fresh lemon juice over my powdered sugar dusted wedge, and eat it just like that – YUM. This breakfast treat is sweet, tangy, and absolutely delicious.

If you enjoy eating Dutch Babies, please be sure to also check out my fun recipe for Mini Dutch Babies. They are fruit filled little miniature Dutch babies, and are perfect for serving at any brunch or special occasion! Thanks for stopping by, and I sincerely hope you will come back again soon for more yummy, family-friendly recipes. Have a fantastic day. friends.

Looking For More BREAKFAST Recipes?

You can find ALL of my recipes in the Recipe Index, located at the top of the page. I have a wonderful variety of recipes for breakfast I know you’ll enjoy, including:

Interested In More Recipes?

Thank you for visiting this website. I appreciate you using some of your valuable time to do soIf you’re interested, I publish a newsletter 2 times per month (1st and 15th) with all the latest recipes, and other fun info. I would be honored to have you join our growing list of subscribers, so you never miss a great recipe!
There is a Newsletter subscription box on the top right side (or bottom) of each blog post, depending on the device you use, where you can easily submit your e-mail address (only) to be included in my mailing list.

You Can Also Find Me On Social Media:

Facebook page: The Grateful Girl Cooks!
Pinterest:
The Grateful Girl Cooks!
Instagram:
jbatthegratefulgirlcooks

Author's signature

0 from 0 votes
Lemon Dutch Baby
Prep Time
5 mins
Cook Time
13 mins
Total Time
18 mins
 

Make a Lemon Dutch Baby (serves 4) in only a few minutes! Ingredients for this fluffy German pancake are blended, then baked in a skillet!

Category: Breakfast
Cuisine: American
Keyword: lemon Dutch baby
Servings: 4
Calories Per Serving: 218 kcal
Author: JB @ The Grateful Girl Cooks!
Ingredients
  • ½ cup milk
  • 4 large eggs
  • ½ cup all purpose flour
  • ¼ teaspoon salt
  • ½ teaspoon vanilla extract
  • teaspoons grated lemon zest
  • 3 Tablespoons butter melted, cooled and DIVIDED
Garnish with sifted powdered sugar, and lemon wedges, for serving. (OPTIONAL, but recommended)
    Instructions
    1. Preheat oven to 425°F.

    2. Place milk, eggs, flour, salt, vanilla, and lemon zest into blender. Put lid on; blend well, until combined. Make sure there are no lumps in the batter. Drizzle in 2 Tablespoons of butter (melted/cooled to room temp.) slowly through removable top on blender. Reserve remaining Tablespoon of butter for later.

    3. Heat a 9" or 10" cast iron skillet on medium heat. Once skillet is hot, pour in reserved Tablespoon of melted butter. Use a pastry brush to coat bottom and sides of skillet with butter. Pour batter into hot skillet, and immediately place skillet into preheated 425°F. oven.

    4. Bake at 425°F. for 13-15 minutes. When done, the Dutch baby should be puffy, a light golden brown color, and cooked through. Remove skillet from oven.

    5. I highly recommend generously dusting the surface with sifted powdered sugar, and then top with lemon wedges. Each person can squeeze fresh lemon juice over their serving (one or two wedges per serving).  No syrup is really needed, because the lemon juice and powdered sugar combo will sweeten each serving. Slice into 4 wedges, and serve immediately! Enjoy!

    Recipe Notes

    NOTE: Caloric calculation is made without adding in calories from optional powdered sugar and lemon wedge garnish, as amounts used may vary from person to person.

    Nutrition Facts
    Lemon Dutch Baby
    Amount Per Serving (1 (1/4 of total))
    Calories 218 Calories from Fat 126
    % Daily Value*
    Fat 14g22%
    Saturated Fat 7g44%
    Trans Fat 1g
    Polyunsaturated Fat 1g
    Monounsaturated Fat 4g
    Cholesterol 210mg70%
    Sodium 305mg13%
    Potassium 134mg4%
    Carbohydrates 14g5%
    Fiber 1g4%
    Sugar 2g2%
    Protein 9g18%
    Vitamin A 591IU12%
    Vitamin C 1mg1%
    Calcium 71mg7%
    Iron 2mg11%
    * Percent Daily Values are based on a 2000 calorie diet.

    Here’s one more to pin on your Pinterest boards!Make a Lemon Dutch Baby (serves 4) in only a few minutes! Ingredients for this fluffy German pancake are blended, then baked in a skillet!


    Apple Cider Vinaigrette

    Make a simple apple cider vinaigrette in 5 minutes! Use this delicious salad dressing to top your favorite spinach or mixed green salads.
    Make a simple apple cider vinaigrette in 5 minutes! Use this delicious salad dressing to top your favorite spinach or mixed green salads.

    Do you enjoy homemade salad dressings? I sure do, and think it’s fun to make salad dressings from scratch using ingredients found in our kitchen. I’ve experimented with many salad dressings over the years, and have posted a LOT of them on this blog.

    Today I want to share a recipe for apple cider vinaigrette, which can be easily made in a few minutes. The vinaigrette tastes great on spinach salads or mixed green salads. Typically a vinaigrette combines oil and some type of vinegar. The vinegar used in this recipe is apple cider vinegar. Other fresh ingredients and spices are added to give the vinaigrette extra flavor and slight sweetness. I really think you will enjoy this salad dressing. Here’s how easy it is to make:

    What Ingredients Will I Need To Make Apple Cider Vinaigrette?

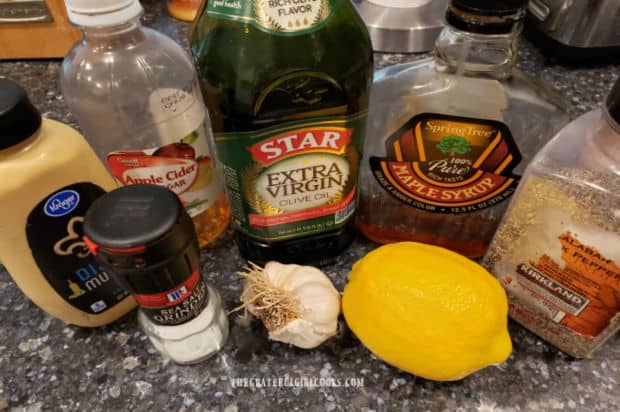
    The ingredients needed are olive oil, apple cider vinegar, fresh lemon juice, Dijon mustard, minced garlic, maple syrup and salt and pepper.  These are fairly common ingredients, and because I keep them on hand, it’s easy to whip up a batch of vinaigrette for salads.

    The ingredients are gathered to make apple cider vinaigrette.

    Mixing The Vinaigrette

    It is so easy to make apple cider vinaigrette! Place all of the ingredients in a small bowl or in a jar or container that has a tight fitting lid. If you are using a bowl for mixing, whisk the ingredients together well, until the vinaigrette has emulsified. This means the oil and vinegar and other ingredients are thoroughly combined.

    If you are mixing the vinaigrette in a jar or container, place the ingredients into the container and seal with the lid. Vigorously shake the sealed jar until the oil, vinegar and other ingredients have emulsified, and are completely combined..

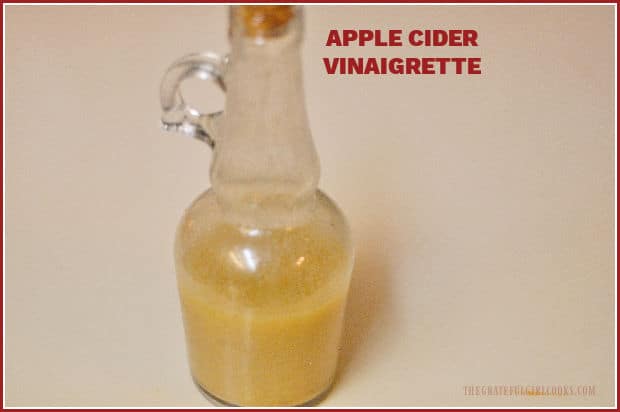
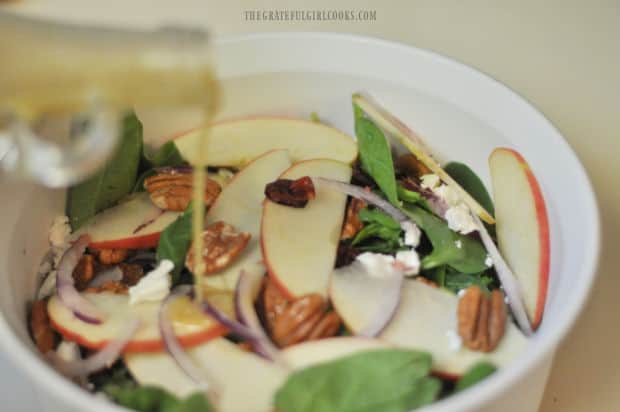
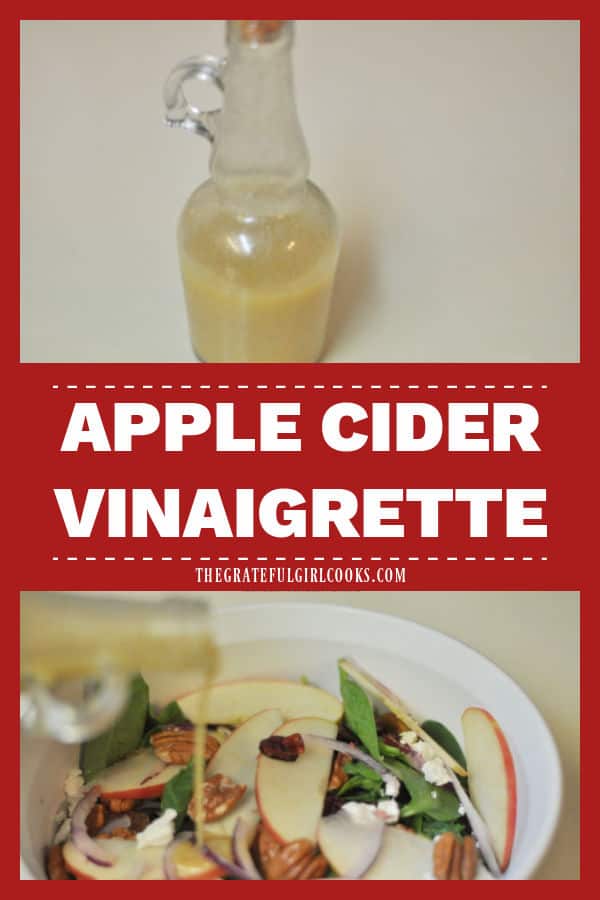
    The apple cider vinaigrette is mixed, then poured into a cruet for pouring onto salad.

    Ready To Use!

    Once the apple cider vinaigrette is combined, it can be used immediately to drizzle on a favorite green salad. You can also refrigerate the vinaigrette (covered) in the refrigerator until ready to use. TIP: If using AFTER refrigerating, remove the jar from the fridge a couple minutes before using. Shake the jar (or whisk in the bowl) really well before drizzling on the salad.

    That’s it! You made apple cider vinaigrette from scratch! We especially enjoy this vinaigrette used to compliment a Spinach, Apple and Goat Cheese Salad (shown below). It’s really tasty.

    This salad dressing tastes wonderful on a spinach or mixed green salad.

    I love making homemade salad dressings, and hope you will enjoy trying this easy recipe! Thanks so much for stopping by, and I sincerely hope you will come back again soon. Take care, and have a wonderful day.

    Looking For More SALAD DRESSING Recipes?

    You can find ALL of my recipes in the Recipe Index, which is located at the top of the page. I have a wonderful variety of homemade, delicious salad dressings to choose from, including:

    Interested In More Recipes?

    Thank you for visiting this website. I appreciate you using some of your valuable time to do soIf you’re interested, I publish a newsletter 2 times per month (1st and 15th) with all the latest recipes, and other fun info. I would be honored to have you join our growing list of subscribers, so you never miss a great recipe!
    There is a Newsletter subscription box on the top right side (or bottom) of each blog post, depending on the device you use, where you can easily submit your e-mail address (only) to be included in my mailing list.

    You Can Also Find Me On Social Media:

    Facebook page: The Grateful Girl Cooks!
    Pinterest:
    The Grateful Girl Cooks!
    Instagram:
    jbatthegratefulgirlcooks

    Author's signature

    Original recipe source: http://www.gimmesomeoven.com/my-favorite-apple-spinach-salad/

    0 from 0 votes
    Apple Cider Vinaigrette
    Prep Time
    5 mins
    Cook Time
    0 mins
    Total Time
    5 mins
     

    Make a simple apple cider vinaigrette in 5 minutes! Use this delicious salad dressing to top your favorite spinach or mixed green salads.

    Category: Salad Dressing
    Cuisine: American
    Keyword: apple cider vinaigrette
    Servings: 12 Tablespoons (approx. 3/4 cup total)
    Calories Per Serving: 60 kcal
    Author: JB @ The Grateful Girl Cooks!
    Ingredients
    • cup extra virgin olive oil
    • ¼ cup apple cider vinegar
    • 2 Tablespoons fresh lemon juice
    • 1 Tablespoon Dijon mustard
    • 1 med. clove garlic , peeled and minced
    • 1 Tablespoon pure maple syrup (or honey)
    • 1 pinch salt and black pepper (each) , to taste
    Instructions
    1. If Mixing Vinaigrette In A Bowl: Place all ingredients in the bowl. Whisk together well, until oil, vinegar, and other ingredients have emulsified, and are completely combined.

    2. If Mixing Vinaigrette In Jar or Container: Place all ingredients into container and cover with tight fitting lid. Vigorously shake sealed jar until the oil, vinegar and other ingredients have emulsified, and are completely combined..

    3. Store (covered) in refrigerator. If using after refrigeration, remove vinaigrette a couple minutes before serving. Vigorously shake jar (or whisk, if in bowl) to re-combine ingredients before using. Enjoy!

    Nutrition Facts
    Apple Cider Vinaigrette
    Amount Per Serving (1 Tablespoon)
    Calories 60 Calories from Fat 54
    % Daily Value*
    Fat 6g9%
    Saturated Fat 1g6%
    Polyunsaturated Fat 1g
    Monounsaturated Fat 4g
    Sodium 18mg1%
    Potassium 12mg0%
    Carbohydrates 1g0%
    Fiber 1g4%
    Sugar 1g1%
    Protein 1g2%
    Vitamin A 1IU0%
    Vitamin C 1mg1%
    Calcium 3mg0%
    Iron 1mg6%
    * Percent Daily Values are based on a 2000 calorie diet.

    Here’s one more to pin on your Pinterest boards!Make a simple apple cider vinaigrette in 5 minutes! Use this delicious salad dressing to top your favorite spinach or mixed green salads.

    Easy Tomato Basil Pasta

    Easy tomato basil pasta is yummy, and is a CINCH to make! Marinate fresh tomatoes, basil, garlic & spices, then add to cooked pasta, to serve!
    Easy tomato basil pasta is yummy, and is a CINCH to make! Marinate fresh tomatoes, basil, garlic & spices, then add to cooked pasta, to serve!

    As I write this blog post, we are in the middle of a record-shattering heat wave here in our part of Oregon. Temps yesterday were 113°F., and they are “expected to hit 115° F today. Even though we have air conditioning (most in the Portland metro do not), we are trying our best not to use the oven, or even cook a lot of hot food. That’s where this recipe comes in handy! I am making this again tonight for my husband, and my sister-in-law (who is staying with us and our air conditioning during this heat wave, to stay cool).

    I found this recipe (source unknown) many years ago in an old recipe box I’ve had for over 30 years. Not sure where I got the original recipe, but it’s a KEEPER! I’ve made it a few times way back when, but decided recently to make it again, photograph it, and post the recipe on the ol’ blog! Now you can enjoy it, too!

    It is totally simple meatless main dish, and light enough (yet filling) to enjoy on a hot OR cold day!. If you can boil spaghetti noodles, you can make this delicious pasta dish! I’ve now made this pasta twice in the past two weeks, and it is yummy! Here’s how to make easy tomato basil pasta.

    Scroll Down For A Printable Recipe Card At The Bottom Of The Page

    How To Make Easy Tomato Basil Pasta

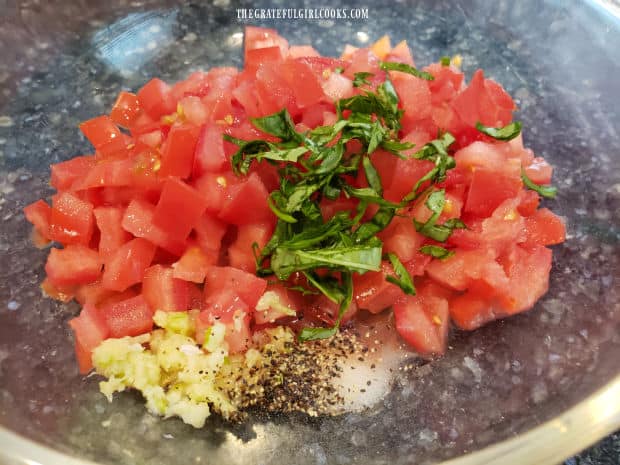
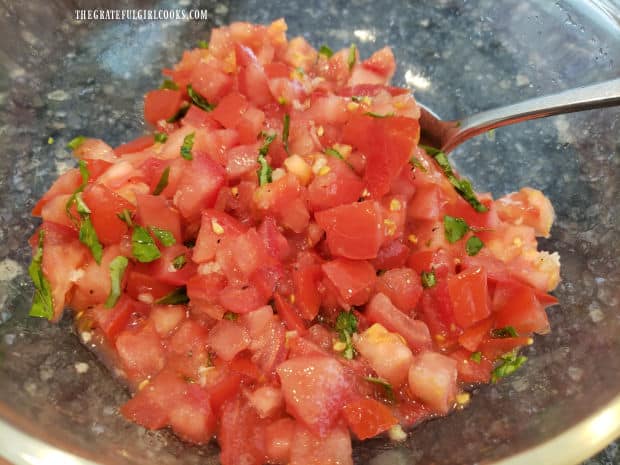
    In a medium sized bowl, combine chopped fresh tomatoes, thinly sliced fresh basil, minced garlic, and salt and pepper. Give them a good stir to fully combine ingredients together, and then cover the bowl with plastic wrap and let it sit on the counter for one hour (or more, if you have the time). Do NOT refrigerate the tomato mixture, and give it a stir a couple of times during the “marinating”.

    Chopped tomatoes, basil, garlic and spices are combined in a bowl.After stirring, the tomatoes and other ingredients sit undisturbed for at least an hour.

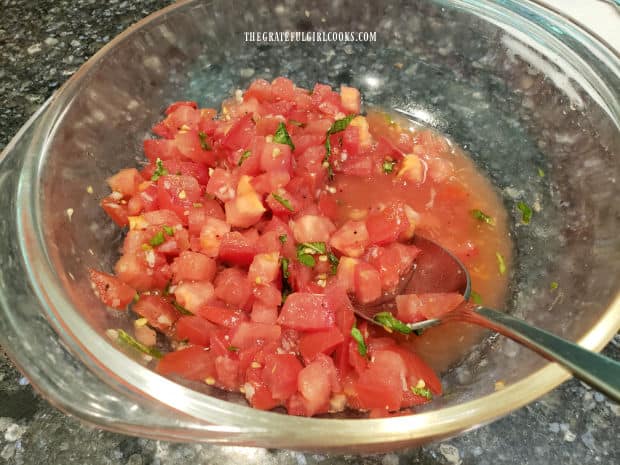
    After the tomato basil mixture has marinated for an hour, you will notice that the tomatoes have released some of their juice. That is perfect, and just what you want them to do. Set the tomato mixture aside while you cook the pasta.

    After resting for an hour, the ingredients for the tomato basil pasta are ready to use.

    Cook The Pasta

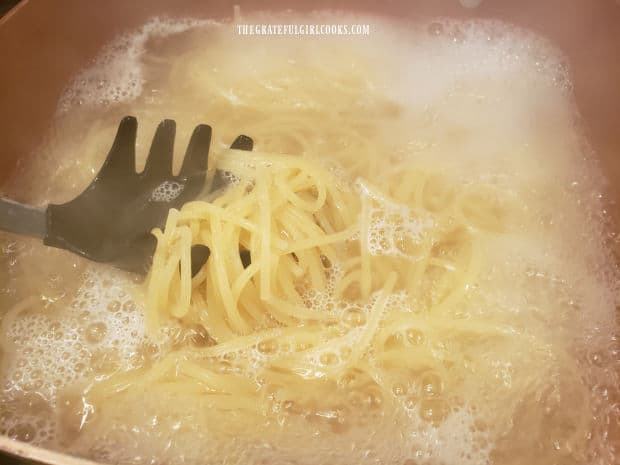
    Cook the spaghetti (or angel hair pasta) in boiling, lightly salted water according to the package instructions until done. Immediately pour the hot pasta into a colander to drain off water, BUT DO NOT RINSE! You want the pasta HOT.

    Spaghetti noodles (or angel hair pasta) is cooked in boiling water

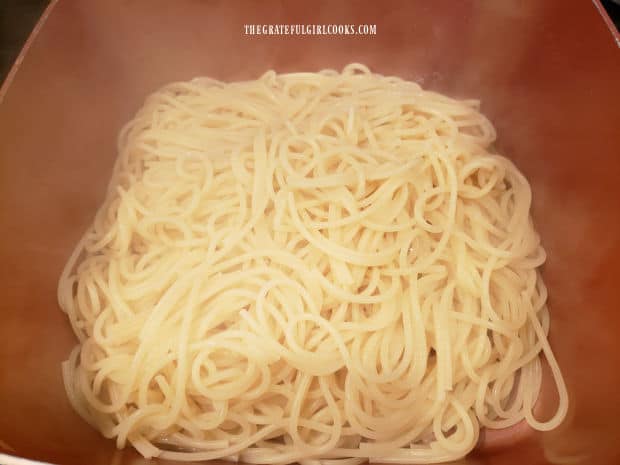
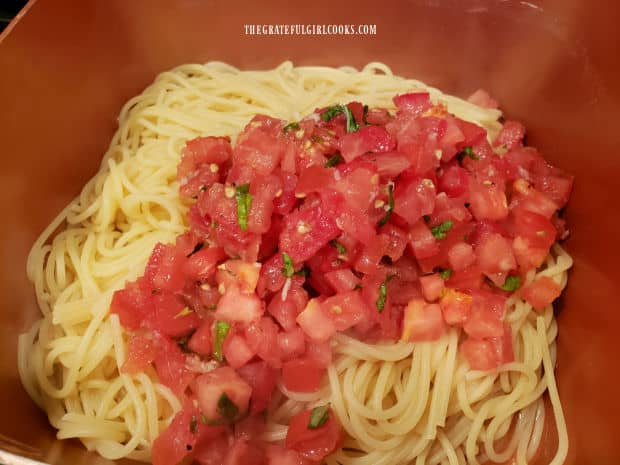
    As soon as the water is drained, pour the hot pasta noodles back into the cooking pan. Immediately add the room temperature tomato/basil/garlic mixture. YES, you add it (uncooked) to the hot pasta. Toss the pasta and tomato basil mixture (including all the accumulated juice) until fully combined. 

    The pasta is drained and immediately placed back into the cooking pan.The easy tomato basil pasta ingredients are combined and tossed until fully integrated.

    Garnish, Then Serve Easy Tomato Basil Pasta

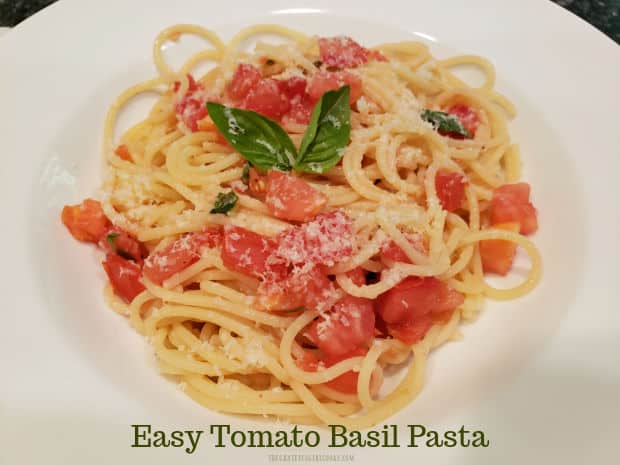
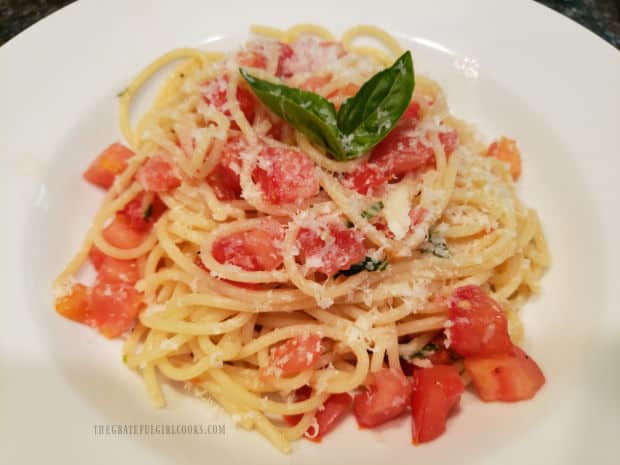
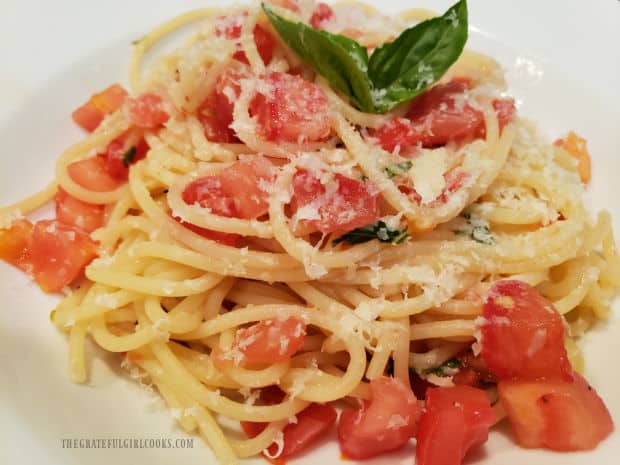
    While it is still hot, portion out the easy tomato basil pasta into serving bowls or onto plates. Grate fresh Parmesan cheese on top of the pasta, and garnish with a couple fresh basil leaves, if desired. Serve immediately!

    The tomato basil pasta is garnished with grated Parmesan cheese and basil leaves before serving.A serving of easy tomato basil pasta in a white bowl is garnished and ready to enjoy!

    We love this simple pasta dish, and it truly tastes wonderful! I hope you have the opportunity to try this recipe, and trust you will enjoy it as much as we do. If you like meatless pasta, be sure to check out my recipe for Garlic Penne Pasta and Veggies! Thanks for stopping by, and I trust you will come back again soon! Take care, and may God bless you throughout this day.

    Looking For More PASTA Recipes?

    You can find ALL of my recipes in the Recipe Index, located at the top of the page. I have lots of yummy pasta recipes I think you’ll enjoy, including:

    Interested In More Recipes?

    Thank you for visiting this website. I appreciate you using some of your valuable time to do soIf you’re interested, I publish a newsletter 2 times per month (1st and 15th) with all the latest recipes, and other fun info. I would be honored to have you join our growing list of subscribers, so you never miss a great recipe!
    There is a Newsletter subscription box on the top right side (or bottom) of each blog post, depending on the device you use, where you can easily submit your e-mail address (only) to be included in my mailing list.

    You Can Also Find Me On Social Media:

    Facebook page: The Grateful Girl Cooks!
    Pinterest:
    The Grateful Girl Cooks!
    Instagram:
    jbatthegratefulgirlcooks

    Author's signature

    Original recipe source: unknown

    0 from 0 votes
    Easy Tomato Basil Pasta
    Prep Time
    5 mins
    Cook Time
    10 mins
    RESTING TIME (inactive prep)
    1 hr
    Total Time
    1 hr 15 mins
     

    Easy tomato basil pasta is yummy, & a CINCH to make! Marinate fresh tomatoes, basil, garlic & spices, then add to cooked pasta, to serve!

    Category: Main Dish
    Cuisine: Italian
    Keyword: easy tomato basil pasta
    Servings: 4
    Calories Per Serving: 249 kcal
    Author: JB @ The Grateful Girl Cooks!
    Ingredients
    • 2 cups diced, fresh tomatoes , approx. 2 large tomatoes
    • 2 teaspoons fresh basil , thinly sliced or chopped
    • 2 teaspoons minced garlic
    • ½ teaspoon salt
    • teaspoon ground black pepper
    • 8 ounces spaghetti or angel hair pasta
    • 4 Tablespoons finely grated Parmesan cheese , for garnish
    • 8 leaves fresh basil , for garnish
    Instructions
    1. In a medium bowl, combine chopped tomatoes, chopped or thinly sliced basil, minced garlic, salt and pepper. Stir to fully combine ingredients. Cover bowl with plastic wrap and let it sit on the counter for one hour (or more). Do NOT refrigerate tomato mixture; give it a stir a couple times during the "marinating". After mixture has marinated for an hour, you will notice the tomatoes have released some juice. That what you want them to do. Set the tomato mixture aside while you cook the pasta.

    2. Cook spaghetti (or angel hair pasta) in boiling, lightly salted water according to package instructions until done. Immediately pour hot pasta into a colander to drain off water, BUT DO NOT RINSE! You want the pasta HOT.

    3. As soon as water has drained off, pour hot pasta back into cooking pan. Immediately add room temperature tomato mixture. YES, add it (uncooked) to the hot pasta. Toss the pasta and tomato basil mixture (including accumulated juice) until fully combined.

    4. While still hot, portion pasta into serving bowls or onto plates. Grate fresh Parmesan cheese on top, and garnish with a couple fresh basil leaves, if desired. Serve immediately!

    Nutrition Facts
    Easy Tomato Basil Pasta
    Amount Per Serving (1 (1/4 of total))
    Calories 249 Calories from Fat 18
    % Daily Value*
    Fat 2g3%
    Saturated Fat 1g6%
    Polyunsaturated Fat 1g
    Monounsaturated Fat 1g
    Cholesterol 4mg1%
    Sodium 375mg16%
    Potassium 323mg9%
    Carbohydrates 46g15%
    Fiber 3g13%
    Sugar 4g4%
    Protein 10g20%
    Vitamin A 720IU14%
    Vitamin C 11mg13%
    Calcium 82mg8%
    Iron 1mg6%
    * Percent Daily Values are based on a 2000 calorie diet.

    Here’s one more to pin on your Pinterest boards!Easy tomato basil pasta is yummy, and is a CINCH to make! Marinate fresh tomatoes, basil, garlic & spices, then add to cooked pasta, to serve!

    Blackberry Pancake Syrup

    Learn how to make delicious Blackberry Pancake Syrup with fresh or frozen blackberries. Easy to make, and it’s yummy on waffles and ice cream, too!Learn how to make delicious Blackberry Pancake Syrup with fresh or frozen blackberries. Easy to make- yummy on waffles and ice cream, too!

    I love pancakes. I can’t help myself… they bring back so many memories of my childhood. Usually we eat our pancakes the traditional way- with maple syrup… BUT it is so awesome to make a batch of homemade blackberry pancake syrup for an occasional treat!

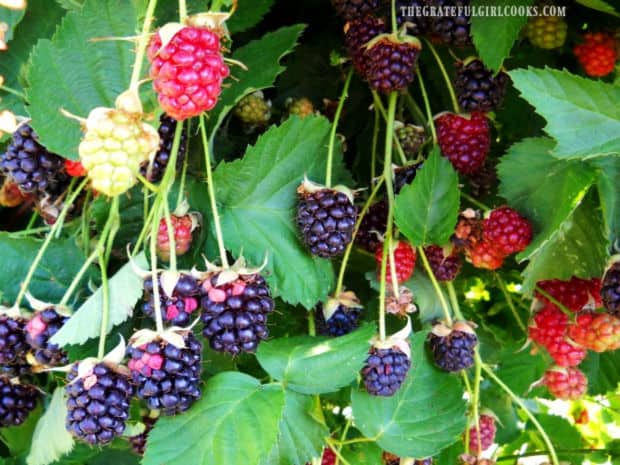
    In our little corner of Oregon, blackberries grow wild just about everywhere you turn during the heat of summer! We have several vines that grown up and over our back fence (from the neighborhood park), so I can get all the free blackberries I want! I can even store them in our freezer to use later in the year. WhooHoo!

    Blackberries growing over our back fence.

    Blackberry pancake syrup is one of the treats I can make with fresh (or frozen) blackberries, and it is really tasty! Other foods I have made with my treasure trove of blackberries are muffins, blackberry jam, crisps, handpies, scones, soda, and bar cookies, etc. Today I want to show you how to make blackberry pancake syrup using only a few ingredients. Here’s how:

    NOTE: The recipe (as written) will yield about 3 cups syrup. My photos reflect a doubled recipe. I also used frozen blackberries when I photographed this blog post.

    Scroll Down For A Printable Recipe Card At The Bottom Of The Page

    How To Make Blackberry Pancake Syrup

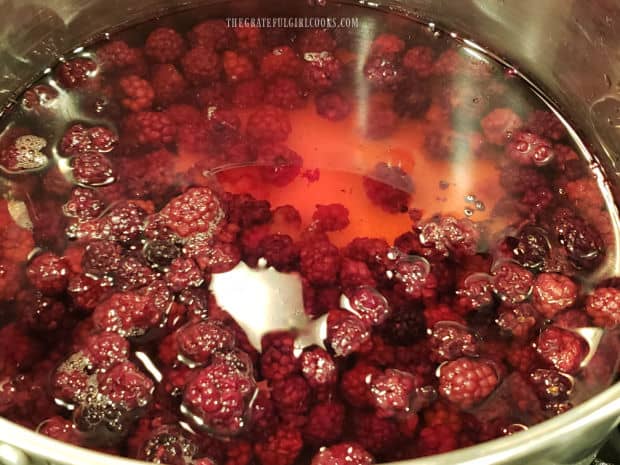
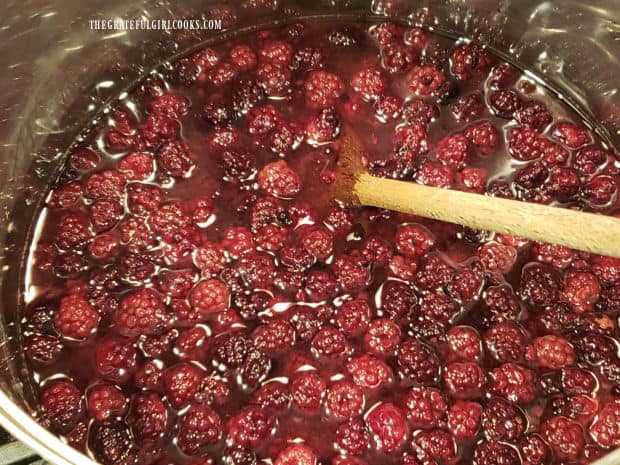
    Place blackberries, granulated sugar and water in a large pot (see NOTE section of printable recipe for details regarding using frozen berries). **Not sure why these turned out looking so red under the lights, but yep… they REALLY are blackberries that had been frozen**. Stir the mixture well, and turn the heat to medium-high. Bring the berries to a FULL BOIL, then reduce the heat to Low. Let the berries and liquid simmer 10-12 minutes, stirring occasionally, then remove the pot from the heat.

    Mash the berries really well. You can use a potato masher, the back of a large spoon, or a fork to do this. I vote for the potato masher, if you have access to one (quicker). Once mashed, let the berry mixture cool (off the heat) for 20-25 minutes.

    Blackberries, water and sugar cooking in order to make pancake syrup.Lots of blackberries cooking in large pot to make pancake syrup.

    Strain Berries to Remove The Seeds

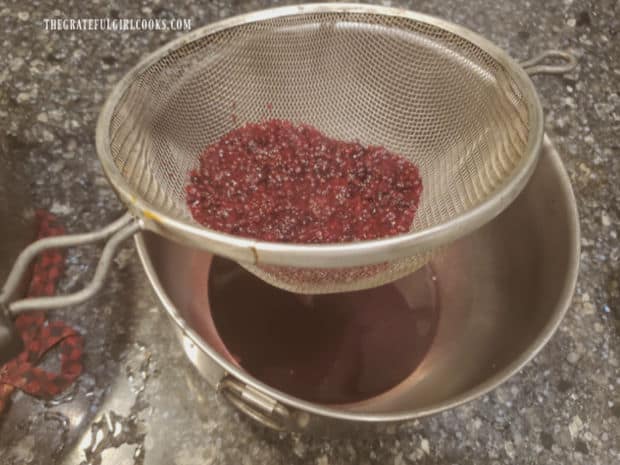
    This step can be a bit time-consuming, but it will be worth it in the end, because it will remove almost all the seeds from your pancake syrup. First, place a large bowl on the counter, and place a wire sieve over it. Transfer a cup or two of the berry/juice mixture to the strainer.

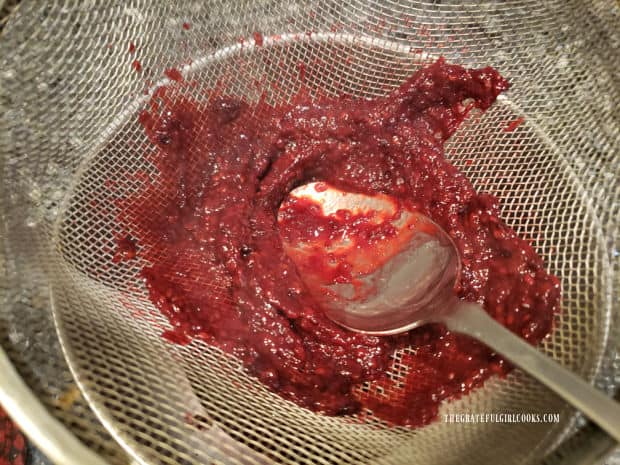
    Using the back of a large spoon, firmly press the “syrupy” blackberry puree into the sieve. The juice for the syrup will drip through into the bowl below. Continue pressing until almost all of the juice and puree have been filtered through the sieve. Just keep on pressing!

    Pressing cooked blackberries through sieve to remove seeds from syrup below.Back of a spoon is used to press cooked blackberries through sieve to filter out seeds.

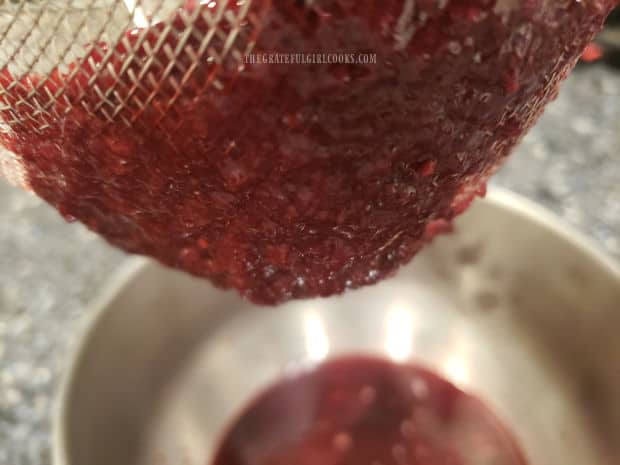
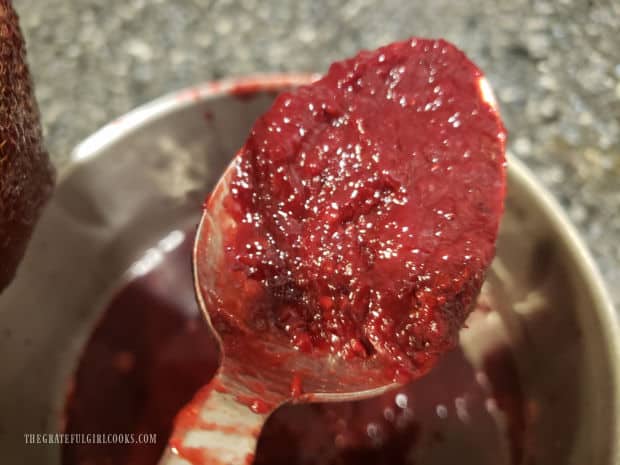
    Be sure to take a spoon and remove all the thick blackberry puree clinging to the underside bottom of the sieve and add it to the juices in the bowl. This thick puree is what will help thicken the syrup, so it is GOLD! Discard the seeds that remain inside of the sieve, then give the sieve a quick rinse. Process the next bit of berries and juice, continuing until all have been processed in this way.

    Continue to repeat this process until all the berries and juice have been “processed” this way. The blackberry pancake syrup that is in the bowl is what you will use. Your syrup may vary in thickness consistency, depending on whether you use frozen (tends to be thinner) or fresh blackberries, but there are ways to thicken it more, if necessary. See below.

    Thickened blackberry pulp is collected from bottom of sieve to thicken syrup.Spoon with blackberry pulp to add to the pancake syrup to thicken it.

    Tips for Thickening Syrup

    TIP: Do you want the syrup thicker? Here are two options: I have heard from others that if you want the finished syrup to be thicker in consistency, you can add 1/2 cup of light corn syrup to the blackberry syrup and stir to combine (after seeds have been removed). You can also cook the syrup again for 2-3 minutes more at this point to reduce the volume (and thicken it more). Your choice, if you think it’s necessary (usually it’s not), but it’s good to have options, right?

    Time to Enjoy Homemade Blackberry Pancake Syrup!

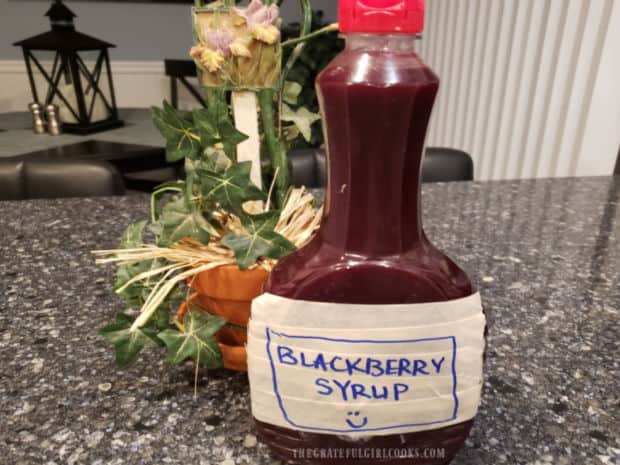
    Pour the finished blackberry syrup into the container of your choice. I like to use a clean, empty old pancake syrup bottle for this purpose, but you can use whatever you have available (with a lid, of course). 

    Because I doubled this recipe it made enough to fill a standard sized pancake syrup bottle, plus an “almost full” quart jar. Be sure to store the blackberry pancake syrup in the refrigerator when not using. TIP: You can also store extra blackberry pancake syrup in the freezer to use at a later date. Thaw and reheat to use.

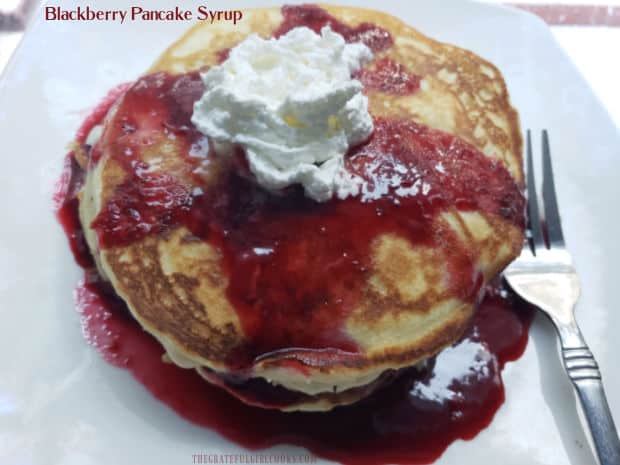
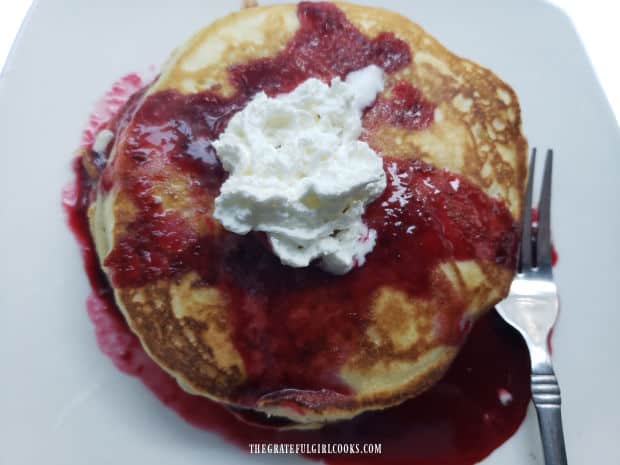
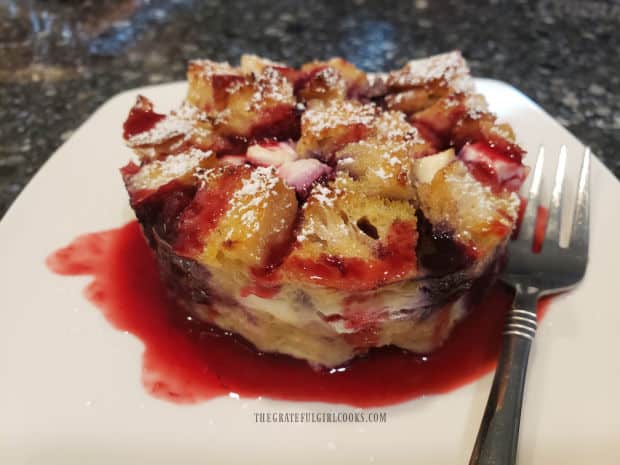
    Serve blackberry pancake syrup warm or at room temperature on your favorite stack of pancakes! Enjoy this delicious treat- it’s a nice reminder year-round of summer’s bountiful blackberry harvest! It’s also yummy on ice cream, pound cake, cheesecake or other desserts! I even used it on my Triple Berry French Toast Cups (3rd photo below). YUM!

    A bottle full of homemade blackberry pancake syrup is ready to use.A stack of pancakes topped with homemade blackberry pancake syrup and whipped cream.Blackberry pancake syrup, served with a baked French Toast cup.

    I hope you have the opportunity to make this delicious blackberry pancake syrup. It’s really quite delicious, and it’s a very versatile syrup to have in the refrigerator for a number of desserts, too. Thanks for stopping by, and I sincerely hope you will come back soon.

    Looking For Some PANCAKE Recipes?

    You can find all of my recipes in the Recipe Index, which is located at the top of the page. I have several delicious pancake recipes you might enjoy, including:

    Interested In More Recipes?

    Thank you for visiting this website. I appreciate you using some of your valuable time to do soIf you’re interested, I publish a newsletter 2 times per month (1st and 15th) with all the latest recipes, and other fun info. I would be honored to have you join our growing list of subscribers, so you never miss a great recipe!
    There is a Newsletter subscription box on the top right side (or bottom) of each blog post, depending on the device you use, where you can easily submit your e-mail address (only) to be included in my mailing list.

    You Can Also Find Me On Social Media:

    Facebook page: The Grateful Girl Cooks!
    Pinterest:
    The Grateful Girl Cooks!
    Instagram:
    jbatthegratefulgirlcooks

    Author's signature

    0 from 0 votes
    Blackberry Pancake Syrup
    Prep Time
    30 mins
    Cook Time
    10 mins
    Total Time
    40 mins
     

    Learn how to make delicious Blackberry Pancake Syrup with fresh or frozen blackberries. Easy to make- yummy on waffles and ice cream, too!

    Category: Sauce
    Cuisine: American
    Keyword: blackberry pancake syrup
    Servings: 12 (1/4 cup per serving)
    Calories Per Serving: 107 kcal
    Author: JB @ The Grateful Girl Cooks!
    Ingredients
    • cups water
    • cups granulated sugar
    • 2 cups blackberries (fresh or frozen)
    Instructions
    1. Place blackberries, sugar and water in a large pot. Stir well; turn heat to medium-high. Bring berries to a FULL BOIL; reduce heat to Low. Let berries simmer 10-12 minutes, stirring occasionally, then remove from the heat. Mash the berries with potato masher, back of a large spoon, or fork. Once mashed, let berry mixture cool 20-25 minutes.

    2. Strain syrup from berry mixture: Place a wire sieve on top of a large bowl. Transfer 1-2 cups of berry/juice mixture into sieve. Using the back of a large spoon, firmly press blackberries and juice into sieve. The juice will drip through sieve into bowl below; seeds will remain in sieve. Continue pressing until almost all juice and puree have been filtered through sieve. Use a spoon to remove blackberry puree clinging to underside of sieve; add to juice in bowl. This puree will help thicken syrup.

    3. Discard seeds in sieve; give sieve a quick rinse. Repeat process until all berries and juice have been filtered through sieve. Pour syrup from bowl into container of your choice. Store (covered) in refrigerator. Serve blackberry pancake syrup warm (or at room temperature) on your favorite stack of pancakes! **Also good on ice cream, cheesecake, or other desserts.

    4. NOTE: You can store extra syrup in freezer to use at a later date. Thaw and reheat to use.

      If you feel your syrup is too thin (especially if you used frozen berries), you can cook the syrup for a few minutes after straining out seeds. This will reduce the volume slightly, but will help to thicken the syrup. Other people suggest adding 1/2 cup light corn syrup to thicken the finished syrup. Not really necessary, but it is another option.

    Recipe Notes

    Caloric calculation made using 1/4 cup serving size out of approximately 3 cups total syrup.

    Nutrition Facts
    Blackberry Pancake Syrup
    Amount Per Serving (1 (1/4 cup))
    Calories 107 Calories from Fat 9
    % Daily Value*
    Fat 1g2%
    Saturated Fat 1g6%
    Polyunsaturated Fat 1g
    Monounsaturated Fat 1g
    Sodium 3mg0%
    Potassium 39mg1%
    Carbohydrates 27g9%
    Fiber 1g4%
    Sugar 26g29%
    Protein 1g2%
    Vitamin A 51IU1%
    Vitamin C 5mg6%
    Calcium 9mg1%
    Iron 1mg6%
    * Percent Daily Values are based on a 2000 calorie diet.

    Original recipe source: biscuitsandburlap.com/blackberry-syrup/

    Here’s one more to pin on your Pinterest boards!Learn how to make delicious Blackberry Pancake Syrup with fresh or frozen blackberries. Easy to make- yummy on waffles and ice cream, too!

    Air Fryer Buffalo Honey Wings

    Delicious Air Fryer Buffalo Honey Wings are seasoned with a spice rub, cooked until crisp, and coated with a sweet, spicy sauce to serve.
    Delicious Air Fryer Buffalo Honey Wings are seasoned with a spice rub, cooked until crisp, and coated with a sweet, spicy sauce to serve.

    We love chicken wings, and have eaten lots of them since getting an air fryer a couple of years ago. The recipe I am sharing today is an absolutely delicious way to make sweet and spicy wings in an air fryer. I have also included instructions for baking these, in case you do not have access to an air fryer. Either cooking method will produce a scrumptiously addicting chicken wing that you are gonna love!

    Basically, you will whip up a quick spice rub, season the chicken, cook the chicken wings, then toss them in a simple buffalo honey sauce. It’s actually quite simple, whether you air fry the wings or bake the wings. Here’s how to make them:

    Scroll Down For A Printable Recipe Card At the Bottom Of The Page

    Prepare A Spice Mixture For Seasoning The Wings

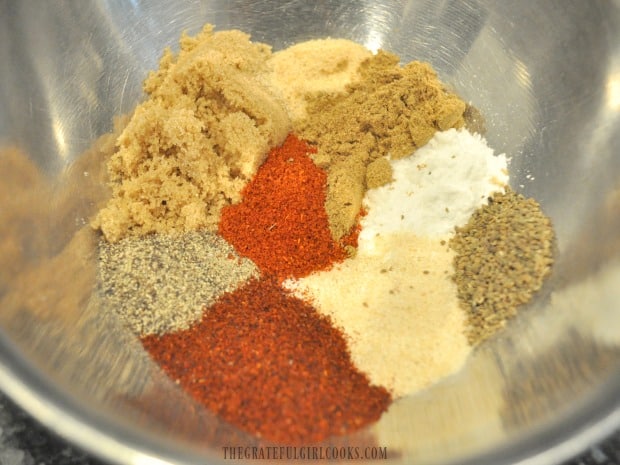
    Making the spice rub for the air fryer buffalo honey wings could not be any more simple! Measure the ingredients into a medium bowl, and stir or whisk until the spices are fully combined. Pat the chicken wings dry using paper towels, then place them in a large bowl or container.

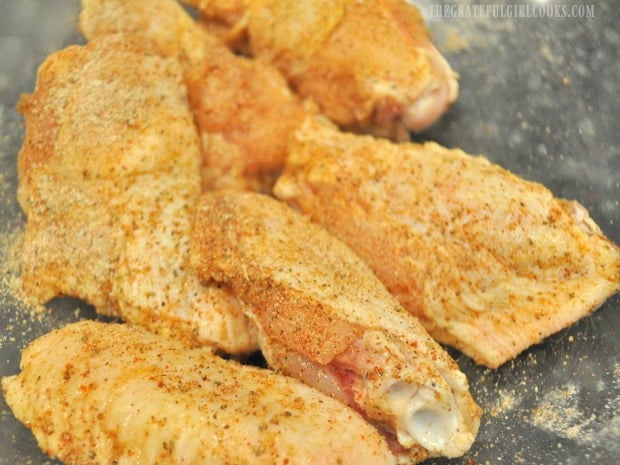
    Sprinkle the chicken wings with the spice rub. Make sure to rub the spices into the chicken wings to coat them all sides. Use all of the spice mixture, if making a full recipe (3 pounds of wings)

    Spices are measured into a small bowl for the chicken wings.Chicken wings are covered with spices before cooking.

    Time To Cook The Air Fryer Buffalo Honey Wings

    There are so many air fryer machines today, which can vary quite a bit in cooking temps, so be sure to keep an eye on the wings as they cook, so they will not undercook OR overcook in YOUR machine! I use a Cosori air fryer, and often cook these wings in a couple batches. Here’s how I cook them in my air fryer.

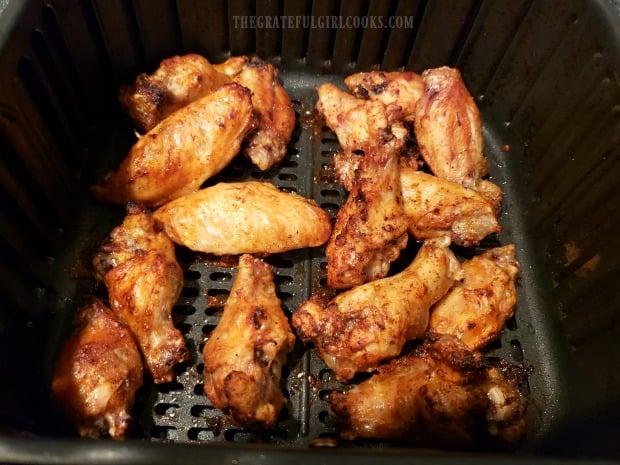
    Preheat air fryer to 380°F. Once preheated, add the seasoned wings to the basket (I usually try to keep them in a single layer if possible). Cook the air fryer buffalo honey wings at 380°F for 12 minutes, then flip the wings to the other side and cook for another 12 minutes. I then turn the temperature up to 400°F and cook them for 3-4 more minutes, until cooked through and crispy on the outside.

    Air Fryer Buffalo Honey Wings in the basket halfway though the cooking time.

    Make The Buffalo Honey Sauce While the Wings Cook

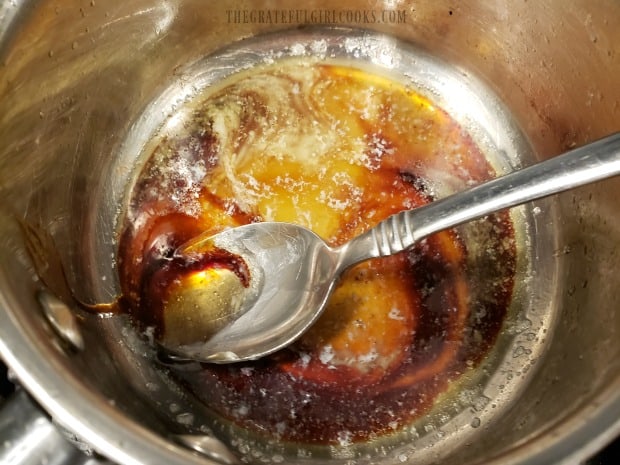
    Melt butter in a medium-sized saucepan on medium heat. In a separate bowl, whisk together cornstarch and Frank’s Original Hot Sauce until blended. Add this to the melted butter in the saucepan, and stir to combine. Now add honey and molasses, and stir again, until ingredients are combined.

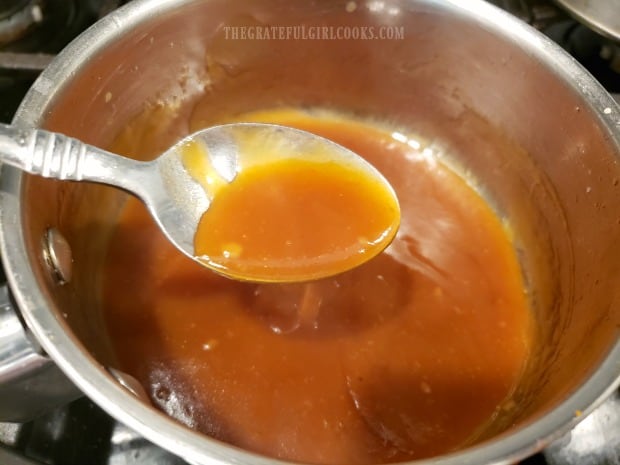
    Heat the buffalo honey sauce until it comes to a boil, making sure to stir (or whisk) it often. When it comes to a boil, reduce the heat to low and then simmer the sauce for 3-5 minutes, until it thickens slightly. Give it a taste. If you want it a bit sweeter, stir in more honey. If you want it spicier, add a bit more hot sauce.

    Cooking the ingredients for the buffalo honey sauce.Sauce is ready to add to the cooked chicken wings.

    Coat Wings With Sauce Then Serve

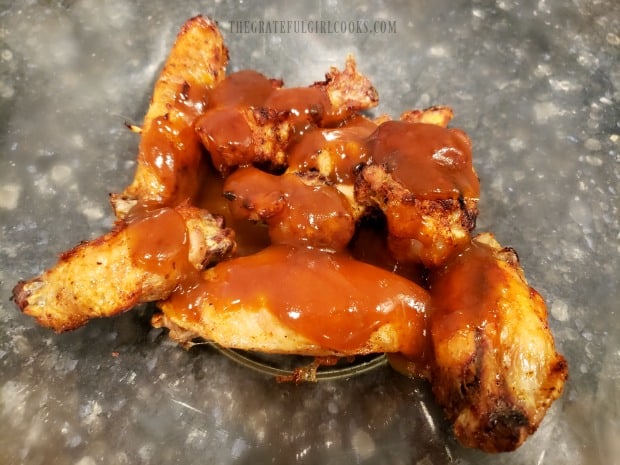
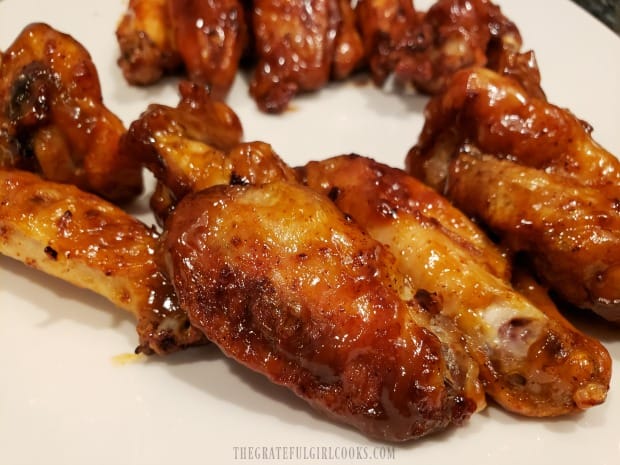
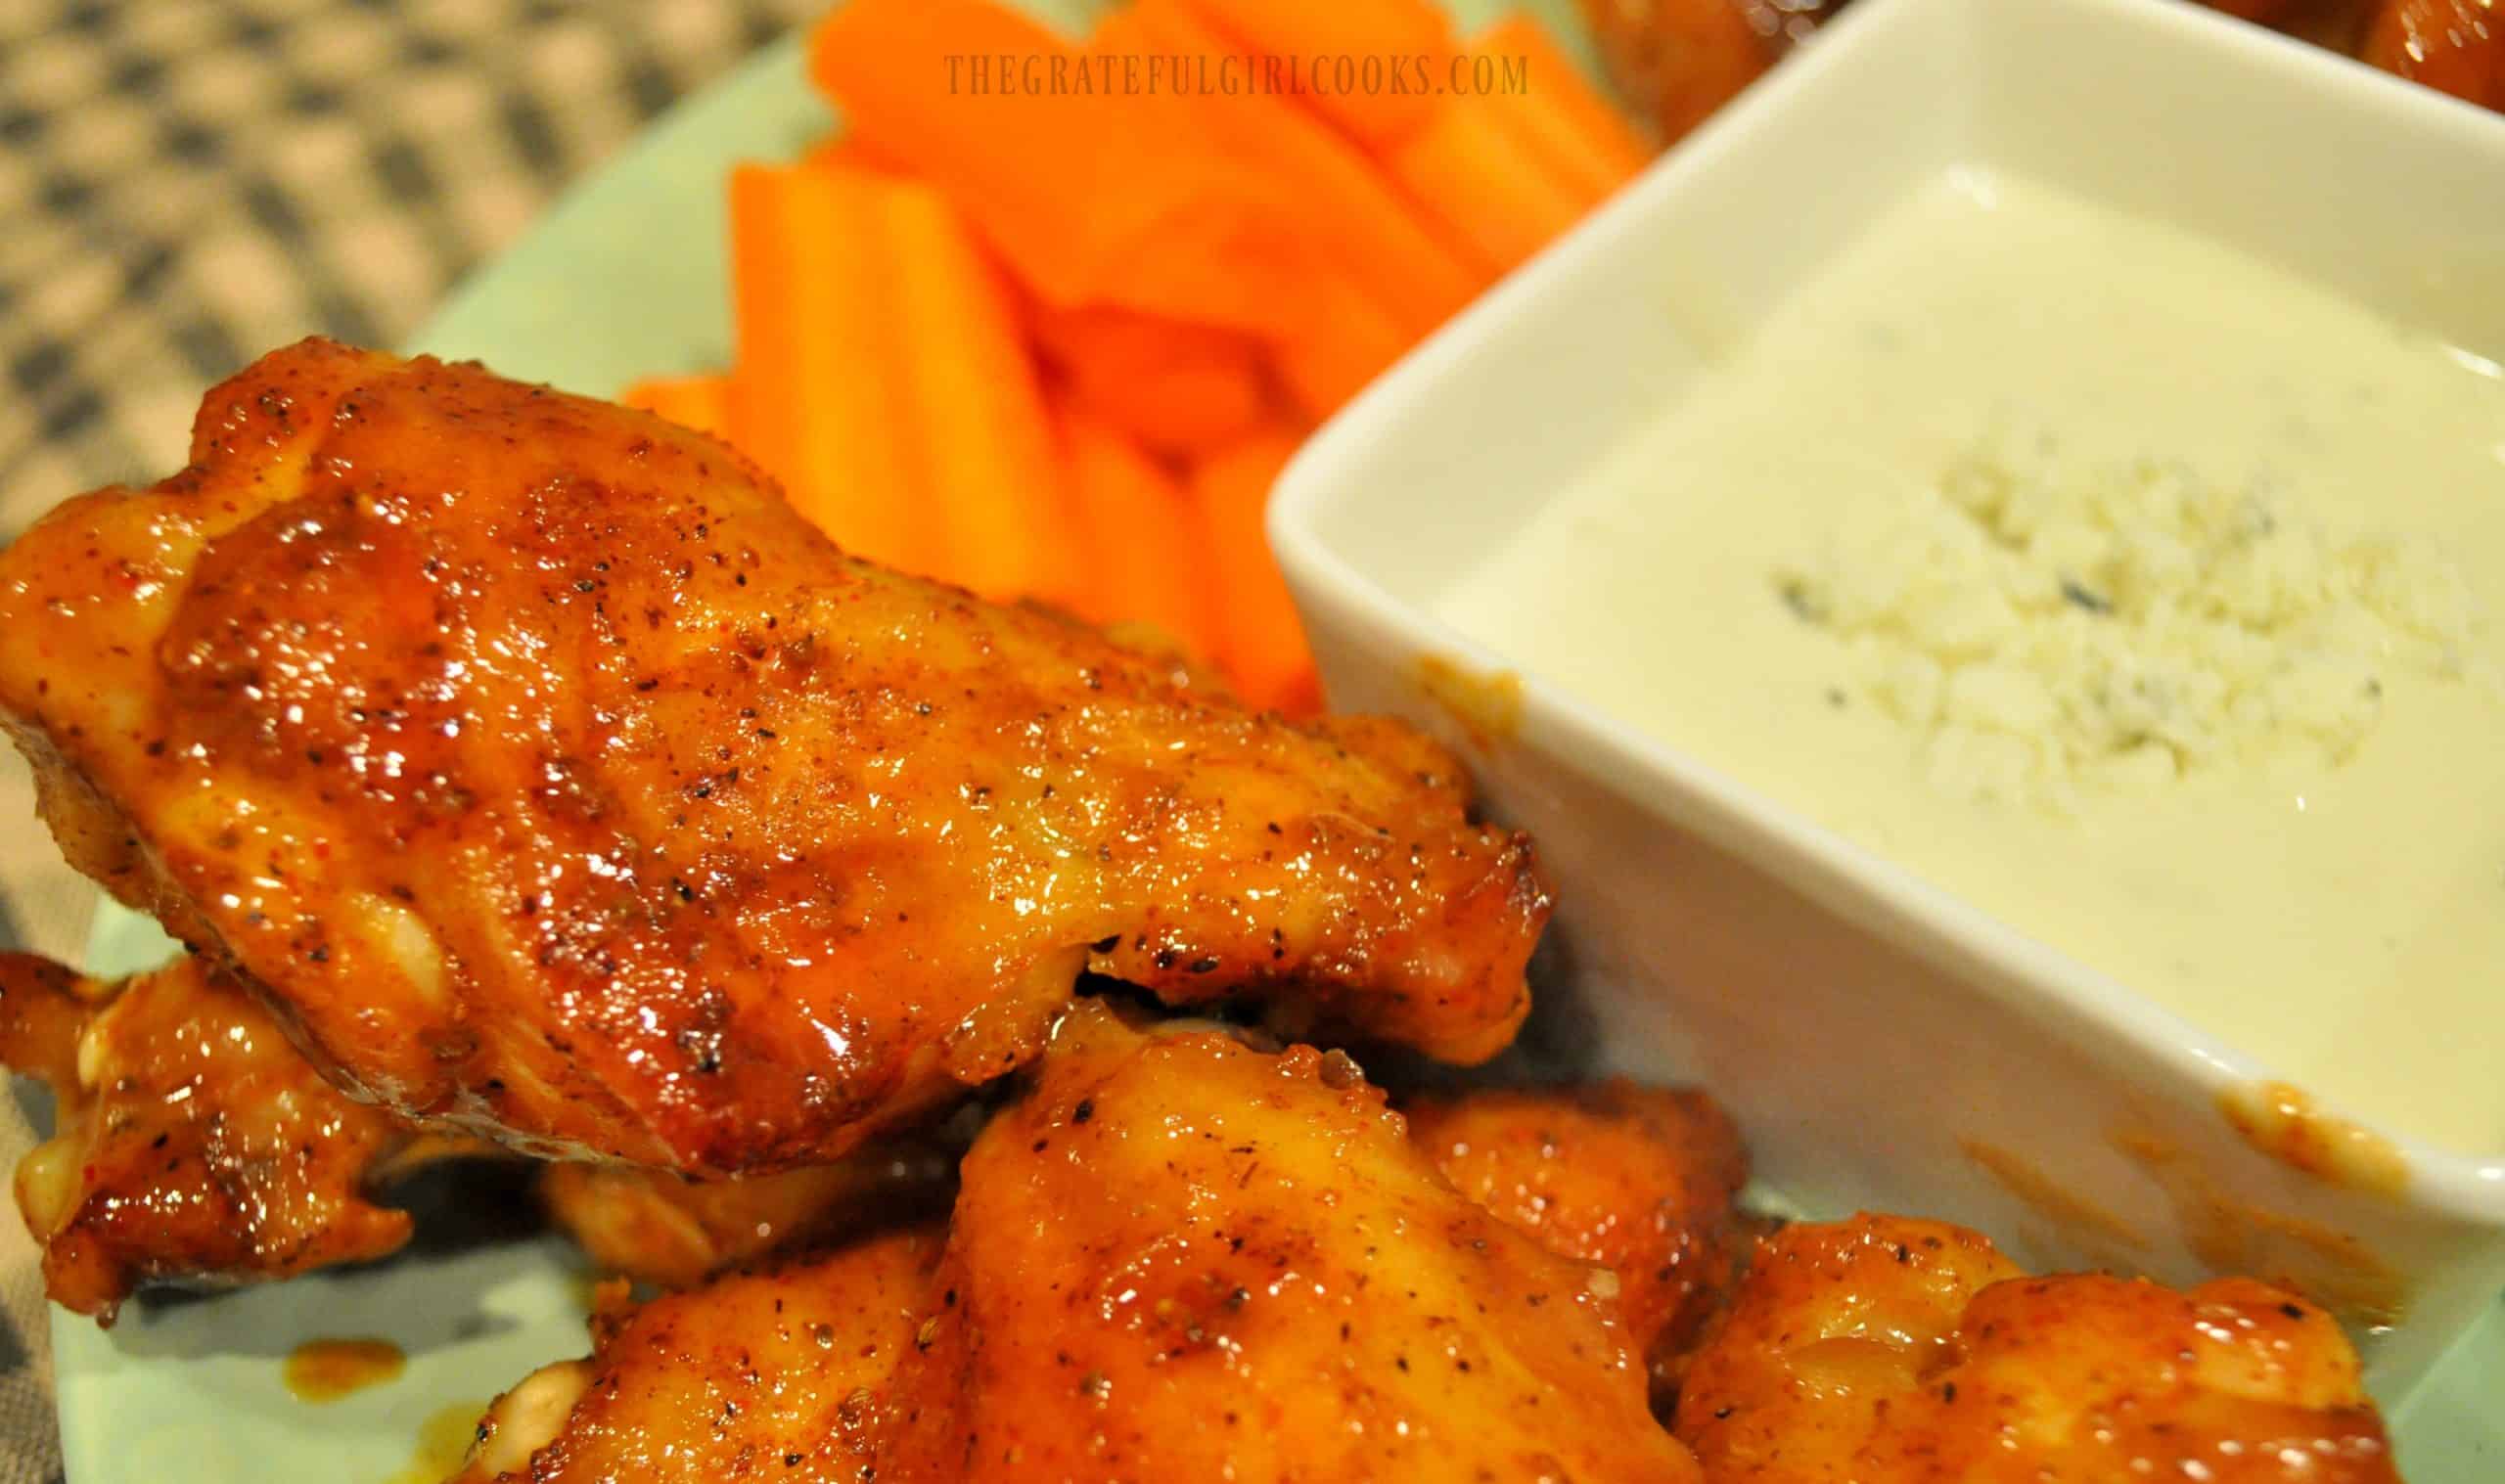
    Place the cooked wings in a large bowl, and pour the sauce over them. Toss the air fryer buffalo honey wings so they are fully coated with sauce. Once all the wings are cooked and coated with the sauce, they are ready to serve, while hot. Serve with bleu cheese or ranch dressing and carrot and celery sticks on the side, if desired. Enjoy!

    Air Fryer Buffalo Honey Wings are coated with the spicy and sweet sauce before serving.Some of the air fryer buffalo honey wings on a white plate, ready to serve and eat!

    No Air Fryer? No Problem… BAKE Them!

    It will take longer to bake the wings, but here is how to do it. Cover a 9″x13″ baking sheet with aluminum foil, and spray lightly with non-stick baking spray. Place the seasoned wings on the foil in a single layer. Bake in a preheated 400°F. oven for 45-50 minutes. Once done baking, turn the oven setting to BROIL. Place wings (on baking sheet) about 6-8 inches away from the broiler. 

    Broil the chicken wings until they reach the crispiness you want, then flip them over to the other side and broil again until crispy on outside. Keep a close eye on the wings so they don’t burn. THE BROILING TIME WILL ONLY BE A COUPLE MINUTES TOTAL. Once done, remove from oven, and toss with prepared buffalo honey sauce, and serve!

    Carrots and dip are served with the cooked buffalo honey chicken wings.

    Thanks for stopping by today. I really hope you get the opportunity to make these delicious chicken wings, and trust you will enjoy them. Please come back again soon for more yummy recipes. Have a GREAT day.

    Looking For More Appetizer Recipes?

    You can find all of my recipes in the Recipe Index, which is located at the top of the page. I have some delicious appetizer recipes, including:

    Interested In More Recipes?

    Thank you for visiting this website. I appreciate you using some of your valuable time to do soIf you’re interested, I publish a newsletter 2 times per month (1st and 15th) with all the latest recipes, and other fun info. I would be honored to have you join our growing list of subscribers, so you never miss a great recipe!
    There is a Newsletter subscription box on the top right side (or bottom) of each blog post, depending on the device you use, where you can easily submit your e-mail address (only) to be included in my mailing list.

    You Can Also Find Me On Social Media:

    Facebook page: The Grateful Girl Cooks!
    Pinterest:
    The Grateful Girl Cooks!
    Instagram:
    jbatthegratefulgirlcooks

    Author's signature

    Recipe adapted from: https://carlsbadcravings.com/buffalo-honey-hot-wings-traditional-buffalo-hot-wings-recipe/

    0 from 0 votes
    Air Fryer Buffalo Honey Wings
    Prep Time
    5 mins
    Cook Time
    28 mins
    Total Time
    33 mins
     

    Delicious Air Fryer Buffalo Honey Wings are seasoned with a spice rub, cooked until crisp, and coated with a sweet, spicy sauce to serve.

    Category: Appetizer/Snack, Entree
    Cuisine: American
    Keyword: Air Fryer Buffalo Honey Wings
    Servings: 6 (4 wings per serving)
    Calories Per Serving: 376 kcal
    Author: JB @ The Grateful Girl Cooks!
    Ingredients
    • 3 pounds chicken wings (approx. 24 wings)
    Dry Rub Spice Mix:
    • 2 Tablespoons brown sugar
    • 2 Tablespoons baking powder
    • 2 teaspoons onion powder
    • 2 teaspoons salt
    • 2 teaspoons ground black pepper
    • 2 teaspoons paprika
    • 2 teaspoons garlic powder
    • 2 teaspoons ground cumin
    • 2 teaspoons chili powder
    • 1 teaspoon celery salt
    Buffalo Honey Sauce:
    • cup Frank's ORIGINAL Hot Sauce (NOT hot wings sauce)
    • 2 teaspoons cornstarch
    • ¼ cup honey
    • 1 Tablespoon molasses
    • 1 Tablespoon butter
    Instructions
    1. Measure spice rub ingredients into a medium bowl; stir/whisk until combined. Pat chicken wings dry with paper towels; place wings into large bowl or container. Sprinkle with spice rub, rubbing spices into wings to coat all sides.

    If Cooking In Air Fryer:
    1. Preheat air fryer to 380°F. Once preheated, add seasoned wings to basket in single layer, if possible. Cook wings at 380°F for 12 minutes; flip wings to the other side; cook another 12 minutes. Turn temp. up to 400°F. Cook 3-4 minutes, until cooked through/crispy on outside. TIP: Keep an eye on chicken wings. Air fryers can widely vary on heating temperatures!

    If Baking In Oven:
    1. Cover a 9"x13" baking sheet with aluminum foil; spray lightly with non-stick baking spray. Place seasoned wings on foil in single layer. Bake in a preheated 400°F. oven 45-50 minutes. When done, turn oven setting to BROIL. Place wings (on baking sheet) about 6-8 inches away from broiler.  Broil wings until they reach the crispiness you want. Flip over to other side; broil again until crispy. Keep a close eye on wings so they don't burn. BROILING TIME WILL ONLY BE A COUPLE MINUTES TOTAL. Once done, remove from oven; toss with sauce, and serve!

    Make Sauce While Wings Cook:
    1. Melt butter on medium heat in medium saucepan. In separate bowl, whisk together cornstarch and Frank's Original Hot Sauce until blended. Add to melted butter; stir to combine. Stir in the honey and molasses, until combined. Heat sauce until it comes to a boil, making sure to stir (or whisk) often. Once boiling, reduce heat to low; simmer 3-5 minutes, until it thickens slightly.

    Serve:
    1. Place cooked wings in a large bowl; pour warm sauce over them. Toss wings until coated with sauce. Serve wings hot, with bleu cheese or ranch dressing, carrot and celery sticks on the side, if desired. Enjoy!

    Nutrition Facts
    Air Fryer Buffalo Honey Wings
    Amount Per Serving (1 (4 wings))
    Calories 376 Calories from Fat 198
    % Daily Value*
    Fat 22g34%
    Saturated Fat 7g44%
    Trans Fat 1g
    Cholesterol 99mg33%
    Sodium 2107mg92%
    Potassium 725mg21%
    Carbohydrates 23g8%
    Fiber 1g4%
    Sugar 18g20%
    Protein 23g46%
    Vitamin A 776IU16%
    Vitamin C 1mg1%
    Calcium 217mg22%
    Iron 3mg17%
    * Percent Daily Values are based on a 2000 calorie diet.

    Here’s one more to pin on your Pinterest boards!Delicious Air Fryer Buffalo Honey Wings are seasoned with a spice rub, cooked until crisp, and coated with a sweet, spicy sauce to serve.