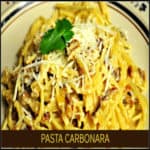
Category: Main Dishes

Pan Seared Creole Salmon

Make delicious, lightly seasoned, pan seared Creole salmon fillets, using only a few ingredients, and have it on the table in under 15 minutes!Make delicious, lightly seasoned, pan seared Creole salmon fillets, using only a few ingredients, and have it on the table in under 15 minutes!
If you are looking for an EASY and DELICIOUS way to prepare salmon…look no further. I debated whether even to post this Pan Seared Creole Salmon as a “recipe”, but decided to preserve it on my blog for all time. This is my “go to” way to prepare salmon fillets. Seriously- this is THE way I have prepared salmon fillets in our home for the past several years. It is so easy to prepare this delicious seafood.

One of my dearest friends (who happens to be a fantastic cook) said it was fantastic after being served this for dinner in our home recently. In the summer my husband loves to grill salmon on a cedar plank on our Weber BBQ (when it sunny and dry outside!), but this truly is how we cook salmon 9 times out of 10. We LOVE it!

I sure hope you will give it a try. Salmon is so good for you, and this recipe only takes 15 minutes, from start to finish! EASY! Here’s how to make this yummy dish:

Scroll Down For A Printable Recipe Card At The Bottom Of The Page

How To Make Pan Seared Creole Salmon

Lightly sprinkle the creole seasoning onto one side of the salmon fillets. I used skinless fillets.

Salmon fillets are lightly seasoned with creole (cajun) seasoning.

This is the seasoning I use (shown below) in case you were wondering. NO, I do not receive any compensation for this product. If you do not have access to this seasoning mix, I recommend my recipe for homemade Cajun seasoning mix. It is a great substitute, and is very easy to make!

The seasoning mix used for this recipe.

Pan-Sear The Salmon Fillets

Heat oil on medium high heat in a large skillet. Place the salmon fillets, seasoned side down, into the hot skillet.

The salmon fillets are pan seared, seasoned side down, in hot oil.

When half of the way done, carefully turn the salmon to the other side and continue cooking until the salmon is done. Depending on the size of the salmon used, it “usually” only takes about 8-9 minutes total to cook the fillets.

Pan seared creole salmon cooking in skillet.

Baste Pan Seared Cajun Salmon With Melted Butter

After turning the fillets to the other side, butter is added to skillet. Let the butter melt in the skillet. Continue cooking side 2 of the salmon, and spoon the melted butter up and all over the salmon continuously while it finishes cooking. As the salmon cooks, the butter browns, and will add GREAT browned butter flavor to the salmon!

Melted butter is used to baste the creole salmon.

Once the fish is cooked through and flakes easily, this pan seared Creole salmon is ready to eat. See just how EASY it is to make? Enjoy!

A pan seared creole salmon fillet is served with rice and vegetables on the side.

Hope you enjoy this delicious pan seared creole salmon. We LOVE it! Have a good day, and I hope you will come back soon.

Looking For More SALMON Recipes?

You can find all of my recipes in the Recipe Index, located at the top of the page. I have quite a few salmon recipes, including:

Interested In More Recipes?

Thank you for visiting this website. I appreciate you using some of your valuable time to do soIf you’re interested, I publish a newsletter 2 times per month (1st and 15th) with all the latest recipes, and other fun info. I would be honored to have you join our growing list of subscribers, so you never miss a great recipe!
There is a Newsletter subscription box on the top right side (or bottom) of each blog post, depending on the device you use, where you can easily submit your e-mail address (only) to be included in my mailing list.

You Can Also Find Me On Social Media:
Facebook page: The Grateful Girl Cooks!
Pinterest: The Grateful Girl Cooks!
Instagram: jbatthegratefulgirlcooks

Author's signature

↓↓ PRINTABLE RECIPE BELOW ↓↓

0 from 0 votes
Pan Seared Creole Salmon
Prep Time
5 mins
Cook Time
10 mins
Total Time
15 mins
 

Make delicious, lightly seasoned, pan seared Creole salmon fillets, using only a few ingredients, and have it on the table in under 15 minutes!

Category: Entree
Cuisine: Cajun
Keyword: pan seared Creole salmon
Servings: 2 servings
Calories Per Serving: 353 kcal
Author: JB @ The Grateful Girl Cooks!
Ingredients
  • 2 Skinless salmon filets (we've used salmon with skin on, it's ok, but messy to remove at serving time).
  • Tony Chachere's Original Creole Seasoning (I'm sure any Cajun or Creole seasoning will work)
  • 1 Tablespoon olive oil
  • 1 Tablespoon butter
Instructions
  1. Lightly (do not put too much seasoning on!) sprinkle the surface of ONE side of each of the salmon filets.
  2. Heat the olive oil in a large non-stick skillet over medium-high heat. Once the skillet is very hot (but not smoking), place the salmon in SEASONING SIDE DOWN. It should sizzle.
  3. After 3-4 minutes (depending on thickness of filets), carefully turn salmon over; continue cooking. After 2-3 minutes (when salmon is right on the verge of being done, add the butter to the pan.
  4. Once the butter is melted, continually spoon up the melted butter and pour over tops of salmon. Continue to "baste" the salmon with butter for a couple of minutes. Remove salmon from skillet and serve!
Nutrition Facts
Pan Seared Creole Salmon
Amount Per Serving (1 g)
Calories 353 Calories from Fat 207
% Daily Value*
Fat 23g35%
Saturated Fat 6g38%
Cholesterol 108mg36%
Sodium 124mg5%
Potassium 833mg24%
Protein 33g66%
Vitamin A 245IU5%
Calcium 20mg2%
Iron 1.4mg8%
* Percent Daily Values are based on a 2000 calorie diet.

Here’s one more to pin on your Pinterest boards!Make delicious, lightly seasoned, pan seared Creole salmon fillets, using only a few ingredients, and have it on the table in under 15 minutes!


Save

Save

Italian Sausage and Spinach Quiche

This delicious Italian sausage spinach quiche (with mozzarella and Parmesan cheeses) is a meal you can enjoy for breakfast, lunch or dinner! This delicious Italian sausage spinach quiche (with mozzarella and Parmesan cheeses) is a meal you can enjoy for breakfast, lunch or dinner! Nothing like a great piece of Italian Sausage Spinach Quiche to satisfy your hunger pangs, right? I think it’s going to be a great day!  It’s a great day to make a yummy Italian Sausage Spinach Quiche!

I woke up this morning with such peace and anticipation about what God will bring into my life today. I am so grateful He has proved Himself over and over through the years to be completely worthy of my trust and whole heart. “I lift up my eyes to the hills – where does my help come from? My help comes from the Lord, the Maker of heaven and earth”. (Psalm 121:1-2). I sure do love that Bible verse.

Scroll Down For A Printable Recipe Card At The Bottom Of The Page

Breakfast For Dinner!

Sometimes I feel like having “breakfast” for dinner. Do you ever feel that way? Yesterday I asked my husband for his input on choices for dinner. One of the ideas I gave him was quiche, but I really didn’t think (i.e. never dreamed) he would choose this option. But he did! He constantly surprises me. Hmmm… breakfast for dinner (I know some think of quiche as a lunch entree, but for us it’s been a breakfast option). This sounded like a good plan to me.

So… in the afternoon I checked out the ol’ refrigerator to see what my options were. I also found my old “faithful, tried and true” Quiche Lorraine recipe (handwritten on a 3×5 card), that I’ve used for over 25 years, but since I didn’t have any bacon or Swiss cheese in the fridge (bummer!), I decided to experiment with my original recipe a bit and make a quiche with what I DID have!

Necessity Is The Mother Of Invention, Right?

This monumental decision was influenced by the fact that 1) I was sick, 2) I remembered my car battery had died (again…ugh) during our recent snowstorm and 3) my husband was away working on inspections for the afternoon. I knew I wasn’t going to be headed to the grocery store any time soon.

So…being the determined woman I am, I decided to make our quiche with Italian sausage, Parmesan and mozzarella cheeses, and spinach. Sounded promising…I mean, really…how bad could THAT be? Right?

One More Mouth To Feed!

Success! It turned out to be quite delicious. Our oldest son, the same one who asked me a few weeks ago to teach him how to make quiche since he was craving it, but our schedules never came together, happened to drop by after work. He was surprised we were having quiche for dinner.

I was pleasantly surprised and thrilled to have an extra mouth to feed. Perfect! It was wonderful to have him join us. We really enjoyed the quiche, and even had seconds (yep…it WAS good)!  I promised him I would put the recipe on my blog so he could make one, also! So here ya go, Michael…this one’s for YOU! Hope you enjoy it! Love, Mom.

Preparing The Italian Sausage Spinach Quiche

Cooking the Italian sausage and onion…

Italian sausage slices and onions are cooked in skillet.

Spinach and garlic added to Italian sausage and onion…

Spinach and garlic are added to the skillet of sausage and onions.

Pie crust is pricked, and is ready to add the ingredients for quiche.

Pie crust is made and is ready to fill.

Ingredients added to pie crust… now for the egg filling…

Cheeses and meat mixture is added to the unbaked pie crust.

Whipping cream/egg mixture is added to pie shell, and ingredients are gently mixed together. In to the oven it goes!

A whipping cream and egg mixture is added to the quiche filling.

Hot and straight out of the oven!

The Italian Sausage Spinach Quiche is golden brown after baking is complete.

Time for a delicious slice of Italian sausage spinach quiche!

A side view of a slice of Italian sausage spinach quiche on a plate.

Hope you enjoy this Italian sausage spinach quiche! Have a great day.

Looking For Other QUICHE Recipes?

You can find all of my recipes in the Recipe Index, located at the top of the page. A couple quiche recipes you might enjoy include:

Interested In More Recipes?

Thank you for visiting this website. I appreciate you using some of your valuable time to do soIf you’re interested, I publish a newsletter 2 times per month (1st and 15th) with all the latest recipes, and other fun info. I would be honored to have you join our growing list of subscribers, so you never miss a great recipe!
There is a Newsletter subscription box on the top right side (or bottom) of each blog post, depending on the device you use, where you can easily submit your e-mail address (only) to be included in my mailing list.

You Can Also Find Me On Social Media:
Facebook page: The Grateful Girl Cooks!
Pinterest: The Grateful Girl Cooks!
Instagram: jbatthegratefulgirlcooks

Author's signature

↓↓ PRINTABLE RECIPE BELOW ↓↓

0 from 0 votes
Italian Sausage and Spinach Quiche
Prep Time
15 mins
Cook Time
50 mins
Total Time
1 hr 5 mins
 

This delicious Italian sausage spinach quiche (with mozzarella and Parmesan cheeses) is a meal you can enjoy for breakfast, lunch or dinner!

Category: Breakfast
Cuisine: American
Keyword: Italian sausage quiche
Servings: 8 servings
Calories Per Serving: 484 kcal
Author: JB @ The Grateful Girl Cooks!
Ingredients
  • 1 unbaked deep dish pie crust (make sure it is a deep-dish crust/pan)
  • 2 links mild Italian sausage , sliced 1/2 " thin, then quartered (**slice while sausage is still partly frozen...makes it so much easier to slice. You can also remove sausage casing and crumble the sausage, if you prefer!)
  • 1/3 cup onion , finely chopped
  • 1 teaspoon minced garlic
  • 1/3 cup shredded mozzarella cheese
  • 1/2 cup shredded Parmesan cheese (the real stuff)
  • 2 Tablespoons grated Kraft Parmesan cheese
  • 1/2 box frozen chopped spinach (thawed, cooked according to pkg. and drained well)
  • 2 cups heavy whipping cream
  • 4 large eggs
  • 1/4 teaspoon granulated sugar
  • 1/8 teaspoon cayenne pepper
  • 3/4 teaspoon salt
  • 1/4 teaspoon garlic powder
  • small pinch of red pepper flakes (optional)
Instructions
  1. Preheat oven to 425 degrees. While oven is preheating, cook the Italian sausage and onion in a non-stick skillet, till completely cooked through. (5-10 minutes approx.). Drain grease.
  2. In a separate saucepan, cook the spinach per pkg. instructions. Remove from heat, and drain really well to get excess moisture out. Add the cooked/drained spinach and the minced garlic to the skillet with sausage/onion mixture and mix well. Cook for an additional 1-2 minutes.
  3. Prepare the unbaked pie shell by piercing shell with the tines of a fork - (this is to prevent the crust from creating air pockets and puffing up too much while baking)
  4. Add cooked sausage, mozzarella and Parmesan cheese, garlic, onions, and spinach to the unbaked, prepared pie crust.
  5. In a separate bowl, whisk together whipping cream, eggs, sugar, cayenne pepper, salt, and red pepper flakes, until well blended.
  6. Pour egg mixture on top of the sausage/spinach/cheese mixture in pie crust. Gently mix ingredients together (I use a fork-be careful not to mix too hard or you will damage the crust. Just enough to blend the ingredients evenly together!)
  7. Carefully put quiche into the preheated 425 degree oven. Don't spill it!
  8. Bake at 425 degrees for 15 minutes, then reduce heat to 300 degrees and bake for an additional 35-40 minutes. (quiche is done when a knife comes out clean).
  9. Remove quiche pan to a wire rack. Let it cool a bit, slice, serve... and enjoy!
Nutrition Facts
Italian Sausage and Spinach Quiche
Amount Per Serving (1 slice)
Calories 484 Calories from Fat 396
% Daily Value*
Fat 44g68%
Saturated Fat 21g131%
Cholesterol 194mg65%
Sodium 720mg31%
Potassium 189mg5%
Carbohydrates 16g5%
Protein 13g26%
Vitamin A 1110IU22%
Vitamin C 1.6mg2%
Calcium 170mg17%
Iron 1.4mg8%
* Percent Daily Values are based on a 2000 calorie diet.

Here’s one more to pin on your Pinterest boards!This delicious Italian sausage spinach quiche (with mozzarella and Parmesan cheeses) is a meal you can enjoy for breakfast, lunch or dinner!


Save

Save

Save

Orange Glazed Pork Roast

You’ll really enjoy this delicious Orange Glazed Pork Roast, with dry rub spices, baked until tender, coated and served with a sweet citrus glaze.You'll really enjoy this delicious Orange Glazed Pork Roast, with dry rub spices, baked until tender, coated and served with a sweet citrus glaze.
Today’s recipe is for an Orange Glazed Pork Roast I made recently for the first time.  We loved the flavor the pork receives from the orange sauce… totally scrumptious!

Scroll Down For A Printable Recipe Card At The Bottom Of The Page

Why I Decided To Try This Recipe For Orange Glazed Pork Roast

So here’s the “back story”…  My husband and I shop at Costco occasionally when we feel the urge to buy a 20 pound jar of peanut butter or some other “can’t live without this” product.

This was the case recently when we decided to buy a 4 pack of pork roasts. The price was right, so even though it’s usually just the two of us here for dinner, we grabbed a package and threw it into the cart. Can you believe it? FOUR roasts for TWO people.

What On Earth Do You Make With FOUR Pork Roasts?

Then the fun of figuring out new ways to cook 4 pork roasts began for me. Hmmmm. Well, let’s see- the first one I threw in the crock pot with seasonings. This was used for shredding, for pork enchiladas. The next roast was used to make BBQ pork for sandwiches.

Now for the one I pulled out of the ol’ family freezer this morning. I’ve been sick for a week now and snowed in. Really snowed in. I needed to fix something that would taste good with food items we already had around the house. Dinner needed to be not too hard…not too fancy…but tasty. I searched online for recipes and came up with this one to try.

A Dry Rub And Orange Glaze Give This Pork Roast GREAT Flavor!

A dry rub on the pork (garlic, ginger, brown sugar, thyme, etc.) gives GREAT flavor to the roast. The real star is the the orange flavored glaze that is “brushed” onto the meat for the second half of cooking! Orange marmalade and juice in the citrus glaze is a perfect flavor addition for this orange glazed pork roast.

My husband and I totally enjoyed our dinner, and look forward to the leftovers! Hope you will enjoy this recipe as much as we did. My husband declared it “A KEEPER”! It is delicious!

Prepare The Pork Roast

A small pork roast is coated with a dry rub mix (including garlic!), then it is baked. The original recipe calls for a 4 pound roast, but I used a 2.5 pound roast, with no problem.

Pork Roast is covered with spice rub (including garlic).

While the pork roast is baking, a simple orange glaze is mixed together. The glaze is simmered on the stove top while the pork bakes.

Orange glaze for pork roast is cooked on stove.

Orange Glaze Is Added To Pork During Baking Time

After the first 2 hours of baking, the glaze is brushed onto the pork roast. The glaze is brushed on, in 15 minute intervals for the rest of the baking time. The slow baking time ensures this orange glazed pork roast is tender and juicy. Who wouldn’t want that, right?  As an added benefit, your kitchen will sure smell good while it bakes!

Here’s a photo of the first time the orange sauce was added to make this a true orange glazed pork roast!

The Pork Roast being brushed with orange glaze part way through baking time.

Continue to glaze the pork roast with the orange sauce every 15 minutes.  Think of it as adding layer upon layer of delicious orange flavor! The pork roast is ready when it reaches an internal temperature of 160 degrees F.

Orange Glazed Pork Roast is ready when internal temperature reaches 160 degrees F.

Orange Glazed Pork Roast Is Ready To Eat!

Here is the finished orange glazed pork roast! The roast is golden brown on the outside, and rests for a few minutes before being sliced.

Orange glazed pork roast is finished baking and rests for a few minutes before slicing.

To serve the orange glazed pork roast, place a couple thin slices of pork on plate. Spoon some of the orange glaze over the top. Once that is done, all that is left to do is dig in! I served the pork slices with mashed potatoes and garden peas on the side. It tasted so GOOD! the pork was very juicy, full of flavor, and quite tender!

Mashed potatoes and peas are served with orange glazed pork roast.

I really hope you enjoy this delicious recipe for orange glazed pork roast! We sure did! Hope you have a wonderful day, full of encouragement and good things!

Looking for More PORK Recipes?

You can find ALL my recipes in the Recipe Index, located at the top of the page. I hav lots of great pork recipes, including:

Interested In More Recipes?

Thank you for visiting this website. I appreciate you using some of your valuable time to do soIf you’re interested, I publish a newsletter 2 times per month (1st and 15th) with all the latest recipes, and other fun info. I would be honored to have you join our growing list of subscribers, so you never miss a great recipe!
There is a Newsletter subscription box on the top right side (or bottom) of each blog post, depending on the device you use, where you can easily submit your e-mail address (only) to be included in my mailing list.

You Can Also Find Me On Social Media:

Facebook page: The Grateful Girl Cooks!
Pinterest:
The Grateful Girl Cooks!
Instagram:
jbatthegratefulgirlcooks

Author's signature

Recipe Adapted from: Cookingwithdoyle.com/index.php/orange-glazed-pork-roast  

↓↓ PRINTABLE RECIPE BELOW ↓↓

0 from 0 votes
Orange Glazed Pork Roast
Prep Time
10 mins
Cook Time
3 hrs
Total Time
3 hrs 10 mins
 
You'll really enjoy this delicious Orange Glazed Pork Roast, with dry rub spices, baked until tender, coated and served with a sweet citrus glaze.
Category: Entree
Cuisine: American
Keyword: orange glazed pork roast
Servings: 8 servings
Calories Per Serving: 358 kcal
Author: JB @ The Grateful Girl Cooks!
Ingredients
  • 4 lb. boneless pork roast
For the rub:
  • 1 teaspoon salt
  • 1 clove garlic , minced
  • 1/4 teaspoon thyme (dried)
  • 1/4 teaspoon ginger (dried)
  • 1/4 teaspoon black pepper
For the orange glaze:
  • 1/4 cup packed brown sugar
  • 1 Tablespoon cornstarch
  • 1 cup orange juice (I use fresh squeezed)
  • 1/3 cup water
  • 1 Tablespoon Dijon mustard (I used Dijon - original recipe calls for spicy brown)
  • 1 Tablespoon soy sauce (I added this just because I thought it would be good.)
  • 2 Tablespoon orange marmalade ( I added this to original recipe)
Instructions
  1. Combine the rub ingredients in a small bowl. Rub this mixture over the entire pork roast; then place the roast in a baking pan that has been sprayed with non-stick spray. Bake uncovered at 350 degrees for 2 hours.
  2. While roast is cooking, make the orange glaze. In a saucepan, combine the brown sugar and cornstarch, then stir in the remaining glaze ingredients. Bring this mixture to a simmer over medium heat. Simmer for two minutes, then remove pan from the heat. The mixture should have thickened a little bit. Set aside 1/3 of the glaze to drizzle over the meat slices when you serve them.
  3. After the roast has cooked for the first two hours, remove it from oven. With a pastry brush, "paint" the rest of the glaze (the non-reserved) over the roast every 15 minutes for another 60-90 minutes, or until the roast reaches an internal temperature of 160 degrees (check in the thickest part of the meat with a meat thermometer). Once the internal temperature of the roast has reached 160 degrees, remove it from oven. Let it stand for 10 minutes before slicing (if you cut into it too soon, all those great juices will run out...be patient).
  4. When meat has rested for 10 minutes, slice and serve, with additional glaze spooned over the slices of roast. Enjoy!
Recipe Notes

NOTE: I used a smaller 2 1/2 lb. roast and adapted the baking times to match, but have kept the recipe as originally written for a 4 lb. roast. I also used the glaze and rub ingredients in the amounts as originally written.

Nutrition Facts
Orange Glazed Pork Roast
Amount Per Serving (1 g)
Calories 358 Calories from Fat 81
% Daily Value*
Fat 9g14%
Saturated Fat 2g13%
Cholesterol 142mg47%
Sodium 494mg21%
Potassium 919mg26%
Carbohydrates 14g5%
Sugar 12g13%
Protein 51g102%
Vitamin A 60IU1%
Vitamin C 15.8mg19%
Calcium 22mg2%
Iron 1.4mg8%
* Percent Daily Values are based on a 2000 calorie diet.

Here’s one more to pin on your Pinterest boards!You'll really enjoy this delicious Orange Glazed Pork Roast, with dry rub spices, baked until tender, coated and served with a sweet citrus glaze.


Save

Save

Save

Fiesta Rice

Fiesta Rice is a totally EASY, hearty, and delicious side dish made with white rice, black beans, corn, tomatoes, scallions, cilantro and lime juice.Fiesta Rice is a totally EASY, hearty, and delicious side dish made with white rice, black beans, corn, tomatoes, scallions, cilantro and lime juice.
This fiesta rice just might be one of the easiest side dishes ever created. Really. It’s almost too easy to call it a “recipe”, but yet it is! Guess what? It is DELICIOUS!

I discovered the recipe on Pinterest, and found it to be a perfect accompaniment for Taco Night! The flavors in the fiesta rice are a refreshingly nice change from my recipe for Spanish Rice that I have made and served over the years.

Scroll Down For A Printable Recipe Card At The Bottom Of The Page

Fiesta Rice Is So Easy To Make

Basically to make fiesta rice, all you will need to do is cook rice, and then add the remaining ingredients and mix them all together. That’s it!

This rice is so good, I suppose you COULD just eat it right out of the bowl before it gets to the table. Not that I would ever do such a despicable thing (*cough, cough). Didn’t take photos other than the finished product, because, honestly, it’s SO EASY!

Fiesta rice is a great side dish, and it’s super easy if you already have leftover cooked rice to use. This would be delicious paired with chicken, pork, shrimp.

You could also morph it into a yummy burrito bowl, and add some barbacoa shredded beef, etc.! Hope you enjoy it!

Looking For More Mexican-Style Dishes?

You can find all of my recipes in the Recipe Index, which is located at the top of the page. I have a good variety of Mexican-style dishes (and side dishes), including:

Want More Recipes? Get My FREE Newsletter!

I publish a newsletter 2 times per month (1st and 15th) with lots of recipes, tips, etc..
Would you like to join our growing list of subscribers?

There is a Newsletter subscription box on the top right (or bottom) of each blog post, depending on the device you use.
You can submit your e-mail address there, to be added to my mailing list.

Find Me On Social Media:

Facebook page: The Grateful Girl Cooks!
Pinterest:
The Grateful Girl Cooks!
Instagram:
jbatthegratefulgirlcooks

Author's signature

Recipe Source: http://www.skinnytaste.com/2011/04/fiesta-lime-rice.html

↓↓ PRINTABLE RECIPE BELOW ↓↓

0 from 0 votes
Fiesta Rice
Prep Time
10 mins
Cook Time
25 mins
Total Time
35 mins
 

Fiesta Rice is a totally EASY, hearty, and delicious side dish made with white rice, black beans, corn, tomatoes, scallions, cilantro and lime juice.

Category: Side Dish
Cuisine: Mexican
Keyword: fiesta rice
Servings: 6 servings
Calories Per Serving: 295 kcal
Author: JB @ The Grateful Girl Cooks!
Ingredients
  • 1 1/2 cups cooked , long-grain rice
  • 1 can black beans-rinsed and heated
  • 1 cup corn (canned or frozen), heated
  • 1 large tomato , diced
  • 1 large scallion , finely diced
  • 2-4 Tablespoons chopped cilantro (I used 4)
  • 1 heaping Tablespoon fresh squeezed lime juice (I added an extra Tablespoon)
  • Salt (to taste)
Instructions
  1. Cook the rice.
  2. In a large serving bowl, mix the hot rice with the remaining ingredients (salt to taste).
  3. Toss and Serve.
  4. The End. Wasn't that EASY? Enjoy!
Nutrition Facts
Fiesta Rice
Amount Per Serving (1 g)
Calories 295 Calories from Fat 9
% Daily Value*
Fat 1g2%
Saturated Fat 1g6%
Sodium 5mg0%
Potassium 437mg12%
Carbohydrates 61g20%
Fiber 8g33%
Sugar 2g2%
Protein 11g22%
Vitamin A 330IU7%
Vitamin C 6.4mg8%
Calcium 35mg4%
Iron 2.1mg12%
* Percent Daily Values are based on a 2000 calorie diet.

Here’s one more to pin on your Pinterest boards!Fiesta Rice is a totally EASY, hearty, and delicious side dish made with white rice, black beans, corn, tomatoes, scallions, cilantro and lime juice.

Save

Save

Save

Save

Olive Garden Toscana Soup

Olive Garden Toscana Soup is a delicious copycat recipe for a beloved, hearty soup with potatoes, Italian sausage and kale, in a seasoned broth!Olive Garden Toscana Soup is a delicious copycat recipe for a beloved, hearty soup with potatoes, Italian sausage and kale, in a seasoned broth!
I’m sitting in my office at home looking out the window at freshly fallen snow in our backyard. We had a crazy snowstorm yesterday (it gets crazy in Portland when we have significant snow). Today another 3-5 inches of snow is expected. Whoa! 

This is a great day for Olive Garden Toscana Soup! My husband and I have both been fighting pesky head colds for several days now, and we decided a big pot of soup was what we needed.

This way we can have soup made for 1) the snowstorm, and 2) leftovers (so I don’t have to cook much while sick). It was a really good idea (we occasionally have good ideas!).

Scroll Down For A Printable Recipe Card At The Bottom Of The Page

Where I Found The Recipe For Olive Garden Toscana Soup

Once my hubby and I settled on what KIND of soup it was easy: A big pot of Toscana Soup, a copycat version of the popular soup found at Olive Garden restaurants nationwide. It is also known as Zuppa Toscana.

I dug out my trusty cookbook called “Top Secret Restaurant Recipes”, by author Todd Wilbur, and got busy in the kitchen. Honestly, I can’t count how many times I’ve made this recipe over the years.

We find this soup wonderfully tasty, filling, and it’s ridiculously easy to make. The blended flavors of Italian sausage, potatoes and kale are enhanced by a light, creamy broth.

Olive Garden Toscana Soup is a seriously good soup to cozy up with on a cold, snowy day, or any time you want a great bowl of soup!

How To Make Olive Garden Toscana Soup

Place four Italian sausage links into a large skillet. Pan-sear the sausage links on medium heat until they are browned, and cooked through.

Cooking the sausage links will take between 10 and 15 minutes to cook the sausages all the way through.

Italian sausage links are pan-seared in skillet.

Once they are finished cooking, transfer the sausages out of the skillet, and let them cool for about 10 minutes before attempting to slice them..

Use a sharp knife to slice the cooked Italian sausage links into thin rounds. Set the sausage slices aside to rest while you add other ingredients to the soup.

The cooked Italian sausage links are cut in thin slices.

Time To Slice Those Potatoes!

Slice the cleaned, unpeeled potatoes into thin slices, and then cut them into quarters. The potato slices will cook more evenly if they are all cut about the same size.

Unpeeled russet potatoes are cut into thin slices, then cut into quarters.

Add Potatoes And Kale To The Toscana Soup

Add the sliced potatoes (make them “walk the plank”) to the Toscana soup base that is simmering in a large soup pot.

Potatoes being added to the Olive Garden Toscana Soup in pan.

Next into the soup pot goes the kale. Yes… this recipe calls for lots of fresh chopped kale (the HEALTHY veggie)! Stir to incorporate the potatoes and kale into the soup.

The kale will wilt and reduce in volume as it heats in the hot broth. Now your big ol’ pot of Olive Garden Toscana Soup is almost ready to eat! Are you getting excited? I know I am!

Chopped kale is added to the soup in pan.

Final Step, Then It’s Time To EAT!

Add the cooked and sliced Italian sausage to the soup, and stir, to combine. Continue to heat the soup, until it is very hot, and then get ready to serve it!

Ladle the hot Toscana Soup into individual serving bowls. Serve Olive Garden Toscana Soup with some crusty Italian bread on the side, and enjoy!

The sliced, cooked Italian sausage pieces are added to the pot of Olive Garden Toscana Soup.

Hope you will give this Olive Garden Toscana Soup a try and will discover (if you haven’t already), how delicious it really is!

It’s pretty easy to make a big pot of this soup to enjoy! Sure hope you like it!  If you enjoy the soups at The Olive Garden, be sure to check out my recipe for Olive Garden Chicken Gnocchi Soup! It is fantastic, and is one of my all-time favorites!

Thanks for stopping by today. Please come back soon for more family-friendly recipes. Take care, and have a great day.

Looking For More SOUP Recipes?

You can find ALL of my recipes in the Recipe Index, located at the top of the page. I have lots of delicious soups for you to enjoy, including:

Want More Recipes? Get My FREE Newsletter!

I publish a newsletter 2 times per month (1st and 15th) with lots of recipes, tips, etc..
Would you like to join our growing list of subscribers?

There is a Newsletter subscription box on the top right (or bottom) of each blog post, depending on the device you use.
You can submit your e-mail address there, to be added to my mailing list.

Find Me On Social Media:

Facebook page: The Grateful Girl Cooks!
Pinterest:
The Grateful Girl Cooks!
Instagram:
jbatthegratefulgirlcooks

Author's signature
Recipe adapted from the cookbook: “Top Secret Restaurant Recipes”, by Todd Wilbur, (published 1977).
 

↓↓ PRINTABLE RECIPE BELOW ↓↓

0 from 0 votes
Olive Garden Toscana Soup
Prep Time
20 mins
Cook Time
1 hr
Total Time
1 hr 20 mins
 

Olive Garden Toscana Soup is a delicious copycat recipe for a beloved, hearty soup with potatoes, Italian sausage and kale, in a seasoned broth!

Category: Soup
Cuisine: Italian
Keyword: Toscana soup
Servings: 6 servings
Calories Per Serving: 396 kcal
Author: JB @ The Grateful Girl Cooks!
Ingredients
  • 4 Italian sausage links (mild or hot flavors are okay-I typically use mild)
  • 6 cups chicken stock
  • 3/4 cup milk (for an even creamier version, use heavy whipping cream, then omit the butter)
  • 2 Tablespoons butter
  • 3 cups chopped kale
  • 3 small russet potatoes- unpeeled (or 1 1/2 large potatoes-unpeeled)
  • 3/4 teaspoon salt
  • 1/2 teaspoon pepper
  • 1/4 teaspoon garlic powder
  • 1/2 teaspoon red pepper flakes
Instructions
  1. Grill or sauté the sausages till done (approx. 15 minutes). Remove from heat and let cool. Once sausage has cooled, slice the sausages at an angle into slices about 1/2 inch thick.
  2. In a large saucepan, combine the chicken stock and the milk/butter (or heavy cream) over medium heat. Add the grilled Italian sausage slices and kale to the soup. Slice the unpeeled potatoes into 1/4 inch slices, and then quarter each slice. Add the quartered potato slices to the soup.

  3. Add the spices (salt, pepper, garlic powder, and red pepper flakes) to taste. Let the soup simmer on low, uncovered for about 1 hour, stirring occasionally. Serve, and enjoy!

Recipe Notes

Recipe adapted from the cookbook: "Top Secret Restaurant Recipes", by Todd Wilbur, (published 1977).

Nutrition Facts
Olive Garden Toscana Soup
Amount Per Serving (1 (1/6 of total))
Calories 396 Calories from Fat 279
% Daily Value*
Fat 31g48%
Saturated Fat 12g75%
Cholesterol 77mg26%
Sodium 1245mg54%
Potassium 1000mg29%
Carbohydrates 28g9%
Fiber 1g4%
Sugar 5g6%
Protein 20g40%
Vitamin A 3560IU71%
Vitamin C 47mg57%
Calcium 116mg12%
Iron 2.6mg14%
* Percent Daily Values are based on a 2000 calorie diet.

Here’s one more to pin on your Pinterest boards!Olive Garden Toscana Soup is a delicious copycat recipe for a beloved, hearty soup with potatoes, Italian sausage and kale, in a seasoned broth!


Save

Save

Save

Save

Save

Orange Beef Stir Fry

Enjoy an Orange Beef Stir Fry, with marinated steak cooked with broccoli, carrots and red bell peppers, in an Asian-inspired soy and marmalade sauce!  Enjoy an Orange Beef Stir Fry, with marinated steak cooked with broccoli, carrots and red bell peppers, in an Asian-inspired soy and marmalade sauce!

Last year I bought a cookbook called “Hungry Girl To the Max!” – The Ultimate Guilt-Free Cookbook”, by Lisa Lillien. I found this recipe for Orange Beef Stir Fry in the cookbook and enjoyed giving it a try.

We ended up really enjoying this delicious meal and our family found it to be full of favor and very satisfying!  Another good thing is that the original author has taken steps to cut the fat in a lot of her recipes.

I don’t eat very much beef in general, but this recipe sounded really good to me because I am a sucker for anything with orange in it.  Here’s how to make this orange beef stir fry.

Scroll Down For A Printable Recipe Card At The Bottom Of The Page

The Marinated Steak Is Full Of Flavor!

The steak marinades until time to cook, so it helps to tenderize it, and allows the wonderful, delicious combination of orange marmalade, soy sauce, ginger and garlic flavors to permeate it! 

Add to that some good and fresh stir-fried veggies, and you’re in for a delightful treat! The orange sauce would be great just on the veggies alone, if you don’t eat meat.

You can also substitute chicken for the beef if you don’t like red meat. This is a very versatile recipe, and the flavor is all in the sauce!

My suggestion would be to get the beef marinating in the refrigerator early in the day, then the recipe will be a snap to throw together later, for a delicious dinner. Hope you enjoy it!

Make The Sauce

Making the sauce is EASY! Simply whisk the ingredients together. The two main ingredients in the sauce are orange marmalade and soy sauce.

There are a few other ingredients that are added to season and thicken the sauce, but overall, the sauce is a cinch to make in only a minute or two.

An Asian-inspired orange and soy sauce is mixed for the stir fry.

Prepare the Beef

Pat the beef dry and then slice the steak very thin. TIP: You will find it’s easiest to slice thin if the meat is partially frozen before cutting. Put it in the freezer for 10-15 minutes (if desired) before slicing.

Steak is cut into thin strips for the orange beef stir fry.

Marinating The Steak Strips For FLAVOR!

The steak strips are marinated in a delicious soy and marmalade Asian-inspired sauce, before they are stir-fried.

Steak marinates in orange and soy sauce before cooking.

While the steak marinates, prep the veggies for the orange beef stir fry. The veggies (grated carrots, broccoli florets and bell peppers) are shown below once they’re prepped and ready.

I love the vibrant colors of the veggies in a good stir fry, don’t you?

Broccoli, bell peppers and carrots are chopped and prepped before stir frying.

Stir Fry The Veggies

The colorful veggies are stir-fried in a large skillet with a portion of the orange marmalade and soy sauce mixture.

Broccoli, bell peppers and carrots are stir-fried in orange sauce.

Cook The Orange Beef Stir Fry And Serve!

The marinated beef slices and the remaining portion of the sauce are then added to the veggies. Orange beef stir fry is cooked until the steak is cooked through, and the sauce has thickened.

Once the orange beef stir fry has finished cooking, remove the skillet from the heat. Serve this dish immediately on top of a bed of steamed rice. Yum!

Orange Beef Stir Fry is served on top of white steamed rice.

Hope you will consider trying this yummy orange beef stir fry. It is really scrumptious, and I am confident you and those you love will enjoy it, too!

Thanks for stopping by, and I invite you to come back again soon for more family-friendly recipes. Take care, may God bless you, and have a wonderful day.

Looking For More BEEF Recipes?

You can find ALL of my recipes in the Recipe Index, which is located at the top of the page. I have some delicious recipes featuring beef to choose from, including:

Want More Recipes? Get My FREE Newsletter!

I publish a newsletter 2 times per month (1st and 15th) with lots of recipes, tips, etc.
Would you like to join our growing list of subscribers?

There is a Newsletter subscription box on the top right (or bottom) of each blog post, depending on the device you use.
You can submit your e-mail address there, to be added to my mailing list.

Find Me On Social Media:

Facebook page: The Grateful Girl Cooks!
Pinterest:
The Grateful Girl Cooks!
Instagram:
jbatthegratefulgirlcooks

Author's signatureRecipe Adapted from “Hungry Girl To The Max-The Guilt-Free Cookbook”, by Lisa Lillien, published in 2012.

↓↓ PRINTABLE RECIPE BELOW ↓↓

0 from 0 votes
Orange Beef Stir Fry
Prep Time
1 hr 30 mins
Cook Time
12 mins
Total Time
1 hr 42 mins
 

Enjoy an Orange Beef Stir Fry, with marinated steak cooked with broccoli, carrots and red bell peppers, in an Asian-inspired soy and marmalade sauce!

Category: Entree
Cuisine: Chinese
Keyword: orange beef stir fry
Servings: 3 servings
Calories Per Serving: 243 kcal
Author: JB @ The Grateful Girl Cooks!
Ingredients
  • 3 Tablespoons orange marmalade (author recommends low-sugar)
  • 1 1/2 Tablespoons reduced sodium/light soy sauce
  • 1 1/2 Tablespoons seasoned rice vinegar
  • 1 1/2 Tablespoons cornstarch
  • 3/4 teaspoons ground ginger
  • 1/2 teaspoons garlic powder
  • 8 oz. raw lean beefsteak fillet (I used a rib eye steak I found in the freezer...heh heh heh!)
  • 2 dashes Couple dashes of salt
  • 3 cups broccoli florets
  • 1 1/2 cups chopped red bell pepper (I used a combination of red and yellow peppers for color)
  • 3/4 cup shredded carrots
  • Optional seasonings to taste: additional salt , pepper, and red pepper flakes (I used all of them)
Instructions
  1. Make the sauce: In a medium bowl, mix the marmalade with the soy sauce until blended. Add the vinegar, cornstarch, ginger and garlic powder and mix well. Add 1 cup of water to this and whisk together until the cornstarch is completely dissolved.
  2. At this point, reserve 1/2 cup of the marinade in a separate bowl. Cover and refrigerate. This will be used later in the recipe.
  3. Thinly slice the beef (trimming the visible fat) and season with salt. (Hint: the easiest way to slice the beef thin is to slice while the beef is semi-thawed, but still firm. Trust me.) Add the beef to the bowl w/ the remaining marinade (NOT the 1/2 cup you reserved earlier) and coat well. Cover the bowl and let marinate in the refrigerator for at least one hour (I recommend all day)
  4. Chop and grate the veggies. Spray a large skillet with non-stick spray, and bring to medium-high heat. Add the broccoli, bell pepper, carrots, and the 1/2 cup of the marinade that you reserved earlier. Cook this on medium-high for approximately 5 minutes, stirring, until the veggies have slightly softened.
  5. Add the 1/2 cup of leftover marinade and the beef into the skillet. Cook on medium-high until the veggies are tender, the beef has cooked through, and the sauce has thickened (approx. 4-5 minutes). When done, remove from heat, and serve! We had rice on the side and it was a perfect accompaniment to the stir-fry. ENJOY!
Nutrition Facts
Orange Beef Stir Fry
Amount Per Serving (1 (1/3 of total))
Calories 243 Calories from Fat 36
% Daily Value*
Fat 4g6%
Saturated Fat 1g6%
Cholesterol 46mg15%
Sodium 871mg38%
Potassium 824mg24%
Carbohydrates 31g10%
Fiber 4g17%
Sugar 18g20%
Protein 21g42%
Vitamin A 8245IU165%
Vitamin C 179.2mg217%
Calcium 87mg9%
Iron 2.6mg14%
* Percent Daily Values are based on a 2000 calorie diet.

Here’s one more to pin on your Pinterest boards!  Enjoy an Orange Beef Stir Fry, with marinated steak cooked with broccoli, carrots and red bell peppers, in an Asian-inspired soy and marmalade sauce!


Save

Save

Tuscan Garlic Chicken

This easy, stove top Tuscan Garlic Chicken features lightly seasoned chicken, with a spinach, red pepper, garlic and Parmesan cheese sauce, on fettuccine pasta.
“Winner, Winner…Chicken Dinner”! I might have said these words after making this amazing recipe for Tuscan garlic chicken last night for dinner.
 
I love to search for new recipes and try them out for my husband and myself. When I find a great one, like Tuscan garlic chicken, it’s a “Christmas miracle”, as I like to say! 
 
I made a few small changes to the original recipe, utilizing ingredients I had on hand. The end result? We totally enjoyed this dish.
 
Scroll Down For A Printable Recipe Card At The Bottom Of The Page

About This Recipe

The Italian flavors of lightly seasoned chicken, spinach, red peppers, garlic and Parmesan cheese on a bed of fettuccine pasta are wonderful!
 
As I made the sauce, I kept tasting it. Yes, it’s a tough job, but “someone” has to do quality control, right?
 
The original recipe calls for 4 chicken breasts, but I only used 2 for this recipe. After pounding them out thinner and cutting them in half (total of 4 pieces of chicken breast), my husband and I ended up having 1 half piece each (with 2 pieces leftover for “leftovers”).
 
That portion size of chicken was more than enough, so that cut the already inexpensive price of this delicious meal way down!
 
I’m very glad I tried this recipe and look forward to making it again. This would be a great meal to cook when company comes over for dinner!  Here are a few pictures taken while cooking Tuscan Garlic Chicken:

Some Photos Of The Process

Pounding the chicken breasts between plastic wrap with a meat mallet is good, cheap therapy! The plastic wrap on both sides helps keep the splatter “inside”.
 
Keep pounding with the flat edge of the mallet until the chicken breasts are fairly flattened and then repeat with the remaining chicken breasts.
 
Pound the chicken breasts with a meat mallet, to flatten them.

You will cook red peppers and garlic together in a large skillet, before adding the rest of the ingredients needed to make a colorful, creamy sauce for the chicken.
 
Red bell peppers and garlic cook in skillet before adding more sauce ingredients.

The Sauce Is Very Colorful!

This is what the sauce for Tuscan garlic chicken will look like once all ingredients are added. It is very creamy and incredibly full of flavor.
 
The creamy sauce for Tuscan garlic chicken is very colorful in the skillet.

Serving Tuscan Garlic Chicken

And that’s it! The Tuscan garlic chicken is wonderful, served on top of fettucine pasta. Doesn’t it look good? Well, let me tell you, it IS absolutely DELICIOUS!

Tuscan Garlic Chicken, served on a bed of fettucine noodles.

This chicken dish really is a simple meal to prepare, and it tastes wonderful! I hope you will consider making this Tuscan garlic chicken and feel confident you will enjoy it as much as we do.

Thank you for stopping by, and I invite you to come back again soon for more family friendly recipes. Take care, may God bless you, and have a wonderful day.

Looking For More CHICKEN Recipes?

You can find ALL of my recipes in the Recipe Index, which is located at the top of the page. I have LOTS of delicious chicken recipes to choose from, including:

Want More Recipes? Get My FREE Newsletter!

I publish a newsletter 2 times per month (1st and 15th) with lots of recipes, tips, etc.
Would you like to join our growing list of subscribers?

There is a Newsletter subscription box on the top right (or bottom) of each blog post, depending on the device you use.
You can submit your e-mail address there, to be added to my mailing list.

Find Me On Social Media:

Facebook page: The Grateful Girl Cooks!
Pinterest:
The Grateful Girl Cooks!
Instagram:
jbatthegratefulgirlcooks


Author's signature

 Adapted From: http://www.tastesbetterfromscratch.com/2014/01/tuscan-garlic-chicken.html 

↓↓ PRINTABLE RECIPE BELOW ↓↓

0 from 0 votes
Tuscan Garlic Chicken
Prep Time
30 mins
Cook Time
15 mins
Total Time
45 mins
 

This easy, stove top Tuscan Garlic Chicken features lightly seasoned chicken, with a spinach, red pepper, garlic and Parmesan cheese sauce, on fettuccine pasta.

Category: Entree
Cuisine: Italian
Keyword: Tuscan garlic chicken
Servings: 4
Calories Per Serving: 540 kcal
Author: JB @ The Grateful Girl Cooks!
Ingredients
  • 2 large chicken breasts
  • 2 Tablespoons olive oil
For the chicken coating:
  • 1/2 cup all-purpose flour
  • 1 teaspoon salt
  • 1/2 teaspoon pepper
  • 1/4 teaspoon dried basil
  • 1/4 teaspoon dried oregano
  • 1/4 teaspoon onion powder
  • 1/4 teaspoon garlic powder
For the sauce:
  • 1/2 large red bell pepper , diced
  • 1 Tablespoon minced garlic
  • 1 1/2 Tablespoons olive oil
  • 1/2 cup chicken broth
  • 1/2 Tablespoon flour
  • 3/4 cup milk
  • 1 1/4 teaspoon corn starch
  • 1/4 teaspoon garlic powder
  • salt & pepper , to taste
  • 1/2 small box frozen chopped spinach (cooked according to pkg. & drained well) You can also substitute 2 cups of chopped fresh baby spinach, if desired)
  • 1/2 cup shredded Parmesan cheese (I used the real stuff!)
For the pasta:
  • 1/2 lb. fettuccine noodles , cooked according to pkg. directions)
  • * Note: I'm sure any pasta would work great...the fettuccine noodles were fantastic though; they really handled the sauce well!)
Instructions
  1. Preheat oven to 375 degrees.
  2. Cut the chicken breasts in half. Place each piece between two pieces of plastic wrap and pound with a meat mallet until much thinner (think of this as good therapy...pound, pound, pound!). You can also cut the chicken breasts in half horizontally, if desired. I pounded away!
  3. On a large plate, mix together the chicken coating ingredients (flour, salt, pepper, basil, oregano, onion powder and garlic powder). Dredge the chicken in the mixture, coating both sides.
  4. Heat 2 TBSP olive oil in a non-stick skillet on medium high. When the oil is really HOT, add the chicken. Brown the chicken on both sides (approx. 1-2 minutes per side-till golden brown), then remove chicken from skillet and place in a baking dish and bake at 375 degrees for 15 minutes (or until fully cooked). Keep chicken warm.
  5. While the chicken is in the oven, whip up the sauce. (Easy so far, right?)
  6. To make the sauce, start by sauteing the diced red peppers in just a touch of olive oil for about 5 minutes. Then add the minced garlic and saute for another minute or two (being careful NOT to burn the garlic!). Once done, remove from skillet to a small plate and set aside.
  7. Add the 1 1/2 TBSP olive oil to the warm skillet. Add in the flour and whisk into the oil to blend. Add the chicken broth to this mixture and whisk until smooth. Slowly bring this sauce to a boil.
  8. In a small bowl, combine the milk and the cornstarch until dissolved. Add this to the boiling sauce, then reduce the heat to a simmer.
  9. Stir in the cooked, well-drained spinach (or 2 cups fresh chopped baby spinach), the peppers and garlic mixture, the Parmesan cheese and garlic powder. Season with a touch of salt and pepper (to taste).
  10. Simmer the sauce until it thickens, stirring occasionally. If sauce is too thick, you can always add in several tablespoons of the starchy hot pasta water. (I added 3-4 TBSP of pasta water)
  11. Place fettuccine noodles on plates, top with the sauce and then place the chicken on top. Garnish with a bit of fresh, chopped basil (optional) and some additional shredded Parmesan cheese. ENJOY!
Nutrition Facts
Tuscan Garlic Chicken
Amount Per Serving (1 serving)
Calories 540 Calories from Fat 180
% Daily Value*
Fat 20g31%
Saturated Fat 5g31%
Cholesterol 97mg32%
Sodium 1000mg43%
Potassium 584mg17%
Carbohydrates 59g20%
Fiber 2g8%
Sugar 4g4%
Protein 28g56%
Vitamin A 2120IU42%
Vitamin C 26.6mg32%
Calcium 235mg24%
Iron 2.8mg16%
* Percent Daily Values are based on a 2000 calorie diet.

Here’s one more to pin on your Pinterest boards!This easy, stove top Tuscan Garlic Chicken features lightly seasoned chicken, with a spinach, red pepper, garlic and Parmesan cheese sauce, on fettuccine pasta.

Save

Save

Save

Save

Save

Honey Lime Chicken Skewers

Honey lime chicken skewers, with marinated chicken breast, zucchini, yellow squash, mushrooms and bell peppers are the perfect (yummy) kabobs for grilling!Honey lime chicken skewers, with marinated chicken breast, zucchini, yellow squash, mushrooms and bell peppers are the perfect (yummy) kabobs for grilling!

As I write this post for honey lime chicken skewers, it is the middle of winter in the Pacific Northwest…cold and overcast. Sigh. I find myself longing for more hours of sunlight, warm weather, and the smell of smoke coming from our hard-working BBQ grill, as another delicious chicken dinner is prepared.

We grill as soon as is it warm enough to hang around outside without getting frozen or pelted with rain; I can hardly wait for warm weather and Daylight Savings Time to arrive!

There’s nothing better than sitting outside, sipping iced tea on a warm evening and watching my husband (“The Grill Master”) help me cook dinner, armed with charcoal briquets, charcoal lighter, and kitchen tongs! Yay for BBQs and honey lime chicken skewers!

Scroll Down For A Printable Recipe Card At The Bottom Of The Page

Weber grill is fired up to cook honey lime chicken skewers!

This recipe for honey lime chicken skewers is one I found on Pinterest last year. I added skewers of summer veggies to the dish (grilled separately, but basted with the honey lime marinade), and we really loved it! Honey lime chicken skewers (with yummy grilled veggies) is definitely one of those “Perfect For Those Lazy Days Of Summer” meals.

How To Make These Chicken Skewers (it’s easy)

Boneless, skinless chicken breasts are cut into chunks, then marinated, threaded onto skewers, and grilled. TIP: Marinade the chicken early in the day, throw it in the refrigerator before you head to work or go have some summer fun, then skewer and grill it later for an amazing dinner!

Chicken breasts are cut into chunks for honey lime chicken skewers.

I used zucchini, yellow squash, red and orange bell peppers and button mushrooms. If you want to add your own veggies (such as onions, tomatoes, etc.), please do! Make this honey lime chicken skewers recipe your own!

Zucchini squash and bell peppers, sliced for honey lime chicken skewers.

The chicken pieces are marinated in an amazing honey lime sauce. Marinated chicken cubes are then evenly divided between two skewers.

The veggies are cut, then threaded (alternating veggies), onto two additional skewers. Note: I used metal skewers. If you will be using wooden skewers, remember to soak them in water for approximately 15 minutes. This will help to prevent them from burning on the grill.

Marinated honey lime chicken skewers and veggies ready to grill.

Grilling Honey Lime Chicken Skewers

The kabobs (also known as skewers), are grilled (turning occasionally) until done. They are brushed with some of the reserved honey lime marinade, while they cook. When fully cooked through, the honey lime chicken skewers and grilled veggies are removed from the grill.

The chicken and veggies are slid off their skewers onto individual plates. We served the grilled chicken and veggies with a side of steamed rice. Honey lime chicken skewers (along with the veggies) are very quick, tasty meal. It’s a real “no-brainer” recipe that is easily doubled or tripled, if you’re feeding a few people. I hope you enjoy it as much as we do!

Honey lime chicken skewers (kabobs), after grilling. Ready to eat!

Hope you will consider trying these honey lime chicken skewers! They have wonderful flavor! Have a great day, and remember… be kind to those you meet today. They may need a kind word from a stranger to make their day a little brighter.

Looking for More KABOB Recipes?

You can find all of my recipes in the Recipe Index, located at the top of the page. I have some delicious kabob recipes you might enjoy, including:

Interested In More Recipes?

Thank you for visiting this website. I appreciate you using some of your valuable time to do soIf you’re interested, I publish a newsletter 2 times per month (1st and 15th) with all the latest recipes, and other fun info. I would be honored to have you join our growing list of subscribers, so you never miss a great recipe! 

There is a Newsletter subscription box on the top right side (or bottom) of each blog post, depending on the device you use, where you can easily submit your e-mail address (only) to be included in my mailing list.

You Can Also Find Me On Social Media:

Facebook page: The Grateful Girl Cooks!
Pinterest:
The Grateful Girl Cooks!
Instagram:
jbatthegratefulgirlcooks

Author's signatureRecipe Source: http://kitchenmeetsgirl.com/honey-lime-chicken-skewers/  

↓↓ PRINTABLE RECIPE BELOW ↓↓

0 from 0 votes
Honey Lime Chicken Skewers
Prep Time
1 hr
Cook Time
15 mins
Total Time
1 hr 15 mins
 
Honey lime chicken skewers, with marinated chicken breast, zucchini, yellow squash, mushrooms and bell peppers are the perfect (yummy) kabobs for grilling!
Category: Entree
Cuisine: American
Keyword: honey lime chicken skewers
Servings: 2
Calories Per Serving: 445 kcal
Author: JB @ The Grateful Girl Cooks!
Ingredients
  • 1 pound boneless skinless chicken breasts , (cut into large chunks)
  • 2 Tablespoons cilantro , chopped (for garnish)
For Marinade:
  • 3 Tablespoons soy sauce
  • 2 Tablespoons honey
  • 1 Tablespoon vegetable oil
  • Juice of 1 lime
  • 2 garlic cloves , minced
  • 1-2 teaspoons Sriracha sauce
  • teaspoon Red pepper flakes
For Veggie Skewers (alternate these on separate skewers):
  • 1 small zucchini , sliced
  • 1 small yellow squash , sliced
  • 6 button mushrooms , rinsed
  • 1/2 red / orange bell pepper
Instructions
  1. Cut boneless, skinless chicken breasts into 1-2" chunks. Set aside while you make the honey lime marinade.

  2. In a small bowl, combine soy sauce, honey, oil, lime juice, minced garlic, Sriracha sauce and red pepper flakes, to make the marinade. Mix thoroughly.
    NOTE: Measure out 3 Tablespoons of marinade and set aside for later. Pour the remaining marinade over the chicken chunks. Marinate the chicken (covered) in the refrigerator for a minimum of 1 hour. The longer you let the chicken marinate, the better the flavor.

  3. Thread marinated chicken onto skewers, dividing evenly. It is BEST to thread the veggies onto separate skewers, since the meat and the veggies tend to cook through at slightly different times. It's easier to cook them on separate skewers.

  4. For veggie skewers: Alternate veggies onto 2 skewers. Place on grill and occasionally brush with the reserved honey lime chicken marinade. Cook veggies, turning skewers occasionally to cook all sides. They will probably take a bit less time to grill than the chicken. Plan accordingly.

  5. Grill chicken skewers on medium-high heat for 6-8 minutes per side, or until the juices run clear. Turn chicken skewers occasionally to ensure they get browned on all sides. Remove skewers from grill, remove skewers from chicken and veggies. Serve, and enjoy!

Recipe Notes

The chicken skewers are best when served alongside grilled skewered vegetables like zucchini, onions, mushrooms and yellow squash. Use whatever veggies you enjoy!

*** I used metal skewers. If you will be using wooden skewers, remember to soak them in water for approximately 15 minutes (this will prevent them from burning on the grill...which would NOT be a good thing!)

Nutrition Facts
Honey Lime Chicken Skewers
Amount Per Serving (1 skewer (each-chicken and veggies))
Calories 445 Calories from Fat 117
% Daily Value*
Fat 13g20%
Saturated Fat 7g44%
Cholesterol 145mg48%
Sodium 1127mg49%
Potassium 1444mg41%
Carbohydrates 29g10%
Fiber 2g8%
Sugar 23g26%
Protein 53g106%
Vitamin A 1265IU25%
Vitamin C 69.5mg84%
Calcium 35mg4%
Iron 2.2mg12%
* Percent Daily Values are based on a 2000 calorie diet.

Here’s one more to pin on your Pinterest boards!Honey lime chicken skewers, with marinated chicken breast, zucchini, yellow squash, mushrooms and bell peppers are the perfect (yummy) kabobs for grilling!


Save

Save

Creamy Tomato Basil Soup

Nothing is as comforting as a hot bowl of soup on a cool day. This delicious, creamy tomato basil soup will really hit the spot, and it’s simple to make!Nothing is as comforting as a hot bowl of soup on a cool day. This delicious, creamy tomato basil soup will really hit the spot, and it's simple to make!

Writing this post made me laugh…my entire life I have despised (I know, harsh words!) tomato soup. Really, really despised it. However, I am married to a guy who loves it. Go figure! But the truth is… I have come to love the taste of this Creamy Tomato Basil Soup!

Scroll Down For A Printable Recipe Card At The Bottom Of The Page

Tomato Soup Was NOT On The List Of Foods I Enjoyed… Originally!

Years ago I worked at a school where occasionally they would serve the students and staff grilled cheese sandwiches with a small cup of tomato soup.  Word on the street was the soup was good with a grilled cheese sandwich on the side, but I could never even bring myself to try the soup.

I grew up watching that gelatinous blob of tomato soup come out of canned tomato soup when my Dad would have it for lunch. No Thanks! I had such an “ugh” factor going on.

Then I married a guy who LOVES tomato soup, so through the years I would occasionally buy him a can of the stuff to make him happy. He sometimes even buys a carton of freshly made tomato basil soup from the grocery store deli to “heat and eat”.

Why I Ended Up LIKING Creamy Tomato Basil Soup

Fast this story forward to this past summer –  our little garden was overflowing with fresh basil. I decided to combine my home-grown basil with my deep love of cooking and my love for that “tomato-soup-lovin’ husband of mine”. 

 I searched online to find a homemade tomato basil soup recipe he could enjoy.  This recipe for creamy tomato basil soup is the one I tried, and guess what? I had a tiny cup of it and it was absolutely delicious…who knew? Wait… now I like this soup? I was totally surprised!

Now I really enjoy this yummy tomato basil soup! That has to be some kind of miracle! Maybe my taste buds have changed as I’ve gotten older. Perhaps it is the fact that it didn’t come sliding (in one gelatinous blob) out of a little red and white labeled can?
 

How To Make Homemade Creamy Tomato Basil Soup

In a medium sized pan, sauté onions and garlic in butter over medium heat until they are fairly clear (about 4-5 minutes).  Don’t let the garlic burn!

Add the canned tomatoes (including juice) and the chicken stock to the saucepan. Bring the tomato mixture to a full boil.  Reduce the heat, and let it simmer, uncovered for 10 minutes.  Once the tomato mixture has cooked for 10 minutes, remove pan from heat.

 
Cooking the tomato soup before pureeing the tomatoes.
 
Use an immersion blender to puree. Be careful… the soup is HOT! NOTE: If you don’t have an immersion blender, no problem! Carefully transfer the “hot” tomato mixture to a blender or a food processor and puree. You may need to do this in batches.
 
 
Using an immersion blender to puree the tomato soup.
 
Creamy tomato basil soup, AFTER it has been pureed.
 

Add The Fresh Basil

Once the tomato mixture has been pureed, add in the fresh basil and pulse (or blend) a few more times to incorporate the basil into the soup.
 
Fresh, chopped basil is added to tomato soup, then blended in.
 
If you used a blender, return the hot soup carefully to the saucepan. Whisk in the heavy whipping cream, until blended.
 
Whipping cream is added to creamy tomato basil soup.
 
Season with salt and pepper, to taste.  Heat on low until the creamy tomato basil soup is fully heated through. Do NOT let the soup boil!
 
Creamy tomato basil soup, after whipping cream has been whisked in.
 

Serve This Delicious Creamy Tomato Basil Soup

Ladle the hot soup into cups or bowls. Garnish each portion with croutons and fresh basil leaves, if desired. ENJOY!
 
Creamy tomato basil soup is served in white bowl, with croutons and basil leaves as garnish.
 
This creamy tomato basil soup is very EASY to make and it’s DELICIOUS. Hope you will give it a try!  Have a wonderful day!

Looking For More SOUP Recipes?

You can find all of my recipes in the Recipe Index, located at the top of the page. I have LOTS of soup recipes, including:

Interested In More Recipes?

Thank you for visiting this website. I appreciate you using some of your valuable time to do soIf you’re interested, I publish a newsletter 2 times per month (1st and 15th) with all the latest recipes, and other fun info. I would be honored to have you join our growing list of subscribers, so you never miss a great recipe! 

There is a Newsletter subscription box on the top right side (or bottom) of each blog post, depending on the device you use, where you can easily submit your e-mail address (only) to be included in my mailing list.

You Can Also Find Me On Social Media:

Facebook page: The Grateful Girl Cooks!
Pinterest:
The Grateful Girl Cooks!
Instagram:
jbatthegratefulgirlcooks

Author's signatureRecipe Source: http://unsophisticook.com/tomato-basil-soup/
0 from 0 votes
Creamy Tomato Basil Soup
Prep Time
10 mins
Cook Time
30 mins
Total Time
40 mins
 
Nothing is as comforting as a hot bowl of soup on a cool day. This delicious, creamy tomato basil soup will really hit the spot, and it's simple to make!
Category: Soup
Cuisine: American
Keyword: creamy tomato basil soup
Servings: 8
Calories Per Serving: 210 kcal
Author: JB @ The Grateful Girl Cooks!
Ingredients
  • 4 Tablespoons butter
  • 2 brown onions , chopped
  • 4 garlic cloves , minced
  • 2 (28 oz.) cans whole tomatoes
  • 3 cups chicken stock
  • 1/2 cup fresh basil , chopped (plus additional leaves for garnish, if desired)
  • 1/2 cup heavy whipping cream
  • salt (to taste)
  • pepper (to taste)
  • Croutons and additional basil (for garnish, if desired)
Instructions
  1. In a medium sized pan, saute onions and garlic in butter over medium heat till they are fairly clear (about 4-5 minutes). Don't let the garlic burn!
  2. Add the canned tomatoes (including the juice) and the chicken stock to saucepan. Bring the tomato mixture to a full boil, then reduce the heat and let it simmer, uncovered, for 10 minutes. When the tomato mixture has cooked for 10 minutes, remove from heat.

  3. Use an immersion blender to puree. NOTE: If you don't have an immersion blender, no problem! Carefully transfer the "hot" tomato mixture to a blender or a food processor and puree. You may need to do this in batches.

  4. Once the tomato mixture has been pureed, add in the fresh basil and pulse (or blend) a few times to incorporate the basil into the soup.
  5. If you used a blender, return the hot soup to saucepan. Whisk in the heavy whipping cream, till blended. Season with salt and pepper, to taste. Heat on low until the creamy tomato basil soup is fully heated through. Do NOT let the soup boil!

  6. To serve: Ladle soup into cups or bowls. Garnish with croutons and fresh basil leaves, if desired. ENJOY!

Nutrition Facts
Creamy Tomato Basil Soup
Amount Per Serving (1 (1/8th of total))
Calories 210 Calories from Fat 108
% Daily Value*
Fat 12g18%
Saturated Fat 7g44%
Cholesterol 38mg13%
Sodium 447mg19%
Potassium 737mg21%
Carbohydrates 21g7%
Fiber 4g17%
Sugar 11g12%
Protein 6g12%
Vitamin A 900IU18%
Vitamin C 21.2mg26%
Calcium 93mg9%
Iron 2.9mg16%
* Percent Daily Values are based on a 2000 calorie diet.

Here’s one more to pin on your Pinterest boards!Nothing is as comforting as a hot bowl of soup on a cool day. This delicious, creamy tomato basil soup will really hit the spot, and it's simple to make!


Save

Save

Save

Save

Mexican Layer Dip

Mexican Layer Dip is the perfect party appetizer! Set out a platter of this easy, layered dip with tortilla chips, and let the feeding frenzy begin!Super Bowl 2014 is coming up in a week and a half. Are you looking for a delicious appetizer that will feed the football loving masses, and is a real crowd-pleaser? Well, this Mexican Layer Dip is your answer!!!
Super Bowl 2014 is coming up in a week and a half. Are you looking for a delicious appetizer that will feed the football loving masses, and is a real crowd-pleaser? Well, this Mexican Layer Dip is your answer for football games, parties, New Years celebrations, birthdays, etc.!

Mexican Layer Dip is layers of refried beans, green chilis, tomatoes, two cheeses, olives, avocados, and creamy spicy sour cream. I mean, how could this NOT taste fantastic! It’s got all the good stuff we LOVE to eat!

Scroll Down For A Printable Recipe Card At The Bottom Of The Page

We LOVE Mexican Layer Dip!

I’ve had this Mexican layer dip recipe on a little index card for over 30 years! Now I really don’t remember how or where I first received it, but I’ve made this countless times over the years. It is a family favorite!

This popular appetizer takes about 20 minutes to make, and then it’s refrigerated for about an hour OR until you’re ready to serve it!  It’s a winner recipe, and I’ve even made it the day before I want to serve it, with perfect results!

Our family loves this easy to assemble appetizer. Our oldest son even asked for a platter of this dip as part of his birthday present this past year.  What? Yes, that’s how good it is!

A pizza platter filled with the Mexican layer dip, ready to eat!

Prep the ingredients before you begin preparing the Mexican layer dip, then all you need to do is layer the ingredients in order! The dip is refrigerated for an hour after that! When you’re ready to serve, all that is left is to gobble it up with a handful of tortilla or corn chips! It’s so very easy – anyone can make this! Here’s how:

How To Prepare This Mexican Layer Dip, Step By Step

Spread a can of spicy (or regular) refried beans onto a large round serving platter or pizza pan, mashing it and spreading it out to cover almost the entire platter.

Refried beans are spread out onto a large round serving platter.

Stir together sour cream, mayonnaise and taco seasoning in a bowl until fully combined. Carefully spread this mixture out (using the back of a large spoon) to cover the refried bean layer. 

Sour cream, mayonnaise and taco seasoning are combined to make a spicy spread.The spicy sour cream mixture is spread over the top of the refried bean layer.

Now For The Creamy Avocado Layer

Peel and remove the seeds from three ripe avocados. Place the avocados in a bowl, and add fresh lemon juice. Mash with a fork until the avocados are fairly smooth in texture and the lemon juice has been incorporated. The lemon juice helps the avocados retain their pretty green color!

Dollop the avocado mixture over the sour cream layer, then carefully and gently spread the avocado layer to cover. Sprinkle the avocado layer evenly with sliced green onions.

Avocados mashed with lemon juice are spooned on top of sour cream mixture and spread out.Sliced green onions are sprinkled evenly on top of the avocado layer.

Okay… Let’s Layer The Remaining Ingredients!

Distribute the chopped tomatoes evenly on top of the green onions. After that, evenly add a layer of chopped green chilis.

Chopped tomatoes are layered on top of the green onion layer.Chopped green chilis are evenly sprinkled on top of the tomato layer.

Ready For The Final Layers

Sprinkle sliced black olives over the top of the tomatoes. The next layer to be added is grated Jack cheese, which is then followed by a final layer of grated Cheddar cheese. Be sure to evenly distribute the cheeses over the surface of the Mexican Layer Dip. If desired, add a garnish of fresh cilantro leaves, but that is totally OPTIONAL.

Cover the Mexican Layer Dip platter with plastic wrap, and refrigerate for at least one hour to let the flavors come together. You can also make this up the day before you want to serve it, too. How’s that for convenience?

Sliced black olives then grated jack cheese is sprinkled on top of the green chili layer..The final layer is grated cheddar cheese on top of the Mexican Layer Dip and a cilantro garnish.

Ready To Serve

I know you will love this Mexican Layer Dip. Isn’t it “pretty”? This is one appetizer that is perfect for scooping! Yum. Serve the Mexican Layer Dip with a big bag of tortilla chips (or corn chips), and watch how fast it disappears. Just wait till you TASTE it!

Mexican Layer Dip is always a family or party favorite appetizer, and it’s fun to watch everyone huddled around it, scooping this delicious dip up as fast as they can! It is wonderful!

Mexican Layer Dip is chilled and is ready to serve with tortilla chips for dipping!

I hope you enjoy this classic layered dip appetizer! We sure do. Thanks for taking time from your busy day to stop by this website today. Have a great day, and please come back again soon, for more family-friendly recipes.

Looking For More APPETIZER Recipes?

You can find all of my recipes in the Recipe Index, located at the top of the page. A few of our favorite appetizers include:

Interested In More Recipes?

Thank you for visiting this website. I appreciate you using some of your valuable time to do soIf you’re interested, I publish a newsletter 2 times per month (1st and 15th) with all the latest recipes, and other fun info. I would be honored to have you join our growing list of subscribers, so you never miss a great recipe!
There is a Newsletter subscription box on the top right side (or bottom) of each blog post, depending on the device you use, where you can easily submit your e-mail address (only) to be included in my mailing list.

You Can Also Find Me On Social Media:
Facebook page: The Grateful Girl Cooks!
Pinterest: The Grateful Girl Cooks!
Instagram: jbatthegratefulgirlcooks

Author's signatureRecipe source: Unknown (had this recipe on an index card for over 30 years)

↓↓ PRINTABLE RECIPE BELOW ↓↓

0 from 0 votes
Mexican Layer Dip
Prep Time
20 mins
Cook Time
0 mins
Refrigeration (inactive time)
1 hr
Total Time
1 hr 20 mins
 

Mexican Layer Dip is the perfect party appetizer! Set out a platter of this easy, layered dip with tortilla chips, and let the feeding frenzy begin!

Category: Appetizer
Cuisine: Mexican
Keyword: Mexican layer dip
Servings: 12
Calories Per Serving: 216 kcal
Author: JB @ The Grateful Girl Cooks!
Ingredients
  • 16 ounces spicy fat-free refried beans (1 can) (can use regular, too)
  • 6 Tablespoons sour cream
  • 4 Tablespoons mayonnaise
  • 1 ounce taco seasoning mix (1 envelope pkg.) (or use your own mix ☺)
  • 3 medium avocados peeled/pits removed
  • 2 teaspoons fresh lemon juice
  • 3 stems green onions , chopped (green and white parts)
  • 4.5 ounces diced green chiles (small can), drained
  • 1 large tomato or 2 Roma tomatoes , chopped
  • 2.25 ounces chopped black olives (small can), drained
  • 1 cup jack cheese , grated
  • 1 cup cheddar cheese , grated
  • Tortilla chips (or corn chips), for serving
Instructions
  1. Spread entire can of refried beans onto a large round serving platter or pizza pan, mashing it down as you spread it out, to cover platter or pan.

  2. In separate bowl, stir together sour cream, mayonnaise and taco seasoning. Spread this mixture on top of refried beans, to cover.

  3. Mash avocados with lemon juice in a bowl until fairly smooth. Drop avocado mixture by large spoonfuls on top of sour cream layer. Gently spread to cover.

  4. Add layer of sliced green onions.

    Add layer of diced green chiles.

    Add layer of chopped tomatoes.

    Add layer of black olives.

    Add layer of grated jack cheese.

    Top with layer of grated cheddar cheese.

  5. Cover platter with plastic wrap and refrigerate for at least one hour. Remove from refrigerator and DIG IN! Serve this with tortilla or corn chips!

Recipe Notes

Caloric calculation does not include tortilla chips!

Nutrition Facts
Mexican Layer Dip
Amount Per Serving (1 (1/12th of total))
Calories 216 Calories from Fat 144
% Daily Value*
Fat 16g25%
Saturated Fat 5g31%
Trans Fat 0.003g
Polyunsaturated Fat 2g
Monounsaturated Fat 7g
Cholesterol 21mg7%
Sodium 699mg30%
Potassium 324mg9%
Carbohydrates 12g4%
Fiber 6g25%
Sugar 2g2%
Protein 8g16%
Vitamin A 679IU14%
Vitamin C 12mg15%
Calcium 172mg17%
Iron 1mg6%
* Percent Daily Values are based on a 2000 calorie diet.

Here’s one more to pin on your Pinterest boards!Mexican Layer Dip is the perfect party appetizer! Set out a platter of this layered dip with tortilla chips, & let the feeding frenzy begin!


Save

Save