Gingerbread Pancakes in Lemon Sauce

Make the holidays (or any time) more fun with Gingerbread Pancakes In Lemon Sauce! This absolutely scrumptious recipe makes 4 servings!

If you’re looking for a yummy breakfast for kids or extended family for the holidays (or anytime!), may I recommend gingerbread pancakes in lemon sauce?

The pancakes are flavored with molasses, cinnamon and ginger, and are topped with a sweet and tangy lemon sauce. This is really a WONDERFUL holiday breakfast!

The lemon sauce is super easy to make, and the batter for the pancakes is simple to prepare, as well. That’s very convenient, especially when we all know the holidays can be a bit hectic, at times!

This recipe as written will yield eight, good-sized pancakes (2 per serving), but can be easily doubled or tripled, if necessary! You can also make the pancakes smaller, if desired, to have more for everyone! Here’s how to make these gingerbread pancakes in lemon sauce:

Scroll Down For A Printable Recipe Card At The Bottom Of The Page

Make The Lemon Sauce

Okay… let’s make the lemon sauce first! Stir granulated sugar, cornstarch and nutmeg together in a large saucepan. Add a cup of water to the pan, and cook the mixture on Medium heat until it is bubbly and slightly thickened (just a few minutes).

Once it’s bubbling, continue to cook the lemon sauce, stirring often for 2 more minutes. The sauce will bubble a lot, so continue stirring and keep an eye on it!

After the sauce has cooked for the full 2 minutes, remove the saucepan from the heat source. Stir in butter, lemon juice and finely grated lemon zest. Stir until the butter has melted and been incorporated into the sauce.

Cover the pan, and keep the sauce warm until you’re ready to serve the pancakes.

Cooking the lemon sauce in a medium saucepan until bubbling.After coming to a boil, lemon sauce is cooked for 2 more minutes, stirring as it cooks.Butter is added to the lemon sauce and heated only until it melts.

Make The Gingerbread Pancake Batter

The gingerbread pancake batter is simple to make! Sift flour, baking powder, baking soda, salt, cinnamon and ground ginger together into a large bowl. These are the “dry” ingredients. Set the bowl aside while you combine the “wet” ingredients.

In a separate bowl, whisk an egg and milk together, until combined. Add molasses and vegetable oil to the egg mixture, and stir to combine.

Pour this mixture into the large bowl containing the flour mixture. Stir only until all ingredients have been incorporated, but do not overmix the batter. This is the gingerbread pancake batter. See how easy that is?

The dry ingredients for the gingerbread pancake batter are combined in a large bowl.Eggs, molasses, milk, etc. are combined, becoming the wet ingredients for the pancake batter.Wet and dry ingredients are combined to make batter for the gingerbread pancakes.

Cook The Pancakes

Heat and lightly grease a griddle or large skillet. Pour the batter (1/3 cup per pancake) onto the hot griddle or into the hot skillet. Cook on medium heat until bubbles form on top, and the bottom is lightly browned.

Carefully turn the pancakes with a spatula to the opposite side. Cook until the pancakes are set, cooked through, and browned on both sides.

Remove the pancakes from the griddle, and cover to keep them warm. Continue cooking the remaining batter. This recipe will yield a total of 8 good-sized pancakes, with 2 pancakes per serving.

Gingerbread pancakes are cooked until bubbles form on surface, then pancakes are flipped.Pancakes are cooked until set and browned on both sides.

Serving Gingerbread Pancakes In Lemon Sauce

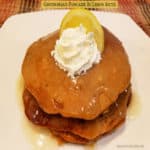
Place a couple pancakes onto each individual plate, and spoon warm lemon sauce over the top, to serve. Add whipped cream and a lemon wedge, if desired, and serve.

The whipped cream and lemon wedge garnish is optional, but adds additional color and flavor! The lemon slice can be squeezed over the pancakes, as well!

Gingerbread pancakes in lemon sauce are served with whipped cream and lemon wedge garnish.

I really hope you enjoy these delicious gingerbread pancakes in lemon sauce! They are a wonderful breakfast treat, especially around the holidays.

If you enjoy this recipe, be sure to also check out my recipes for Homemade Gingerbread, Gingerbread Muffins, Gingerbread Granola, Gingerbread Bagels, and Gingerbread Scones! They’re all delicious!

Thanks so much for taking time out of your day to visit this website, and hope you’ll back soon for more family-friendly recipes. Take care, may God bless you, and have a GREAT day!

Looking For More PANCAKE Recipes?

You can find ALL of my recipes in the Recipe Index, which is located at the top of the page. I have several delicious pancake recipes for you to check out, including:

Want More Recipes? Get My FREE Newsletter!

I publish a newsletter 2 times per month (1st and 15th) with lots of recipes, tips, etc..
Would you like to join our growing list of subscribers?

There is a Newsletter subscription box on the top right (or bottom) of each blog post, depending on the device you use.
You can submit your e-mail address there, to be added to my mailing list.

Find Me On Social Media:

Facebook page: The Grateful Girl Cooks!
Pinterest:
The Grateful Girl Cooks!
Instagram:
jbatthegratefulgirlcooks

Author's signature

Original recipe source: The book “Have Yourself A Homemade Christmas”, by Gooseberry Patch, page 220, published in 2014 by Time Home Entertainment, Inc.

↓↓ PRINTABLE RECIPE BELOW ↓↓

0 from 0 votes
Gingerbread Pancakes In Lemon Sauce
Prep Time
10 mins
Cook Time
10 mins
Total Time
20 mins
 

Make the holidays (or any time) more fun with Gingerbread Pancakes In Lemon Sauce! This absolutely scrumptious recipe makes 4 servings!

Category: Breakfast, Brunch
Cuisine: American
Keyword: gingerbread pancakes, lemon sauce
Servings: 4 (2 pancakes per serving)
Calories Per Serving: 501 kcal
Author: JB @ The Grateful Girl Cooks!
Ingredients
For Lemon Sauce:
  • ½ cup granulated sugar
  • 1 Tablespoon cornstarch
  • teaspoon nutmeg
  • 1 cup water
  • 2 Tablespoons butter
  • 1 teaspoon grated lemon zest
  • 2 Tablespoons lemon juice
For Gingerbread Pancake Batter:
  • cups all purpose flour
  • 1 teaspoon baking powder
  • 1 teaspoon ground cinnamon
  • ½ teaspoon ground ginger
  • ¼ teaspoon salt
  • ¼ teaspoon baking soda
  • 1 large egg
  • cups milk
  • ¼ cup molasses
  • 2 Tablespoons vegetable oil or other neutral oil
Optional Garnish For Serving: whipped cream, lemon slices
    Instructions
    Make Lemon Sauce:
    1. Stir sugar, cornstarch and nutmeg together in large saucepan. Add water; cook on Medium heat until bubbly/slightly thickened. Once bubbling, continue to cook sauce 2 more minutes, stirring often. Remove pan from heat. Add butter, lemon juice and zest, stirring until butter is melted and incorporated into sauce. Cover pan; keep sauce warm until ready to serve pancakes.

    Make Pancakes:
    1. Sift flour, baking powder, cinnamon, ginger, baking soda and salt into a large bowl. Set bowl aside.

    2. In separate bowl, whisk egg and milk together, until combined. Add molasses and oil; stir to combine. Pour into bowl with flour mixture. Stir only until all ingredients are incorporated; do not overmix batter.

    3. Heat/lightly grease griddle or large skillet. Pour batter (⅓ cup per pancake) onto hot griddle. Cook on medium heat until bubbles form on top, and bottom is lightly browned. Carefully turn pancakes with spatula to opposite side. Cook until pancakes are set, cooked through, and lightly browned on both sides. Remove pancakes from griddle; cover to keep warm. Repeat with remaining batter.

    To Serve:
    1. Place pancakes onto plates. Generously spoon warm lemon sauce over the top, to serve. Add whipped cream/lemon wedge, if desired, and serve.

    Recipe Notes

    NOTE: Pancakes can be frozen for later. Cook, let cool to room temp., then stack and wrap in plastic wrap, then aluminum foil. Lemon sauce may also be frozen (once cooled to room temp.) in airtight container. Let thaw and re-heat pancakes and sauce before serving.

    Nutrition Facts
    Gingerbread Pancakes In Lemon Sauce
    Amount Per Serving (2 pancakes plus sauce)
    Calories 501 Calories from Fat 135
    % Daily Value*
    Fat 15g23%
    Saturated Fat 6g38%
    Trans Fat 0.3g
    Polyunsaturated Fat 5g
    Monounsaturated Fat 4g
    Cholesterol 65mg22%
    Sodium 319mg14%
    Potassium 610mg17%
    Carbohydrates 84g28%
    Fiber 2g8%
    Sugar 45g50%
    Protein 9g18%
    Vitamin A 389IU8%
    Vitamin C 4mg5%
    Calcium 204mg20%
    Iron 4mg22%
    * Percent Daily Values are based on a 2000 calorie diet.

    Here’s one more to pin on your Pinterest boards!Make the holidays (or any time) more fun with Gingerbread Pancakes In Lemon Sauce! This absolutely scrumptious recipe makes 4 servings!

    Peppermint Pinwheel Cookies

    Peppermint Pinwheel Cookies are festive holiday treats for family and friends! Colored spirals and light peppermint flavor make them special!
    Peppermint Pinwheel Cookies are festive holiday treats for family and friends! Colored spirals and light peppermint flavor make them special!

    If you’re looking for a new Christmas cookie recipe to try this year, may I suggest these Peppermint Pinwheel Cookies? They’re not only pretty to look at, they have a nice light peppermint flavor, which is perfect for the holidays!

    I found the recipe many years ago (don’t remember where), and made them for my annual cookie exchange in our home. They were a hit! Two layers of an easily made dough (red and white) are tightly rolled into a log shape. The dough is well chilled, then sliced and baked! That’s it! Let me show you how to make these adorable holiday cookies!

    Scroll Down For A Printable Recipe Card At The Bottom Of The Page

    Make The Dough For The Peppermint Pinwheel Cookies

    Cream softened butter and granulated sugar in a mixing bowl, using an electric mixer. Once well blended, beat in one egg YOLK and vanilla extract, until the batter is creamy and well combined.

    In a separate bowl, stir together all purpose flour, salt and baking powder. Add this mixture to the batter, a little at a time while mixing. Continue beating until fully incorporated and a thick, soft dough has formed.

    Butter and sugar are creamed, then egg yolk and vanilla extract are added.Dry ingredients are added to the cookie batter until thoroughly combined.

    Color And Flavor Half The Dough

    Evenly divide the cookie dough in half, and set one half aside. Place the remaining half of the dough in a large bowl, and add peppermint extract and red food coloring (liquid or gel- I used gel).

    Use a large spoon to combine the extract and food coloring. I find it helpful to use the back of the spoon to fully blend in the color. Yes, you will have to work hard to fully stir in the red coloring! Just keep blending until the red coloring has been completely incorporated into the dough! Set the red dough aside.

    Cookie dough is cut in half, and one half has red food color and peppermint extract added to it.Peppermint extract and red food coloring is worked into the dough until it has completely turned red.

    Rolling The Red And White Dough Into Rectangles

    Place the plain dough on a long piece of waxed paper. Use your hands to shape it into a small rectangle. Now place another long piece of wax paper on top. Roll the dough out into a rectangle shape until it measures 16″ long by 10″ wide. Slowly peel off the top layer of wax paper, and set the dough aside.

    Repeat this process with the red dough (using clean wax paper), rolling it out to the same measurements (16″ x 10″). Slowly peel off the top layer of wax paper, and set the dough aside.

    Plain cookie dough is rolled out between layers of wax paper into a long rectangle shape.Red peppermint dough is rolled out between layers of wax paper into a long rectangle shape.

    Layering The Dough

    Now you should have one 16″ long by 10″ wide plain rectangle and a red rectangle (both with wax paper on the bottom). Place the plain dough rectangle in front of you. Carefully flip the RED layer over on top of the PLAIN layer, fitting it to the shape of the plain rectangle. The red dough wax paper should now be on the top. Slowly and carefully peel off the wax paper from the red layer.

    TIP: In the photo below you can see that occasionally the dough will stick to the wax paper or rip as you remove the wax paper- NO worries)! This is a very forgiving dough. Just keep slowly removing the wax paper, then go back and patch any ripped areas with excess dough from the edges.

    Red dough layer is placed on top of the plain dough rectangle, and holes are patched.Red dough for the peppermint pinwheel cookies is fitted on top of the plain dough layer.

    Roll The Dough Into A Tight “Log”

    Using the wax paper (on the bottom of the plain dough) as a guide, tightly roll up the dough (jelly roll style), starting with the long side. Wrap the dough log in plastic wrap once done. Place the dough log on a baking sheet and refrigerate it for 2 hours. This is an important step, because you need the dough to be very cold and firm, in order to make clean slices later! 

    Dough for the peppermint pinwheel cookies is tightly rolled into a long log shape.After being rolled, the cookie dough is sealed in plastic wrap and refrigerated until firm.

    Slice The Chilled Dough Before Baking

    After the dough has chilled for 2 hours, preheat your oven to 350°F. Unwrap the dough, and place the “log” on a cutting board. Use a sharp knife to cut the dough into 1/4″ slices. Because the dough is very cold and firm, this is an easy step, resulting in wonderfully cut, clean slices.

    Place the sliced cookies onto lightly greased cookie sheets, keeping the cookies about 2″ apart. You should end up with between 36-46 cookies, depending on the thickness of the slices (and length of the dough rectangle you rolled up). Typically I end up with about 40 cookies, but your quantity may vary slightly.

    Cold cookie dough is sliced into 1/4" slices before baking.The peppermint pinwheel cookies are put on baking sheets 2" apart.

    Ready, Set, Bake!

    Bake the cookies at 350°F. for approximately 10-12 minutes. The peppermint pinwheel cookies are done when barely lightly browned on the bottom, and the dough is “set”. Keep an eye on them, because they can brown very quickly (and you don’t want that).

    Let the cookies cool for 1 minute, then transfer the cookies from the baking sheet to a wire rack. Let the cookies cool completely before serving. They will crisp up slightly, once cooled.

    After baking, the peppermint pinwheel cookies cool on a wire rack.

    Who’s Ready To Eat Some Peppermint Pinwheel Cookies?

    The peppermint pinwheel cookies are ready to serve, once they have cooled completely!  Serve them on a pretty, decorative platter, and watch how fast they disappear. They have a light peppermint taste, but don’t worry! The peppermint flavor is absolutely NOT overpowering, in case you were wondering.

    These cookies also freeze very well, if wrapped and placed in an airtight container in the freezer. Simply thaw them out before you need them, and enjoy!

    Peppermint pinwheel cookies are served on a festive and decorative Christmas platter.Spirals are visible on each of the peppermint pinwheel cookies.

    I hope you have the opportunity to try these peppermint pinwheel cookies, and trust you will enjoy them as much as we do! Thank you for visiting my blog today, and I invite you to come back soon for more family-friendly recipes. Take care, God bless you, and have a GREAT day!

    Looking For More CHRISTMAS COOKIE Recipes?

    You can find ALL of my recipes in the Recipe Index, which is located at the top of the page. I have some wonderful Christmas cookie recipes (and lots of other cookie recipes, too!), including:

    Interested In More Recipes?

    Thank you for visiting this website. I appreciate you using some of your valuable time to do soIf you’re interested, I publish a newsletter 2 times per month (1st and 15th) with all the latest recipes, and other fun info. I would be honored to have you join our growing list of subscribers, so you never miss a great recipe!
    There is a Newsletter subscription box on the top right side (or bottom) of each blog post, depending on the device you use, where you can easily submit your e-mail address (only) to be included in my mailing list.

    You Can Also Find Me On Social Media:

    Facebook page: The Grateful Girl Cooks!
    Pinterest:
    The Grateful Girl Cooks!
    Instagram:
    jbatthegratefulgirlcooks

    Original recipe source: unknown

    ↓↓ PRINTABLE RECIPE BELOW ↓↓

    0 from 0 votes
    Peppermint Pinwheel Cookies
    Prep Time
    20 mins
    Cook Time
    10 mins
    Inactive Prep Time- Dough Refrigeration
    2 hrs
    Total Time
    2 hrs 30 mins
     

    Peppermint Pinwheel Cookies are festive holiday treats for family and friends! Colored spirals and light peppermint flavor make them special!

    Category: Dessert
    Cuisine: American
    Keyword: peppermint pinwheel cookies
    Servings: 40
    Calories Per Serving: 70 kcal
    Author: JB @ The Grateful Girl Cooks!
    Ingredients
    • ¾ cup butter softened (no substitutes)
    • ¾ cup granulated sugar
    • 1 large egg YOLK
    • 1 teaspoon vanilla extract
    • 2 cups all purpose flour
    • ½ teaspoon salt
    • ½ teaspoon baking powder
    • ½ teaspoon peppermint extract
    • ¼ teaspoon red liquid food coloring (or gel)
    Instructions
    1. Cream butter and sugar with electric mixer in large bowl. Beat in one egg YOLK and vanilla extract into batter, until combined/creamy.

    2. In separate bowl, combine flour, salt, baking powder. Add to batter, a small amount at a time; mix until combined and thick, soft dough has formed.

    3. Evenly divide dough in half; set one half aside. Place remaining half in large bowl. Add peppermint extract and red food coloring; stir to combine. You have to work hard to mix in red coloring! Keep blending until dough is completely red. Set red dough aside.

    4. Place reserved white dough on a long piece of waxed paper. Use hands to shape it into small rectangle. Place another long piece of wax paper on top. Roll dough into rectangle shape (16" long by 10" wide). Slowly peel off top layer of wax paper; set dough aside. Repeat process with red dough (using clean wax paper), rolling it out to same measurements (16" x 10"). Slowly peel off top layer of wax paper; set dough aside.

    5. You should have a 16"x 10" white rectangle and a red rectangle (each with wax paper on the bottom). Place white dough rectangle in front of you. Carefully flip RED layer over on top of the PLAIN layer, fitting it to the shape of the plain rectangle. Red dough wax paper should now be on top. Slowly peel off wax paper from red layer. Repair any rips or tears that may occur with excess dough.

    6. Using wax paper (on bottom of white rectangle) as a guide, tightly roll up dough, starting with long side. Wrap dough "log" in plastic wrap. Place dough log on a baking sheet; refrigerate dough for 2 hours, then preheat oven to 350°F.

    7. Unwrap dough; place on cutting board. Use sharp knife to cut dough into 1/4" slices. Place slices on lightly greased cookie sheets, about 2" apart.

    8. Bake at 350°F. for 10-12 minutes. Cookies are done when lightly browned on bottom, and dough is "set". Keep an eye on them, because they can brown very quickly. Let cookies cool for 1 minute; transfer to wire rack to cool completely before serving. Enjoy!

    Recipe Notes

    NOTE: You should end up with between 36-46 cookies, depending on thickness of slices (and length of dough rectangle you rolled up).

    Nutrition Facts
    Peppermint Pinwheel Cookies
    Amount Per Serving (1 cookie)
    Calories 70 Calories from Fat 36
    % Daily Value*
    Fat 4g6%
    Saturated Fat 2g13%
    Trans Fat 0.1g
    Polyunsaturated Fat 0.2g
    Monounsaturated Fat 1g
    Cholesterol 14mg5%
    Sodium 57mg2%
    Potassium 14mg0%
    Carbohydrates 9g3%
    Fiber 0.2g1%
    Sugar 4g4%
    Protein 1g2%
    Vitamin A 112IU2%
    Calcium 5mg1%
    Iron 0.3mg2%
    * Percent Daily Values are based on a 2000 calorie diet.

    Here’s one more to pin on your Pinterest boards!Peppermint Pinwheel Cookies are festive holiday treats for family and friends! Colored spirals and light peppermint flavor make them special!

    Crispy Green Bean Fries

    Watch how fast a plate of Crispy Green Bean Fries with Ranch/Sriracha dipping sauce disappears at a get together! They’re easy and delicious!
    Watch how fast a plate of Crispy Green Bean Fries with Ranch/Sriracha dipping sauce disappears at a get together! They're easy and delicious!

    Looking for a yummy recipe that can be served as an appetizer OR as a veggie side dish for a meal? Check out these crispy green bean fries! Fresh green beans are coated in egg and flour, then rolled in a crunchy, well-seasoned Panko breadcrumb mixture. After that, they’re baked for 10 minutes, and served hot, along with a creamy Ranch and Sriracha dipping sauce!

    They’re so good! Perfect for a small meal (get the kids to eat their veggies!) or a small get together, these crunchy green beans will be a big hit! They don’t take too much effort to prepare, and then you can serve them with pride… because your family or friends will love this dish!

    Scroll Down For A Printable Recipe Card At The Bottom Of The Page

    Prepare The Green Beans

    You will need a pound of fresh green beans to make this dish, and the recipe, as written, will make 4 servings. Cut off the very tip ends of the green beans with a sharp knife, then set them aside while you get the rest of the ingredients ready to go.

    Fresh green beans ready to have their ends trimmed for this dish.

    A Tiny Bit Of Prep Work

    Preheat your oven to 425°F. and lightly spray a large baking sheet with non-stick spray. Stir Panko breadcrumbs, parsley, seasoning salt, garlic powder, chili powder, black pepper and onion powder together in a bowl or on a large plate. Set the bowl or plate aside.

    In a small separate dish, combine Ranch salad dressing with a teaspoon of Sriracha sauce. This will be the dipping sauce for the finished green beans. Taste it, and add more Sriracha sauce if you want it “hotter”. Set the sauce aside or refrigerate it until serving time.

    Okay… now measure all purpose flour into a medium bowl. In a separate medium bowl, beat two eggs. Now you’re ready for the “Green Bean Dipping Station”. Place the various bowls on the kitchen counter in this order (L to R): Green beans, Flour, Eggs, and the Panko breadcrumb mixture last.

    Panko bread crumbs and a variety of spices are combined in a bowl.A dipping sauce is made with Ranch and Sriracha for the crispy green bean fries.Dipping station with bowls of flour, egg, and panko mixture for dredging fresh green beans.

    Let’s Get Those Green Beans Ready For The Oven!

    Before you start dipping those green beans, I must tell you your fingers will probably get messy! I find it helpful to use one hand for the flour and a fork for the egg mixture. Okay, now that’s off the table, so here’s how to get those green beans ready for the oven. By the way, once you get the rhythm of it, this step will go quicker:

    Step #1: Dip the green beans (one at a time or a few at a time-your choice) in the flour, coating all sides. You can use your fingers and/or a fork to do this.
    Step #2: Dip flour covered beans in the egg mixture to coat all sides, letting excess egg drip back into the bowl. TIP: It’s helpful to lift them out using a fork.
    Step #3: REPEAT Steps 1 and 2. (That’s right… flour, egg, flour, egg).
    Step #4: Roll the green beans in the seasoned Panko breadcrumb mixture until coated on all sides.

    Repeat this process for all remaining green beans, and place them on a large baking sheet in a single layer (don’t overcrowd) as you finish each “batch”.

    Green beans are dredged in flour mixture to cover.Flour coated green beans are coated in egg, then process is repeated.The flour and egg coated green beans will be rolled in a panko breadcrumb/spice mixture.

    Ready, Set… BAKE!

    Bake at 425°F. for 10 minutes. Halfway through the baking time, turn the beans to the other side, then finish cooking. When done, the Panko coated green beans should be golden brown in color and crispy on the outside.

    Remove the baking sheet from the oven and serve the crispy green bean fries immediately, while hot. Be sure to serve the dipping sauce on the side, too… yum!

    Coated green beans are baked in a single layer on a large baking sheet for 10 minutes.Crispy green bean fries are golden brown once baked.

    Time To Enjoy Some Crispy Green Bean Fries

    Transfer the hot, crispy green bean fries to a serving plate with a spatula, and serve with the dipping sauce on the side. Serve immediately, and enjoy them with those you love.

    The dipping sauce isn’t too spicy, so don’t be afraid to try it! P.S. If you prefer a more spicy sauce, simply add additional Sriracha (or hot sauce) to suit your personal taste.

    The crispy green bean fries are served hot, with a Ranch and Sriracha dipping sauce.

    A Ranch and Sriracha dipping sauce is served along with the crispy green bean fries.

    Use The Green Beans As A Side Dish, Too!

    Crispy Green Bean Fries are also great used as a side dish for a variety of meats. We especially love them served with chicken, pork and beef. Below is a photo of them served as a side dish for Easy Garlic Butter Steak Bites (with mashed potatoes also on the side)! YUM… they’re so good!

    Crispy green bean fries make a great side dish for meats, as well!


    I really hope you have the opportunity to make these crispy green bean fries, and trust you will enjoy them, too! Thanks so much for stopping by, and I invite you to come back again for more delicious recipes. Take care, may God bless you, and have a GREAT day!

    Looking For More VEGGIE Recipes?

    You can find ALL of my recipes in the Recipe Index, which is located at the top of the page. I have LOTS of delicious recipes featuring veggies, including:

    Interested In More Recipes?

    Thank you for visiting this website. I appreciate you using some of your valuable time to do soIf you’re interested, I publish a newsletter 2 times per month (1st and 15th) with all the latest recipes, and other fun info. I would be honored to have you join our growing list of subscribers, so you never miss a great recipe!
    There is a Newsletter subscription box on the top right side (or bottom) of each blog post, depending on the device you use, where you can easily submit your e-mail address (only) to be included in my mailing list.

    You Can Also Find Me On Social Media:

    Facebook page: The Grateful Girl Cooks!
    Pinterest:
    The Grateful Girl Cooks!
    Instagram:
    jbatthegratefulgirlcooks

    Author's signature

    Original recipe source: Jamie Sherman at lovebakesgoodcakes.com

    ↓↓ PRINTABLE RECIPE BELOW ↓↓

    0 from 0 votes
    Crispy Green Bean Fries
    Prep Time
    15 mins
    Cook Time
    10 mins
    Total Time
    25 mins
     

    Watch how fast a plate of Crispy Green Bean Fries with Ranch/Sriracha dipping sauce disappears at a get together! They're easy and delicious!

    Category: Appetizer/Snack, Vegetable Dish
    Cuisine: American
    Keyword: crispy green bean fries
    Servings: 4
    Calories Per Serving: 239 kcal
    Author: JB @ The Grateful Girl Cooks!
    Ingredients
    • 1 pound fresh green beans tips trimmed off both ends
    • ¾ cup Panko breadcrumbs
    • ¼ teaspoon garlic powder
    • ¼ teaspoon onion powder
    • ¼ teaspoon seasoning salt
    • ¼ teaspoon dried parsley
    • ¼ teaspoon chili powder
    • ¼ teaspoon ground black pepper
    • 2 large eggs beaten
    • ½ cup all purpose flour
    For Dipping Sauce:
    • ¼ cup Ranch salad dressing
    • 1 teaspoon Sriracha sauce or other hot sauce
    Instructions
    1. Preheat oven to 425°F. Spray a large baking sheet lightly with non-stick spray.

    2. Cut tip off of both ends of the green beans. Place in bowl; set aside.

    3. Combine Panko breadcrumbs, parsley, seasoning salt, garlic powder, chili powder, black pepper and onion powder in a bowl or on a large dinner plate. Set aside.

    4. In a separate small dish, combine Ranch dressing with Sriracha sauce. Set sauce aside or refrigerate until serving time.

    5. Place flour into a medium bowl. Set aside.

    6. In a separate medium bowl, beat two eggs. Now you're ready for the "Green Bean Dipping Station". Place bowls on counter in this order (L to R): Green beans, Flour, Eggs, and Panko mix last.

    7. Step #1: Dip green beans (one. or a few at a time) in flour, coating all sides. You can use fingers and/or a fork for this.

      Step #2: Dip flour covered beans in the egg mixture, coating all sides, letting excess egg drip back into bowl. TIP: It's helpful to lift them out using a fork.

      Step #3: REPEAT Steps 1 and 2. (That's right... flour, egg, flour, egg).

      Step #4: Coat green beans in Panko mixture until all sides covered.

      Repeat process for remaining beans. Place them in a single layer (don't overcrowd) on large baking sheet as you finish each "batch".

    8. Bake at 425°F. for 10 minutes total. **After 5 minutes, flip the beans to the other side, then finish cooking**. When done, coating should be golden brown and crispy on the outside. Remove from oven; transfer beans to serving plate and serve immediately while hot, with dipping sauce on the side.

    Recipe Notes

    Caloric calculation is formulated on consuming 1/4 of the crispy green bean fries and 1/4 of the dipping sauce.

    Nutrition Facts
    Crispy Green Bean Fries
    Amount Per Serving (1 (1/4 of total))
    Calories 239 Calories from Fat 90
    % Daily Value*
    Fat 10g15%
    Saturated Fat 2g13%
    Trans Fat 0.01g
    Polyunsaturated Fat 5g
    Monounsaturated Fat 2g
    Cholesterol 97mg32%
    Sodium 434mg19%
    Potassium 331mg9%
    Carbohydrates 29g10%
    Fiber 4g17%
    Sugar 5g6%
    Protein 9g18%
    Vitamin A 963IU19%
    Vitamin C 15mg18%
    Calcium 85mg9%
    Iron 3mg17%
    * Percent Daily Values are based on a 2000 calorie diet.

    Here’s one more to pin on your Pinterest boards!Watch how fast a plate of Crispy Green Bean Fries with Ranch/Sriracha dipping sauce disappears at a get together! They're easy and delicious!

    Peanut Butter Fudge

    Make 3 dozen pieces of peanut butter fudge in 10 minutes, using only 4 ingredients! Delicious treat for the holidays or any time of year!
    Make 3 dozen pieces of peanut butter fudge in 10 minutes, using only 4 ingredients! Delicious treat for the holidays or any time of year!

    This recipe for peanut butter fudge is so easy to make in such a short time, you’re not going to believe it! I found the recipe a number of years ago in one of my cooking magazines, and wanted to share it with you today. If you enjoy peanut butter, then you’re probably going to love this sweet holiday treat.

    The holidays can be somewhat challenging for some people, as they try to create a “memorable” Christmas season for those they love. Well, if you’re finding it hard to find time to make treats for neighbors, friends, family, teachers, co-workers, etc., may I suggest this recipe? It only takes 4 ingredients and 10 minutes prep to make 3 dozen pieces of fudge. Then you refrigerate it, and BOOM! Your yummy fudge is ready to cut and serve! That in my book is a winning recipe! Here’s how simple it is to make this delicious fudge.

    Scroll Down For A Printable Recipe Card At The Bottom Of The Page

    Let’s Make Some Peanut Butter Fudge!

    NOTE: BEFORE you begin, generously butter an 8″ x 8″ square baking dish (bottom and sides) and set it aside. You will need this dish ready to go once the fudge ingredients are melted!

    Measure the granulated sugar and milk into a very large saucepan. You will need a large pan because you will be adding the other ingredients to this pan later! Stir to combine the milk and sugar, and bring the mixture to a boil on Medium heat, stirring often. Once the liquid begins boiling, let it boil for exactly 3 minutes, stirring constantly. 

    Granulated sugar and milk are combined and cooked in a large saucepan.Sugar and milk are boiled for three minutes until syrupy.

    Stir, Stir, Stir!

    When done boiling, remove the pan from the heat and immediately stir in the creamy peanut butter and marshmallow creme. The mixture will be very thick! Keep on stirring and eventually you will have all the ingredients melted and combined. Trust me… just stir and stir, and in a couple minutes it will be fully blended!

    Creamy peanut butter and marshmallow creme are stirred into the sugar and milk syrup.Peanut butter fudge ingredients being mixed in saucepan before pouring into dish.Once peanut butter and marshmallow creme are mixed in, the fudge is ready to pour into pan.

    Refrigerate The Fudge Until Set

    Spread the peanut butter fudge evenly into the buttered 8″ x 8″ dish immediately after it is combined. The fudge will set up fairly quickly. Try to pat down the surface a bit, so there are no points sticking up.

    Cover the fudge loosely and put it into the refrigerator to chill for 2-3 hours before cutting into portions. When the fudge is completely chilled and firmed up, slice it into 36 small pieces.

    The creamy peanut butter fudge is spread into and refrigerated in an 8x8" square dish.When cold and firm, the peanut butter fudge is cut into 35 pieces.

    Who Wants A Piece Of Peanut Butter Fudge?

    Transfer the cut pieces of peanut butter fudge to a serving plate and enjoy this delicious treat! Remember to keep all remaining pieces of fudge covered in the refrigerator! This is a yummy treat to give to friends or family for holidays or special occasions. It will be our little secret just how easy it was to make, okay? Wink, wink.

    A Christmas plate with several pieces of peanut butter fudge, ready to enjoy.A close up look at a few pieces of the peanut butter fudge on a Christmas plate.

    I hope you enjoy making (and eating) this peanut butter fudge! Thank you for stopping by today, and I hope you come back soon for more family-friendly recipes. Take care, may God bless you throughout this holiday season, and have a GREAT day!

    Looking For More Recipes For HOLIDAY TREATS?

    You can find ALL of my recipes in the Recipe Index, which is located at the top of the page. I have some wonderful recipes for holiday treats that you might want to check out, including:

    Interested In More Recipes?

    Thank you for visiting this website. I appreciate you using some of your valuable time to do soIf you’re interested, I publish a newsletter 2 times per month (1st and 15th) with all the latest recipes, and other fun info. I would be honored to have you join our growing list of subscribers, so you never miss a great recipe!
    There is a Newsletter subscription box on the top right side (or bottom) of each blog post, depending on the device you use, where you can easily submit your e-mail address (only) to be included in my mailing list.

    You Can Also Find Me On Social Media:

    Facebook page: The Grateful Girl Cooks!
    Pinterest:
    The Grateful Girl Cooks!
    Instagram:
    jbatthegratefulgirlcooks

    Author's signature

    Original recipe source: “Taste of Home’s Quick Cooking” magazine, Collector’s Edition, pages 29-30

    ↓↓ PRINTABLE RECIPE BELOW ↓↓

    0 from 0 votes
    Peanut Butter Fudge
    Prep Time
    10 mins
    Cook Time
    0 mins
    Inactive refrigeration time
    3 hrs
    Total Time
    3 hrs 10 mins
     

    Make 3 dozen pieces of peanut butter fudge in 10 minutes, using only 4 ingredients! Delicious treat for the holidays or any time of year!

    Category: Candy, Desssert
    Cuisine: American
    Keyword: peanut butter fudge
    Servings: 36 pieces
    Calories Per Serving: 118 kcal
    Author: JB @ The Grateful Girl Cooks!
    Ingredients
    • 2 cups granulated sugar
    • ½ cup milk
    • 1⅓ cups creamy peanut butter don't use "all natural"
    • 7 ounces marshmallow creme
    Instructions
    1. Generously butter an 8" x 8" square baking dish (bottom and sides) and set aside. You will need this dish ready to go once the fudge ingredients are melted! 

    2. Measure sugar and milk into very large saucepan. Stir to combine; bring to a boil on medium heat, stirring often. Once boiling, let boil for exactly 3 minutes, stirring constantly.

    3. When done boiling, remove pan from heat. Immediately stir in peanut butter and marshmallow creme (mixture will be thick). Continue to stir until all ingredients have melted and are fully combined.

    4. Spread fudge evenly into buttered 8" x 8" dish immediately after it is combined. Fudge will set up fairly quickly. Try to pat down the surface, so there are no points sticking up.

    5. Cover dish loosely and put it into refrigerator to chill for about 2 hours before cutting. When fudge is chilled and firm, cut it into 36 small pieces. Serve and enjoy.

    Nutrition Facts
    Peanut Butter Fudge
    Amount Per Serving (1 piece)
    Calories 118 Calories from Fat 45
    % Daily Value*
    Fat 5g8%
    Saturated Fat 1g6%
    Polyunsaturated Fat 1g
    Monounsaturated Fat 2g
    Cholesterol 0.2mg0%
    Sodium 42mg2%
    Potassium 59mg2%
    Carbohydrates 18g6%
    Fiber 0.5g2%
    Sugar 16g18%
    Protein 2g4%
    Vitamin A 6IU0%
    Calcium 9mg1%
    Iron 0.2mg1%
    * Percent Daily Values are based on a 2000 calorie diet.

    Here’s one more to pin on your Pinterest boards!Make 3 dozen pieces of peanut butter fudge in 10 minutes, using only 4 ingredients! Delicious treat for the holidays or any time of year!

    Easy Garlic Butter Steak Bites

    Make Easy Garlic Butter Steak Bites for 2 in only a few minutes! Use tri-tip or other steak, pan-sear, then cover with garlic butter sauce.
    Make Easy Garlic Butter Steak Bites for 2 in only a few minutes! Use tri-tip or other steak, pan-sear, then cover with garlic butter sauce.

    If you’re looking for a simple, yet delicious dinner for two, I hope you’ll take a look at this recipe (found online a while back)! This meal can be cooked and ready to eat in well under 20 minutes from start to finish! Easy garlic butter steak bites require only a few ingredients, and they’re ridiculously EASY to make!

    To make this dinner for two you will need a one pound steak, which you will split between the two servings. You can use tri-tip, ribeye, sirloin steak, etc. to make this delicious dish. My husband and I enjoy tri-tip because it has great flavor and is typically less expensive than other types of steak. Bottom line, you can make this dish with several different types of steak, so use what you can afford, what you have, or what you really enjoy. Here’s how to make this meal for two:

    Scroll Down For A Printable Recipe Card At The Bottom Of The Page

    Prepare The Steak For Pan-Searing

    I typically use tri-tip steak when preparing the steak bites, but other choices of meat to use include sirloin, ribeye or even strip steak, to name a few. Basically you will want a one pound, nicely marbled steak to make this dish to serve two people.

    Cut the meat into bite-sized chunks, keeping in mind that they will decrease slightly in size as they cook. Larger pieces will obviously take longer to cook than smaller pieces, so keep that in mind, as well. If there’s a lot of fat on the edges, simply trim it off.

    Pat the steak bites very dry, by blotting them with several paper towels to absorb the moisture. This is an important step, because if the meat is too “wet”, that moisture will steam the meat instead of searing and browning it well. Season the steak bites with salt and pepper, and you’re ready to cook the meat!

    A one pound steak is cut into bite sized bites before cooking.Paper towels are used to absorb excess moisture from the beef bites before searing.The steak bites are generously seasoned with salt and pepper before cooking.

    Time To Cook The Steak Bites

    Heat a heavy skillet on High heat until very hot, but not smoking (I like to use cast iron). Add a Tablespoon of olive oil, and heat this in the skillet. Place the steak bites into the hot oil in a single layer. Once you put them in the skillet, don’t move them so they can begin pan-searing. You want that high heat and hot oil to crisp and brown the steak bites quickly.

    Let the steak bites cook, without moving them, for 2-3 minutes until the bottom side is well-browned, then turn each piece to the other side. Continue to cook, making sure all sides are crusty and browned. The amount of time it cooks will entirely depend on the size of the steak bites you are cooking, and how you enjoy your cooked steak.

    On average, if you typically enjoy your steak cooked to MEDIUM, then you’ll want to cook the steak bites for about 5-6 minutes total time. RARE? About 4 minutes total time. MEDIUM-RARE? About 5 minutes total. Just keep an eye on the steak bites to ensure they’re cooked to your personal preference.

    Steak bites are seared in hot oil in a very hot skillet until browned and crispy.Pan-searing the steak bites produces a nicely browned exterior crust on the meat.

    Finish The Easy Garlic Butter Steak Bites And Serve!

    When the steak bites reach the doneness you wish, quickly remove them from the skillet, and transfer them to a plate or bowl, Cover to keep warm. Turn the heat down to Medium, and immediately add butter to the same hot skillet. Once the butter has melted, add minced garlic and cook for only 30-60 seconds, stirring often so the garlic doesn’t burn (and become bitter).

    Put the cooked steak bites back into the skillet, and toss to coat them with the garlic butter sauce. Cook this only until reheated, then the easy garlic butter steak bites are ready to serve. Garnish the meat with chopped fresh parsley, and serve hot!

    Melted butter, minced garlic, and chopped parsley are added to the steak bites.Easy garlic butter steak bites are topped with chopped parsley before serving hot.

    We enjoy serving easy garlic steak bites with mashed potatoes on the side. This time we enjoyed them with crispy green bean fries served alongside, too! YUM! The steak bites have a LOT of flavor, and truly are a CINCH to make! My husband and I love this meal for two, but the recipe can easily be doubled or tripled to suit your needs!

    A white plate with easy garlic butter steak bites, mashed potatoes and crispy green bean fries.

    I hope you enjoy this super simple recipe for easy garlic butter steak bites, and trust you’ll like them as much as we do! Thank you so much for stopping by, and please come back again soon for more family-friendly recipes. Take care, may God bless you, and have a GREAT day!

    Looking For More BEEF Recipes?

    You can find ALL of my recipes in the Recipe Index, which is located at the top of the page. I have some delicious meals with beef as the main ingredient, including:

    Interested In More Recipes?

    Thank you for visiting this website. I appreciate you using some of your valuable time to do soIf you’re interested, I publish a newsletter 2 times per month (1st and 15th) with all the latest recipes, and other fun info. I would be honored to have you join our growing list of subscribers, so you never miss a great recipe!
    There is a Newsletter subscription box on the top right side (or bottom) of each blog post, depending on the device you use, where you can easily submit your e-mail address (only) to be included in my mailing list.

    You Can Also Find Me On Social Media:

    Facebook page: The Grateful Girl Cooks!
    Pinterest:
    The Grateful Girl Cooks!
    Instagram:
    jbatthegratefulgirlcooks

    Author's signature

    Original recipe source: Melissa Stadler, at https://www.modernhoney.com/garlic-butter-steak-bites/

    ↓↓ PRINTABLE RECIPE BELOW ↓↓

    0 from 0 votes
    Easy Garlic Butter Steak Bites
    Prep Time
    10 mins
    Cook Time
    6 mins
    Total Time
    16 mins
     

    Make Easy Garlic Butter Steak Bites for 2 in only a few minutes! Use tri-tip or other steak, pan-sear, then cover with garlic butter sauce.

    Category: Main Course
    Cuisine: American
    Keyword: garlic butter steak bites
    Servings: 2
    Calories Per Serving: 595 kcal
    Author: JB @ The Grateful Girl Cooks!
    Ingredients
    • 1 Tablespoon extra virgin olive oil
    • 1 pound tri-tip steak (or ribeye, sirloin, strip steak, etc.)
    • ½ teaspoon salt
    • ½ teaspoon ground black pepper
    • 3 Tablespoons butter
    • 3 cloves garlic peeled, minced
    • 1 Tablespoon fresh parsley rough chopped
    Instructions
    1. Cut meat into bite-sized pieces. Trim fat from edges. Pat steak dry with paper towels to absorb moisture. Season meat with salt and pepper.

    2. Heat a heavy skillet on High temp. until very hot, but not smoking (I use cast iron). Add olive oil, swirling to coat bottom of skillet; heat this in the skillet. Place steak bites into hot oil in single layer. Once you put them in the skillet, don't move them. You want high heat and hot oil to crisp/brown steak bites quickly.

    3. Let steak bites cook, without moving them, for 2-3 minutes until well browned on bottom. Turn each piece to the other side. Continue to cook, making sure all sides are well browned. **Amount of time it cooks will depend on the size of the steak bites, and how you enjoy your steak. If you typically enjoy a MEDIUM steak, then cook steak bites for about 5-6 minutes total time. RARE? About 4 minutes total time. MEDIUM-RARE? About 5 minutes total. Just keep an eye on the steak bites to ensure they are cooked to your personal preference.

    4. When the steak bites reach desired doneness, quickly remove them from skillet to a plate or bowl, Cover to keep warm. Turn heat down to medium, and immediately add butter to the same hot skillet. When butter has melted, add garlic; cook for only 30-60 seconds, stirring often so garlic doesn't burn..

    5. Put steak bites back into skillet; toss to coat with garlic butter. Cook only until reheated, then it's ready to serve. Garnish with chopped fresh parsley. Serve hot!

    Nutrition Facts
    Easy Garlic Butter Steak Bites
    Amount Per Serving (1 (1/2 of total))
    Calories 595 Calories from Fat 387
    % Daily Value*
    Fat 43g66%
    Saturated Fat 19g119%
    Trans Fat 1g
    Polyunsaturated Fat 2g
    Monounsaturated Fat 19g
    Cholesterol 195mg65%
    Sodium 836mg36%
    Potassium 760mg22%
    Carbohydrates 2g1%
    Fiber 0.3g1%
    Sugar 0.1g0%
    Protein 47g94%
    Vitamin A 696IU14%
    Vitamin C 4mg5%
    Calcium 75mg8%
    Iron 4mg22%
    * Percent Daily Values are based on a 2000 calorie diet.

    Here’s one more to pin on your Pinterest boards!Make Easy Garlic Butter Steak Bites for 2 in only a few minutes! Use tri-tip or other steak, pan-sear, then cover with garlic butter sauce.

    Peppermint Mocha Coffee Creamer

    Make delicious, homemade Peppermint Mocha Coffee Creamer to brighten the holidays (or ANY time)! Easy to make recipe only has 4 ingredients!Make delicious, homemade Peppermint Mocha Coffee Creamer to brighten the holidays (or ANY time)! Easy to make recipe only has 4 ingredients!

    Do you like making your own homemade coffee creamers? If you do, I would love to share with you today how to make this delicious coffee creamer! Peppermint Mocha Coffee Creamer is the flavor of the day!

    It is SO SIMPLE to make, and tastes wonderful  when added to a big ol’ mug of hot coffee. I scribbled the recipe on the bottom of a piece of paper many years ago, but don’t know where I got it from, so I’m not sure who to give credit to for this recipe. 

    The creamer only has 4 ingredients and can be ready to pour into a cup of coffee in less than 5 minutes. It will yield almost 3 cups of creamer. How’s that for convenient?

    If you enjoy the flavors of chocolate and mint, then I’ll bet you will enjoy this coffee creamer. Here’s how to make it!

    Scroll Down For A Printable Recipe Card At The Bottom Of The Page

    What Ingredients Will I Need?

    You need peppermint extract, 2 cups half and half, several Tablespoons of chocolate syrup, and a can of sweetened condensed milk to make this coffee creamer. These ingredients are all you will need, and can be found in most grocery stores.

    If you want to “fancy the coffee up” for serving, you will also want to have whipped cream and some crushed peppermint sticks. You can garnish each steaming hot mug of coffee with them, but that is completely optional!

    Ingredients are half and half, peppermint extract, chocolate syrup and sweetened condensed milk.

    Preparing The Creamer

    Measure all of the creamer ingredients into a large bowl. The only thing you need to do to prepare the creamer is to thoroughly combine the ingredients.

    You can use a wire whisk for this OR an electric mixer. I have used both, but because the sweetened condensed milk is very thick, I find that using an electric mixer works best.

    NOTE: If using an electric mixer, blend, using the LOWEST setting, so the liquid doesn’t splatter everywhere, ok? Whisk or blend the creamer only until everything is completely blended.

    Using a whisk to combine all the ingredients for the coffee creamer.Electric mixer can also be used (on LOW) to combine coffee creamer ingredients.

    Storing The Peppermint Mocha Coffee Creamer

    Once the peppermint mocha coffee creamer is fully combined, place a funnel into the neck of an airtight jar or bottle you’re using for the creamer. You can either POUR or LADLE the liquid creamer into the funnel in the jar.

    I make a lot less mess when I use the funnel instead of just pouring the liquid in the bottle… just sayin’. Now the creamer is ready to enjoy! See how easy that was?

    TIP: To store creamer, I remove the label from an old, empty creamer container. After washing and draining it well, I can re-use the container for homemade coffee creamers! The creamer should last approximately the same amount of time as the expiration date on the half and half carton, if stored in an airtight container.

    Peppermint Mocha Coffee Creamer is ladled into a funnel on top of a storage bottle.A container of peppermint mocha coffee creamer and a cup of hot, black coffee, ready for creamer.

    Enjoy Your Coffee With Peppermint Mocha Coffee Creamer!

    Most of the time, I simply add the peppermint mocha coffee creamer straight into my coffee, give it a stir and drink it up! But sometimes… I can’t help myself and try to make my coffee more fancy!

    To do this, stir creamer into the coffee, then top with aerosol whipped cream, and sprinkle with crushed peppermint, right off of a candy cane!

    This coffee creamer has a soothing, yet subtle peppermint and chocolate flavor, which I really enjoy in my strong, hot morning coffee! YUM! It’s a delicious coffee creamer any old time of the year, not just during the holidays!

    Whipped cream and peppermint top a cup of coffee with peppermint mocha creamer.A mug of whipped cream topped coffee sweetened with peppermint mocha coffee creamer.

    I hope you have the chance to make this simple, yet yummy coffee creamer, and trust you’ll enjoy it. I make it every year for Christmas, and love it a lot!

    Thanks so much for taking time out of your day to visit my blog. I invite you to come back again soon, for more family-friendly recipes. Take care, and have a GREAT day!

    Looking For More COFFEE CREAMER Recipes?

    You can find ALL of my recipes in the Recipe Index, which is located at the top of the page. I have several delicious coffee creamer recipes to check out, including:

    Want More Recipes? Get My FREE Newsletter!

    I publish a newsletter 2 times per month (1st and 15th) with lots of recipes, tips, etc..
    Would you like to join our growing list of subscribers?

    There is a Newsletter subscription box on the top right (or bottom) of each blog post, depending on the device you use.
    You can submit your e-mail address there, to be added to my mailing list.

    Find Me On Social Media:

    Facebook page: The Grateful Girl Cooks!
    Pinterest:
    The Grateful Girl Cooks!
    Instagram:
    jbatthegratefulgirlcooks

    Author's signature

    Original recipe source: unknown

    ↓↓ PRINTABLE RECIPE BELOW ↓↓

    0 from 0 votes
    Peppermint Mocha Coffee Creamer
    Prep Time
    4 mins
    Cook Time
    0 mins
    Total Time
    4 mins
     

    Make delicious, homemade Peppermint Mocha Coffee Creamer to brighten the holidays (or ANY time)! Easy to make recipe only has 4 ingredients!

    Category: Beverages, Condiments
    Cuisine: American
    Keyword: peppermint mocha coffee creamer
    Servings: 48 (1 T. per serving)
    Calories Per Serving: 46 kcal
    Author: JB @ The Grateful Girl Cooks!
    Ingredients
    • 2 cups half and half
    • 14 ounces sweetened condensed milk canned
    • 5 Tablespoons chocolate syrup
    • 1 teaspoon peppermint extract
    Instructions
    1. Measure all ingredients into a large bowl. Use a wire whisk OR an electric mixer to fully combine ingredients. NOTE: I have used both, but because sweetened condensed milk is thick, using an electric mixer works best. If using an electric mixer, use on LOWEST setting, so liquid doesn't splatter.

    2. Pour creamer through funnel into an airtight jar or bottle for storage. Store in refrigerator for approx. as long as expiration date on the half and half carton. Enjoy!

    Recipe Notes

    Recipe will yield approximately 3 cups of liquid creamer. Caloric calculation is made based on using 1 Tablespoon per serving.

    Nutrition Facts
    Peppermint Mocha Coffee Creamer
    Amount Per Serving (1 1 Tablespoon)
    Calories 46 Calories from Fat 18
    % Daily Value*
    Fat 2g3%
    Saturated Fat 1g6%
    Polyunsaturated Fat 0.1g
    Monounsaturated Fat 1g
    Cholesterol 6mg2%
    Sodium 18mg1%
    Potassium 49mg1%
    Carbohydrates 6g2%
    Fiber 0.1g0%
    Sugar 6g7%
    Protein 1g2%
    Vitamin A 58IU1%
    Vitamin C 0.3mg0%
    Calcium 35mg4%
    Iron 0.1mg1%
    * Percent Daily Values are based on a 2000 calorie diet.

    Here’s one more to pin on your Pinterest boards!Make delicious, homemade Peppermint Mocha Coffee Creamer to brighten the holidays (or ANY time)! Easy to make recipe only has 4 ingredients!

    Garlic Penne Pasta And Veggies

    Garlic Penne Pasta And Veggies is a meatless pasta dish with garlic, spinach, tomatoes, chickpeas and Parmesan. It’s ready in 20 minutes!
    Garlic Penne Pasta And Veggies is a meatless pasta dish with garlic, spinach, tomatoes, chickpeas and Parmesan. It's ready in 20 minutes!

    If you’re looking for a meatless main dish that is full of flavor and takes practically no time at all to prepare, I think you’ll enjoy this tasty meal! Penne pasta is paired with a light garlic, Parmesan and veggie sauce.

    This dish includes garbanzo beans (chickpeas) for added protein, fresh tomatoes, baby spinach and garlic, which bring color, texture, and flavor to the pasta.

    It’s a cinch to make, and is ready in 20 minutes, because you make the sauce and veggies while the pasta cooks! How’s that for convenience? Let me show you how to make this meal:

    Scroll Down For A Printable Recipe Card At The Bottom Of The Page

    Cook The Penne Pasta

    The first thing you’ll need to do is cook the penne pasta in boiling water, according to the directions found on the package.

    While the pasta is cooking you prepare the rest of this dish, so it’s ready when the pasta is done! Once the penne is done cooking, drain the water off of the hot pasta.

    Penne pasta is cooked in boiling water according to package instructions.

    Prepare The Garlic Sauce And Veggies

    While the pasta cooks, make the simple garlic sauce and veggies. Heat olive oil on medium heat in a large skillet. Add minced garlic and red pepper flakes to the hot oil.

    Stir to combine, and sauté them, stirring often for 30-45 seconds. Be careful to not burn the garlic or it may become bitter in taste (and you do NOT want that!).

    Add chopped fresh tomatoes and a can of garbanzo beans (chickpeas) that have been rinsed and drained to the skillet.

    Stir to combine, and continue to cook and stir on medium heat for 2 more minutes.

    Minced garlic and red pepper flakes cook in hot oil in a large skillet.Chopped fresh tomatoes and drained chickpeas (garbanzo beans) are added to skillet.

    Place the fresh baby spinach and salt into the skillet, and cook, stirring often until the spinach leaves have wilted from the heat.

    This is the garlic and veggie sauce you will add to the hot penne pasta, once it is done cooking. See how simple that was?

    Baby spinach and salt are added to the garlic, tomato and chickpeas in skillet and cooked.Once the spinach leaves have wilted from the heat, the garlic and veggie sauce is done.

    Serving The Garlic Penne Pasta And Veggies

    Once the penne pasta has finished cooking, drain it and immediately add it to the skillet full of veggies. Add grated Parmesan cheese, and then toss the garlic penne pasta and veggies, to combine.

    Because there is not a thick sauce coating everything, the pasta will cool fairly quickly, so serve the pasta immediately while hot. If desired, you can add additional Parmesan cheese to the top as a garnish for serving.

    Cooked, drained penne pasta is added to the garlic and veggie sauce in skillet to combine.Grated Parmesan is added and combined with the Garlic Penne Pasta And Veggies, then served.

    I hope you have the chance to make this delicious dish for those you love, and trust you’ll enjoy it as much as we do.

    Thanks for stopping by, and I hope you’ll come back again soon for more family-friendly recipes. Take care, God bless you, and have a GREAT day!

    Looking For More PASTA Recipes?

    You can find ALL of my recipes in the Recipe Index, which is located at the top of the page. I have lots of wonderful pasta recipes for you to enjoy, including:

    Want More Recipes? Get My FREE Newsletter!

    I publish a newsletter 2 times per month (1st and 15th) with lots of recipes, tips, etc..
    Would you like to join our growing list of subscribers?

    There is a Newsletter subscription box on the top right (or bottom) of each blog post, depending on the device you use.
    You can submit your e-mail address there, to be added to my mailing list.

    Find Me On Social Media:

    Facebook page: The Grateful Girl Cooks!
    Pinterest:
    The Grateful Girl Cooks!
    Instagram:
    jbatthegratefulgirlcooks

    Author's signature

    Original recipe source: Doris Heath, via “Taste of Home Magazine”, Oct./Nov. 2022 edition, page 26, published by Reiman Publications

    ↓↓ PRINTABLE RECIPE BELOW ↓↓

    0 from 0 votes
    Garlic Penne Pasta and Veggies
    Prep Time
    20 mins
    Total Time
    20 mins
     

    Garlic Penne Pasta And Veggies is a meatless pasta dish with garlic, spinach, tomatoes, chickpeas and Parmesan. It's ready in 20 minutes!

    Category: Main Dish
    Cuisine: Italian
    Keyword: garlic penne pasta and veggies
    Servings: 6
    Calories Per Serving: 353 kcal
    Author: JB @ The Grateful Girl Cooks!
    Ingredients
    • 12 ounces uncooked penne pasta
    • 2 Tablespoons extra virgin olive oil
    • 6 cloves garlic minced
    • ¼ teaspoon red pepper flakes or more if you like it spicy
    • 15 ounce can garbanzo beans (chickpeas) rinsed and drained
    • 2 medium tomatoes , seeded, cut in ½" pieces
    • 9 ounces fresh baby spinach
    • ¼ teaspoon salt
    • ¼ cup grated Parmesan cheese + more for garnish, if desired
    Instructions
    1. Cook pasta in boiling water, according to directions on the package. Once pasta is done cooking, drain water off pasta.

    2. While pasta cooks, prepare sauce, so it's ready when pasta is done! Heat olive oil on medium heat in large skillet. Add garlic/red pepper flakes to hot oil. Stir to combine; cook stirring often for 30-45 seconds (don't let garlic burn or it becomes bitter).

    3. Add tomatoes and garbanzo beans (chickpeas). Stir to combine. Continue to cook and stir on medium heat for 2 minutes.

    4. Add spinach and salt to sauce; cook, stirring often until spinach has wilted from the heat. Sauce is now ready for hot, drained pasta.

    5. Once pasta is done, drain; immediately add it to skillet with veggies. Add grated Parmesan cheese; toss well, to combine ingredients. Serve immediately, sprinkled with additional Parmesan cheese, if desired.

    Nutrition Facts
    Garlic Penne Pasta and Veggies
    Amount Per Serving (1 (1½ cups per serving))
    Calories 353 Calories from Fat 72
    % Daily Value*
    Fat 8g12%
    Saturated Fat 2g13%
    Polyunsaturated Fat 2g
    Monounsaturated Fat 4g
    Cholesterol 4mg1%
    Sodium 408mg18%
    Potassium 584mg17%
    Carbohydrates 57g19%
    Fiber 6g25%
    Sugar 3g3%
    Protein 14g28%
    Vitamin A 4401IU88%
    Vitamin C 19mg23%
    Calcium 126mg13%
    Iron 3mg17%
    * Percent Daily Values are based on a 2000 calorie diet.

    Here’s one more to pin on your Pinterest boards!Garlic Penne Pasta And Veggies is a meatless pasta dish with garlic, spinach, tomatoes, chickpeas and Parmesan. It's ready in 20 minutes!

    Cranberry Pineapple Jello Salad

    Cranberry Pineapple Jello Salad is a delicious dish for the holidays or any time! Only 4 ingredients and minimum prep time are needed to make it!
    Cranberry Pineapple Jello Salad is a delicious dish for the holidays or any time! Only 4 ingredients and minimum prep time needed to make it!

    Looking for a fantastic tasting salad to serve for the holidays (or anytime)? This cranberry pineapple Jello salad can be made in advance with very little prep time, and is full of vibrant color and flavor! Best of all… it’s EASY to make, which is wonderful during such a busy time of year, right?

    I found the recipe online several years ago, and added it to our holiday favorites rotation! You can make it up to a couple days ahead of time, then top it with whipped cream, mint and orange zest before serving time. You can even prepare it in a Jello salad mold, individual custard cups, or in a 9″ square dish, so you can make this salad your own! Here’s how to make it.

    Scroll Down For A Printable Recipe Card At The Bottom Of The Page

    Making This Salad Is EASY!

    You only need 4 ingredients to make this cranberry pineapple Jello salad. They are 6 ounces raspberry gelatin mix, a large can of crushed pineapple, a can of whole berry cranberry sauce, and the grated zest of an orange. That’s all, and it only takes about 10 minutes or less to prepare! You can choose to garnish the finished salad, of course, but these 4 ingredients are all you will need to make this delicious salad.

    Orange zest, whole cranberry sauce, crushed pineapple and raspberry gelatin are the ingredients needed.

    Place the raspberry gelatin powder in a large mixing bowl. Add a cup of boiling water, and stir these two ingredients for 2 minutes, to allow time for the gelatin to fully dissolve. Once dissolved, pour in a half cup of very cold water, and stir to combine.

    Add the canned pineapple (including juice), whole berry cranberry sauce, and the finely grated zest of an orange. Stir well, until all the jello salad ingredients have been well combined. Hot water is stirred into the raspberry gelatin powder and stirred to dissolve powder.Whole berry cranberry sauce, orange zest and crushed pineapple are added to jello mixture.The cranberry pineapple jello salad mixture is combined and ready to pour into serving dish.

    Prepare The Gelatin Salad Mold Or Other Dishes

    You have three options for dishes to use to hold the Jello. Lightly coat the bottom and sides of the dish(es) you use with non-stick baking spray before adding the Jello salad. For this recipe you can use either a 6 cup Jello mold, individual custard cups (4 ounce), or a 9″ square pan. NOTE: using small custard cups will yield aprox.16 servings, rather than 8 using the other options).

    NOTE: I’ve also successfully used a 5 cup gelatin mold (as seen in the photo below). You will have extra jello left over, but can pour the extra into individual custard cups. I did this to show you another option for serving this salad in individual portions.

    After spraying the dish you will be using, pour the Jello mixture into the dish. Lightly cover the dish(es) with plastic wrap, and refrigerate for at least 6 hours until well-chilled and firm. You can also make the salad a couple days ahead of serving time, if necessary, for convenience.

    Jello salad mold (or other dishes) is coated with non-stick spray before adding jello.Jello mold and 2 custard cups, filled with cranberry pineapple jello salad, ready to refrigerate.

    Releasing The Jello From The Salad Mold For Serving

    If using a 9″ square pan or individual custard dishes, you can simple serve the cranberry pineapple Jello salad after it has been refrigerated for at least 6 hours. If you’re using a Jello mold, you will need to carefully unmold it before serving.

    To unmold the salad, place very hot water in a large bowl. Holding the Jello mold with both hands, gently submerge it about 2/3 of the way into the hot water. Be careful to not let any water go over the top edge of the Jello mold. Hold the salad mold in the hot water for approximately 30 seconds, then remove it from the water.

    Place your serving platter upside down on top of the open part. Hold the platter and Jello mold together with both hands, and carefully flip it over. The salad should release and invert onto the platter. If for some reason it doesn’t come out of the Jello mold immediately, repeat the hot water immersion and try again until it comes out.

    Jello salad mold is submerged 2/3 of the way in hot water to help release jello from sides.

    Serve The Cranberry Pineapple Jello Salad

    The cranberry pineapple Jello salad should be served immediately after it’s been removed from the mold. Slice the salad into pie-shaped wedges, or if using a 9″ square pan, cut into squares for serving.

    If you choose to serve this salad with a beautiful garnish, top the salad (or each portion) with whipped cream, a mint sprig and additional orange zest. The garnish will add extra color and flavor to the presentation of this tasty Jello salad!

    Two custard cups of jello salad, topped with whipped cream, mint and orange zest.Cranberry Pineapple Jello Salad, out of plastic mold, topped with whipped cream, mint and orange zest.

    I’m confident you’re going to enjoy this cranberry pineapple Jello salad for the holidays or any ol’ time of year! It’s so simple to make, and truly does taste wonderful! Thanks for taking the time to stop by, and I hope you’ll come back soon. Take care, may God bless you, and have a GREAT day!

    Looking For More HOLIDAY SIDE DISH Recipes?

    You can find ALL of my recipes in the Recipe Index, which is located at the top of the page. I have lots of delicious side dish recipes that are perfect holiday recipes (or any day, for that matter). They include:

    Interested In More Recipes?

    Thank you for visiting this website. I appreciate you using some of your valuable time to do soIf you’re interested, I publish a newsletter 2 times per month (1st and 15th) with all the latest recipes, and other fun info. I would be honored to have you join our growing list of subscribers, so you never miss a great recipe!
    There is a Newsletter subscription box on the top right side (or bottom) of each blog post, depending on the device you use, where you can easily submit your e-mail address (only) to be included in my mailing list.

    You Can Also Find Me On Social Media:

    Facebook page: The Grateful Girl Cooks!
    Pinterest:
    The Grateful Girl Cooks!
    Instagram:
    jbatthegratefulgirlcooks

    Author's signature

    Original recipe source: Sara, at http://www.dinneratthezoo.com/cranberry-pineapple-gelatin-mold/

    ↓↓ PRINTABLE RECIPE BELOW ↓↓

    0 from 0 votes
    Cranberry Pineapple Jello Salad
    Prep Time
    10 mins
    Cook Time
    0 mins
    Inactive Refrigeration Time
    6 hrs
    Total Time
    6 hrs 10 mins
     

    Cranberry Pineapple Jello Salad is a delicious dish for the holidays or any time! Only 4 ingredients and minimum prep time needed to make it!

    Category: Salad/Side Dish
    Cuisine: American
    Keyword: cranberry pineapple jello salad
    Servings: 8
    Calories Per Serving: 204 kcal
    Author: JB @ The Grateful Girl Cooks!
    Ingredients
    • 6 ounces raspberry gelatin 1 large box or 2 small boxes
    • 20 ounce can crushed pineapple do not drain!
    • 14 ounce can whole berry cranberry sauce
    • 1 zest of one orange
    OPTIONAL GARNISHES: whipped cream, orange zest, fresh mint sprig
      Instructions
      1. Place jello mix in large mixing bowl. Add 1 cup boiling water; stir for 2 minutes, to allow time for gelatin to fully dissolve. Pour in ½ cup cold water; stir to combine.

      2. Add pineapple (including juice), cranberry sauce, and grated orange zest. Stir well, until all ingredients have been well-combined.

      3. Lightly coat bottom and sides of the dish(es) you use with non-stick baking spray. Pour jello into prepared dish(es). Lightly cover with plastic wrap; refrigerate at least 6 hours until well-chilled and firm. TIP: You can make this salad a couple days in advance, if necessary.

      4. To unmold jello: Place hot water in a large bowl. Holding jello mold with both hands, gently submerge salad mold about ⅔ of the way in the water. Be careful to not let water go over top edge of salad mold. Hold salad mold in hot water for approx. 30 seconds, then remove. Place serving platter upside down on top of the open part of mold. Hold platter and jello mold tightly together with both hands; carefully flip it over. Salad should release and invert onto the platter. If it doesn't come out of salad mold right away, repeat hot water immersion and try again until it comes out.

      5. If desired, garnish salad with whipped cream, a mint sprig and additional orange zest. Cut into slices and serve. Cover/refrigerate leftovers.

      Recipe Notes

      Caloric calculation does NOT include optional garnishes and is based on eight total servings. If using only 4 ounce custard cups, you will have approx. 16 servings.

      Nutrition Facts
      Cranberry Pineapple Jello Salad
      Amount Per Serving (1 slice (1/8 of total))
      Calories 204 Calories from Fat 2
      % Daily Value*
      Fat 0.2g0%
      Saturated Fat 0.01g0%
      Polyunsaturated Fat 0.04g
      Monounsaturated Fat 0.01g
      Sodium 102mg4%
      Potassium 106mg3%
      Carbohydrates 51g17%
      Fiber 2g8%
      Sugar 44g49%
      Protein 2g4%
      Vitamin A 63IU1%
      Vitamin C 9mg11%
      Calcium 16mg2%
      Iron 0.4mg2%
      * Percent Daily Values are based on a 2000 calorie diet.

      Here’s one more to pin on your Pinterest boards!Cranberry Pineapple Jello Salad is a delicious dish for the holidays or any time! Only 4 ingredients and minimum prep time needed to make it!

      No-Knead Mini Loaves

      No-Knead Mini Loaves are crusty on the outside, soft on the inside and use only 4 ingredients! Makes enough for 5 small artisan bread loaves!
      No-Knead Mini Loaves are crusty on the outside, soft on the inside and use only 4 ingredients! Makes enough for 5 small artisan bread loaves!

      Today I want to share a fabulous recipe I found online a while back. The recipe is unique because you stir up dough in about 5 minutes, let it rise, and then refrigerate the dough until you want to bake a loaf or two of bread. The recipe (as written) will yield 4 large (1 pound) loaves OR if you make them a tiny bit smaller, you can make 5 no knead mini loaves from the dough. My husband and I enjoy the smaller loaves, since they’re the perfect size for the two of us.

      After the dough has risen, it can be kept (covered) in the refrigerator for up to 2 weeks. That means you can have hot baked bread often! Isn’t that awesome? Then, when you want to bake a small loaf for dinner, just pull some of the dough out of the fridge about 1½ hours before you want to eat it. Shape the dough, let it rise for a short time, and then bake it FRESH! We love having enough dough in the fridge to make 5 mini loaves, because it’s so convenient! This amazing dough can also be used to make small dinner rolls, pizza dough, etc. Here’s how to make no knead mini loaves.

      Scroll Down For A Printable Recipe Card At The Bottom Of The Page

      Make The Dough

      To make the dough for this bread, you need to heat water to 100° F. (or 37.7°C). The water needs to be at this temperature when you add the yeast in order to activate it. If the water is too hot,  it can kill the yeast, and we don’t want that to happen! You also want to ensure the yeast you are using is still fresh. If you’re not sure if it’s fresh or not, you can check its viability by doing this.

      Place the 100°F. water in a very large bowl or food-safe container (about 2 gallons), and whisk or stir in the active dry yeast until combined. Now add flour and salt to the liquid mixture and stir WELL to combine. This dough will be very thick and sticky, but just keep stirring until all the ingredients have been successfully combined.

      Dry active yeast is whisked into warm water in a large, 2 gallon bowl.Flour and salt are stirred into the water and yeast to form a sticky bread dough.Thick and sticky, the dough is combined in a large bowl for the no knead mini loaves.

      Let The Dough Rise

      Cover the bowl with plastic wrap, then top the bowl with a kitchen dish towel. Place the bowl on the counter, in a warm place in your kitchen. Let the dough sit at room temperature, undisturbed for 2 hours.

      After the dough has rested at room temperature for 2 hours, place the covered bowl into the refrigerator. Let the bread dough chill in the refrigerator overnight OR until 1½ hours before you want the baked bread to be ready! It should have doubled in size and be ready to go when you are!

      I usually mix up the dough the night BEFORE I want to bake the bread. Then I pull out just enough dough to make a loaf or two, re-cover the remaining dough and pop it back in the fridge until I’m ready to make another fresh loaf. This bread dough will keep (if covered) up to 2 weeks in the refrigerator, so it’s really convenient to have around.

      Bread dough is covered with plastic wrap and sits undisturbed at room temperature for 2 hours.

      Ready To Make No-Knead Mini Loaves!

      Okay… so now you’ve let the bread dough refrigerate overnight and it’s about 1½ hours before you want a nice hot, fresh loaf of bread. Here’s how to make the mini-loaves out of that beautifully risen dough! Remove the plastic wrap from the bowl.

      Flour a banneton proofing basket generously with flour for each loaf you will be making (rice flour or all purpose), then set it aside. NOTE: If you do not have access to a banneton proofing basket, place a large piece of parchment paper on the counter and lightly sprinkle it with flour.

      Pull out a grapefruit sized portion of dough from the refrigerator (return remaining dough to fridge). With floured hands, shape it into a ball, by stretching out the dough and tucking the edges under the bottom of the dough ball. You want it to be smooth on top, and the outer edges tucked under to form a tight, round dough ball. Pinch the dough together on the bottom to seal the edges together as much as possible. Place the dough ball, top-side DOWN, into the prepared banneton. NOTE: If using parchment paper (no banneton), place the dough ball, top side UP onto the parchment paper.

      Dough has risen to double its original size after being refrigerated overnight.Bread dough ball is transferred top side down into a floured banneton basket for rising.

      Time To Bake Some Bread!

      Cover the bread with a dish towel, set the banneton or parchment on the counter, and let it sit and rise at room temp. for 40 minutes. Halfway through this rising time (about 20 minutes), preheat your oven to 425°. At the same time, place a Dutch oven into the oven, so it will preheat, as well.

      Once the dough has risen for 40 minutes, if using a banneton, carefully turn the banneton over onto a large sheet of parchment paper. TIP: Place a large sheet of parchment on a baking sheet, then turn it over to cover the banneton (paper onto banneton with baking sheet on top). Securely hold the baking sheet and banneton with both hands and carefully flip it over to release and invert the dough ball from the banneton onto the parchment paper.

      Remove the hot Dutch oven from the preheated oven. Lift the parchment paper with the bread dough and lower the loaf carefully into the pan. Put the lid on the Dutch oven, place it back into the oven, and let it bake for 30 minutes. Take the lid off and continue baking uncovered for about 5 minutes or so, until the loaf is a light golden brown color on top.

      Bread dough ball, transferred from banneton basket onto parchment paper.When the no knead mini loaves are golden brown in color, they are removed from the oven.

      Who Wants A Warm Slice Of Homemade Bread?

      Remove the pan from the oven, and carefully (it’s HOT) transfer the bread to a wire rack to cool for about 5 minutes before attempting to slice it. Once the no knead mini loaves have cooled slightly, use a serrated knife to cut the warm bread into slices. We usually get between 6-8 thin slices per loaf. Grab some butter, spread it on thick, and enjoy a slice or two of these absolutely delicious no knead mini loaves!

      One of the no knead mini loaves of hot bread, ready to be sliced.Slices of the no knead mini loaves on a wire rack, ready to be buttered and eaten.

      I really hope you enjoy this delicious bread as much as we do! The first time I made an extra loaf for our son (who was sick), and took him some homemade hot soup and a fresh loaf of this bread. He said it was one of the best loaves of bread he has ever had! I really think you’ll enjoy it, too. It is so handy to have the dough already made up and in the fridge for when you want fresh hot bread for dinner! YUM!

      Thank you for stopping by today, and I invite you to come back again soon for more family-friendly recipes! Take care, may God bless you, and have a GREAT day!

      Looking For More BREAD Recipes?

      You can find ALL of my recipes in the Recipe Index, located at the top of the page. I have lots of delicious bread recipes, savory and sweet, including:

      Interested In More Recipes?

      Thank you for visiting this website. I appreciate you using some of your valuable time to do soIf you’re interested, I publish a newsletter 2 times per month (1st and 15th) with all the latest recipes, and other fun info. I would be honored to have you join our growing list of subscribers, so you never miss a great recipe!
      There is a Newsletter subscription box on the top right side (or bottom) of each blog post, depending on the device you use, where you can easily submit your e-mail address (only) to be included in my mailing list.

      You Can Also Find Me On Social Media:

      Facebook page: The Grateful Girl Cooks!
      Pinterest:
      The Grateful Girl Cooks!
      Instagram:
      jbatthegratefulgirlcooks

      Author's signature

      Original recipe source: With thanks to Carolyn Thomas, at: homesteadingfamily.com/no-knead-artisan-bread/

      ↓↓ PRINTABLE RECIPE BELOW ↓↓

      5 from 1 vote
      No-Knead Mini Loaves
      Prep Time
      10 mins
      Cook Time
      35 mins
      Resting Time
      2 hrs
      Total Time
      2 hrs 45 mins
       

      No-Knead Mini Loaves are crusty on the outside, soft on the inside and use only 4 ingredients! Makes enough for 5 small artisan bread loaves!

      Category: Bread
      Cuisine: All Cuisines
      Keyword: no-knead mini loaves
      Servings: 5 small loaves
      Calories Per Serving: 597 kcal
      Author: JB @ The Grateful Girl Cooks!
      Ingredients
      • 3 cups water at 100°F. temperature
      • 2 Tablespoons active dry yeast
      • cups all purpose flour or combo of whole wheat/all purpose
      • Tablespoons sea salt
      Instructions
      To Make Dough:
      1. Place the 100°F. water in a very large bowl or food-safe container (about 2 gallons), and whisk or stir in the active dry yeast until combined. Now add flour and salt to the liquid mixture and stir WELL to combine. This dough will be very thick and sticky, but just keep stirring until all the ingredients have been successfully combined.

      2. Cover the bowl with plastic wrap, then top the bowl with a kitchen dish towel. Place the bowl on the counter, in a warm place in your kitchen. Let the dough sit at room temperature, undisturbed for 2 hours.

        After the dough has rested at room temperature for 2 hours, place the covered bowl into the refrigerator. Let the bread dough chill in the refrigerator overnight OR until 1½ hours before you want the baked bread to be ready! It should have doubled in size.

      To Make Loaves: (Begin 1½ hours before you want a fresh loaf)
      1. Flour a banneton proofing basket (for each loaf) generously with flour; set aside. NOTE: If not using a banneton, place a large piece of parchment paper on the counter; sprinkle with flour.

        Pull out a grapefruit-sized amount of dough from bowl (return remaining dough to fridge). With floured hands, shape it into a ball, by stretching out dough and tucking edges under the bottom. You want it smooth on top, and outer edges tucked under, forming a tight, round dough ball. Pinch dough edges together on the bottom to seal edges as much as possible. Place dough ball, top-side DOWN, into prepared banneton. NOTE: If using parchment paper (no banneton), place dough ball, top side UP onto prepared parchment paper.

      2. Cover bread with a dish towel. Set banneton or parchment on counter; let it sit/rise at room temp. for 40 minutes. Halfway through rising time (20 minutes), preheat oven to 425°. Place Dutch oven into the oven, so it will preheat, as well.

      3. Once dough has sat for 40 minutes, if using a banneton, carefully turn the banneton over onto a large sheet of parchment paper. TIP: Place a large sheet of parchment paper on a baking sheet, then turn it over on top of the banneton (paper onto banneton with baking sheet on top). Securely hold baking sheet and banneton with both hands; carefully flip it over to release and invert the dough ball from banneton onto parchment.

      4. Remove Dutch oven from the preheated oven (it's HOT). Lift parchment paper with dough ball; lower loaf carefully into pan. Put the lid on Dutch oven; place back in oven; bake for 30 minutes. Remove lid; continue baking uncovered for about 5 minutes, until loaf is light golden brown in color.

      5. Remove pan from oven. Carefully lift paper/bread loaf out; transfer bread to wire rack to cool 4-5 minutes before slicing with a serrated knife. Enjoy!

      6. NOTE: Dough will keep, (covered in fridge) up to 2 weeks. Each time you want a fresh loaf, follow instructions above for making a new loaf!

      Nutrition Facts
      No-Knead Mini Loaves
      Amount Per Serving (1 loaf (1/5 of total))
      Calories 597 Calories from Fat 18
      % Daily Value*
      Fat 2g3%
      Saturated Fat 0.3g2%
      Polyunsaturated Fat 1g
      Monounsaturated Fat 0.2g
      Sodium 2104mg91%
      Potassium 190mg5%
      Carbohydrates 125g42%
      Fiber 5g21%
      Sugar 0.4g0%
      Protein 17g34%
      Vitamin C 0.004mg0%
      Calcium 30mg3%
      Iron 8mg44%
      * Percent Daily Values are based on a 2000 calorie diet.

      Here’s one more to pin on your Pinterest boards!No-Knead Mini Loaves are crusty on the outside, soft on the inside and use only 4 ingredients! Makes enough for 5 small artisan bread loaves!

      Banana Streusel Coffeecake

      Banana Streusel Coffeecake is a yummy breakfast treat, featuring a banana sour cream coffeecake with a brown sugar cinnamon crumb topping.
      Banana Streusel Coffeecake is a yummy breakfast treat, featuring a banana sour cream coffeecake with a brown sugar cinnamon crumb topping.

      We LOVE coffeecake! How about you? There’s just something about a slice of delicious coffeecake to go with my big old mug of hot coffee in the morning! Today I want to share this recipe for a delicious banana streusel coffeecake that is simple to make, and tastes wonderful!

      This coffeecake is truly not difficult to prepare, and yields 12 slices of yummy coffeecake, perfect for a breakfast or afternoon snack! Here’s how to make this treat.

      Scroll Down For A Printable Recipe Card At The Bottom Of The Page

      Prepare The Coffeecake Batter

      BEFORE YOU BEGIN: Preheat your oven to 350°F.  You will also need to line a 9″ cake pan with parchment paper (extending the paper to overhang the edges of the pan).

      Leave parchment paper hanging over the sides, because you will lift the finished coffeecake out of the pan later using the excess paper as “handles”. Lightly spray the parchment paper with non-stick baking spray.

      Okay… now it’s time to make the batter for this coffeecake. Place melted butter, granulated sugar, brown sugar, an egg plus an egg yolk, sour cream and coffee powder in a large mixing bowl. Mix these wet ingredients together until combined and the batter is smooth. Add mashed bananas to the bowl and stir until the mashed bananas have been fully incorporated into the batter.

      Batter ingredients for the coffeecake are combined in a large mixing bowl.Mashed bananas are added to the batter and mixed until the batter becomes smooth and thick.

      Combine And Add Dry Ingredients To Batter

      In a separate bowl, whisk together all purpose flour, baking soda and salt. These are the dry ingredients. Add the dry ingredients a little bit at a time to the wet ingredients (the batter), and stir only until all ingredients have been combined. Don’t overmix! You will be left with a fairly thick coffeecake batter. Set this aside while you make the streusel topping.

      Flour, baking soda and salt are whisked together until combined.The flour mixture is then added, a little at a time, to the wet banana batter.A very thick batter is now ready to pour into the baking pan.

      Make The Streusel Topping

      Place flour, brown sugar, salt, cinnamon, and small chunks of COLD butter in a medium bowl. Use a hand held pastry blender, two forks (or your fingers), and cut the butter into the other ingredients until the streusel crumbs become about the size of peas.

      Flour, salt, brown sugar, cinnamon and cold butter are placed in bowl to combine into topping.A pastry cutter is used to cut the cold butter into the streusel topping.

      Bake The Banana Streusel Coffeecake

      Spread the banana streusel coffeecake batter evenly in the parchment paper-lined cake pan. Sprinkle all of the streusel topping over the top of the batter, making sure to coat the entire surface.

      Coffeecake batter is spread into a parchment paper lined cake pan.Streusel topping is sprinkled over the entire top surface of the coffeecake.

      Bake the coffeecake at 350°F. for about 45 minutes OR until a toothpick inserted into the top middle of the coffeecake comes out clean. Your time may vary just a bit due to oven temperature variations. When done, remove the pan from the oven, and transfer it to a wire rack to cool.

      Let the banana streusel coffeecake cool for 10-15 minutes, then carefully lift it up and out of the pan by using the parchment paper “handles”. Place the coffeecake back onto the wire rack and let it cool completely before removing the parchment paper.

      After baking, the banana streusel coffeecake cools in the pan, on a wire rack.

      Who Wants A Slice Of Banana Streusel Coffeecake?

      When the banana streusel coffeecake has cooled completely (to room temperature), remove the parchment paper from the sides and bottom. Now this delicious coffeecake is ready to slice and serve! We feel this coffeecake tastes the absolute best when served at room temperature! Cut the coffeecake into 12 wedges and serve with a steaming cup of coffee, tea OR a big old glass of cold milk. YUM!

      The recipe will yield 12 nice sized pieces, and any leftovers will keep (covered, at room temp.) for several days. Any leftover coffeecake slices can also be frozen, if wrapped and stored in an airtight container or wrapped well in aluminum foil.

      The banana streusel coffeecake is cut into wedge shaped pieces before serving.One slice of the banana streusel coffeecake, on a white plate, ready to be eaten.

      I really hope you try this absolutely delicious banana streusel coffeecake. I’m confident you’re going to love it! Thank you for stopping by, and please come back again soon for more family-friendly recipes. Take care, may God bless you, and have a GREAT day!

      Looking For More COFFEECAKE Recipes?

      You can find ALL of my recipes in the Recipe Index, which is located at the top of the page. I have a nice variety of coffeecake recipes for you to check out, including:

      Interested In More Recipes?

      Thank you for visiting this website. I appreciate you using some of your valuable time to do soIf you’re interested, I publish a newsletter 2 times per month (1st and 15th) with all the latest recipes, and other fun info. I would be honored to have you join our growing list of subscribers, so you never miss a great recipe!
      There is a Newsletter subscription box on the top right side (or bottom) of each blog post, depending on the device you use, where you can easily submit your e-mail address (only) to be included in my mailing list.

      You Can Also Find Me On Social Media:

      Facebook page: The Grateful Girl Cooks!
      Pinterest:
      The Grateful Girl Cooks!
      Instagram:
      jbatthegratefulgirlcooks

      Author's signature

      Original recipe adapted from Lauren Miyashiro at: https://www.delish.com/cooking/recipe-ideas/recipes/a57269/banana-bread-coffee-cake-recipe/

      ↓↓ PRINTABLE RECIPE BELOW ↓↓

      0 from 0 votes
      Banana Streusel Coffeecake
      Prep Time
      15 mins
      Cook Time
      45 mins
      Total Time
      1 hr
       

      Banana Streusel Coffeecake is a yummy breakfast treat, featuring a banana sour cream coffeecake with a brown sugar cinnamon crumb topping.

      Category: Breakfast, Desssert, Snack
      Cuisine: American
      Keyword: banana streusel coffeecake
      Servings: 12 slices
      Calories Per Serving: 336 kcal
      Author: JB @ The Grateful Girl Cooks!
      Ingredients
      For Coffeecake Batter:
      • 2 cups all purpose flour
      • 1 teaspoon baking soda
      • ½ teaspoon salt
      • ½ cup butter melted (½ cup= 1 stick)
      • ¾ cup granulated sugar
      • ¼ cup brown sugar
      • 1 large egg + 1 egg YOLK
      • ¼ cup sour cream
      • 1 teaspoon vanilla extract
      • ¾ teaspoon instant coffee granules (finely ground) or espresso powder
      • 3 bananas (very ripe) mashed
      For Streusel Topping:
      • ½ cup all purpose flour
      • ½ cup brown sugar
      • ¼ teaspoon salt
      • ¼ teaspoon ground cinnamon
      • 4 Tablespoons cold butter cut in small cubes
      Instructions
      1. Preheat oven to 350°F.  Line a 9" cake pan with parchment paper, leaving some parchment paper hanging over the sides. You'll lift the coffeecake out of the pan later using excess paper as "handles". Lightly spray parchment paper with non-stick baking spray. Set pan aside.

      2. Make Batter: Place melted butter, sugar, brown sugar, an egg plus an egg yolk, sour cream and coffee powder in a large bowl. Mix together until combined and smooth. Add mashed bananas; stir until they're fully incorporated into the batter.

      3. In separate bowl, whisk together flour, baking soda and salt. Add this dry mix a little at a time to the wet batter. Stir only until ingredients have been combined. Don't overmix! Set bowl aside.

      4. Make streusel: Place flour, brown sugar, salt, cinnamon, and chunks of COLD butter in a medium bowl. Use a hand held pastry blender, two forks (or your fingers), to cut the butter in until the streusel crumbs are about the size of peas.

      5. Spread batter evenly in the parchment paper-lined cake pan. Sprinkle the streusel topping over the batter, coating the entire surface.

      6. Bake coffeecake at 350°F. for 45 minutes OR until a toothpick inserted into the top middle of the coffeecake comes out clean. Your time may vary a bit due to oven temperature variations. When done, remove pan from oven; transfer to a wire rack to cool in pan for 10-15 minutes, then carefully lift it out of the pan by using the parchment paper "handles". Place coffeecake back on wire rack; cool completely before removing parchment paper.

      7. Remove parchment paper from coffeecake sides and bottom. Cut the coffeecake into 12 wedges and serve. Enjoy!

      Nutrition Facts
      Banana Streusel Coffeecake
      Amount Per Serving (1 slice (1/12 of total))
      Calories 336 Calories from Fat 117
      % Daily Value*
      Fat 13g20%
      Saturated Fat 8g50%
      Trans Fat 0.5g
      Polyunsaturated Fat 1g
      Monounsaturated Fat 3g
      Cholesterol 48mg16%
      Sodium 342mg15%
      Potassium 174mg5%
      Carbohydrates 53g18%
      Fiber 1g4%
      Sugar 30g33%
      Protein 4g8%
      Vitamin A 410IU8%
      Vitamin C 3mg4%
      Calcium 30mg3%
      Iron 1mg6%
      * Percent Daily Values are based on a 2000 calorie diet.

      Here’s one more to pin on your Pinterest boards!Banana Streusel Coffeecake is a yummy breakfast treat, featuring a banana sour cream coffeecake with a brown sugar cinnamon crumb topping.