Caribbean Jerk Pork Chops

Caribbean Jerk Pork Chops are bone-in pork chops, marinated in a 2 ingredient sauce, then grilled on a traditional BBQ or a smoker grill! Such a SIMPLE, delicious dish!
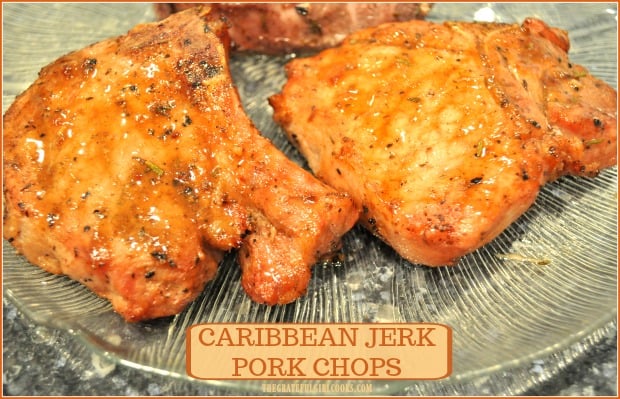
Caribbean Jerk Pork Chops are marinated in a 2 ingredient sauce, then grilled on a traditional BBQ or a smoker grill! Such a SIMPLE, delicious dish!

Are you looking for an EASY grilling recipe for bone-in pork chops? If so, then I hope you will continue reading! This recipe for Caribbean jerk pork chops is ridiculously simple to prepare, and the chops taste wonderful!

The prep time for these pork chops is only a couple minutes, then the chops are refrigerated for half an hour. After that, throw ’em on the grill or smoker, and enjoy the finished grilled pork chops. Anyone can make these flavorful pork chops, and I’m happy to show you just how very easy it is!

Scroll Down For A Printable Recipe Card At the Bottom Of The Page

Marinate The Caribbean Jerk Pork Chops Before Cooking

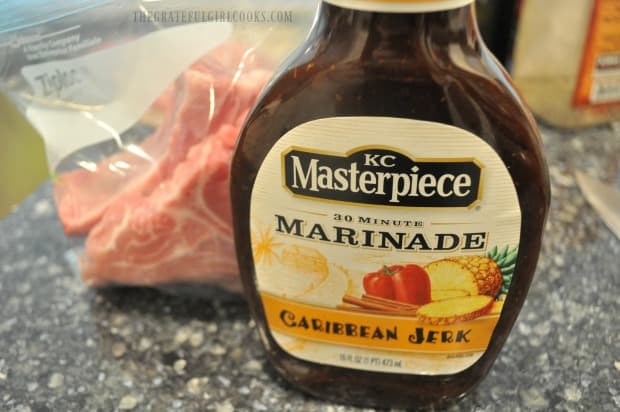
This is the marinade that we use to make these delicious pork chops. I am not sponsored by this company, but just want to show you what we used. We bought this sauce at our local grocery store, and it is also available on Amazon.

Mix the marinade with pineapple juice in a small container. Place two large bone-in pork chops in a resealable bag or container and pour in the marinade and pineapple juice blend.

This is the Caribbean-inspired marinade I used for the pork chops.

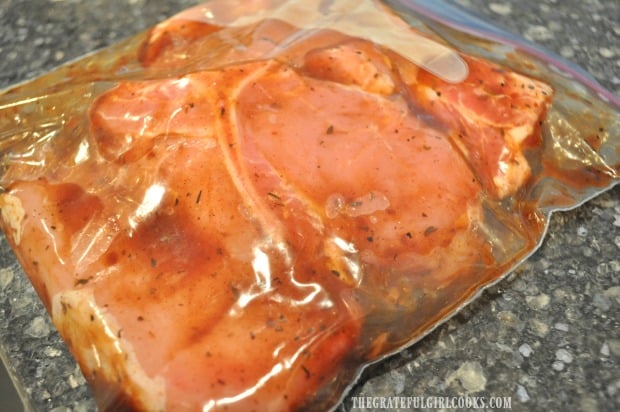
Seal the bag or container and then “smoosh” the bag around to distribute the marinade sauce, to fully cover the chops with sauce.

Once the pork chops are coated in sauce, place the container or bag in the refrigerator for 30 minutes, so they can absorb lots of flavor!

The bone-in pork chops marinate in the refrigerator for at least 30 minutes before cooking.

When ready to grill the pork chops, remove them from the refrigerator. Discard the excess sauce that had the raw pork in it.

Pour additional “fresh” Caribbean jerk sauce (without the pineapple juice) in a small container, so you can baste the chops with it, while they cook on the grill.

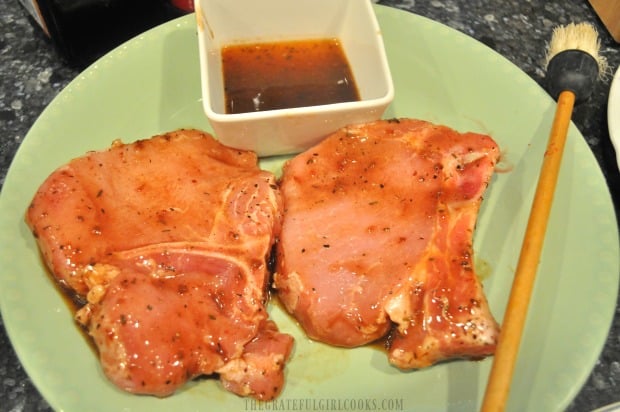
Marinated Caribbean jerk pork chops (and extra sauce) are ready to put on the grill.

We Had Quite The Grilling “Traegerpalooza”!

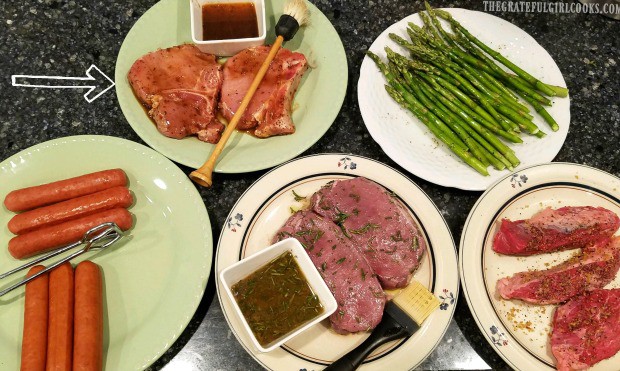
The same evening we enjoyed these delicious Caribbean jerk pork chops, we also grilled other items alongside them on our Traeger grill.

In the photo below you can see we also had grilled asparagus, brats and hot dogs, tri-tip steaks, and another batch of boneless pork chops, made with a different sauce. We also roasted a whole turkey breast on the Traeger (not pictured). As you can see, the Caribbean jerk pork chops were in great company!

These are some of the foods we grilled along with the pork chops.

Directions For Cooking Caribbean Jerk Pork Chops On A Traeger Grill

If using a Traeger smoker grill to cook the pork chops, follow manufacturer instructions to get the fire ignited. Once ignited and smoking, set the temperature control to 450° F. Close the cover, and let the grill preheat for 10-15 minutes.

Once the grill is preheated and at temperature, place the marinated pork chops directly on the grill grate. Cook the Caribbean jerk pork chops for about 30 minutes, or until the internal temperature reaches between 145-160° F.

Continue to baste with sauce while cooking. It is not necessary to turn the chops, because of the indirect heat feature (convection) present on a Traeger grill. Remove the pork chops once done, and let them “rest” for a few minutes to let the juices redistribute inside the meat, before serving.

Cooking The Pork Chops On A Traditional BBQ?

If you will be cooking the Caribbean pork chops on a traditional BBQ, place the chops directly on the grill grate. Continue to baste with sauce while cooking, turning as necessary during the cooking time.

The cooking time might vary slightly due to cooking them over a direct flame, so be sure to check the internal temperature of the pork chops. They are safely “done” when they reach an internal temperature of 145-160° F. Remove the pork chops once done, and let them rest for a few minutes to let the juices redistribute inside the meat, before serving.

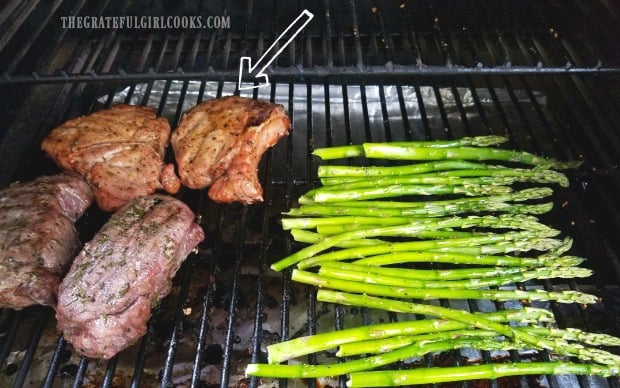
We grilled the pork chops on our Traeger grill, along with other items.

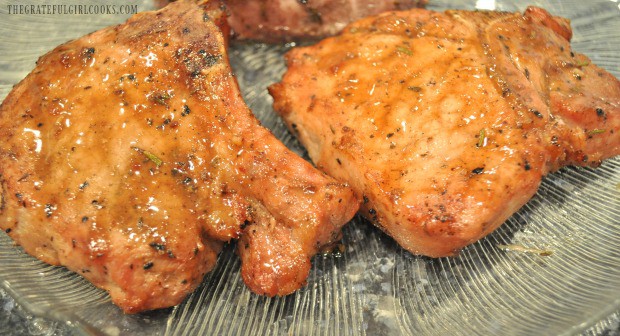
Here are the finished Traeger grilled Caribbean jerk pork chops! They are full of flavor, and are enhanced by the wood pellet smoker feature of the grill! We used mesquite wood pellets in our Traeger. NOTE: If cooking these on a traditional “over the flame” BBQ, the chops will be a lot browner and crispy on the outside.

The Caribbean jerk pork chops have come off the grill, and are ready to eat!

I really hope you will give this very simple recipe for Caribbean jerk pork chops a try! We really enjoyed them, and trust you will, too! Have a wonderful day!

Looking For More PORK CHOP Recipes?

You can find all of my recipes (over 700!) in the Recipe Index, located at the top of the page. A few of the pork chop recipes you might want to check out include:

Interested In More Recipes?

Thank you for visiting this website. I appreciate you using some of your valuable time to do soIf you’re interested, I publish a newsletter 2 times per month (1st and 15th) with all the latest recipes, and other fun info. I would be honored to have you join our growing list of subscribers, so you never miss a great recipe!

There is a Newsletter subscription box on the top right side (or bottom) of each blog post, depending on the device you use, where you can easily submit your e-mail address (only) to be included in my mailing list.

You Can Also Find Me On Social Media:
Facebook page: The Grateful Girl Cooks!
Pinterest: The Grateful Girl Cooks!
Instagram: jbatthegratefulgirlcooks
Author's signature

0 from 0 votes
Caribbean Jerk Pork Chops
Prep Time
3 mins
Cook Time
30 mins
Marinating
30 mins
Total Time
1 hr 3 mins
 
Caribbean Jerk Pork Chops are marinated in a 2 ingredient sauce, then grilled on a traditional BBQ or a smoker grill! Such a SIMPLE, delicious dish!
Category: Main Course
Cuisine: Caribbean
Keyword: Caribbean Jerk Pork Chops
Servings: 2
Calories Per Serving: 362 kcal
Author: JB @ The Grateful Girl Cooks!
Ingredients
  • 2 large pork chops (bone-in)
  • 1/2 cup KC Masterpiece Caribbean Jerk Marinade
  • 2 Tablespoons pineapple juice
  • Additional marinade for basting meat while grilling , as needed
Instructions
  1. Mix the marinade with pineapple juice in a small container. Place two large bone-in pork chops in a resealable bag or container and pour in the marinade and the pineapple juice blend.
  2. Seal the bag or container and then "smoosh" the bag around to distribute marinade sauce, to fully cover chops with sauce. Once the chops are coated in sauce, place container or bag in refrigerator for 30 minutes, so they can absorb lots of flavor!

If Cooking On A Traeger Or Smoker Grill:
  1. If using a Traeger or smoker grill to cook the pork chops, follow manufacturer instructions to get the fire ignited. Once ignited and smoking, set the temperature control to 450° F. Close the cover, and let the grill preheat for 10-15 minutes. Once the grill is preheated and at temperature, place the marinated pork chops directly on the grill grate. Cook the Caribbean jerk pork chops for about 30 minutes, or until the internal temperature reaches 145-160° F. Continue to baste with sauce while cooking. It is not necessary to turn the chops. Remove the pork chops once done, and let them "rest" for a few minutes to let the juices redistribute inside the meat, before serving. Enjoy!

If Cooking On Traditional BBQ Grill
  1. Once fire (or briquettes are ready) place the chops directly on the grill grate. Continue to baste with sauce while cooking, turning as necessary during the cooking time. The cooking time might vary slightly, due to cooking them over a direct flame, so be sure to check the internal temperature of the pork chops. They are safely "done" when they reach an internal temperature of 145-160° F. Remove the pork chops once done, and let them rest for a few minutes to let the juices redistribute inside the meat, before serving. Enjoy!
Nutrition Facts
Caribbean Jerk Pork Chops
Amount Per Serving (1 chop)
Calories 362 Calories from Fat 135
% Daily Value*
Fat 15g23%
Saturated Fat 5g31%
Cholesterol 116mg39%
Sodium 93mg4%
Potassium 600mg17%
Carbohydrates 1g0%
Sugar 1g1%
Protein 35g70%
Vitamin C 1.5mg2%
Calcium 32mg3%
Iron 1.1mg6%
* Percent Daily Values are based on a 2000 calorie diet.

Here’s one more to pin on your Pinterest boards!Caribbean Jerk Pork Chops are marinated in a 2 ingredient sauce, then grilled on a traditional BBQ or a smoker grill! Such a SIMPLE, delicious dish!

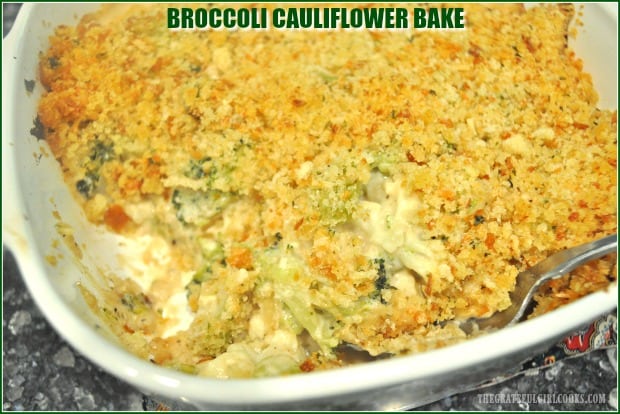
Broccoli Cauliflower Bake

Broccoli Cauliflower Bake is a yummy veggie side dish with vegetables baked in a creamy Parmesan white sauce, topped with Parmesan garlic herb crumbs!

I don’t know about you, but I am always looking for new recipes for vegetable dishes. Most of the time I steam, bake or pan-sear fresh vegetables just as they are, with a minimal amount of spices to add flavor.

Every now and then I want something different than “plain” vegetables to serve. This delicious broccoli cauliflower bake fits that bill. It seems more like a vegetable “casserole”, than a side dish. Fresh (or frozen vegetables are cooked in a  simple white sauce, and baked with a seasoned bread crumb topping. EASY PEASY! Here’s how to make this dish:

Scroll Down For A Printable Recipe Card At The Bottom Of The Page

Make The Bread Crumb Topping

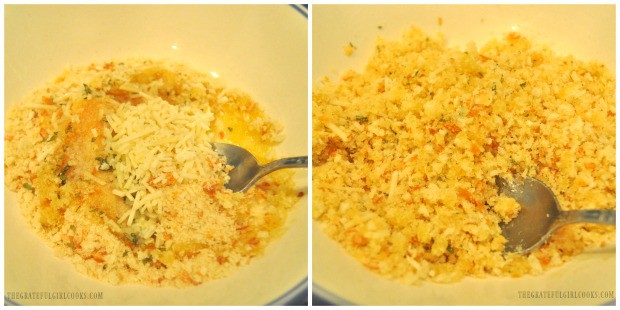
The bread crumb topping for the dish is very easy to make. Place bread crumbs, melted butter, two Tablespoons of grated Parmesan cheese and the three spices (garlic powder, onion powder, and dried parsley) in a small bowl, and stir to combine. Set this mixture aside.

NOTE: There is a product from Progresso called “herb & garlic bread crumbs”. If you want to use those, simply omit the spices from the topping mix. You will still need to add the Parmesan cheese and melted butter.

A simple bread crumb mixture is made to top the broccoli cauliflower bake.

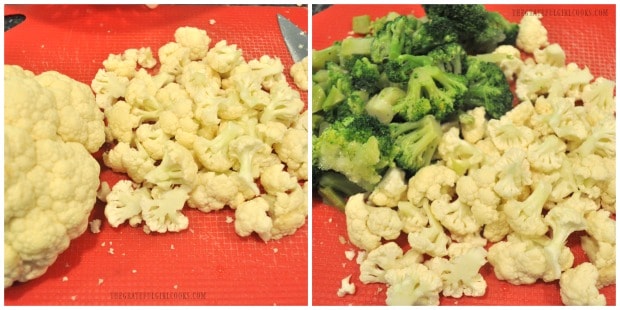
Cut the fresh (or frozen, but thawed) cauliflower and broccoli into small bite-sized florets. I used fresh cauliflower and frozen (but thawed) broccoli for this dish.

Cauliflower and broccoli are cut into bite sized florets for the veggie dish.

Prepare The Creamy Sauce For The Broccoli Cauliflower Bake

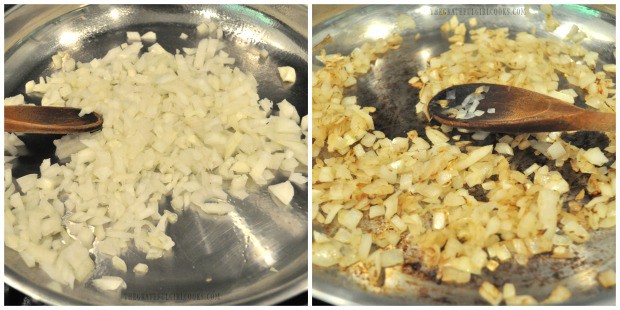
Spray a very large skillet with non-stick baking spray. Add the chopped onions to the skillet and heat on medium heat until they are softened and golden brown. Stir often while they cook.

A chopped onion is cooked and browned to add to the sauce for the veggie dish.

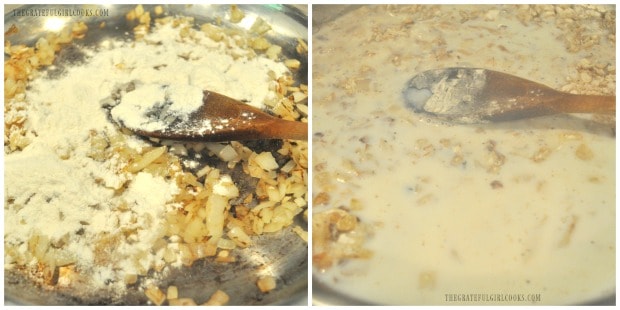
Stir the flour into the onions, and then add the milk to the skillet. Give it a good stir, and you will see the sauce beginning to thicken fairly quickly as it cooks.

Flour is added to cooked onions, then milk, to make sauce for the broccoli cauliflower bake.

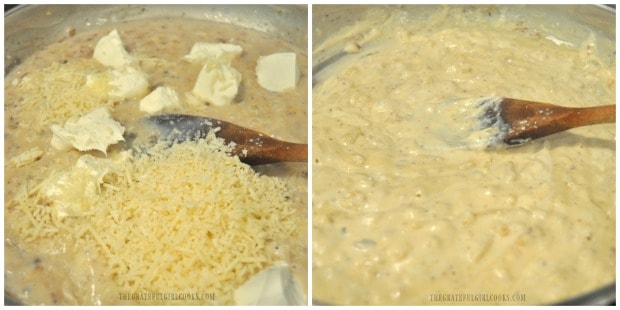
Once the sauce has begun to noticeably thicken, add the remaining grated Parmesan cheese and the cream cheese. If you cut the cream cheese into chunks it will melt much faster! Continue to cook, stirring often, until all of the cream cheese has melted.

Cream cheese and Parmesan cheese is added to the sauce for the broccoli cauliflower bake..

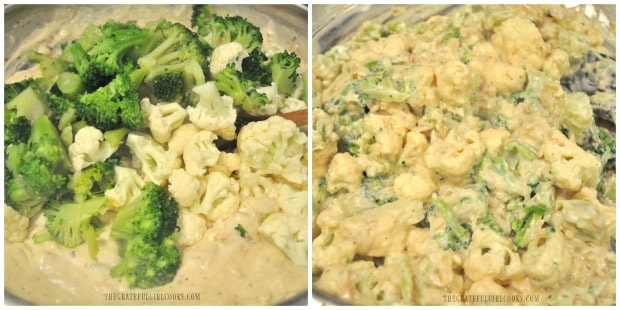
Add the broccoli and cauliflower florets to the sauce, and stir to fully cover the veggies with the sauce.

TIP: At this point, I recommend taste-testing the sauce. Season it with a little garlic powder, salt and pepper, to suit your personal taste buds!

The broccoli and cauliflower florets are added to the sauce, and stirred to combine.

Finish Preparing The Broccoli Cauliflower Bake

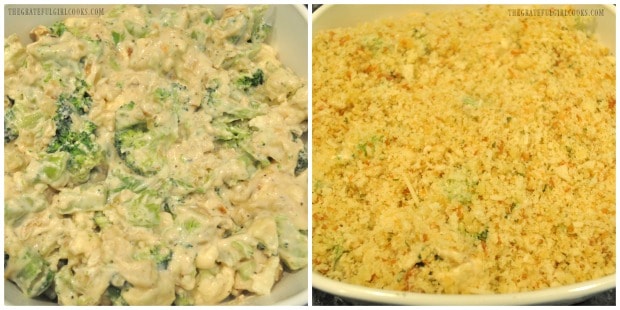
Spray a 2 quart baking dish with non-stick spray. Pour the veggies and sauce into the dish.  Top the surface of the broccoli cauliflower bake with the bread crumb mixture. It’s looking pretty good, right? Now, all you have to do is BAKE it!

The veggies and sauce are put in baking dish, and topped with bread crumb mixture.

Bake in a preheated 350° F oven for 45 minutes. Once the broccoli cauliflower bake is done, the top will be nice and golden brown, and some of the sauce should be bubbling around the edges.

Transfer from the oven to a wire rack, and let this steaming hot veggie dish cool for just a couple minutes before serving.

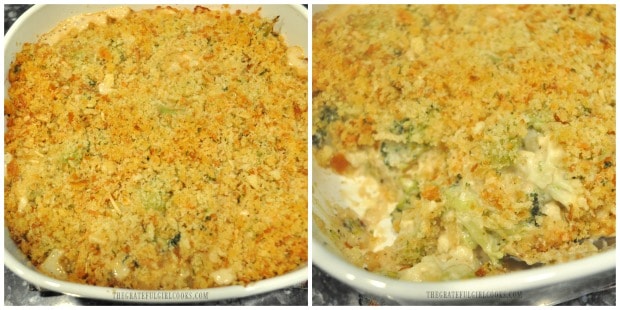
The broccoli cauliflower bake is cooked, and then served.

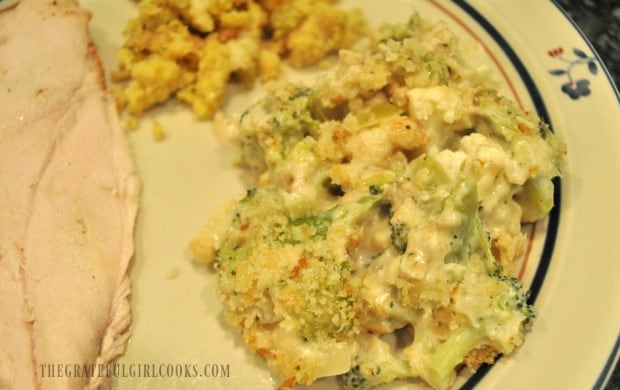
We enjoyed our broccoli cauliflower bake as a side dish accompanying a nice juicy slice of Traeger roasted turkey breast. YUM!

A serving of the veggie dish, on plate with slice of roast turkey.

We really enjoyed this EASY broccoli cauliflower bake, and hope you will consider trying this delicious side dish! Have a wonderful day, and may God bless you!

Looking For More VEGETABLE SIDE DISH Recipes?

You can find all of my recipes in the Recipe Index, located at the top of the page.  There are a number of veggie side dishes you might enjoy, including:

Interested In More Recipes?

Thank you for visiting this website. I appreciate you using some of your valuable time to do soIf you’re interested, I publish a newsletter 2 times per month (1st and 15th) with all the latest recipes, and other fun info. I would be honored to have you join our growing list of subscribers, so you never miss a great recipe!

There is a Newsletter subscription box on the top right side (or bottom) of each blog post, depending on the device you use, where you can easily submit your e-mail address (only) to be included in my mailing list.

You Can Also Find Me On Social Media:
Facebook page: The Grateful Girl Cooks!
Pinterest: The Grateful Girl Cooks!
Instagram: jbatthegratefulgirlcooks

Author's signature

Original Recipe Source: https://bitzngiggles.com/broccoli-cauliflower-parmesan-bake/

0 from 0 votes
Broccoli Cauliflower Bake
Prep Time
15 mins
Cook Time
45 mins
Total Time
1 hr
 
Broccoli Cauliflower Bake is a yummy veggie side dish with vegetables baked in a creamy Parmesan white sauce, topped with Parmesan garlic herb crumbs!
Category: Side Dish, Vegetable Dish
Cuisine: American
Keyword: broccoli cauliflower bake
Servings: 8
Calories Per Serving: 175 kcal
Author: JB @ The Grateful Girl Cooks!
Ingredients
For Bread Crumb Topping: (can substitute Progresso herb & garlic bread crumbs-but omit spices)
  • 1/2 cup bread crumbs
  • 2 Tablespoons melted butter
  • 2 Tablespoons grated Parmesan cheese
  • 1/4 teaspoon garlic powder
  • 1/4 teaspoon onion powder
  • 1/4 teaspoon dried parsley flakes
For Rest of Dish:
  • 16 ounces fresh broccoli florets (or frozen, but thawed) , cut in bite sized pieces
  • 16 ounces fresh cauliflower florets (or frozen, but thawed) , cut in bite sized pieces
  • 1 large yellow onion , chopped
  • garlic powder, salt, pepper (to taste)
  • 2 Tablespoons all purpose flour
  • cups milk
  • 1/3 cup grated Parmesan cheese
  • 4 ounces cream cheese , room temperature
Instructions
  1. Preheat oven to 350° F.

  2. Place bread crumbs, melted butter, two Tablespoons Parmesan cheese, garlic powder, onion powder and parsley in a small bowl, and stir to combine. Set aside.

  3. Spray a large skillet with non-stick spray. Add chopped onions and cook on medium heat until softened and golden brown, stirring often. Stir flour into onions, and then add milk to skillet. Give it a good stir; the sauce will begin to thicken as it cooks. Once sauce begins to thicken, add remaining grated Parmesan cheese and cream cheese (cut cream cheese into chunks- it will melt faster). Continue to cook, stirring often, until all the cream cheese has melted.

  4. Add broccoli and cauliflower florets to the sauce; stir to fully coat veggies with sauce. TIP: At this point, I recommend taste-testing the sauce. Season with a little garlic powder, salt and pepper, to suit your personal taste buds!

  5. Spray a 2 quart baking dish with non-stick spray. Pour veggies and sauce into dish.  Top  the dish with the  reserved bread crumb mixture. Bake at 350° F for 45 minutes, until top is golden brown, and sauce is bubbling around the edges. Let cool for a couple minutes, then serve and enjoy!

Nutrition Facts
Broccoli Cauliflower Bake
Amount Per Serving (1 (1/8th of total))
Calories 175 Calories from Fat 72
% Daily Value*
Fat 8g12%
Saturated Fat 4g25%
Cholesterol 23mg8%
Sodium 276mg12%
Potassium 479mg14%
Carbohydrates 17g6%
Fiber 3g13%
Sugar 6g7%
Protein 8g16%
Vitamin A 630IU13%
Vitamin C 79.3mg96%
Calcium 180mg18%
Iron 1.2mg7%
* Percent Daily Values are based on a 2000 calorie diet.

Here’s one more to pin on your Pinterest boards!Broccoli Cauliflower Bake is a yummy veggie side dish with vegetables baked in a creamy Parmesan white sauce, topped with Parmesan garlic herb crumbs!

Cinnamon Roll Crescents

Cinnamon roll crescents are quick and easy to make! Crescent roll dough is coated in a brown sugar/cinnamon mixture, then rolled, baked and drizzled with glaze!
Cinnamon roll crescents are quick and easy to make! Crescent roll dough is coated in brown sugar/cinnamon, then rolled, baked and drizzled with glaze!

I found a recipe on Pinterest that sounded like a totally quick and easy way to have a “cinnamon roll” to munch on with breakfast, so I decided to try it! There was a can of crescent roll dough in the refrigerator begging to be used, so out it came, for this delicious recipe!

We LOVE my homemade cinnamon rolls, but they take quite a while to prepare because of time necessary to let the homemade dough rise, etc. When you want the taste of a cinnamon roll, but without the fuss and effort, these cute little cinnamon roll crescents are the way to go!

We were having scrambled eggs and some bacon that I cooked in our oven, and I wanted something quick, easy, and yummy to serve with it. This was the perfect accompaniment, and we loved these cute little cinnamon roll crescents! They only take a couple minutes to prepare, and then they bake for only 9-12 minutes!

Scroll Down For A Printable Recipe Card At The Bottom Of The Page

How To Make Cinnamon Roll Crescents

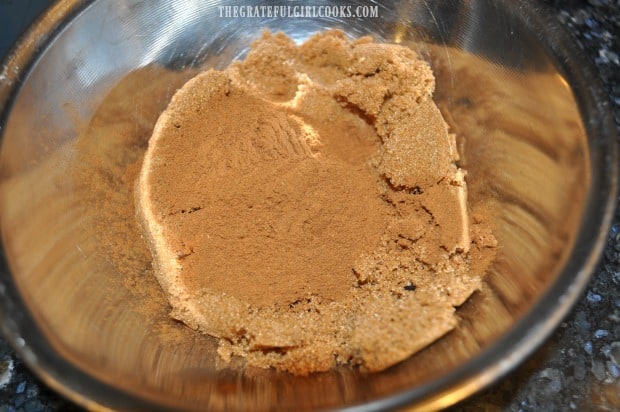
The first thing you need to do is mix up the cinnamon roll filling! Easy! Simply mix together some brown sugar and cinnamon in a small bowl, until combined. DONE!

Brown sugar and cinnamon are mixed together for the cinnamon roll crescents filling.

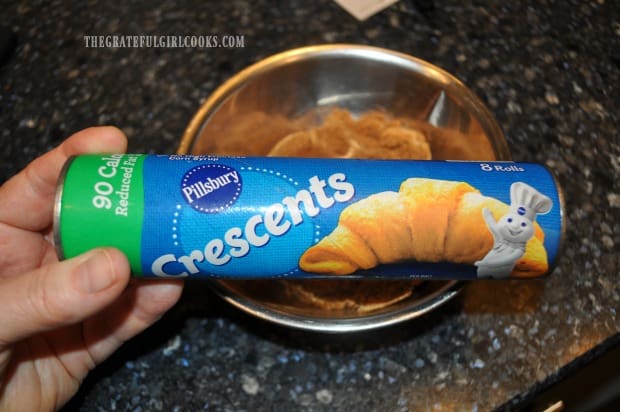
Grab a can of refrigerated crescent roll dough out of the fridge. I used this kind, which has the dough for 8 crescent rolls in it.

Refrigerated crescent roll dough is used to make this breakfast treat quick and easy!

Cover The Crescent Roll Triangles With Filling Mixture

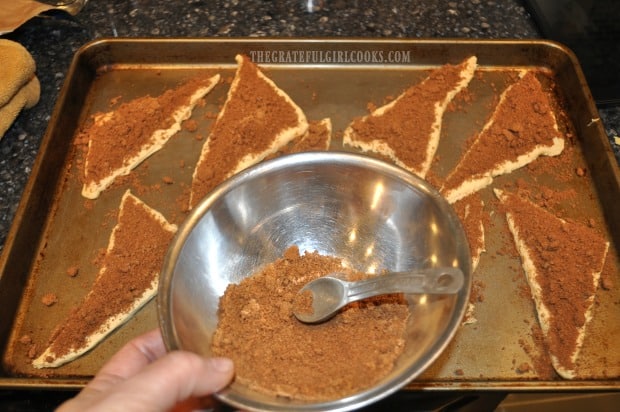
Separate each of the crescent rolls at the perforations, then lay them on a 13 x 9 inch ungreased baking sheet, about an inch apart. NOTE: You can also make them and roll them, THEN put them on the baking sheet, if desired.

Sprinkle the entire surface of each dough triangle with the filling mixture. Yes… it will be a bit messy, and yes, it will fall all over the baking sheet. No worries. Just scoop up as much as you can and dump it right back on top! Gently press down some of the filling onto the dough.

NOTE: You will most likely NOT use all of the mix. You can see in the photo below how much I had left AFTER completely covering the dough! Store the extras for next time!

Dough is separated into 8 portions and covered with brown sugar/cinnamon filling.

Now roll up the cinnamon roll crescents. If you can, roll each one up, beginning at the short side, and roll toward the tip of the triangle, but no worries! You can see in the photo below how mine weren’t that “pretty” or even moderately fashionable. This particular can of dough was pretty decimated when I took it out of the can. Trust me… it doesn’t matter!

Simply roll them up and tuck the end point under. Yes… again, some of the filling will fall out as you roll. I just scooped up what I could, and sprinkled it right back, on top! I used a pastry brush to clean up and remove the extra filling on the pan.

Dough is rolled up and sprinkled with extra filling mixture on top.

Bake The Cinnamon Roll Crescents

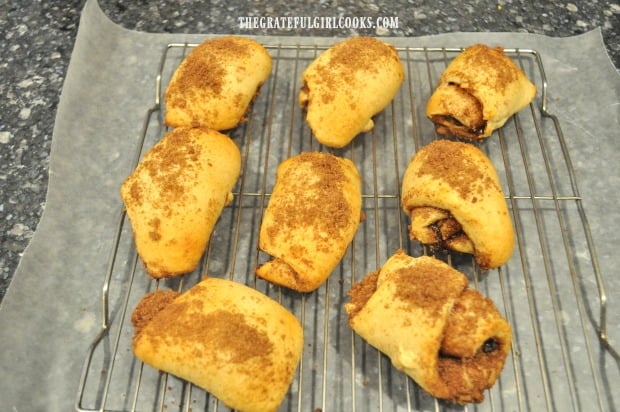
Bake the cinnamon roll crescents in a preheated 350° F oven, for between 9-12 minutes. Since oven temps vary greatly, be sure to check on them around 8-9 minutes.

When done, the cinnamon roll crescents will be golden brown on top (and will sure smell good!). Transfer the crescents to a wire rack, that is positioned on top of wax or parchment paper, and let them cool. The paper underneath will catch the drips when you glaze the crescents later.

Cinnamon roll crescents are baked until golden brown, then transferred to wire rack to cool.

Glazing The Cinnamon Roll Crescents

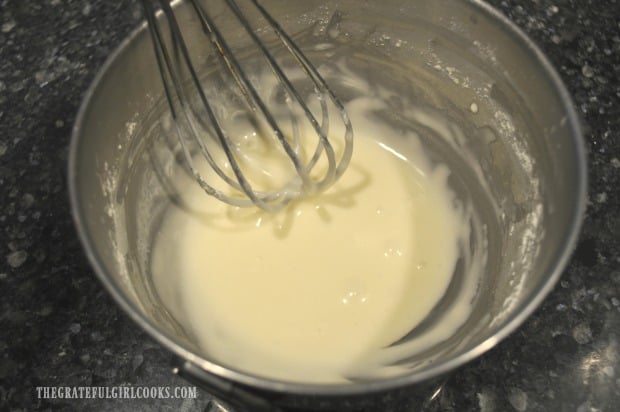
While the cinnamon roll crescents cool, mix together the glaze. Whisk together powdered sugar and heavy cream (or milk) in a small bowl, it reaches your desired consistency.

A simple glaze is mixed to drizzle onto the baked cinnamon roll crescents once done.

Lightly drizzle the glaze over the tops of the cinnamon roll crescents once they have cooled down a bit. The wax (or parchment) paper placed under the wire rack will make your cleanup a lot easier!

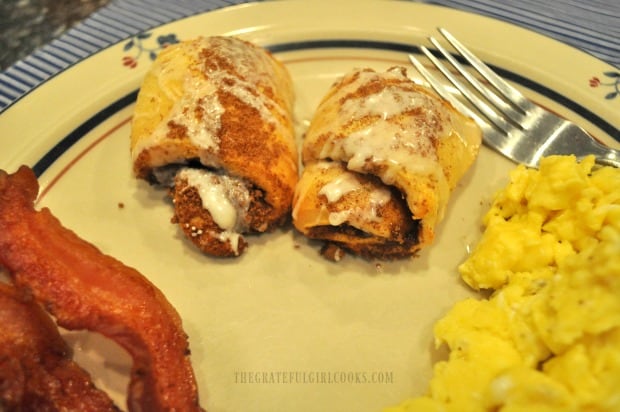
The glaze will firm up very quickly, and then the cinnamon roll crescents are ready to serve! Aren’t they CUTE? You can see the glaze on top, and all that cinnamon and brown sugar filling in every bit of these decadent breakfast treats!

The cinnamon roll crescents were served along with scrambled eggs and bacon.

I truly hope you will consider trying these super easy and quick cinnamon roll crescents. They are absolutely delicious, and I am confident you will enjoy them as much as we did! Have a wonderful day, and may God bless you.

Looking For More BREAKFAST Recipes?

You can find all of my recipes in the Recipe Index, located at the top of the page. A few other breakfast recipes you might be interested in trying include:

Interested In More Recipes?

Thank you for visiting this website. I appreciate you using some of your valuable time to do soIf you’re interested, I publish a newsletter 2 times per month (1st and 15th) with all the latest recipes, and other fun info. I would be honored to have you join our growing list of subscribers, so you never miss a great recipe!

There is a Newsletter subscription box on the top right side (or bottom) of each blog post, depending on the device you use, where you can easily submit your e-mail address (only) to be included in my mailing list.

You Can Also Find Me On Social Media:
Facebook page: The Grateful Girl Cooks!
Pinterest: The Grateful Girl Cooks!
Instagram: jbatthegratefulgirlcooks

Author's signature

Original recipe source: http://www.sprinklesomesugar.com/cinnamon-roll-crescents/

↓↓ PRINTABLE RECIPE BELOW ↓↓

0 from 0 votes
Cinnamon Roll Crescents
Prep Time
10 mins
Cook Time
9 mins
Total Time
19 mins
 
Cinnamon roll crescents are quick and easy to make! Crescent roll dough is coated in a brown sugar/cinnamon mixture, then rolled, baked and drizzled with glaze!
Category: Breakfast, Brunch
Cuisine: American
Keyword: cinnamon roll crescents
Servings: 8 crescents
Calories Per Serving: 186 kcal
Author: JB @ The Grateful Girl Cooks!
Ingredients
  • 8 ounces refrigerated crescent roll dough (1 can)
  • 1/2 cup brown sugar (light or dark)
  • 3 teaspoons cinnamon
For Glaze:
  • 1/2 cup powdered sugar (confectioner's sugar)
  • 2-3 Tablespoons heavy cream or milk
Instructions
  1. Preheat oven to 375° F. 

  2. Separate the crescent rolls at the perforations, then lay them on a 13 x 9 inch ungreased baking sheet, about an inch apart. Sprinkle entire surface of each dough triangle with the filling mixture. Yes... it will be messy. Scoop up as much as you can and dump it right back on top! Gently press down the filling onto the dough. Roll up crescents and tuck the end point under. Some of the filling will fall out as you roll. Scoop up what you can, and sprinkle it back, on top! NOTE: You will most likely NOT use all of the mix.  Store extra filling for next time! 

  3. Bake at 350° F, between 9-12 minutes. Since oven temps vary, check on them around 8-9 minutes. When done, crescents will be golden brown. Remove from oven and transfer to a wire rack, positioned on top of wax or parchment paper; let them cool for a few minutes.

  4. While crescents cool, make the glaze. Whisk together powdered sugar and heavy cream (or milk) in a small bowl, until it reaches desired consistency. Lightly drizzle glaze over the top of the crescents once they have cooled slightly. The paper placed under the wire rack will make cleanup a lot easier! The glaze firms up quickly, and then cinnamon roll crescents are ready to serve! Enjoy!

Nutrition Facts
Cinnamon Roll Crescents
Amount Per Serving (1 g)
Calories 186 Calories from Fat 63
% Daily Value*
Fat 7g11%
Saturated Fat 3g19%
Cholesterol 5mg2%
Sodium 228mg10%
Potassium 18mg1%
Carbohydrates 33g11%
Sugar 23g26%
Protein 1g2%
Vitamin A 55IU1%
Calcium 21mg2%
Iron 0.5mg3%
* Percent Daily Values are based on a 2000 calorie diet.

Here’s one more to pin on your Pinterest boards!Cinnamon roll crescents are quick and easy to make! Crescent roll dough is coated in brown sugar/cinnamon, then rolled, baked and drizzled with glaze!

Traeger Roasted Turkey Breast

Traeger roasted turkey breast is an easy way to cook a delicious, well seasoned turkey breast on the smoker/grill, without heating up the kitchen!

Last summer we got a Traeger grill. I had saved and saved my money for a while, and purchased it for my husband’s birthday (and so I could use it for my blog, too!) We have enjoyed experimenting and learning how to grill and smoke meats, veggies and desserts on our grill!

A couple of weeks ago we had what we fondly call a “Traegerpalooza”! We cooked this Traeger roasted turkey breast, grilled asparagus with lemon and Parmesan, 2 types of pork chops, turkey sausages, tri-tip, and brats (sausages). It was so good (and I didn’t have to cook dinner for almost a week)! Ha Ha!

Scroll Down For A Printable Recipe Card At The Bottom Of The Page

How To Make A Traeger Roasted Turkey Breast

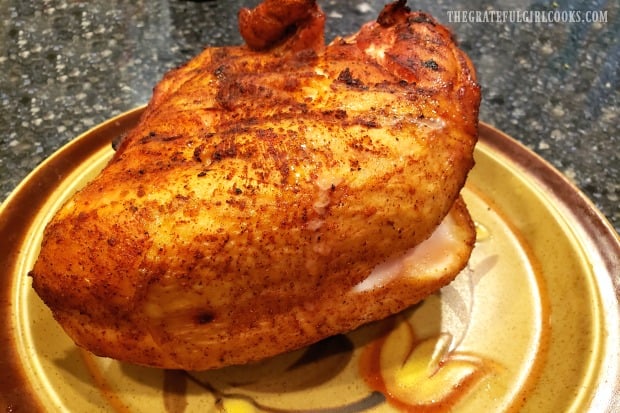
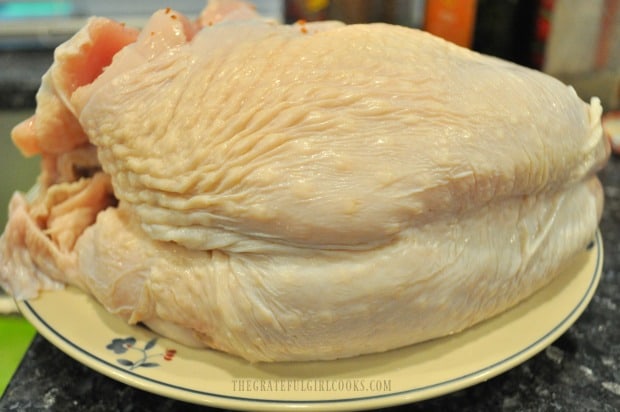
The roasted turkey breast turned out fantastic, so I wanted to share what we did with you today! We started out with an almost 5 pound turkey breast (bone in). The first thing I did was to rinse the turkey, and then pat it dry with paper towels.

A whole turkey breast (bone-in) is rinsed, then patted dry before adding seasonings.

Make The Spice Rub Mix In Under 5 MInutes!

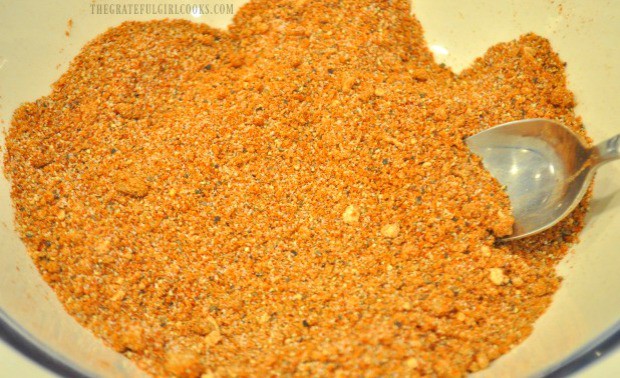
A dry rub spice mix was quickly mixed up.  It’s soooo easy to pull together, and I have used this same flavorful mix before on smoked pork loin roast , pork butt, and whole chickens that we have slow roasted on the Traeger.

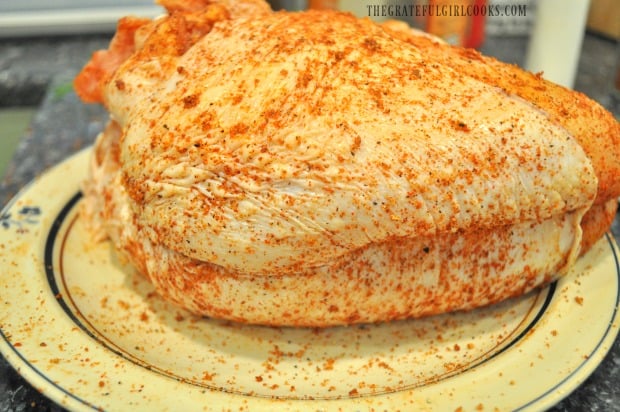
The spice mix is made with brown sugar, paprika, garlic powder, onion powder, cayenne pepper, cumin, salt, pepper, and dry mustard. It is a fantastic spice rub, and you will have some leftover for your next grilling project, too! The turkey breast is generously sprinkled with the spice rub on all sides. I rubbed the spices into the turkey, and even rubbed some of the mix inside the turkey breast.

A dry rub spice mix is made to season the meat with, before cooking.

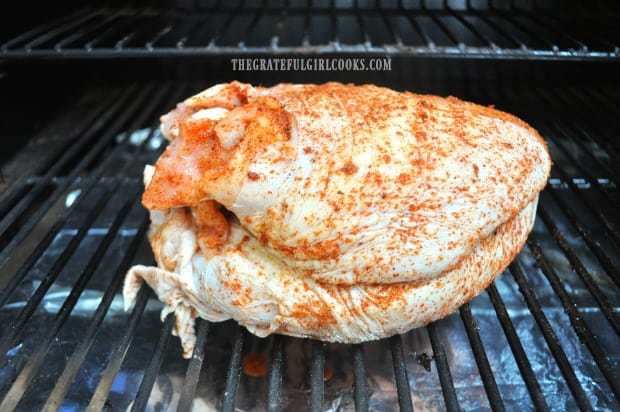
Dry rub spices are applied to the entire piece of meat, before putting it on the grill.

Cooking The Traeger Roasted Turkey Breast

Turn the Traeger to the SMOKE setting with the lid open. After about 4-5 minutes, you should see lots of smoke coming from the grill, meaning the pellets have ignited. Turn the temperature to 325° F and close the grill cover. Let the Traeger preheat for about 15 minutes. TIP: Prepare the spice rub and the turkey WHILE the Traeger is preheating, to save time!

Once the grill has preheated, place the seasoned turkey breast directly on the grill grate. Close the cover, and let the turkey breast cook for approximately 1 hour and 45 minutes. Cooking times will vary slightly because of varying weights of turkey breasts used. Check the internal temperature occasionally as it cooks, to ensure you don’t overcook or undercook the turkey breast.

The Traeger roasted turkey breast is placed directly on the grill grate to cook.

How Will I Know When The Traeger Roasted Turkey Breast Is Done?

Continue to check the internal temperature using a probe inserted into the thickest part of the breast. When the turkey breast has reached an internal temperature of 165° F, pull it off the grill. Transfer the Traeger roasted turkey breast to a cutting board, and let it “rest” for about 15 minutes before slicing. This “resting time” helps the juices redistribute inside the meat.

The turkey breast rests after cooking, and before slicing.

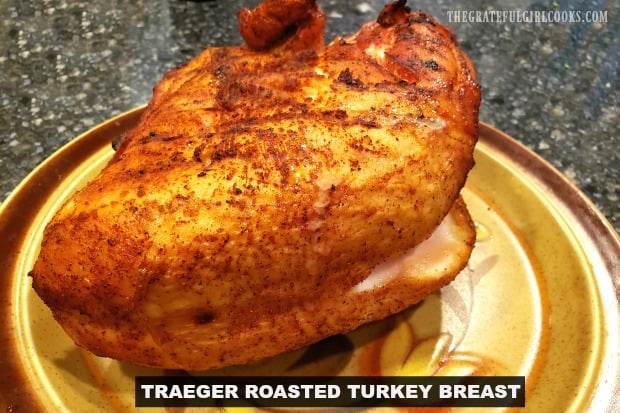
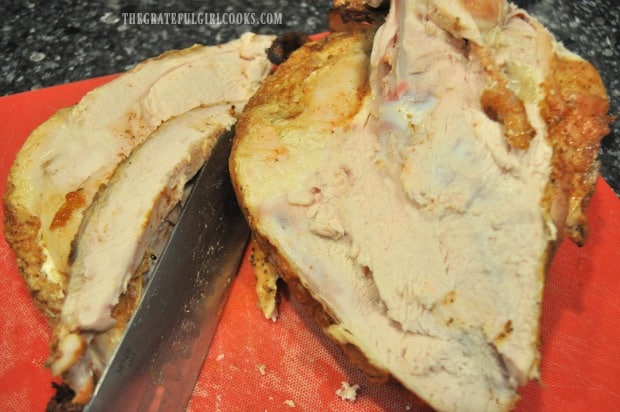
Once the turkey breast has “rested”, it is ready to slice and eat! The turkey breast is juicy, and full of flavor, thanks in part to the dry rub spices, and the long smoking time! We LOVE having perfectly cooked slices of roasted turkey breast for quick dinners and sandwiches. It tastes so good! I froze half of the turkey breast to save for another time, too!

The roasted turkey is juicy, and slices well, which is perfect for sandwiches!

Hope you enjoy this recipe for Traeger roasted turkey breast. It’s awesome to be able to smoke a turkey breast and then have it around for easy dinners or a great tasting turkey sandwich throughout the week! If you are considering cooking an entire turkey on a pellet grill or smoker, be sure to check out my delicious recipe for Smoked Whole Turkey! Have a GREAT day!

Looking For More TRAEGER Recipes?

You can find ALL my recipes in the Recipe Index, located at the top of the page. I have some other delicious Traeger recipes you might be interested in, including:

Interested In More Recipes?

Thank you for visiting this website. I appreciate you using some of your valuable time to do soIf you’re interested, I publish a newsletter 2 times per month (1st and 15th) with all the latest recipes, and other fun info. I would be honored to have you join our growing list of subscribers, so you never miss a great recipe!

There is a Newsletter subscription box on the top right side (or bottom) of each blog post, depending on the device you use, where you can easily submit your e-mail address (only) to be included in my mailing list.

You Can Also Find Me On Social Media:
Facebook page: The Grateful Girl Cooks!
Pinterest: The Grateful Girl Cooks!
Instagram: jbatthegratefulgirlcooks

Author's signature

Recipe Adapted From Traeger Grill recipe booklet (that came with grill)

↓↓ PRINTABLE RECIPE BELOW ↓↓

0 from 0 votes
Traeger Roasted Turkey Breast
Prep Time
15 mins
Cook Time
1 hr 45 mins
Total Time
2 hrs
 
Traeger roasted turkey breast is an easy way to cook a delicious, well seasoned turkey breast on the smoker/grill, without heating up the kitchen!
Category: Entree, Grill
Cuisine: American
Keyword: Traeger roasted turkey breast
Servings: 10
Calories Per Serving: 251 kcal
Author: JB @ The Grateful Girl Cooks!
Ingredients
  • 4.5 pound turkey breast (approx,) , bone in, skin on
For Dry Rub Spice Mix (this will make MORE than you will use- enough for several uses)
  • 1/3 cup brown sugar
  • 1/2 cup paprika
  • 1/4 cup garlic powder
  • 1/4 cup salt
  • 2 Tablespoons pepper
  • 2 Tablespoons onion powder
  • 1 Tablespoon cayenne pepper
  • 1 Tablespoon ground cumin
  • 1 Tablespoon dry ground mustard
Instructions
  1. Rinse the turkey, and pat it dry with paper towels.

  2. Mix ingredients for spice rub in a small bowl. Generously sprinkle turkey breast with spice rub on all sides (and inside, if desired). Store extra spice rub mix in covered container for additional uses.

  3. Turn the Traeger to SMOKE setting with the lid open. After about 4-5 minutes, you should see lots of smoke coming from the grill, meaning the pellets have ignited. Turn temperature to 325° F and close grill cover. Let the Traeger preheat for about 15 minutes. Once preheated, place seasoned turkey breast directly on grill grate. Close the cover, and let it cook for approx. 1 hour and 45 minutes. Cooking times will vary slightly because of differing weights of turkey breasts used. Continue to check the internal temperature using a probe inserted into the thickest part of the breast, to ensure you don't overcook or undercook the turkey breast.

  4. When the turkey breast has reached an internal temperature of 165° F, pull it off the grill. Transfer turkey breast to a cutting board, and let it "rest" for about 15 minutes before slicing. This "resting time" helps the juices redistribute inside the meat. Once turkey has "rested", slice, and enjoy!

Recipe Notes

NOTE: The spice mix was NOT calculated into the caloric calculations. The spice mix (as written) will make enough mix for several additional uses beyond that of the turkey breast, so it was not included.

Nutrition Facts
Traeger Roasted Turkey Breast
Amount Per Serving (1 g)
Calories 251 Calories from Fat 90
% Daily Value*
Fat 10g15%
Saturated Fat 3g19%
Cholesterol 108mg36%
Sodium 368mg16%
Carbohydrates 1g0%
Protein 40g80%
* Percent Daily Values are based on a 2000 calorie diet.

Here’s one more to pin on your Pinterest boards!Traeger roasted turkey breast is an easy way to cook a delicious, well seasoned turkey breast on the smoker/grill, without heating up the kitchen!

Grilled Asparagus with Lemon and Parmesan

It’s easy to prepare grilled asparagus on the BBQ in only a few minutes! Garnished with lemon zest and Parmesan cheese, this is a delicious, low calorie side dish!
It's easy to prepare grilled asparagus on the BBQ in only a few minutes! Garnished with lemon zest and Parmesan cheese, this is a delicious side dish!

Do you enjoy fresh asparagus? We sure do, and look forward to it, especially in the spring, when fresh asparagus hits the grocery stores in all it’s glory! We enjoy pan-cooking or baking asparagus inside in our kitchen, but one of our favorite ways to prepare it is to grill it on a BBQ!

Last week we had what my husband and I call a “Traegerpalooza”, where we smoked/grilled lots of different meats on our Traeger grill. We cooked enough to provide our meals for almost a week! Another dish we made was this delicious grilled asparagus with lemon and Parmesan cheese! Asparagus is very easy to grill. Let me show you just how simple it is!

Scroll Down For A Printable Recipe Card At The Bottom Of The Page

How To Make Grilled Asparagus

Before grilling the asparagus, you need to get it ready! Snap the “woody” ends of each asparagus spear off, at the bottom. It should easily snap off between your fingers. You can discard the end pieces.

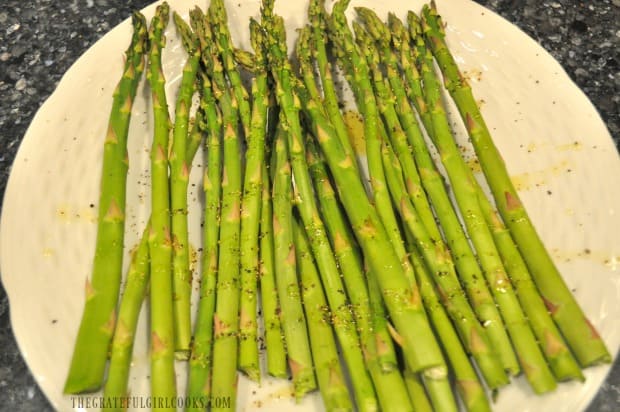
Lightly drizzle the asparagus with olive oil, and then lightly season with salt and pepper. I also squeezed a tiny bit of fresh lemon juice over the asparagus. Mix this all together with your fingers until the asparagus spears are well coated. Now it is ready to grill. You will need your Traeger OR traditional BBQ preheated and ready to go!

Fresh asparagus is drizzled with lemon juice and olive oil, and seasoned before grilling.

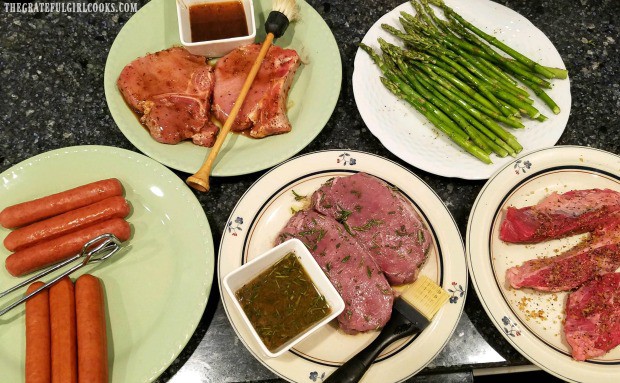
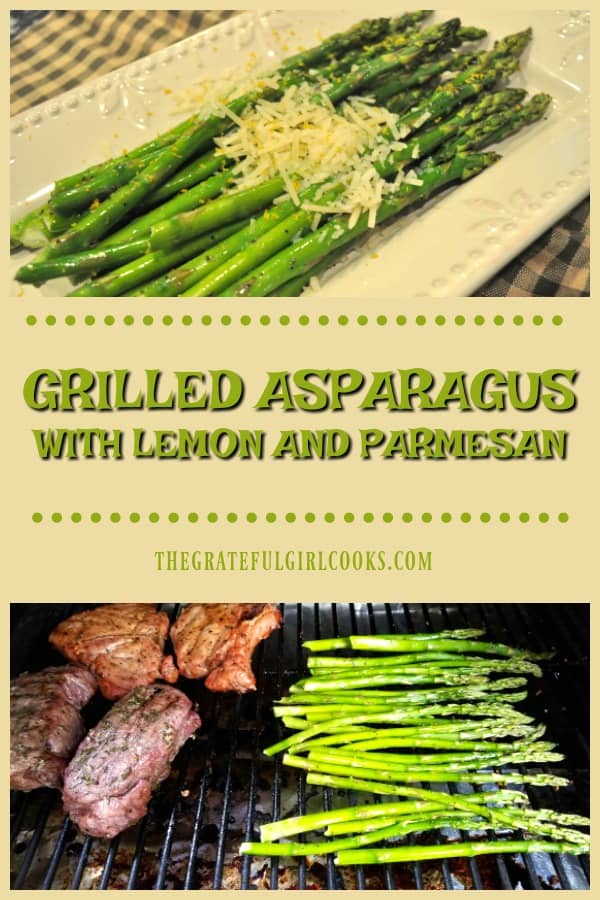
I’m showing you a photo (below) of the items we smoked and grilled on our Traeger along with the grilled asparagus. We cooked two different recipes for pork chops, some brats and turkey sausages, tri-tip steaks, the asparagus, and a bone-in turkey breast (not in photo).

The seasoned asparagus is ready to grill, along with other meats.

The grilled asparagus can be prepared this way on any kind of BBQ. When we grilled them on our Traeger, we went through all the normal preheating necessary, and then heated the grill to 450° F. to prepare the asparagus.

Cooking The Grilled Asparagus On The BBQ

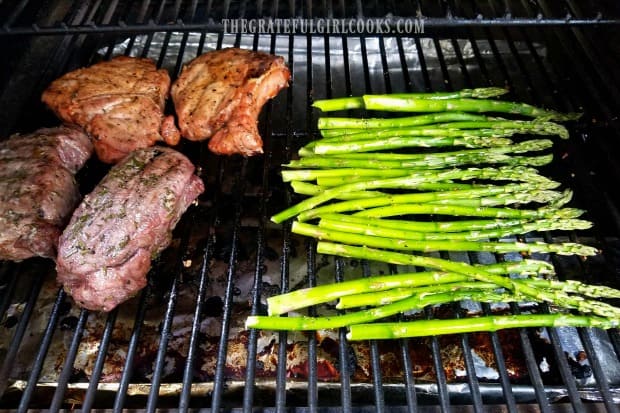
The seasoned asparagus spears are placed directly on the grill grate in a single layer.  Cook the grilled asparagus for 4-5 minutes at 450° (high heat). Once done, the asparagus spears will be slightly tender and still slightly crisp after this time. If you want them a tiny bit softer, cook them just a tiny bit longer. Be sure to NOT overcook the asparagus!

On a Traeger grill, there is no need to turn the asparagus, because there is no direct flame underneath the grill grate. If making this on a traditional BBQ (with propane or briquettes), you will need to keep a close eye on the veggies. Turn them once during the cooking. Once done, remove the grilled asparagus to a serving plate.

Grilled asparagus is placed directly on the BBQ grill, to cook.

To Serve The Grilled Asparagus

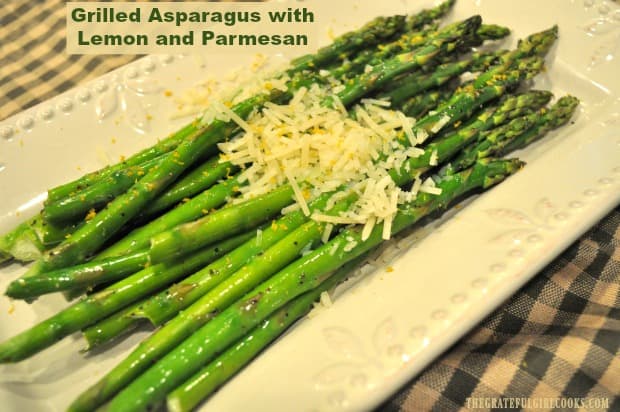
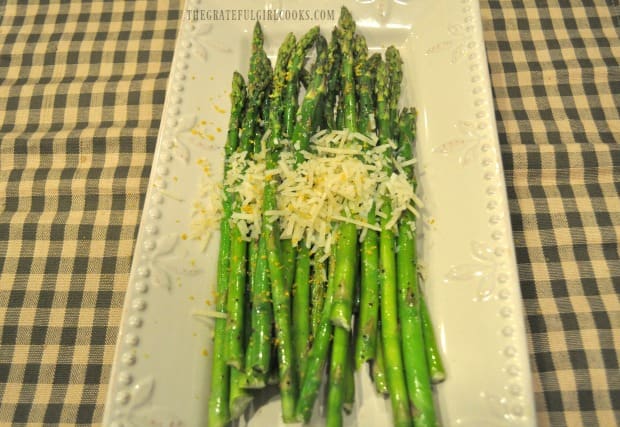
Immediately after transferring the hot grilled asparagus to a serving plate, garnish with shredded Parmesan cheese, a squeeze of fresh lemon juice and lemon zest.

Grilled asparagus is garnished with lemon zest and grated Parmesan cheese, to serve.

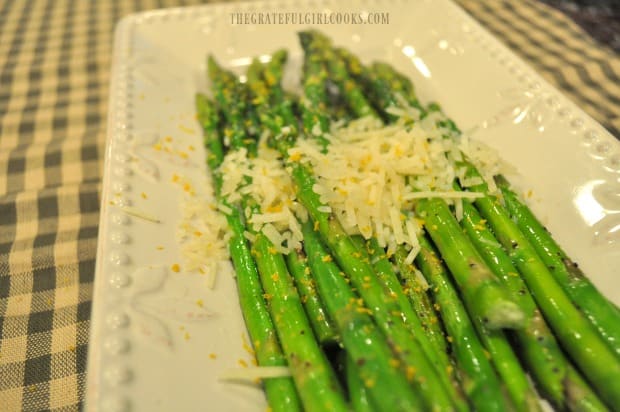
The heat from the asparagus should slightly melt the Parmesan cheese you have added to the top of the dish. A little lemon juice and zest help to give the finished grilled asparagus a nice fresh “pop” of extra flavor! Serve immediately, and enjoy this simple vegetable dish!

Grated Parmesan cheese and lemon zest help flavor and garnish the grilled asparagus.

Grilled asparagus with lemon and Parmesan is a delicious, and totally simple side dish, and I really hope you enjoy it! If you enjoy grilling fresh vegetables dishes, you might also enjoy my recipes for Grilled Summer Veggies or Grilled Corn on The Cob. YUM.

Thank you for stopping by today, and I truly hope you will come back again soon for more family-friendly recipes. Be sure to check out ALL of my recipes in the Recipe Index, located at the top of the page. Have a wonderful day!

Interested In More Recipes?

Thank you for visiting this website. I appreciate you using some of your valuable time to do soIf you’re interested, I publish a newsletter 2 times per month (1st and 15th) with all the latest recipes, and other fun info. I would be honored to have you join our growing list of subscribers, so you never miss a great recipe!
There is a Newsletter subscription box on the top right side (or bottom) of each blog post, depending on the device you use, where you can easily submit your e-mail address (only) to be included in my mailing list.

You Can Also Find Me On Social Media:
Facebook page: The Grateful Girl Cooks!
Pinterest: The Grateful Girl Cooks!
Instagram: jbatthegratefulgirlcooks

Author's signature

0 from 0 votes
Grilled Asparagus with Lemon and Parmesan
Prep Time
5 mins
Cook Time
5 mins
Total Time
10 mins
 
It's easy to prepare grilled asparagus on the BBQ in only a few minutes! Garnished with lemon zest and Parmesan cheese, this is a delicious side dish!
Category: Side Dishes, Vegetable Dish
Cuisine: American
Keyword: grilled asparagus
Servings: 2 servings
Calories Per Serving: 81 kcal
Author: JB @ The Grateful Girl Cooks!
Ingredients
  • 1/2 pound asparagus (fresh)
  • 2 teaspoons olive oil
  • salt & pepper, to taste
  • 1/8 teaspoon garlic powder
  • 1/2 teaspoon fresh lemon juice
To Garnish Asparagus
  • 1 teaspoon lemon juice (fresh)
  • 1 teaspoon lemon zest
  • 2 Tablespoons Parmesan cheese (grated)
Instructions
  1. Snap the "woody" ends of each asparagus spear off, at the bottom. It should easily snap off between your fingers.  Lightly drizzle asparagus with olive oil, and then lightly season with salt and pepper. Squeeze fresh lemon juice over the asparagus. Mix together with your fingers until the asparagus spears are well coated.

  2. If cooking on a Traeger grill, complete all the normal preheating necessary, and then heat the grill to 450° F. to prepare the asparagus. Place seasoned asparagus spears directly on the grill grate in a single layer.  Cook asparagus for 4-5 minutes at 450° (high heat). Once done, the asparagus spears will be slightly tender and still slightly crisp after this time. If you want them a tiny bit softer, cook it just a bit longer. Be sure to NOT overcook the asparagus!  On a Traeger, there is no need to turn the asparagus, because there is no direct flame underneath the grill grate. If making this on a traditional BBQ (with propane or briquettes), you will need to keep a close eye on the veggies. Turn them once during the cooking. Once done, remove the grilled asparagus to a serving plate.

  3. Immediately after transferring the hot grilled asparagus to a serving plate, garnish with shredded Parmesan cheese, a squeeze of fresh lemon juice and lemon zest. Serve, and enjoy!

Nutrition Facts
Grilled Asparagus with Lemon and Parmesan
Amount Per Serving (1 (1/2 of total))
Calories 81 Calories from Fat 45
% Daily Value*
Fat 5g8%
Saturated Fat 1g6%
Cholesterol 4mg1%
Sodium 79mg3%
Potassium 229mg7%
Carbohydrates 5g2%
Fiber 2g8%
Sugar 2g2%
Protein 4g8%
Vitamin A 900IU18%
Vitamin C 9.1mg11%
Calcium 83mg8%
Iron 2.4mg13%
* Percent Daily Values are based on a 2000 calorie diet.

Here’s one more to pin on you Pinterest boards!It's easy to prepare grilled asparagus on the BBQ in only a few minutes! Garnished with lemon zest and Parmesan cheese, this is a delicious side dish!


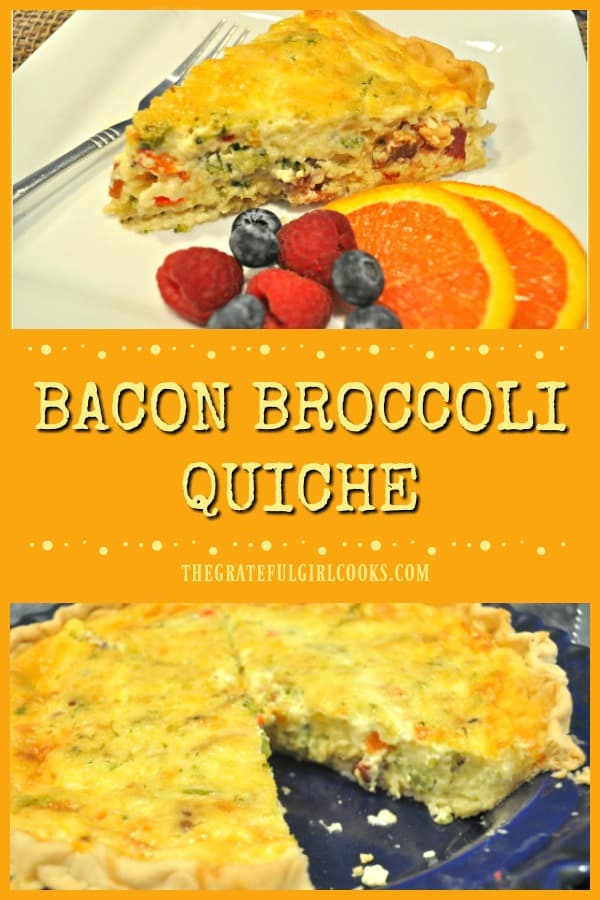
Bacon Broccoli Quiche

Bacon broccoli quiche is a perfect dish for any meal! Bacon, broccoli, red pepper & garlic add flavor to this egg based dish, baked in a pie crust.

Do you like QUICHE? We sure do! I think it is a perfect breakfast, lunch OR dinner dish, which makes it very convenient to have around! It is soooo good!

Making classic quiche lorraine has been something I’ve done for almost 40 years now. I’ve also added my recipes for Italian Sausage and Spinach Quiche, Quiche Lorraine, and Southwestern Bacon Quiche to this blog, and recommend these delicious dishes, as well. Now I can add this bacon broccoli quiche to the list, too!

Scroll Down For A Printable Recipe Card At the Bottom Of The Page

How To Make This Quiche

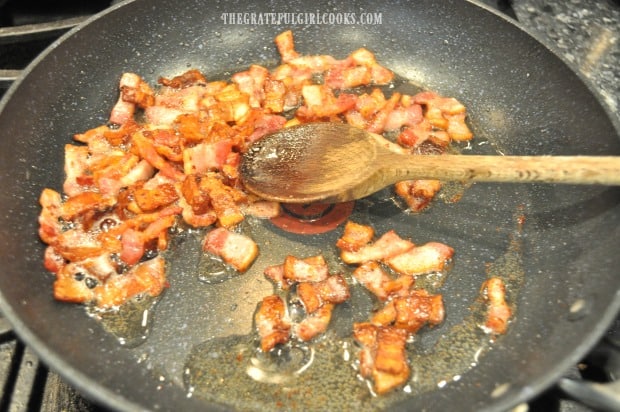
Preheat oven to 425 degrees. While oven is preheating, cook bacon in a non-stick skillet or in the oven, until it’s completely cooked through, and crispy. I like to cut the bacon into small pieces BEFORE cooking in a skillet, because it cooks much faster that way!

Remove bacon from pan to paper towels (to drain) and crumble it (if you cooked whole slices). Be sure NOT to drain grease from skillet. You will cook the veggies in it, which will add flavor!

Chopped bacon is cooked until crisp, to add to the bacon broccoli quiche.

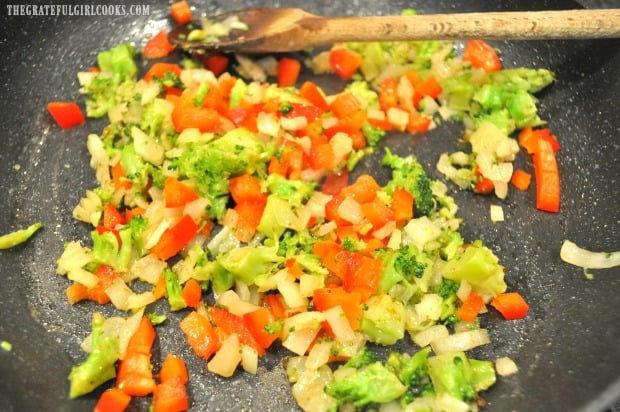
Using the same skillet (with the bacon grease still in it), cook the onion, red bell pepper and broccoli for 4-5 minutes until softened. Stir often while this mixture cooks.

Add the minced garlic to the veggies, and cook for one more minute, stirring to combine. Remove veggies from the heat, and set them aside to cool down a bit (before adding to pie crust dough) .

Chopped broccoli, red bell peppers, garlic and onion are cooked, before adding to the quiche.

Prepare The Deep Dish Pie Crust

TIP: To save time and effort, you can use a purchased DEEP DISH pie crust. My photos show a homemade pie crust, because that’s just how I roll. Whatever type of pie crust you use, just make sure it is deep dish, because there is a lot of filling that goes into the quiche, itself.

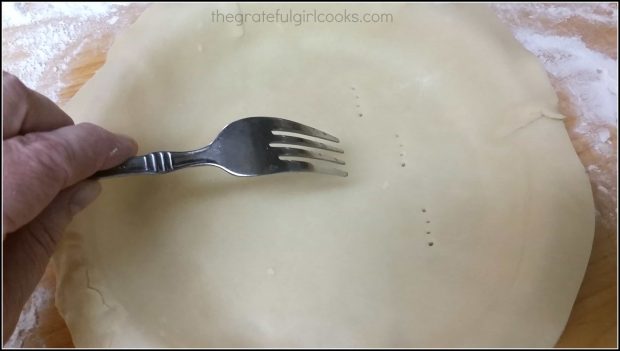
Prepare the unbaked deep dish pie shell by piercing the dough on the bottom and sides with the tines of a fork. This step helps prevent the crust from creating air pockets and puffing up too much while baking. Do this for homemade or purchased pie crust.

Pricking an unbaked quiche crust with the tines of a fork, before baking.

Add The Bacon Broccoli Quiche Filling

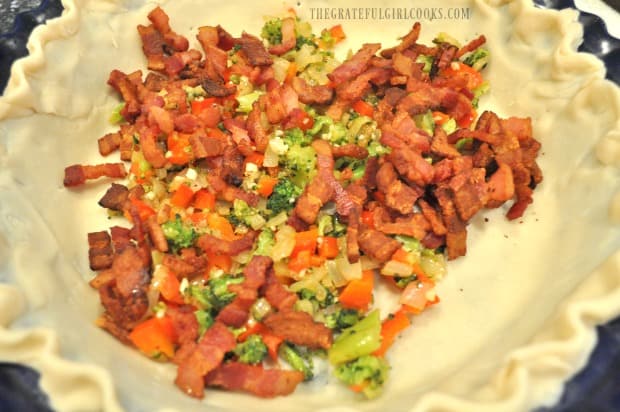
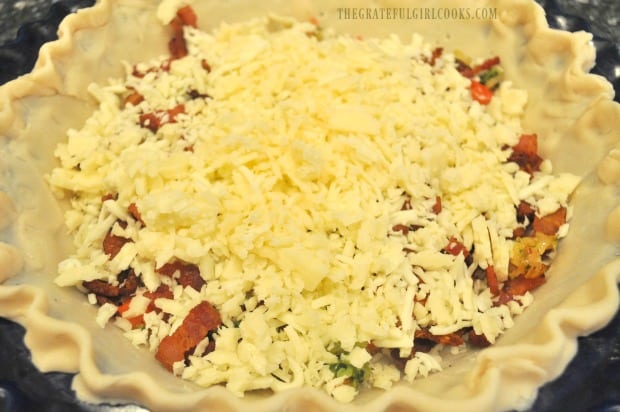
Add the crumbled bacon and veggies to the unbaked, prepared pie crust. Top the bacon and veggies with the grated mozzarella and Swiss cheese.

The cooked bacon and veggies are added to an uncooked pie crust.

Grated mozzarella and Swiss cheeses are added to the bacon broccoli quiche.

Mix and Add The Egg and Cream Quiche Filling

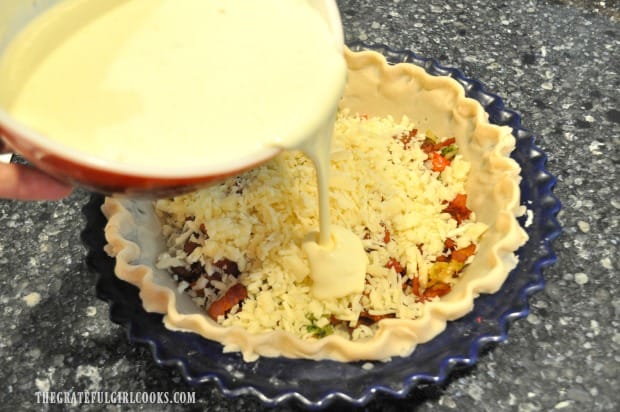
In a separate bowl, whisk together whipping cream, eggs, cayenne pepper and salt, until well blended. Pour the egg mixture on top of the bacon/veggies/cheese mixture in the pie crust.

Gently mix ingredients together. I use a fork- just be careful not to mix too hard or you will damage the crust. Mix only enough to blend the ingredients evenly together!

Egg and cream filling are poured over the quiche ingredients in the crust.

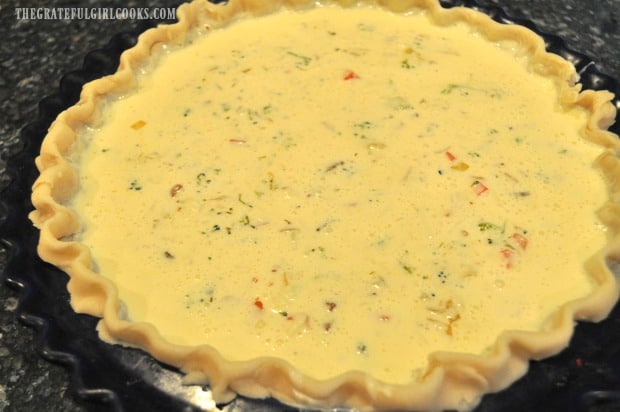
Here is the bacon broccoli quiche, before it goes into the oven.

Bake The Broccoli Bacon Quiche

Carefully put quiche into a preheated 425 degree oven. Don’t spill it! Bake at 425 degrees for 15 minutes, then reduce heat to 300 degrees and bake for an additional 35-40 minutes (quiche is done when a knife comes out clean).

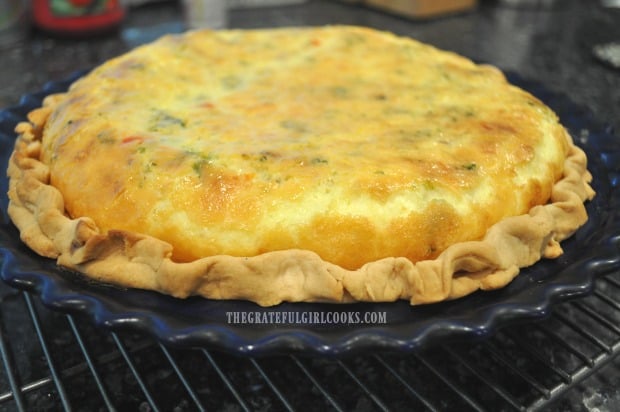
Remove the baked bacon broccoli quiche (still in pan) to a wire rack to cool. When it first comes out of the oven it will be nice and puffed up, as in the photo below. The top of the quiche will flatten as it cools down.

 This is a picture of the bacon broccoli quiche right AFTER it comes out of the oven.

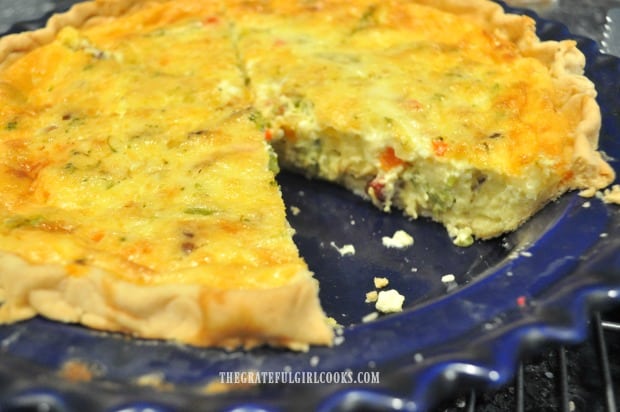
Let the quiche cool down a bit, slice into 8 portions, serve… and enjoy! We enjoy eating this bacon broccoli quiche, and think it tastes best when it is warm, but not too hot!

One slice has been removed from the finished quiche.

Slice yourself a piece of this delicious bacon broccoli quiche, and enjoy it for breakfast, lunch OR dinner! It really is quite versatile, and the leftovers store well in the refrigerator for several days!

When you are ready to have a slice of leftover bacon broccoli quiche, simply reheat it in the microwave for a quick and easy meal!

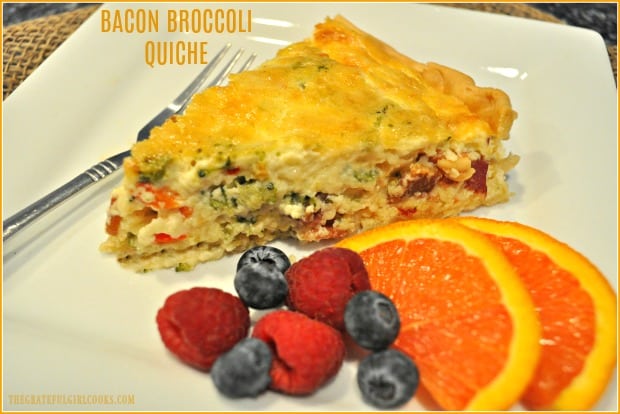
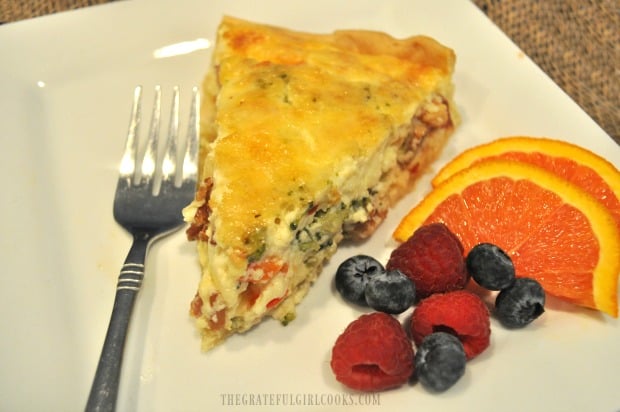
One slice of bacon broccoli quiche, with fresh fruit on the side.

Hope that you will try this yummy quiche, and trust you will enjoy it as much as we do! Have a wonderful day!

Interested In More Recipes?

Thank you for visiting this website. I appreciate you using some of your valuable time to do soIf you’re interested, I publish a newsletter 2 times per month (1st and 15th) with all the latest recipes, and other fun info. I would be honored to have you join our growing list of subscribers, so you never miss a great recipe!

There is a Newsletter subscription box on the top right side (or bottom) of each blog post, depending on the device you use, where you can easily submit your e-mail address (only) to be included in my mailing list.

You Can Also Find Me On Social Media:
Facebook page: The Grateful Girl Cooks!
Pinterest: The Grateful Girl Cooks!
Instagram: jbatthegratefulgirlcooks

Author's signature

Recipe Source: my brain and my mom’s pie crust recipe

0 from 0 votes
Bacon Broccoli Quiche
Prep Time
20 mins
Cook Time
50 mins
Total Time
1 hr 10 mins
 
Bacon broccoli quiche is a perfect dish for any meal! Bacon, broccoli, red pepper & garlic add flavor to this egg based dish, baked in a pie crust.
Category: Breakfast, Brunch, Dinner
Cuisine: American
Keyword: bacon broccoli quiche
Servings: 8 slices
Calories Per Serving: 462 kcal
Author: JB @ The Grateful Girl Cooks!
Ingredients
  • 1 deep dish pie crust (homemade or purchased) , unbaked
  • 6 slices bacon , cooked crisp, crumbled
  • 1/2 cup yellow onion , finely chopped
  • 1/2 cup broccoli florets (fresh or frozen) , finely chopped
  • 1/4 cup red bell pepper , finely chopped
  • 1 teaspoon minced garlic
  • 1/2 cup shredded mozzarella cheese
  • 1/2 cup shredded Swiss cheese
  • 2 cups heavy whipping cream
  • 4 large eggs
  • 1/2 teaspoon salt
  • 1/8 teaspoon cayenne pepper
Instructions
  1. Preheat oven to 425 degrees. While oven is preheating, cook bacon in a non-stick skillet (or oven), until crispy and cooked through. Remove bacon from pan to paper towels (to drain) and then crumble; do NOT drain grease from skillet.

  2. Using the same skillet (with the bacon grease still in it), cook the onion, red bell pepper and broccoli for 4-5 minutes until softened. Add the minced garlic during the last minute of cooking. Remove veggies from the heat, and set aside to cool.
  3. Prepare the unbaked deep dish pie shell by piercing the dough on the bottom and sides with the tines of a fork - (this helps prevent air pockets puffing up while baking). Add the crumbled bacon to the unbaked, prepared pie crust, then add the cooked veggies. Top with the grated mozzarella and Swiss cheese.

  4. In a separate bowl, whisk together whipping cream, eggs, cayenne pepper and salt, until well blended. Pour the egg mixture on top of the bacon/veggies/cheese mixture in the pie crust. Gently mix ingredients together (I use a fork-be careful not to mix too hard or you will damage the crust. Just enough to blend the ingredients evenly together!)
  5. Carefully put quiche into a preheated 425 degree oven. Don't spill it! Bake at 425 degrees for 15 minutes, then reduce heat to 300 degrees and bake for an additional 35-40 minutes (quiche is done when a knife comes out clean). Remove quiche pan to a wire rack. Let it cool down a bit, slice, serve... and enjoy!

Nutrition Facts
Bacon Broccoli Quiche
Amount Per Serving (1 slice)
Calories 462 Calories from Fat 360
% Daily Value*
Fat 40g62%
Saturated Fat 20g125%
Cholesterol 106mg35%
Sodium 437mg19%
Potassium 155mg4%
Carbohydrates 17g6%
Protein 8g16%
Vitamin A 1170IU23%
Vitamin C 12.3mg15%
Calcium 138mg14%
Iron 0.8mg4%
* Percent Daily Values are based on a 2000 calorie diet.

Here’s one more to pin on your Pinterest boards!Bacon broccoli quiche is a perfect dish for any meal! Bacon, broccoli, red pepper & garlic add flavor to this egg based dish, baked in a pie crust.

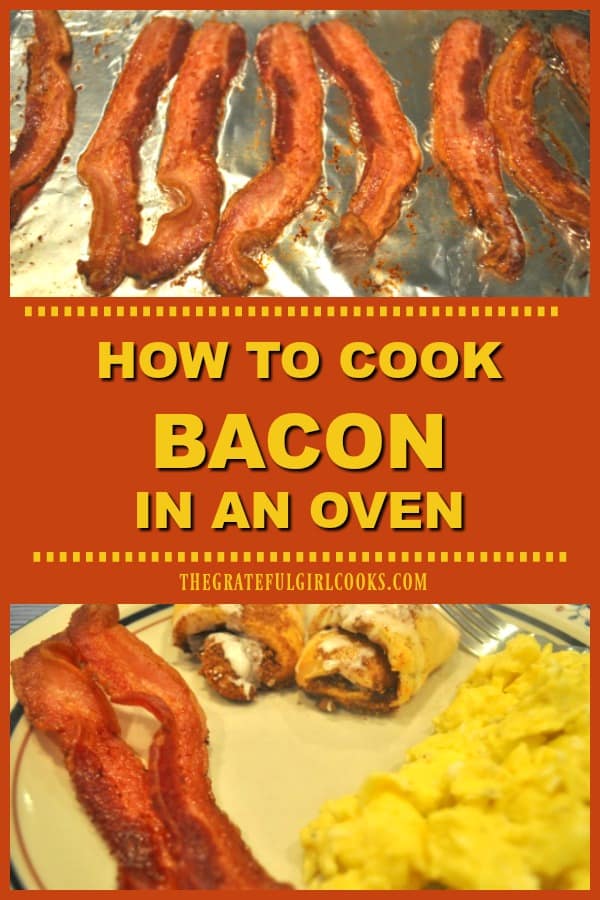
How To Cook Bacon In An Oven

Do you know how to cook bacon in an oven? This method makes it INCREDIBLY EASY to make “practically hands-free”, perfect bacon every time!
Do you know how to cook bacon in an oven? This method makes it INCREDIBLY EASY to make "practically hands-free", perfect bacon every time!

Well, it is said that “an old dog can’t learn new tricks”. I beg to differ!  After cooking bacon in a skillet and on a electric grill for most of my life, I can safely say I DID learn a new trick! The trick I learned was how to cook bacon in an OVEN!

Cooking bacon in the oven (and the easy clean up) helps save time! You can be busy doing other things while the bacon cooks. PLUS, you don’t have to stand right there, watching the bacon splatter all over the skillet or stove top! You won’t even have to clean out the skillet or griddle once it’s done. Just pull up the foil, wad it up, and throw it in the trash! It’s a WIN-WIN!

Have you ever prepared bacon this way? Gotta tell ya, it is life changing! I love that cooking bacon this way is practically hands-free, clean up is next to nothing, and it is SO EASY! Once you’ve made bacon this way (and it turns out perfect), you will be “hooked for life”!

Scroll Down For A Printable Recipe Card At The Bottom Of The Page

How To Cook Bacon In An Oven!

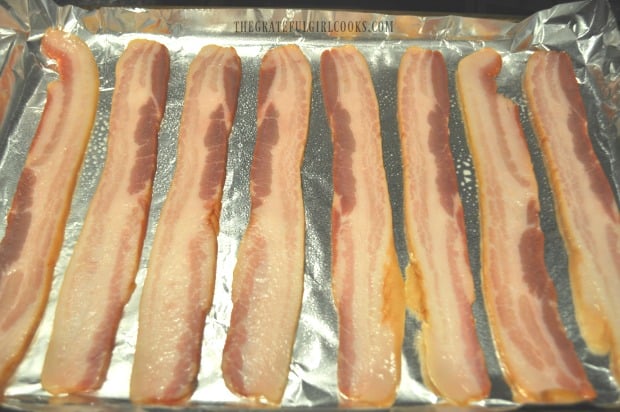
It’s always best to do first things first, right? Line a large baking sheet with aluminum foil (up the edges), and then lightly spray the foil with non-stick baking spray. Lay the strips of uncooked bacon onto the foil in a single layer, leaving just a bit of space in between each slice.

IMPORTANT: Place the baking sheet into your oven, and THEN turn the oven on to 400°F. THAT’S RIGHT! Don’t preheat the oven!

Bacon is placed in a single layer on sprayed foil on baking sheet before cooking.

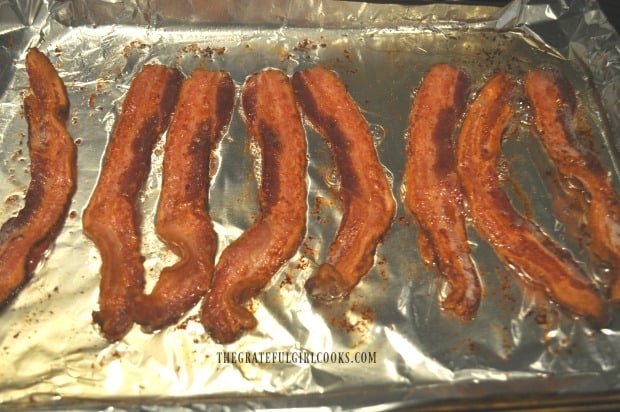
Turn on the oven AFTER you add the bacon. Cook the bacon slices for 15-20 minutes, without disturbing. There is no need to turn the bacon over, or do anything else to it! Since this is “hands-free” cooking, I was able to prepare the rest of our meal while the bacon was in the oven!

TIP: If you want the bacon to be REALLY crisp, you can place it on a wire rack to cook, but I have found that we prefer it, cooked right on the foil.

Timing The Bacon For Doneness

My recommendation is to check the bacon at the 15 minute mark! Obviously thin slices of bacon will cook for a slightly shorter amount of time than a thicker slice of bacon! I was using fairly thick slices, and they were perfectly done in 16 minutes! Plus, did you notice that when you cook bacon in an oven, the bacon slices don’t shrink up as much? .

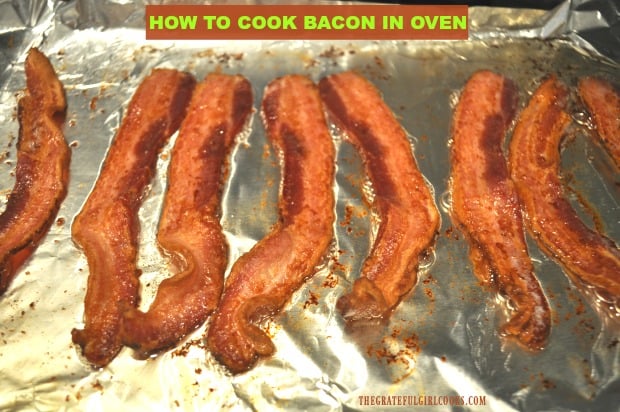
To perfectly cook bacon in an oven is very easy, and is practically "hands free"!

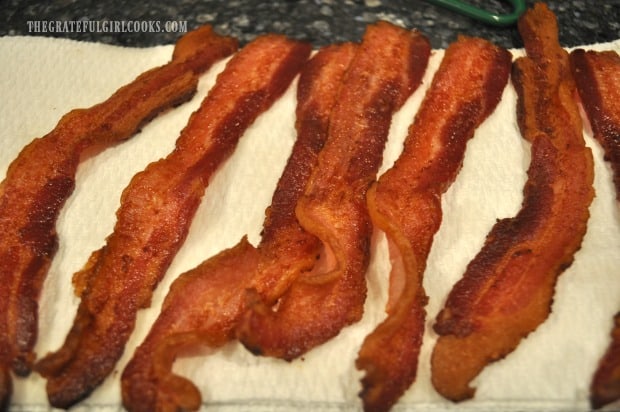
Once the bacon is done cooking, remove the baking sheet from the oven. Transfer the cooked bacon to a couple layers of paper towels. The paper towels will help to absorb any extra bacon grease left on the bacon.

Cooked bacon is drained on paper towels before serving.

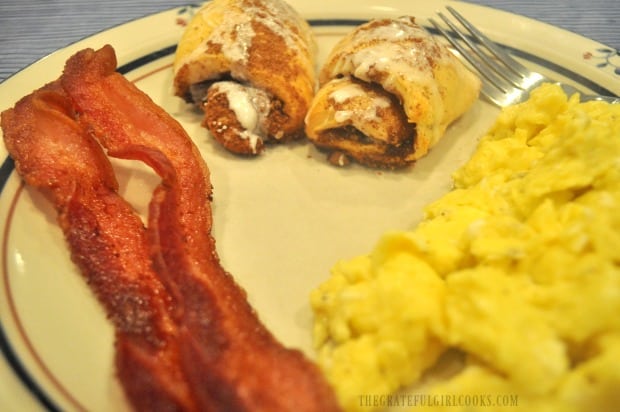
That’s it! Just like that, and with hardly any effort, you’ve learned how to cook bacon in an oven!  We enjoyed perfectly cooked bacon with some scrambled eggs and yummy cinnamon roll crescents. YUM!

The cooked bacon is done perfectly, and served with cinnamon crescent rolls and scrambled eggs!

This truly is the easiest way to cook bacon in an oven! No splatter screens and grease filled skillets anymore… just perfectly cooked bacon slices! As an added bonus, you can just roll up the used aluminum foil, and throw it into the trash with no pan cleanup!

Hope you will try this method next time you want bacon for breakfast, or to add to a burger (or other recipes).

Looking For More BACON Recipes?

Everything is better with bacon, right? You can find all my recipes in the Recipe Index, located at the top of the page. Here are a few other recipes you might enjoy that heavily feature BACON:

Interested In More Recipes?

Thank you for visiting this website. I appreciate you using some of your valuable time to do soIf you’re interested, I publish a newsletter 2 times per month (1st and 15th) with all the latest recipes, and other fun info. I would be honored to have you join our growing list of subscribers, so you never miss a great recipe!

There is a Newsletter subscription box on the top right side (or bottom) of each blog post, depending on the device you use, where you can easily submit your e-mail address (only) to be included in my mailing list.

You Can Also Find Me On Social Media:
Facebook page: The Grateful Girl Cooks!
Pinterest: The Grateful Girl Cooks!
Instagram: jbatthegratefulgirlcooks

Author's signature.

0 from 0 votes
How To Cook Bacon In An Oven
Prep Time
5 mins
Cook Time
15 mins
Total Time
20 mins
 
Do you know how to cook bacon in an oven? This method makes it INCREDIBLY EASY to make "practically hands-free", perfect bacon every time!
Category: Breakfast, Tip
Cuisine: American
Keyword: cook bacon in an oven
Servings: 8 slices
Calories Per Serving: 91 kcal
Author: JB @ The Grateful Girl Cooks!
Ingredients
  • 8 slices bacon
  • Non-stick baking spray
Instructions
  1. Line a large baking sheet with aluminum foil (up the edges), and then lightly spray foil with non-stick baking spray.

  2. Lay strips of uncooked bacon onto the foil in a single layer, leaving a bit of space between each slice. IMPORTANT: Place baking sheet into oven, and THEN turn the oven on to 400°F. THAT'S RIGHT! Don't preheat the oven!

  3. Turn on the oven AFTER you add the bacon. Cook bacon slices at 400° for 15-20 minutes, without disturbing. Check them at 15 minutes, because due to varying thicknesses of bacon, cooking times can vary slightly. There is no need to turn the bacon over, or do anything else to it!

  4. Once bacon is done cooking to your desired amount of "crispness", remove  baking sheet from oven. Transfer cooked bacon to a couple layers of paper towels. The paper towels will absorb any extra bacon grease left on the bacon. Serve, and enjoy!

Nutrition Facts
How To Cook Bacon In An Oven
Amount Per Serving (1 slice)
Calories 91 Calories from Fat 72
% Daily Value*
Fat 8g12%
Saturated Fat 2g13%
Cholesterol 14mg5%
Sodium 145mg6%
Potassium 43mg1%
Protein 2g4%
Vitamin A 10IU0%
Iron 0.1mg1%
* Percent Daily Values are based on a 2000 calorie diet.

Here’s one more to pin on your Pinterest boards!Do you know how to cook bacon in an oven? This method makes it INCREDIBLY EASY to make "practically hands-free", perfect bacon every time!

Sweet Chili Shrimp Pasta

Sweet Chili Shrimp Pasta, (in a soy/sweet chili/sesame sauce) is a simple, delicious Asian-inspired meal that can be ready in about 30 minutes!

A couple months ago I made a meal (for my husband and I) with shrimp in an Asian inspired sauce, and it was served with zucchini noodles. It tasted wonderful, and my husband suggested it would be a great recipe to try with pasta (instead of zoodles)!

So… that’s how this recipe for sweet chili shrimp pasta came from THAT conversation! This is one VERY EASY recipe, and if you can multi-task, it can be ready in about 30 minutes or less!

Scroll Down For A Printable Recipe Card At The Bottom Of The Page

Prepare The Pasta

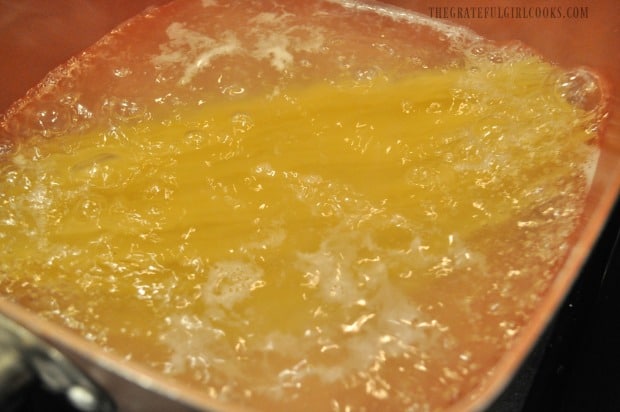
To save time, begin cooking the pasta, and then make the sauce and cook the shrimp (while pasta cooks). This multi-tasking will save you a lot of precious time in the kitchen! Cook the spaghetti noodles in boiling, salted water, according to the package instructions. Once done, drain the noodles.

Cooking the spaghetti noodles for this shrimp an pasta dish.

Make the Sauce For The Sweet Chili Shrimp Pasta

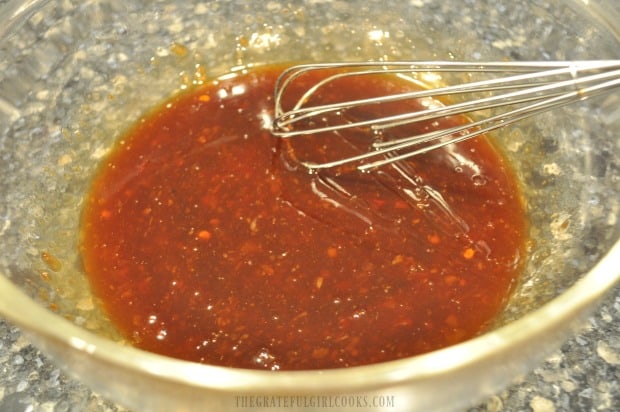
While the pasta cooks, make the sauce, because it is ridiculously EASY to make. Place sweet chili sauce, low sodium soy sauce, and sesame oil in a small bowl, and whisk well, until fully combined.  Once combined, measure out 1/2 cup of the sauce, and set it aside.

Whisking ingredients together for the sauce used to flavor sweet chili shrimp pasta.

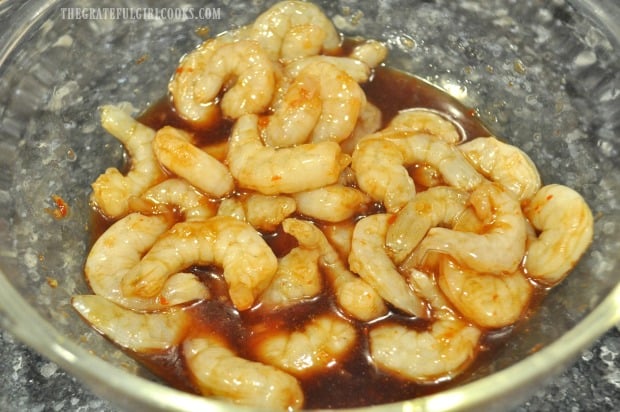
Place the peeled, deveined shrimp into a large mixing bowl, and pour the remaining sauce left in the bowl over them. Gently toss, to fully coat the shrimp with the sweet chili sauce.

Large shrimp marinate in sauce to season them for the sweet chili shrimp pasta.

Cook The Shrimp

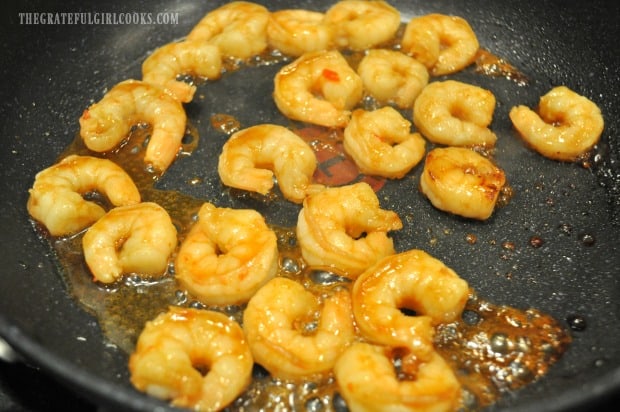
Spray a large skillet with non-stick spray, and heat skillet on medium heat. Once the skillet is hot (but not smoking), add the shrimp to the skillet in a single layer. Cook the shrimp for about 2 minutes, then turn and cook the other side for 1-2 minutes. When done the shrimp will have turned pink and should be cooked through.

You can spoon some of the sauce in the skillet over the shrimp while they cook, if desired. Remove shrimp from skillet when done, and keep warm.

The marinated shrimp are pan-seared until done, in a skillet.

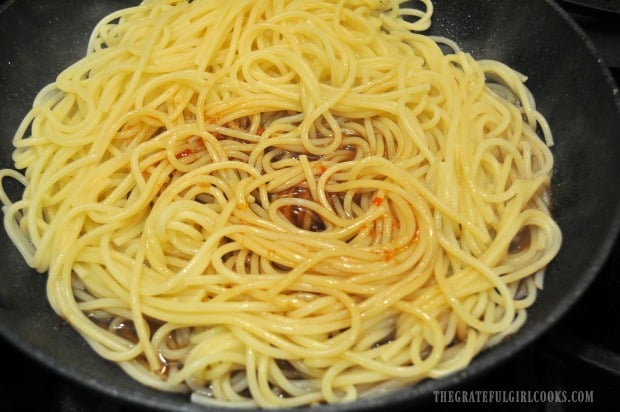
Once spaghetti noodles are finished cooking, drain them well and place in the skillet that you used to cook the shrimp. Add the 1/2 cup of reserved Asian sauce to the pasta, and toss, to fully combine.

An Asian sweet chili sauce is added to the drained, cooked pasta.

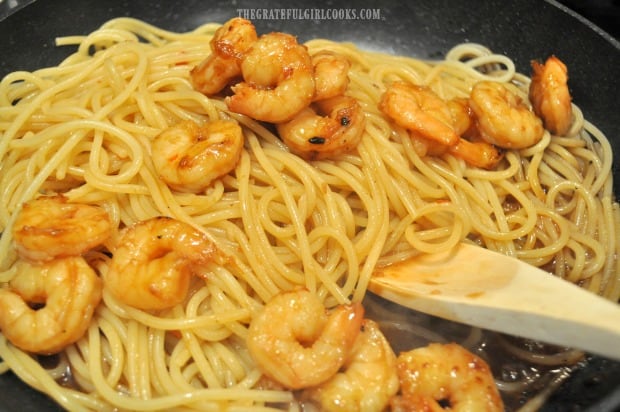
Add the shrimp to the pasta, and toss gently, to combine the pasta, sauce and shrimp. Cook until the sweet chili shrimp pasta is heated through. This should only take a minute or two, and then the dish is done!

Marinated shrimp are added to the skillet with the sweet chili sauce and pasta.

Serve The Sweet Chili Shrimp Pasta

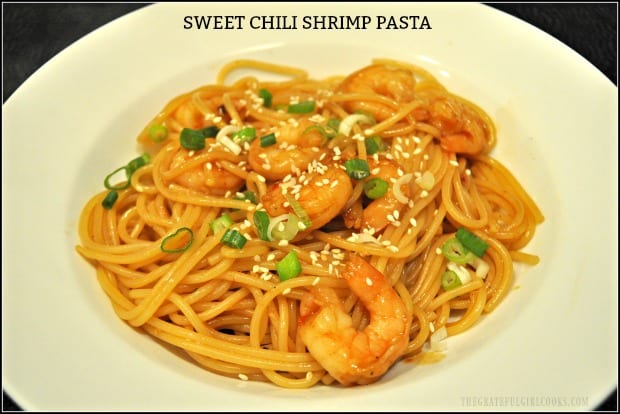
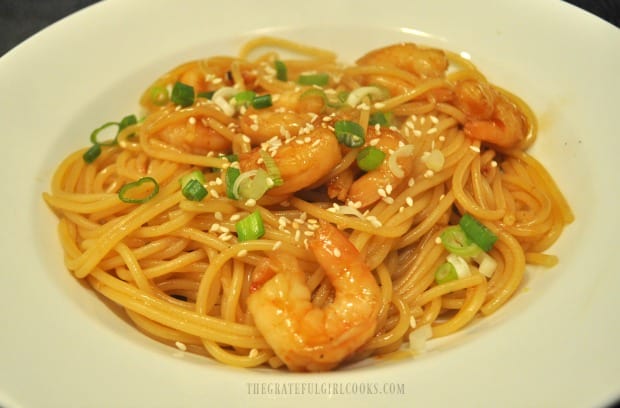
When ready to serve, place half of the pasta onto a serving plate or into a bowl. Top with half of the shrimp, as well. Garnish the sweet chili shrimp pasta (if desired) with sesame seeds and thinly sliced green onions (white and green parts). Eat it while it’s hot, and ENJOY!

The sweet chili shrimp pasta is served, topped with sesame seeds and green onions.

I really hope you enjoy this recipe for sweet chili shrimp pasta! There is a lot of flavor in the noodles and on the shrimp! Hope you have a wonderful day!

Looking For More SHRIMP Recipes?

You can find all of my recipes in the Recipe Index, located at the top of the page. A few favorite shrimp recipes include:

Interested In More Recipes?

Thank you for visiting this website. I appreciate you using some of your valuable time to do soIf you’re interested, I publish a newsletter 2 times per month (1st and 15th) with all the latest recipes, and other fun info. I would be honored to have you join our growing list of subscribers, so you never miss a great recipe!

There is a Newsletter subscription box on the top right side (or bottom) of each blog post, depending on the device you use, where you can easily submit your e-mail address (only) to be included in my mailing list.

You Can Also Find Me On Social Media:
Facebook page: The Grateful Girl Cooks!
Pinterest: The Grateful Girl Cooks!
Instagram: jbatthegratefulgirlcooks

Author's signature

Recipe Source For The Sauce: https://iowagirleats.com/2017/06/14/sweet-chili-sesame-shrimp-and-zoodles/

↓↓ PRINTABLE RECIPE BELOW ↓↓

0 from 0 votes
Sweet Chili Shrimp Pasta
Prep Time
15 mins
Cook Time
15 mins
Total Time
30 mins
 
Sweet Chili Shrimp Pasta, (in a soy/sweet chili/sesame sauce) is a simple, delicious Asian-inspired meal that can be ready in about 30 minutes!
Category: Entree-Seafood
Cuisine: Asian
Keyword: sweet chili shrimp pasta
Servings: 2
Calories Per Serving: 489 kcal
Author: JB @ The Grateful Girl Cooks!
Ingredients
  • 4 ounces spaghetti pasta
  • 7 Tablespoons sweet chili sauce (I used Mae Ploy brand)
  • 1/4 cup low-sodium soy sauce (or Tamari)
  • teaspoons sesame oil
  • 1/2 pound large shrimp (peeled, deveined, patted dry)
For Garnish (optional)
  • 1 stem green onion (scallion) , sliced thinly
  • 1 teaspoon sesame seeds
Instructions
  1. To save time, begin cooking pasta, and then make sauce and cook shrimp (while pasta cooks). This multi-tasking will save you a lot of time in the kitchen! Cook pasta according to package instructions. Once done, drain the noodles.

  2. While pasta cooks, make the sauce. Place sweet chili sauce, soy sauce, and sesame oil in a small bowl, and whisk well, until fully combined.  Once combined, measure out 1/2 cup of the sauce, and set it aside.

  3. Place shrimp into a large mixing bowl, and pour remaining sauce left in the bowl over them. Gently toss, to fully coat shrimp with the sauce. Spray a large skillet with non-stick spray, and heat skillet on medium. Once skillet is hot (but not smoking), add shrimp to the skillet in a single layer. Cook shrimp for 2 minutes, then turn and cook the other side for 1-2 minutes. When done shrimp will have turned pink and should be cooked through. You can spoon some of the sauce in the skillet over the shrimp while they cook, if desired. Remove shrimp from skillet when done, and keep warm.

  4. Once pasta is done, place drained pasta into the skillet you used to cook shrimp. Add 1/2 cup reserved sauce to pasta, and toss, to combine. Add shrimp, and toss gently, to combine pasta, sauce and shrimp. Cook until dish is heated through (1-2 minutes). 

  5. To serve, divide hot pasta onto plates, and top with shrimp. Garnish (if desired) with sesame seeds and sliced green onions. Eat while hot... and ENJOY!

Nutrition Facts
Sweet Chili Shrimp Pasta
Amount Per Serving (1 (1/2 of total))
Calories 489 Calories from Fat 45
% Daily Value*
Fat 5g8%
Cholesterol 285mg95%
Sodium 2541mg110%
Potassium 274mg8%
Carbohydrates 74g25%
Fiber 2g8%
Sugar 30g33%
Protein 32g64%
Vitamin C 4.6mg6%
Calcium 182mg18%
Iron 3.8mg21%
* Percent Daily Values are based on a 2000 calorie diet.

Here’s one more to pin on your Pinterest boards!Sweet Chili Shrimp Pasta, (in a soy/sweet chili/sesame sauce) is a simple, delicious Asian-inspired meal that can be ready in about 30 minutes!

WW Freestyle Banana Blueberry Pancakes

Delicious banana blueberry pancakes (6 ingredient) are made with NO flour, have GREAT flavor and ZERO points, if using the Weight Watchers Freestyle plan.
Delicious banana blueberry pancakes (6 ingredient) are made with NO flour, have GREAT flavor and ZERO points, if using Weight Watchers Freestyle plan.

Do you enjoy pancakes? I sure do, but because they pack quite a calorie punch, I typically may only indulge in them about once a month or so. Even though I LOVE them, I’ve been known to refer to them as “gut bombs”!

Recently I made some banana blueberry pancakes using ingredients that count as ZERO points on the Weight Watchers Freestyle eating plan. Basically the Freestyle plan includes certain foods (about 200) that are tracked as zero point foods in an effort to help you focus on this food list (to assist in making wiser food selection choices).

My Inspiration For Making These “Flourless” Banana Blueberry Pancakes

I decided to try and make some pancakes using only those ingredients found on the Freestyle zero points list, and see how they turned out. Can you tell I was craving pancakes? So, into the kitchen I went to experiment.

My goal was to NOT use flour (not on the “list”), and knew it could work, because I had made peanut butter cookies this way (without flour) before, and they were fantastic! I decided to make banana blueberry pancakes, and use banana and eggs as the base for the pancake batter. And THAT is how I came up with this pancake recipe! It was EASY, and the pancakes tasted amazing!

Scroll Down For A Printable Recipe Card At The Bottom Of The Page

How To Make WW Freestyle Banana Blueberry Pancakes

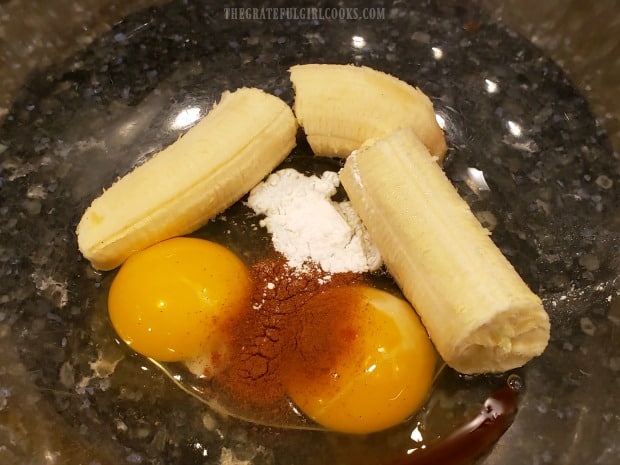
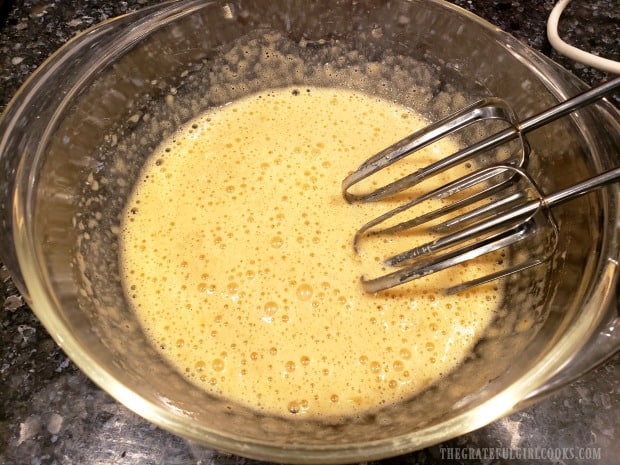
Place a large ripe banana (they’re sweeter), two eggs, cinnamon, baking powder, and vanilla extract into a medium sized mixing bowl.

Use an electric mixer to fully blend these ingredients together. NOTE: The mixture will be thinner than if you were using a commercially prepared pancake mix with flour.

Banana, eggs, cinnamon, baking powder and vanilla in bowl to make batter for pancakes.

Batter for the banana blueberry pancakes is mixed in bowl.

Cook The Pancakes

Spray an electric griddle (or large skillet) with non-stick baking spray (or lightly brush with oil). Heat the griddle on a medium-high heat.

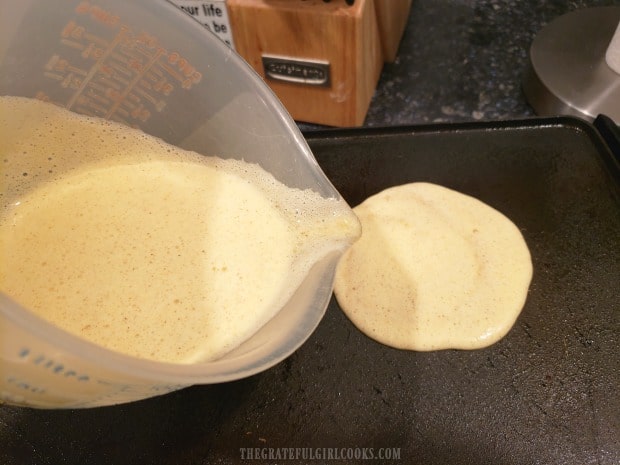
Once the griddle is hot, carefully pour or ladle out the batter into 5 small pancakes. Each of the banana blueberry pancakes was about 4 inches in diameter. I used a large measuring cup with a pour spout to do this, but a soup ladle will also do the trick!

Batter is poured onto electric grill, to make 5 Weight Watchers Freestyle banana blueberry pancakes.

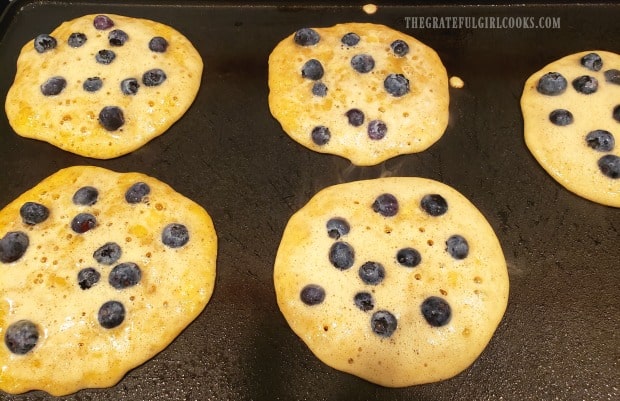
As soon as you have the pancakes on the hot grill, place the blueberries onto the pancakes. Once bubbles have formed over the surface of the pancakes, and they are nice and brown underneath, carefully turn the pancakes to the other side using a spatula.

NOTE: Be very careful when turning pancakes. The batter is thin, and since they are studded with the weight of the blueberries, you don’t want to tear the pancakes!

Fresh blueberries are added to the pancakes cooking on the electric grill.

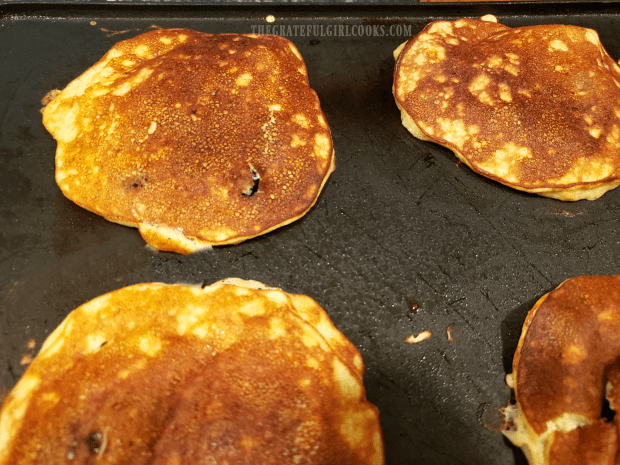
The photo below is what the banana blueberry pancakes looked like right after I flipped them to the other side. Nice and golden brown!

Continue to cook the pancakes until the other side is golden brown as well, and the center of the pancake is firm (not too soft and mushy). The pancakes are now done, and are ready to serve!

The banana blueberry pancakes are carefully flipped to cook other side.

Serve The Banana Blueberry Pancakes

Transfer the pancakes to a plate. Now, the pancakes DO have calories (just over 300), but if you are on the Weight Watchers Freestyle plan, pig out! 5 of these pancakes are zero points! If not on Freestyle plan, simply enjoy them all, or split them with someone you love!

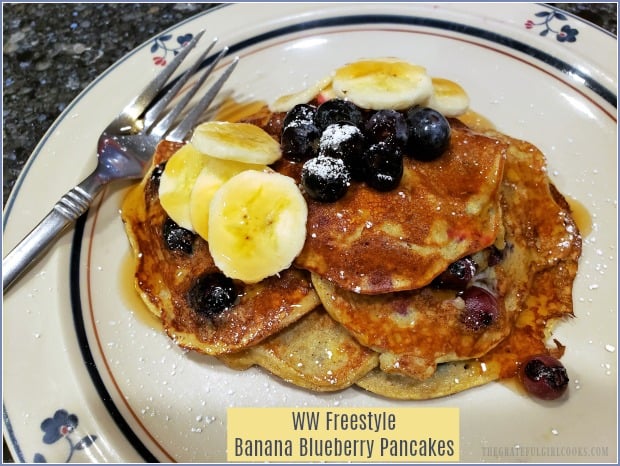
I garnished the pancakes with additional blueberries and several banana slices to make it “look pretty”, and served this dish.  The blueberries inside the pancakes are loaded with juice and flavor, so you can eat the pancakes just like this OR you can add just one more “garnish”!

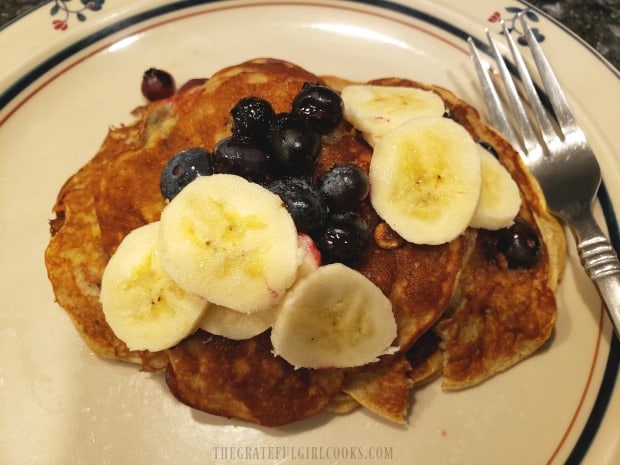
A serving of banana blueberry pancakes, topped with banana slices and fresh blueberries.

Other Optional Toppings For The Banana Blueberry Pancakes

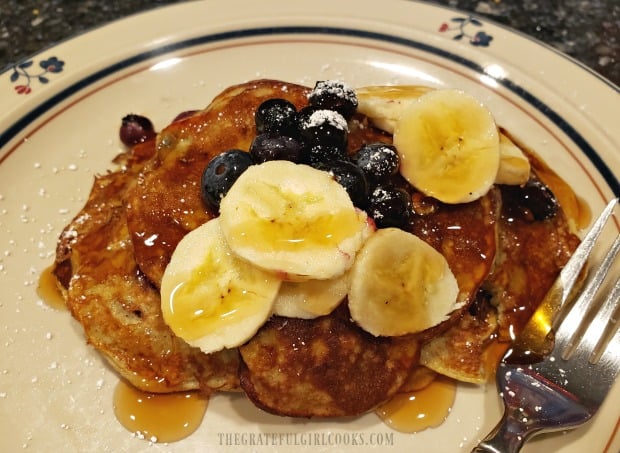
I lightly dusted the banana blueberry pancakes with 1/2 of a teaspoon of sifted powdered sugar (for the photo, of course!). How much or little you use is your choice (and extra calories).

You can also top these pancakes with traditional pancake syrup OR sugar-free pancake syrup (to stick with the plan), or just top them with a dollop of whipped cream. Again, these toppings have more calories (and points values), but eat them however you like ’em!

Banana blueberry pancakes, served with optional pancake syrup.

The banana blueberry pancakes are light in texture, popping with big, juicy blueberries, and have a wonderful flavor! WooHoo! I really hope you will give these a try, and trust you will enjoy them, too! Have a great day!

Looking For More PANCAKE Recipes?

You can find all of my recipes in the Recipe Index, located at the top of the page. A few wonderful “traditional” pancake recipes include:

Interested In More Recipes Via Newsletter?

Thank you for visiting this website. I appreciate you using some of your valuable time to do soIf you’re interested, I publish a newsletter 2 times per month (1st and 15th) with all the latest recipes, and other fun info. I would be honored to have you join our growing list of subscribers, so you never miss a great recipe!

There is a Newsletter subscription box on the top right side (or bottom) of each blog post, depending on the device you use, where you can easily submit your e-mail address (only) to be included in my mailing list.

You Can Also Find Me On Social Media:
Facebook page: The Grateful Girl Cooks!
Pinterest: The Grateful Girl Cooks!
Instagram: jbatthegratefulgirlcooks

Author's signature

Recipe Source: my hungry brain

↓↓ PRINTABLE RECIPE BELOW ↓↓

0 from 0 votes
WW Freestyle Banana Blueberry Pancakes
Prep Time
5 mins
Cook Time
4 mins
Total Time
9 mins
 
Delicious banana blueberry pancakes (5 ingredient) are made with NO flour, have GREAT flavor and ZERO points, if using Weight Watchers Freestyle plan.
Category: Breakfast
Cuisine: American
Keyword: banana blueberry pancakes
Servings: 1 serving (5 small pancakes)
Calories Per Serving: 318 kcal
Author: JB @ The Grateful Girl Cooks!
Ingredients
  • 1 large banana
  • 2 large eggs
  • 1/4 teaspoon cinnamon
  • 1/2 teaspoon baking powder
  • 1/2 teaspoon vanilla extract
  • 1/2 cup blueberries (approximate)
  • non-stick spray or vegetable oil
OPTIONAL GARNISHES INCLUDE: sliced banana, fresh blueberries, sifted powdered sugar, or pancake syrup (regular or sugar-free).
    Instructions
    1. Place a ripe banana (they are sweeter), two eggs, cinnamon, baking powder, and vanilla into a large mixing bowl. Use an electric mixer to fully blend these ingredients. NOTE: The mixture will be thinner than if you were using a commercially prepared pancake mix with flour in it.

    2. Spray an electric griddle (or large skillet) with non-stick baking spray (or lightly brush with oil). Heat the griddle on a medium-high heat. Once griddle is hot, carefully pour or ladle out batter into 5 pancakes (about 4" each in diameter). 

    3. As soon as all pancakes are on grill, place blueberries onto pancakes. Once bubbles have formed on pancake surface, and they are nice and brown underneath, carefully turn the pancakes to the other side using a spatula. NOTE: Be very careful when turning. The batter is thin, and since they are studded with the weight of the blueberries, you don't want to tear the pancakes! Continue to cook the pancakes until the other side is golden brown as well, and the center of the pancake is firm.

    4. Once done cooking, transfer pancakes to a plate. Garnish with additional banana slices and blueberries. Additional garnishes can include powdered sugar, whipped cream, regular or sugar-free pancake syrup, etc. (these calories are not included in calorie count!). Enjoy!
    Recipe Notes

    One serving is 5 small pancakes! Caloric Calculation was made without including optional garnishes. Wt. Watchers zero points were calculated without any garnishes except for additional blueberries and banana slices.

    Nutrition Facts
    WW Freestyle Banana Blueberry Pancakes
    Amount Per Serving (1 (5 small pancakes))
    Calories 318 Calories from Fat 99
    % Daily Value*
    Fat 11g17%
    Saturated Fat 3g19%
    Cholesterol 421mg140%
    Sodium 164mg7%
    Potassium 837mg24%
    Carbohydrates 40g13%
    Fiber 5g21%
    Sugar 22g24%
    Protein 16g32%
    Vitamin A 690IU14%
    Vitamin C 17.4mg21%
    Calcium 150mg15%
    Iron 2.5mg14%
    * Percent Daily Values are based on a 2000 calorie diet.

    Here’s one more to pin on your Pinterest boards!Delicious banana blueberry pancakes (6 ingredient) are made with NO flour, have GREAT flavor and ZERO points, if using Weight Watchers Freestyle plan.

    Créme Brulee Coffee Creamer

    It’s SO EASY to make yummy Créme Brulee Coffee Creamer from scratch in 10 minutes, using only 4 ingredients! A great addition to morning coffee!
    It's SO EASY to make yummy Créme Brulee Coffee Creamer from scratch, in 10 minutes, using only 4 ingredients! A great addition to morning coffee!

    Do you put creamer in your coffee? I sure do! As much as I WISH I could drink my coffee black, I just can’t do it! UGH. I LOVE coffee, but don’t want it to TASTE like COFFEE. Does that make sense? I seem to only enjoy coffee if it is flavored with creamer! Ha Ha!

    Well, we have bought our fair share of coffee creamer at the grocery store, but I also like to know how to make my own from scratch at home! I also enjoy knowing exactly what is in my creamer! It’s also good to know I can make coffee creamer in a pinch, if necessary!

    I’ve experimented with a recipe for cinnamon roll coffee creamer before, with great results, so it was time to try a new variety. Enter this recipe for Créme Brulee Coffee Creamer, from Aimee at Shugary Sweets! Since I love créme brulee for dessert, it seemed likely I would enjoy this creamer, too! The creamer is so very easy to make, and only takes 4 common ingredients!

    Scroll Down For A Printable Recipe Card At The Bottom Of The Page

    How To Make Créme Brulee Coffee Creamer

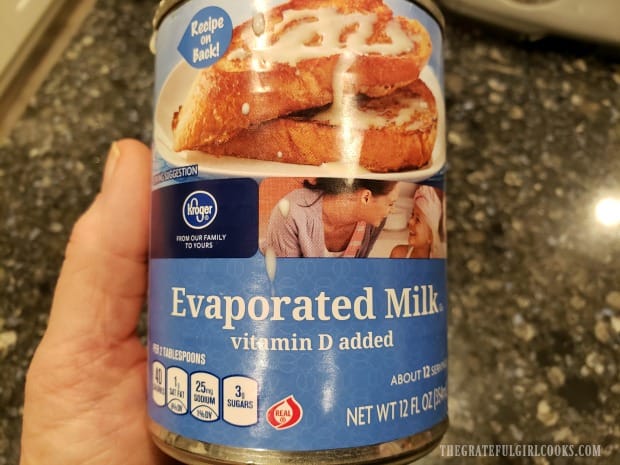
    Start with a 12 ounce can of EVAPORATED milk. Note that it is NOT condensed milk. This recipe will use EVAPORATED milk. That is important!

    Evaporated milk is used to make Créme Brulee Coffee Creamer.

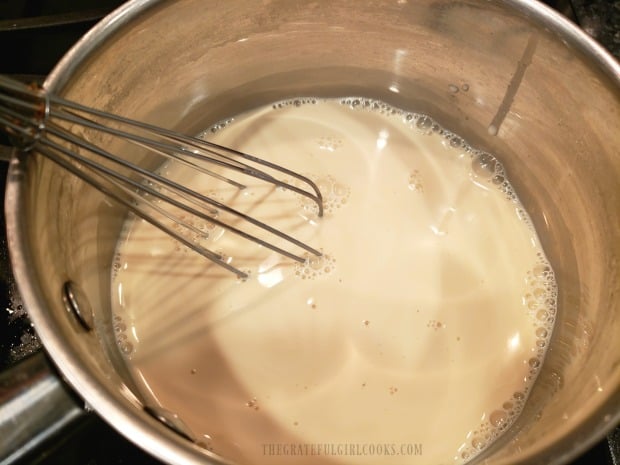
    Pour the evaporated milk and the brown sugar into a saucepan. Turn the heat to medium-low, and whisk these two ingredients, to combine. Continue whisking and cooking the créme brulee coffee creamer on medium-low heat for 2-3 minutes, until all the brown sugar has dissolved.

    Evaporated milk and brown sugar are cooked until sugar is dissolved.

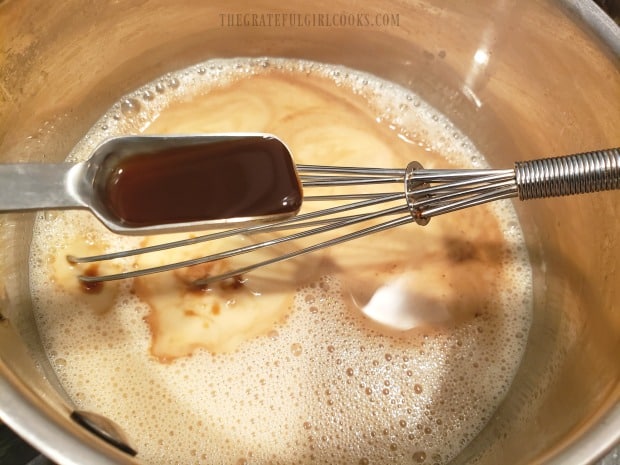
    Remove the pan from the heat, and stir in the milk and vanilla extract. So far, so good, right? NOTE: Any type of milk is fine to use (low-fat, non-fat), but whole milk will yield a “creamier” taste to this coffee creamer.

    Milk and then vanilla extract are added to the pan when making Créme Brulee Coffee Creamer.

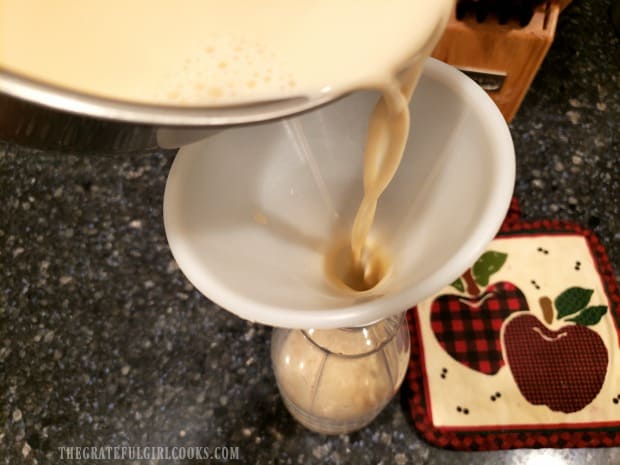
    Once mixed fully, pour the créme brulee coffee creamer into a container. You can use a quart sized canning jar, OR a clean old coffee creamer bottle, as shown in the photo below. I find it easiest to use a funnel to fill the bottle, which I insert directly into the top. It helps to prevent spills!

    The Créme Brulee Coffee Creamer is poured though a funnel into storage container.

    There you have it! You just made créme brulee coffee creamer! I ended up with about 24 ounces of creamer. Now it is time to dress up that dark, plain cup of coffee!

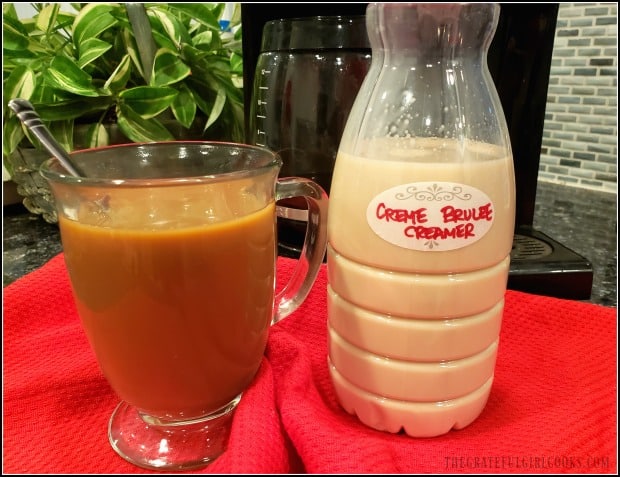
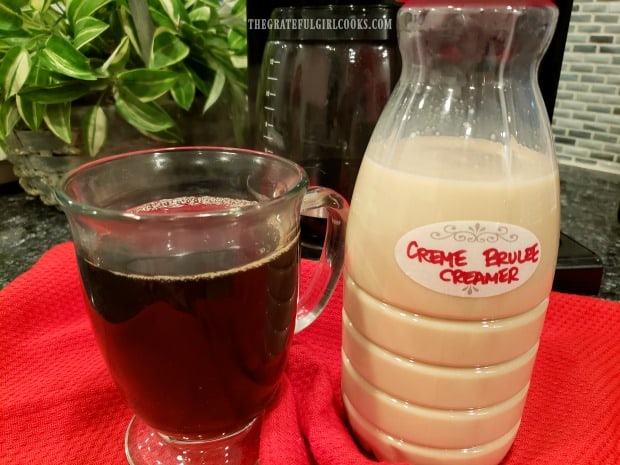
    Créme Brulee Coffee Creamer, ready to add to a hot cup of coffee.

    Aw… that’s better. Now my coffee is ready to enjoy!  I would point out that this creamer is not overly sweet, so if you like your creamer really sweet, you may want to slightly adjust the brown sugar amount that you add at the beginning.

    Keep the coffee creamer stored (covered) in the refrigerator. It’s shelf life will be the same as the expiration date on the carton of milk that you used to make this recipe. Enjoy!
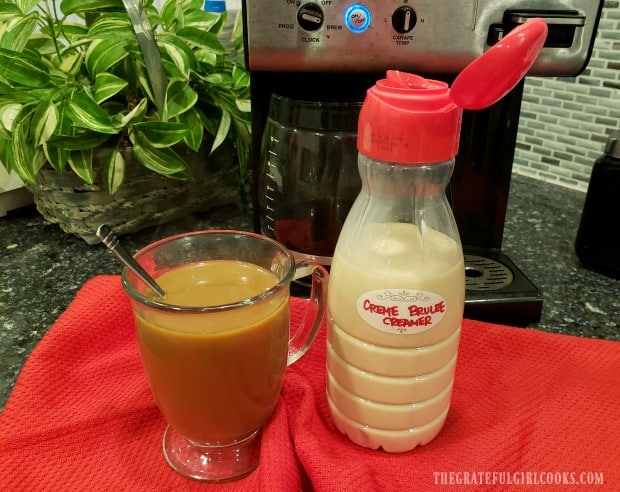
    The coffee with créme brulee coffee creamer is ready to drink and enjoy!
    See how easy it is to make your own homemade créme brulee coffee creamer? I bet you hardly even broke a sweat!  Hope you like this creamer. Enjoy your mug of coffee, and have a GREAT day! Be sure to check out ALL of my recipes in the Recipe Index, located at the top of the page.

    Interested In More Recipes?

    Thank you for visiting this website. I appreciate you using some of your valuable time to do soIf you’re interested, I publish a newsletter 2 times per month (1st and 15th) with all the latest recipes, and other fun info. I would be honored to have you join our growing list of subscribers, so you never miss a great recipe! 
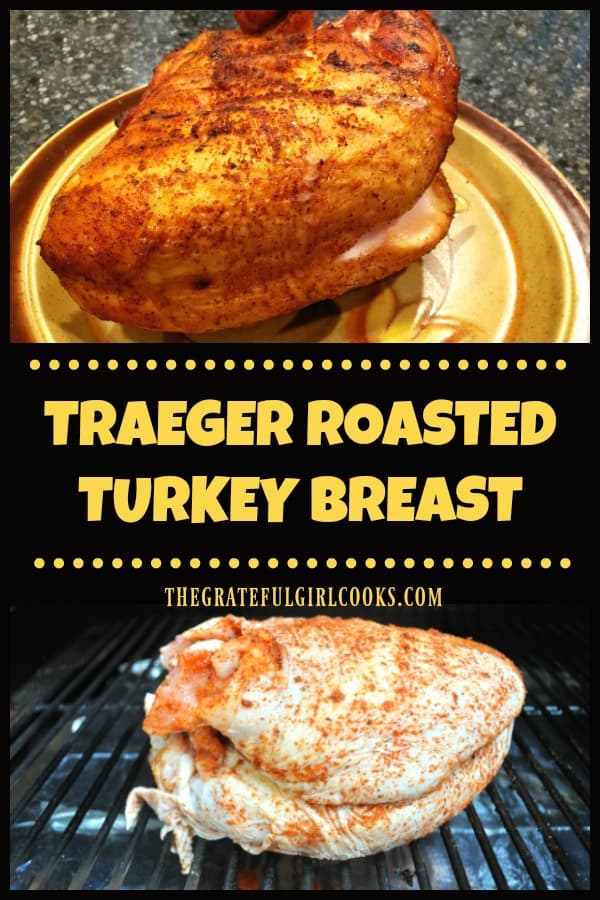
    There is a Newsletter subscription box on the top right side (or bottom) of each blog post, depending on the device you use, where you can easily submit your e-mail address (only) to be included in my mailing list.

    You Can Also Find Me On Social Media:

    Facebook page: The Grateful Girl Cooks!
    Pinterest:
    The Grateful Girl Cooks!
    Instagram:
    jbatthegratefulgirlcooks

    Author's signature

    Original Recipe Source: https://www.shugarysweets.com/creme-brulee-coffee-creamer/

    3.67 from 3 votes
    Créme Brulee Coffee Creamer
    Prep Time
    5 mins
    Cook Time
    5 mins
    Total Time
    10 mins
     
    It's SO EASY to make yummy Créme Brulee Coffee Creamer from scratch, in 10 minutes, using only 4 ingredients! A great addition to morning coffee!
    Category: Condiments
    Cuisine: American
    Keyword: coffee creamer
    Servings: 24 (2 T. per serving)
    Calories Per Serving: 46 kcal
    Author: JB @ The Grateful Girl Cooks!
    Ingredients
    • 12 ounces evaporated milk (one can)
    • 1/2 cup light brown sugar, packed
    • cups milk
    • 2 teaspoons vanilla extract
    Instructions
    1. Pour the evaporated milk and brown sugar into a saucepan. Turn the heat to medium-low, and whisk these two ingredients together, to combine. Continue whisking and cooking the creamer on medium-low heat for 2-3 minutes, until all the brown sugar has dissolved.

    2. Remove the pan from the heat, and stir in the milk and vanilla extract.  NOTE: Any type of milk is fine to use (low-fat, non-fat), but whole milk will yield a "creamier" taste to this coffee creamer.
    3. Once mixed fully, pour the créme brulee coffee creamer into a container. You can use a quart sized canning jar, OR a clean old coffee creamer bottle. TIP: I find it easiest to use a funnel to fill the bottle, which I insert directly into the top. It helps to prevent spills!

    Nutrition Facts
    Créme Brulee Coffee Creamer
    Amount Per Serving (2 Tablespoons)
    Calories 46 Calories from Fat 9
    % Daily Value*
    Fat 1g2%
    Cholesterol 5mg2%
    Sodium 22mg1%
    Potassium 69mg2%
    Carbohydrates 6g2%
    Sugar 6g7%
    Protein 1g2%
    Vitamin A 60IU1%
    Vitamin C 0.2mg0%
    Calcium 58mg6%
    Iron 0.1mg1%
    * Percent Daily Values are based on a 2000 calorie diet.

    Here’s one more to pin on your Pinterest boards!It's SO EASY to make yummy Créme Brulee Coffee Creamer from scratch, in 10 minutes, using only 4 ingredients! A great addition to morning coffee!