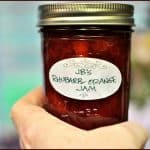
Peach Turnovers

Peach turnovers with vanilla glaze are delicious, and so quick and easy to make using peach pie filling and puff pastry sheets! Sure to be a family favorite!Peach turnovers with vanilla glaze are delicious, and so quick and easy to make using peach pie filling and puff pastry sheets! Sure to be a family favorite!

Well, I’m finally coming up for air again after having houseguests for nearly 3 of the past 5 weeks, AND having tweaked my back big-time. How about I just say that the month of JULY 2015 was a memorable one, and leave it at that! Seriously, it’s time to get back to the old blog , since I can now sit down at my desk without wincing (ouch!). Today I am sharing a quick recipe for peach turnovers!

Scroll Down For A Printable Recipe Card At The Bottom Of The Page

How I Came Up With the Recipe For Peach Turnovers

After I saw a doctor and was able to move again without as much pain, I canned 9 quarts of Peach Pie Filling after going out and picking peaches at a local U-Pick Farm. I had to make up for lost time! With just a little bit of pie filling left over, I tried to figure out what else I could make with it. 

I remembered I had one sheet of Puff Pastry left in my freezer, and decided to make some quick Peach Turnovers, and off to the kitchen I went! The recipe uses two pastry sheets to make 8 turnovers, but I only made half a recipe, which is why you only see 4 turnovers in my pictures. The printable recipe gives the amount necessary to make 8 turnovers.

Prepare The Puff Pastry

First I got out the frozen puff pastry and let it thaw on the counter for about half an hour. The thawing out time was the hardest/longest part of the whole recipe. Go figure!

Puff pastry sheets are used to make peach turnovers.
Once thawed, carefully unroll the entire pastry sheet, and seal the perforated fold lines in the pastry together (using fingers) to form one whole sheet of puff pastry. You can see the fold lines in the photo below.

Puff pastry is rolled out and perforated lines in dough are sealed.
Cut the pastry into 4 equal sized squares, using a knife.

Peach turnover dough is cut into 4 equal squares.
Add The Peach Pie Filling

Place a heaping Tablespoonful of peach pie filling into the middle of each square, trying not to put too much onto each square (if using canned pie filling, you will not use the entire can!). Brush all the edges of each square with a beaten egg white and water mixture, then fold one side of each square (over the pie filling) to the opposite side, to form a triangle.

Once each triangle is made, crimp the edges of each triangle using the tines of a fork to seal the two sides of the dough together. (sorry, forgot to take photo of the crimping part). You can also just pinch the two pieces of dough together to completely seal the edges of the peach turnovers.

Peach pie filling is added to puff pastry squares, then dough is folded over.
Bake The Peach Turnovers

Carefully place the peach turnovers onto a cookie sheet which has been sprayed with non-stick spray, and bake for 20-25 minutes until light golden brown. When I make them, it usually takes 23 minutes, but keep an eye on yours, as oven temps can vary quite a bit!

Peach Turnovers are baked, then cooled on wire rack.
Time To Glaze The Turnovers

Once done, remove the peach turnovers to a wire rack to cool slightly. I place aluminum foil under the rack to catch any drips that might occur while glazing the turnovers. Mix up a quick glaze while the hand pies are cooling, and drizzle each of them with it.

Peach Turnovers are drizzled with glaze once cooled.
The glaze firmed up in a few minutes, then these delicious Peach Turnovers were ready to eat.  The recipe makes 8 peach turnovers (using 2 sheets of puff pastry), and I think they would be fantastic hand pies with cherry or apple pie filling, as well.

Peach Turnovers / The Grateful Girl Cooks!

Sure hope you will give these delicious peach turnovers a try. Hope you have a great week! Make the most of every minute you are given… and go out and make a difference to all you happen to interact with today!

Looking For More Recipes For PEACH DESSERTS?

You can find ALL of my recipes in the Recipe Index, located at the top of the page. I have some wonderful peach desserts you might be interested in, including:

Interested In More Recipes?

Thank you for visiting this website. I appreciate you using some of your valuable time to do soIf you’re interested, I publish a newsletter 2 times per month (1st and 15th) with all the latest recipes, and other fun info. I would be honored to have you join our growing list of subscribers, so you never miss a great recipe!
There is a Newsletter subscription box on the top right side (or bottom) of each blog post, depending on the device you use, where you can easily submit your e-mail address (only) to be included in my mailing list.

You Can Also Find Me On Social Media:

Facebook page: The Grateful Girl Cooks!
Pinterest:
The Grateful Girl Cooks!
Instagram:
jbatthegratefulgirlcooks

Author's signatureRecipe Source: http://thedomesticrebel.com/2015/07/13/the-easiest-peach-turnovers/

0 from 0 votes
Peach Turnovers
Prep Time
15 mins
Cook Time
23 mins
Total Time
38 mins
 

Peach turnovers with vanilla glaze are delicious, and so quick and easy to make using peach pie filling and puff pastry sheets! Sure to be a family favorite!

Category: Dessert
Cuisine: American
Keyword: peach turnovers
Servings: 8 turnovers
Calories Per Serving: 514 kcal
Author: JB @ The Grateful Girl Cooks!
Ingredients
For the Turnovers:
  • 1 box puff pastry (2 sheets total), thawed
  • 21 ounces (1 can) peach pie filling (or use your own homemade peach pie filling)
  • 1 egg white , beaten with 1 teaspoon water
For the Glaze:
  • 2 cups powdered sugar
  • 2 Tablespoons milk
  • 1 teaspoon vanilla extract
Instructions
  1. Preheat your oven to 375 degrees F.
  2. Prepare 2 cookie sheets by spraying with non-stick spray (or line with parchment paper). Set prepared sheets aside. You will put 4 turnovers on each baking sheet.
  3. Thaw the puff pastry sheets per instructions on box (approx. 30 min). Carefully unroll the puff pastry sheets, then gently press any of the perfprated fold lines together so that they are completely sealed.
  4. Cut the pastry sheets into four equal square pieces, using a sharp knife.
  5. Place a large Tablespoonful of peach pie filling into the middle of each puff pastry square.
  6. In a small bowl, mix together the egg white and the water. Make one turnover at a time. Use a pastry brush to brush the edges of the pastry square with egg white mixture. After brushing edges with egg white mixture, gently take one corner of the puff pastry and bring it over the pie filling to the opposite corner. Use the tines of a fork to crimp the 2 edges shut, which will seal the dough.
  7. Brush the top of each turnover with the egg white/water mixture. Repeat this process with each of the turnovers.
  8. Gently place turnovers onto prepared baking sheets. Bake at 375 degrees for about. 20-25 minutes. The turnovers should be a light golden brown when done. Remove to a wire rack to cool.
  9. While the turnovers are cooling down, whisk the glaze ingredients together in a medium sized bowl. You want the glaze to be smooth, and pourable. Add a bit more milk if necessary to thin glaze out a bit. Drizzle the glaze decoratively over the tops of the turnovers. When glaze has firmed up a bit, the turnovers are ready to serve and enjoy!
  10. These turnovers are great warm... OR at room temperature, and are best eaten on the day you make them. Enjoy!
Recipe Notes

30 minutes needed to thaw out the frozen puff pastry is not included in the Prep Time. Perhaps thaw the pastry earlier in the day and keep refrigerated until ready to use. Once pastry is thawed, these can be put together and baked in no time at all!

Nutrition Facts
Peach Turnovers
Amount Per Serving (1 turnover)
Calories 514
* Percent Daily Values are based on a 2000 calorie diet.

Here’s one more to pin on your Pinterest boards!Peach turnovers with vanilla glaze are delicious, and so quick and easy to make using peach pie filling and puff pastry sheets! Sure to be a family favorite!


Save

Save

Raspberry Jam

Making homemade raspberry jam and canning jars of it for long term storage is a great way to enjoy the taste of summer raspberries all year round!Making homemade raspberry jam and canning jars of it for long term storage is a great way to enjoy the taste of fresh summer raspberries all year round!
It’s THAT time of year once again… I go and pick fresh berries at a local U-Pick Farm, then come home and “morph” the berries into several different recipes. This Raspberry Jam is the result of my latest berry picking adventure!

Scroll Down For A Printable Recipe Card At The Bottom Of The Page

I Love To Pick Raspberries At A Local Farm

There’s something to be said for picking your own raspberries in the cool of the morning on a gorgeous day. It’s also fun to use those fresh-picked berries to make raspberry jam! That’s my feeling every single time I pick berries at a local U-Pick place, called Rowell Brothers Berry Farm, which has been in existence since 1853.

Fresh raspberries, ready to pick!
This time I picked about 14 pounds of Willamette Red Raspberries. Here’s a few of them…

One of the buckets of fresh raspberries, freshly picked!
I use a lot of berries picked to make homemade raspberry jam. Jam making, once you get the “basics” down, is fairly easy and results in lots of jars of jam to store in our pantry.

Prepare Equipment and Jars For Canning

To make this recipe for raspberry jam, first wash and pre-heat the jars and lids (lids are in separate bowl). Follow all manufacturer guidelines for canning equipment.

Jars are preheated in a water bath canner, used to make jamPrepare The Raspberry Jam

Crush the raspberries (I used my trusty potato masher), measure the exact amount of raspberries into a large cooking pot, then add one box (2 ounces) of powdered fruit pectin, and stir it in.

Fruit pectin powder is added to crushed raspberries in large pot.
Bring the raspberry/pectin mixture to a full rolling boil (a “rolling boil” means it won’t stop boiling even while stirring), then add the sugar quickly, and stir it all to combine.

Granulated sugar is added to fruit in pan when making jam.
Bring the raspberry/pectin/sugar mixture to a full rolling boil, then continue boiling it for exactly 4 minutes, stirring constantly.

Raspberries, pectin and sugar are brought to a full rolling boil.
After it has boiled for 4 minutes, remove pan from heat, and skim off the foam that has accumulated on the top of the jam mixture.

Foam is skimmed off the cooked raspberry jam mixture in pot.Fill the Jars With Jam

Ladle the HOT raspberry jam into prepared canning jars, using a wide mouth canning funnel.

Hot raspberry jam is ladled into hot canning jars using a funnel
Add jam up to 1/8 inch headspace from the top of the jar, then follow standard canning instructions for removing the air bubbles from jam.

Headspace is measured in canning jar.
Adjust the headspace (if necessary), then wipe rim of the jar with a wet paper towel to remove any jam debris (so the jar would seal properly).

Rims of the jam jars are wiped clean so lids will seal.
Use magnetic canning wand (if you have one) to pick up the hot lids out of the water, and place one on each jar.

Canning wand with magnetic tip lifts lids to place on jars.
Screw the jar rings on, fingertip tight, then carefully lower jars into water bath canner, making sure that jars are completely covered by at least one inch of water above the tops of the jars.

Jars of raspberry jam sit in water on rack inside cannerProcess The Jars Of Raspberry Jam

Cover the canner, and bring water to a boil. Process the raspberry jam for 10 minutes (after it comes to a boil).

Canner is covered, then raspberry jam is processed for 10 minutes.
When processing time is done, turn off heat, wait for a couple minutes, remove lid, then remove jars of raspberry jam (using canning tongs), and set them on a dish towel to cool.

Raspberry jam in sealed jars cool to room temperature after processing.
Let the jars sit, undisturbed on the dish towel for 24 hours, listening for the tell-tale “PING” sounds, which means the jars have sealed. Check the seal by lightly pressing on the middle of the lid with a finger. If the jar did not seal, the lid will spring back. if that happens, you must refrigerate that jar of jam.

After 24 hours, I put all the jars of jam into our pantry, to use up throughout the year and to give as gifts. Just yesterday, I gave a jar to my next door neighbor That’s it… a little bit of time guarantees us absolutely delicious, fresh raspberry jam all year long! YAY!  Sure hope you’ll give this recipe a try!

Looking For More JAM Recipes?

You can find all of my jam recipes in the Recipe Index, located at the top of the page. I have several, including:

Interested In More Recipes?

Thank you for visiting this website. I appreciate you using some of your valuable time to do soIf you’re interested, I publish a newsletter 2 times per month (1st and 15th) with all the latest recipes, and other fun info. I would be honored to have you join our growing list of subscribers, so you never miss a great recipe!
There is a Newsletter subscription box on the top right side (or bottom) of each blog post, depending on the device you use, where you can easily submit your e-mail address (only) to be included in my mailing list.

You Can Also Find Me On Social Media:

Facebook page: The Grateful Girl Cooks!
Pinterest:
The Grateful Girl Cooks!
Instagram:
jbatthegratefulgirlcooks

Have a GREAT day!

Author's signatureRecipe Source: Instruction page for jam, found in box of MCP Premium Fruit Pectin.

0 from 0 votes
Raspberry Jam
Prep Time
30 mins
Cook Time
10 mins
Total Time
40 mins
 
Making homemade raspberry jam and canning jars of it for long term storage is a great way to enjoy the taste of fresh summer raspberries all year round!
Category: Jam
Cuisine: American
Keyword: raspberry jam
Servings: 10 cups (approx.10 half pint jars)
Calories Per Serving: 43 kcal
Author: JB @ The Grateful Girl Cooks!
Ingredients
  • 6 cups of crushed raspberries (measure AFTER crushing them)
  • 8 1/2 cups granulated sugar
  • 2 ounces Classic powdered fruit pectin (1 box)
Instructions
  1. Fill a boiling water canner half full of water. Bring this to a simmer. (At the same time, I start a teapot with water going, so I will have boiling water for the jar lids later on). Wash jars and lids in soapy hot water. Put lids in small bowl. Fill jars with water and put in canner on a rack, while it is simmering, to keep jars warm. (Or you can set jars on dish towel on a cookie sheet and keep in oven at 250 degrees for 20 minutes for same effect).

  2. In a large bowl, measure out the exact amount of sugar. Set aside.
  3. Crush the raspberries, one cup at a time, until you have 6 cups of mashed berries. Put the berries into a large stock pot. Stir the box of Pectin into the berries. Bring the raspberry mixture to a full rolling boil on high heat, stirring constantly (a rolling boil is when it is boiling hard, so that it won't stop bubbling even when stirred). Stir in all of the sugar quickly (all at once). Stir well to combine.

  4. At this point, I pour boiling water over the jar lids that are in the little bowl. Let them just sit in the hot water for 5 minutes while you finish the jam.
  5. Bring the jam/pectin/sugar mixture back to a full, rolling boil. Once it is a full rolling boil, boil it for exactly 4 minutes, stirring constantly. When time is up, remove pan from heat, then skim off any accumulated foam (and discard foam). Ladle the hot jam mixture into hot, prepared jars. Fill the jars, but leave 1/8 inch headspace at the top of each jar. Insert a plastic knife into each jar a couple times to help remove air bubbles. Adjust the headspace if necessary. Use a damp cloth or paper towel to wipe down the rim and edges of the jar. You need it free of debris in order to get a good seal on the jar. Cover the jars with the hot, flat jar lid. Screw on the jar rings tightly.

  6. Lower each of the jars onto an elevated rack in the canner. The jars must be completely covered with water, and must have at least an inch of water over the top of the jar. Add more boiling water to canner, if necessary, to make sure.
  7. Cover the canner; bring to a gentle boil. Once the water is boiling, process the jars for 10 minutes. When done, wait for a minute, carefully remove canner lid (lift lid away from you because of steam); carefully lift each jar out of water (with canning tongs), and place on dish towel on the counter to cool (do not put jars directly on counter cause you don't want temperature differences to possibly crack jars). You should hear "ping" sound as the jars seal properly.

  8. After the jars cool for 24 hours, you can check to see they sealed properly by pressing the middle of the lid. The jar should NOT spring back when touched. If it does spring back, then you will need to refrigerate that particular jar. Let the sealed jars stand at room temp for 24 hours, then store unopened in a cool, dark place for up to 1 year.

Recipe Notes

FYI-The ten cups of jam this recipe produced filled the equivalent of 10 half-pint jars.

Nutrition Facts
Raspberry Jam
Amount Per Serving (1 Tablespoon)
Calories 43
% Daily Value*
Potassium 6mg0%
Carbohydrates 11g4%
Sugar 10g11%
Vitamin C 1.2mg1%
Calcium 1mg0%
* Percent Daily Values are based on a 2000 calorie diet.

Here’s one more to pin on your Pinterest boards!Making homemade raspberry jam and canning jars of it for long term storage is a great way to enjoy the taste of fresh summer raspberries all year round!


Save

Save

Quick n’ Easy Chef’s Salad

Summertime. Heat. Hot. UGH. What better time to make a Quick n’ Easy Chef’s Salad for dinner? This is a great idea for those HOT, HOT, summer days when you don’t really want to heat up the kitchen or cook a lot. Quick n' Easy Chef's Salad / The Grateful Girl Cooks!
My husband and I love to have lighter meals at times when it is so hot outside that all you want to do is fill your tummy or feed your family, without exerting too much energy. Ever have days like that? I do, occasionally. Well, why not throw together a healthy, delicious entree salad, filled with lots of veggies AND protein and make THAT your meal? The bonus is that it’s quick, easy, and delicious!

Chef Salads are kind of like that. You just “build” them as you like them. Usually I start with a bed of mixed greens. I slice up some hard-boiled eggs (see my cute little egg picture below?), slice cheese into stick-like portion sizes (I’ve used cheddar in these photos, but have also used cheddar and pepper jack combo before), chop a few tomatoes and/or other veggies like green/red peppers, cucumber chunks, red onions, etc, and slice up some deli-bought ham and turkey slices.

Then I assemble it all (as decoratively as my little old hands can), on a dinner plate, and top it with my favorite salad dressing. **In case you’re wondering, my favorite salad dressing is bleu cheese. (I posted that in case you want to send me a case of bleu cheese dressing for my birthday).

Really the “hardest” thing about making this salad  is just hard-boiling the eggs ahead of time. No biggie.

By the way, speaking of eggs… I love my handy-dandy little ol’ egg slicer I’ve had for over 30 years. Still works like a charm to make even slices of hard boiled egg to garnish this salad or potato salad with. Just sayin’. From the looks of this picture, it looks like it needs a good cleaning!

Quick n' Easy Chef's Salad / The Grateful Girl Cooks!Quick n' Easy Chef's Salad / The Grateful Girl Cooks!
Anyways… just build the salad the way you or your family likes it. This is just the way I do it. Nothing too fancy… just GOOD. You really can’t go wrong with hard-boiled eggs, ham/turkey, cheese, and whatever veggies you want.

Just try to make it look good. Remember… we eat with our eyes, right? (something like that… I do tend to use a fork for this meal).

Quick n' Easy Chef's Salad / The Grateful Girl Cooks!
It’s as simple as that! You really can make a quick, healthy, entree Chef’s Salad for much less than you would spend to buy one in a restaurant. Hope you will consider making a Chef’s Salad for you and your significant others sometime this summer.

Quick n' Easy Chef's Salad / The Grateful Girl Cooks!
Hope you will be inspired to make a Chef’s Salad this summer, and make it your OWN way. Have a great summer. Enjoy the beauty all around (look closely- you can find it everywhere); practice thankfulness, and try to make the most out of each day you are given.

God Bless You!

Interested In More Recipes?

Thank you for visiting this website. I appreciate you using some of your valuable time to do so.  If you’re interested, I publish a newsletter 2 times per month (1st and 15th) with all the latest recipes, and other fun info. I would be honored to have you join our growing list of subscribers, so you never miss a great recipe! 

There is a Newsletter subscription box on the top right side (or bottom) of each blog post, depending on the device you use, where you can easily submit your e-mail address (only) to be included in my mailing list.

You Can Also Find Me On Social Media:

Facebook page: The Grateful Girl Cooks!
Pinterest:
The Grateful Girl Cooks!
Instagram:
jbatthegratefulgirlcooks

Quick n' Easy Chef's Salad / The Grateful Girl Cooks!


Here’s one more to pin on your Pinterest boards!Quick n' Easy Chef's Salad / The Grateful Girl Cooks!

Save

Save

Healthy Chocolate Banana “Ice Cream”

All you need are several frozen bananas, cocoa powder and a food processor to make a batch of this yummy and healthy Chocolate Banana “Ice Cream”!All you need are several frozen bananas, cocoa powder and a food processor to make a batch of this yummy and healthy Chocolate Banana "Ice Cream"!
So… here’s the backstory on this Healthy Chocolate Banana “Ice Cream”… there’s no cream in this at all!  As a matter of fact, there are only TWO ingredients. Frozen bananas and cocoa powder.

And amazing as it seems, I was skeptical the first time I tried it, but boy was I surprised! It tasted GREAT! All the flavor of chocolate banana ice cream, but it’s NOT ice cream! Take note, calorie-counters!

The only thing you need to have is a food processor or a majorly powerful blender (and some previously frozen bananas!) to mix this up really well. I am fortunate that I was given one that a family member no longer wanted… yay! That makes this healthy chocolate banana ice cream a breeze to make.

Scroll Down For A Printable Recipe Card At the Bottom Of The Page

Really Ripe Bananas Are Essential For Sweetness!

You know those bananas on the counter that have turned brown? Yeah. Put them into your freezer instead of throwing them away. They give this chocolate banana ice cream it’s creaminess and natural sweetness.

See these gnarly looking bananas? They are perfect for this recipe. They are frozen solid. Yep. Sometimes I peel them before freezing, but other times I just shove them in the freezer just the way they are!

Frozen ripe bananas, ready to peel to make ice cream!
Processing Healthy Chocolate Banana Ice Cream Is Easy!

Take those completely frozen bananas, peel, and then slice them into small chunks. Now toss the slices into your handy dandy food processor (or heavy duty blender).

Frozen chunks of banana are placed in a food processor.
Put the lid on and fire up your food processor to pulse the frozen banana chunks. After a minute or so the frozen bananas should be in tiny pieces and look like this (shown below).

The frozen bananas are processed into tiny pieces in food processor.
Time To Add Some Chocolate Flavoring

Once the bananas are pulverized into tiny pieces, add 4 Tablespoons cocoa powder to the mix. The cocoa powder adds wonderful flavor to the healthy chocolate banana ice cream, without adding lots of calories!

Cocoa powder is added to the frozen bananas in the food processor.
Keep Processing The Healthy Chocolate Banana Ice Cream

Turn the food processor back on, and keep on pulsing/mixing the ingredients together. Have no fear… this WILL work! Be patient, because this will take a bit of time to fully come together into a creamy, delicious treat!

Continue processing the frozen bananas and cocoa powder until smooth.
All Of A Sudden- “Ice Cream”!

After several minutes (when you think it’s NOT ever gonna turn into anything that resembles ice cream, and you’re starting to get hungry) this happens (see photo below)! Whoa… I’ll bet ya didn’t see THAT happening! Those frozen bananas and cocoa powder turn into a smooth, delectable  “Ice Cream-y” looking mixture! Time to stop processing it, and EAT!

Finally the healthy chocolate banana ice cream is smooth and creamy!Okay, Now What?

Now that it’s finished processing, you can either eat it right away, OR put it into a sealed container in your refrigerator’s freezer for awhile and let it firm up more. I usually let it firm up a bit in the freezer (after sampling it, of course!). The photo below shows what it looks like going into the freezer. Once frozen, let it sit out a few minutes to thaw slightly before serving, then enjoy!

Let healthy chocolate banana ice cream firm up in the freezer, after processing.
Enjoy every bite, knowing you saved some calories by not pigging out on regular ice cream, but enjoyed this delicious treat instead!  Remember… 7 bananas, 4 T. cocoa powder, and MIX, MIX, MIX. (makes approx. five or six 1/2 cup servings).

I thought everyone had heard of this kind of “ice cream” before, but we had a friend visit here recently. She had never heard of this before, so she tried some, and was quite surprised how good it was!  See? Scientific proof. Absolutely 1 out of 1 house guests recommend this treat! Hope you will give it a try, as well. You’re gonna love it!

Looking For More FROZEN TREAT Recipes?

You can find all of my recipes in the Recipe Index, located at the top of the page. I have lots of traditional ice cream recipes, too. A few favorite frozen treats include:

Interested In More Recipes?

Thank you for visiting this website. I appreciate you using some of your valuable time to do soIf you’re interested, I publish a newsletter 2 times per month (1st and 15th) with all the latest recipes, and other fun info. I would be honored to have you join our growing list of subscribers, so you never miss a great recipe! 

There is a Newsletter subscription box on the top right side (or bottom) of each blog post, depending on the device you use, where you can easily submit your e-mail address (only) to be included in my mailing list.

You Can Also Find Me On Social Media:

Facebook page: The Grateful Girl Cooks!
Pinterest:
The Grateful Girl Cooks!
Instagram:
jbatthegratefulgirlcooks

Author's signature


Here’s one more to pin on your Pinterest boards!All you need are several frozen bananas, cocoa powder and a food processor to make a batch of this yummy and healthy Chocolate Banana "Ice Cream"!

Save

Save

Save

Easy Grilled Chicken with Jerk Seasoning

I found a new recipe for seasoning grilled chicken. It’s called EASY Grilled Chicken With Jerk Seasoning, and the jerk seasoning is made from scratch!  The recipe is really, really simple… and there are layers of flavors to the jerk spiced chicken that completely surprised me. EASY Grilled Chicken With Jerk Seasoning / The Grateful Girl Cooks!
Wanna know a little secret? Until I made this easy recipe, I had NEVER used Jerk seasoning before on anything. ANYTHING. I’d heard of chicken with jerk seasoning, but never had madeany meals that included this spice mix. Hmmm. What about you? Have you ever tried Jerk Seasoning? Well, here’s a simple recipe to give it a try!

All I had heard before trying this spice was that it is filled with layers of amazing flavors, was a dry rub for pork or chicken, and that it is thought to be native to Jamaica. So I decided to give it a try with this super easy recipe for mixing up the Jerk seasoning, and then grilling chicken with the spices on it. How hard can THAT be, right? NOT. This is ridiculously EASY.

To make the Jerk spice rub, here’s what ya do… First you mix the spices  in a small bowl. (Easy, right?)

EASY Grilled Chicken With Jerk Seasoning / The Grateful Girl Cooks!
Add a tablespoon of oil to the spices.

EASY Grilled Chicken With Jerk Seasoning / The Grateful Girl Cooks!
Give it a good stir to fully blend it all together. It will look like this (and it only took a second to make!)

EASY Grilled Chicken With Jerk Seasoning / The Grateful Girl Cooks!
Now use your hands and rub the spices onto both sides of the chicken. Coat it as thin or as thick as you like. I did a fairly thin layer, and the flavors were wonderful!

EASY Grilled Chicken With Jerk Seasoning / The Grateful Girl Cooks!Time To Cook The Chicken With Jerk Seasoning!

Put the chicken onto your hot BBQ grill (or you can also make this in a hot skillet in the kitchen). Note: Recipe makes enough spice for 4 chicken breasts; I only cooked 3 (FYI).

EASY Grilled Chicken With Jerk Seasoning / The Grateful Girl Cooks!
Cook the chicken (time will vary depending on size of pieces) until done, turning to cook both sides. (We cooked ours for about 10 minutes per side).

When the chicken is done, the outside will be a very deep brown color, and the insides will not be pink.

EASY Grilled Chicken With Jerk Seasoning / The Grateful Girl Cooks!
I served the chicken with a side of white rice (nice and bland went well with the flavorful and full of taste chicken, and a green salad. That’s it!  See how easy that was?

EASY Grilled Chicken With Jerk Seasoning / The Grateful Girl Cooks!
The chicken with jerk seasoning was delicious. It’s hard to describe, but each bite had many levels of flavor… at times a tiny bit spicy, other bites I got the sweet flavor of the brown sugar, and various spices that complimented the chicken well. I would definitely make this recipe again!

Hope you will give this recipe a try. Next time I’ll try this seasoning rub on pork, and see how that tastes, as well! Have a great day!

Interested In More Recipes?

Thank you for visiting this website. I appreciate you using some of your valuable time to do so.  If you’re interested, I publish a newsletter 2 times per month (1st and 15th) with all the latest recipes, and other fun info. I would be honored to have you join our growing list of subscribers, so you never miss a great recipe!
There is a Newsletter subscription box on the top right side (or bottom) of each blog post, depending on the device you use, where you can easily submit your e-mail address (only) to be included in my mailing list.

You Can Also Find Me On Social Media:
Facebook page: The Grateful Girl Cooks!
Pinterest: The Grateful Girl Cooks!
Instagram: jbatthegratefulgirlcooks

EASY Grilled Chicken With Jerk Seasoning / The Grateful Girl Cooks!Recipe Source: http://pinchofyum.com/super-simple-jerk-chicken

0 from 0 votes
Easy Grilled Chicken with Jerk Seasoning
Prep Time
5 mins
Cook Time
20 mins
Total Time
25 mins
 
Enjoy the many levels of flavor of Jamaican Jerk Seasoning in this easy grilled chicken dish.
Category: Entree
Cuisine: Jamaican
Keyword: chicken with jerk seasoning
Servings: 4 servings
Calories Per Serving: 187 kcal
Author: JB @ The Grateful Girl Cooks!
Ingredients
For Jerk Seasoning:
  • 2 teaspoons allspice
  • 2 Tablespoons brown sugar
  • 1/2 teaspoon cumin
  • 1/4 teaspoon cloves
  • 1/4 teaspoon cinnamon
  • 1 teaspoon salt
  • 1/2 teaspoon ground black pepper
  • 1/8 teaspoon cayenne pepper
  • 1 Tablespoon canola oil (or vegetable oil)
  • 4 boneless, skinless chicken breasts , (4 oz. each)
Instructions
  1. Mix all the spices and oil in a small bowl.
  2. Using your hands, rub the spice mixture over both sides of each chicken breast to fully coat (spread spices thin or thick-your choice!).
  3. Preheat your BBQ grill or a skillet. You want both of them to be really hot when you add the chicken.
  4. Cook chicken on both sides until done (dark brown on outside, not pink on inside). Our chicken breasts which were fairly large, cooked for about 8-10 minutes on each side. Yours may take less time or more time, depending on how large or small the pieces of chicken are.
  5. Once chicken is done, remove it from heat, cover with foil and let it "rest" for about 5 minutes before serving. This will help the juices to stay in and soak in to the meat.
  6. Serve, and enjoy!
Nutrition Facts
Easy Grilled Chicken with Jerk Seasoning
Amount Per Serving (1 breast)
Calories 187 Calories from Fat 54
% Daily Value*
Fat 6g9%
Cholesterol 72mg24%
Sodium 716mg31%
Potassium 430mg12%
Carbohydrates 7g2%
Sugar 5g6%
Protein 24g48%
Vitamin A 60IU1%
Vitamin C 1.7mg2%
Calcium 17mg2%
Iron 0.6mg3%
* Percent Daily Values are based on a 2000 calorie diet.

Here’s one more to pin on your Pinterest boards!EASY Grilled Chicken With Jerk Seasoning / The Grateful Girl Cooks!


Save

Save

Save

Bread and Butter Pickles

Learn how to make traditional Bread and Butter Pickles, (perfect topping for burgers, sandwiches or just for snacking), and can the jars, for long term storage!Learn how to make traditional Bread and Butter Pickles, (perfect topping for burgers, sandwiches or just for snacking), and can the jars, for long term storage!Do you enjoy pickles?  I never really liked Bread and Butter Pickles… until a year ago, when my friend Sandy let me try some of the ones she grew in her garden (pickling cucumbers) and canned.

I’ve been a dill pickle fan since Jr. High School when I ordered HUGE dill pickles to sell to students during our annual Spirit Week.  I even used to buy GIANT SIZED dill pickles in the Main Street “General Store” at Disneyland as a kid. But bread and butter pickles? Didn’t like them too much until I tried these homemade ones.

Whoa… they were good! Really changed my opinion of them.  So this year, I decided to make my own with some of the pickling cucumbers I grew in our backyard raised bed garden. I got the recipe out of my “Ball Complete Book of Home Preserving”, which I bought last year, and found a recipe for Traditional Bread and Butter Pickles. Sounded good, so I thought I would give it a try! And guess what? It was pretty easy, and they are soooo good!

This recipe makes approximately 5 pint jars, so it’s not a HUGE batch, but it IS more than enough for our needs.

Scroll Down For A Printable Recipe Card At The Bottom Of The Page

Here’s How To Make Bread And Butter Pickles

Slice both ends off each of the cucumbers (discard ends), then slice cucumbers into 1/4 inch slices. Thinly slice the onions, as well.

Pickling cucumbers used to make bread and butter pickles

Place the sliced pickling cucumbers, onions, and canning salt into a large glass (or stainless steel) bowl.

Pickling cucumbers, sliced onions and canning salt are mixed in large glass bowl

Mix them up real good, then cover the mixture completely with water, and let it stand at room temperature for 2 hours. It really helps to put a small salad plate on top to keep the cucumbers submerged.

Sliced pickling cucumbers and onions submerged in water
Make The Pickling Brine

While the cucumbers are taking a bath, mix up the pickling brine AND get your canning jars and lids prepared for canning (cleaned/heated per USDA canning guidelines).

To make the brine, mix together white vinegar, granulated sugar, mustard seeds, celery seeds, and turmeric (a spice). Bring this mixture to a boil over medium high heat, stirring to dissolve the sugar. Once combined, turn off heat. (do this if making the brine ahead of time).

Brine for pickles is cooked in large saucepan

Once the cucumber and onion mixture has soaked for 2 hours, pour them into a colander and drain the water off. Rinse them very well, then drain thoroughly.

Cucumbers and onions (for pickles) are rinsed and drained in colander

Bring the brine mixture back up to a full boil, add cucumber mixture, stir to combine, then bring it all to a rolling boil.

Adding pickling cucumbers and onions to bring in large saucepanCooking cucumbers, onions and spices for bread and butter pickles

Filling The Jars With Bread And Butter Pickles

Remove the pan from the heat. Pack the vegetables into clean, hot prepared jars, leaving a 1/2 inch headspace at the top of the jar. Ladle the hot brine in, enough to cover the cucumbers. Remove the air bubbles, and add or remove more brine, if necessary, to keep the headspace at 1/2 inch.

Wipe the rims of the jars clean, to ensure a good seal, then place heated flat lid on top, and screw on the jar band to finger-tip tightness. Now you’re ready to process the jars!

Adding cucumber mixture for pickles to canning jar with a green funnel

Processing the Jars Of Bread And Butter Pickles

Place jars onto a canning rack in the canner full of simmering water. Make sure the jars are completely submerged in water (plus an inch of water over the tops of the jars). Bring the water to a full boil, then process jars for 10 minutes. When done, remove the canner lid, wait a few minutes, then remove jars with canning tongs to a dish towel on the counter to cool.

Once the jars are completely cool, test them to make sure they were properly sealed. Wipe the jars clean, then label and store jars (upright) in your pantry, to await the big moment when you open and enjoy them. Here a photo of a couple of the jars of bread and butter pickles, right out of the canner.

Two jars of canned bread and butter pickles

Hope you will give these delicious pickles a try! They really are quite good (yes, I snuck a few samples before sealing the jars)! Update: I served these pickles on the side with our other dishes for Thanksgiving 2015… Delicious! Here’s a picture:

Homemade bread and butter pickles, in serving bowl

Hope you will try this delicious recipe for bread and butter pickles. They taste GREAT! Have a great day, and thank you for stopping by. Please come back again soon for more recipes.

Looking For More CANNING Recipes?

You can find all of my recipes in the Recipe Index, which is located at the top of the page. I have quite a few delicious recipes for canning (water bath and pressure canning, including:

Interested In More Recipes?

Thank you for visiting this website. I appreciate you using some of your valuable time to do soIf you’re interested, I publish a newsletter 2 times per month (1st and 15th) with all the latest recipes, and other fun info. I would be honored to have you join our growing list of subscribers, so you never miss a great recipe!
There is a Newsletter subscription box on the top right side (or bottom) of each blog post, depending on the device you use, where you can easily submit your e-mail address (only) to be included in my mailing list.

You Can Also Find Me On Social Media:

Facebook page: The Grateful Girl Cooks!
Pinterest:
The Grateful Girl Cooks!
Instagram:
jbatthegratefulgirlcooks


Author's signatureRecipe Source: Ball Complete Book of Home Preserving, Published 2006,by Robert Rose, Inc., page 303.

0 from 0 votes
Bread and Butter Pickles
Prep Time
2 hrs
Cook Time
10 mins
Total Time
2 hrs 10 mins
 
Learn how to make traditional Bread and Butter Pickles, (perfect topping for burgers, sandwiches or just for snacking), and can the jars, for long term storage!
Category: Canning
Cuisine: American
Keyword: bread and butter pickles
Servings: 5 pints (approx. 80 2 Tablespoon servings)
Calories Per Serving: 26 kcal
Author: JB @ The Grateful Girl Cooks!
Ingredients
  • 10 cups sliced pickling cucumbers (1/4 inch slices, plus both ends trimmed off each cucumber)
  • 4 medium brown onions , thinly sliced
  • 1/2 cup canning salt (can also use pickling salt)
  • 3 cups white vinegar
  • 2 cups granulated sugar
  • 2 Tablespoons mustard seeds (found in spice section at store)
  • 1 teaspoon celery seeds (found in spice section at store)
  • 1 teaspoon ground turmeric (found in spice section at store)
Instructions
  1. Place the sliced and trimmed cucumbers, sliced onions, and canning salt into a large glass or stainless steel bowl. Stir to combine. Cover the cucumbers completely with water (I used a small plate on top to help keep the cucumbers submerged). Let them sit and soak for 2 hours. When done, pour into a colander, rinse and drain very thoroughly.
  2. While the cucumbers are in the soaking mode, you can prepare the brine, AND prepare your water bath canner, jars and lids (per canning guidelines), so they are ready to go.
  3. In a large saucepan, mix together the vinegar, granulated sugar, mustard and celery seeds, and the turmeric. Bring this brine mixture to a boil, while stirring. Once the sugar has dissolved, pour in the rinsed and drained cucumber/onion mixture. Stir to combine. Return the mixture to a full boil.
  4. Remove saucepan from heat. Pack the pickle/onions mixture into hot canning jars to within 1/2 inch from the top. (I used a slotted spoon to scoop out the veggies). Once the veggies are packed into the jars, Iadle the hot brine into the jars, covering the cucumbers fully. Remove air bubbles from jar, then adjust headspace, if necessary. Wipe the rims of each jar with a clean cloth or wet paper towel. Put hot, flat lid on top of jar, the screw on the band until it is fingertip tight.
  5. Put the filled jars into the simmering water in a water bath canner, adding more boiling water, if necessary, to make sure jars are completely submerged (and have at least an inch of water over the top of the jars). Bring water to a full boil and process pickles for 10 minutes. When done, carefully remove lid (away from you to prevent steam burn), wait a few minutes, then remove jars from canner, using canning tongs. Set hot jars onto a dish towel on counter (not directly on counter), then let jars cool. Test to make sure jars have sealed. Sealed lids will be concave (curving downward), and will show no signs of "give" when you press down in the middle of lid.
  6. Store cooled jars upright in cool dark place.
Recipe Notes

Recipe makes approx. 5 pint jars. Please refer to official USDA canning guidelines if you are unsure of proper process for preparing jars for canning/sealing.

Nutrition Facts
Bread and Butter Pickles
Amount Per Serving (2 Tablespoons)
Calories 26
% Daily Value*
Sodium 708mg31%
Potassium 33mg1%
Carbohydrates 5g2%
Sugar 5g6%
Vitamin A 10IU0%
Vitamin C 1mg1%
Calcium 6mg1%
Iron 0.1mg1%
* Percent Daily Values are based on a 2000 calorie diet.

Here’s one more to pin on your Pinterest boards!earn how to make traditional Bread and Butter Pickles, (perfect topping for burgers, sandwiches or just for snacking), and can the jars, for long term storage!

Save

Save

Save

Strawberry Pie

Nothing beats this classic dessert recipe for delicious homemade Strawberry Pie, with strawberry glaze! It’s SO QUICK AND EASY to make, you won’t believe it!Nothing beats this classic dessert recipe for delicious homemade Strawberry Pie, with strawberry glaze! It's SO QUICK AND EASY to make, you won't believe it!

A couple days ago I was scrolling through my Facebook news feed, and found a recipe for an easy, fresh Strawberry Pie from “Taste of Home”, a website/magazine I have loved for years!

I recently bought 2 large containers of strawberries at the grocery store (got a screamin’ good deal on them), and had been looking for a “new” recipe for strawberry pie to make using them.

The next morning I got up and made this delicious strawberry pie, and I’m sure glad I did. Totally delicious, classic fruit pie!!!!  I’m reminded of a quote I saw: “The best thing to put into a homemade pie is your teeth!” (author unknown). Honestly, this pie is super easy to make.

I made my own pie crust (here’s my recipe that I’ve used for years:  (DIY-moms-pie-crust/), but if you want quick and easy, just buy a pre-made pie crust, and save yourself some time.

Once you’ve got your pie crust taken care of, making the pie is as simple as slicing strawberries, mixing the glaze up in a saucepan, and pouring the glaze on top. Seriously EASY.

How To Make This Classic Strawberry Pie

Start with a pie crust. Make your own pie crust or buy one. Either way, it’s all good. Make sure to flute the edges to form a pretty edge.

Empty pie crust and rolling pin used to make a strawberry pie.

Pre-Bake The Strawberry Pie Crust

You will need to cook the pie crust before filling it. Put a layer of heavy duty aluminum foil over the crust, then fill it with dry beans to weigh it down.

Doing this simple step will help keep the pie crust from “puffing” up too much while cooking.

Dry beans on foil in empty pie crust help to keep air bubbles out of pie crust.

Bake the pie crust for 8 minutes, then lift out the foil and beans, and pop the crust back into the oven for 5-6 more minutes. When done, it will look something like this, shown below.

Baked pie crust cooling on wire rack, ready to make strawberry pie.
Make The Glaze For The Pie

Let the pie crust cool completely. While it is cooling, mix up the sugar, cornstarch and water in a saucepan over medium heat, until thickened. This mixture will be part of your glaze for the strawberry pie.

Sugar, cornstarch and water in saucepan with a whisk, making glaze for strawberry pie

Once the liquid has thickened, add a small box of strawberry gelatin, and stir well to combine. This is the glaze for your strawberry pie!

Let the strawberry glaze cool for 15-20 minutes in the refrigerator before using it to fill the pie. 

Strawberry gelatin added to glaze mixture for strawberry pieStrawberry pie filling in saucepan with metal whisk.Fill the Pie With Strawberries

While the glaze is cooling in the refrigerator, go ahead and slice up 4½ cups of ripe, sweet, fresh strawberries.

Fresh strawberries, sliced in bowl with blue rim, ready to go into a pie crust.
When the pie crust has cooled, arrange the strawberries in the crust. Now it’s starting to LOOK LIKE a REAL strawberry pie!

Strawberries arranged in baked pie crust, for strawberry pie!Time To Glaze This Strawberry Pie!

Once the glaze has cooled, give it a stir, then carefully pour it all over the top of the strawberry pie.

Pour the glaze all around, to completely cover the strawberries on top, AND to fill any little spaces. Try not to drizzle it onto the crimped pie crust.

Strawberry glaze is poured over strawberry pie in crust.
Once all the glaze is on the strawberry pie, place the pie in a refrigerator for several hours, so the glaze will firm up.

When ready to serve the strawberry pie, garnish the pie with a sprig of mint, and/or some whipped cream, slice and serve!

Strawberry Pie with fresh sprig of mint garnish on top.Time To EAT!

Because the glaze has firmed up, this is not a messy pie to cut and serve. Just sayin’. See how “clean” the cuts in the strawberry pie are?

Strawberry pie, with one slice removed.
That’s it! Slice yourself a good sized piece, grab a fork, a can of whipped cream to decorate the slice with, and a good cup of coffee!

Hope you enjoy this delicious, fresh-tasting Strawberry Pie!

One slice of strawberry pie on a plate with a fork.
Thanks for stopping by, and try this pie! It’s awesome. Hope you have a great day, and trust you will come back soon!

Looking For Other PIE Recipes?

All of my recipes can be found in the Recipe Index at the top of the page. A few of our family favorite pie recipes include:

Want More Recipes? Get My FREE Newsletter!

I publish a newsletter 2 times per month (1st and 15th) with lots of recipes, tips, etc..
Would you like to join our growing list of subscribers?

There is a Newsletter subscription box on the top right (or bottom) of each blog post, depending on the device you use.
You can submit your e-mail address there, to be added to my mailing list.

Find Me On Social Media:

Facebook page: The Grateful Girl Cooks!
Pinterest:
The Grateful Girl Cooks!
Instagram:
jbatthegratefulgirlcooks

Author's signatureRecipe Source: http://www.tasteofhome.com/recipes/easy-fresh-strawberry-pie

↓↓ PRINTABLE RECIPE BELOW ↓↓

0 from 0 votes
Strawberry Pie
Prep Time
35 mins
Cook Time
0 mins
Refrigeration Time
2 hrs
Total Time
2 hrs 35 mins
 
Nothing beats this classic dessert recipe for delicious homemade Strawberry Pie, with strawberry glaze! It's SO QUICK AND EASY to make, you won't believe it!
Category: Dessert
Cuisine: American
Keyword: strawberry pie
Servings: 8 slices
Calories Per Serving: 278 kcal
Author: JB @ The Grateful Girl Cooks!
Ingredients
  • 1 unbaked pastry (pie) shell (9 inches)
  • * a couple cups of dry beans (ONLY TO WEIGH DOWN THE CRUST DURING PRE-BAKE)
  • 3/4 cup granulated sugar
  • 2 Tablespoons cornstarch
  • 1 cup water
  • 1 package (3 ounces) strawberry gelatin
  • 4 1/2 cups sliced fresh strawberries
  • Fresh sprig of mint (optional)
  • Whipping cream for garnish (optional)
Instructions
To make pie shell:
  1. Line an unpricked and uncooked pie shell with heavy duty aluminum foil. Fill with dried beans to weigh down the shell (this helps keep the crust from puffing up full of air). Bake crust at 425 degrees for 8 minutes. Carefully lift out the aluminum foil and beans (**beans can be put back in the container you got them from and can still be used**). After beans and foil are out of the shell, put it back into the oven for an additional 5-6 minutes longer, then remove to a wire rack to cool.
To make strawberry glaze:
  1. In a medium saucepan, whisk together the granulated sugar, cornstarch and water until it is fully combined and smooth. Bring mixture to a boil; stir and cook it for 2 minutes, until thickened. Remove the pan from the heat. Stir in the strawberry gelatin powder, until dissolved. Refrigerate the glaze mixture for 15-20 minutes, or until it has cooled down some.
To assemble the pie:
  1. Slice the strawberries. Carefully place/arrange them into the baked pie crust. Pour the cooled strawberry glaze over the entire surface of the pie, even filling in the little nooks and crannies. Use all of the glaze mixture. When done, place pie in refrigerator for 2-3 hours, or until it is completely "set up" (the glaze will congeal and firm up).
  2. Garnish pie with mint and/or whipped cream, if desired.
  3. Cut into 8 pieces, serve... and enjoy!
Recipe Notes

Note: Prep time of 3 hours INCLUDES inactive prep time of 2 1/2 hours for refrigeration of pie. If using a pre-made crust, this recipe can be made in about 30 minutes.

Nutrition Facts
Strawberry Pie
Amount Per Serving (1 slice)
Calories 278 Calories from Fat 72
% Daily Value*
Fat 8g12%
Saturated Fat 2g13%
Sodium 150mg7%
Potassium 149mg4%
Carbohydrates 49g16%
Fiber 2g8%
Sugar 31g34%
Protein 2g4%
Vitamin A 10IU0%
Vitamin C 47.6mg58%
Calcium 19mg2%
Iron 1mg6%
* Percent Daily Values are based on a 2000 calorie diet.

Here’s one more to pin on your Pinterest boards!Nothing beats this classic dessert recipe for delicious homemade Strawberry Pie, with strawberry glaze! It's SO QUICK AND EASY to make, you won't believe it!

Save

Save

Save

Save

Cedar Plank Grilled Salmon

Cedar Plank Grilled Salmon with butter, lemon and spices is a simple, easy way to BBQ outside on hot, summer days! Cedar Plank Grilled Salmon with butter, lemon and spices is a simple, easy way to BBQ outside on hot, summer days!
We’ve been enjoying much warmer than normal temperatures (can you say HOT???) in the Pacific Northwest this summer. Hot temps (in the high 90’s) have meant that I don’t use my oven as much to fix meals, so I don’t add to the heat in our home, PLUS it has meant more time outside on the deck, bonding with our Weber BBQ at dinner time. This Cedar Plank Grilled Salmon was our dinner last night.

Scroll Down For A Printable Recipe Card At The Bottom Of The Page

Last night my hubby (the “Grill-Meister”) grilled a salmon fillet on a cedar plank on our BBQ, and man oh man, it was so good! I typically pan-sear or bake salmon inside, in my kitchen, but there’s just something about grilled salmon in the summer, with the smokey smell from the BBQ and the cedar plank that you cook it on, that makes everything right with the world.

I had to remind my husband to put the lighter fluid on the charcoal briquets and NOT in his glass of wine, but after we got that sorted out, he took over the grilling duties! We cooked the salmon on our Weber BBQ on medium heat (lid closed, top vent open);  if you are using a gas grill, be sure the flames don’t reach the cedar plank or you might catch it on fire!

Cook, getting ready to grill salmon on cedar plank on BBQ
Have you ever grilled salmon fillets on cedar planks on your BBQ? Yum. It’s SO easy. First you buy a package of cedar planks at the grocery store (most stores carry them by the fish counter). They look like this, and usually a package contains 3-4 planks.

How To Prepare Cedar Plank So It Won’t Burn

You will need to soak the plank you are going to use in water for at least 30-40 minutes before putting on the grill. (I weigh mine down with filled pans of water in the sink, then cover board completely with water).

The wood plank needs to be soaked this long, so it doesn’t catch fire on the grill. As the fish cooks, the cedar board smokes and infuses flavor into the seafood. Makes sense, right?

Cedar plank used to grill salmon on BBQTime To Cook the Salmon

Once it is done “soaking”, you place a fresh salmon fillet on it  SKIN SIDE DOWN (we used one of two wild sockeye salmon fillets we bought at good old Costco).

Use a pastry brush to spread melted butter all over the top of the salmon. Sprinkle with salt, pepper, and garlic powder. Squeeze a bit of lemon juice over the top, also. I like to “garnish” the salmon fillet with thin slices of lemon while it cooks.

Once you have that done, you simply put the entire plank on the hot BBQ grill (with the top little vent open). Put the lid on the BBQ, and let it cook covered for about 35 minutes, until salmon is done (flaky). That’s it! No need to mess with it at all.

Cedar plank with salmon and lemon slices on grill
This is what it should look like when it is done. See? The soaked cedar plank didn’t burn up!

Grilled salmon is done cooking on cedar plank
Serving Cedar Plank Grilled Salmon

Remove the entire plank from the BBQ, take it inside, and cut salmon (not the cutting board!) into serving pieces (4-5 out of this piece of salmon). See how easy that is? When you realize how much 4-5 servings of cedar plank grilled salmon would cost in a restaurant, it REALLY is an inexpensive and easy way to make it yourself!!! Why not?

I served the salmon with some grilled mixed veggies (including yellow squash and peas from our garden), and we had a wonderful, healthy dinner that was incredibly delicious! AND we have a couple extra pieces of salmon for leftovers, too!

We really enjoy cedar plank grilled salmon; I have several other delicious recipes for this fish on my blog! You might want to check out the recipes for Salmon in a Lemon Butter Herb Sauce, Orange and Rosemary Glazed Salmon, or Pan-Seared Salmon with Cilantro Lime Sauce, to name a few. There are additional salmon recipes which you can find in the Recipe Index at the top of the page. YUM!

Grilled salmon served with mixed vegetables
Hope you will give this easy cedar plank grilled salmon a try this summer! Throw it on the grill, sit back and relax with a refreshing beverage, and let your BBQ do almost all the work for you!  Don’t forget to check out my Recipe Index, to see ALL my recipes. It’s located at the top of the page. Have a great week!

Interested In More Recipes?

Thank you for visiting this website. I appreciate you using some of your valuable time to do soIf you’re interested, I publish a newsletter 2 times per month (1st and 15th) with all the latest recipes, and other fun info. I would be honored to have you join our growing list of subscribers, so you never miss a great recipe!
There is a Newsletter subscription box on the top right side (or bottom) of each blog post, depending on the device you use, where you can easily submit your e-mail address (only) to be included in my mailing list.

You Can Also Find Me On Social Media:

Facebook page: The Grateful Girl Cooks!
Pinterest:
The Grateful Girl Cooks!
Instagram:
jbatthegratefulgirlcooks

Author's signature

↓↓ PRINTABLE RECIPE BELOW ↓↓

0 from 0 votes
Cedar Plank Grilled Salmon
Prep Time
30 mins
Cook Time
35 mins
Total Time
1 hr 5 mins
 
Cedar Plank Grilled Salmon with butter, lemon and spices is a simple, easy way to BBQ outside on hot, summer days! The smell from the cedar on the grill infuses smoky flavor into the fish for an amazing meal!
Category: Dinner
Cuisine: American
Keyword: cedar plank grilled salmon
Servings: 5 servings
Calories Per Serving: 301 kcal
Author: JB @ The Grateful Girl Cooks!
Ingredients
  • 2 pounds fresh salmon fillet (with skin on bottom)
  • 2 Tablespoons butter (melted)
  • 1/4 teaspoon salt
  • 1/4 teaspoon black pepper
  • 1/4 teaspoon garlic powder
  • 1/2 lemon (juice of)
  • 5 slices lemon (thinly sliced)
Instructions
  1. Soak the cedar plank you are going to use in water for at least 30-40 minutes before putting on the grill. (I weigh mine down with filled pans of water in the sink, then cover board completely with water). The wood plank needs to be soaked this long, so it doesn't catch fire on the grill. As the fish cooks, the cedar board smokes and infuses flavor into the seafood.

  2. Once it is done "soaking", remove from water. Place a fresh salmon fillet on it  SKIN SIDE DOWN.  Use a pastry brush to spread melted butter all over the top of the salmon. Sprinkle with salt, pepper, and garlic powder. Squeeze some lemon juice over the top, also. Garnish the salmon fillet with thin slices of lemon.

  3. Once BBQ is hot and ready, place wood plank directly onto BBQ rack. Cook salmon on medium heat (on our Weber grill we cooked it with lid closed, top vent open);  if you are using a gas grill, be sure the flames are set low enough to not reach the cedar plank directly or you might catch it on fire! Cook salmon (with lid on BBQ) for about 35 minutes, until done and fish flakes easily.

  4. Remove the entire plank from the BBQ, take it inside, and cut salmon (not the cutting board!) into serving pieces... serve, and enjoy! 

Nutrition Facts
Cedar Plank Grilled Salmon
Amount Per Serving (1 piece)
Calories 301 Calories from Fat 144
% Daily Value*
Fat 16g25%
Saturated Fat 4g25%
Cholesterol 111mg37%
Sodium 236mg10%
Potassium 898mg26%
Carbohydrates 1g0%
Protein 36g72%
Vitamin A 215IU4%
Vitamin C 4.9mg6%
Calcium 22mg2%
Iron 1.5mg8%
* Percent Daily Values are based on a 2000 calorie diet.

Here’s one more to pin on your Pinterest boards!Cedar Plank Grilled Salmon with butter, lemon and spices is a simple, easy way to BBQ outside on hot, summer days!

Save

Pecan Sticky Rolls

If you like Cinnamon Rolls, then you’ll love these scrumptious homemade Pecan Sticky Rolls! Raised yeast rolls, dripping with a caramel-pecan topping.If you like Cinnamon Rolls, then you'll love these scrumptious homemade Pecan Sticky Rolls! Raised yeast rolls, dripping with a caramel-pecan topping.
Oh my goodness… these pecan sticky rolls are so delicious! They are a wonderful treat to enjoy (occasionally) over a cup of morning coffee or tea! I found this easy recipe in the user manual for my bread machine years ago. After making them ONCE, I decided this was a “keeper” recipe, and have enjoyed making these rolls many times since then.

The method used for making pecan sticky rolls is very similar to making cinnamon rolls (with only a couple changes). Here’s how to make them:

Scroll Down For A Printable Recipe Card At The Bottom Of The Page

Make The Dough In A Bread Machine OR By Hand

I made the dough in my bread machine. It’s possible to make these even without a machine , and I’ve included directions in the printable recipe at the bottom of this post. Make the dough on the DOUGH cycle of your bread machine, or follow instructions to make by hand. When the dough is done, roll it out to a 15×10 inch rectangle on a lightly floured surface.

The dough is rolled out into a large rectangle.
Spray a 9 x 13 x 2 inch pan with non-stick spray. In a small bowl, mix the topping ingredients (melted butter, brown sugar, corn syrup, and pecan halves). Spread this mixture all over the bottom of the baking pan. The rolls are baked on top of this sticky butter pecan mixture, and then flipped over, which lets all the gooey topping drip down and coat the sweet rolls.

Prepare The Pecan Sticky Rolls

Combine granulated sugar and cinnamon in a small bowl. Spread 2 teaspoons of softened butter over the surface of the dough, then sprinkle with the cinnamon-sugar mixture. Roll up the dough tightly (starting at the LONG side), and seal the edges when done. Cut the pecan sticky rolls into 1 inch slices, then arrange them in the baking pan on top of the caramel-pecan mixture.

Let The Dough For The Pecan Sticky Rolls Rise

Cover the pan with a dish towel and let the dough rise in a warm place until the dough has doubled in size. Shhh- here’s a secret! I actually put them outside on top of our jacuzzi to rise, because it was a really hot day!

Pecan sticky rolls in pan rising in a warm place!The dough for the sweet rolls has risen, and is now ready to bake.

Bake, Then Invert The Pecan Sticky Rolls!

Once the rolls have risen, bake them (uncovered) in a 375 degree oven for about 25 minutes, until golden brown. As soon as they are done, remove the pan from the oven and immediately INVERT the pan onto a heat proof serving platter. Let the pan stay inverted (upside down) for a minute, so that yummy caramel-pecan topping can drizzle all over the hot rolls. Now you can see why they are called pecan sticky rolls!

Remove the pan from the inverted rolls, and spoon any excess topping onto the tops of the rolls. Let the pecan sticky rolls cool just a bit before serving them! The recipe makes 14-15 rolls… and they are wonderful. Sweet, full of cinnamon, and sticky… just the way we like ’em.

Sure hope you will give this recipe a try! If you enjoy this, be sure to check out my recipes for homemade cinnamon rolls or cinnamon roll crescents. Yum! You can also find ALL of my recipes in the Recipe Index, located at the top of the page. Have a great day.

Interested In More Recipes?

Thank you for visiting this website. I appreciate you using some of your valuable time to do soIf you’re interested, I publish a newsletter 2 times per month (1st and 15th) with all the latest recipes, and other fun info. I would be honored to have you join our growing list of subscribers, so you never miss a great recipe!
There is a Newsletter subscription box on the top right side (or bottom) of each blog post, depending on the device you use, where you can easily submit your e-mail address (only) to be included in my mailing list.

You Can Also Find Me On Social Media:

Facebook page: The Grateful Girl Cooks!
Pinterest:
The Grateful Girl Cooks!
Instagram:
jbatthegratefulgirlcooks

Author's signatureRecipe Source: Oster Deluxe Bread & Dough Maker User Handbook, published 1994, Sunbeam-Oster Household Products, page 55

0 from 0 votes
Pecan Sticky Rolls
Prep Time
2 hrs 30 mins
Cook Time
25 mins
Total Time
2 hrs 55 mins
 

If you like Cinnamon Rolls, then you'll love these scrumptious homemade Pecan Sticky Rolls! Raised yeast rolls, dripping with a caramel-pecan topping.

Category: Breakfast
Cuisine: American
Keyword: pecan sticky rolls
Servings: 14
Calories Per Serving: 294 kcal
Author: JB @ The Grateful Girl Cooks!
Ingredients
For Dough:
  • 1 cup water
  • 1 egg
  • 2 Tablespoons butter , softened
  • 3 1/4 cups all-purpose flour
  • 1/4 cup granulated sugar
  • 1 teaspoon salt
  • 3 teaspoons reg. active dry yeast OR 3 teaspoons bread machine yeast OR quick acting yeast
For Spreadable Filling (to spread on rolled out dough)
  • 2 Tablespoons butter , softened (to spread on rolled out dough)
  • 1/2 cup granulated sugar (to spread on rolled dough)
  • 2 teaspoons ground cinnamon (to spread on rolled out dough)
For Caramel-Pecan Topping:
  • 1/3 cup butter , melted
  • 1/2 cup packed brown sugar
  • 1 Tablespoon corn syrup
  • 2/3 cup pecan halves
Instructions
  1. Place all dough ingredients ( into bread machine and select DOUGH cycle. (If making by hand, see NOTES section for directions).
  2. Spray a 13x9x2 inch baking pan with non-stick spray
  3. In a medium bowl, combine 1/3 cup melted butter, brown sugar, corn syrup, and pecan halves. Mix well. Spread this in the bottom of the baking pan.
  4. In a small bowl, mix together the spreadable filling (1/2 cup sugar and 2 teaspoons cinnamon). Set aside.
  5. When dough is ready, roll it out to a 15x10 inch rectangle on a lightly floured surface. Spread the 2 Tablespoons of softened butter over the surface of the dough, all the way to the edges. Sprinkle the buttered dough with the cinnamon-sugar mixture, all the way to the edges.
  6. Roll up the dough very tightly, beginning at the long (15 inch) side of the dough. Tuck in the ends and pinch the dough into the roll to seal. Using a sharp knife, cut the dough roll into 14-15 one inch slices. Arrange the cut slices on top of the pecan mixture in baking pan. Cover with a dish towel, and let rise in a warm place for about an hour (or until dough has doubled in size).
  7. Once dough has risen, place the uncovered pan in a preheated 375 degree oven. Bake rolls for 22-27 minutes (mine took 25), or until they turn golden brown. Remove the pan from the oven and immediately invert (flip over) the entire pan onto a heat proof serving platter (or tray). Don't remove the pan for about a minute or so, because you want all that sticky caramel-pecan topping to drip onto the rolls. Remove the pan after a minute or so, and spoon any remaining topping over the top of the rolls. Let cool slightly, then serve!
Recipe Notes

If you are NOT using a bread machine: In a LARGE mixing bowl, dissolve the yeast into 1 cup warm water (not hot). Let sit for about 5 minutes to make sure it bubbles (meaning the yeast is good). Add/mix in the egg, and the softened butter. Stir in the flour, sugar and salt. Mix ingredients very well. Knead dough on a lightly floured surface (for about 10 minutes) into a large ball, using lightly flour-dusted hands. Spray a LARGE bowl with non-stick spray. Place dough ball in bowl. Flip the dough over, to coat it with the spray from the bowl. Cover dough with dish towel. Let rise in a warm place for about an hour (or until doubled in size). Once dough has doubled in size, continue with recipe, as directed.

Nutrition Facts
Pecan Sticky Rolls
Amount Per Serving (1 roll)
Calories 294 Calories from Fat 99
% Daily Value*
Fat 11g17%
Saturated Fat 5g31%
Cholesterol 31mg10%
Sodium 242mg11%
Potassium 89mg3%
Carbohydrates 43g14%
Fiber 2g8%
Sugar 19g21%
Protein 4g8%
Vitamin A 250IU5%
Calcium 21mg2%
Iron 1.7mg9%
* Percent Daily Values are based on a 2000 calorie diet.

Here’s one more to pin on your Pinterest boards!If you like Cinnamon Rolls, then you'll love these scrumptious homemade Pecan Sticky Rolls! Raised yeast rolls, dripping with a caramel-pecan topping.


Save

Save

Florentine Manicotti

Florentine manicotti, filled with ricotta, Parmesan and mozzarella cheeses, and covered with marinara sauce is a meatless, easy to make Italian dish.Florentine manicotti, filled with ricotta, Parmesan and mozzarella cheeses, and covered with marinara sauce is a meatless, easy to make Italian dish.

My husband and I love Italian food! One of the dishes we enjoy occasionally is this “meatless” recipe for Florentine Manicotti. Pasta shells filled with three cheeses (creamy ricotta, mozzarella and Parmesan), spinach, and covered in spaghetti sauce. Yum. I like to think of manicotti as the Italian version of Mexican enchiladas!

For anyone unfamiliar with manicotti, it is a large, tube shaped type of pasta that is typically filled with meat or cheese and is baked in spaghetti sauce. This particular recipe is meatless; it’s delicious, and is a fairly easy dish to prepare. I use a recipe I found years ago on a box of pasta, and tweaked it a bit by adding cooked spinach and a couple additional spices to the cheesy filling, to give it a true “Florentine” touch!

Scroll Down For A Printable Recipe Card At The bottom Of The Page

Make The Filling For Florentine Manicotti

Cook a small box of frozen spinach, according to the package directions. Drain it very well, and let the spinach cool. When it has cooled off, mix up the cheese filling, and then add the spinach.

Preparing the filling for the florentine manicotti.

Prepare The Manicotti For Filling

Here’s what manicotti pasta shells look like BEFORE they are cooked. They’re each about 5 inches long. The tubes of pasta are fragile, so be very careful not to break them.

Manicotti pasta shells BEFORE cooking. Carefully add the pasta to a large pot of boiling, salted water, and cook it for 7 minutes.

The pasta shells are cooked for 7 minutes in boiling, salted water.Once done cooking, carefully remove the manicotti shells to a colander and drain them well.

After cooking, the manicotti pasta shells are drained in a colander.

Before you begin filling the Florentine manicotti put a layer of spaghetti sauce on the bottom of a baking pan.

Marinara sauce is spread on the bottom of casserole dish before adding stuffed manicotti.

Make The Florentine Manicotti

Gently fill each of the pasta tubes with the cheese and spinach filling. I hold the shell in my hand and fill one side with the cheese/spinach filling (using a spoon and sometimes a butter knife) clear to the middle. Switch to the other end of the shell and fill the other side. Try to get as much filling into the shell as possible without splitting it.

Stuffing the florentine manicotti shells before baking.Once the Florentine manicotti shells are filled, lay them on top of the spaghetti sauce.

Stuffed florentine manicotti are laid on top of sauce in baking dish.Cover the manicotti with the rest of the spaghetti sauce. I cover the entire pasta shell with sauce, then sprinkle the top with Parmesan cheese (or grated mozzarella cheese).

The manicotti are covered with sauce and Parmesan cheese, to bake.

Time To Bake!

Cover the baking pan with aluminum foil. Bake at 350 degrees for 40 minutes, then remove the foil and bake an additional 15 minutes longer. when done, the Florentine manicotti is heated through, and the cheese filling is bubbly.

Let cool for a minute or two (easier to serve up) , then remove the manicotti to serving plates using a spatula. The only thing left to do is grab a fork, dig in, and enjoy this tasty dish!

Florentine manicotti are done baking and ready to eat!Hope you will give this recipe a try!  I may not have the most mouthwatering “professional” photos to share, but trust me. Florentine manicotti are delicious, and I really think you will enjoy them! Have a great day, and please come back soon.

Looking for More ITALIAN Recipes?

You can find all of my recipes in the Recipe Index, located at the top of the page. I have lots of delicious Italian dishes you might want to check out, including:

Interested In More Recipes?

Thank you for visiting this website. I appreciate you using some of your valuable time to do soIf you’re interested, I publish a newsletter 2 times per month (1st and 15th) with all the latest recipes, and other fun info. I would be honored to have you join our growing list of subscribers, so you never miss a great recipe!
There is a Newsletter subscription box on the top right side (or bottom) of each blog post, depending on the device you use, where you can easily submit your e-mail address (only) to be included in my mailing list.

You Can Also Find Me On Social Media:

Facebook page: The Grateful Girl Cooks!
Pinterest:
The Grateful Girl Cooks!
Instagram:
jbatthegratefulgirlcooks

Author's signatureRecipe adapted from: Box of American Beauty Manicotti Pasta Shells.

0 from 0 votes
Florentine Manicotti
Prep Time
25 mins
Cook Time
1 hr
Total Time
1 hr 25 mins
 
Florentine manicotti, filled with ricotta, Parmesan and mozzarella cheeses, and covered with marinara sauce is a meatless, easy to make Italian dish.
Category: Entree
Cuisine: Italian
Keyword: florentine manicotti
Servings: 6 servings
Calories Per Serving: 332 kcal
Author: JB @ The Grateful Girl Cooks!
Ingredients
  • 6-8 uncooked manicotti pasta shells
  • 15 ounces part-skim ricotta cheese (1 3/4 cups)
  • 2 cups (8 ounces) grated mozzarella cheese
  • 10 ounces frozen chopped spinach (cooked per package directions, and drained well)
  • 1/4 cup grated Parmesan cheese
  • 2 Tablespoons fresh parsley , chopped
  • 1/2 teaspoon salt
  • 1/4 teaspoon ground black pepper
  • 1/8 teaspoon garlic powder
  • 1/8 teaspoon ground oregano
  • 3 cups (or one 28 ounce jar) prepared spaghetti sauce
  • Additional Parmesan or mozzarella cheese (for garnish, optional)
Instructions
  1. Preheat oven to 350 degrees F.
  2. Cook frozen chopped spinach per package instructions. Remove from heat; drain WELL. Let spinach cool.
  3. In a medium sized mixing bowl, combine the ricotta cheese, grated mozzarella, Parmesan cheese, parsley, salt, pepper, garlic powder and ground oregano. Stir well until fully combined.
  4. Add spinach to the cheese mixture. Stir well, to combine.
  5. Cook manicotti shells according to package instructions (add to boiling water-7 minutes cook time is typical). When done, remove from heat, drain gently, and let dry.
  6. Fill each shell using a spoon until full of filling.
  7. Spread some of the spaghetti sauce over the bottom of 13x9 baking pan (enough to fully cover); put the filled pasta in a single layer on top of sauce.
  8. Spoon the rest of the spaghetti sauce over the top of the manicotti. Sprinkle with additional grated Parmesan cheese (or mozzarella), if desired. Cover pan with aluminum foil.
  9. Bake at 350 degrees for 40 minutes; remove foil, then cook an additional 15 minutes. Manicotti should be hot and cheese bubbly when done. Remove pan from oven. Let sit for a minute or two, then gently remove manicotti to individual serving plates using a spatula.
  10. Serve with a green salad and a slice of crusty french bread, and enjoy!
Nutrition Facts
Florentine Manicotti
Amount Per Serving (1 manicotti)
Calories 332 Calories from Fat 135
% Daily Value*
Fat 15g23%
Saturated Fat 8g50%
Cholesterol 45mg15%
Sodium 1270mg55%
Potassium 736mg21%
Carbohydrates 25g8%
Fiber 3g13%
Sugar 6g7%
Protein 24g48%
Vitamin A 6720IU134%
Vitamin C 13mg16%
Calcium 596mg60%
Iron 2.9mg16%
* Percent Daily Values are based on a 2000 calorie diet.

Here’s one more to pin on your Pinterest boards!Florentine manicotti, filled with ricotta, Parmesan and mozzarella cheeses, and covered with marinara sauce is a meatless, easy to make Italian dish.

Save

Save

Save