Chicken Broccoli Fettucine Alfredo

Chicken Broccoli Fettucine Alfredo- this classic Italian dish with a creamy butter Parmesan sauce is delicious, and can be on the table in about 30 minutes!

You know what? Right up front I have to tell you this “all in one” meal is fairly high in calories, but I gotta be honest here… sometimes you just have to enjoy yourself! This dish is Italian comfort food at it’s very best!!!

Chicken broccoli fettucine alfredo is one of my favorite Italian dishes, but I only make it occasionally, because it has more delicious calories than I need to routinely consume in one meal!

But… having said that, I cannot say enough GOOD things about this dish- the pasta is coated in a creamy Parmesan butter alfredo sauce packed with flavor, and features chicken breasts and broccoli… an all in one dinner! It tastes DELICIOUS! Oh boy… is it ever delicious!

Scroll Down For A Printable Recipe Card At The Bottom Of The Page

SO HOW DO I MAKE CHICKEN BROCCOLI FETTUCINE ALFREDO?

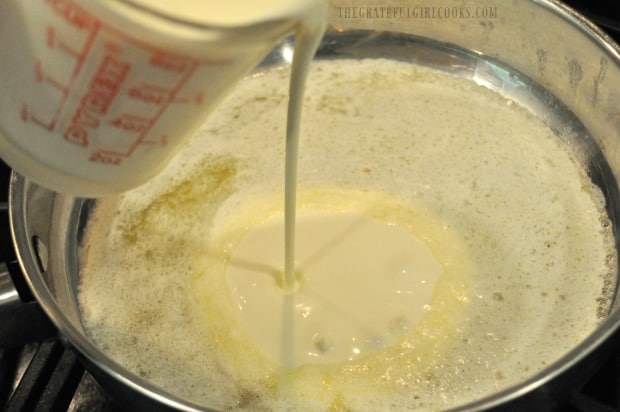
The first thing you will need to do is make the alfredo sauce for the pasta. It’s EASY!  Melt butter in a large skillet. Once butter is melted, add heavy whipping cream, pepper, and garlic powder. Stir until combined. Cook this sauce for about 5 minutes on medium low. Try to NOT let it come to a boil.

Butter is melted for fettucine alfredo sauce

Heavy whipping cream is added to alfredo sauce in pan

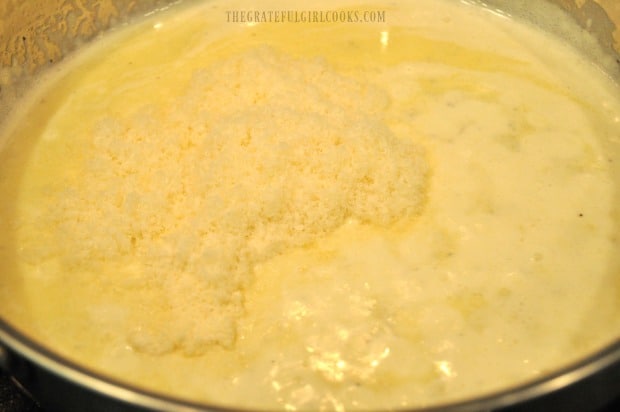
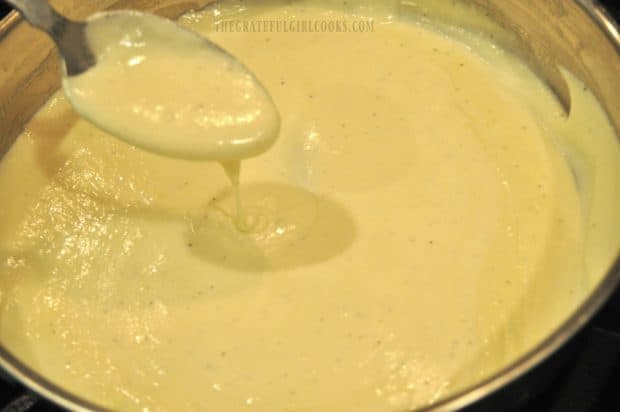
Add grated fresh Parmesan cheese to the sauce, and stir to combine. Cook these ingredients on medium low until the cheese has melted and the sauce has thickened.

Grated Parmesan cheese is added to alfredo sauce in pan

Alfredo sauce has thickened to the perfect consistency

Prepare The “Add-Ins”

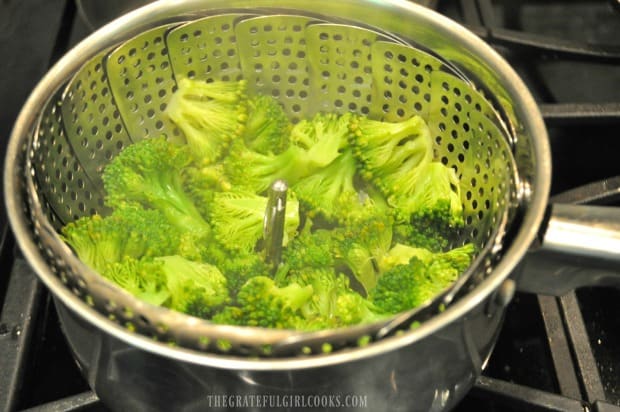
NOTE: (This step can be done ahead of time!) Cook broccoli florets (either fresh or frozen). I use fresh broccoli florets and steam them over boiling water until they are done. Set aside until you’re ready to add them to the sauce. Cut the cooked chicken breast into bite-sized pieces.

Broccoli florets are steamed before adding to alfredo sauce

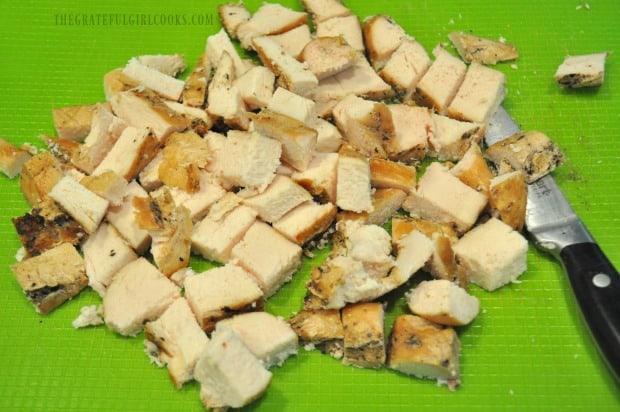
Cooked chicken breasts are cut into cubes before adding to alfredo sauce.

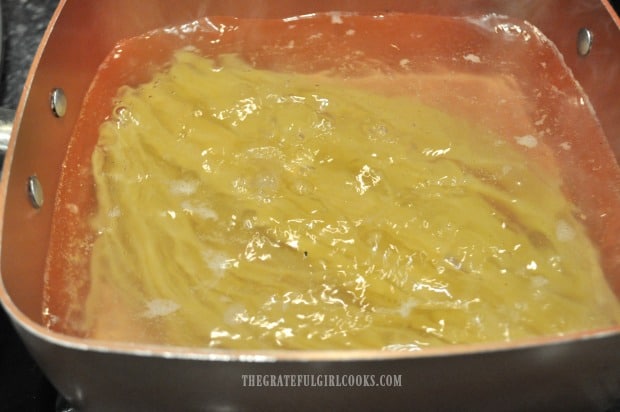
Cook fettucine pasta according to the package directions.  When done, drain pasta well.

Fettucine noodles cooking in pan

Finishing The Chicken Broccoli Fettucine Alfredo

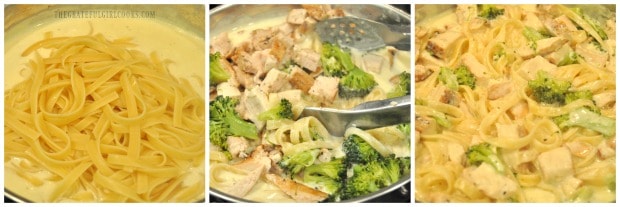
Add cooked and drained fettucine noodles to the alfredo sauce.  Next add cooked broccoli and chicken pieces.  Stir well, to combine ingredients and fully coat everything with the alfredo sauce. TIP: If the mixture seems too thick, simply add a bit more whipping cream to the pan, and stir to blend it in.

Taste test the pasta (it’s a hard job, but someone’s gotta do it). Season with salt and pepper, to suit your taste. Continue cooking on medium low for a minute or two to ensure everything is heated through before serving.

Fettucine noodles, chicken and broccoli are added to alfredo sauce

Time To Serve This Delicious Meal

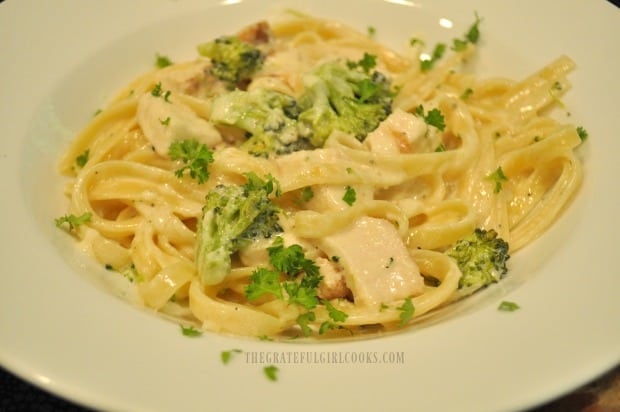
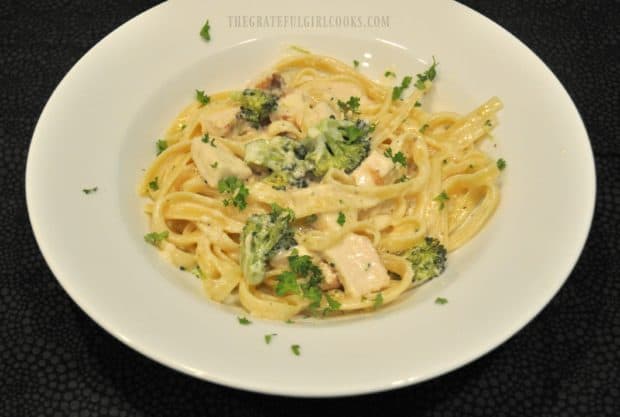
To serve, transfer chicken broccoli fettucine alfredo to individual serving bowls or plates. Garnish each serving with chopped fresh parsley, if desired. If you don’t mind the extra calories, you can also grated a tiny bit of Parmesan cheese over the top, too.

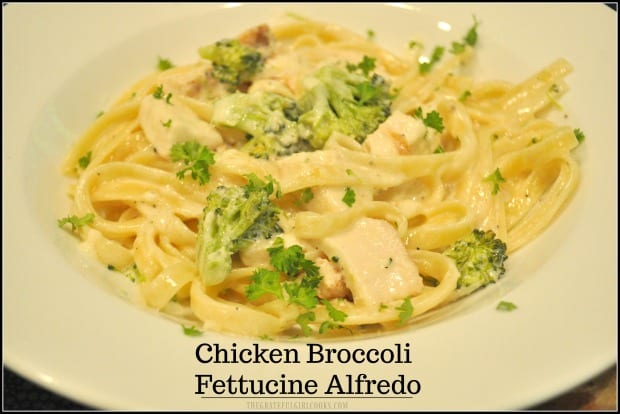
Chicken broccoli fettucine, served in a white bowl

Serve this delicious pasta, and enjoy every single yummy, high calorie bite! If you enjoy this meal, you might also want to check out my recipe for Shrimp and Penne Pasta Alfredo.

Chicken fettucine is garnished with parsley before serving

While this may not be the “healthiest” dish you’ve ever had… it might be one of the most delicious dishes you’ve ever had!  The fettucine is so good… creamy, cheesy, and hey… since there is a vegetable (broccoli) and lean protein (chicken breast) in it, that’s gotta count for something, right?  It’s all about BALANCE in everything! Sure hope you enjoy this meal!

Looking For More PASTA Recipes?

You can find ALL of my recipes in the Recipe Index, which is located at the top of the page. I have lots of yummy pasta dishes, including:

Interested In More Recipes?

Thank you for visiting this website. I appreciate you using some of your valuable time to do soIf you’re interested, I publish a newsletter 2 times per month (1st and 15th) with all the latest recipes, and other fun info. I would be honored to have you join our growing list of subscribers, so you never miss a great recipe!
There is a Newsletter subscription box on the top right side (or bottom) of each blog post, depending on the device you use, where you can easily submit your e-mail address (only) to be included in my mailing list.

You Can Also Find Me On Social Media:

Facebook page: The Grateful Girl Cooks!
Pinterest:
The Grateful Girl Cooks!
Instagram:
jbatthegratefulgirlcooks

Hope you have a fantastic day!

Author's signature

0 from 0 votes
Chicken Broccoli Fettucine Alfredo
Prep Time
15 mins
Cook Time
11 mins
Total Time
26 mins
 
Chicken Broccoli Fettucine Alfredo- this classic Italian dish with a creamy butter Parmesan sauce is delicious, and can be on the table in about 30 minutes!
Category: Dinner
Cuisine: Italian
Keyword: chicken broccoli fettucine alfredo
Servings: 5 servings
Calories Per Serving: 934 kcal
Author: JB @ The Grateful Girl Cooks!
Ingredients
  • 12 ounces fettucine pasta
  • 3/4 cup butter
  • cups heavy whipping cream
  • 1/4 teaspoon black pepper
  • 1/4 teaspoon garlic powder
  • cups Parmesan cheese , grated
  • 2 chicken breasts (boneless, skinless) , precooked
  • 2 cups broccoli , steamed
  • 2 teaspoons parsley (fresh) , for garnish (if desired)
Instructions
  1. Make the alfredo sauce for the pasta. Melt butter in a large skillet. Once butter is melted, add heavy whipping cream, pepper, and garlic powder. Stir until combined. Cook this sauce for about 5 minutes on medium low. Try to NOT let it come to a boil. Add grated fresh Parmesan cheese to the sauce, and stir to combine. Cook on medium low until the cheese has melted and the sauce has thickened.

  2. NOTE: To save time, these two steps can be done ahead of time: #1-Cook broccoli florets until done.  #2-Cut two pre-cooked boneless, skinless chicken breasts into bite sized pieces.  Set broccoli and chicken aside until ready to add to sauce.

  3. Cook fettucine pasta according to the package directions.  When done, drain pasta well.
  4. Add drained fettucine noodles to the alfredo sauce in pan, then add cooked broccoli and chicken pieces.  Stir well, to combine ingredients and fully coat everything with alfredo sauce. If the mixture seems too thick, simply add a bit more whipping cream to the pan, and stir to blend it in. Taste test the pasta. Season with additional salt and pepper, if desired. Continue cooking on low for a minute or two, to ensure everything is hot.

  5. To serve, transfer chicken broccoli fettucine alfredo to individual serving dishes. Garnish each serving with chopped fresh parsley, if desired. If you don't mind the extra calories, you can also grated a tiny bit of Parmesan cheese over the top, too. Serve hot, and enjoy!

Nutrition Facts
Chicken Broccoli Fettucine Alfredo
Amount Per Serving (1 serving)
Calories 934 Calories from Fat 594
% Daily Value*
Fat 66g102%
Saturated Fat 39g244%
Cholesterol 277mg92%
Sodium 829mg36%
Potassium 537mg15%
Carbohydrates 54g18%
Fiber 3g13%
Sugar 2g2%
Protein 32g64%
Vitamin A 2415IU48%
Vitamin C 33.4mg40%
Calcium 453mg45%
Iron 2mg11%
* Percent Daily Values are based on a 2000 calorie diet.

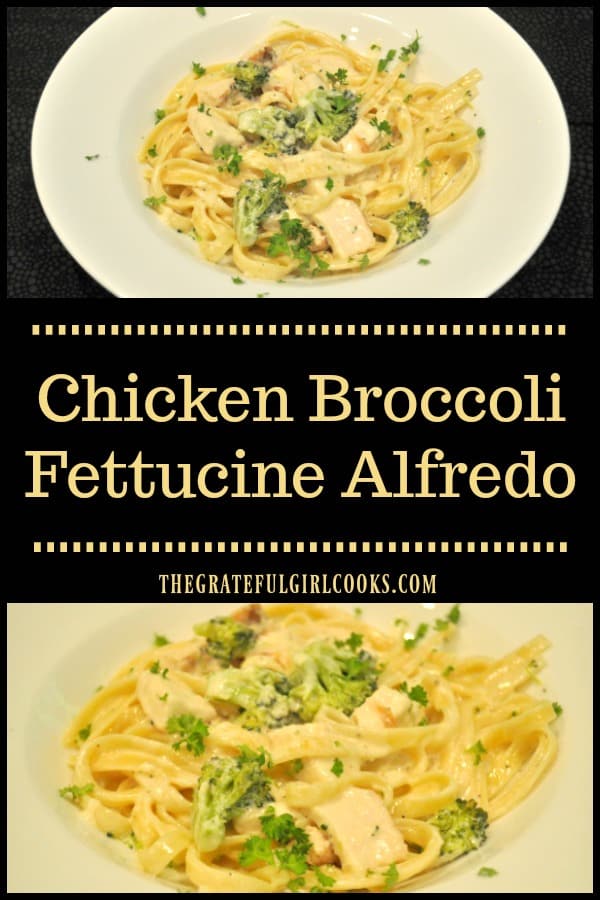
Here’s one more to pin on your Pinterest boards!Chicken Broccoli Fettucine Alfredo- this classic Italian dish with a creamy butter Parmesan sauce is delicious, and can be on the table in about 30 minutes!
 

Peach Jam (how to can it)

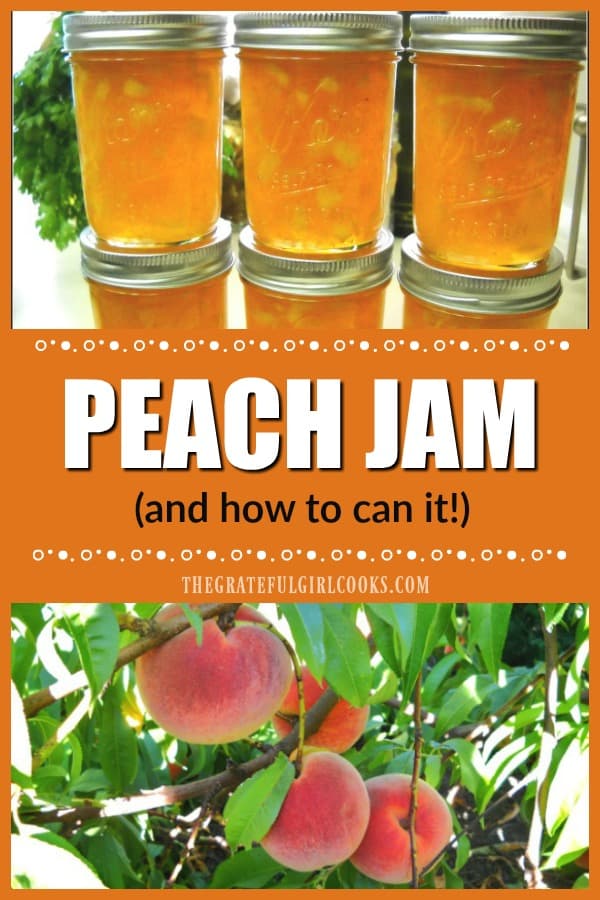
Homemade peach jam is a reminder of summer time at it’s BEST! Learn how to make this classic jam, and can it for long term storage!
Homemade peach jam is a reminder of summer time at it's BEST! Learn how to make this classic jam, and can it for long term storage!

Scroll Down For A Printable Recipe Card At The bottom Of The Page

I LOVE Fresh Peaches!

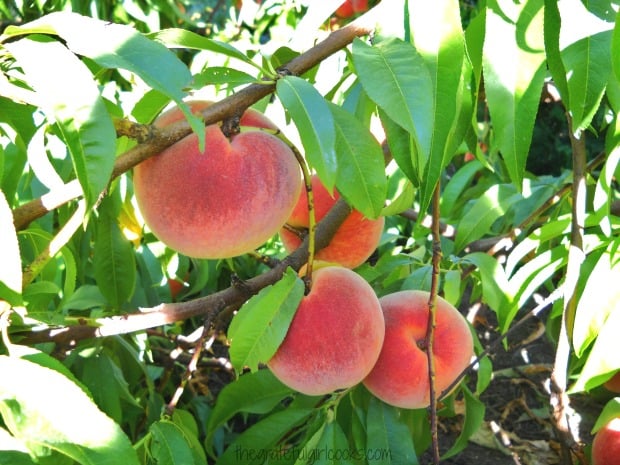
I LOVE summer time in the Pacific Northwest!  After months of cool weather and rain, it feels like everything blooms and “wakes up”!  One of my favorite activities during the peak of the summer season is picking ripe fresh fruit (including peaches) at local U-Pick farms.

Ripe peaches on a tree, waiting to be picked to make jam

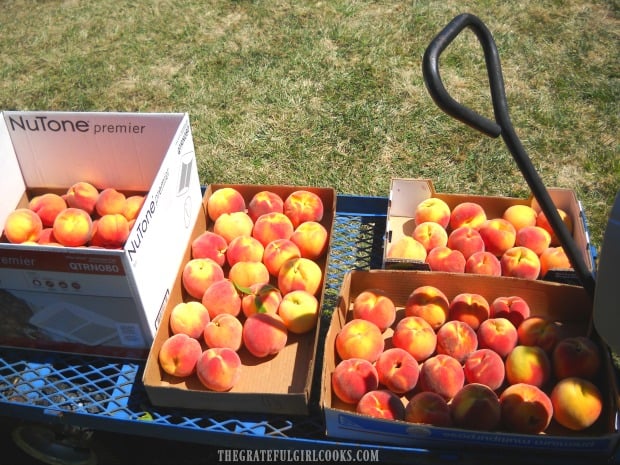
It’s so much FUN to get outside and pick peaches at their very best, ripe, juicy, and right there on the tree! Once I get them home, I LOVE to make peach jam, ice cream, cobblers, pies, etc. with the “fruits of my labor”. Another thing I do each summer is to can sliced peaches! That way I can enjoy the fresh taste all year long!

Fresh picked ripe peaches, heading home to make jam and pies!

Why I Learned To Can Jam and Jelly

I learned how to can jam using a water bath canner several years ago. I simply wanted to learn HOW it was done, so I taught myself  Once I saw how easy it is to can jam, I’ve never stopped, and am happy to say I haven’t bought jam in at least 8 years!

Here Are A Few Other Jam Recipes I’ve Shared On This Blog

I’ve posted some of the jam I’ve made on this blog. I have a nice variety of jams, which include Apple Butter, Bing Cherry, Orange Marmalade, Rhubarb-Orange, Strawberry, Blueberry, and Raspberry, to name a few.

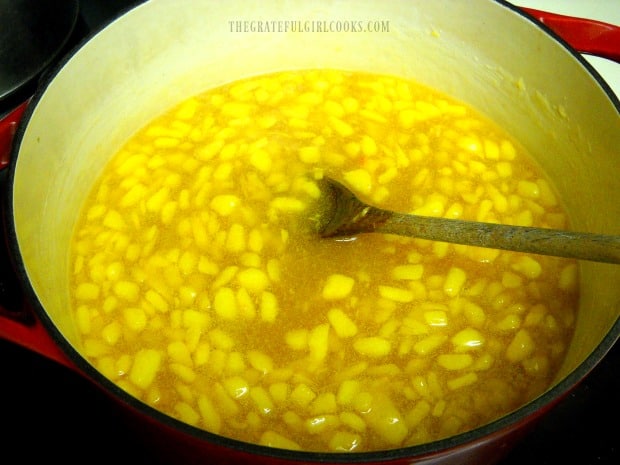
Cooking peach jam before adding it to jars

Most jellies and jams follow a very simple process, and if you follow that process carefully, you will be successful in your efforts to “put up” (as canning is sometimes referred to as) these items in your pantry!

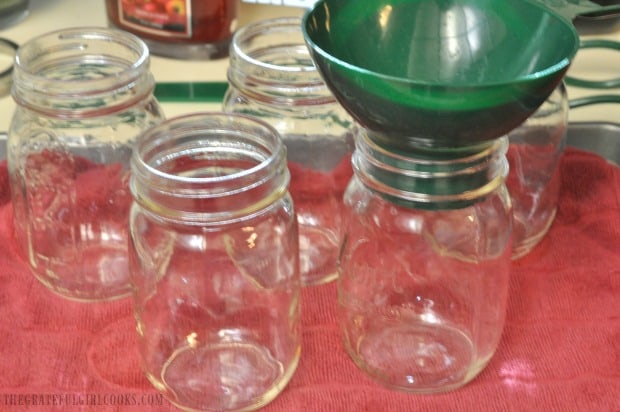
Warm canning jars are ready for jam to be added

With a few ingredients and a few basic canning tools, you can successfully store summer’s harvest for long term use! Jams and jellies are typically canned using a water bath canner.

What Is A Water Bath Canner?

A “water bath canner”  is basically a very large, tall pot with a lid, that has an elevated rack to slightly elevate the jars off the bottom of the pot. The rack handles are then used to lift the processed jars out of the pot, once done.

Jams and jellies (prepared with high acid foods in a water bath canner) are far simpler to can than vegetables, soups or meat, all low-acid foods, which require a different appliance called a “pressure canner”.

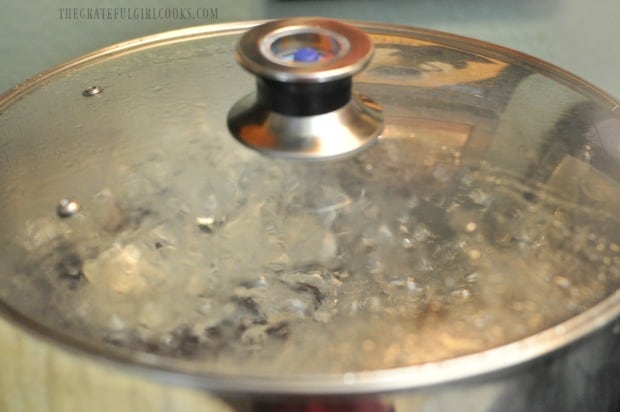
Jars of peach jam processing in water bath canner

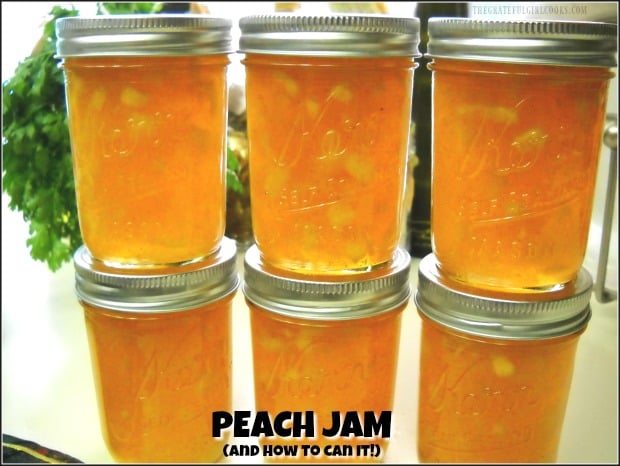
Once you are done and your jars of peach jam have sealed correctly, you can enjoy the work of your hands for years!  I LOVE the feeling that comes with knowing our pantry is well stocked!

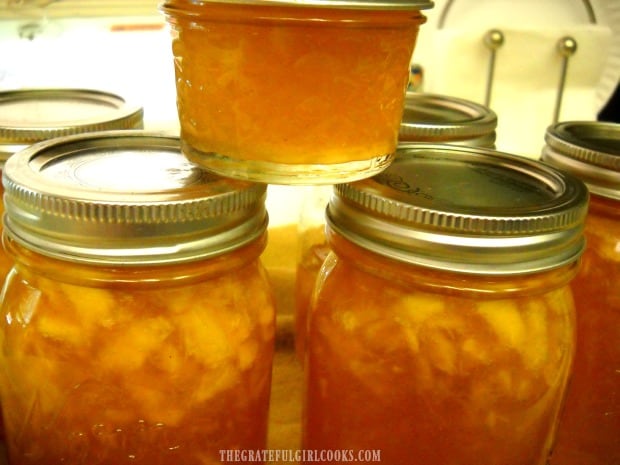
Canned peach preserves, ready to store in our pantry!

Enjoying The Peach Jam

The morning I was finishing writing this blog post, I realized I didn’t have any photos of the peach jam “in action”. I went downstairs to our pantry and scrounged through all our jars of jam and canned veggies until I found a jar of peach jam hiding in back of the cupboard. Guess what I found? A jar of peach jam I canned 4 YEARS AGO! I was a bit apprehensive as to whether it would still be good, but guess what? It was DELICIOUS, and tasted as fresh as the day I canned it.

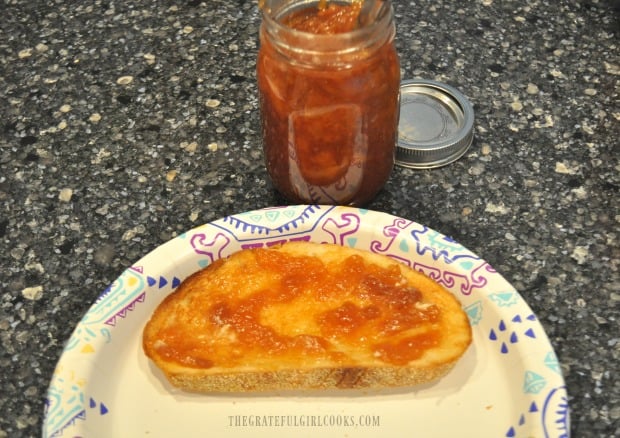
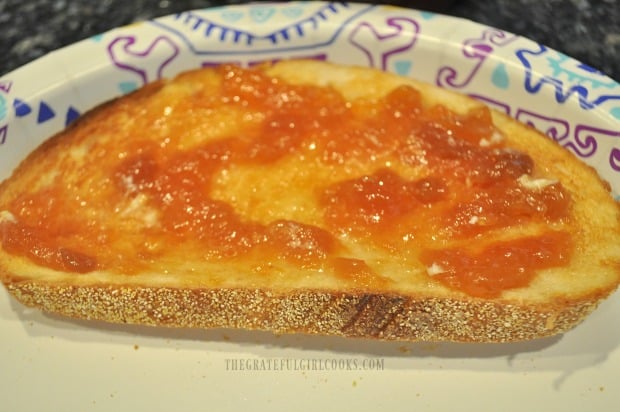
Here’s a picture!  My husband and I both had a piece of sourdough toast with the peach jam on it for breakfast, and said it tasted as yummy and fresh as when it was first made! THAT is why I enjoy canning so much for long term storage. I haven’t bought jam in years!

Sourdough toast with jam spread on it

Sourdough toast with canned peach jam, right out of the pantry!

I hope you will consider making these peach preserves.  It is such a great way to savor (over and over) the taste of fresh peaches, long after summer has come and gone! Thanks for stopping by, and have a great day. Be sure to check out ALL my recipes in the Recipe Index, located at the top of the page.

Interested In More Recipes?

Thank you for visiting this website. I appreciate you using some of your valuable time to do soIf you’re interested, I publish a newsletter 2 times per month (1st and 15th) with all the latest recipes, and other fun info. I would be honored to have you join our growing list of subscribers, so you never miss a great recipe!
There is a Newsletter subscription box on the top right side (or bottom) of each blog post, depending on the device you use, where you can easily submit your e-mail address (only) to be included in my mailing list.

You Can Also Find Me On Social Media:

Facebook page: The Grateful Girl Cooks!
Pinterest:
The Grateful Girl Cooks!
Instagram:
jbatthegratefulgirlcooks

Have a fantastic day, friends!

Author's signature

Recipe Source: MCP Pectin

5 from 1 vote
Peach Jam
Prep Time
35 mins
Cook Time
10 mins
Total Time
45 mins
 
Homemade peach jam is a reminder of summer time at it's BEST! Learn how to make this classic jam, and can it for long term storage!
Category: Canning and Preserving
Cuisine: American
Keyword: peach jam
Servings: 7 (1/2 pint jars)
Calories Per Serving: 45 kcal
Author: JB @ The Grateful Girl Cooks!
Ingredients
  • 4 cups finely chopped fresh peaches (peeled, approx. 3½ pounds)
  • 1/4 cup fresh lemon juice (approx. 2 lemons)
  • 6 cups granulated sugar
  • 1 box Fruit Pectin (powdered) (1.75 ounces powdered pectin per box)
Instructions
  1. Fill a boiling water canner half full of water. Bring this to a simmer. (At the same time, I start a teapot with water going, so I will have boiling water for the jar lids later on). Wash jars and lids in soapy hot water. Put lids in small bowl. Fill jars with water and put in canner on a rack, while it is simmering, to keep jars warm. (Or you can set jars on dish towel on a cookie sheet and keep in oven at 250 degrees for 20 minutes for same effect).

  2. In a large bowl, measure out the exact amount of sugar. Set aside.
  3.  Put the finely chopped peaches (4 cups) into a large stock pot. Stir the lemon juice and the box of Pectin into the peaches. Bring mixture to a full rolling boil on high heat, stirring constantly (a rolling boil is when it is boiling hard, it won't stop bubbling even when stirred). Stir in all of the sugar quickly (all at once). Stir well to combine.

  4. At this point, I pour boiling water over the jar lids that are in the little bowl. Let them just sit in the hot water for 5 minutes while you finish the jam.
  5. Bring the jam/pectin/sugar mixture back to a full, rolling boil. Once it is a full rolling boil, boil it for exactly 4 minutes, stirring constantly. When time is up, remove pan from heat, then skim off any accumulated foam (and discard foam). Ladle the hot jam mixture into hot, prepared jars. Fill the jars, but leave 1/8 inch headspace at the top of each jar. Insert a plastic knife into each jar a couple times to help remove air bubbles. Adjust the headspace if necessary. Use a damp cloth or paper towel to wipe down the rim and edges of the jar. You need it free of debris in order to get a good seal on the jar. Cover the jars with the hot, flat jar lid. Screw on the jar rings tightly. Lower each of the jars onto an elevated rack in the canner. The jars must be completely covered with water, and must have at least an inch of water over the top of the jar. Add more boiling water to canner, if necessary, to make sure.

  6. Cover the canner; bring to a gentle boil. Once the water is boiling, process the jars for 10 minutes. When done, wait for a couple minutes, then carefully remove canner lid (lift lid away from you because of steam); carefully lift each jar out of water (with canning tongs), and place on dish towel on the counter to cool (do not put jars directly on counter cause you don't want temperature differences to possibly crack jars). You should hear "ping" sound as the jars seal properly.

  7. After the jars cool off, you can check to see they sealed properly by pressing the middle of the lid. The jar should NOT spring back when touched. If it does spring back, then you will need to refrigerate that particular jar. Let the sealed jars stand at room temp for 24 hours, then store unopened in a cool, dark place for up to 1 year. If any jars do NOT seal, store in refrigerator and use immediately.

Nutrition Facts
Peach Jam
Amount Per Serving (1 Tablespoon)
Calories 45
% Daily Value*
Sodium 1mg0%
Potassium 11mg0%
Carbohydrates 11g4%
Sugar 11g12%
Vitamin A 20IU0%
Vitamin C 0.6mg1%
* Percent Daily Values are based on a 2000 calorie diet.

Here’s one more to pin on your Pinterest boards!Homemade peach jam is a reminder of summer time at it's BEST! Learn how to make this classic jam, and can it for long term storage!

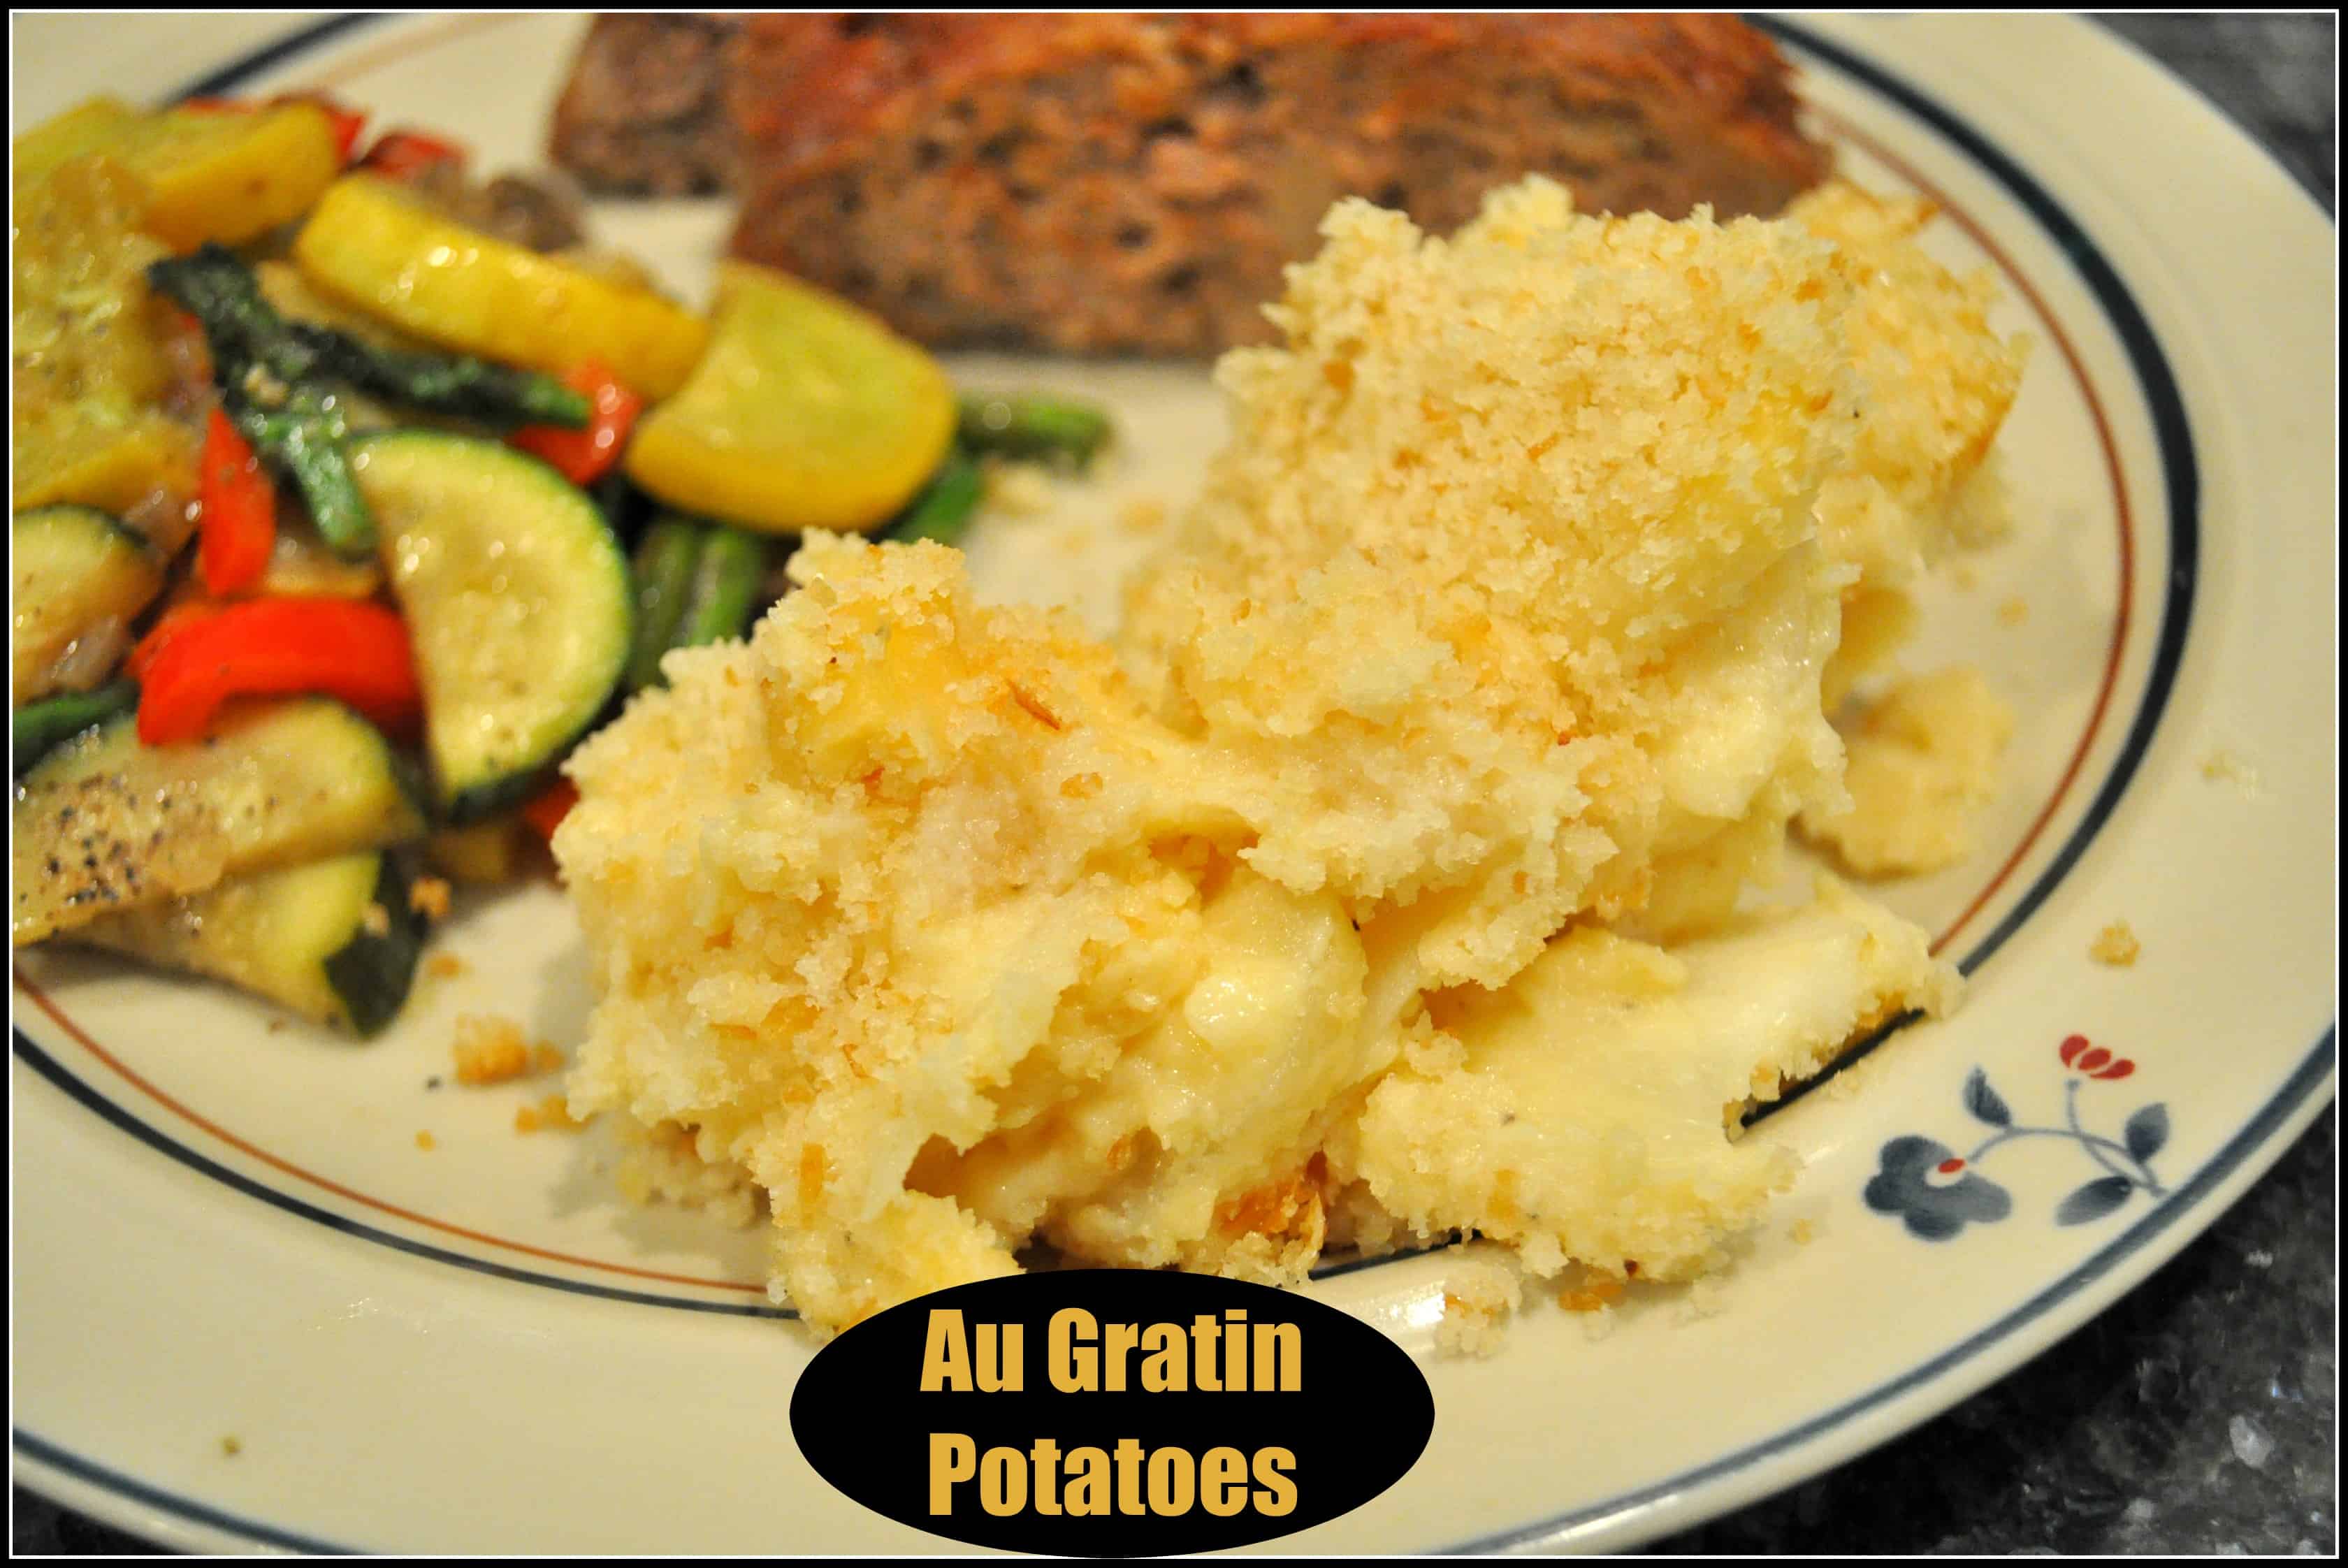
Au Gratin Potatoes

Au Gratin Potatoes are a comforting classic side dish, with thinly sliced potatoes covered in a homemade cheese sauce, then baked until golden brown and bubbly!

Do you like Potatoes au Gratin? Pretty fancy sounding French name for potatoes and cheese, right? My husband found a simple translation online for  “au gratin” which said that it simply means “cooked with a cover of cheese and bread crumbs mixed with butter”.

Well, I do not speak French, but I do know that I love this “comfort food” side dish! That description of au gratin fits this recipe perfectly! How can you go wrong with baked russet potatoes smothered in cheese sauce, and covered with a buttery bread crumb topping?

I found an old recipe recently that I had written down on an index card many years ago, made a few slight changes to the original, then made them for dinner. It is fairly straight forward to make, and was very delicious!

Scroll Down For A Printable Recipe Card At The Bottom Of The Page

Here’s How To Make Au Gratin Potatoes:

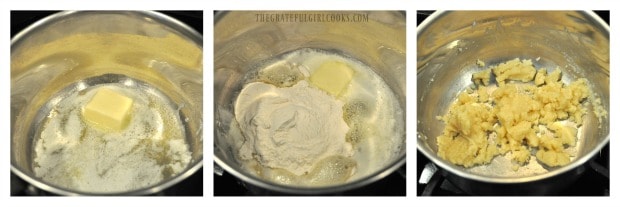
Melt butter in a medium saucepan on medium low heat.  Stir in flour. Continue stirring; the mixture will clump up a bit (as seen in photo). Continue cooking for one minute, stirring often (this helps cook the “floury” taste out of it).

Cooking butter and flour to make a thickener for cheese sauce

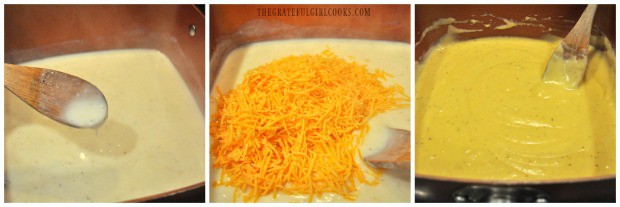
Stir the milk, salt and pepper into butter mixture. Continue to cook on medium heat until mixture thickens considerably.  Add sharp cheddar cheese; stir until cheese has fully melted, and sauce is quite thick.

Cheddar cheese is added to thickened au gratin sauce

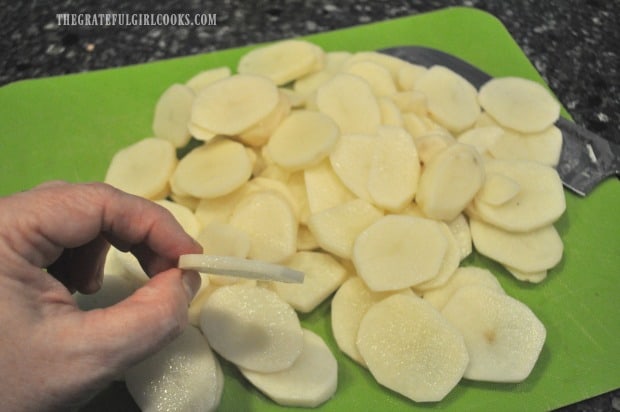
Peel, then slice potatoes into 1/8″ round slices.  If you have a mandoline, use that to get very thin slices (1/8″ is best!).  I have a mandoline, but used a knife to slice the potatoes to show how thin the potato slices should be (when using a knife try hard to get them 1/4″ or thinner), in case you don’t have one.

If the potatoes slices are too thick, it will take much longer to cook them until tender! The thinner the slices are, the better!

Potatoes are sliced very thin for au gratin dish
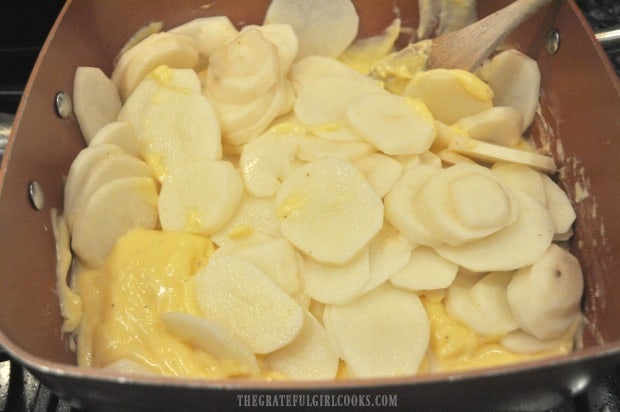
Place the sliced potatoes to the cheese sauce in pan. Stir well, to completely cover potatoes with cheese sauce.

Potato slices are added to au gratin cheese sauce in pan

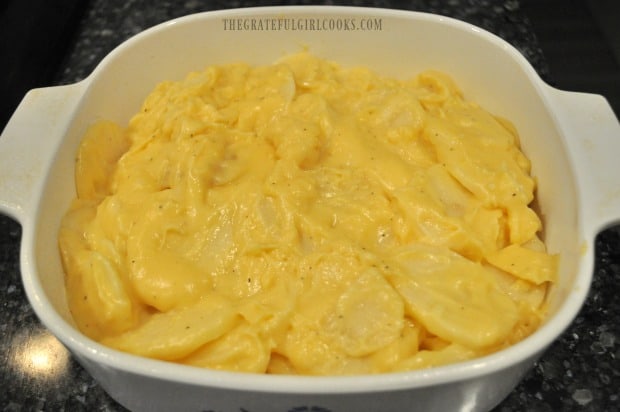
Spray a 2 quart sized baking dish with non-stick spray (bottom and sides).  Add the cheesy potatoes to the dish, and evenly spread to disperse. Set aside.

Potatoes and cheese sauce layered into baking dish

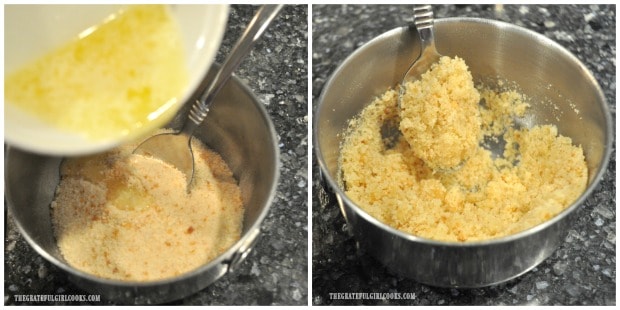
Create the buttery crumb topping by mixing together melted butter and soft breadcrumbs.

Buttery crumb topping is mixed for top of au gratin potato dish

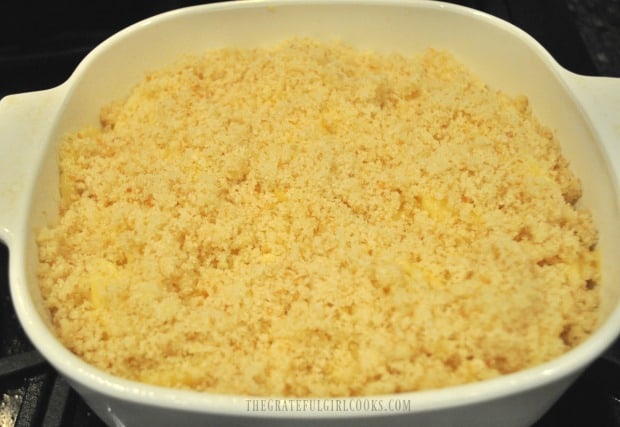
Sprinkle the buttered bread crumbs over the entire surface of the au gratin potatoes.

Buttered bread crumbs top potatoes in dish

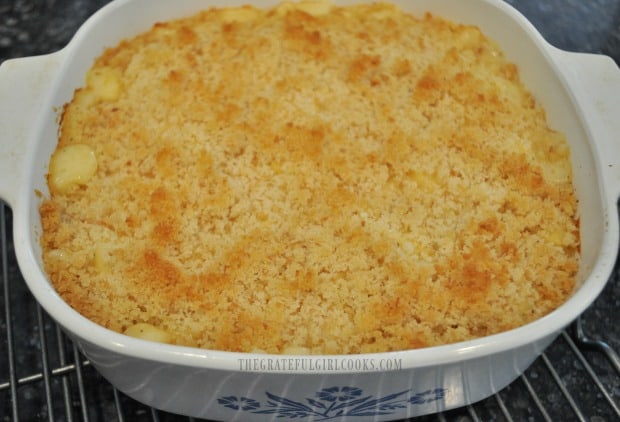
Bake potatoes in a preheated 400 degree oven for 60 minutes (covered with foil). Remove foil and continue baking for an additional 15 minutes, or until surface of potatoes is golden brown and cheese sauce is bubbly around the edges of dish.

Potatoes au gratin are baked until golden brown on top

When done baking, remove dish to a wire rack.  The cheese should be bubbling around the edges, and the potatoes should be fully cooked through and tender. Season with additional salt and pepper, if desired, serve, and enjoy these au gratin potatoes!

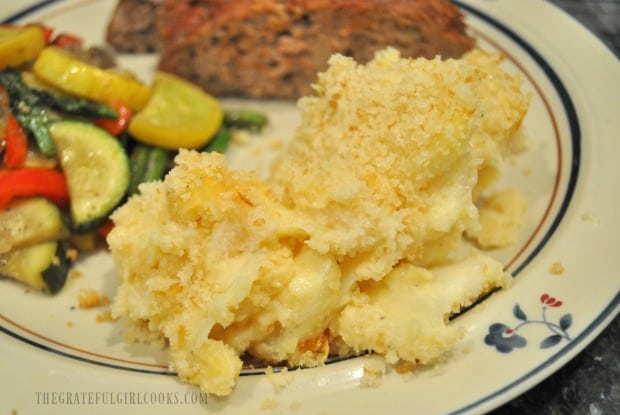
Au gratin potatoes are served as a side dish with meat and vegetables

We enjoyed the potatoes, served with grilled vegetables and my REALLY GOOD meatloaf. This meal was a tried and true meat and potatoes dinner, to be sure! Hope you will consider making this delicious side dish to compliment YOUR favorite meal!

Looking For More POTATO Recipes?

You can find all of my recipes in the Recipe Index, located at the top of the page. I have quite a few recipes featuring potatoes, including:

Interested In More Recipes?

Thank you for visiting this website. I appreciate you using some of your valuable time to do soIf you’re interested, I publish a newsletter 2 times per month (1st and 15th) with all the latest recipes, and other fun info. I would be honored to have you join our growing list of subscribers, so you never miss a great recipe!
There is a Newsletter subscription box on the top right side (or bottom) of each blog post, depending on the device you use, where you can easily submit your e-mail address (only) to be included in my mailing list.

You Can Also Find Me On Social Media:
Facebook page: The Grateful Girl Cooks!
Pinterest: The Grateful Girl Cooks!
Instagram: jbatthegratefulgirlcooks

Have a wonderful day… God Bless You!

Author's signature

Original Recipe Source: unknown (written down many years ago on 3×5 card-no author noted)

0 from 0 votes
Au Gratin Potatoes
Prep Time
15 mins
Cook Time
1 hr 15 mins
Total Time
1 hr 30 mins
 
Au Gratin Potatoes are a comforting classic side dish, with thinly sliced potatoes covered in a homemade cheese sauce, then baked until golden brown and bubbly!
Category: Side Dish, Vegetables
Cuisine: American
Keyword: au gratin potatoes
Servings: 8 servings
Calories Per Serving: 283 kcal
Author: JB @ The Grateful Girl Cooks!
Ingredients
  • 6 medium potatoes (or 4 large), peeled, thinly sliced into 1/4" rounds
For Cheese Sauce (total approx. 2½ cups)
  • 4 Tablespoons butter
  • 4 Tablespoons all purpose flour
  • 1/2 teaspoon Salt , plus more to taste (if desired)
  • 1/4 teaspoon Pepper
  • 2 cups milk
  • cups sharp cheddar cheese (grated)
For Bread Crumb Topping:
  • 1/2 cup bread crumbs
  • 2 Tablespoons butter, melted
Instructions
  1. Melt butter in a medium saucepan on medium low heat.  Stir in flour. Continue stirring; the mixture will clump up a bit. Continue cooking for one minute, stirring often (this helps cook the "floury" taste out of it). Stir the milk, salt and pepper into butter mixture. Continue to cook on medium heat until mixture thickens considerably.  Add sharp cheddar cheese; stir until cheese has fully melted, and sauce is quite thick.

  2. Peel, then slice potatoes into 1/8" round slices.  If you have a mandoline, use that to get very thin slices.  If using a knife to slice potatoes, slice them as thin as possible (no more than 1/4" thin). If the potatoes slices are too thick, it will take much longer to cook them until tender! The thinner the slices are, the better!

  3. Add potatoes to the cheese sauce in pan. Stir well, to completely cover potatoes. Spray a 2 quart sized baking dish with non-stick spray (bottom and sides).  Add potatoes to the dish, and evenly spread to disperse. Set aside.

  4. Make the buttery crumb topping by mixing together melted butter and soft breadcrumbs. Sprinkle the buttered bread crumbs over the entire surface of the au gratin potatoes.

  5. Bake potatoes in a preheated 400 degree oven for 60 minutes (covered with foil). Remove foil and continue baking for an additional 15 minutes, or until surface of potatoes is golden brown and cheese sauce is bubbly around the edges of dish. Remove from oven, season with additional salt and pepper, if desired. Serve, and enjoy!

Nutrition Facts
Au Gratin Potatoes
Amount Per Serving (1 serving)
Calories 283 Calories from Fat 189
% Daily Value*
Fat 21g32%
Saturated Fat 13g81%
Cholesterol 62mg21%
Sodium 515mg22%
Potassium 136mg4%
Carbohydrates 11g4%
Sugar 3g3%
Protein 12g24%
Vitamin A 730IU15%
Calcium 342mg34%
Iron 0.8mg4%
* Percent Daily Values are based on a 2000 calorie diet.

Here’s one more to pin on your Pinterest boards!Au Gratin Potatoes are a comforting classic side dish, with thinly sliced potatoes covered in a homemade cheese sauce, then baked until golden brown and bubbly!

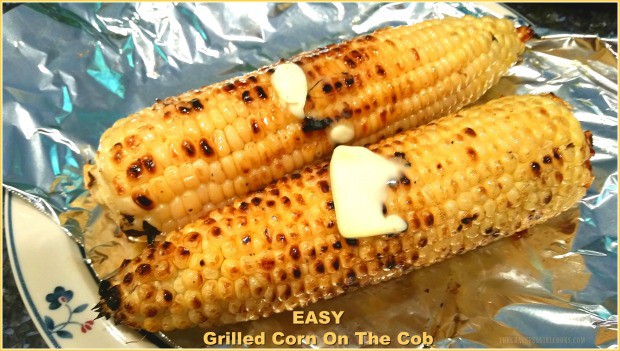
Easy Grilled Corn On The Cob

Grilled corn on the cob (on the BBQ) is easy to make, delicious, and a great way to keep a kitchen cool on hot days, by cooking outside!Grilled corn on the cob (on the BBQ) is super easy to make, delicious, and is a great way to keep your kitchen cool during hot summer days, by cooking outside!
Do you enjoy corn on the cob?  We LOVE corn on the cob!  Each summer, I try to pick up fresh corn at the grocery store or farmer’s market whenever I can. 

For most of our married life I simply boiled the corn with a teensy tiny bit of sugar in the water. That’s the way I used to cook corn on the cob most of the time.

But in the past couple years I’ve realized just how absolutely delicious grilled corn on the cob can be.

Scroll Down For A Printable Recipe Card At The Bottom Of The Page

How To Make Easy Grilled Corn On The Cob

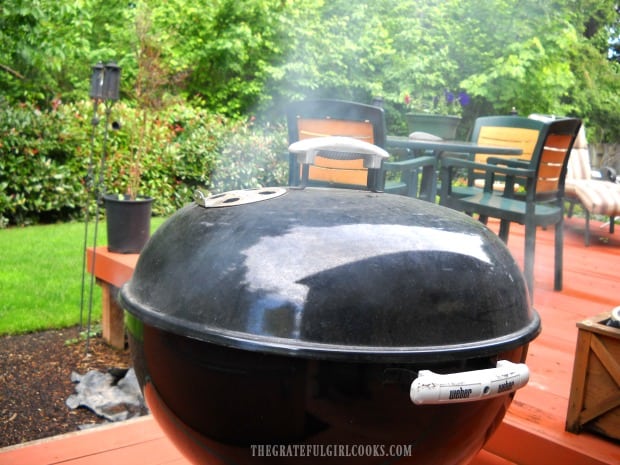
Getting our BBQ heated up for grilled corn on the cob

There are several methods for grilling corn… we’ve grilled it with the husks still on, after soaking it in water (to prevent burning). That is delicious, and “steams” the corn inside the husk.

Another way to grill corn is the method I’m sharing today. This method is perfect if you just want to get corn on the grill, then onto the table, but don’t want to soak the corn in water.

Here’s The Method We Use For Grilled Corn On The Cob

Soooo… always start with FRESH corn. Corn on the cob is the best when it is at its peak locally during the Summer months.

Whether you get fresh corn from your own garden, a grocery store, farmer’s market, or a friend who is feeling generous with their harvest, it doesn’t matter. Just get yourself some fresh yummy ears of corn!

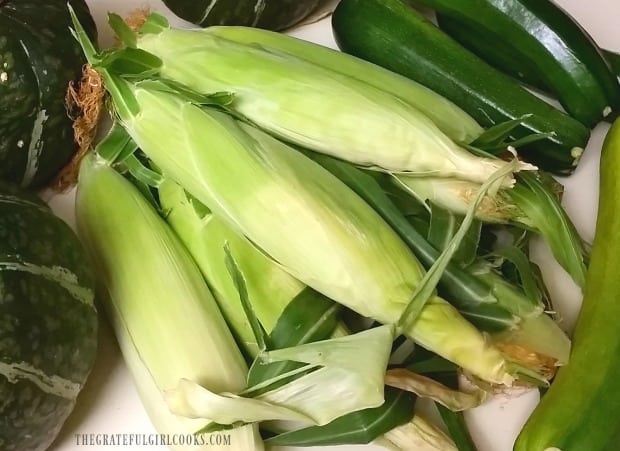
Fresh picked corn, ready to cook!
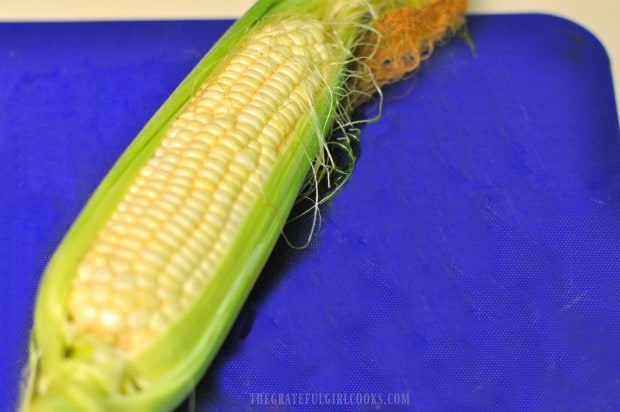
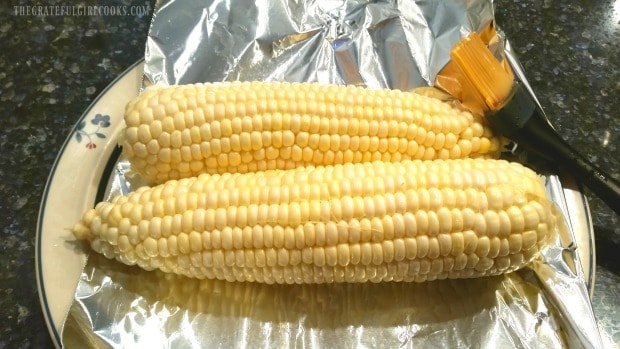
For this method used for grilled corn on the cob, you will need to completely remove the corn husks and as much of the corn “silk” as possible before starting. Rinse, then dry off corn.

Cleaning corn silk and husk off corn in order to grill

Lightly brush each ear of corn you are using with a very mild tasting cooking oil (I used vegetable oil). Make sure to brush the oil on all sides.

Corn is lightly brushed with oil before grilling

Time To Grill The Corn On The Cob!

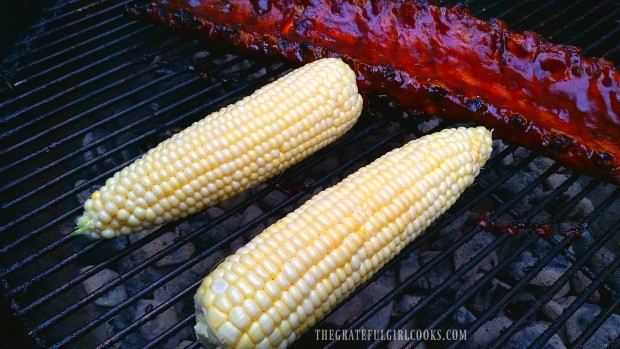
Preheat your charcoal BBQ grill until the coals are ready (hot, hot, hot) or a gas grill has reached a high temperature. 

We grilled the corn this time on our beloved Weber charcoal grill with some yummy looking baby back ribs. Now THAT’S gonna be a good dinner!

Corn is placed on hot BBQ grill to cook

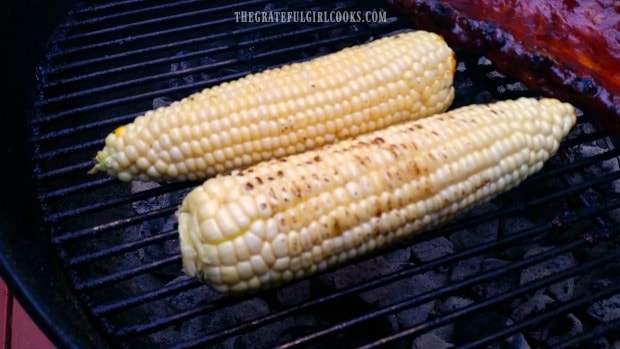
Cook the corn for 2-3 minutes on the hot grill, then rotate each ear of corn a quarter turn. It should be “barely charred” or have light brown grill marks on it.

See how the ears of corn are starting to have a slight “char” on the kernels? That is GOOD.

Corn is rotated on grill a quarter turn every 2-3 minutes

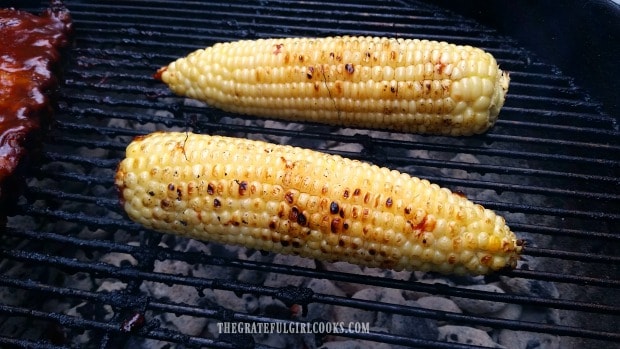
Keep rotating the ears of corn a quarter turn every 2-3 minutes.  If the coals are hot enough, the total time to cook the grilled corn on the cob is usually about 10 minutes.

Be careful to not let the kernels burn too much, but a good char on each piece of corn is wonderful!

Grilled corn on the cob is almost done!

When Is The Corn Done?

Once the corn has been grilled on all sides (after about 10-11 minutes), the corn should be done! 

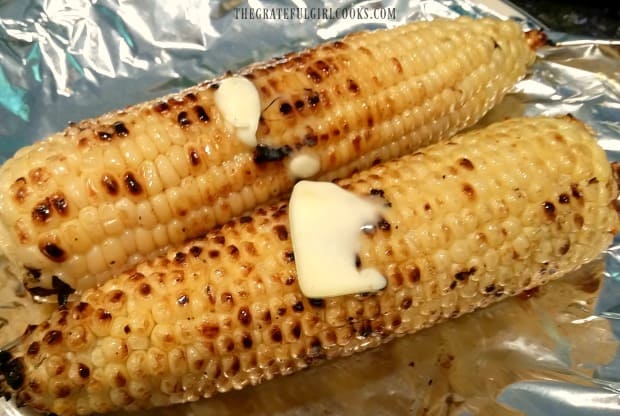
Transfer the grilled corn on the cob to a serving plate, add butter, season to taste with salt and pepper, and dig in!

Go ahead and chomp away on this summertime treat – it’s really delicious! We love the slight smoky taste the corn has after being grilled.

How Else Can I Use Grilled Corn?

Another way to use grilled corn on the cob is to let it cool, then slice off the kernels from the cob.

The grilled corn kernels taste wonderful when added to a Southwestern-style salad like Black Bean Corn & Tomato Salad w/ Avocado Cilantro Dressing, soup or a taco salad. A great smoky grilled corn flavor will be instantly added to that dish!

Grilled corn on the cob is done and slathered with butter

There are so many different ways to cook corn on the cob… this is one simple method that we enjoy using. It’s nice to cook a piece of meat AND the corn on the grill at the same time!

Sure hope you will consider trying it this EASY way! If you enjoy dishes with fresh corn, may I also suggest my recipes for Grilled Unshucked Corn On the Cob and Fresh Corn Sauté with Red Peppers and Onions?

Thanks for stopping by today. I invite you to come back again soon for more family friendly recipes. Take care, and have a GREAT day!

Want More Recipes? Get My FREE Newsletter!

I publish a newsletter 2 times per month (1st and 15th) with lots of recipes, tips, etc..
Would you like to join our growing list of subscribers?

There is a Newsletter subscription box on the top right (or bottom) of each blog post, depending on the device you use.
You can submit your e-mail address there, to be added to my mailing list.

Find Me On Social Media:

Facebook page: The Grateful Girl Cooks!
Pinterest:
The Grateful Girl Cooks!
Instagram:
jbatthegratefulgirlcooks

Author's signature

↓↓ PRINTABLE RECIPE BELOW ↓↓

0 from 0 votes
Easy Grilled Corn On The Cob
Prep Time
5 mins
Cook Time
10 mins
Total Time
15 mins
 
Grilled corn on the cob (on the BBQ) is super easy to make, delicious, and is a great way to keep your kitchen cool during hot summer days, by cooking outside!
Category: Side Dishes, Vegetables
Cuisine: American
Keyword: grilled corn on the cob
Servings: 2 servings
Calories Per Serving: 155 kcal
Author: JB @ The Grateful Girl Cooks!
Ingredients
  • 2 ears fresh corn on the cob
  • 1 Tablespoon vegetable oil (or light tasting oil)
  • 1 teaspoon butter (or more, to taste)
  • 1 pinch salt (or more, to taste)
  • 1 pinch black pepper (or more, to taste)
Instructions
  1. Completely remove the corn husks and as much of the corn "silk" as possible before starting. Rinse, and dry off corn.

  2. Lightly brush each ear of corn you are using with a very mild tasting cooking oil (I used vegetable oil). Make sure to brush the oil on all sides.
  3. Preheat your BBQ grill until you have very hot coals or a high temperature reading. When hot, place corn ears on grill. After 2-3 minutes cooking the corn on the hot grill, rotate each ear a quarter turn. Keep rotating the ears of corn a quarter turn every 2-3 minutes. If the coals are hot enough, the total time to cook the ears of corn is usually about 10-11 minutes. Be careful to not let the kernels burn too much, but a good char is wonderful!

  4. When corn is grilled on all sides (after about 10-11 minutes), the corn should be done!  Transfer the grilled corn on the cob to a serving plate, add butter, season to taste with salt and pepper, and dig in! Enjoy!

Nutrition Facts
Easy Grilled Corn On The Cob
Amount Per Serving (1 ear of corn)
Calories 155 Calories from Fat 90
% Daily Value*
Fat 10g15%
Saturated Fat 7g44%
Cholesterol 5mg2%
Sodium 31mg1%
Potassium 243mg7%
Carbohydrates 16g5%
Fiber 1g4%
Sugar 5g6%
Protein 2g4%
Vitamin A 230IU5%
Vitamin C 6.1mg7%
Iron 0.5mg3%
* Percent Daily Values are based on a 2000 calorie diet.

Here’s one more to pin on your Pinterest boards!Grilled corn on the cob (on the BBQ) is super easy to make, delicious, and is a great way to keep your kitchen cool during hot summer days, by cooking outside!


Triple Berry Streusel Coffeecake

Triple Berry Streusel Coffeecake with blackberries, raspberries and blueberries, and topped with a buttery crumb topping is a perfect breakfast or brunch treat!

I found the recipe for this triple berry streusel coffeecake while searching for breakfast ideas in my old trusty recipe card file box.  I’ve had these old recipes for many, many years, and quite literally just happened upon this one. I thought it sounded like a great coffeecake for a breakfast or brunch with a crowd, so decided to give it a try.

Scroll Down For A Printable Recipe Card At The Bottom Of The Page

Where Did This Recipe Originate?

The original recipe was called “Hawthorne Street Cafe Coffeecake”, and I believe it originated with a small restaurant in Portland that has since gone out of business. This coffeecake was one of their most requested dishes!

The recipe was cut from a newspaper and I had taped it to a 3×5 card years ago, but no source was given. The recipe “might” have come from The Oregonian newspaper, but my search of their recipes turned up nothing by this name. I decided to make this breakfast cake, but where the original recipe only used Marionberries, I substituted three berries: blackberry, raspberry and blueberry!

The recipe uses FROZEN berries (to ensure a moist cake), and I just happened to have a large bag of all three in my freezer (thanks to my husband buying them at the store).  The recipe is very easy, and the results? OUTSTANDING! Here’s how to make this treat that serves 12.

How To Make Triple Berry Streusel Coffeecake

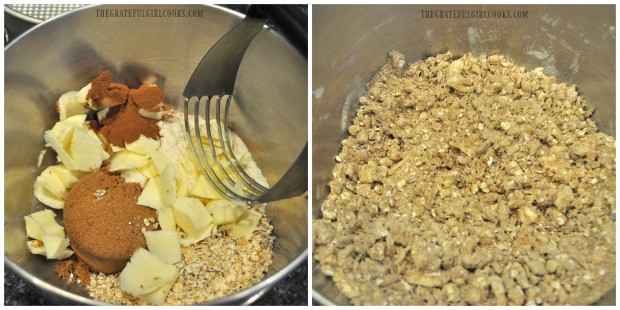
To make the streusel topping, place brown sugar, quick cooking oats, flour, cold butter and cinnamon in a medium sized bowl. Using a pastry blender, cut butter into the other ingredients until mixture is crumbly (and butter becomes about the size of peas). Set aside. NOTE: You can also blend these ingredients until crumbly in a food processor, if desired. 

Mixing the streusel ingredients together for topping.

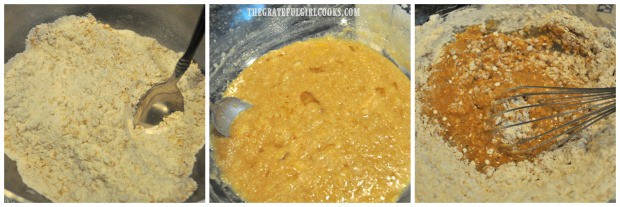
Make the coffeecake batter in a separate bowl by first combining flour, quick cooking oats and baking powder. In a separate bowl, blend melted butter, brown sugar, egg, vanilla and milk.  Add the flour mixture to the butter mixture, and stir until ingredients are fully combined.

Making the batter for the berry coffeecake.

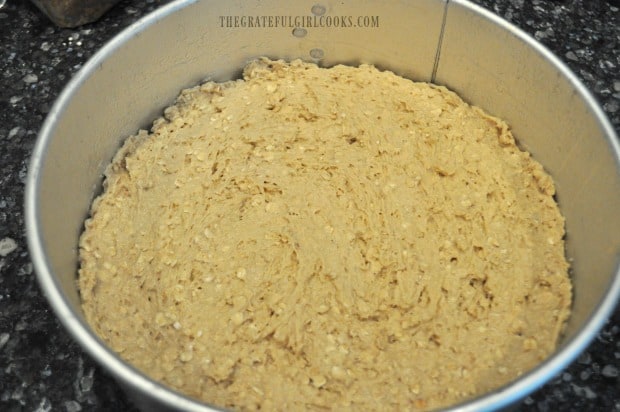
Spoon the coffeecake batter into a very well greased (bottom and sides) 10 inch springform pan.  Spread the batter out, to completely cover the bottom of the pan.

Batter is spread on the bottom of a springform pan.

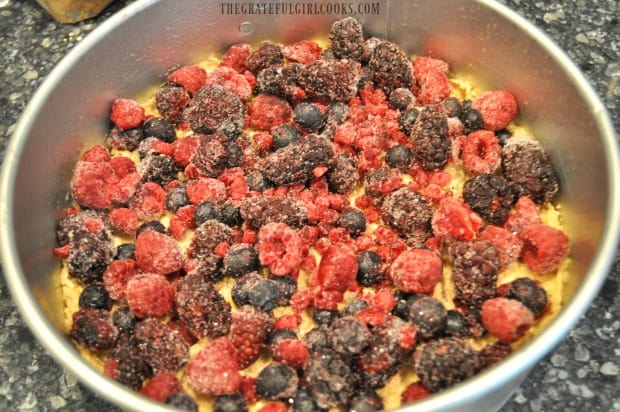
Place the FROZEN (not thawed) berries on top of the batter, and spread out to evenly cover batter. (Why use FROZEN berries? Frozen berries help ensure the triple berry streusel coffeecake is moist).

Frozen berries are placed on top of the coffeecake batter in pan.

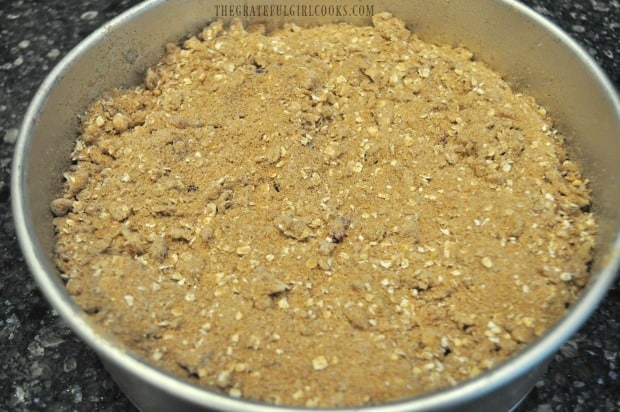
Sprinkle the fruit with the streusel topping, dispersing evenly over the top of the coffeecake to cover.

Streusel topping is sprinkled all over the top of the coffeecake.

Baking The Triple Berry Streusel Coffeecake

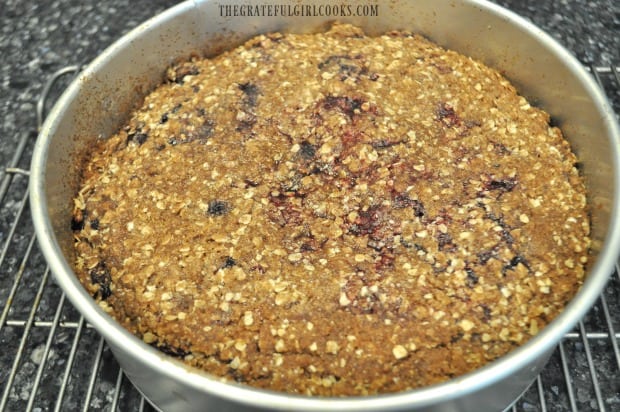
Bake the coffeecake in a preheated 350° F. oven for 1 hour, or until completely done in the center.  You can test its doneness by inserting a toothpick into the center of coffeecake. If it comes out clean, it is done.

When done, transfer coffeecake to a wire rack, and let it cool in the pan for 30 minutes. Once cooled, run a butter knife around the edges of pan, then carefully open the pan by releasing latch and remove pan.

Cooling down coffeecake, still in springform pan.

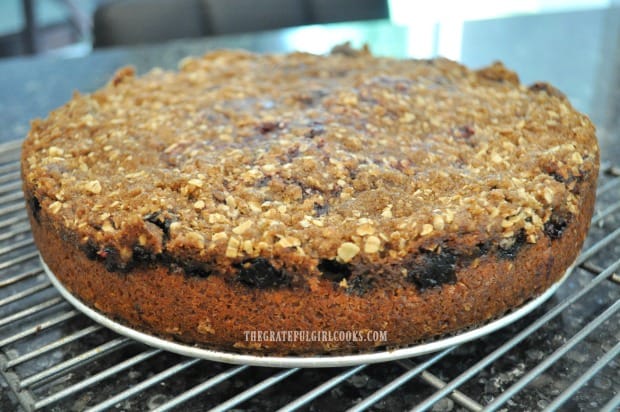
The triple berry streusel coffeecake is baked and cooling on a wire rack.

Time To EAT!

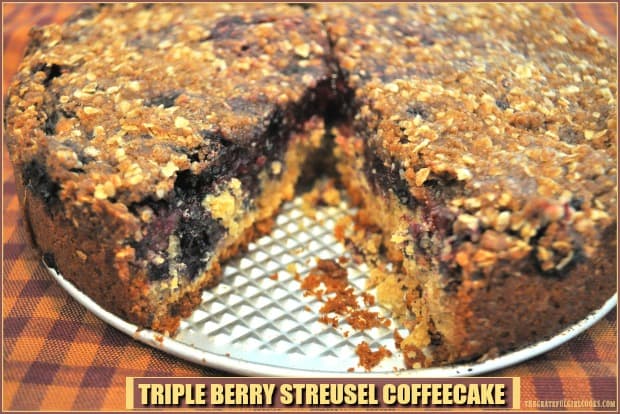
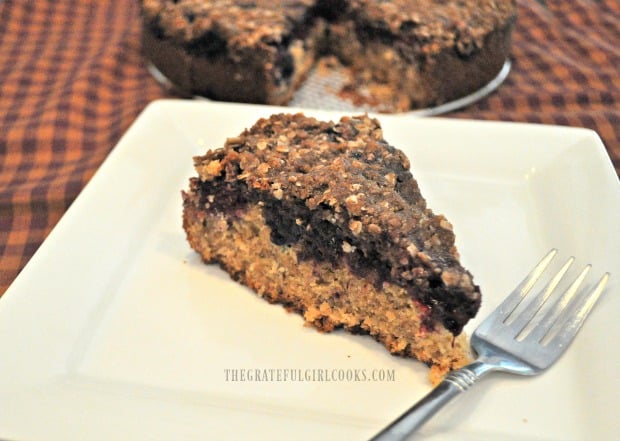
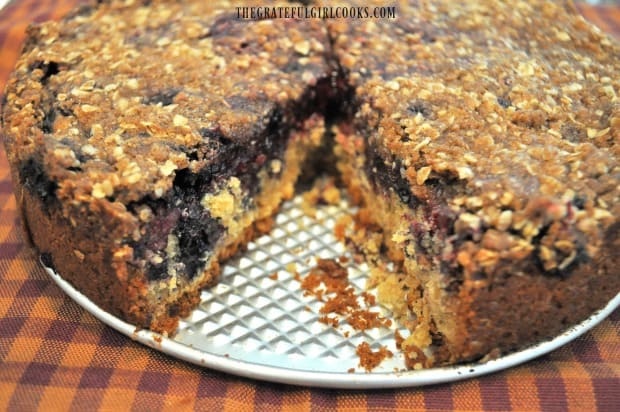
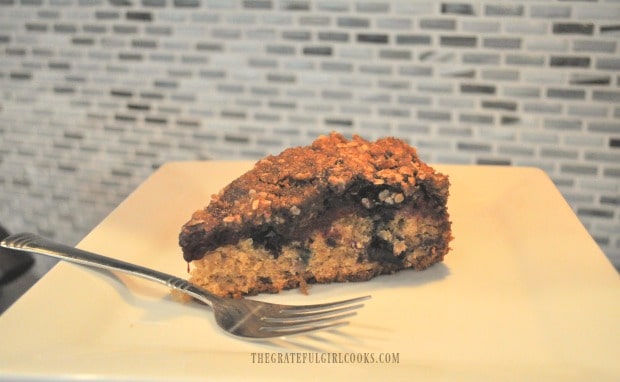
After the triple berry streusel coffeecake has completely cooled, it is ready to serve.  See that layer of berries? They taste so fresh, and really help keep this coffeecake moist! Grab a knife, cut yourself a big ol’ slice, sit back and enjoy this delicious treat!

A piece of the coffeecake on a white plate.

You can see all the berries inside the triple berry streusel coffeecake.

I wrapped several pieces up really well and put them in our freezer to enjoy another day. I am happy to report that even on Day 3 after making this triple berry streusel coffeecake, the pieces were still moist and absolutely delicious!

By the way… if you enjoy coffeecake, be sure to check out my recipes for Pumpkin Streusel Coffeecake, Old Fashioned Crumb Coffeecake, or Hummingbird Cake.  Throw in a good strong cup of coffee to drink, for good measure, and you’ve got yourself a yummy breakfast!

A slice of the triple berry streusel coffeecake, ready to eat!

I hope you really enjoy this triple berry streusel coffeecake. It TRULY is delicious!  I’m looking forward to making it again in a few weeks when my sister and brother-in-law come up for a visit!

Thank you for stopping by, and I hope you will come back again soon for more delicious recipes. Don’t forget, you can check out ALL of my recipes in the Recipe Index, located at the top of the page. Have a wonderful day.

Looking For More COFFEECAKE Recipes?

You can find ALL of my recipes in the Recipe Index, which is located at the top of the page. I have some really delicious coffeecake recipes for you to check out, including:

Interested In More Recipes?

Thank you for visiting this website. I appreciate you using some of your valuable time to do soIf you’re interested, I publish a newsletter 2 times per month (1st and 15th) with all the latest recipes, and other fun info. I would be honored to have you join our growing list of subscribers, so you never miss a great recipe!
There is a Newsletter subscription box on the top right side (or bottom) of each blog post, depending on the device you use, where you can easily submit your e-mail address (only) to be included in my mailing list.

You Can Also Find Me On Social Media:

Facebook page: The Grateful Girl Cooks!
Pinterest:
The Grateful Girl Cooks!
Instagram:
jbatthegratefulgirlcooks

Have a wonderful day… make it a GOOD one!

Author's signature

Original Recipe Source: unknown (possibly The Oregonian newspaper)

↓↓ PRINTABLE RECIPE BELOW ↓↓

0 from 0 votes
Triple Berry Streusel Coffeecake
Prep Time
15 mins
Cook Time
1 hr
Total Time
1 hr 15 mins
 
Triple Berry Streusel Coffeecake with blackberries, raspberries and blueberries, and topped with a buttery crumb topping is a perfect breakfast or brunch treat!
Category: Breakfast
Cuisine: American
Keyword: triple berry streusel coffeecake
Servings: 12 servings
Calories Per Serving: 348 kcal
Author: JB @ The Grateful Girl Cooks!
Ingredients
  • 1 cup brown sugar , firmly packed, divided use
  • 2 cups all purpose flour , divided use
  • cups quick cooking oats , uncooked, divided use
  • 1 cup butter (2 sticks) , divided use
  • 2 Tablespoons baking powder
  • 1 egg
  • 1 teaspoon vanilla extract
  • 3/4 cup milk
  • 3 cups frozen blackberries, blueberries, raspberries (or 3 cups blackberries)
Instructions
To Make Streusel Topping:
  1. Place ½ cup brown sugar, ½ cup oats, ½ cup flour, ½ cup cold butter and cinnamon in a medium sized bowl. Using a pastry blender, cut butter into the other ingredients until mixture is crumbly (and butter becomes about the size of peas).  NOTE: You may also choose to blend these ingredients until crumbly in a food processor, if desired. Set aside.

To Make Coffeecake Batter:
  1. Make coffeecake batter in a separate large bowl by combining remaining flour, oats and baking powder. In another bowl, blend melted (remaining) butter, brown sugar, egg, vanilla and milk.  Add flour mixture to the butter mixture, and stir until ingredients are fully combined.

To Assemble Coffeecake:
  1. Spoon the coffeecake batter into a very well greased (bottom and sides) 10 inch springform pan.  Spread batter out to completely cover the bottom of the pan. Place the FROZEN (not thawed) berries on top of the batter, and spread out to evenly cover batter. Sprinkle the fruit with the streusel topping, dispersing evenly over the top of the coffeecake to cover.

  2. Bake coffeecake in a preheated 350° F. oven for 1 hour, or until done in the center. You can test doneness by inserting a toothpick into the center of coffeecake. If it comes out clean, it is done. When done, transfer coffeecake to a wire rack, and let it cool in the pan for 30 minutes. Once cooled, run a butter knife around inside edge of pan, then carefully open pan by releasing latch to remove outside form. After coffeecake has completely cooled, it is ready to serve. Slice into 12 pieces, and enjoy!

Nutrition Facts
Triple Berry Streusel Coffeecake
Amount Per Serving (1 slice)
Calories 348 Calories from Fat 144
% Daily Value*
Fat 16g25%
Saturated Fat 10g63%
Cholesterol 55mg18%
Sodium 154mg7%
Potassium 374mg11%
Carbohydrates 45g15%
Fiber 3g13%
Sugar 20g22%
Protein 5g10%
Vitamin A 600IU12%
Vitamin C 7.6mg9%
Calcium 145mg15%
Iron 2mg11%
* Percent Daily Values are based on a 2000 calorie diet.

Here’s one more to pin on your Pinterest boards!Triple Berry Streusel Coffeecake with blackberries, raspberries and blueberries, and topped with a buttery crumb topping is a perfect breakfast or brunch treat!

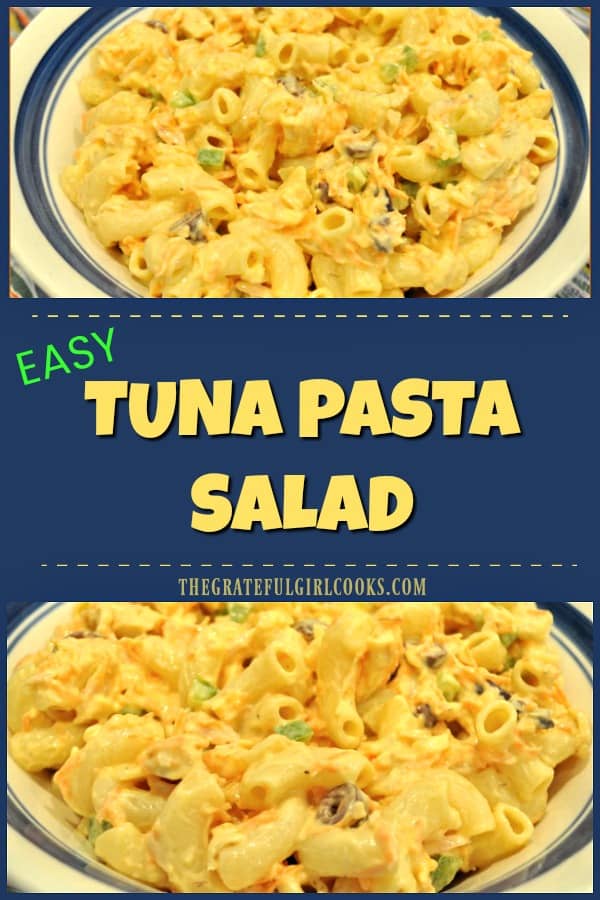
Tuna Pasta Salad

Tuna Pasta Salad, with a creamy dressing, albacore tuna, elbow macaroni, carrots, green peppers, onions, and kalamata olives, is a perfect meal for hot summer days! DELICIOUS!Tuna Pasta Salad with a creamy dressing, albacore tuna, elbow macaroni, carrots, green peppers, onions, and kalamata olives, is a perfect meal for hot summer days!

I found this recipe in my trusty old recipe file box I’ve had for over 40 years. I used to write down recipes I had found on little 3×5 cards and file them in this old, beaten up box, and  recently found this one for tuna pasta salad while looking through old recipes.

Scroll Down For A Printable Recipe Card At The Bottom Of The Page

Seriously… I have no idea WHERE I got the recipe from, because I didn’t write it down back in the day! I added a couple ingredients to the original recipe, and made it for lunch. YUM. This easy to make salad is not overpowered by the addition of canned albacore tuna… it actually is complimented by it!  You might also enjoy my recipes for a classic Pasta Salad or Chicken Club Pasta Salad; they are delicious… especially on hot summer days!

Throughout the year I love to make chilled side salads for Summer BBQ’s and get togethers! Salads like Hawaiian Macaroni Salad, Homemade Potato Salad, Asian Kale Slaw, and Black Bean, Corn & Tomato Salad with Avocado Dressing are wonderful side dishes to serve a hungry crowd!

Okay… So HOW Do I Make Tuna Pasta Salad?

This salad is totally easy and very quick to make.  In the time it takes to cook macaroni noodles, you can have everything ready to go.  Then all you need to do is mix ingredients, let it “chill” in the fridge for an hour or two, and you’ve got yourself a great little side dish or main dish salad.  Here’s how easy it is to make:

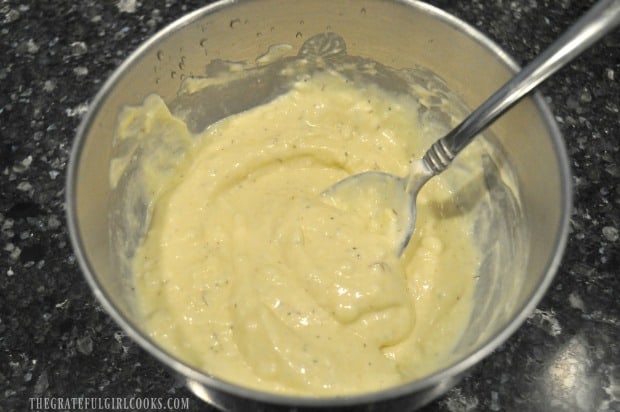
In a small bowl, combine mayonnaise, milk, lemon juice, mustard, dill weed, salt and pepper. Stir until sauce is smooth.  Set aside. If you want to save time, make the sauce while the pasta is cooking.

Ingredients for tuna pasta salad are mixed together in small bowl

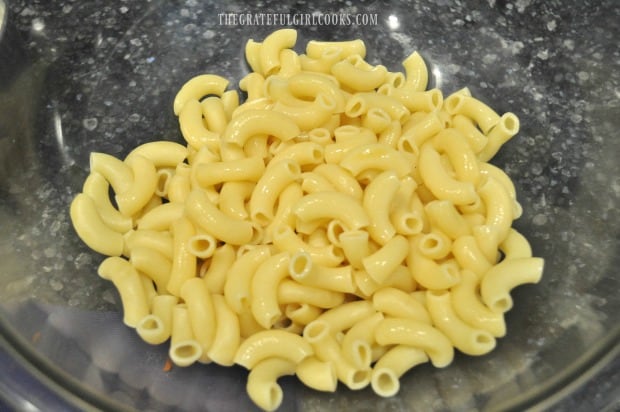
Cook elbow macaroni according to package instructions. Once fully cooked, transfer to a colander, rinse with cold water, drain, and then transfer pasta to large mixing bowl.

Elbow macaroni is cooked and drained for pasta salad

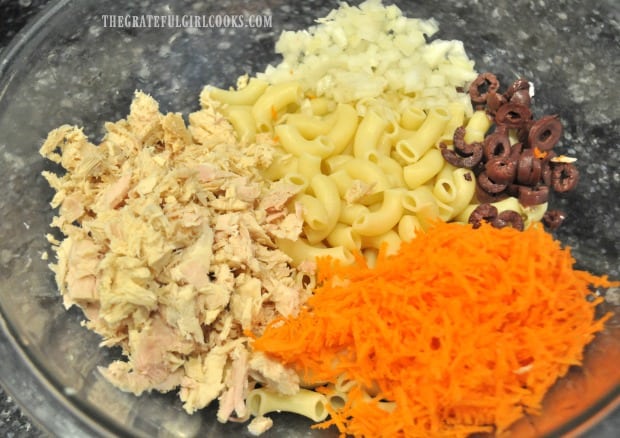
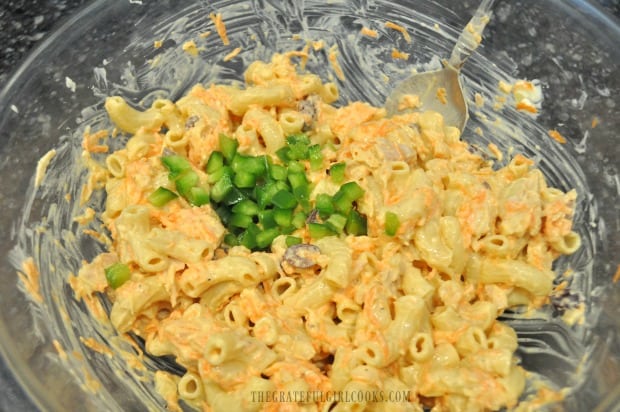
Add one can of albacore tuna (drained and flaked), a large carrot (shredded), finely chopped onion, chopped green peppers and sliced kalamata olives to the cooked pasta.

Pasta with tuna, onion, kalamata olives and shredded carrots ready to combine

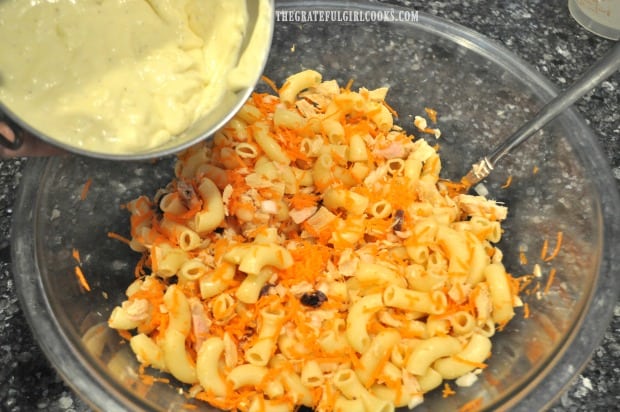
Pour the dressing over the salad and stir well, to mix everything together.

Salad dressing is poured over pasta salad with tuna

OOPS!!!! Remember to add the chopped green pepper (I forgot!).  Kept thinking it was missing something for color, and realized I left them out. My bad. Gave it another stir, and salad was DONE!

Chopped green peppers are added to pasta salad

Refrigerate The Tuna Pasta Salad Before Serving

Transfer the finished salad to a pretty serving bowl (preferably one that doesn’t have salad dressing smeared all over the sides from mixing the ingredients… (heh heh heh). Cover the salad with plastic wrap, and place in refrigerator for 1-2 hours. This not only chills it very well, but gives the flavors time to develop.

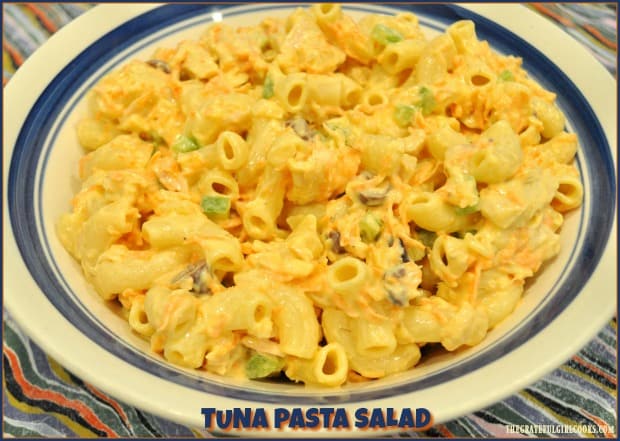
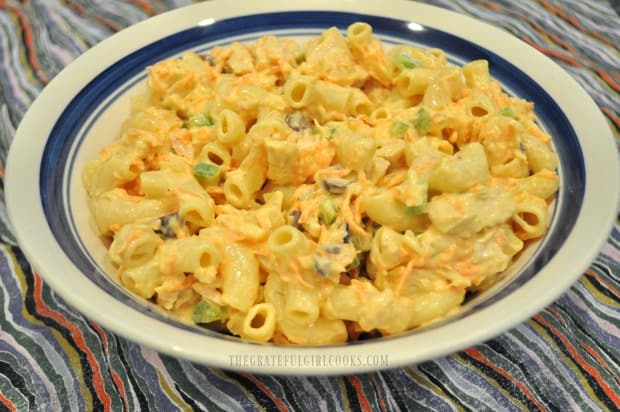
Tuna pasta salad ready to serve, in white bowl

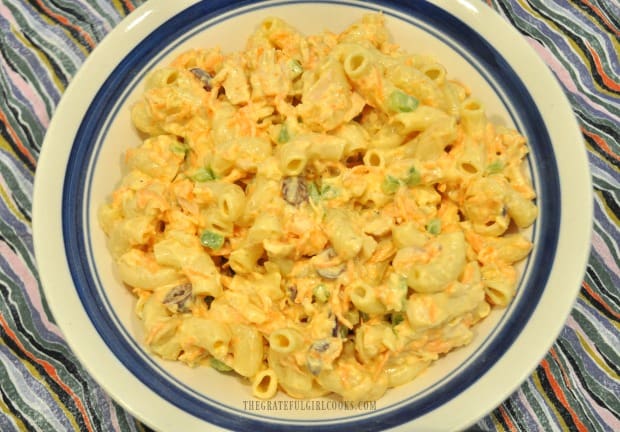
Tuna pasta salad overhead view

When ready to serve, remove salad from fridge, remove plastic wrap (because NO ONE wants to eat THAT!), grab a big old spoon or fork, and dig in! This tuna pasta salad is delicious, and will keep for 3-4 days (covered), in refrigerator.

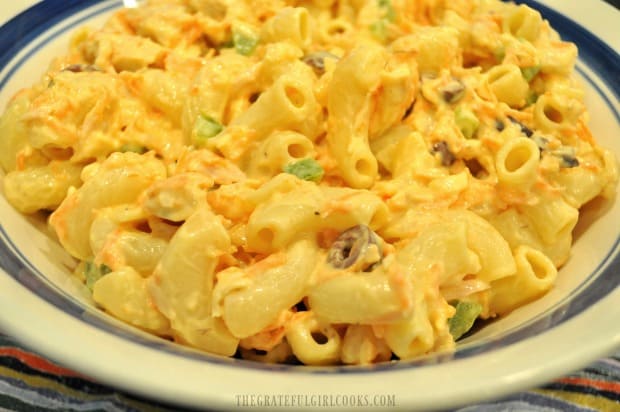
Tuna pasta salad closeup view, in bowl

I hope you enjoy this simple salad. We sure do! Hope you have a wonderful day, friends.

Looking For More Side Dish SALAD Recipes?

You can find all of my recipes in the Recipe Index, located at the top of the page. A few favorite side dish salad recipes include:

Interested In More Recipes?

Thank you for visiting this website. I appreciate you using some of your valuable time to do soIf you’re interested, I publish a newsletter 2 times per month (1st and 15th) with all the latest recipes, and other fun info. I would be honored to have you join our growing list of subscribers, so you never miss a great recipe!
There is a Newsletter subscription box on the top right side (or bottom) of each blog post, depending on the device you use, where you can easily submit your e-mail address (only) to be included in my mailing list.

You Can Also Find Me On Social Media:
Facebook page: The Grateful Girl Cooks!
Pinterest: The Grateful Girl Cooks!
Instagram: jbatthegratefulgirlcooks

Author's signature


↓↓ PRINTABLE RECIPE BELOW ↓↓

0 from 0 votes
Tuna Pasta Salad
Prep Time
10 mins
Cook Time
10 mins
Total Time
20 mins
 
Tuna Pasta Salad with a creamy dressing, albacore tuna, elbow macaroni, carrots, green peppers, onions, and kalamata olives, is a perfect meal for hot summer days!
Category: Salad/Side Dish
Cuisine: American
Keyword: tuna pasta salad
Servings: 6 servings
Calories Per Serving: 243 kcal
Author: JB @ The Grateful Girl Cooks!
Ingredients
For Salad Dressing:
  • 3/4 cup light mayonnaise
  • 1/4 cup low-fat milk
  • 1 Tablespoon lemon juice
  • 1 teaspoon prepared yellow mustard
  • 1 teaspoon dill weed
  • 1/2 teaspoon salt
  • 1/8 teaspoon black pepper
For Pasta Salad:
  • 7 ounces elbow macaroni (4 cups cooked)
  • 5.4 ounces albacore tuna (one can). drained, flaked
  • 1 carrot (large) , shredded
  • 1/4 cup white onion , finely chopped
  • 1/4 cup green bell pepper , finely chopped
  • 8 kalamata olives (or black) , sliced
Instructions
  1. In a small bowl, combine mayonnaise, milk, lemon juice, mustard, dill weed, salt and pepper. Stir until sauce is smooth.  Set aside.
  2. Cook elbow macaroni according to package instructions. Once fully cooked, transfer to a colander, rinse with cold water, drain, and then transfer pasta to large mixing bowl.
  3. Add albacore tuna, carrot, onion, green peppers and kalamata olives to the cooked, drained pasta. Pour the dressing over the salad and stir well, to mix everything together.

  4. Cover salad with plastic wrap, and place in refrigerator for 1-2 hours. This not only chills the salad very well, it gives the flavors time to develop. When fully chilled, serve and enjoy!

Nutrition Facts
Tuna Pasta Salad
Amount Per Serving (1 serving)
Calories 243 Calories from Fat 72
% Daily Value*
Fat 8g12%
Saturated Fat 1g6%
Cholesterol 15mg5%
Sodium 605mg26%
Potassium 209mg6%
Carbohydrates 30g10%
Fiber 1g4%
Sugar 3g3%
Protein 11g22%
Vitamin A 1770IU35%
Vitamin C 7mg8%
Calcium 30mg3%
Iron 0.8mg4%
* Percent Daily Values are based on a 2000 calorie diet.

Here’s one more to pin on your Pinterest boards!Tuna Pasta Salad with creamy dressing, albacore tuna, elbow macaroni, carrots, green peppers, onions, & kalamata olives, is a perfect meal for hot summer days!

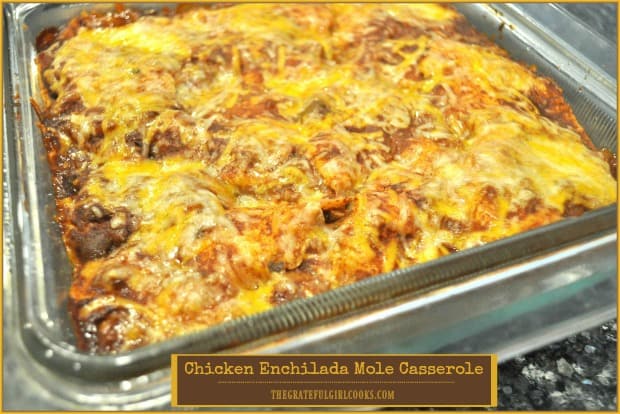
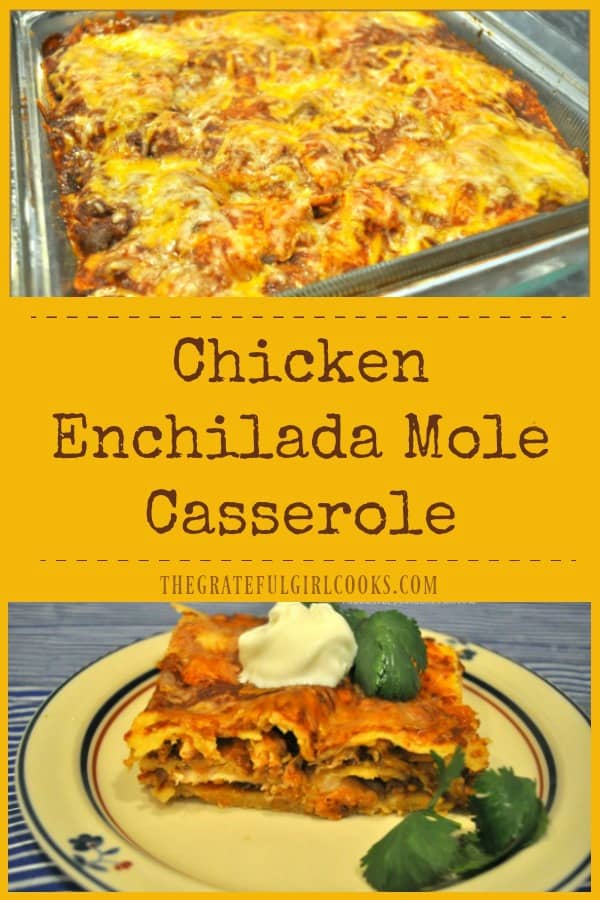
Chicken Enchilada Mole Casserole

Chicken Enchilada Mole Casserole is an easy to make dinner, with layers of corn tortillas, chicken breast strips, enchilada and mole sauce, onions and cheese, and is ready in 35 minutes!Chicken Enchilada Mole Casserole is an easy to make dinner, with layers of corn tortillas, chicken breast strips, enchilada and mole sauce, onions and cheese, and is ready in 35 minutes!

Ever have one of those days where you know you need to fix something for dinner, but don’t have a clue what that will be?  That is how I came up with this simple layered chicken enchilada casserole! I used my recipe for Layered Chicken Enchilada Casserole as inspiration (which uses a creamy green sauce). Then I started pulling things out of the refrigerator and pantry and then just started cooking!

I gathered two leftover grilled chicken breasts, some homemade red enchilada sauce (it was in our freezer, but I thawed it out!), a jar of mole sauce (check out this link to find out what is in this traditional Mexican sauce), onion, a few tortillas and some Mexican blend cheese and got busy creating this easy casserole dish that serves 6.

By the way… don’t worry about using homemade enchilada sauce… a large (28 oz.) can will do just fine… and mole sauce? You can pretty much find small 8.25 oz. jars of it in almost every grocery store in the Mexican Foods section. Mole sauce adds a rich depth of flavor to standard enchilada sauce and partners very well in this recipe.

Scroll Down For A Printable Recipe Card At The Bottom Of The Page

So… How Do I Make This Chicken Enchilada Casserole?

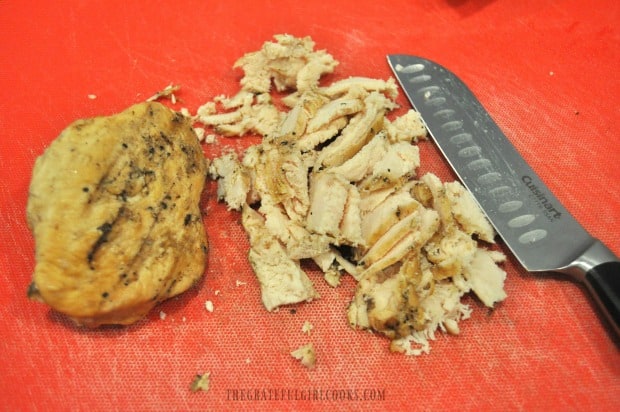
It’s easy. You will just be creating a layer of ingredients, then repeating the layers, etc.  Start by thinly slicing two grilled chicken breasts (I used leftovers). A quick and easy substitution would be to use two rotisserie chicken breasts, lightly seasoned with salt and pepper.

Slicing chicken breast for enchilada casserole

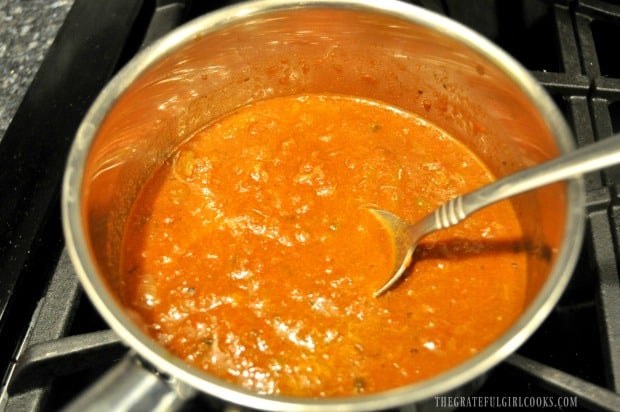
Mix enchilada sauce and mole sauce in pan. Stir until blended, then cook on low heat for 5 minutes. This allows the flavors to come together a bit! (Note: I used homemade enchilada sauce, so your version may look slightly different)

Cooking enchilada and mole sauces for casserole

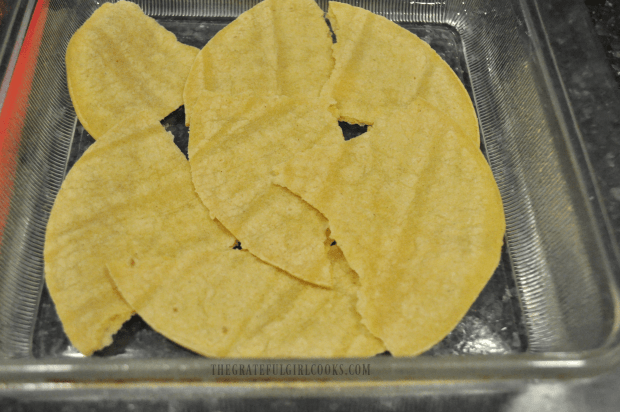
Spray an 8×8 inch pan with non-stick cooking spray. Rip two tortillas into large pieces and layer the bottom of the dish, trying to cover as much as possible.

Torn tortillas are layered into casserole dish

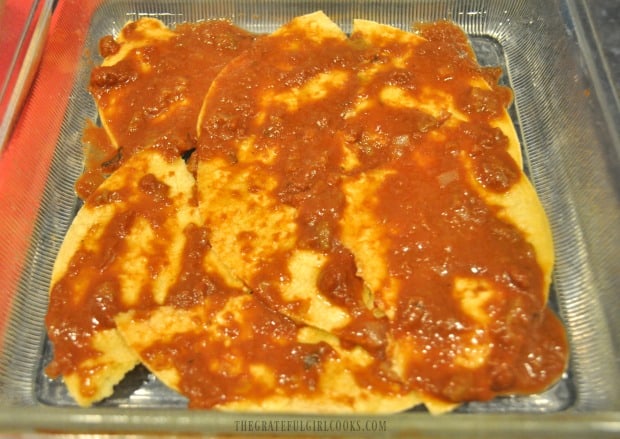
Spread 1/3 of the sauce over the tortilla pieces, spreading to cover.

Enchilada/mole sauce is spread over tortillas

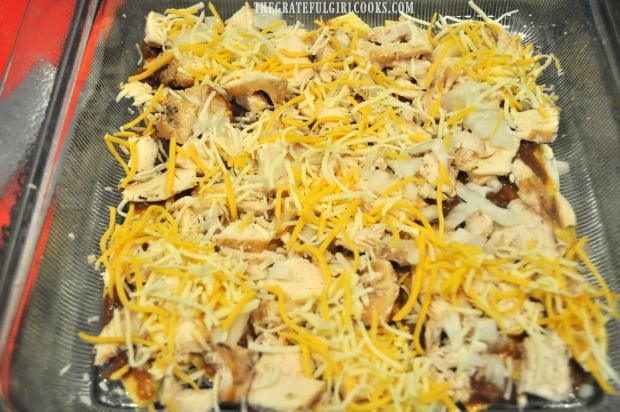
Cover the sauce with 1/2 of the chicken slices, 1/2 of the chopped onions and top them with 1/3 of the grated Mexican cheese blend.

Chicken, onions and cheese layered onto enchilada casserole

Repeat Layers

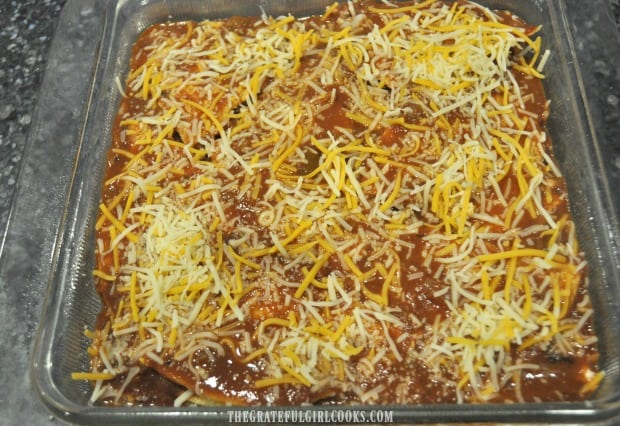
Repeat another layer in the same order:  2 torn tortillas, 1/3 of the sauce, remaining 1/2 of the chicken and onions, then top this second layer with 1/3 of the grated Mexican blend cheese. For the final layer, simply add the remaining two torn tortilla pieces, top with remaining sauce, then top it all off with the remaining grated cheese.

Chicken enchilada mole casserole is ready to bake

Time To Bake The Chicken Enchilada Mole Casserole

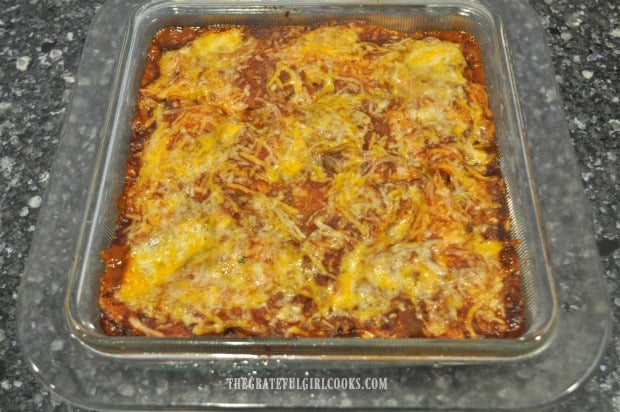
Bake the casserole (uncovered) in a 350° F. preheated oven for 20-25 minutes (mine was done in 20). The cheese and sauce should be bubbly when done. Remove chicken enchilada casserole from oven to a wire rack.

Chicken enchilada casserole, hot from the oven

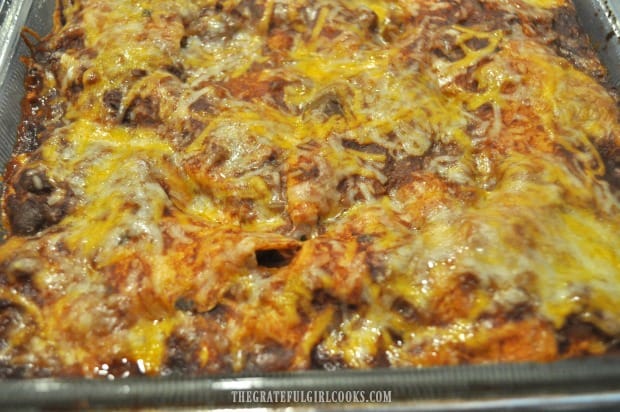
Let the casserole rest for a  minute or two to let the cheese firm up, so it will be easier to slice.

Melted cheese on top of chicken enchilada casserole

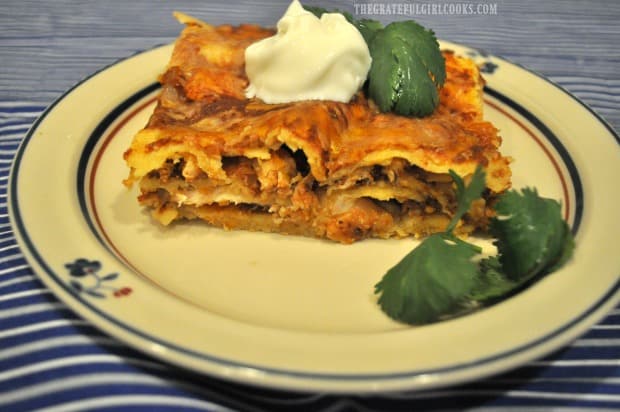
Slice the casserole into 6 pieces, and transfer to plates. Serve each piece with a dollop of sour cream and a cilantro leaf garnish, if desired.

Chicken Enchilada Mole Casserole on a plate, with sour cream and cilantro garnish

And that’s how this casserole came to be made and eaten at our house!  Hope you will give it a try! Since this yummy casserole can be on the table in about 35 minutes, it’s a great meal for busy weeknights!

Looking For More Mexican-Inspired Recipes?

You can find ALL of my recipes in the Recipe Index, which is located at the top of the page. I have quite a few Mexican-inspired recipes you might enjoy, including:

Interested In More Recipes?

Thank you for visiting this website. I appreciate you using some of your valuable time to do soIf you’re interested, I publish a newsletter 2 times per month (1st and 15th) with all the latest recipes, and other fun info. I would be honored to have you join our growing list of subscribers, so you never miss a great recipe!
There is a Newsletter subscription box on the top right side (or bottom) of each blog post, depending on the device you use, where you can easily submit your e-mail address (only) to be included in my mailing list.

You Can Also Find Me On Social Media:

Facebook page: The Grateful Girl Cooks!
Pinterest:
The Grateful Girl Cooks!
Instagram:
jbatthegratefulgirlcooks

Author's signature

0 from 0 votes
Chicken Enchilada Mole Casserole
Prep Time
15 mins
Cook Time
20 mins
Total Time
35 mins
 
Chicken Enchilada Mole Casserole is an easy to make dinner, with layers of corn tortillas, chicken breast strips, enchilada and mole sauce, onions and cheese, and is ready in 35 minutes!
Category: Dinner
Cuisine: Mexican
Keyword: chicken enchilada mole casserole
Servings: 6 servings
Calories Per Serving: 499 kcal
Author: JB @ The Grateful Girl Cooks!
Ingredients
  • 6 corn tortillas
  • 28 ounces Red enchilada sauce
  • 1/2 cup Mole sauce (found in Mexican food sections of grocery store)
  • 2 chicken breasts (cooked)
  • 1/2 cup white onion , finely chopped
  • 2 cups Mexican 4 blend cheese (or combo of cheddar/jack)
  • 4 Tablespoons sour cream
  • 4 cilantro leaves (optional)
Instructions
  1. Preheat oven to 350° F.

  2. Thinly slice two grilled chicken breasts for the casserole. A quick and easy substitution would be to use two rotisserie chicken breasts, lightly seasoned with salt and pepper.
  3. Mix enchilada sauce and mole sauce in pan. Stir until blended, then cook on low heat for 5 minutes.
  4. Spray an 8x8 inch baking dish with non-stick cooking spray. Rip two tortillas into large pieces and layer the bottom of the dish, trying to cover as much as possible. Spread 1/3 of sauce over the tortilla pieces. Cover sauce with 1/2 of the chicken, 1/2 of the onions and top them with 1/3 of the grated Mexican cheese blend. Repeat another layer in the same order:  2 torn tortillas, 1/3 of the sauce, remaining 1/2 of the chicken and onions, then top this second layer with 1/3 of the grated Mexican blend cheese. For the final layer, add remaining two torn tortilla pieces, cover with remaining sauce, then top it all off with the remaining grated cheese.

  5. Bake the casserole (uncovered) in a 350° F. preheated oven for 20-25 minutes (mine was done in 20). The cheese and sauce should be bubbly when done. Remove chicken enchilada casserole from oven to a wire rack. Let the casserole rest for a  minute or two to let the cheese firm up, so it will be easier to slice.

  6. Slice the casserole into 6 pieces, and transfer to plates. Serve each piece with a dollop of sour cream and a cilantro leaf garnish, if desired. Enjoy!

Nutrition Facts
Chicken Enchilada Mole Casserole
Amount Per Serving (1 serving)
Calories 499 Calories from Fat 144
% Daily Value*
Fat 16g25%
Saturated Fat 9g56%
Cholesterol 68mg23%
Sodium 1474mg64%
Potassium 274mg8%
Carbohydrates 24g8%
Fiber 3g13%
Sugar 9g10%
Protein 22g44%
Vitamin A 1445IU29%
Vitamin C 3.8mg5%
Calcium 336mg34%
Iron 1.6mg9%
* Percent Daily Values are based on a 2000 calorie diet.

Here’s one more to pin on your Pinterest boards!Chicken Enchilada Mole Casserole is an easy to make dinner, with layers of corn tortillas, chicken breast strips, enchilada and mole sauce, onions and cheese, and is ready in 35 minutes!

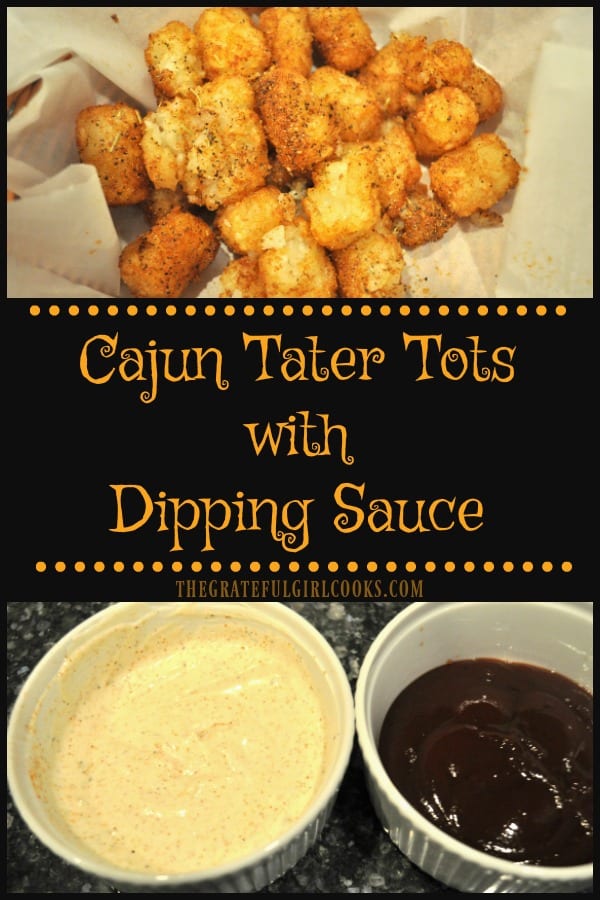
Cajun Tater Tots with Dipping Sauce

Spicy Cajun tater tots (fried OR baked), served with a seasoned Ranch/Sour Cream dipping sauce and BBQ sauce on the side, are the perfect appetizer to munch on at any dinner, get together or party!
Spicy Cajun tater tots (fried OR baked), served with a seasoned Ranch/Sour Cream dipping sauce and BBQ sauce, are the perfect appetizer to munch on at any dinner, get together or party!

My husband and I enjoy eating out at a Pacific Northwest well known restaurant called McMenamins. They have over 55 casual restaurant / brewhouses located in Oregon and Washington (including one about a mile from our home), and are a very popular hangout.

Our favorite appetizer to get (each time we go) is a basket of their Cajun Tater Tots! I love the dipping sauce they’re served with, and my husband loves his tots with BBQ sauce, so we each get our own little cup of sauce to dip the tots into! Perfect!

The deep fried tater tots, seasoned with Cajun-style spices are the perfect little treat to munch on while we wait for our order to be cooked! These little tots are so addictive… once you eat one, it is hard to stay out of them (trust me…I know what I’m talking about here)!

Scroll Down For A Printable Recipe Card At The Bottom Of The Page

Time To Try Making My Own Cajun Tater Tots!

I decided to try and make something similar at home, just for fun, and found a copycat recipe (for the tots only) online.  That particular recipe baked the tater tots, so I adapted the recipe a bit, changed the recipe from baking to deep frying, then created my own sauce, and made them!

The Cajun tater tots turned out really good!  NOTEI am posting pictures of the “deep fried” version, but am including directions for baking them, for your convenience, in the printable recipe below.

Okay… So How Do I Make Them?

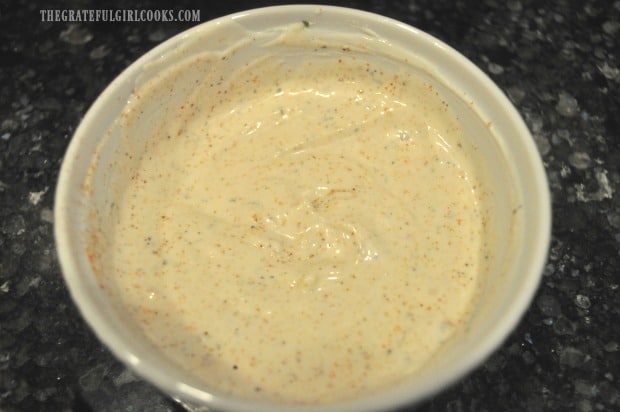
The first thing you need to do is make the dipping sauce.  I made a sauce similar to what they serve at the restaurant. A small amount of Cajun spices are added to a simple mixture of Ranch dressing and sour cream.

Ingredients are mixed until smooth, covered, then refrigerated until ready to use. This cooling sauce is a great balance to the slightly spicy tots! It’s easy to make the sauce up early in the day for later use!

Dipping sauce for tater tots, in white bowl

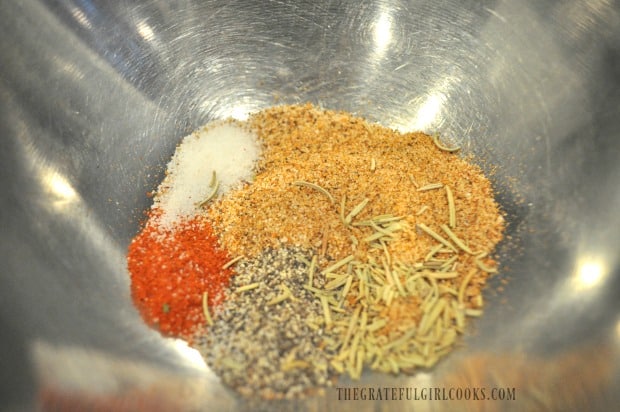
After you’ve made the dipping sauce, it’s time to make the seasoning for the tots. This is done by simply mixing up the dry ingredients in a small bowl, then setting it aside.

Bowl of cajun spice ingredients for cooked tater tots

To Deep Fry Cajun Tater Tots:

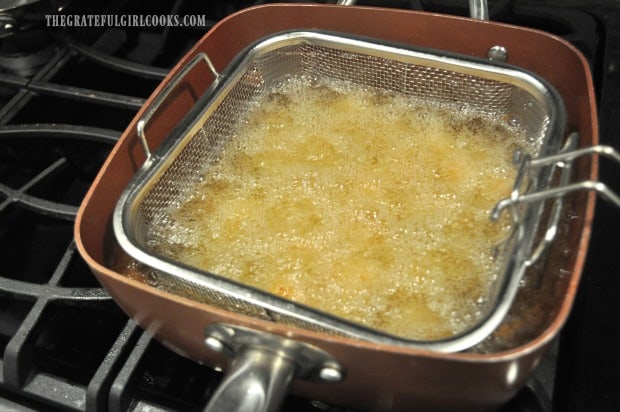
Frozen tater tots are carefully deep fried in a basket in a pan half full of hot oil (375 degrees). They cook for 3-4 minutes until they become crispy and the color has changed to golden brown.

Tater tots deep frying in oil in large saucepan with fry basket

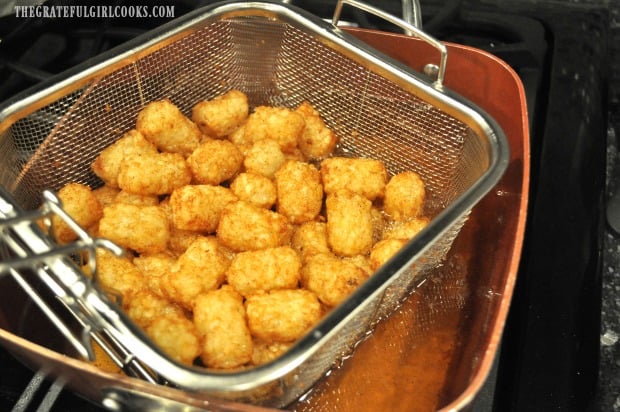
Once they are cooked to a golden brown color, the fryer basket and tots are removed from oil, drained slightly (over the pan), then tots are transferred to a large bowl.

Golden brown tater tots are removed from cooking oil

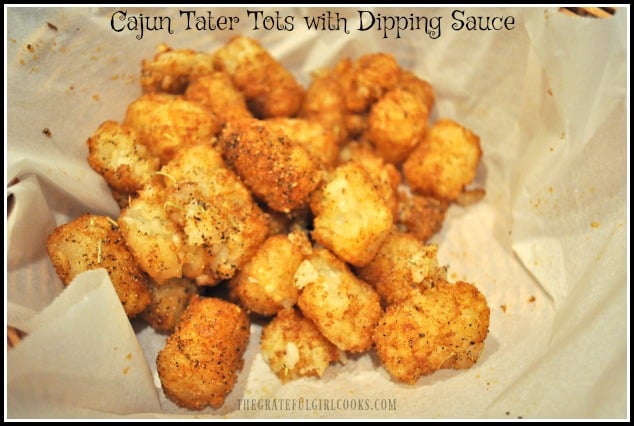
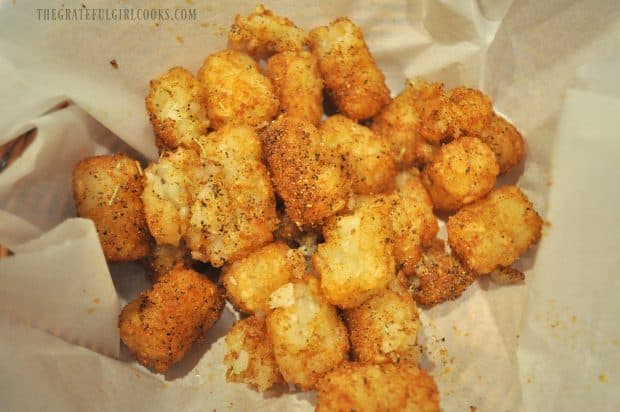
Sprinkle Cajun spice mixture is immediately over hot tater tots, then toss them until the tots are covered with seasoning. The spices will stick to the oil remaining on the drained tots. I serve them hot in a parchment paper lined basket.

Cajun tater tots, served in basket

Serve The Cajun Tater Tots

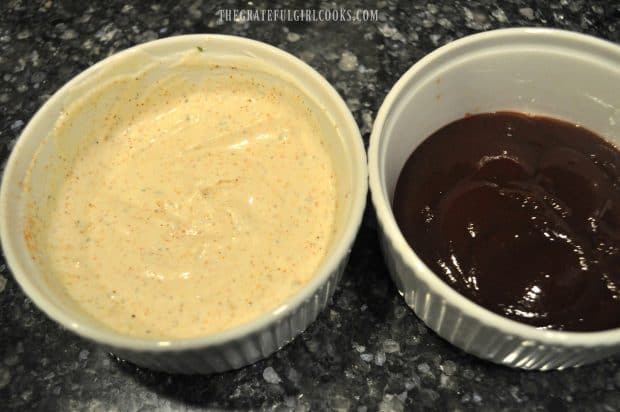
Serve the hot spiced tater tots with two bowls of dipping sauces. Sauces are the perfect way to enjoy your tots! Dip away! Pictured on the left is the Ranch/Sour cream dipping sauce, and the dish on the right contains bottled BBQ sauce (my hubby’s preferred sauce, straight out of the bottle).

Dipping sauces, served to accompany Cajun tater tots

That’s it! It’s not too hard to make these delicious Cajun tots at home, if you can’t get to a McMenamins to taste the original! They are so good!

You can find ALL of my recipes in the Recipe Index, located at the top of the page. If you’re looking for more appetizers like this one, you might also enjoy Crunchy Homemade Onion Rings , Baked Parmesan Zucchini Fries or Crispy Homemade French Fries.  Each of them is a wonderful, yummy appetizer or side dish!

Interested In More Recipes?

Thank you for visiting this website. I appreciate you using some of your valuable time to do soIf you’re interested, I publish a newsletter 2 times per month (1st and 15th) with all the latest recipes, and other fun info. I would be honored to have you join our growing list of subscribers, so you never miss a great recipe!
There is a Newsletter subscription box on the top right side (or bottom) of each blog post, depending on the device you use, where you can easily submit your e-mail address (only) to be included in my mailing list.

You Can Also Find Me On Social Media:

Facebook page: The Grateful Girl Cooks!
Pinterest:
The Grateful Girl Cooks!
Instagram:
jbatthegratefulgirlcooks

Author's signature

Tot recipe adapted from Sandy, at: http://www.everydaysouthwest.com/recipes/cajun-spiced-tater-tots/

0 from 0 votes
Cajun Tater Tots with Dipping Sauce
Prep Time
10 mins
Cook Time
4 mins
Total Time
14 mins
 
Spicy Cajun tater tots (fried OR baked), served with a seasoned Ranch/Sour Cream dipping sauce and BBQ sauce, are the perfect appetizer to munch on at any dinner, get together or party!
Category: Appetizer
Cuisine: Cajun
Keyword: Cajun tater tots
Servings: 4 servings
Calories Per Serving: 342 kcal
Author: JB @ The Grateful Girl Cooks!
Ingredients
For Tots:
  • 2 teaspoons Cajun seasoning
  • 1/2 teaspoon ground black pepper
  • 1/8 teaspoon cayenne pepper , or more if you like 'em spicy!
  • 1/2 teaspoon dried rosemary
  • 1/4 teaspoon salt , + more to season at finish
  • 1/2 teaspoon garlic powder
  • 1/4 teaspoon onion powder
  • 16 ounces Ore Ida Tater Tots
  • Enough oil to deep fry tater tots (Fill pan HALF full only)
For Dipping Sauces:
  • 1/3 cup bottled Ranch Dressing
  • 2 Tablespoons sour cream
  • 1/8 teaspoon (EACH) Cajun seasoning, cayenne, dried rosemary, salt, garlic and onion powder
  • 1/2 cup bottled BBQ sauce
Instructions
  1. Make dipping sauce by mixing Ranch dressing with sour cream, Cajun seasoning, cayenne pepper, rosemary, salt, garlic powder and onion powder. Stir until fully combined. Cover, then refrigerate until ready to use. 

  2. Make the seasoning for the Cajun tater tots, by simply mixing up the dry ingredients in a small bowl, and set aside.
OPTION #1 - Deep Fried (this is the method I used):
  1. Fill a cooking pot half full of vegetable oil (no more than half full!).  Preheat oil to 375° F. (uncovered). Carefully add frozen tater tots to fryer basket (only fill basket HALF full), and lower into hot oil. IMPORTANT: Be very careful-ice crystals on the frozen tots may splatter when they hit the hot oil.  If this happens, immediately put a lid on pan and reduce heat till splattering stops, then uncover and return oil to cooking temp.  Cook tater tots for 3-4 minutes at temperature, until they turn golden brown. Turn off heat, and carefully lift fryer basket out of oil, letting oil drain out of basket back into the pot.  Once fairly well drained, pour 1/2 of hot tots into a medium mixing bowl.  Immediately sprinkle with 1/2 of the Cajun seasoning mixture and lightly mix or toss to season. Repeat with other half until all tots are seasoned.  Lightly season with additional salt (to taste), if desired, and serve while hot.

OPTION #2 - Baked
  1. Preheat your oven to 425° F.  Melt 3 Tablespoons butter with 1 Tablespoon vegetable oil.  Combine the Cajun season mixture with the butter/oil mixture. Stir until combined.  Pour 1/2 of the sauce into medium mixing bowl; swirl it around to coat sides of bowl. Add 1/2 of the tots. Place plastic wrap over the bowl, seal tightly, then toss the tater tots carefully (keeping bowl tightly sealed) until they are fairly well covered by the spice/butter mixture.  Transfer the seasoned tots onto a 13x9 inch rimmed baking sheet, in a single layer. Repeat process until all tots are coated.  Bake tots at 425° F. for 20-25 minutes, or until crispy and light golden brown. (Note: If doubling recipe, baking time will increase to between 25 and 35 minutes). When done, remove from oven. Lightly season with additional salt (to taste), if desired,  and serve while hot.

  2. To Serve: Place hot, seasoned tots in a parchment paper lined basket or bowl and serve, with little cups of dipping sauce(s) on the side. Enjoy!

Recipe Notes

Note: IF baking (Option #2), you will also need 3 Tablespoons butter, and 1 Tablespoon vegetable oil added to ingredient list.

Nutrition Facts
Cajun Tater Tots with Dipping Sauce
Amount Per Serving (1 serving + Ranch dipping sauce (1/4 of total))
Calories 342 Calories from Fat 216
% Daily Value*
Fat 24g37%
Saturated Fat 4g25%
Cholesterol 8mg3%
Sodium 854mg37%
Potassium 348mg10%
Carbohydrates 31g10%
Fiber 2g8%
Protein 2g4%
Vitamin A 540IU11%
Vitamin C 9.2mg11%
Calcium 29mg3%
Iron 0.9mg5%
* Percent Daily Values are based on a 2000 calorie diet.

Here’s one more to pin on your Pinterest boards!Spicy Cajun tater tots (fried OR baked), served with a seasoned Ranch/Sour Cream dipping sauce and BBQ sauce, are the perfect appetizer to munch on at any dinner, get together or party!

How To Make Bread Crumbs

Did you know it is super easy to make your own bread crumbs?  Yep… that’s right!  All that is needed is some stale bread and a food processor or blender, to save you money and another trip to the grocery store.It's super easy to make your own bread crumbs with some stale bread and a food processor or blender, to save you another trip to the grocery store.

I used to BUY bread crumbs at the grocery store, but a few years ago I started making my own.  It’s so easy to used leftover stale french bread to easily make them at home! Why pay for it, if you can make the same amount with pieces of stale bread in the pantry? 

My husband LOVES french bread (my preferred bread type for making bread crumbs). He often picks up a fresh warm loaf at the grocery store. Since there are only 2 of us in our home, parts of the loaf we don’t eat tend to go stale after a couple days.  Normally people waste stale bread by just throwing it in the garbage, but now you can put it to good use!

To make that old stale bread “go the distance”, why not turn it into something you can use in other recipes?  I add these homemade crumbs to my Really Good Meatloaf, and they’re perfect to stretch out the filling in meatballs, too.  This ends up being a very frugal way to use up inedible stale bread, without wasting it or dumping any of it in the trash.

Scroll Down For A Printable Recipe Card At The Bottom Of The Page

How To Make Bread Crumbs (Options)

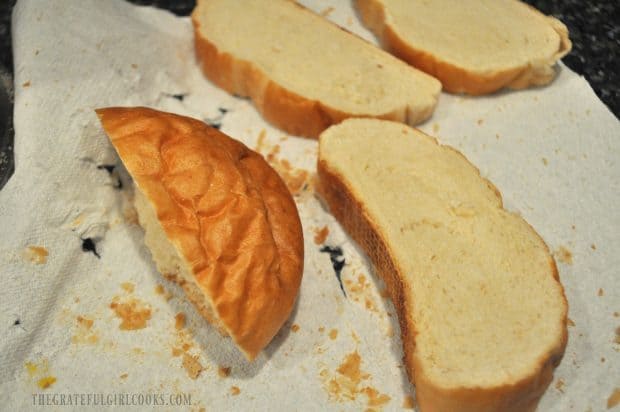
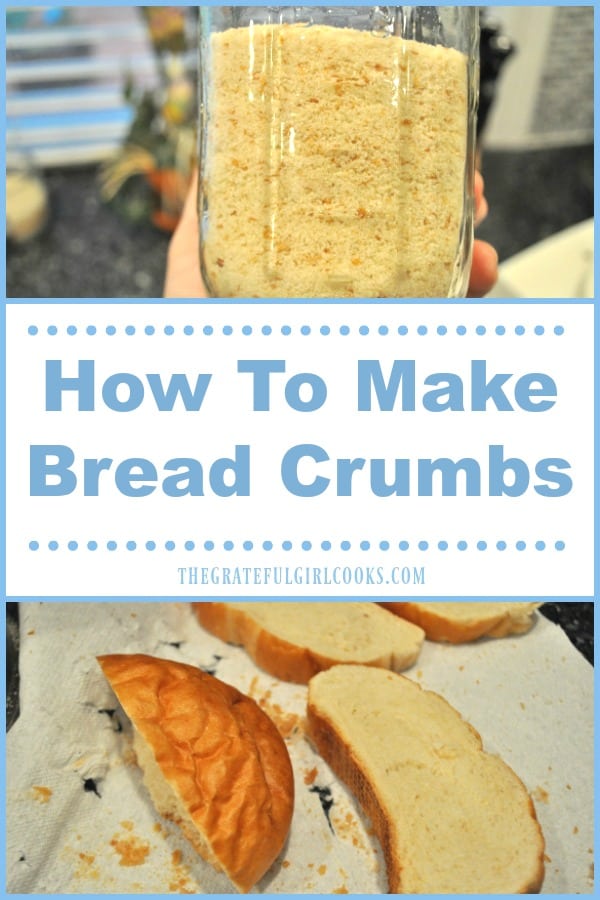
OPTION 1: Slice any stale bread you have.  Even if it’s already stale, I leave it out, uncovered on the counter for a couple days, until it is CRISPY stale, very hard and dried out! Another way to do this is to leave the bread in the fridge on a plate or tray, exposed to the air for a day or two. This will remove any moisture left in the bread (and the bread will not grow mold).

4 slices of French bread drying on paper towel

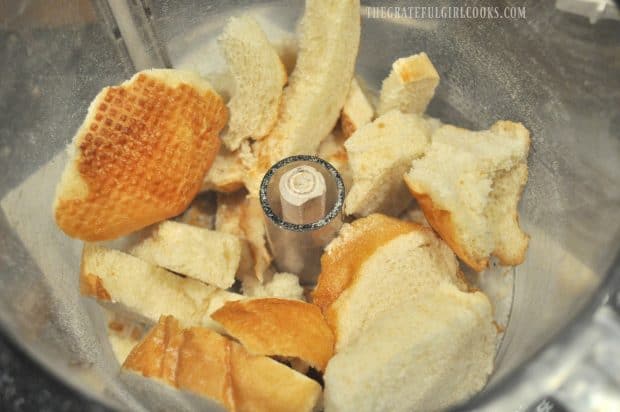
The next thing to do is break or cut the bread up into smaller sized pieces. Place them, several pieces at a time, into a food processor with the blade attachment on. Continue to pulse and process bread chunks until they have broken down into fine crumbs.

Hard, stale bread is placed into food processor to make crumbs

OPTION 2: If you happen to be in a real hurry, and need those bread crumbs STAT use this option. Cut the bread into cubes, spread them onto a cookie sheet, and bake at 350 degrees for about 10 minutes.  You will need to check them and turn them to prevent burning, but this is a solution that might work for you.  Once you are done toasting them until crispy, process them as mentioned above.

How Do I Store Homemade Bread Crumbs?

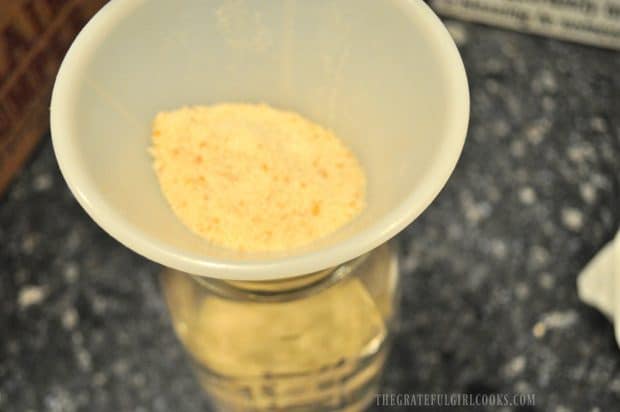
Once the bread has been reduced to tiny crumbs, pour it into airtight, sealable jars (I like to use canning jars). If desired, use a funnel to fill the jar. You can use a long skinny skewer to clear any clogs in the funnel. Store the bread crumbs in an airtight container in the pantry.

Funnel is used to transfer bread crumbs into jar

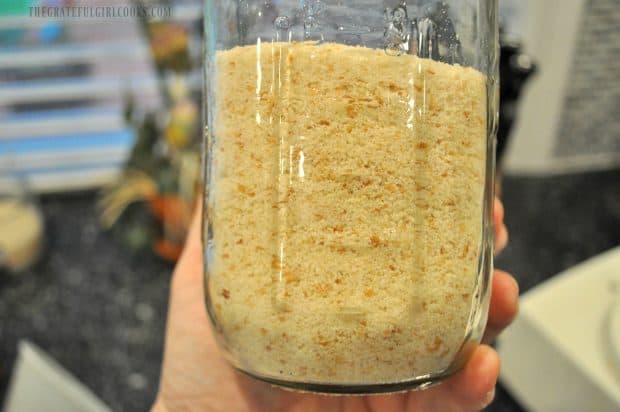
See how many bread crumbs I got out of half a loaf of old, stale bread?  This is the perfect size bread crumbs to use if adding to meatballs or meatloaf, etc. A half loaf of French bread will typically yield about 2 cups of crumbs. See? You just learned how to make bread crumbs, very easily.

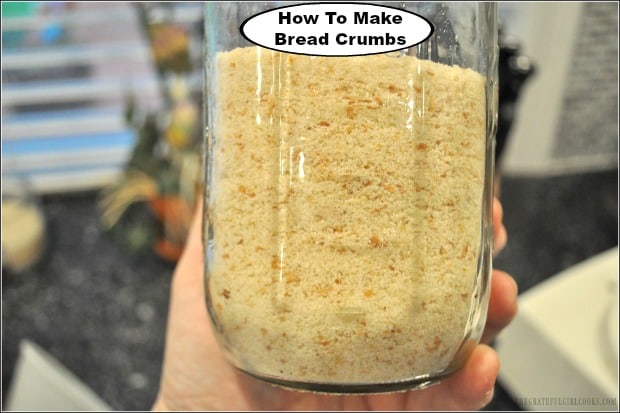
Canning jar, full of finely ground bread crumbs

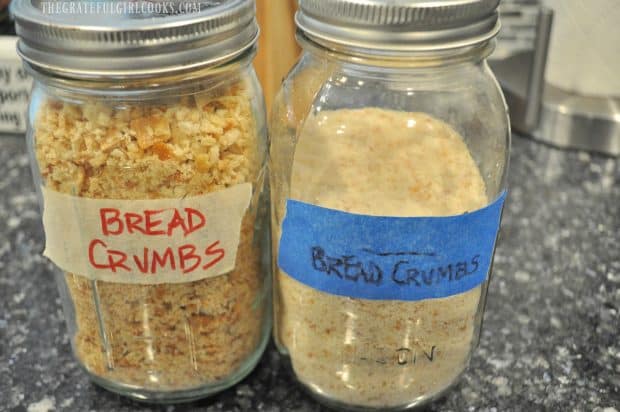
Sometimes I leave the bread crumbs a bit larger, as you can see in the jar on the left below. These can be used this to make homemade stuffing, etc.). It’s really up to you how finely you process the bread.  The finely processed crumbs in the jar on the right are typically the size you would find in a grocery store, and is my “normal” size.

What If I Need ITALIAN Bread Crumbs?

By the way, if you need Italian bread crumbs for a recipe, no problem! Once you’ve learned how to make bread crumbs, it’s easy to add a few spices to transform them.

To make Italian flavored crumbs, simply add salt, black pepper, dried parsley, oregano, basil, onion powder and garlic powder. Mix together until the spices are fully combined with the bread crumbs! Exact measurements can be found in the printable recipe below.

2 canning jars, full of homemade bread crumbs

It’s so easy to make this staple pantry ingredient. There’s really no need to spend any extra money buying it!  You can also keep stale pieces of bread in a freezer bag in the freezer until you have time to make bread crumbs! 

Looking For More Simple TIPS?

You can find all my recipes and tips in the Recipe Index, located at the top of the page. I have quite a few you might find helpful, including:

Interested In More Recipes?

Thank you for visiting this website. I appreciate you using some of your valuable time to do soIf you’re interested, I publish a newsletter 2 times per month (1st and 15th) with all the latest recipes, and other fun info. I would be honored to have you join our growing list of subscribers, so you never miss a great recipe!
There is a Newsletter subscription box on the top right side (or bottom) of each blog post, depending on the device you use, where you can easily submit your e-mail address (only) to be included in my mailing list.

You Can Also Find Me On Social Media:

Facebook page: The Grateful Girl Cooks!
Pinterest:
The Grateful Girl Cooks!
Instagram:
jbatthegratefulgirlcooks

Have a wonderful day!

Author's signature

0 from 0 votes
How To Make Bread Crumbs
Prep Time
10 mins
Cook Time
0 mins
Total Time
10 mins
 

It's super easy to make your own bread crumbs with some stale bread and a food processor or blender, to save you another trip to the grocery store.

Category: Condiments
Cuisine: American
Keyword: make bread crumbs
Servings: 2 cups (approx.)
Calories Per Serving: 289 kcal
Author: JB @ The Grateful Girl Cooks!
Ingredients
  • 1/2 loaf STALE french bread , sliced
For ITALIAN Bread Crumbs (optional), Add these ingredients (for every CUP of bread crumbs)
  • 1/4 teaspoon salt
  • 1/2 teaspoon garlic powder
  • 1/4 teaspoon dried oregano
  • 1/4 teaspoon ground black pepper
  • 1/2 teaspoon parsley (dried)
  • 1/4 teaspoon basil (dried)
  • 1/4 teaspoon onion powder
Instructions
  1. Slice up any stale bread you have.  Even if it's already a bit stale, simply leave it out, uncovered on the counter for a couple days, until it is CRISPY stale and very hard and dried out!

  2. Break or cut the bread up into smaller sized pieces, and toss them, several pieces at a time, into a food processor (or heay duty blender) with the blade attachment on. Continue to pulse and process bread chunks until they have broken down into fine crumbs.

  3. Once the bread has been reduced to tiny crumbs, transfer mixture into a jar (or container) with a lid, and store until ready to use.

  4. NOTE: I you wish to make ITALIAN bread crumbs, add the spices to the processed bread crumbs and mix well to fully combine ingredients. Transfer mixture into a jar (or container) with a lid, and store until ready to use.

Nutrition Facts
How To Make Bread Crumbs
Amount Per Serving (1 cup)
Calories 289 Calories from Fat 18
% Daily Value*
Fat 2g3%
Saturated Fat 1g6%
Sodium 513mg22%
Potassium 128mg4%
Carbohydrates 56g19%
Fiber 2g8%
Sugar 3g3%
Protein 12g24%
Calcium 44mg4%
Iron 3.6mg20%
* Percent Daily Values are based on a 2000 calorie diet.

Here’s one more to pin on your Pinterest boards!It's super easy to make your own bread crumbs with some stale bread and a food processor or blender, to save you another trip to the grocery store.

Easy Chile Relleno Casserole

This easy chile relleno casserole (vegetarian) has all the wonderful Southwest flavors of the traditional dish, but is baked not fried, and it’s DELICIOUS!
This scrumptious chile relleno casserole is easy to make, is vegetarian, and has all the Southwest flavors of the traditional dish, but is baked, not fried!

I received this wonderful, meatless chile relleno casserole recipe over 20 years ago from my friend Lanita, who I sang with in a church choir.  She’s an amazing, strong woman, and I love her dearly! I’ve made her recipe for this dish several times over the years, but hadn’t made in quite a while.

So, I decided to make it once again, tweaked her original recipe ever so slightly, made it, devoured it, and am sharing how you can make it, too! Now I’ve made it countless times, and we love it!

Scroll Down For A Printable Recipe Card At the Bottom Of The Page

The Origins of Chile Rellenos

Did you know that the words “chile relleno” actually mean “stuffed chile” in Spanish?  This popular dish had its origins in Puebla, Mexico, and showed up in recipe form over 150 years ago.  If you enjoy Tex-Mex food or enjoy eating chile rellenos at your favorite Mexican food spot, I’m confident you will enjoy this twist on the original in this delicious layered casserole.

This easy to prepare dish has lots of mild flavor from whole green chiles and gooey melted cheese, and all the taste commonly found in the original dish, but guess what? It is BAKED, not FRIED, so there’s much less prep work (and calories), and it’s in casserole form! Did I mention how simple it is to prepare?

So How Do I Make This Casserole?

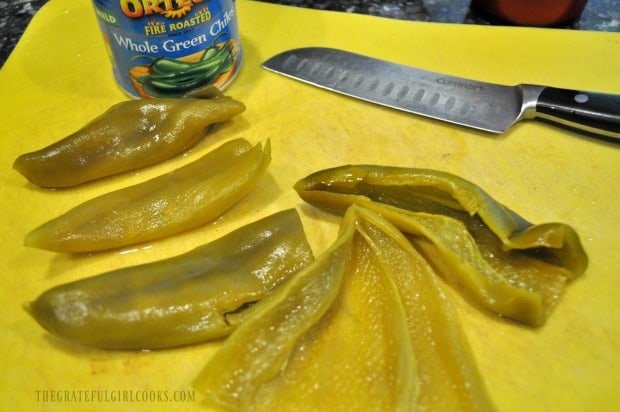
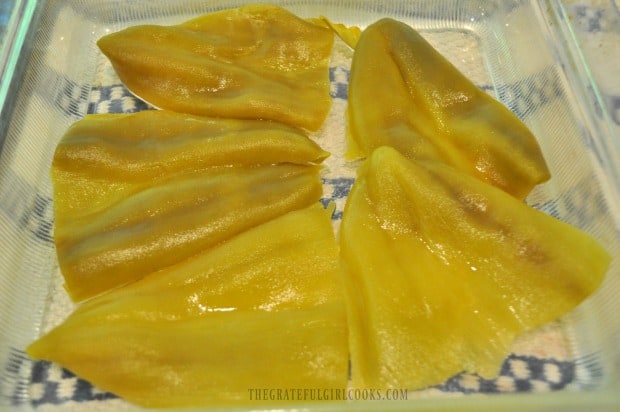
Start by spraying a 9×9 inch baking dish (bottom and sides) with non-stick spray. Slice whole canned green chiles open; rinse out any seeds, then drain. Using HALF of the chiles, place a first layer of chiles (spread open) on the bottom of an 9×9 inch baking dish.

Slicing and cleaning whole green chiles for casserole

Whole green chiles on bottom of glass baking dish

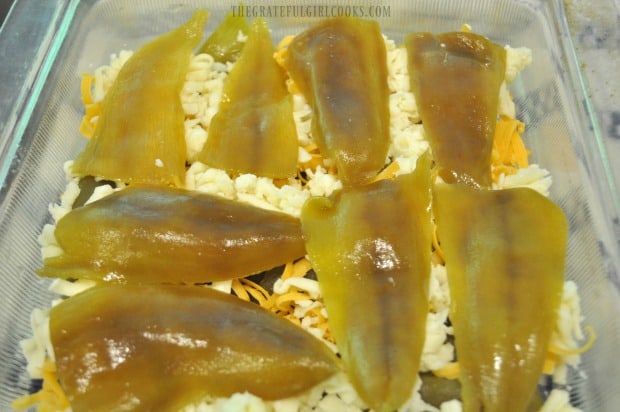
Sprinkle the chiles with HALF of the grated jack and cheddar cheeses, then add another layer of the remaining green chiles on top of the cheese.

Layers of green chiles and grated cheese for relleno casserole

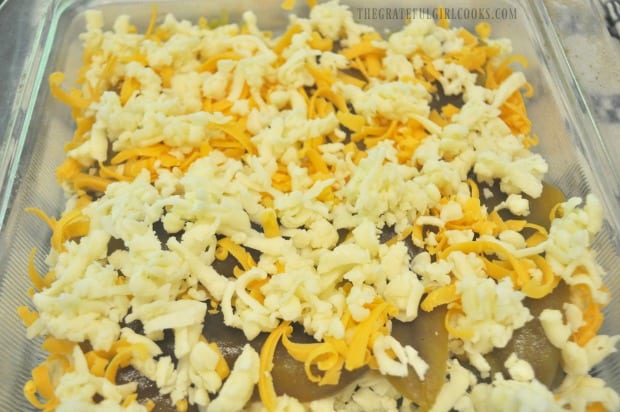
Top with the remaining jack and cheddar cheeses.

Grated jack and cheddar cheese on top of green chiles in glass baking dish

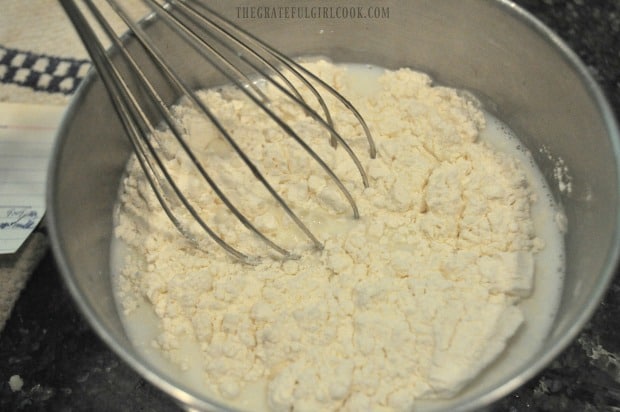
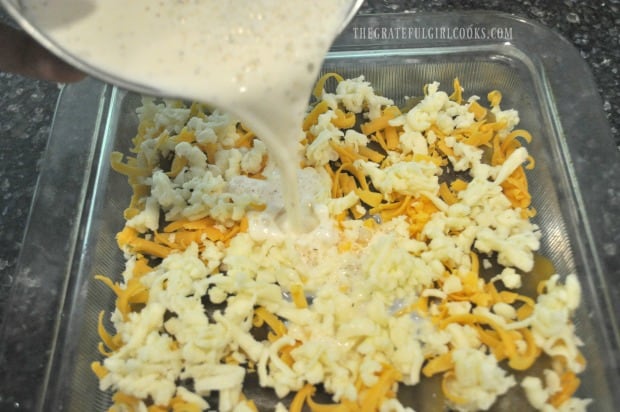
In a small bowl, whisk together eggs, flour, milk and salt until fully blended.  Pour this mixture over the casserole, distributing evenly.

Mixing flour, milk and salt for casserole

Pouring milk/flour mixture over chile relleno casserole before baking

Time To Bake The Easy Chili Relleno Casserole

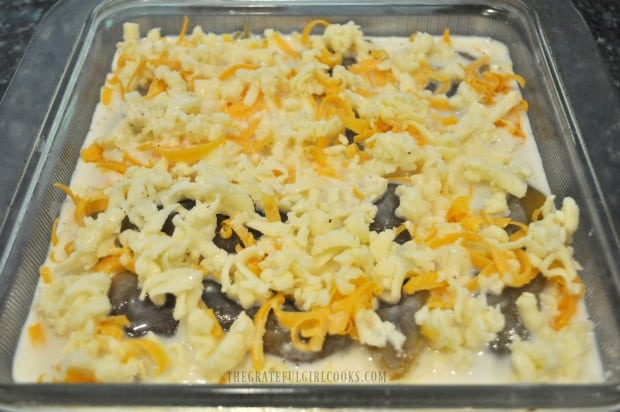
This is what the casserole looks like when it is ready to bake.  Bake the casserole at 350 degrees for 30-35 minutes (uncovered), until it’s golden brown on top. I baked mine for a total of 35 minutes.

Casserole with green chiles and cheese is ready to go into oven

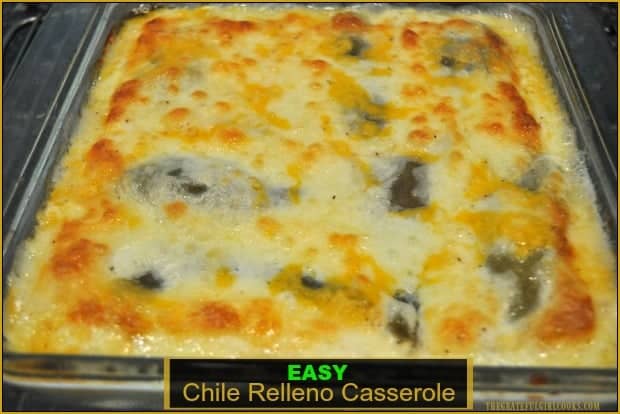
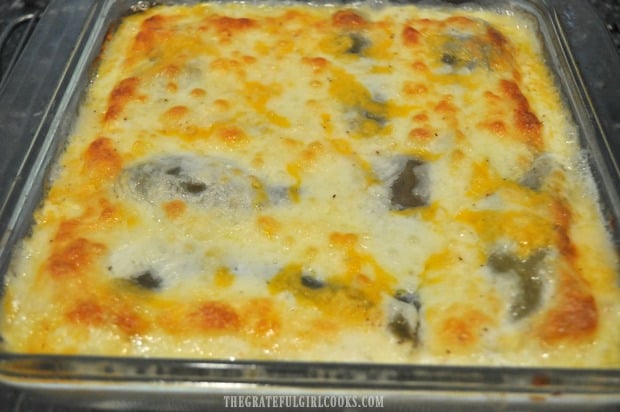
When done, the casserole should be golden brown in color on top.  Remove dish from oven and transfer to a wire rack. Let it cool and firm up for a few minutes, then slice the casserole with a sharp knife into 6 equal sized pieces, serve and enjoy!  See how simple it is to prepare?

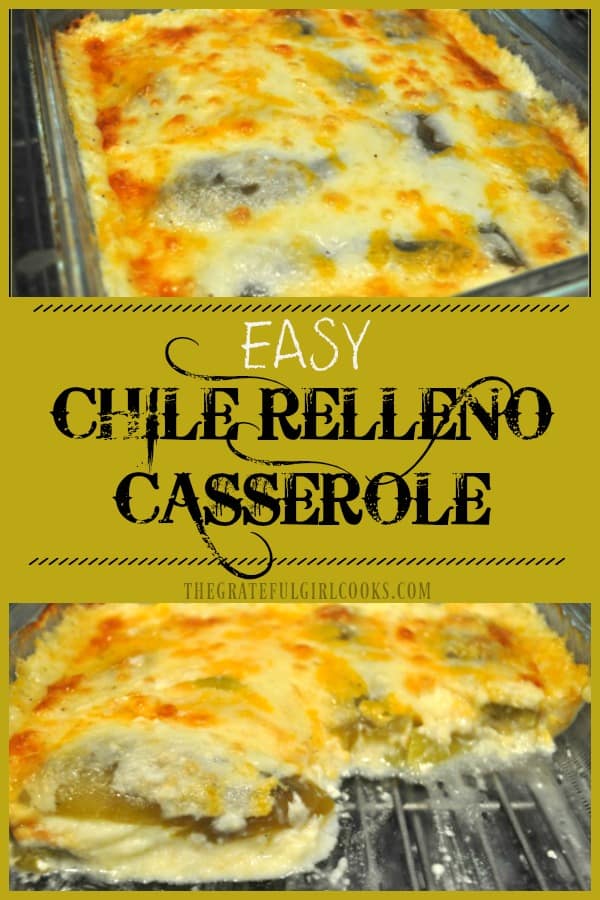
Easy chile relleno casserole, hot out of the oven!

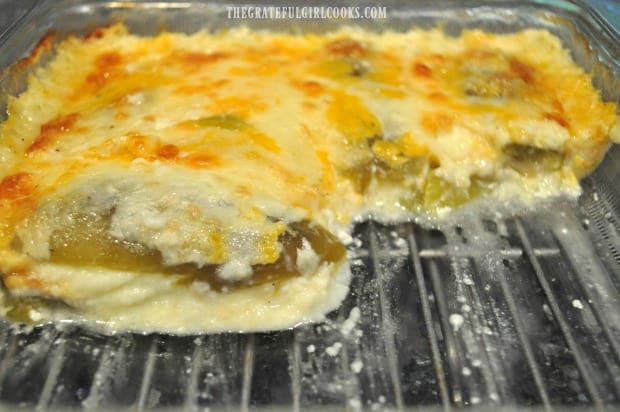
I took a photo after dinner so you could see what the INSIDE of the casserole looks like (after hungry humans had their fill).  See those chiles peeking out from under the cheese? Ooh- I’m telling you, this is one great tasting MEATLESS casserole! Truth is… it’s not only good for lunch or dinner… it’s even good for breakfast… yep!

A close up look at the inside of chili relleno casserole after baking

I hope you enjoy this recipe.  I have a similar recipe for a layered casserole on this blog that uses tortillas, green chiles and chicken, if you are interested in looking at that one. It’s called Layered Chicken Enchilada Casserole, and it also tastes fantastic.

Looking For More Southwestern-Style Recipes?

You can find ALL of my recipes in the Recipe Index, which is located at the top of the page. I have some delicious Southwest/Mexican-style recipes you might enjoy, including:

Interested In More Recipes?

Thank you for visiting this website. I appreciate you using some of your valuable time to do soIf you’re interested, I publish a newsletter 2 times per month (1st and 15th) with all the latest recipes, and other fun info. I would be honored to have you join our growing list of subscribers, so you never miss a great recipe! 

There is a Newsletter subscription box on the top right side (or bottom) of each blog post, depending on the device you use, where you can easily submit your e-mail address (only) to be included in my mailing list.

You Can Also Find Me On Social Media:

Facebook page: The Grateful Girl Cooks!
Pinterest:
The Grateful Girl Cooks!
Instagram:
jbatthegratefulgirlcooks

Hope to have you visit again soon. Have a GREAT day!

Author's signature

Recipe Adapted From: My sweet friend, Lanita Moen

0 from 0 votes
Easy Chile Relleno Casserole
Prep Time
10 mins
Cook Time
35 mins
Total Time
45 mins
 

This scrumptious chile relleno casserole is easy to make, is vegetarian, and has all the Southwest flavors of the traditional dish, but it is is baked, not fried!

Category: Dinner
Cuisine: Mexican, Southwestern
Keyword: chile, relleno
Servings: 6 servings
Calories Per Serving: 385 kcal
Author: JB @ The Grateful Girl Cooks!
Ingredients
  • 14 ounces whole green chiles , canned (2 -7 ounce cans)
  • 3/4 pound jack cheese , grated
  • 1 cup cheddar cheese , grated
  • 2 eggs
  • 1/2 cup all purpose flour
  • cups milk
  • 1 teaspoon salt
  • 1/2 teaspoon black pepper
Instructions
  1. Spray a 9x9 inch baking dish with non-stick spray. Slice whole canned green chiles wide open; rinse out any seeds, then drain. Arrange half of the chiles  in the bottom of the dish.

  2. Sprinkle chiles with HALF of the grated jack and cheddar cheeses.  Add remaining green chiles in another layer on top of the cheese. Top with remaining jack and cheddar cheeses.

  3. In a small bowl, whisk together eggs, flour, milk and salt until fully blended.  Pour this mixture over the casserole, distributing evenly.
  4. Bake casserole (uncovered) at 350 degrees for 30-35 minutes, until golden brown on top.  Remove dish from oven and transfer to a wire rack.  Let it cool and firm up for a few minutes, then slice casserole with sharp knife into 6 equal sized pieces, serve (a spatula works great) and enjoy!

Nutrition Facts
Easy Chile Relleno Casserole
Amount Per Serving (1 serving)
Calories 385 Calories from Fat 225
% Daily Value*
Fat 25g38%
Saturated Fat 15g94%
Cholesterol 127mg42%
Sodium 1118mg49%
Potassium 259mg7%
Carbohydrates 14g5%
Fiber 1g4%
Sugar 3g3%
Protein 23g46%
Vitamin A 905IU18%
Vitamin C 22.6mg27%
Calcium 665mg67%
Iron 2.2mg12%
* Percent Daily Values are based on a 2000 calorie diet.

Here’s one more to pin on your Pinterest boards!
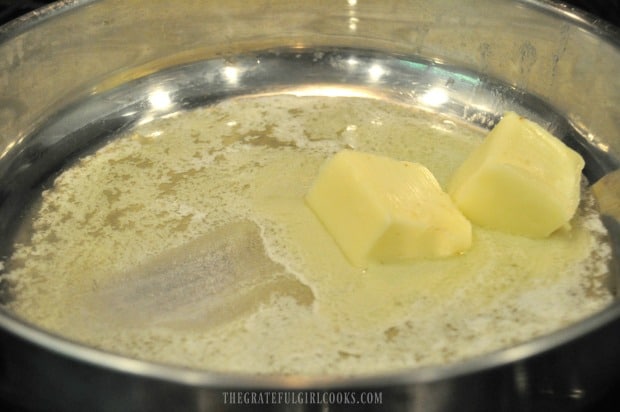
This scrumptious chile relleno casserole is easy to make, is vegetarian, and has all the Southwest flavors of the traditional dish, but is baked, not fried!