Mom’s Chocolate Chip Cookies

Can anything beat Mom’s Chocolate Chip Cookies? They’re huge, soft on the inside, crisp on the outside, and filled with chocolate chips and pecans. Can anything beat Mom's Chocolate Chip Cookies? They're huge, soft on the inside, crisp on the outside, and filled with chocolate chips and pecans.

Recently my husband, who, when I asked what kind of special dessert he’d like for Father’s Day said…”Could you just make me those good cookies you always make?” So I made this batch of Mom’s Chocolate Chip Cookies just for him…Happy Father’s Day!

Truthfully, I have tried many recipes over the years. Especially the kind that advertise “THE BEST CHOCOLATE CHIP COOKIES EVER”, but always seem to come back to this recipe.

I grew up eating my mom’s version of chocolate chip cookies which used the recipe straight from the back of the bag of chocolate chips. Now THAT’S a classic cookie!

They were always delicious, but these taste BETTER, in my humble opinion. Truth is…I have NO IDEA where I even got this recipe, originally. I’ve had it in my recipe box for years and years.

By now it is a stained and gnarly looking 3×5 index card, but I don’t let that stop me…ever! To me, that is the true sign of a fantastic recipe!

Scroll Down For A Printable Recipe Card At The Bottom Of The Page

Mom’s Chocolate Chip Cookies Are the BEST!

THIS Mom (yep… ME) loves to make these cookies for her family! One of the best treats ever is to have one of mom’s chocolate chip cookies (and a cup of milk), a few minutes after removing the cookie from the oven.

You know what kind of chocolate chip cookie I’m talking about, right? The kind that isn’t too hot as to burn your mouth, or too cold as to be really crunchy, but JUST RIGHT.

Sounds like kind of a Three Bears thing going on here!  My ideal cookie is eaten warm, and it’s soft on the inside, with a slight crunch on the outside! Yum.

Mom's Chocolate Chip Cookies / The Grateful Girl Cooks!These Cookies Are LARGE!

This recipe makes about one and a half dozen BIG cookies. See how two cookies fill up that salad plate? If you need more than 18 cookies, just make the cookies smaller, and cook them for slightly less time.

Better yet, see how one cookie fits so nice in my (very pink) hand, right before I gingerly take a huge bite out of it? One of these would easily equal three smaller sized ones. Now THAT’S my kind of cookie!
Mom's Chocolate Chip Cookies / The Grateful Girl Cooks!
So, there ya have it. This is our old standby…Mom’s Chocolate Chip Cookies! Just the way I’ve made ’em for YEARS! They are scrumdiddlyumptious! (Try saying that with a huge cookie in your mouth!!!)  Hope you enjoy them.

Looking For More COOKIE Recipes?

You can find all of my recipes in the Recipe Index, located at the top of the page. A few favorite cookie recipes include:

Want More Recipes? Get My FREE Newsletter!

I publish a newsletter 2 times per month (1st and 15th) with lots of recipes, tips, etc..
Would you like to join our growing list of subscribers?

There is a Newsletter subscription box on the top right (or bottom) of each blog post, depending on the device you use.
You can submit your e-mail address there, to be added to my mailing list.

Find Me On Social Media:

Facebook page: The Grateful Girl Cooks!
Pinterest:
The Grateful Girl Cooks!
Instagram:
jbatthegratefulgirlcooks

Author's signatureOriginal recipe source: unknown

↓↓ PRINTABLE RECIPE BELOW ↓↓

0 from 0 votes
Mom's Chocolate Chip Cookies
Prep Time
15 mins
Cook Time
13 mins
Total Time
28 mins
 

Can anything beat Mom's Chocolate Chip Cookies? They're huge, soft on the inside, crisp on the outside, and filled with chocolate chips and pecans.

Category: Cookies
Cuisine: American
Keyword: chocolate chip cookies
Servings: 18 large cookies (approx.)
Calories Per Serving: 310 kcal
Author: JB @ The Grateful Girl Cooks!
Ingredients
  • 1 cup cold butter = 2 sticks of butter
  • 1 cup dark brown sugar
  • 3/4 cup granulated sugar
  • 1 teaspoon vanilla
  • 2 large eggs
  • 3 cups all-purpose flour
  • 3/4 teaspoon salt
  • 3/4 teaspoon baking soda
  • 12 oz. semi-sweet chocolate chips
  • 1 cup pecans (or walnuts), chopped
Instructions
  1. Preheat oven to 350 degrees. Line cookie sheets with parchment paper (or wax paper).

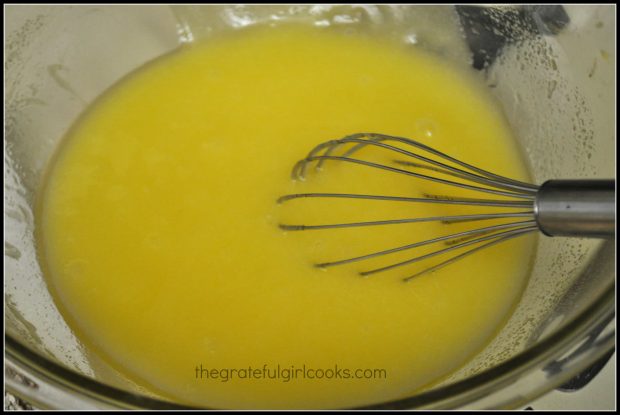
  2. Using a stand mixer or a hand mixer, cream butter, brown sugar and granulated sugar in a medium bowl until well incorporated. Add eggs and vanilla. Beat 3-4 minutes longer.

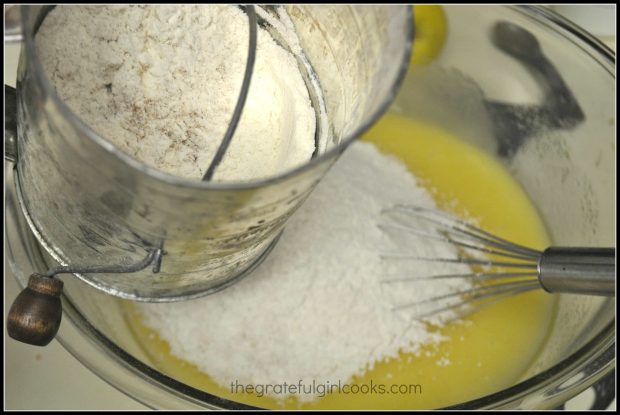
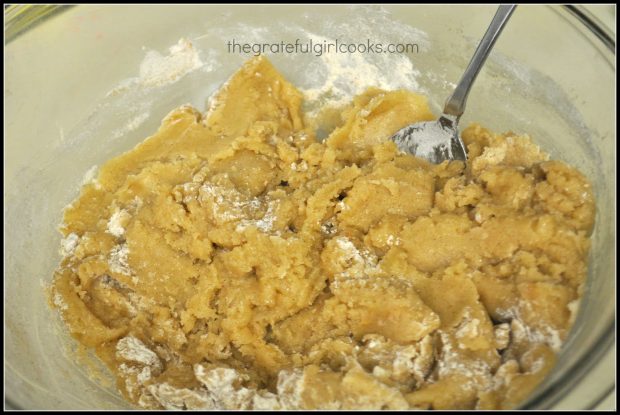
  3. In a separate bowl, whisk together the flour, salt and baking soda. Stir the flour mixture into the butter mixture. Do not beat...just stir until mixed together. Add chocolate chips and chopped nuts to batter. Stir until incorporated into batter.

  4. Fill a 1/3 measuring cup with cookie dough. Remove by using a knife around the edges. Form into rounds by using your hands. Place cookies on parchment paper. Press cookie down until it is about 1/2 inch high. Repeat with remaining dough.

  5. Bake at 350 degrees for 13-15 minutes, or until cookie is light golden brown. Remove from oven. Let cookies cool on baking sheet for a couple of minutes, then transfer cookies to a wire rack to cool. Enjoy!

Recipe Notes

**The recipe as written makes 1 1/2 dozen LARGE cookies. You can make smaller cookies (in order to have more). Remember to decrease cooking time to between 8-10 minutes. If you make 36 (smaller) cookies, each cookie will have approx. 155 calories.


Nutrition Facts
Mom's Chocolate Chip Cookies
Amount Per Serving (1 cookie)
Calories 310 Calories from Fat 99
% Daily Value*
Fat 11g17%
Saturated Fat 4g25%
Cholesterol 19mg6%
Sodium 156mg7%
Potassium 175mg5%
Carbohydrates 46g15%
Fiber 2g8%
Sugar 27g30%
Protein 4g8%
Vitamin A 40IU1%
Vitamin C 0.1mg0%
Calcium 32mg3%
Iron 2.5mg14%
* Percent Daily Values are based on a 2000 calorie diet.

Here’s one more to pin on your Pinterest boards!Can anything beat Mom's Chocolate Chip Cookies? They're huge, soft on the inside, crisp on the outside, and filled with chocolate chips and pecans.


Save

Save

Save

Make It Yourself Pepperoni Pizza

Make it yourself pepperoni pizza from scratch! It’s easy to prepare, easy on the budget, and is absolutely delicious! Makes 2 medium pizzas!
Make it yourself pepperoni pizza from scratch! It's easy to prepare, easy on the budget, and is absolutely delicious! Makes 2 medium pizzas!
True confession: I LOVE pizza…greasy, cheesy, hot, pepperoni pizza! (LOVE being the key word here, folks!)  And you know what? I even like to make it from scratch sometimes!  So today I am sharing how to make it yourself! Pepperoni Pizza. When we want pizza, most of the time my husband or I will simply pick up the phone and call our favorite pizza place and order a large pizza.  It’s CONVENIENT. The hardest part is simply picking out WHICH kind of pizza our family can agree on.

Well, I personally like almost every single kind of pizza (shocking, I know!), but honestly, my all time favorite still is pepperoni pizza…greasy, and dripping with hot, stringy melted cheese.  You know what I’m talkin’ about… the kind that has lots of melted cheese and floppy pepperoni that slide off onto your chin and scald you for life? Yeah…THAT kind.

Several years ago, I decided to try making pizza at home as a way to learn how…and to save money.  I wasn’t sure if I would like the results (can anything taste better than a great take-out pizza?), but I am happy to say that making my own pizza turned out to be fun and tasty!  Oh yeah- the cost is way less than ordering take out.

Scroll Down For A Printable Recipe Card At The Bottom Of The Page

Making Homemade Pepperoni Pizza

This is a recipe for basic pepperoni pizza, but it doesn’t take a rocket scientist to tell you how easy it is to “make it your own” and add whatever toppings you love.  I’ve morphed this basic recipe so many ways I can’t even count, at this point!  I like to use my bread machine to make the dough, but I’ve included directions for making it using a stand mixer with a dough hook OR by simply kneading it by hand.

First you make the dough. Use either: a bread machine, a dough hook on a stand mixer, or your own hands and brute strength to make it.

Dough is mixed, risen, and ready to make pepperoni pizza!The next thing to do is to roll the dough out on a pizza pan and add the sauce (again, whatever kind floats your boat)…I usually just end up using spaghetti sauce and fancy-ing it up with additional spices like garlic powder, oregano, etc.

Pizza dough is rolled out, then covered with sauce.
Now Add the GOOD Stuff

Add the mozzarella cheese, and follow that up with the pepperoni slices, or other toppings, as desired – whatever YOUR favorite toppings are!

Mozzarella cheese and pepperoni slices are added to pizza.Ready To Bake The Pepperoni Pizza!

Sprinkle the top of the pizza with additional oregano, Parmesan cheese, red pepper flakes, and a few other spices (if desired), and into the hot oven it goes. This recipe makes two pizzas, which is great if you have a lot of mouths to feed (or if you just want some tasty leftovers for lunch!). 

The pepperoni pizza only takes about 20 minutes in a hot (400 degree) oven to bake. Before you know it, you’re pulling two hot pepperoni pizzas out of the oven. Yum! I really hope you will give these a try. You can always make the dough early in the day, wrap it up real tight in plastic wrap and refrigerate it until you are ready to prepare the pizzas!

Pepperoni pizza, straight out of the hot oven!

I hope you will give this recipe for pepperoni pizza a try! If you are pushed for time and can’t make homemade dough, you can always buy a ball of pizza dough at the store (many stores carry this in the deli section), OR you might have a local pizza place that will sell you their dough. I hope you are successful, so you can see just how easy it is to make homemade pepperoni pizza!

For another interesting way to cook pizzas, you might enjoy looking at my blog post showing how to make grilled pizzas on your BBQ! Sure helps keep the kitchen cool during hot summers!

Looking For More PIZZA Recipes?

You can find ALL my recipes in the Recipe Index, located at the top of the page. I have a variety of pizza recipes, including:

Interested In More Recipes?

Thank you for visiting this website. I appreciate you using some of your valuable time to do soIf you’re interested, I publish a newsletter 2 times per month (1st and 15th) with all the latest recipes, and other fun info. I would be honored to have you join our growing list of subscribers, so you never miss a great recipe!
There is a Newsletter subscription box on the top right side (or bottom) of each blog post, depending on the device you use, where you can easily submit your e-mail address (only) to be included in my mailing list.

You Can Also Find Me On Social Media:

Facebook page: The Grateful Girl Cooks!
Pinterest:
The Grateful Girl Cooks!
Instagram:
jbatthegratefulgirlcooks

Have a GREAT day!

Author's signature Dough Recipe Source: Oster Deluxe Bread & Dough Maker Handbook (c 1994 Sunbeam-Oster Household Products)

↓↓ PRINTABLE RECIPE BELOW ↓↓

0 from 0 votes
Make It Yourself! Pepperoni Pizza
Prep Time
1 hr 30 mins
Cook Time
20 mins
Total Time
1 hr 50 mins
 
Make your own pepperoni pizza from scratch! It's easy to prepare, easy on the budget... and tastes absolutely delicious! Recipe makes 2 medium pizzas!
Category: Entree
Cuisine: Italian
Keyword: pepperoni pizza
Servings: 16 slices (2 pizzas)
Calories Per Serving: 262 kcal
Author: JB @ The Grateful Girl Cooks!
Ingredients
For the dough:
  • 1 cup , plus 2 Tablespoons warm water (not hot)
  • 2 Tablespoons olive oil (or vegetable oil, if desired)
  • 3 cups all-purpose flour
  • 1 teaspoon granulated sugar
  • 1 teaspoon salt
  • 2 1/2 teaspoons regular active dry yeast , bread machine yeast, or quick-acting active dry yeast
For the pizza (these ingredients will be split between two pizzas):
  • 1 1/2 cups pizza or spaghetti sauce
  • 1/4 teaspoon garlic powder
  • 1/4 teaspoon dried oregano (+ additional 1/4 teaspoon for sprinkling on top of prepared pizza)
  • 1/4 teaspoon dried basil
  • 1/2 cup Parmesan cheese (+ additional 2 Tablespoons for sprinkling on top of prepared pizza)
  • 4 cups Mozzarella cheese
  • 1 package Pepperoni slices
  • Additional toppings , as desired (oregano, Parmesan cheese, red pepper flakes, etc.)
Instructions
  1. Prepare the dough. IF USING BREAD MACHINE: Place the dough ingredients into the bread pan in the order given. Select white Dough cycle. IF USING DOUGH HOOK ON STAND MIXER: Dissolve the yeast in the water in a small bowl. Let it sit for 5 minutes until it becomes frothy (meaning the yeast is "good"). Add the other ingredients, and mix into the flour. Using the dough hook, mix well for 5 minutes until all dry ingredients are incorporated. Turn out into a lightly sprayed large bowl, cover with a towel and let it sit in a warm spot to rise until nearly doubled in size (about an hour). Punch down the dough, then knead it until smooth on a lightly floured surface. IF MAKING BY HAND: Follow directions for stand mixer, except knead the dough by hand on a clean, lightly floured surface for at least 5 minutes.
  2. When dough is ready, divide it into two pieces. Put each half on a pizza pan (or large cookie sheet). Pat the each piece of dough out (with floured fingers) into a 12 inch circle.
  3. Preheat oven to 400 degrees.
  4. Mix the garlic powder, oregano and basil into the sauce. Spread each pizza circle with half of the prepared sauce.
  5. Sprinkle half of the Parmesan cheese over each pizza.
  6. Sprinkle half of the mozzarella cheese over each pizza.
  7. Sprinkle the tops of the pizza with a little bit of oregano, Parmesan cheese, red pepper flakes, etc. (to garnish).
  8. Cook the pizzas at 400 degrees for approximately 20 minutes (everyone's oven is different, so keep an eye on them for the last couple minutes!). Remove pizzas when the crust is light brown and the cheese is bubbly! Enjoy!
Nutrition Facts
Make It Yourself! Pepperoni Pizza
Amount Per Serving (1 slice)
Calories 262 Calories from Fat 117
% Daily Value*
Fat 13g20%
Saturated Fat 6g38%
Cholesterol 35mg12%
Sodium 680mg30%
Potassium 172mg5%
Carbohydrates 20g7%
Fiber 1g4%
Sugar 1g1%
Protein 13g26%
Vitamin A 315IU6%
Vitamin C 1.7mg2%
Calcium 187mg19%
Iron 1.7mg9%
* Percent Daily Values are based on a 2000 calorie diet.

Here’s one more to pin on your Pinterest boards!Make it yourself pepperoni pizza from scratch! It's easy to prepare, easy on the budget, and is absolutely delicious! Makes 2 medium pizzas!


Save

Save

Marinated Tomato Salad

You’ll enjoy this marinated tomato salad, featuring cherry tomatoes in a balsamic/honey sauce, on mixed greens, with pine nuts and Parmesan cheese!You'll enjoy this marinated tomato salad, featuring cherry tomatoes in a balsamic/honey sauce, on mixed greens garnished with pine nuts and Parmesan cheese!
Do you like tomatoes?  We sure do, so I want to share this delightful recipe for a Marinated Tomato Salad. Yes…you heard me right. The tomatoes are MARINATED before serving, and they are wonderful!

If you’re looking for a simple way to spruce up an otherwise dull salad, may I suggest trying this recipe? I really think you will enjoy the marinated tomatoes! Let me show you how easy it is to prepare this simple, but tasty salad.

Scroll Down For A Printable Recipe Card At The Bottom Of The Page

How I Got The Recipe For Marinated Tomato Salad

My husband and I were first served this marinated tomato salad when we were guests at a lovely Italian dinner, hosted by our mutual friend Gregg. The cherry tomatoes are marinated in a wonderful blend of balsamic vinegar and honey, along with other ingredients, which give the tomatoes a fantastic flavor. The marinade is also used as the dressing over chilled, fresh greens. It was so delicious, and the rest is history.

Marinated tomato salad is not only delicious, but is really easy to prepare! It LOOKS like a “normal” green salad, but the marinated tomatoes really make this salad taste very different from “normal” salads. I asked our friend Gregg for the recipe he used, and he was kind enough to send it to me. I’ve only made a couple very slight changes to his original recipe.

What Kind Of Tomatoes?

You can use a basket of red cherry tomatoes or a colorful mix of cherry tomatoes. I’ve used both, with great results. It all comes down to what you prefer on your mixed green salads.

Cherry tomatoes are sliced in half before marinating.Preparing The Marinade


Marinade for tomatoes includes balsamic vinegar and honey
The marinade is so easy to prepare, and doubles as a wonderful dressing to the chilled salad when serving!

Sliced cherry tomatoes marinade for several hours.
Let those beautiful tomatoes sit in the marinade in the refrigerator for several hours to soak up all the flavor! The longer time they marinade, the better for taste!

Marinated tomato salad is served on chilled greens, topped with pine nuts and Parmesan cheese!
I hope you will give this refreshing and delicious marinated tomato salad a try. Pretty sure you will love it! Thanks for stopping by today, and I invite you to come back soon for more family-friendly recipes. Take care, God bless you, and have a GREAT day!

Looking For More SALAD Recipes?

You can find ALL my recipes in the Recipe Index, which is located at the top of the page. I have a wonderful variety of delicious salads you might enjoy checking out, including:

Interested In More Recipes?

Thank you for visiting this website. I appreciate you using some of your valuable time to do soIf you’re interested, I publish a newsletter 2 times per month (1st and 15th) with all the latest recipes, and other fun info. I would be honored to have you join our growing list of subscribers, so you never miss a great recipe!
There is a Newsletter subscription box on the top right side (or bottom) of each blog post, depending on the device you use, where you can easily submit your e-mail address (only) to be included in my mailing list.

You Can Also Find Me On Social Media:
Facebook page: The Grateful Girl Cooks!
Pinterest: The Grateful Girl Cooks!
Instagram: jbatthegratefulgirlcooks

Have a GREAT day!

Author's signatureRecipe adapted from: Gregory Beagle

↓↓ PRINTABLE RECIPE BELOW ↓↓

0 from 0 votes
Marinated Tomato Salad
Prep Time
10 mins
Cook Time
0 mins
Total Time
10 mins
 
You'll enjoy this marinated tomato salad, featuring cherry tomatoes in a balsamic/honey sauce, on mixed greens garnished with pine nuts and Parmesan cheese!
Category: Salad
Cuisine: American
Keyword: marinated tomato salad
Servings: 3 side salads
Calories Per Serving: 201 kcal
Author: JB @ The Grateful Girl Cooks!
Ingredients
  • 1 basket cherry tomatoes , halved
For the Marinade:
  • 4 Tablespoons balsamic vinegar
  • 4 Tablespoons honey
  • 1/4 teaspoon salt
  • 1/4 teaspoon ground pepper
  • 1/4 teaspoon garlic powder
  • 1 pinch dried oregano
  • 1 pinch dried basil
For The Salad:
  • 3 cups Chilled , fresh mixed salad greens
  • 2 Tablespoons Parmesan cheese , grated (enough to sprinkle on top of salad)
  • 1/4 cup pine nuts (or sunflower seeds)
Instructions
  1. Cut the cherry tomatoes in half, horizontally.
  2. In a covered medium sized container, whisk together the balsamic vinegar, honey, salt, pepper, garlic powder, oregano and basil.
  3. Add the halved tomatoes to the marinade mixture. Stir gently to combine. Cover and place container in refrigerator for at least 4 hours, stirring occasionally to completely coat the tomatoes with the marinade.
  4. When ready to serve, arrange fresh, chilled salad greens on serving plate. Spoon the tomatoes over the top of the greens. Spoon some of the marinade over each salad. Top with pine nuts (or sunflower seeds), followed by fresh grated Parmesan cheese
Nutrition Facts
Marinated Tomato Salad
Amount Per Serving (1 side salad (1/3 of total))
Calories 201 Calories from Fat 72
% Daily Value*
Fat 8g12%
Saturated Fat 1g6%
Cholesterol 2mg1%
Sodium 264mg11%
Potassium 174mg5%
Carbohydrates 30g10%
Sugar 26g29%
Protein 3g6%
Vitamin A 480IU10%
Vitamin C 9.3mg11%
Calcium 58mg6%
Iron 1.4mg8%
* Percent Daily Values are based on a 2000 calorie diet.

Here’s one more to pin on your Pinterest boards!You'll enjoy this marinated tomato salad, featuring cherry tomatoes in a balsamic/honey sauce, on mixed greens garnished with pine nuts and Parmesan cheese!
 

Save

Save

Carrot Zucchini Bread

Carrot Zucchini Bread is a wonderful tasting loaf of sweet bread, topped with a cream cheese and pecan frosting! This easy to make recipe yields two loaves!Carrot Zucchini Bread is a wonderful tasting loaf of sweet bread, topped with a cream cheese and pecan frosting! This easy to make recipe yields two loaves!

What do you get if carrot cake gets married to zucchini bread? This! Carrot Zucchini Bread. I found this recipe online and decided to try it and use up some of the frozen, grated zucchini hanging out in my freezer, leftover from our garden surplus. It was a great find.

I made this bread yesterday…the flavor combo of the zucchini, carrots, brown sugar and cinnamon is a winning one, for sure! Then to top it all off (quite literally!), the cream cheese pecan frosting is fantastic!

Scroll Down For A Printable Recipe Card At The Bottom Of The Page

Carrot Zucchini Bread Is Incredibly EASY To Make!

The batter for the carrot zucchini bread is easy to mix together. REALLY easy! 

Batter is mixed and ready, in bowl.

Divide the batter and add to floured loaf pans, then into the oven it goes to bake!

Carrot zucchini bread batter in loaf pan, ready to bake!

Here is the carrot zucchini bread, fresh from the oven, and cooling on a wire rack before frosting.

Carrot zucchini bread, baked and cooling on a wire rack.

Easy To Make Cream Cheese Frosting For Carrot Zucchini Bread

The cream cheese and pecan frosting is super easy to make, and goes PERFECTLY with this delicious bread. Wait until the loaves are completely cooled to room temperature before frosting.

Cream cheese and pecan frosting, for carrot zucchini bread.

Here is a finished, frosted loaf of carrot zucchini bread. I garnished it with a few tiny strips of dehydrated carrots, just for fun!

This loaf of carrot zucchini bread is frosted and ready to serve!

Ready To Slice And Enjoy

The bread is moist, and filled with FLAVOR!  LOOK – I cut a slice just for YOU!

A slice of carrot zucchini bread on a plate, with loaf in background.

The bread was easy to prepare, and very tasty! I had a slice this morning with my coffee. Delicious! I really think you and your family will LOVE this loaf of bread!

Once slice of carrot zucchini bread, on a plate.
The recipe, as written makes 2 loaves of carrot zucchini bread, and is easily cut in half in case you only want to make one loaf, so it’s a win-win!  You can also make two loaves, eat one, and share another with a friend, neighbor, or family member! Hope you will give this yummy bread a try…and hope you enjoy it as much as we did! Have a great day, and come back soon.

You can find ALL of my recipes in the Recipe Index, located at the top of the page. You might also enjoy my recipes for banana bread, apple cinnamon, pumpkin, or cinnamon raisin bread.

Interested In More Recipes?

Thank you for visiting this website. I appreciate you using some of your valuable time to do soIf you’re interested, I publish a newsletter 2 times per month (1st and 15th) with all the latest recipes, and other fun info. I would be honored to have you join our growing list of subscribers, so you never miss a great recipe!
There is a Newsletter subscription box on the top right side (or bottom) of each blog post, depending on the device you use, where you can easily submit your e-mail address (only) to be included in my mailing list.

You Can Also Find Me On Social Media:
Facebook page: The Grateful Girl Cooks!
Pinterest: The Grateful Girl Cooks!
Instagram: jbatthegratefulgirlcooks

Author's signatureRecipe Adapted From: http://www.howtoinstructions.us/carrot-zucchini-bread/#.U5MvNCi4mSq

↓↓ PRINTABLE RECIPE BELOW ↓↓

0 from 0 votes
Carrot Zucchini Bread
Prep Time
15 mins
Cook Time
50 mins
Total Time
1 hr 5 mins
 
Carrot Zucchini Bread is a wonderful tasting loaf of sweet bread, topped with a cream cheese and pecan frosting! This easy to make recipe yields two loaves!
Category: Bread/Breakfast
Cuisine: American
Keyword: carrot zucchini bread
Servings: 16 slices
Calories Per Serving: 407 kcal
Author: JB @ The Grateful Girl Cooks!
Ingredients
For bread:
  • 3 cups all purpose flour
  • 1 1/2 teaspoons baking powder
  • 3/4 teaspoon baking soda
  • 3/4 teaspoon salt
  • 1 3/4 teaspoons ground cinnamon
  • 1/4 teaspoon ground nutmeg
  • 3/4 cup granulated sugar
  • 3/4 cup packed brown sugar
  • 1/2 cup vegetable (or canola) oil
  • 6 Tablespoons unsweetened applesauce
  • 3 large eggs
  • 1 1/2 teaspoons vanilla extract
  • 1 1/2 cups finely shredded , peeled carrots (about 3 medium carrots)
  • 1 1/2 cups finely grated , shredded zucchini (and drained well, if using frozen)
For frosting:
  • 6 Tablespoons butter , softened
  • 5 oz. cream cheese , softened
  • 2 1/2 cups powdered sugar
  • 1/2 teaspoon vanilla extract
  • 1/2 cup chopped pecans (or walnuts, if desired)
Instructions
  1. Preheat oven to 350 degrees. While oven is preheating, coat 2 8x4 inch loaf pans with non stick baking spray, then lightly flour pans.
  2. In a large mixing bowl, whisk the flour, baking powder, baking soda, salt, cinnamon, and nutmeg together. Set aside.
  3. In another large mixing bowl place the granulated and brown sugars; whisk these until combined.
  4. Add the vegetable oil, applesauce, eggs, and vanilla to the sugar mixture; mix until well incorporated.
  5. Stir the shredded carrots and zucchini into this mixture.
  6. Add the flour mixture to the carrot zucchini mixing bowl all at once. Stir this only until combined.
  7. Divide the bread batter into the two loaf pans.
  8. Place loaf pans in oven. Bake at 350 degrees for 35 minutes, then without removing loaves from oven, quickly place a piece of aluminum foil over the top of each pan (to prevent too much browning), then continue baking the bread for an additional 15-20 minutes longer.
  9. Remove bread from oven when toothpick inserted in middle of loaves comes out clean.
  10. Allow the bread to cool in the loaf pan for another 5-10 minutes, then invert it onto a wire rack and let it finish cooling.
  11. While bread is cooling, make the cream cheese frosting: Using a hand mixer, whip the butter and cream cheese together in a medium sized mixing bowl. When smooth and fluffy, add the powdered sugar and the vanilla. Beat this mixture on medium high speed for 2-3 minutes, until it is light and fluffy.
  12. Frost cooled loaf with the cream cheese frosting, then top with chopped pecans. (I just added the pecans to the frosting, by the way...no big deal).
Recipe Notes

Recipe is easily halved. (just use 2 eggs instead of 1 1/2).

Nutrition Facts
Carrot Zucchini Bread
Amount Per Serving (1 slice)
Calories 407 Calories from Fat 153
% Daily Value*
Fat 17g26%
Saturated Fat 10g63%
Cholesterol 51mg17%
Sodium 251mg11%
Potassium 187mg5%
Carbohydrates 59g20%
Fiber 1g4%
Sugar 39g43%
Protein 4g8%
Vitamin A 2325IU47%
Vitamin C 2.8mg3%
Calcium 53mg5%
Iron 1.6mg9%
* Percent Daily Values are based on a 2000 calorie diet.

Here’s one more to pin on your Pinterest boards!Carrot Zucchini Bread is a wonderful tasting loaf of sweet bread, topped with a cream cheese and pecan frosting! This easy to make recipe yields two loaves!


Save

Strawberry Smoothie

It’s EASY to make a homemade strawberry smoothie, with Greek yogurt, honey, fresh strawberries and banana! Cold, thick and creamy, you’ll enjoy this drink!It's EASY to make a homemade strawberry smoothie, with Greek yogurt, honey, fresh strawberries and banana! Cold, thick and creamy, you'll enjoy this drink!
It’s that time of year- yes, it’s strawberry season! Who wants a strawberry smoothie? I do, I do! Doesn’t that sound delicious? Well it does to me!

It gets pretty exciting here when the amazingly wonderful Hood Strawberries come into season in the great Pacific Northwest! People head out to the local U-Pick farms to grab big bucketfuls of these local delicious and sweet Oregon strawberries!

I love to go pick extra strawberries at a nearby U-Pick farm, to supplement what the small strawberry beds in my backyard garden produce each year. There’s just something about a creamy, cold morning smoothie, bursting with great strawberry flavor, that really gets me excited! Here’s a picture I took last year while out on a morning strawberry picking “mission”.

Picking fresh strawberries is a fun part of making a strawberry smoothie!
Whether you go pick them yourself, or you grow them in your own yard, OR you buy them from your local grocer or at a Farmer’s Market, a tasty strawberry smoothie is a GOOD thing!

Why Not Make A Delicious Strawberry Smoothie for Breakfast?

I love to have a strawberry smoothie for breakfast, especially as the weather warms up! They are also a great afternoon cold, healthy, and filling drink! In most of my smoothies, I use plain Greek yogurt, because I like the extra protein I receive from adding it to the drink.

It also helps to grow our strawberries in our little raised bed garden!  That way, I always have them fresh picked or flash-frozen to make a quick strawberry smoothie, year round!

Fresh strawberries growing in our backyard garden can be used to make a strawberry smoothie!A bucket of fresh strawberries can be used to make more than one strawberry smoothie!
So, no matter how you get your fresh berries for your smoothies, I hope you will give this simple, delicious strawberry smoothie a try. Have a great day. Cheers, and bottoms up!

Looking For More SMOOTHIE Recipes?

You can find all of my recipes in the Recipe Index, located at the top of the page. I have quite a few smoothie recipes, including:

Interested In More Recipes?

Thank you for visiting this website. I appreciate you using some of your valuable time to do soIf you’re interested, I publish a newsletter 2 times per month (1st and 15th) with all the latest recipes, and other fun info. I would be honored to have you join our growing list of subscribers, so you never miss a great recipe!
There is a Newsletter subscription box on the top right side (or bottom) of each blog post, depending on the device you use, where you can easily submit your e-mail address (only) to be included in my mailing list.

You Can Also Find Me On Social Media:

Facebook page: The Grateful Girl Cooks!
Pinterest:
The Grateful Girl Cooks!
Instagram:
jbatthegratefulgirlcooks

Author's signature

↓↓ PRINTABLE RECIPE BELOW ↓↓

0 from 0 votes
Strawberry Smoothie
Prep Time
5 mins
Cook Time
0 mins
Total Time
5 mins
 
It's EASY to make a homemade strawberry smoothie, with Greek yogurt, honey, fresh strawberries and banana! Cold, thick and creamy, you'll enjoy this drink!
Category: Beverage, Breakfast
Cuisine: American
Keyword: strawberry smoothie
Servings: 2 large servings (or 4 small)
Calories Per Serving: 157 kcal
Author: JB @ The Grateful Girl Cooks!
Ingredients
  • 10 large strawberries , sliced
  • 1/2 large banana , sliced
  • 3/4 cup plain Greek yogurt
  • 1/4 cup vanilla almond milk (can use regular milk if desired)
  • 2 Tablespoons honey
  • 2 handfuls of crushed ice
Instructions
  1. Place all ingredients into a blender and blend for a couple of minutes until ice and all ingredients have been fully incorporated, and the mixture is smooth. If you want the smoothie to be even thicker, add additional crushed ice.
  2. Pour into 2 large glasses and serve!
  3. Enjoy!
Recipe Notes

Recipe Source: my head trying to think of new ways to use my strawberries!

Nutrition Facts
Strawberry Smoothie
Amount Per Serving (1 serving)
Calories 157
% Daily Value*
Cholesterol 3mg1%
Sodium 69mg3%
Potassium 303mg9%
Carbohydrates 31g10%
Fiber 1g4%
Sugar 26g29%
Protein 8g16%
Vitamin C 37.9mg46%
Calcium 130mg13%
Iron 0.3mg2%
* Percent Daily Values are based on a 2000 calorie diet.

Here’s one more to pin on your Pinterest boards!It's EASY to make a homemade strawberry smoothie, with Greek yogurt, honey, fresh strawberries and banana! Cold, thick and creamy, you'll enjoy this drink!


Save

Save

Just a Little Seed – Garden Musings

I’m always amazed how much great food you can grow from a relatively small amount of inexpensive seeds.

Garden Pickings August 2013The photo shown above is one morning’s pickings from last August. I absolutely am aware that my little backyard urban raised bed garden is pitifully small, when compared to most people’s gardens. But that’s just it…I try not to compare. This is my little piece of heaven on earth in my own urban backyard. I am so grateful and amazed by what can be produced in such a small area. What we can grow in containers and in small raised beds is MORE THAN ENOUGH, and I am delighted to be able to provide healthy, nourishing homegrown food for my family AND share some of the excess with our friends and neighbors.

This year (2014), I planted my veggie seeds in late April and early May (Pacific Northwest has a shorter growing season), and I am loving watching those little seeds buried in the soil come alive! This year’s garden has: kale, rainbow chard, romaine lettuce, spinach, red leaf lettuce, arugula, oak leaf lettuce, flat leaf parsley, basil, regular parsley, pickling cucumbers, cilantro, red onions, walla walla onions, garlic, leeks, chives, dill, parisian carrots, pole beans, bush beans, dover half carrots, rainbow carrots, peas, sugar snap peas, san marzano tomatoes, roma tomatoes, yellow pear tomatoes, striped heirloom tomatoes, sweet million cherry tomatoes, oregon stupice tomatoes, jalapenos, red peppers, tomatillos, broccoli, peppermint, lemon balm, zucchini, yellow squash, pattypan squash, thyme, sage, oregano, along with perennial rhubarb, strawberries and 2 blueberry bushes. I’m sure I will stay very busy this summer!

Veggie Garden 2014-4Veggie Garden 2014-3


It’s exciting to see how our little garden is progressing! (I call it JB’s Garden of Eatin’). We’ve already been enjoying the early bloomers like lettuce, chard and spinach (had a huge spinach salad last night from our garden!), and in another month or so, it will be all I can do to keep up with it all! I CAN’T WAIT!Veggie Garden 2014-7 Veggie Garden 2014-8Here’s a few pics of the garden beds, right after the seeds germinated, and after about a month to a month and a half after being planted.Veggie Garden May 2014There’s been a LOT of growth, and for that I am grateful! Lots of sunshine helps, also!Veggie Garden 2014-5Veggie Garden 2014-6 The amount of food produced will far outweigh my investment (for seed packets and tomato plants) over and over!!!! I will try and post updates as the summer goes by, but for now…I’m off to my backyard produce department to water the “goods”. Hope you will get outside  and grow some food, also!


Mom’s Banana Nut Bread

Make Mom’s banana nut bread with pecans or walnuts. This easy, classic loaf is delicious, and makes 1 large loaf, or 3 small mini-loaves!
Make Mom's banana nut bread with pecans or walnuts. This easy, classic loaf is delicious, and makes 1 large loaf, or 3 small mini-loaves!
It seems like everyone has a recipe for banana bread. So do I… and it’s a recipe for my Mom’s Banana Nut Bread. I’ve made it for years using this recipe for over 35 years and it never disappoints! 

The 3×5 index card it is written on wins the award for most splatters! This recipe has been made too many times over the years to even count.

Whether it’s making one large loaf of banana nut bread, or splitting the batter up to make 3 small loaves, this is a very good, reliable recipe for classic banana nut bread.

Scroll Down For A Printable Recipe Card At The Bottom Of The Page

It’s Fun To Make Mini-Loaves Of Banana Nut Bread For Holiday Gifts

Sometimes at Christmas I make 9 small loaves at a time, for gifts to our neighbors. It then feels rather like a banana bread factory in my kitchen (but it sure smells good the day I make the loaves).

Mini-loaves of Mom's banana nut bread, ready to give as gifts!

For me, it’s always been about the over ripe bananas cluttering up the kitchen counter. That, alone is enough motivation to whip up a loaf or loaves of banana nut bread!

After all, over-ripe bananas are the “perfect” candidate for morphing into a tasty loaf of bread, right? Anyways, this is a very simple, straightforward recipe. It’s easy to make, and delicious to eat!

Remember to reduce the baking time if you will be making the smaller loaves. The instructions are for one standard sized (9×5) loaf. Hope you enjoy this tasty bread as much as we do!

An inside look at a loaf of Mom's banana bread.
Hope you enjoy this banana bread. It’s especially good, eaten warm with softened butter. If you really enjoy banana bread, be sure to check out another recipe on my blog for Banana Apricot Date Bread. YUM!

Thank you for stopping by today, and I invite you to come back soon for more family-friendly recipes. Take care, may God bless you, and have a GREAT day!

Looking For More “SWEET” BREAD Recipes?

You can find all of my bread recipes in the Recipe Index, located at the top of the page. A few favorites you might enjoy include:

Want More Recipes? Get My FREE Newsletter!

I publish a newsletter 2 times per month (1st and 15th) with lots of recipes, tips, etc..
Would you like to join our growing list of subscribers?

There is a Newsletter subscription box on the top right (or bottom) of each blog post, depending on the device you use.
You can submit your e-mail address there, to be added to my mailing list.

Find Me On Social Media:

Facebook page: The Grateful Girl Cooks!
Pinterest:
The Grateful Girl Cooks!
Instagram:
jbatthegratefulgirlcooks

Author's signature

Original Recipe Source: Unknown

↓↓ PRINTABLE RECIPE BELOW ↓↓

0 from 0 votes
Mom's Banana Nut Bread
Prep Time
10 mins
Cook Time
55 mins
Total Time
1 hr 5 mins
 

Make Mom's banana nut bread with pecans or walnuts. This easy, classic loaf is delicious, and makes 1 large loaf, or 3 small mini-loaves!

Category: Bread
Cuisine: American
Keyword: Mom's banana nut bread
Servings: 9 slices ( 1 lg. loaf or 3 small)
Calories Per Serving: 312 kcal
Author: JB @ The Grateful Girl Cooks!
Ingredients
  • 2 cups all purpose flour
  • 2 teaspoons baking powder
  • 1/2 teaspoon baking soda
  • 3/4 teaspoon salt
  • 1/2 cup granulated sugar
  • 1 cup walnuts or pecans , chopped
  • 1 large egg , beaten
  • 1/4 cup vegetable oil
  • 1 cup mashed very ripe bananas (approximately 2 medium sized bananas)
  • 1 Tablespoon fresh lemon juice
Instructions
  1. Sift the flour, baking powder, baking soda, salt and sugar together into a large mixing bowl. Add 3/4 cup of the chopped nuts to the dry ingredients.

  2. In a small bowl, combine the egg, vegetable oil, mashed up bananas, and lemon juice until well blended, then add to dry ingredients. Stir only until the flour is moistened and dry ingredients have been incorporated into batter.

  3. Pour batter into a greased/sprayed 9x5 inch loaf pan (or into 3 small prepared loaf pans). Sprinkle the remaining chopped nuts over the top of the loaf.

  4. Bake at 350 degrees for 55 minutes to 1 hour (large loaf) and approximately 35 minutes for small loaves. A toothpick inserted into middle of loaf should come out clean. Loaves should be golden brown on top. Enjoy!
Recipe Notes

Remember to bake for less time if making 3 small loaves!

Nutrition Facts
Mom's Banana Nut Bread
Amount Per Serving (1 slice (large loaf))
Calories 312 Calories from Fat 135
% Daily Value*
Fat 15g23%
Saturated Fat 5g31%
Cholesterol 18mg6%
Sodium 263mg11%
Potassium 277mg8%
Carbohydrates 40g13%
Fiber 2g8%
Sugar 14g16%
Protein 5g10%
Vitamin A 45IU1%
Vitamin C 3.1mg4%
Calcium 59mg6%
Iron 1.9mg11%
* Percent Daily Values are based on a 2000 calorie diet.

Here’s one more to pin on your Pinterest boards!Make Mom's banana nut bread with pecans or walnuts. This easy, classic loaf is delicious, and makes 1 large loaf, or 3 small mini-loaves!


Save

Save

Homemade Blueberry Pancakes

Delicious, homemade blueberry pancakes are easy to make from scratch, using Greek yogurt. Bursting with flavor…a perfect treat for a family breakfast!Delicious, homemade blueberry pancakes are easy to make from scratch, using Greek yogurt. Bursting with flavor...a perfect treat for a family breakfast!

Yesterday morning I made homemade blueberry pancakes for my husband and I for breakfast.  They were FANTASTIC! Blueberry pancakes, from scratch. This recipe calls for fresh blueberries, and my goodness, they are so good!

Scroll Down For A Printable Recipe Card At The Bottom Of The Page

I picked 15 pounds of blueberries last summer and froze a bunch of them. Once frozen, all I had to do was grab some out of our freezer and enjoy the fruits of my labor (picking them in the hot Oregon sunshine last summer!).

Fresh picked blueberries are perfect for making pancakes!
Making Homemade Blueberry Pancakes Is Easy

I was searching Pinterest for some new recipes to try that sounded good, and I stumbled upon this recipe for blueberry pancakes. They are made from scratch, and so I decided to give the recipe a try. I’d made blueberry pancakes before where you just toss in blueberries to add to a packaged pancake mix.

However,  making them from scratch sounded much better to me. It was easy! The batter is mixed together quickly and easily, and then it’s ready to turn it into yummy breakfast pancakes!

Mixing batter from scratch for homemade blueberry pancakes
The batter was easy to make. It is low in sugar, and is made using plain Greek yogurt for some extra protein. How about that-pancakes with extra protein tossed in for good measure? Alrighty then!

Homemade blueberry pancakes cooking on griddle.
Throw in some delicious blueberries as you are cooking the pancakes. Cook until bubbles form on the surface, then carefully flip them to the other side. Continue to cook the homemade blueberry pancakes until they’re set, and golden brown on both sides!

Serve The Homemade Blueberry Pancakes

Homemade blueberry pancakes taste very close to what you would find in a purchased pancake mix, and they’re easy to prepare, also! Top the pancakes with butter and pancake syrup, and dig into a stack of yummy pancakes.

Blueberry pancakes, topped with butter and maple syrup!

These homemade blueberry pancakes taste delicious and are filled with great blueberry flavor! I hope you will give them a try! Take care, and please come back again soon, for more family friendly recipes.

Looking For More PANCAKE Recipes?

You can find all of my recipes in the Recipe Index, which is located at the top of the page. I have quite a few pancake recipes for you to choose from, including:

Interested In More Recipes?

Thank you for visiting this website. I appreciate you using some of your valuable time to do soIf you’re interested, I publish a newsletter 2 times per month (1st and 15th) with all the latest recipes, and other fun info. I would be honored to have you join our growing list of subscribers, so you never miss a great recipe!
There is a Newsletter subscription box on the top right side (or bottom) of each blog post, depending on the device you use, where you can easily submit your e-mail address (only) to be included in my mailing list.

You Can Also Find Me On Social Media:

Facebook page: The Grateful Girl Cooks!
Pinterest:
The Grateful Girl Cooks!
Instagram:
jbatthegratefulgirlcooks

Have a GREAT day!

Author's signature


Recipe Source: http://www.heathersfrenchpress.com/2013/07/the-best-buttermilk-blueberry-pancakes-using-greek-yogurt.html#more-1289

↓↓ PRINTABLE RECIPE BELOW ↓↓

0 from 0 votes
Homemade Blueberry Pancakes
Prep Time
10 mins
Cook Time
10 mins
Total Time
20 mins
 
Delicious, homemade blueberry pancakes are easy to make from scratch, using Greek yogurt. Bursting with flavor...a perfect treat for a family breakfast!
Category: Breakfast
Cuisine: American
Keyword: homemade blueberry pancakes
Servings: 8 large pancakes
Calories Per Serving: 158 kcal
Author: JB @ The Grateful Girl Cooks!
Ingredients
  • 1 ¼ cups all purpose flour
  • 3 Tablespoons granulated sugar
  • 1 ½ teaspoons baking powder
  • ½ teaspoon baking soda
  • ½ teaspoon salt
  • 2 Tablespoons butter , melted
  • 1 large egg
  • 1 teaspoon vanilla extract
  • ½ cup milk
  • 1 cup plain Greek yogurt
  • 1 cup blueberries (I used frozen blueberries, right out of the freezer)
Instructions
  1. In a medium sized bowl, whisk the dry ingredients (flour, sugar, baking powder, baking soda, salt).
  2. Whisk the milk and yogurt into the dry ingredients. Whisk until batter is smooth and no lumps are present.
  3. Stir in the melted butter, egg and vanilla. Mix until well incorporated.
  4. Heat a skillet or electric griddle to 275 degrees (a low temp for cooking pancakes)
  5. Lightly spray or butter the griddle or skillet.
  6. Pour pancake batter in 1/3 cup increments onto hot griddle. Spread a bit to create the size pancake you want.
  7. Sprinkle blueberries on top of each pancake.
  8. Cook pancakes about 4 minutes on each side (this is longer than when you use a commercial mix, but it IS the proper time for these to ensure the middle of the pancake is "set".
  9. When beautifully browned and done, remove pancakes to serving plate, and serve with additional blueberries and powdered sugar or syrup. Enjoy!
Nutrition Facts
Homemade Blueberry Pancakes
Amount Per Serving (2 pancakes)
Calories 158 Calories from Fat 36
% Daily Value*
Fat 4g6%
Saturated Fat 2g13%
Cholesterol 30mg10%
Sodium 263mg11%
Potassium 173mg5%
Carbohydrates 24g8%
Sugar 8g9%
Protein 5g10%
Vitamin A 150IU3%
Vitamin C 1.8mg2%
Calcium 83mg8%
Iron 1.1mg6%
* Percent Daily Values are based on a 2000 calorie diet.

Here’s one more to pin on your Pinterest boards!Delicious, homemade blueberry pancakes are easy to make from scratch, using Greek yogurt. Bursting with flavor...a perfect treat for a family breakfast!

Save

Save

Save

Save

Tonkatsu Pork

Tonkatsu pork originated in Japan, and is a simple dish to make, with lightly seasoned, panko crumb crusted pork cutlets, pan-fried until crispy. Tonkatsu pork originated in Japan, and is a simple dish to make, with lightly seasoned, panko crumb crusted pork cutlets, pan-fried until crispy.

Did you say Tankatsu Pork…huh? Never heard of it before. Well, I had never heard of it, until I saw a recipe for it while searching the internet for pork recipes.

Wikipedia describes Tonkatsu Pork as a “Japanese food, which consists of a breaded deep-fried pork cutlet, which originated in Japan in the 19th century.” It was originally called Katsu, and is believed to have been served for the first time at the Regatei Restaurant in Tokyo in 1899.  At the time it was thought of as the Japanese version of fine European cuisine.

Scroll Down For A Printable Recipe Card At The Bottom Of The Page

So What Is Tonkatsu Pork ?

Basically, Tonkatsu Pork is a thin pork cutlet, seasoned, and fried with a Panko crumb coating. The panko crumbs give the cutlet a wonderfully crunchy texture. It is ridiculously easy to prepare, and tastes really good.

This entree is really not hard at all to make, and I must say, the pork was wonderful! I served it with a side dish of Orzo With Parmesan, which is a great tasting side dish! This recipe would also be good served with homemade rice pilaf! I sure hope you will give this recipe for tonkatsu pork a try! I really do think you will enjoy it. Have a great day!

Looking For More PORK Recipes?

You can find all of my recipes using pork in the Recipe Index, located at the top of the page. A few of these recipes include:

Interested In More Recipes?

Thank you for visiting this website. I appreciate you using some of your valuable time to do soIf you’re interested, I publish a newsletter 2 times per month (1st and 15th) with all the latest recipes, and other fun info. I would be honored to have you join our growing list of subscribers, so you never miss a great recipe! 

There is a Newsletter subscription box on the top right side (or bottom) of each blog post, depending on the device you use, where you can easily submit your e-mail address (only) to be included in my mailing list.

You Can Also Find Me On Social Media:

Facebook page: The Grateful Girl Cooks!
Pinterest:
The Grateful Girl Cooks!
Instagram:
jbatthegratefulgirlcooks

Author's signatureRecipe Adapted From: http://www.lifesambrosia.com/2010/10/tonkatsu-pork-recipe.html

↓↓ PRINTABLE RECIPE BELOW ↓↓

0 from 0 votes
Tonkatsu Pork
Prep Time
10 mins
Cook Time
10 mins
Total Time
20 mins
 

Tonkatsu pork originated in Japan, and is a simple dish to make, with lightly seasoned, panko crumb crusted pork cutlets, pan-fried until crispy.

Category: Entree
Cuisine: Japanese
Keyword: tonkatsu pork
Servings: 4 servings
Calories Per Serving: 363 kcal
Author: JB @ The Grateful Girl Cooks!
Ingredients
  • 4 boneless pork cutlets (or boneless chops, pounded to 1 1/4 " thick)
  • 1 teaspoon salt
  • 1/2 teaspoon ground black pepper
  • 1/2 teaspoon garlic powder
  • 1/2 cup all-purpose flour
  • 1 large egg , beaten
  • 1 1/2 cups Panko bread crumbs
  • 1 Tablespoon Vegetable or Canola oil , plus more, for frying
Instructions
  1. Lightly season the pork cutlets with salt and pepper (not the measured amounts in ingredient list, just a light sprinkle on both sides to help season the meat)
  2. Set up an "assembly line" for dipping the pork in this order: A bowl with the flour, a bowl with the beaten egg, and a bowl with the Panko crumbs.
  3. Season the flour with 1/2 teaspoon of the salt, 1/4 teaspoon of the flour, and the garlic powder.
  4. Mix the rest of the salt and pepper in with the Panko crumbs.
  5. Dip pork cutlets (one at a time) into the flour (turning to coat both sides), then dip into the egg mixture (fully coating cutlet). Let egg mixture run off of pork, then dip into the Panko crumb coating (fully cover the cutlet on both sides). Set aside and repeat.
  6. Pour oil into large skillet until you have 1/4 " depth covering the bottom. Heat on medium high until hot. You can test the heat...put a couple of panko crumbs into the oil. If they sizzle, the oil is ready.
  7. When oil is hot, carefully add the 4 cutlets (the meat should sizzle). Cook 4-5 minutes on one side, then carefully flip the cutlet over and cook the other side for 4-5 minutes. When done, the coating on the cutlets should be a beautiful golden brown.
  8. When fully cooked, remove from heat, and serve. Enjoy!
Nutrition Facts
Tonkatsu Pork
Amount Per Serving (1 serving)
Calories 363 Calories from Fat 90
% Daily Value*
Fat 10g15%
Saturated Fat 5g31%
Cholesterol 129mg43%
Sodium 827mg36%
Potassium 594mg17%
Carbohydrates 28g9%
Fiber 1g4%
Sugar 1g1%
Protein 36g72%
Vitamin A 60IU1%
Calcium 54mg5%
Iron 2.7mg15%
* Percent Daily Values are based on a 2000 calorie diet.

Here’s one more to pin on your Pinterest boards!Tonkatsu pork originated in Japan, and is a simple dish to make, with lightly seasoned, panko crumb crusted pork cutlets, pan-fried until crispy.


Save

Save

Apple Cinnamon Steel Cut Oats With Pecans

Apple cinnamon steel cut oats with cinnamon, pecans, cranberries, brown sugar, garnished w/ Greek yogurt and honey will be a favorite breakfast treat. Yum!Apple cinnamon steel cut oats with cinnamon, pecans, cranberries, brown sugar, garnished w/ Greek yogurt and honey will be a favorite breakfast treat. Yum!

Sure… the title for this recipe “Apple Cinnamon Steel Cut Oats With Pecans” is a mouthful…but so are these steel cut oats! They’re delicious!

Scroll Down For A Printable Recipe Card At The Bottom Of The Page

Steel Cut Oats… Who Knew I Would Like them?

I grew up eating oatmeal…and didn’t like it so much. I preferred my oatmeal in a COOKIE, thank you very much! But as an adult, I’ve discovered I actually like oatmeal, especially steel cut oats! The caveat to this is I like steel cut oats if they are “classed up” a bit with some tasty add-ins!

This is THAT kind of steel cut oats recipe! The kind of recipe where you take humble oats and add in chopped apples, cinnamon, pecans, dried cranberries, brown sugar…well, you get the picture!

These are the steel cut oats I used for this recipe.

I love to make this recipe because by the time I add all the good stuff in, I have enough for 6 decent sized servings. The oats will really firm up when refrigerated!

Do You Eat Apple Cinnamon Steel Cut Oats HOT Or COLD?

My preferred method for eating them is to eat them cold, with a dollop of plain Greek yogurt on top, along with a drizzle of honey, and a pinch of cinnamon on top (for pizzazz!) It’s so good!

Of course, this recipe is great eaten hot, as well… (but remember to leave off the yogurt and honey at the end if you eat them that way).

Apple Cinnamon Steel Cut Oats Are Great For “On The Go” Meals

It is very convenient to package these apple cinnamon steel cut oats up in little plastic cups with lids on them…then my oatmeal becomes a “Grab and Go” kind of meal.

I used to take a container of apple cinnamon steel cut oats to work, for a quick and filling breakfast or break treat. With a dollop of Greek yogurt and a drizzle of honey on top, this was a delicious “to go” breakfast!

Keep the covered containers in the refrigerator, then just grab one any time you want, or you can take it with you in the car if you’re in a hurry! See how cute they look in their little “Grab and Go” cups?

Containers of apple cinnamon steel cut oats with yogurt make a "to go" quick breakfast!

The first time I tried making apple cinnamon steel cut oats and decided to eat them cold, I was skeptical I would enjoy them served that way. Well, I was totally surprised at how fantastic it tastes!

If you told me a year ago that I’d enjoy COLD apple cinnamon steel cut oats I would have laughed. I’m not laughing now…I LOVE it, and I love the convenience of being able to make a few servings extra, ahead of time. Perfect… Hope you will give this recipe for apple cinnamon steel cut oats a try. They are delicious!

Looking For More OATMEAL Recipes?

All of my recipes can be found in the Recipe Index, located at the top of the page. A few favorite breakfast using oats include:

Interested In More Recipes?

Thank you for visiting this website. I appreciate you using some of your valuable time to do soIf you’re interested, I publish a newsletter 2 times per month (1st and 15th) with all the latest recipes, and other fun info. I would be honored to have you join our growing list of subscribers, so you never miss a great recipe! 

There is a Newsletter subscription box on the top right side (or bottom) of each blog post, depending on the device you use, where you can easily submit your e-mail address (only) to be included in my mailing list.

You Can Also Find Me On Social Media:

Facebook page: The Grateful Girl Cooks!
Pinterest:
The Grateful Girl Cooks!
Instagram:
jbatthegratefulgirlcooks

Author's signatureRecipe Source: My brain, plus instructions for making oats on the back of bag.

↓↓ PRINTABLE RECIPE BELOW ↓↓

5 from 1 vote
Apple Cinnamon Steel Cut Oats With Pecans
Prep Time
10 mins
Cook Time
10 mins
Total Time
20 mins
 
Apple cinnamon steel cut oats with cinnamon, pecans, cranberries, brown sugar, garnished w/ Greek yogurt and honey will be a favorite breakfast treat. Yum!
Category: Breakfast
Cuisine: American
Keyword: apple cinnamon steel cut oats
Servings: 6 servings
Calories Per Serving: 220 kcal
Author: JB @ The Grateful Girl Cooks!
Ingredients
  • 2 cups water
  • 1 cup steel cut oats
  • 1/8 teaspoon salt
  • 1 green apple , large, peeled, seeded and chopped
  • 1/2 cup dried cranberries
  • 1/2 cup pecans (or walnuts), chopped
  • 2 Tablespoons brown sugar , heaping
  • 1/2 teaspoon cinnamon
  • 1/2 teaspoon vanilla
  • 6 Tablespoons plain , Greek yogurt (for topping oats-this is optional, but I recommend)
  • 1 teaspoon Honey (to drizzle on top of yogurt topping-this is optional, but I recommend)
  • Additional cinnamon (to sprinkle on top of yogurt and honey-this is optional, but I recommend)
Instructions
  1. In a medium saucepan, bring the water to a boil. Add the steel cut oats, salt, chopped apple, dried cranberries, chopped pecans, brown sugar and cinnamon. Stir well to combine and continue cooking and stirring occasionally for approximately 7-10 minutes, until water has all been incorporated into oats.

  2. When oats are done cooking, remove pan from heat; add in the vanilla and stir. If eating warm, serve it at this point.

  3. If eating cold (YUM), place oat mixture into a covered container and refrigerate for at least 4 hours. When ready to serve, divide into 6 equal portions. On top of each serving, place a large dollop (1 Tablespoon) of yogurt, then a drizzle of honey on top of yogurt, then a sprinkle of cinnamon on top of honey. Serve and ENJOY!

Recipe Notes

I have also added in just a bit of vanilla almond milk at times to the finished product (especially if eating it warm). If desired, you can also add in 1/2 cup milk to the recipe...just decrease the water used to 1 1/2 cups.

Nutrition Facts
Apple Cinnamon Steel Cut Oats With Pecans
Amount Per Serving (1 serving)
Calories 220 Calories from Fat 72
% Daily Value*
Fat 8g12%
Sodium 59mg3%
Potassium 54mg2%
Carbohydrates 32g11%
Fiber 4g17%
Sugar 12g13%
Protein 6g12%
Calcium 41mg4%
Iron 1.4mg8%
* Percent Daily Values are based on a 2000 calorie diet.

Here’s one more to pin on your Pinterest boards!Apple cinnamon steel cut oats with cinnamon, pecans, cranberries, brown sugar, garnished w/ Greek yogurt and honey will be a favorite breakfast treat. Yum!


Save

Save